Lindy 38205 Manuale utente

Categoria
Estensori AV
Tipo
Manuale utente

Questo manuale è adatto anche per

© LINDY Group - FIFTH EDITION (November 2023)
50m Cat.6 HDMI 4K60 & IR Extender
with PoC & Loop Out
User Manual English
Benutzerhandbuch Deutsch
Manuel Utilisateur Français
Manuale Italiano
Manual de Usuario Español
No. 38205
lindy.com
User Manual English
Safety Instructions
! WARNING !
Please read the following safety information carefully and always keep this document with
the product.
Failure to follow these precautions can result in serious injuries or death from electric
shock, fire or damage to the product.
Touching the internal components or a damaged cable may cause electric shock, which
may result in death.
This device is a switching type power supply and can work with supply voltages in the range 100 - 240
VAC. For worldwide usability four different AC adapters are enclosed: Euro type, UK type, US/Japan
type and Australia/New Zealand type. Use the appropriate AC adapter as shown in the picture and
ensure it is firmly secured in place and does not detach by pulling before installing into a power socket.
To reduce risk of fire, electric shocks or damage:
Do not open the product nor its power supply. There are no user serviceable parts inside.
Only qualified servicing personnel may carry out any repairs or maintenance.
Never use damaged cables.
Do not expose the product to water or places of moisture.
Do not use this product outdoors it is intended for indoor use only.
Do not place the product near direct heat sources. Always place it in a well-ventilated place.
Do not place heavy items on the product or the cables.
Please ensure any adapters are firmly secured and locked in place before inserting into a wall socket
Instructions for Use of Power Supply
To connect the adapter
Slide the desired plug adapter into the power supply and rotate
clockwise until it locks into place.
To remove the adapter
Press the push button latch.
While pressed, rotate the adapter anticlockwise.
User Manual English
Introduction
Thank you for purchasing the Lindy 50m Cat.6 HDMI 4K60 & IR Extender with PoC & Loop Out. This
product has been designed to provide trouble free, reliable operation. It benefits from both a LINDY 2-year
warranty and free lifetime technical support. To ensure correct use, please read this manual carefully and
retain it for future reference.
The Lindy 50m Cat.6 HDMI 4K60 & IR extender with PoC & Loop out is an effective, reliable solution for
extending high quality 4K Ultra HD signals over distances up to 50m (164.04ft) with standard Cat.5e/6 or
higher network cable.
Support for the HDMI 2.0 specification allows for the transmission of highly detailed 4K Ultra HD
resolutions, while power over cable (PoC) functionality provides power to the whole system using only one
power supply with a secure, screw type DC jack connecting to the transmitter. The extender features an
HDMI loop-through output on the transmitter with simultaneous viewing allowing users the option to
connect a local display for monitoring, or to create an additional viewing zone & IR pass-through allowing
the user to control source devices from the remote location. The extender also features a simple EDID
pass-through dip switch, allowing the user to select either the local, or remote display’s EDID. This ensures
maximum compatibility as you can set select the most suitable EDID for use with both displays.
Package Contents
Transmitter
Receiver
IR Emitter cable, 1.5m
IR Receiver cable, 1.5m
12V/1A locking multi-country power supply (includes EU, US, UK & AUS adapters)
Mounting kit with 4x brackets and 8x screws
Lindy manual
User Manual English
Features
Supports resolutions up to 4K Ultra HD @ 60Hz 4:4:4 8-bit
Experience an expanded range of colours & contrasts with native support for High Dynamic Range
Supports 1080p 3D video
PoC (Power over Cable) support allows the use of only one power supply for both the transmitter and
receiver
IR pass-through ensures that source devices can be controlled via an appropriate infrared remote
control at the remote display’s location
Specification
HDMI 2.0
Maximum bandwidth: 18Gbps
Maximum resolution: 3840x2160@60Hz 4:4:4 8-bit
Supported HDR formats: HLG, HDR10
Supported audio formats: Dolby Atmos, DTS-X, LPCM, Dolby Digital/Plus/EX, Dolby True HD, DTS,
DTS-EX, DTS-96/24, DTS High Res, DTS-HD Master, Audio, DSD
Supports up to 7.1 channel 24bit 192kHz audio
Supported IR frequencies: 20-60kHz
Maximum Input & Output HDMI cable lengths:
3m 3840x2160@60Hz
10m 3840x2160@30Hz
15m 1920x1080@60Hz
Operating temperature: 0°C - 40°C (32°F - 104°F)
Storage temperature: -20°C - 60°C (-4°F - 140°F)
Humidity: 20 90% RH (no condensation)
Housing Material: Metal
For the best performance over long distances, we recommend using high quality, solid core / structured
cables. Please see the table below for the maximum distances based on the resolution and cable type.
Cable Type
Distance
Resolution
Cat.5e UTP / STP Solid core 50m (164.04ft) 1920x1080@60Hz 4:4:4 8-bit (Inc. 3D)
Cat.5e UTP / STP Solid core 30m (98.42ft) 3840x2160@60Hz 4:4:4 8-bit
3840x2160@60Hz 4:2:0 12-bit
Cat.6 UTP / STP / Solid core 50m (164.04ft) 3840x2160@60Hz 4:4:4 8-bit
Cat.7 S / FTP Solid core 50m (164.04ft) 3840x2160@60Hz 4:4:4 8-bit
User Manual English
Overview
Transmitter
1. Service Connect a Micro-B cable to this port to perform firmware updates to the transmitter.
2. EDID Switch Locate the switch up to copy the EDID information from the display connected to the
HDMI out port on the transmitter or down to copy the EDID information from the display connected to
the receiver.
3. IR Out Connect the supplied IR emitter cable and place the other end of the cable in line of sight of
the IR port on the device to be controlled.
4. POWER LED (green) Illuminates when the transmitter is receiving power.
5. CAT OUT Connect a Cat.5e/6 or higher cable of up to 50m to this port and the corresponding port
on the receiver.
6. DATA LED (orange) Illuminates when the transmitter is receiving a signal from the HDMI source
device.
7. HDMI IN Connect an HDMI source device, such as a PC, media player or Blu-ray player.
8. HDMI OUT Connect to an HDMI display for local monitoring or to create an additional viewing
zone.
9. DC12V Connect the supplied 12V multi-country power supply to the transmitter.
Receiver
1. SERVICE Input Connect a Micro-B cable to this port to perform firmware updates to the receiver.
2. IR IN Connect the supplied IR Receiver cable and place the other end of the cable in a location
where it is in line of sight of the IR remote control to be used.
3. POWER LED (green) Illuminates when the receiver is being powered.
4. CAT IN Connect a Cat.5e/6 or higher cable of up to 50m to this port and the corresponding port on
the transmitter.
5. DATA LED (orange) Illuminates when a stable HDMI signal is being received from the transmitter.
6. HDMI OUT Connect an HDMI cable to a HDMI display or projector.
User Manual English
Overview
The following steps are for an installation using HDMI equipment, if you are using DVI equipment, please
substitute HDMI cables for DVI to HDMI cables where required.
Connect your HDMI source to the “HDMI IN” port on the transmitter using a High-Speed HDMI cable.
Connect one end of a Cat.5e/6 cable or higher to the “CAT OUT” port on the transmitter, and the
other end to the “CAT IN” port on the receiver.
To utilize the loop out feature, connect a local display or projector to the “HDMI OUT” port on the
transmitter using a High-Speed HDMI cable.
Connect your remote display to the “HDMI OUT” port on the receiver using an HDMI cable.
Connect the included IR emitter cable to the “IR OUT” port on the
transmitter, and the IR receiver cable to the “IR IN” port on the
receiver.
Ensure the emitters eye is in line with the IR receiver on the source
device.
Ensure that the IR receiver is in a clear line of sight of the remote
control.
Using the EDID switch, select which display you want to take the
EDID from for your alternate display. Select TX to pass-through the EDID from the local display (if
connected) or select RX if you would like to pass-through the EDID from your remote display.
Connect the locking DC power supply to the DC12V port on the transmitter. The transmitter and
receiver will immediately turn on, then switch on the display(s) and finally your source device.
The installation is now complete.
Please note: If you are using two displays with different EDID’s, please set the EDID switch accordingly
to enable pass-through from the display with the lowest capability, ensuring maximum compatibility.
User Manual English
Troubleshooting
When Installation is complete, if there is no video being displayed, please consider the following steps to
resolve the issue.
Check that the DC plug and jack used by the external power supply are firmly connected and that the
POWER LED’s on both the transmitter and receiver are both illuminated.
Check that the Cat.5e/6 or higher cable is seated correctly and that the DATA LED on the receiver is
illuminated.
Check that all HDMI connections between the source device, transmitter, receiver and displays are
seated correctly and secure.
Power off all of the devices, then power on in this order: first the transmitter & receiver, followed by
the display(s) and finally the source device.
For some HDMI devices it may be helpful to unplug and replug their HDMI connection to re-initiate
the HDMI handshake and recognition.
Check the length of the Cat.5e/6 or higher cables against the table shown in the installation section
of this manual. Reduce the lengths if necessary or use a higher quality cable.
Check the lengths of the input and output HDMI cables used against the maximum recommended
lengths in the “Specification”. Please consider reducing the length or using a higher quality cable.
Benutzerhandbuch Deutsch
Sicherheitshinweise
! GEFAHR !
Bitte lesen Sie die folgenden Sicherheitshinweise sorgfältig durch und bewahren Sie
dieses Dokument immer zusammen mit dem Produkt auf.
Die Nichtbeachtung dieser Vorsichtsmaßnahmen kann zu schweren Verletzungen oder
zum Tod durch Stromschlag, Feuer oder Schäden am Produkt führen.
Das Berühren der internen Komponenten oder eines beschädigten Kabels kann einen
elektrischen Schlag verursachen, der zum Tod führen kann.
Dieses Schaltnetzteil arbeitet mit Anschlussspannungen im Bereich von 100…240 VAC. Für weltweiten
Einsatz sind vier verschiedene AC-Adapter für Europa, Großbritannien, USA/Japan und
Australien/Neuseeland enthalten. Verwenden Sie den geeigneten Adapter wie es die Abbildung zeigt.
Stellen Sie bitte sicher, dass der Adapter fest eingerastet ist und sich nicht abziehen lässt, bevor Sie ihn
in die Steckdose stecken.
Um die Gefahr von Bränden, Stromschlägen oder Schäden zu verringern:
Öffnen Sie weder das Produkt noch sein Netzteil. Es befinden sich keine vom Benutzer zu
wartenden Teile im Inneren.
Ausschließlich qualifiziertes Personal darf Reparaturen oder Wartungen durchführen.
Verwenden Sie niemals beschädigte Kabel.
Setzen Sie das Produkt nicht Wasser oder Feuchtigkeit aus.
Dieses Produkt ist nur für den Gebrauch in geschlossenen Räumen bestimmt.
Stellen Sie das Produkt nicht in der Nähe von direkten Wärmequellen auf. Stellen Sie es immer an
einem gut belüfteten Ort auf.
Stellen Sie keine schweren Gegenstände auf das Produkt oder die Kabel.
Bitte stellen Sie vor der Verwendung sicher, dass alle Adapter sicher und fest eingerastet sind
Anwendungshinweise für das Netzteil
Zum Anbringen des Adapters
Schieben Sie den gewünschten Steckeradapter in das Netzteil
und drehen Sie ihn im Uhrzeigersinn bis er einrastet.
Zum Entfernen des Adapters
Drücken Sie die Druckknopfverriegelung und drehen Sie den
Adapter währenddessen gegen den Uhrzeigersinn.
Benutzerhandbuch Deutsch
Einführung
Wir freuen uns, dass Ihre Wahl auf ein LINDY-Produkt gefallen ist und danken Ihnen für Ihr Vertrauen.
Sie können sich jederzeit auf unsere Produkte und einen guten Service verlassen. Dieser 50m Cat.6
HDMI 4K60 & IR Extender mit PoC & Loop Out unterliegt einer 2-Jahres LINDY Herstellergarantie und
lebenslangem kostenlosen, technischen Support. Bitte lesen Sie diese Anleitung sorgfältig und
bewahren Sie sie auf.
Der Lindy 50m Cat.6 HDMI 4K60 & IR Extender mit PoC & Loop out ist eine effiiziente und zuverlässige
Lösung, um 4K-Ultra-HD-Signale über Distanzen bis 50m (164.04ft) mit Standard Cat.5e/6 (oder höher)
Netzwerkkabeln zu übertragen.
Die HDMI 2.0 Spezifikation erlaubt die Übertragung detaillierter 4K-Ultra-HD-Auflösungen. Die Funktion
‘Power over cable’ (PoC) versorgt das ganze System mit Strom, wobei nur ein Netzteil mit einer sicheren
Schraubverbindung am Transmitter angeschlossen wird. Der Extender verfügt über einen HDMI Loop-
Through-Ausgang am Transmitter mit simultaner Anzeige, so dass ein lokales Display zur Überwachung
angeschlossen oder eine zusätzliche Anzeige & IR-Pass-Through eingerichtet werden kann, die es dem
Anwender erlaubt, Quellgeräte von einem entfernten Standort aus zu steuern. Der Extender verfügt auch
über einen einfachen EDID Pass-Through-DIP-Schalter zur Auswahl der EDID des lokalen oder
entfernten Displays. Dadurch wird maximale Kompatibilität garantiert, da die am besten geeignete EDID
für beide Displays ausgewählt werden kann.
Lieferumfang
Transmitter
Receiver
IR-Emitterkabel, 1.5m
IR-Receiverkabel, 1.5m
12V/1A Multi-Country Netzteil mit Schraubverbindung mit Adaptern (EU, US, UK & AUS)
Montagesatz mit 4x Halterungen und 8x Schrauben
Lindy Handbuch
Benutzerhandbuch Deutsch
Eigenschaften
Unterstützt Auflösungen bis 4K Ultra HD @ 60Hz 4:4:4 8-Bit
Erweiterte Auswahl an Farben und Kontrasten mit nativer Unterstützung von High Dynamic Range
Unterstützt 1080p 3D Video
PoC (Power over Cable) erlaubt die Verwendung nur eines Netzteils für Transmitter und Receiver
IR-Pass-Through ermöglicht die Steuerung von Quellgeräten mit einer geeigneten Infrarot-
Fernbedienung vom entfernten Standort des Displays
Spezifikationen
HDMI 2.0
Maximale Bandbreite: 18Gbit/s
Maximale Auflösung: 3840x2160@60Hz 4:4:4 8-Bit
Unterstützte HDR-Formate: HLG, HDR10
Unterstützte Audioformate: Dolby Atmos, DTS-X, LPCM, Dolby Digital/Plus/EX, Dolby True HD, DTS,
DTS-EX, DTS-96/24, DTS High Res, DTS-HD Master, Audio, DSD
Unterstützt Audio bis 7.1-Kanal 24Bit 192kHz
Unterstützte IR-Frequenzen: 20-60kHz
Maximale HDMI-Kabellängen am Ein- & Ausgang:
3m 3840x2160@60Hz
10m 3840x2160@30Hz
15m 1920x1080@60Hz
Betriebstemperatur: 0°C - 40°C (32°F - 104°F)
Lagertemperatur: -20°C - 60°C (-F - 140°F)
Feuchtigkeit: 20 90% RH (nicht kondensierend)
Gehäusematerial: Metall Wir empfehlen die Verwendung qualitativ hochwertiger Kabel mit starren Adern
für beste Performance über große Distanzen. In der Tabelle unten finden Sie die maximalen Distanzen
je nach Auflösung und Kabeltyp.
Cable Type
Distance
Resolution
Cat.5e UTP / STP Solid Core 50m (164.04ft) 1920x1080@60Hz 4:4:4 8-Bit (inkl. 3D)
Cat.5e UTP / STP Solid Core 30m (98.42ft) 3840x2160@60Hz 4:4:4 8-Bit
3840x2160@60Hz 4:2:0 12-Bit
Cat.6 UTP / STP / Solid Core 50m (164.04ft) 3840x2160@60Hz 4:4:4 8-Bit
Cat.7 S / FTP Solid Core 50m (164.04ft) 3840x2160@60Hz 4:4:4 8-Bit
Benutzerhandbuch Deutsch
Übersicht
Transmitter
1. SERVICESchließen Sie für Firmwareupdates des Transmitters ein Micro-B-Kabel an diesem Port
an.
2. EDID-Schalter Drücken Sie den Schalter nach oben, um EDID-Informationen vom Display am
HDMI-Ausgangsport des Transmitters zu kopieren oder nach unten, um EDID-Informationen des
Displays zu kopieren, das mit dem Receiver verbunden ist.
3. IR Out Schließen Sie das beiliegende IR-Emitterkabel an und platzieren Sie das andere Kabelende
mit Sichtverbindung zum IR Port des Geräts, das bedient werden soll.
4. POWER LED (green) Diese LED leuchtet, sobald der Transmitter mit Strom versorgt wird.
5. CAT OUT Schließen Sie hier und am entsprechenden Port des Receivers ein Cat.5e/6 (oder höher)
Kabel bis 50m Länge an.
6. DATA LED (orange) Diese LED leuchtet, sobald der Transmitter ein Signal vom HDMI-Quellgerät
erhält.
7. HDMI IN Schließen Sie eine HDMI-Quelle an, z.B. einen PC, Mediaplayer oder Blu-ray Player.
8. HDMI OUT Schließen Sie ein HDMI-Display zur lokalen Überwachung an oder richten Sie eine
zusätzliche Anzeige ein.
9. DC12V Schließen Sie das beiliegende 12V Multi-Country Netzteil am Transmitter an.
Receiver
1. SERVICE EingangSchließen Sie für Firmwareupdates des Receivers ein Micro-B-Kabel an diesem
Port an.
2. IR IN Schließen Sie das beiliegende IR-Receiverkabel an und platzieren Sie das andere Ende des
Kabels in Sichtverbindung mit der IR-Fernbedienung.
3. POWER LED (green) Diese LED leuchtet, wenn der Receiver mit Strom versorgt wird.
4. CAT IN Schließen Sie hier und am entsprechenden Port des Trasnsmitters ein Cat.5e/6 (oder
höher) Kabel bis 50m Länge an.
5. DATA LED (orange) Diese LED leuchtet, wenn ein stabiles HDMI-Signal vom Transmitter
empfangen wird.
6. HDMI OUT Schließen Sie ein HDMI-Kabel an und verbinden Sie es mit einem HDMI Display oder
Projektor.
Benutzerhandbuch Deutsch
Installation
Die folgenden Schritte beschreiben die Installation von HDMI-Geräten. Wenn Sie DVI-Geräte
verwenden, ersetzen Sie bitte HDMI-Kabel durch DVI- auf HDMI-Kabel.
Schließen Sie Ihre HDMI-Quelle mit einem High-Speed HDMI-Kabel am “HDMI IN” Port des
Transmitters an.
Schließen Sie ein Ende eines Cat.5e/6 Kabels (oder höher) am “CAT OUT” Port des Transmitters an
und das andere Ende am “CAT IN” Port des Receivers.
Um die Loop-out-Funktion zu nutzen, schließen Sie mit einem High-Speed HDMI-Kabel ein lokales
Display oder einen Projektor am “HDMI OUTPort des Transmitters an.
Schließen Sie das Display am entfernten Standort mit einem HDMI-Kabel am “HDMI OUT” Port des
Receivers an.
Schließen Sie das mitgelieferte IR-Emitterkabel am “IR OUT” Port
des Transmitters an und das IR-Receiverkabel am “IR IN” Port des
Receivers.
Stellen Sie sicher, dass das Auge des Senders/Emitters direkte
Sichtverbindung zum IR Receiver des Quellgeräts hat.
Stellen Sie sicher, dass der IR Receiver direkte Sichtverbindung zur
Fernbedienung hat.
Mit dem EDID-Schalter wählen Sie aus, von welchem Display Sie die
EDID für Ihr anderes Display verwenden möchten. Wählen Sie ‘TX’ zum Pass-Through der EDID
vom lokalen Display (falls es angeschlossen ist) oder wählen Sie ‘RX’ zum Pass-Through vom
entfernten Display.
Schließen Sie das DC12V-Netzteil am Transmitter an. Transmitter und Receiver werden dann
eingeschaltet. Schalten Sie nun das/die Display(s) ein und zum Schluss das Quellgerät.
Die Installation ist nun abgeschlossen.
Beachten Sie bitte falls Sie zwei Displays mit unterschiedlichen EDIDs verwenden dass der EDID-
Schalter so eingestellt wird, dass Pass-Through vom Display mit dem niedrigsten Standard aktiviert wird
um maximale Kompatibilität zu gewährleisten.
Benutzerhandbuch Deutsch
Fehlersuche
Sollte nach der Installation kein Bild angezeigt werden, gehen Sie bitte folgendermaßen vor:
Überprüfen Sie, ob das Netzteil korrekt angeschlossen ist und ob die POWER LEDs auf Transmitter
und Receiver leuchten.
Überprüfen Sie, ob das Cat.5e/6 (oder höher) Kabel korrekt angeschlossen ist und ob die DATA LED
des Receivers leuchtet.
Überprüfen Sie, ob alle HDMI-Verbindungen zwischen Quellgerät, Transmitter, Receiver und
Displays korrekt sind.
Schalten Sie alle Geräte aus und dann in dieser Reihenfolge wieder ein: Transmitter & Receiver,
Display(s) und zum Schluss das Quellgerät.
Bei einigen HDMI-Geräten kann es hilfreich sein, die HDMI-Verbindung zu trennen und wieder neu
herzustellen, um ein HDMI Handshake und eine Erkennung neu zu initiieren.
Prüfen Sie die Länge der Cat.5e/6 (oder höher) Kabel und vergleichen Sie diese mit den Angaben in
der Tabelle unter ‘Spezifikationen‘. Reduzieren Sie die Längen, wenn nötig, oder verwenden Sie ein
höherwertiges Kabel.
Prüfen Sie die HDMI-Kabellängen am Ein- und Ausgang und vergleichen Sie diese mit den
empfohlenen Längen unter ‚Spezifikationen‘. Reduzieren Sie die Längen, wenn nötig, oder verwenden
Sie ein höherwertiges Kabel.
Manuel Utilisateur Français
Consignes de sécurité
! ATTENTION !
Merci de lire attentivement ces instructions de sécurité et de les conserver avec le
produit.
Le non-respect de ces précautions peut causer un choc électrique entrainant des
blessures graves, voire mortelles, un incendie ou des dommages au produit.
Toucher les composants internes ou un câble endommagé peut provoquer un choc
électrique pouvant entraîner la mort.
Cet appareil est une alimentation à découpage et peut fonctionner avec des tensions d'alimentation de
100...240 VAC Pour une utilisation dans le monde entier, quatre adaptateurs secteur différents sont
inclus : Type Euro, type UK, type US/Japon et type Australie/Nouvelle-Zélande. Utilisez l'adaptateur
secteur approprié comme indiqué sur la photo et assurez-vous qu'il est solidement fixé en place et qu'il
ne se détache pas en tirant avant de l'installer dans une prise électrique.
Pour éviter les risques d'incendie, de choc électrique ou de dommages:
N'ouvrez pas l'appareil ni son alimentation électrique. Il n'y a pas de pièces réparables par
l'utilisateur à l'intérieur.
Seul un personnel d'entretien qualifié est autorisé à effectuer toute réparation ou entretien.
Ne jamais utiliser de câble endommagé.
Ne pas mouiller le produit et ne pas l'exposer à l'humidité.
N'utilisez pas ce produit à l'extérieur, il est destiné à un usage intérieur uniquement.
Ne pas placer le produit à proximité de sources de chaleur. Toujours le placer dans un endroit
suffisamment ventilé.
Ne pas déposer de charge lourde sur le produit ou sur les câbles.
Veuillez vous assurer que l'adaptateur utilisé est fermement fixé et verrouillé en place avant de
l'insérer dans une prise murale.
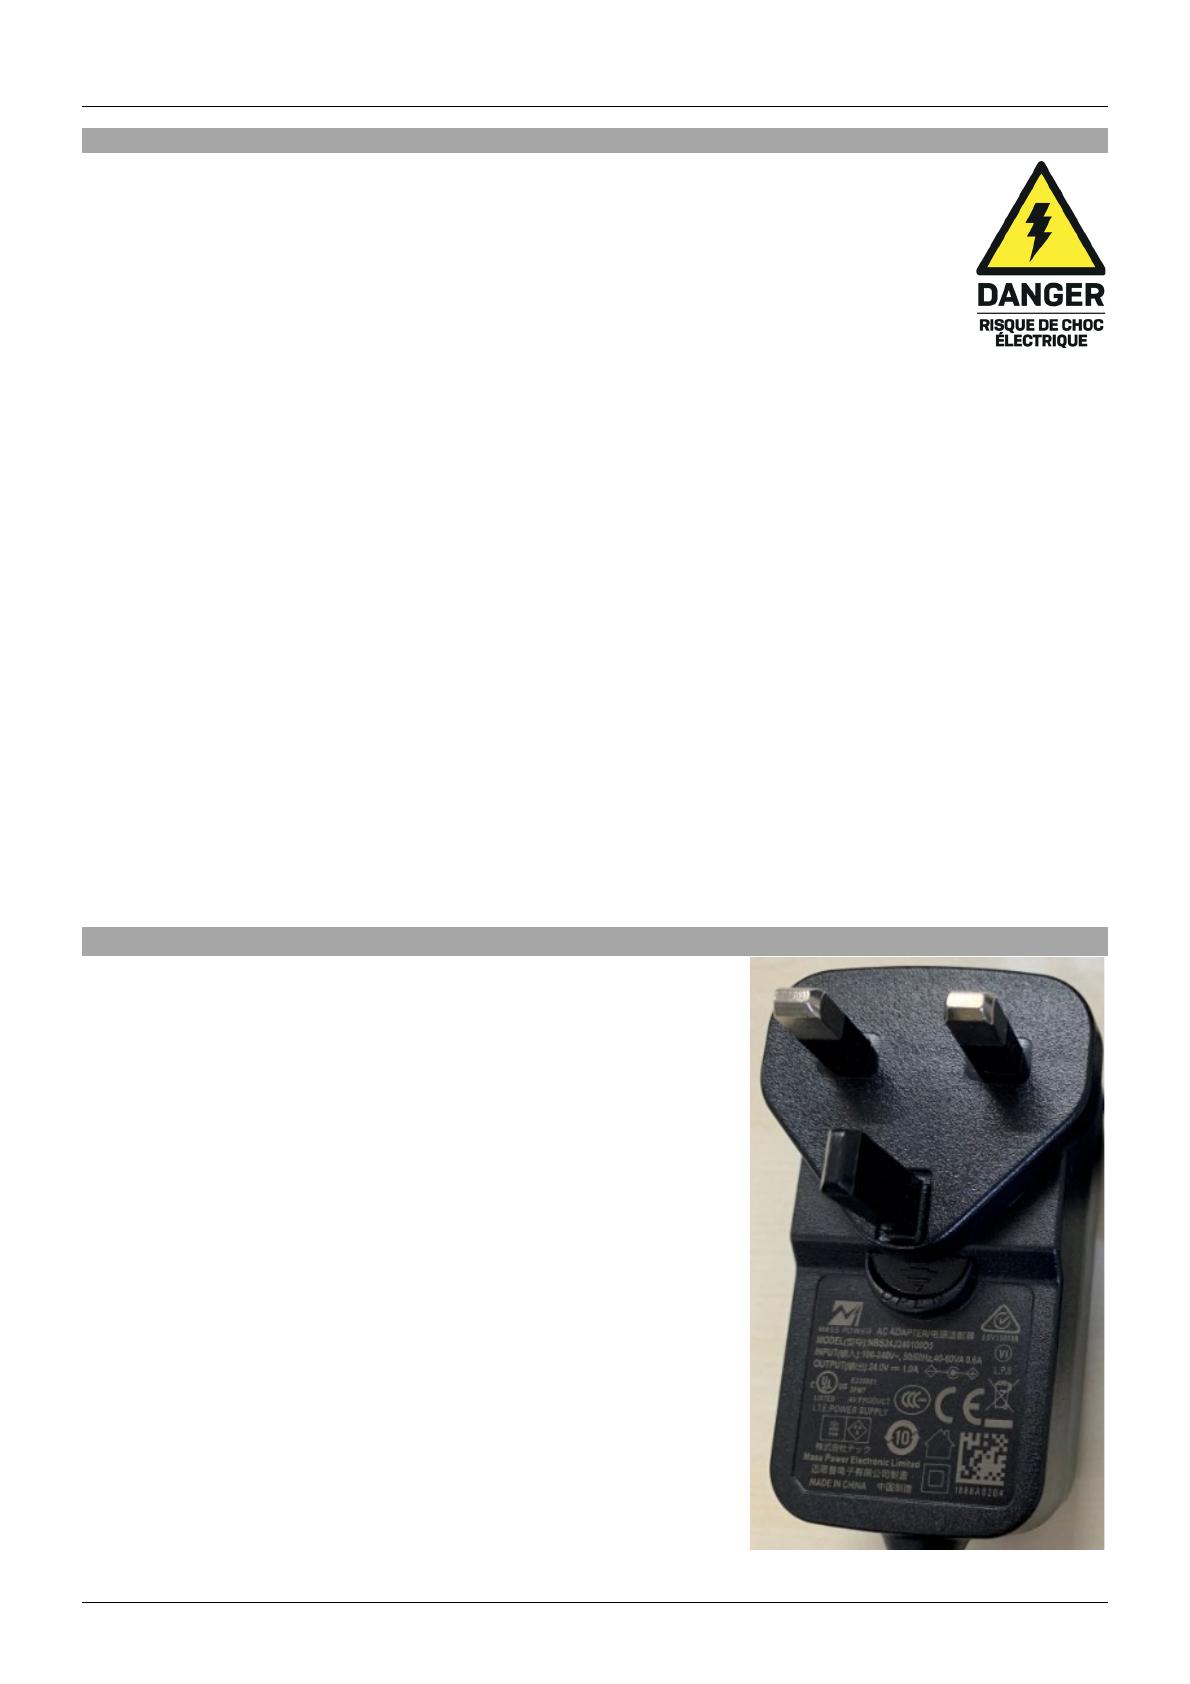
Instructions d’utilisation de l’alimentation
Pour connecter l’adaptateur
Glisser l’adaptateur secteur requis dans l’alimentation et tournez
dans le sens horaire pour le verrouiller.
Pour retirer l’adaptateur
Appuyez sur le bouton de déverrouillage.
Tout en appuyant, tournez l’adaptateur dans le sens anti-horaire.
Manuel Utilisateur Français
Introduction
Nous sommes heureux que votre choix se soit porté sur un produit LINDY et vous remercions de votre
confiance. Vous pouvez compter à tout moment sur la qualité de nos produits et de notre service. Cet
extender HDMI Cat.6 4K60 & IR 50m est soumis à une durée de garantie LINDY de 2 ans et d’une
assistance technique gratuite à vie. Merci de lire attentivement ces instructions et de les conserver pour
future référence.
Le kit extender Lindy Cat.6 HDMI 4K60 & IR 50m avec PoC & sortie locale (Loop out) est une solution
efficace, fiable pour transmettre des signaux 4K Ultra HD jusqu’à 50m (164.04ft) via un câble réseau
Cat.5e/6 ou de catégorie supérieure.
La prise en charge des spécifications HDMI 2.0 permet une transmission de résolutions 4K Ultra HD,
tandis que la fonction PoC (power over cable) transmet l’alimentation qui est vissée à une prise DC sur
le boîtier émetteur. Le kit extender offre une sortie HDMI locale sur le boîtier émetteur avec différents
modes de visualisation : idéal pour l’ajout d’un écran de surveillance ou pour contrôler la source depuis
le boîtier récepteur via le signal IR. Le kit extender prend en charge la fonction ‘’EDID pass-through’’ via
des dip switchs qui sélectionnent les paramètres EDID de l’écran local ou distant. Cela assure un
maximum de compatibilité EDID.
Contenu
Boîtier émetteur
Boîtier récepteur
Câble IR émetteur, 1.5m
Câble IR récepteur, 1.5m
Alimentation multi-pays 12V/1A (adaptateurs fournis pour : EU, USA, UK & AUS)
Kit de montage avec 4x supports et 8x vis
Manuel Lindy
Manuel Utilisateur Français
Caractéristiques
Prise en charge des résolutions jusqu’à 4K Ultra HD @ 60Hz 4:4:4 8-bits
HDR (High Dynamic Range) pris en charge pour une large gamme de couleurs et de contraste
Prise en charge de vidéos 1080p 3D
Prise en charge PoC (Power over Cable) qui permet l’utilisation d’une seule alimentation pour les 2
boîtiers
‘’IR pass-through’’ permet à la source d’être contrôlée via une télécommande infrarouge depuis l’écran
connecté au boîtier récepteur
Spécification
HDMI 2.0
Bande passante maximale : 18Gbit/s
solution maximale : 3840x2160@60Hz 4:4:4 8-bits
Formats HDR pris en charge : HLG, HDR10
Formats audio pris en charge : Dolby Atmos, DTS-X, LPCM, Dolby Digital/Plus/EX, Dolby True HD,
DTS, DTS-EX, DTS-96/24, DTS High Res, DTS-HD Master, Audio, DSD
Prend en charge l’audio 7.1 canaux 24bits 192kHz
Fréquences IR prises en charge : 20-60kHz
Longueurs maximales de câbles HDMI en entrée et en sortie :
3m 3840x2160@60Hz
10m 3840x2160@30Hz
15m 1920x1080@60Hz
Température de fonctionnement : 0°C - 40°C (32°F - 104°F)
Température de stockage : -20°C - 60°C (-F - 140°F)
Humidité : 20 90% RH (sans condensation)
Boîtiers métal
Pour les meilleures performances sur de longues distances, nous recommandons d’utiliser des câbles
monobrins de haute qualité. Merci de voir le tableau ci-dessous pour plus de détails.
Type de câble
Distance
solution
Cat.5e UTP / STP monobrin (Solid
core)
50m (164.04ft) 1920x1080@60Hz 4:4:4 8-bit (avec 3D)
Cat.5e UTP / STP monobrin (Solid
core)
30m (98.42ft) 3840x2160@60Hz 4:4:4 8-bit
3840x2160@60Hz 4:2:2 12-bit
Cat.6 UTP / STP / monobrin (Solid
core)
50m (164.04ft) 3840x2160@60Hz 4:4:4 8-bit
Cat.7 S / FTP monobrin (Solid core) 50m (164.04ft) 3840x2160@60Hz 4:4:4 8-bit
Manuel Utilisateur Français
Utilisation
Boîtier émetteur
1. Service Connectez un câble micro-B à ce port pour effectuer des mises à jour de firmware sur le
boîtier émetteur.
2. Switch EDID Position haute : copie des informations EDID de l’écran connecté au port ‘’HDMI out’
de l’émetteur. Position basse : copie des informations EDID de l’écran connecté au récepteur.
3. IR Out Connectez le câble IR émetteur fourni et placez l’autre extrémité en face du port IR du
périphérique à contrôler.
4. POWER LED (vert) S’allume si le boîtier émetteur est alimenté.
5. CAT OUT Connectez un câble Cat.5e/6 ou de catégorie supérieure, jusqu’à 50m vers le boîtier
récepteur.
6. DATA LED (orange) S’allume si le boîtier émetteur reçoit un signal de la source HDMI.
7. HDMI IN Connectez une source HDMI, tel qu’un PC, un lecteur multimédia ou Blu-ray.
8. HDMI OUT Connectez l’écran HDMI pour une surveillance locale.
9. DC12V Connectez l’alimentation 12V multi-pays fournie au boîtier émetteur.
Boîtier récepteur
1. SERVICE Input Connectez un câble micro-B à ce port pour effectuer des mises à jour de firmware
sur le boîtier récepteur.
2. IR IN Connectez le câble IR récepteur fourni et placez l’autre extrémité de telle sorte que le signal
de la télécommande IR soit réceptionné.
3. POWER LED (vert) S’allume si le boîtier récepteur est alimenté.
4. CAT IN Connectez un câble Cat.5e/6 ou de catégorie supérieure, jusqu’à 50m vers le boîtier
émetteur.
5. DATA LED (orange) S’allume si un signal HDMI est réceptionné.
6. HDMI OUT Connectez un câble HDMI vers l’écran ou projecteur HDMI.
Manuel Utilisateur Français
Installation
Les étapes suivantes sont dédiées à une installation en utilisant des équipements HDMI, si vous utilisez
des équipements DVI, merci de remplacer les câbles HDMI par des câbles DVI vers HDMI.
Connectez votre source HDMI au port “HDMI IN” du boîtier émetteur en utilisant un câble HDMI
High-Speed.
Connectez une extrémité d’un câble Cat.5e/6 ou de catégorie supérieure au port “CAT OUT” du
boîtier émetteur et l’autre extrémité au port “CAT IN” sur le boîtier récepteur.
Pour utiliser la fonction ‘’loop out’’ (écran local), connectez un écran ou projecteur local au port
“HDMI OUT” du boîtier émetteur en utilisant un câble HDMI High-Speed.
Connectez votre écran distant au port “HDMI OUT” au boîtier récepteur en utilisant un câble HDMI.
Connectez le câble émetteur IR fourni au port “IR OUT” du boîtier
émetteur, et le câble IR récepteur au port “IR IN” du boîtier récepteur.
Assurez-vous que l’œil de l’émetteur IR soit en face du récepteur IR
de la source.
Assurez-vous que le récepteur IR puisse recevoir les signaux IR de
la télécommande.
En utilisant le switch EDID, sélectionnez quel écran vous voulez pour
récupérer les informations EDID. Sélectionnez ‘’TX’’ pour faire
passer les informations EDID de votre écran local (si connecté) ou sélectionnez ‘’RX’’ si vous voulez
faire passer les informations EDID de votre écran distant.
Connectez l’alimentation fournie via son port DC à visser au port DC12V du boîtier émetteur.
L’émetteur et le récepteur s’allumeront immédiatement, puis allumez le(s) écrans(s), enfin allumez
votre source.
L’installation est terminée.
Note : si vous utilisez deux écrans avec différents EDID, merci de placer le switch EDID sur la position
correspondant à l’écran le moins récent, ainsi vous assurerez un maximum de compatibilité.
Manuel Utilisateur Français
Dépannage
Si vous avez terminé l’installation, mais qu’aucune vidéo ne s’affiche, merci de suivre les points suivants.
Vérifiez que l’alimentation DC est correctement connectée et que la LED POWER s’allume sur les
boîtiers émetteur et récepteur.
Vérifiez que le câble cat.5e/6 (ou de catégorie supérieure) est correctement connecté et que la LED
DATA est allumée sur le boîtier récepteur.
Vérifiez que tous les prises HDMI entre la source, le boîtier émetteur, récepteur et écrans sont
correctement connectées.
Éteignez tous les appareils, puis allumez dans cet ordre: en premier les boîtiers émetteur et
récepteur, puis le(s) écran(s) et enfin la source.
Pour certains appareils HDMI, il est utile de déconnecter puis reconnecter la prise HDMI pour
réinitialiser la détection HDMI (HDMI handshake).
Vérifiez la longueur des câbles cat.5e/6 (ou de catégorie supérieure) suivant le tableau vu
précédemment dans ce manuel. Réduisez les longueurs si nécessaire ou utilisez un câble de
catégorie/qualité supérieure.
Vérifiez que les longueurs de câble en entrée et en sortie HDMI respectent bien les longueurs
recommandées dans la section ‘’Spécification’’. Réduisez les longueurs si nécessaire ou utilisez un
câble de catégorie/qualité supérieure.
Manuale Italiano
Istruzioni di sicurezza
! ATTENZIONE !
Per favore leggete la seguente informativa e conservate sempre questo documento con
il prodotto.
La mancata osservanza di queste precauzioni può causare seri infortuni o la morte per
folgorazione, incendi o danneggiare il prodotto.
Toccare i componenti interni o un cavo danneggiato può causare uno shock elettrico che può condurre
alla morte.
Questo dispositivo ha un alimentatore a commutazione che può funzionare con tensioni di alimentazione
all’interno del range 100…240 VAC. La fornitura comprende quattro adattatori AC per prese di tutto il
mondo: Euro, UK, US/Giappone e Australia/Nuova Zelanda. Utilizzate l’adattatore AC appropriato e
montatelo come mostrato nell’immagine, assicurandovi che sia fissato correttamente e che non si
stacchi estraendolo dalla presa.
Per ridurre il rischio di incendi, folgorazione o danni:
Non aprite il prodotto o l’alimentatore. Non esistono componenti utilizzabili all'interno.
La riparazione o manutenzione del prodotto può essere effettuata solo da personale qualificato.
Non utilizzare mai cavi danneggiati.
Non fate entrare il prodotto in contatto con acqua e non utilizzatelo in luoghi umidi.
Questo prodotto è pensato esclusivamente per l’uso in ambienti interni.
Non posizionate il prodotto nelle vicinanze di sorgenti di calore. Installatelo sempre in luoghi ben
ventilati.
Non appoggiate oggetti pesanti sul prodotto o sui cavi.
Vi preghiamo di assicurarvi che ogni adattatore sia fermamente inserito e bloccato in sede prima di
collegarlo a una presa di corrente.
Istruzioni per l’uso dell’alimentatore
Per collegare l'adattatore
Far scorrere l'adattatore ad innesto desiderato nell'alimentatore
e ruotarlo in senso orario fino a quando non si blocca in
posizione.
Per rimuovere l'adattatore
Premere il pulsante di chiusura.
Mentre è premuto, ruotare l'adattatore in senso antiorario.
  • Page 1 1
  • Page 2 2
  • Page 3 3
  • Page 4 4
  • Page 5 5
  • Page 6 6
  • Page 7 7
  • Page 8 8
  • Page 9 9
  • Page 10 10
  • Page 11 11
  • Page 12 12
  • Page 13 13
  • Page 14 14
  • Page 15 15
  • Page 16 16
  • Page 17 17
  • Page 18 18
  • Page 19 19
  • Page 20 20
  • Page 21 21
  • Page 22 22
  • Page 23 23
  • Page 24 24
  • Page 25 25
  • Page 26 26
  • Page 27 27
  • Page 28 28
  • Page 29 29
  • Page 30 30
  • Page 31 31
  • Page 32 32
  • Page 33 33
  • Page 34 34

Lindy 38205 Manuale utente

Categoria
Estensori AV
Tipo
Manuale utente
Questo manuale è adatto anche per