Waeco CoolMatic CD50, CRD50 Guida d'installazione
- Categoria
- Scatole fresche
- Tipo
- Guida d'installazione

CD50, CRD50
Refrigerator
Installation and Operating Manual. . . . . . . . 7
Kühlschrank
Montage- und Bedienungsanleitung . . . . .26
Réfrigérateur
Instructions de montage
et de service . . . . . . . . . . . . . . . . . . . . . . . . .46
Nevera
Instrucciones de montaje y de uso . . . . . . .67
Frigorífico
Instruções de montagem e manual de
instruções . . . . . . . . . . . . . . . . . . . . . . . . . . .88
Frigorifero
Istruzioni di montaggio e d’uso . . . . . . . .108
Koelkast
Montagehandleiding en
gebruiksaanwijzing. . . . . . . . . . . . . . . . . . 128
Køleskab
Monterings- og betjeningsvejledning. . . 148
Kylskåp
Monterings- och bruksanvisning . . . . . . . 167
Kjøleskap
Monterings- og bruksanvisning . . . . . . . . 186
Jääkaapp
Asennus- ja käyttöohje . . . . . . . . . . . . . . . 205
Холодильник
Инструкция по монтажу и эксплуатации 224
Lodówka
Instrukcja montażu i obsługi. . . . . . . . . . . 245
Chladnička
Návod na montáž a uvedenie
do prevádzky. . . . . . . . . . . . . . . . . . . . . . . 266
Lednička
Návod k montáži a obsluze . . . . . . . . . . . 285
Hűtőszekrény
Szerelési és használati útmutató . . . . . . . 304
EN
DE
FR
ES
PT
IT
NL
DA
SV
NO
FI
RU
PL
SK
CS
HU
REFRIGERATION
COOLMATIC
CD50-CRD50--IO-16s.book Seite 1 Freitag, 16. September 2016 4:05 16

CD50, CRD50
2
1
3
2
1
1
2
3
4
2
CD50-CRD50--IO-16s.book Seite 2 Freitag, 16. September 2016 4:05 16

CD50, CRD50
3
1
4
3
2
ca. 50 mm
3
A
B
4
CD50-CRD50--IO-16s.book Seite 3 Freitag, 16. September 2016 4:05 16

CD50, CRD50
4
1
5
1
2
6
Ø/mm²
l/m
12 V
24 V
0 2 4 6 8 10 12 14 16 18 20 22 24 26 28
0
2
6
10
14
7
CD50-CRD50--IO-16s.book Seite 4 Freitag, 16. September 2016 4:05 16

CD50, CRD50
5
1
rt
sw
8
1
3
2
9
CD50-CRD50--IO-16s.book Seite 5 Freitag, 16. September 2016 4:05 16

CD50, CRD50
6
12 V/24 V
10 A
–
–
+
+
2
1
rt/sw
rt
sw
sw
110 – 240 Vw
0
1
Vent
Lock
a
380
534
500
b
CD50-CRD50--IO-16s.book Seite 6 Freitag, 16. September 2016 4:05 16

EN
CD50, CRD50
7
Please read this instruction manual carefully before installation and first
use, and store it in a safe place. If you pass on the product to another
person, hand over this instruction manual along with it.
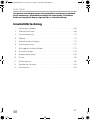
Contents
1 Explanation of symbols. . . . . . . . . . . . . . . . . . . . . . . . . . . . . . . . . . . . . . . . . . .8
2 Safety instructions . . . . . . . . . . . . . . . . . . . . . . . . . . . . . . . . . . . . . . . . . . . . . . .8
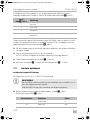
3 Scope of delivery . . . . . . . . . . . . . . . . . . . . . . . . . . . . . . . . . . . . . . . . . . . . . . 11
4 Accessories . . . . . . . . . . . . . . . . . . . . . . . . . . . . . . . . . . . . . . . . . . . . . . . . . . . 11
5 Intended use . . . . . . . . . . . . . . . . . . . . . . . . . . . . . . . . . . . . . . . . . . . . . . . . . . 11
6 Technical description . . . . . . . . . . . . . . . . . . . . . . . . . . . . . . . . . . . . . . . . . . . 11
7 Installing and connecting the refrigerator . . . . . . . . . . . . . . . . . . . . . . . . . . .13
8 Using the refrigerator . . . . . . . . . . . . . . . . . . . . . . . . . . . . . . . . . . . . . . . . . . .17
9 Cleaning and care. . . . . . . . . . . . . . . . . . . . . . . . . . . . . . . . . . . . . . . . . . . . . .21
10 Guarantee . . . . . . . . . . . . . . . . . . . . . . . . . . . . . . . . . . . . . . . . . . . . . . . . . . . .21
11 Disposal. . . . . . . . . . . . . . . . . . . . . . . . . . . . . . . . . . . . . . . . . . . . . . . . . . . . . 22
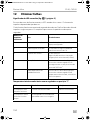
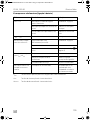
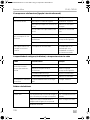
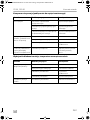
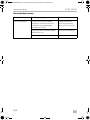
12 Troubleshooting . . . . . . . . . . . . . . . . . . . . . . . . . . . . . . . . . . . . . . . . . . . . . . 22
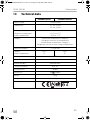
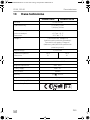
13 Technical data . . . . . . . . . . . . . . . . . . . . . . . . . . . . . . . . . . . . . . . . . . . . . . . . 25
CD50-CRD50--IO-16s.book Seite 7 Freitag, 16. September 2016 4:05 16

EN
Explanation of symbols CD50, CRD50
8
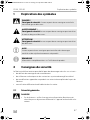
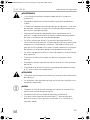
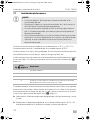
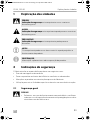
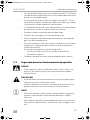
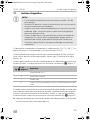
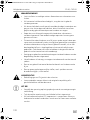
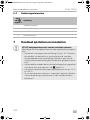
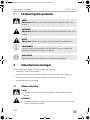
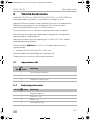
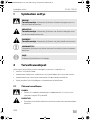
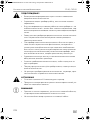
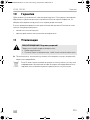
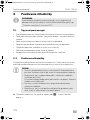
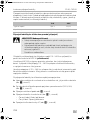
1 Explanation of symbols
D
!
!
A
I
2 Safety instructions
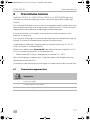
The manufacturer accepts no liability for damage in the following cases:
• Faulty assembly or connection
• Damage to the product resulting from mechanical influences and excess voltage
• Alterations to the product without express permission from the manufacturer
• Use for purposes other than those described in the operating manual
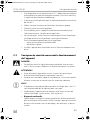
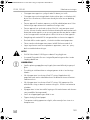
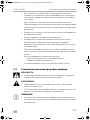
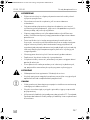
2.1 General safety
D
DANGER!
• On boats: If the device is powered by the mains, ensure that the
power supply has a residual current circuit breaker.
!
WARNING!
• Have a qualified technician perform the installation in wet rooms.
• Do not operate the device if it is visibly damaged.
DANGER!
Safety instruction: Failure to observe this instruction will cause fatal or
serious injury.
WARNING!
Safety instruction: Failure to observe this instruction can cause fatal or
serious injury.
CAUTION!
Safety instruction: Failure to observe this instruction can lead to injury.
NOTICE!
Failure to observe this instruction can cause material damage and impair
the function of the product.
NOTE
Supplementary information for operating the product.
CD50-CRD50--IO-16s.book Seite 8 Freitag, 16. September 2016 4:05 16

EN
CD50, CRD50 Safety instructions
9
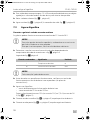
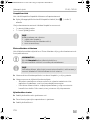
• If this device's power cable is damaged, it must be replaced by the
manufacturer, customer service or a similarly qualified person in order
to prevent safety hazards.
• This device may only be repaired by qualified personnel. Inadequate
repairs may cause serious hazards.
• This device can be used by children aged 8 years or over, as well as by
persons with diminished physical, sensory or mental capacities or a
lack of experience and knowledge, providing they are supervised, or
have been taught how to use the device safely and are aware of the
resulting risks.
• Cleaning and user maintenance must not be carried out by children
without supervision.
• Children must be supervised to ensure that they do not play with the
device.
• Always keep and use the device out of the reach of children under
8 years of age.
• Do not store any explosive substances, such as spray cans with
propellants, in the device.
!
CAUTION!
• Danger of crushing! Do not put your fingers into the hinge.
• Foodstuff may only be stored in its original packaging or in suitable
containers.
A
NOTICE!
• Check that the voltage specification on the type plate is the same as
that of the power supply.
• Never pull the plug out of the socket by the connection cable.
• If the refrigerator is connected to the DC socket: Disconnect the
refrigerator and other electric consumers from the battery before
connecting the quick charging device.
• If the refrigerator is connected to the DC socket: Disconnect the
refrigerator or switch it off when you turn off the engine. Otherwise
you may discharge the battery.
• The refrigerator is not suitable for storing substances which are caustic
or contain solvents.
• Keep the drainage outlet clean at all times.
• Do not open the refrigerant circuit under any circumstances.
CD50-CRD50--IO-16s.book Seite 9 Freitag, 16. September 2016 4:05 16

EN
Safety instructions CD50, CRD50
10
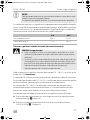
• Never transport the device in a horizontal position, so that no oil can
leak out of the compressor.
• Make sure that the refrigerator circuit is not damaged during transpor-
tation. The refrigerant in the refrigerator circuit is highly flammable.
In the event of any damage to the refrigerator circuit:
– Avoid naked flames and sparks.
– Air the room well.
• Set up the device in a dry location where it is protected against splash-
ing water.
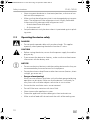
2.2 Operating the device safely
D
DANGER!
• Do not touch exposed cables with your bare hands. This applies
especially when operating the device from the AC mains.
!
CAUTION!
• Before starting the device, ensure that the power supply line and the
plug are dry.
• If you connect the device to a battery, make sure that no food comes
into contact with the battery acid.
A
NOTICE!
• Do not use electrical devices inside the cooling device unless they are
recommended by the manufacturer for that purpose.
• Do not place it near naked flames or other heat sources (heaters, direct
sunlight, gas ovens etc.)
• Danger of overheating!
Always ensure sufficient ventilation so that the heat generated during
operation can dissipate. Make sure that the device is sufficiently far
away from walls and other objects so that the air can circulate.
• Ensure that the ventilation vents are not covered.
• Do not fill the inner container with ice or fluid.
• Never immerse the appliance in water.
• Protect the appliance and the cable against heat and moisture.
• Make sure that foodstuffs do not touch the walls of the cooling area.
CD50-CRD50--IO-16s.book Seite 10 Freitag, 16. September 2016 4:05 16

EN
CD50, CRD50 Scope of delivery
11
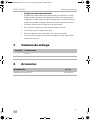
3Scope of delivery
4Accessories
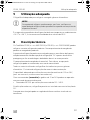
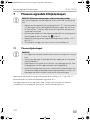
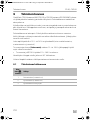
5 Intended use
The refrigerator is suitable for cooling and freezing foodstuffs.
A
An optimum cooling capacity is guaranteed at ambient temperatures between
+16 °C and +38 °C and at a maximum air humidity of 90 %.
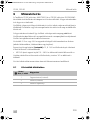
6 Technical description
CoolMatic CD50 (item no. 444270023) and CoolMatic CRD50 (item no.
9105304081) can refrigerate goods and keep them cool. Products can be deep-
frozen in the freezer compartment.
The refrigerator drawer can be pulled out by the handle and completely removed
from the unit for cleaning purposes. Bottles or beverage packaging are separated
with spacers to ensure they do not fall when pulled out.
The freezer compartment is detachable. This allows the refrigerator space to be
extended if required.
All materials used in the refrigerator are compatible for use with foodstuffs. The
refrigerant circuit is maintenance-free.
Quantity Description
1 Refrigerator
1 Operating manual
Description Item no.
MPS35 mains adapter 9103555825
NOTICE!
If you wish to cool medicines, please check if the cooling capacity of the
appliance is suitable for the medicine in question.
CD50-CRD50--IO-16s.book Seite 11 Freitag, 16. September 2016 4:05 16

EN
Technical description CD50, CRD50
12
The refrigerator is suitable for use with a DC voltage of 12 V or 24 V (e.g. in camper
vans, caravans or on boats).
With a rectifier (accessory), the 12 and 24 V refrigerators can be operated on an AC
network:
• MPS35 rectifier: for use with a 110 – 240 V supply
When used on boats the refrigerator can be subjected to a constant inclination of
30°.
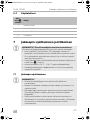
You can use the continuously variable thermostat to set the desired temperature.
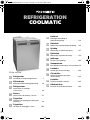
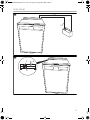
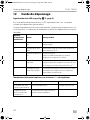
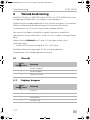
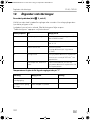
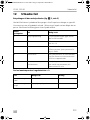
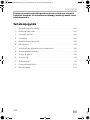
6.1 Overview
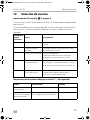
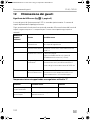
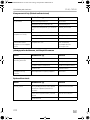
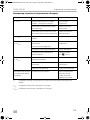
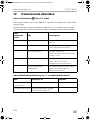
6.2 Control elements
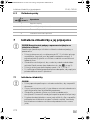
No. in
fig. 1, page 2
Explanation
1 Freezer compartment (detachable)
2 Refrigerator drawer (detachable)
3 Fastening lever for the refrigerator drawer
No. in
fig. 2, page 2
Explanation
1 Temperature controller
2 Green LED: operation
3 Red LED: fault
4 Interior lighting
CD50-CRD50--IO-16s.book Seite 12 Freitag, 16. September 2016 4:05 16

EN
CD50, CRD50 Installing and connecting the refrigerator
13
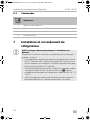
7 Installing and connecting the
refrigerator
A
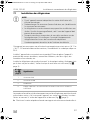
7.1 Installing the refrigerator
A
The appliance is designed for ambient temperatures between +16 °C and +38 °C.
In continuous operation, the air humidity may not exceed 90 %.
Set up the fridge in a dry, sheltered place. Avoid placing it near heat sources such as
radiators, gas ovens, hot water pipes etc.
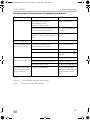
NOTICE! Safety instructions for installation on boats
Please note the following instructions for installation on boats:
• The device can be tilted sideways up to 30°. When setting up the
refrigerator, note that it must be fastened to take account of this. If
you have any questions regarding installation, consult your specialist
dealer.
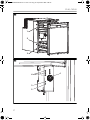
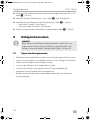
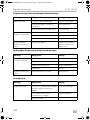
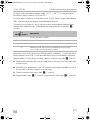
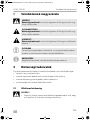
• Install the refrigerator so that the warm air produced can easily flow
away (either upwards or to the sides, fig. 3, page 3).
• The appliance is designed for ambient temperatures between
+16 °C and +38 °C.
• If the appliance is powered by the mains, ensure that the power
supply has a residual current circuit breaker.
NOTICE!
• Fasten the device as described in the operating manual to prevent
hazards.
• Keep objects clear of openings in the housing or mounting structure
(such as ventilation slots).
• The refrigerator is only suitable for installation in a fitted niche. Once
it is installed, only the front of the appliance may be accessible.
• If brakes are applied fully, then strong forces act in the direction of
travel. In order to prevent damage to the cooling appliance and the
vehicle interior, the cooling appliance should not be installed with
the front facing the direction of travel.
CD50-CRD50--IO-16s.book Seite 13 Freitag, 16. September 2016 4:05 16

EN
Installing and connecting the refrigerator CD50, CRD50
14
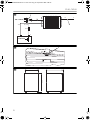
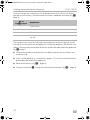
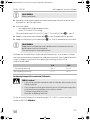
Install the refrigerator so that the warm air produced can easily flow away (either
upwards or to the sides). Therefore make sure there is adequate ventilation (fig. 3,
page 3).
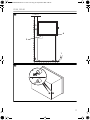
The condensation which forms during normal operation of the refrigerator can be
drained off via two outlets on the appliance. For delivery purposes, these outlets are
sealed. The two outlets are located on the rear and on the underside of the appliance
(fig. 4, page 3).
➤ Choose the condensation outlet most suitable for the place of installation and
remove its cap.
➤ Insert a sharp object (e.g. a screwdriver) approx. 25 to 30 mm into the outlet to
pierce open the inside of the appliance.
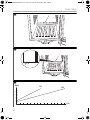
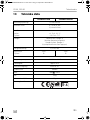
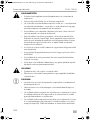
➤ Remove the drip-tray (fig. 5 1, page 4).
➤ Connect a hose (fig. 6 2, page 4) to the outlet connections (fig. 6 1, page 4).
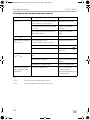
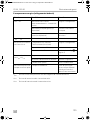
No. in
fig. 3, page 3
Explanation
1 Cold intake air
2 Hot waste air
3 Condenser
4 Spacing above the fridge if insufficient air can circulate above or at
the side.
CD50-CRD50--IO-16s.book Seite 14 Freitag, 16. September 2016 4:05 16

EN
CD50, CRD50 Installing and connecting the refrigerator
15
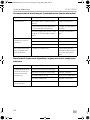
7.2 Connecting the refrigerator
Connect the refrigerator to DC power
The refrigerators can be operated with 12 Vg or with 24 Vg.
A
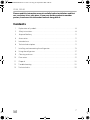
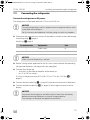
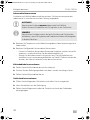
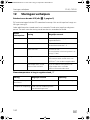
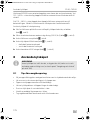
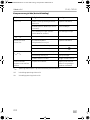
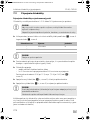
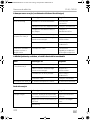
➤ Determine the required cross section of the cable in relation to the cable length
according to fig. 7, page 4.
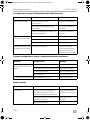
Key for fig. 7, page 4
A
➤ Before starting up the appliance for the first time, check whether the operating
voltage and the battery voltage match (see type plate).
➤ Connect the refrigerator
– as directly as possible to the poles of the battery or
– to a 12 or 24 Vg socket.
Fit a fuse in the positive wire of 15 A (for 12 V) or 7.5 A (for 24 V) (fig. 8 1,
page 5).
➤ Connect the red cable (fig. 8 rt, page 5) to the positive terminal of the battery.
➤ Connect the black cable (fig. 8 sw, page 5) to the negative terminal of the
battery.
A
NOTICE!
To avoid voltage drops and loss of performance, keep the cable as short
as possible and avoid joins.
For this reason avoid additional switches, plugs or multi-way adapters.
Co-ordinate axis Explanation Unit
l Cable length m
∅ Cable cross section mm²
NOTICE!
Make sure that the polarity is correct.
NOTICE!
Disconnect the refrigerator and other electric loads from the battery
before connecting the battery to a quick charging device.
Overvoltage can damage the appliance electronics.
CD50-CRD50--IO-16s.book Seite 15 Freitag, 16. September 2016 4:05 16

EN
Installing and connecting the refrigerator CD50, CRD50
16
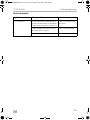
For safety reasons the refrigerator is equipped with an electronic system to prevent
the polarity being reversed. This protects the refrigerator against reversed polarity
when connecting to a battery and against short circuiting. To protect the battery, the
refrigerator switches off automatically if the voltage is insufficient (see table below).
Connecting the refrigerator to AC power (accessory)
D
You can connect the refrigerator to 110 – 240 V AC power if you use the MPS35
rectifier (accessory).
The MPS35 features a priority circuit which conserves the battery connected. When
a 110 – 240 Vw mains connection is used, the rectifier automatically switches from
battery to mains operation.
When disconnected from the 110 – 240 Vw mains supply, the rectifier automatically
switches back to battery operation. Mains operation using the rectifier always takes
priority over battery operation.
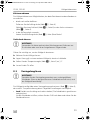
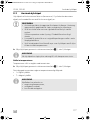
Proceed as follows when you connect the refrigerator to the AC supply:
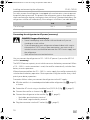
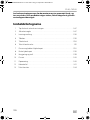
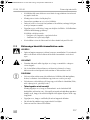
➤ Affix the rectifier in its intended position behind the refrigerator (fig. 9, page 5),
as shown.
➤ Protect the AC circuit using a slow-blow fuse (250 V/4 A) (fig. 9 3, page 5).
➤ Connect the rectifier as shown in fig. 9, page 5.
➤ Connect the refrigerator to the rectifier (fig. 9 2, page 5):
– Red cable: positive battery terminal
– Black cable: negative battery terminal
➤ Plug the connector into the AC socket (fig. 9 1,page 5).
12 V 24 V
Cut-off voltage 10.4 V 22.8 V
Cut-in voltage 11.7 V 24.2 V
DANGER! Danger of fatal injury!
• Never handle plugs and switches with wet hands or if you are
standing on a wet surface.
• If you are operating your refrigerator on board a boat with a mains
connection of 230 V using a shore connection, you must install a
residual current circuit breaker between the 230 V mains supply and
the refrigerator.
Seek advice from a trained technician.
CD50-CRD50--IO-16s.book Seite 16 Freitag, 16. September 2016 4:05 16

EN
CD50, CRD50 Using the refrigerator
17
8 Using the refrigerator
I
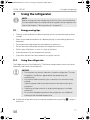
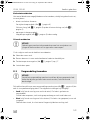
8.1 Energy saving tips
• Choose a well ventilated installation location which is protected against direct
sunlight.
• Allow warm food to cool down first before placing it in the cooling device to
keep cool.
• Do not open the cooling device more often than necessary.
• Do not leave the cooling device open for longer than necessary.
• Defrost your refrigerator as soon as a layer of ice forms.
• Avoid unnecessarily low temperature settings.
• Clean dust and dirt from the condenser at regular intervals.
8.2 Using the refrigerator
The fridge conserves fresh foodstuffs. The freezer compartment conserves frozen
foodstuffs and freezes fresh foodstuffs.
A
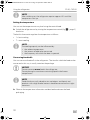
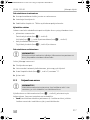
➤ Switch the refrigerator on by turning the temperature control (fig. 2 1 page 2)
clockwise.
NOTE
Before starting your new refrigerator for the first time, you should clean
it inside and outside with a damp cloth for hygienic reasons (please also
refer to the chapter “Cleaning and care” on page 21).
NOTICE!
• Do not place any electrical devices inside the refrigerator. The only
exceptions are devices approved for the purpose by the
manufacturer.
• Ensure that food or liquids in glass containers are not excessively
cooled.
Liquids expand when they freeze and can thus destroy the glass
containers.
• Food may only be stored in its original packaging or in suitable
containers.
• Ensure that the objects placed in the refrigerator are suitable for
cooling to the selected temperature.
CD50-CRD50--IO-16s.book Seite 17 Freitag, 16. September 2016 4:05 16

EN
Using the refrigerator CD50, CRD50
18
I
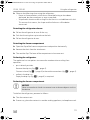
Setting the temperature
You can set the temperature to any level using the control knob.
➤ Switch the refrigerator on by turning the temperature control (fig. 2 1 page 2)
clockwise.
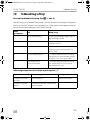
The built-in thermostat regulates the temperature as follows:
• 1=least cooling
• 7=most cooling
I
Conserving foodstuffs
You can conserve foodstuffs in the refrigerator. The time for which the food can be
conserved in this way is usually stated on the package.
A
I
➤ Observe the temperature information and best before date on the food
packaging.
NOTE
After switching on, the refrigerator requires approx. 60 s until the
compressor starts up.
NOTE
The cooling capacity can be influenced by:
• the ambient temperature
• the amount of food to be conserved
• the frequency with which the door is opened.
NOTICE!
Do not conserve warm food in the refrigerator.
Do not place glass containers containing liquid in the freezer
compartment.
NOTE
Food which can easily absorb tastes and odours and liquids and
products with a high alcohol content should be conserved in air-tight
containers.
CD50-CRD50--IO-16s.book Seite 18 Freitag, 16. September 2016 4:05 16

EN
CD50, CRD50 Using the refrigerator
19
➤ Observe the following when using the refrigerator:
– Never re-freeze products which have started defrosting or have been
defrosted, but consume them as soon as possible.
– Wrap food in aluminium foil or cling film and shut in in a suitable box with a lid.
This ensures that aromas, the shape and the freshness will be better
conserved.
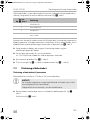
Detaching the refrigerator drawer
➤ Pull out the refrigerator drawer all the way.
➤ Push the fastening lever up to release the lock.
➤ Pull out the refrigerator drawer.
Detaching the freezer compartment
➤ Open the flap of the freezer compartment and position horizontally.
➤ Remove the chain from the attachment.
➤ Take out the flap. The base of the compartment also comes out.
Defrosting the refrigerator
The appliance has two options to remove the condensation resulting from
operation:
• pass it directly outside:
Remove the drip-tray (fig. 5 1, page 4).
Connect a hose (fig. 6 2, page 4) to the outlet connections (fig. 6 1, page 4).
• collect in the drip-tray:
Empty the drip-tray (fig. 5 1, page 4) as required.
Defrosting the freezer compartment
A
To defrost the refrigerator, proceed as follows:
➤ Take the contents out.
➤ If necessary, place the contents in another cooling appliance, to keep them cool.
NOTICE!
Never use mechanical tools to remove ice or to loosen objects stuck to
the device.
CD50-CRD50--IO-16s.book Seite 19 Freitag, 16. September 2016 4:05 16

EN
Using the refrigerator CD50, CRD50
20
➤ Set the temperature control knob (fig. 2 1 page 2) to “0”.
➤ Leave the door open.
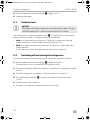
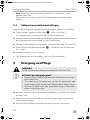
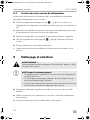
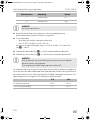
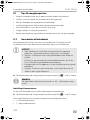
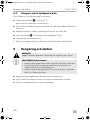
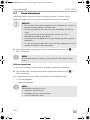
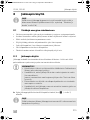
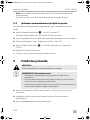
8.3 Undo the lock
A
The refrigerator has a locking mechanism (fig. a 1, page 6) which is also used to
protect it during transport. The following settings are possible:
• Lock (turn wheel clockwise all the way): The drawer is locked and secured.
To open the drawer, lift the handle up and lift the drawer out.
• Vent (turn wheel anti-clockwise all the way): The drawer is slightly open, but
fixed in position.
Use this position if you are not going to use the unit for a long time.
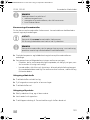
8.4 Switching off and storing the refrigerator
If you do not intend to use the refrigerator for a long time, proceed as follows:
➤ Set the temperature control knob (fig. 2 1 page 2) to level “0”.
The cooling unit is only switched off when you hear a click.
➤ Disconnect the power cable from the battery or pull the AC cable plug out of the
rectifier.
➤ Clean the refrigerator (see chapter “Cleaning and care” on page 21).
➤ Turn the locking wheel (fig. a 1, page 6) anti-clockwise to the end stop
(“Vent”).
➤ Close the door until it latches in.
✓ The door stays open thus preventing smells from arising.
NOTICE!
Only adjust the locking mechanism when the drawer is open. The unit
will be damaged if this is adjusted when the drawer is closed.
CD50-CRD50--IO-16s.book Seite 20 Freitag, 16. September 2016 4:05 16
La pagina si sta caricando...
La pagina si sta caricando...
La pagina si sta caricando...
La pagina si sta caricando...
La pagina si sta caricando...
La pagina si sta caricando...
La pagina si sta caricando...
La pagina si sta caricando...
La pagina si sta caricando...
La pagina si sta caricando...
La pagina si sta caricando...
La pagina si sta caricando...
La pagina si sta caricando...
La pagina si sta caricando...
La pagina si sta caricando...
La pagina si sta caricando...
La pagina si sta caricando...
La pagina si sta caricando...
La pagina si sta caricando...
La pagina si sta caricando...
La pagina si sta caricando...
La pagina si sta caricando...
La pagina si sta caricando...
La pagina si sta caricando...
La pagina si sta caricando...
La pagina si sta caricando...
La pagina si sta caricando...
La pagina si sta caricando...
La pagina si sta caricando...
La pagina si sta caricando...
La pagina si sta caricando...
La pagina si sta caricando...
La pagina si sta caricando...
La pagina si sta caricando...
La pagina si sta caricando...
La pagina si sta caricando...
La pagina si sta caricando...
La pagina si sta caricando...
La pagina si sta caricando...
La pagina si sta caricando...
La pagina si sta caricando...
La pagina si sta caricando...
La pagina si sta caricando...
La pagina si sta caricando...
La pagina si sta caricando...
La pagina si sta caricando...
La pagina si sta caricando...
La pagina si sta caricando...
La pagina si sta caricando...
La pagina si sta caricando...
La pagina si sta caricando...
La pagina si sta caricando...
La pagina si sta caricando...
La pagina si sta caricando...
La pagina si sta caricando...
La pagina si sta caricando...
La pagina si sta caricando...
La pagina si sta caricando...
La pagina si sta caricando...
La pagina si sta caricando...
La pagina si sta caricando...
La pagina si sta caricando...
La pagina si sta caricando...
La pagina si sta caricando...
La pagina si sta caricando...
La pagina si sta caricando...
La pagina si sta caricando...
La pagina si sta caricando...
La pagina si sta caricando...
La pagina si sta caricando...
La pagina si sta caricando...
La pagina si sta caricando...
La pagina si sta caricando...
La pagina si sta caricando...
La pagina si sta caricando...
La pagina si sta caricando...
La pagina si sta caricando...
La pagina si sta caricando...
La pagina si sta caricando...
La pagina si sta caricando...
La pagina si sta caricando...
La pagina si sta caricando...
La pagina si sta caricando...
La pagina si sta caricando...
La pagina si sta caricando...
La pagina si sta caricando...
La pagina si sta caricando...
La pagina si sta caricando...
La pagina si sta caricando...
La pagina si sta caricando...
La pagina si sta caricando...
La pagina si sta caricando...
La pagina si sta caricando...
La pagina si sta caricando...
La pagina si sta caricando...
La pagina si sta caricando...
La pagina si sta caricando...
La pagina si sta caricando...
La pagina si sta caricando...
La pagina si sta caricando...
La pagina si sta caricando...
La pagina si sta caricando...
La pagina si sta caricando...
La pagina si sta caricando...
La pagina si sta caricando...
La pagina si sta caricando...
La pagina si sta caricando...
La pagina si sta caricando...
La pagina si sta caricando...
La pagina si sta caricando...
La pagina si sta caricando...
La pagina si sta caricando...
La pagina si sta caricando...
La pagina si sta caricando...
La pagina si sta caricando...
La pagina si sta caricando...
La pagina si sta caricando...
La pagina si sta caricando...
La pagina si sta caricando...
La pagina si sta caricando...
La pagina si sta caricando...
La pagina si sta caricando...
La pagina si sta caricando...
La pagina si sta caricando...
La pagina si sta caricando...
La pagina si sta caricando...
La pagina si sta caricando...
La pagina si sta caricando...
La pagina si sta caricando...
La pagina si sta caricando...
La pagina si sta caricando...
La pagina si sta caricando...
La pagina si sta caricando...
La pagina si sta caricando...
La pagina si sta caricando...
La pagina si sta caricando...
La pagina si sta caricando...
La pagina si sta caricando...
La pagina si sta caricando...
La pagina si sta caricando...
La pagina si sta caricando...
La pagina si sta caricando...
La pagina si sta caricando...
La pagina si sta caricando...
La pagina si sta caricando...
La pagina si sta caricando...
La pagina si sta caricando...
La pagina si sta caricando...
La pagina si sta caricando...
La pagina si sta caricando...
La pagina si sta caricando...
La pagina si sta caricando...
La pagina si sta caricando...
La pagina si sta caricando...
La pagina si sta caricando...
La pagina si sta caricando...
La pagina si sta caricando...
La pagina si sta caricando...
La pagina si sta caricando...
La pagina si sta caricando...
La pagina si sta caricando...
La pagina si sta caricando...
La pagina si sta caricando...
La pagina si sta caricando...
La pagina si sta caricando...
La pagina si sta caricando...
La pagina si sta caricando...
La pagina si sta caricando...
La pagina si sta caricando...
La pagina si sta caricando...
La pagina si sta caricando...
La pagina si sta caricando...
La pagina si sta caricando...
La pagina si sta caricando...
La pagina si sta caricando...
La pagina si sta caricando...
La pagina si sta caricando...
La pagina si sta caricando...
La pagina si sta caricando...
La pagina si sta caricando...
La pagina si sta caricando...
La pagina si sta caricando...
La pagina si sta caricando...
La pagina si sta caricando...
La pagina si sta caricando...
La pagina si sta caricando...
La pagina si sta caricando...
La pagina si sta caricando...
La pagina si sta caricando...
La pagina si sta caricando...
La pagina si sta caricando...
La pagina si sta caricando...
La pagina si sta caricando...
La pagina si sta caricando...
La pagina si sta caricando...
La pagina si sta caricando...
La pagina si sta caricando...
La pagina si sta caricando...
La pagina si sta caricando...
La pagina si sta caricando...
La pagina si sta caricando...
La pagina si sta caricando...
La pagina si sta caricando...
La pagina si sta caricando...
La pagina si sta caricando...
La pagina si sta caricando...
La pagina si sta caricando...
La pagina si sta caricando...
La pagina si sta caricando...
La pagina si sta caricando...
La pagina si sta caricando...
La pagina si sta caricando...
La pagina si sta caricando...
La pagina si sta caricando...
La pagina si sta caricando...
La pagina si sta caricando...
La pagina si sta caricando...
La pagina si sta caricando...
La pagina si sta caricando...
La pagina si sta caricando...
La pagina si sta caricando...
La pagina si sta caricando...
La pagina si sta caricando...
La pagina si sta caricando...
La pagina si sta caricando...
La pagina si sta caricando...
La pagina si sta caricando...
La pagina si sta caricando...
La pagina si sta caricando...
La pagina si sta caricando...
La pagina si sta caricando...
La pagina si sta caricando...
La pagina si sta caricando...
La pagina si sta caricando...
La pagina si sta caricando...
La pagina si sta caricando...
La pagina si sta caricando...
La pagina si sta caricando...
La pagina si sta caricando...
La pagina si sta caricando...
La pagina si sta caricando...
La pagina si sta caricando...
La pagina si sta caricando...
La pagina si sta caricando...
La pagina si sta caricando...
La pagina si sta caricando...
La pagina si sta caricando...
La pagina si sta caricando...
La pagina si sta caricando...
La pagina si sta caricando...
La pagina si sta caricando...
La pagina si sta caricando...
La pagina si sta caricando...
La pagina si sta caricando...
La pagina si sta caricando...
La pagina si sta caricando...
La pagina si sta caricando...
La pagina si sta caricando...
La pagina si sta caricando...
La pagina si sta caricando...
La pagina si sta caricando...
La pagina si sta caricando...
La pagina si sta caricando...
La pagina si sta caricando...
La pagina si sta caricando...
La pagina si sta caricando...
La pagina si sta caricando...
La pagina si sta caricando...
La pagina si sta caricando...
La pagina si sta caricando...
La pagina si sta caricando...
La pagina si sta caricando...
La pagina si sta caricando...
La pagina si sta caricando...
La pagina si sta caricando...
La pagina si sta caricando...
La pagina si sta caricando...
La pagina si sta caricando...
La pagina si sta caricando...
La pagina si sta caricando...
La pagina si sta caricando...
La pagina si sta caricando...
La pagina si sta caricando...
La pagina si sta caricando...
La pagina si sta caricando...
La pagina si sta caricando...
La pagina si sta caricando...
La pagina si sta caricando...
La pagina si sta caricando...
La pagina si sta caricando...
La pagina si sta caricando...
La pagina si sta caricando...
La pagina si sta caricando...
La pagina si sta caricando...
La pagina si sta caricando...
La pagina si sta caricando...
La pagina si sta caricando...
La pagina si sta caricando...
La pagina si sta caricando...
La pagina si sta caricando...
La pagina si sta caricando...
La pagina si sta caricando...
La pagina si sta caricando...
La pagina si sta caricando...
-
 1
1
-
 2
2
-
 3
3
-
 4
4
-
 5
5
-
 6
6
-
 7
7
-
 8
8
-
 9
9
-
 10
10
-
 11
11
-
 12
12
-
 13
13
-
 14
14
-
 15
15
-
 16
16
-
 17
17
-
 18
18
-
 19
19
-
 20
20
-
 21
21
-
 22
22
-
 23
23
-
 24
24
-
 25
25
-
 26
26
-
 27
27
-
 28
28
-
 29
29
-
 30
30
-
 31
31
-
 32
32
-
 33
33
-
 34
34
-
 35
35
-
 36
36
-
 37
37
-
 38
38
-
 39
39
-
 40
40
-
 41
41
-
 42
42
-
 43
43
-
 44
44
-
 45
45
-
 46
46
-
 47
47
-
 48
48
-
 49
49
-
 50
50
-
 51
51
-
 52
52
-
 53
53
-
 54
54
-
 55
55
-
 56
56
-
 57
57
-
 58
58
-
 59
59
-
 60
60
-
 61
61
-
 62
62
-
 63
63
-
 64
64
-
 65
65
-
 66
66
-
 67
67
-
 68
68
-
 69
69
-
 70
70
-
 71
71
-
 72
72
-
 73
73
-
 74
74
-
 75
75
-
 76
76
-
 77
77
-
 78
78
-
 79
79
-
 80
80
-
 81
81
-
 82
82
-
 83
83
-
 84
84
-
 85
85
-
 86
86
-
 87
87
-
 88
88
-
 89
89
-
 90
90
-
 91
91
-
 92
92
-
 93
93
-
 94
94
-
 95
95
-
 96
96
-
 97
97
-
 98
98
-
 99
99
-
 100
100
-
 101
101
-
 102
102
-
 103
103
-
 104
104
-
 105
105
-
 106
106
-
 107
107
-
 108
108
-
 109
109
-
 110
110
-
 111
111
-
 112
112
-
 113
113
-
 114
114
-
 115
115
-
 116
116
-
 117
117
-
 118
118
-
 119
119
-
 120
120
-
 121
121
-
 122
122
-
 123
123
-
 124
124
-
 125
125
-
 126
126
-
 127
127
-
 128
128
-
 129
129
-
 130
130
-
 131
131
-
 132
132
-
 133
133
-
 134
134
-
 135
135
-
 136
136
-
 137
137
-
 138
138
-
 139
139
-
 140
140
-
 141
141
-
 142
142
-
 143
143
-
 144
144
-
 145
145
-
 146
146
-
 147
147
-
 148
148
-
 149
149
-
 150
150
-
 151
151
-
 152
152
-
 153
153
-
 154
154
-
 155
155
-
 156
156
-
 157
157
-
 158
158
-
 159
159
-
 160
160
-
 161
161
-
 162
162
-
 163
163
-
 164
164
-
 165
165
-
 166
166
-
 167
167
-
 168
168
-
 169
169
-
 170
170
-
 171
171
-
 172
172
-
 173
173
-
 174
174
-
 175
175
-
 176
176
-
 177
177
-
 178
178
-
 179
179
-
 180
180
-
 181
181
-
 182
182
-
 183
183
-
 184
184
-
 185
185
-
 186
186
-
 187
187
-
 188
188
-
 189
189
-
 190
190
-
 191
191
-
 192
192
-
 193
193
-
 194
194
-
 195
195
-
 196
196
-
 197
197
-
 198
198
-
 199
199
-
 200
200
-
 201
201
-
 202
202
-
 203
203
-
 204
204
-
 205
205
-
 206
206
-
 207
207
-
 208
208
-
 209
209
-
 210
210
-
 211
211
-
 212
212
-
 213
213
-
 214
214
-
 215
215
-
 216
216
-
 217
217
-
 218
218
-
 219
219
-
 220
220
-
 221
221
-
 222
222
-
 223
223
-
 224
224
-
 225
225
-
 226
226
-
 227
227
-
 228
228
-
 229
229
-
 230
230
-
 231
231
-
 232
232
-
 233
233
-
 234
234
-
 235
235
-
 236
236
-
 237
237
-
 238
238
-
 239
239
-
 240
240
-
 241
241
-
 242
242
-
 243
243
-
 244
244
-
 245
245
-
 246
246
-
 247
247
-
 248
248
-
 249
249
-
 250
250
-
 251
251
-
 252
252
-
 253
253
-
 254
254
-
 255
255
-
 256
256
-
 257
257
-
 258
258
-
 259
259
-
 260
260
-
 261
261
-
 262
262
-
 263
263
-
 264
264
-
 265
265
-
 266
266
-
 267
267
-
 268
268
-
 269
269
-
 270
270
-
 271
271
-
 272
272
-
 273
273
-
 274
274
-
 275
275
-
 276
276
-
 277
277
-
 278
278
-
 279
279
-
 280
280
-
 281
281
-
 282
282
-
 283
283
-
 284
284
-
 285
285
-
 286
286
-
 287
287
-
 288
288
-
 289
289
-
 290
290
-
 291
291
-
 292
292
-
 293
293
-
 294
294
-
 295
295
-
 296
296
-
 297
297
-
 298
298
-
 299
299
-
 300
300
-
 301
301
-
 302
302
-
 303
303
-
 304
304
-
 305
305
-
 306
306
-
 307
307
-
 308
308
-
 309
309
-
 310
310
-
 311
311
-
 312
312
-
 313
313
-
 314
314
-
 315
315
-
 316
316
-
 317
317
-
 318
318
-
 319
319
-
 320
320
-
 321
321
-
 322
322
-
 323
323
-
 324
324


Waeco CoolMatic CD50, CRD50 Guida d'installazione
- Categoria
- Scatole fresche
- Tipo
- Guida d'installazione
in altre lingue
Altri documenti
-
Dometic CoolPower MPS35 Guida d'installazione
-
-
-
-
Blaupunkt MODENA CD50 BLUE Manuale del proprietario
-
-
Shimano SM-CD50 Dealer's Manual
-
-
-