
itendefr
MANUALE D’USO Lingua originale
Prima di effettuare qualsiasi operazione sull’imballo, sulla macchina
o sull’attrezzatura intercambiabile leggere e comprendere nella sua
interezza il presente manuale.
USER’S MANUAL Translation of the original
Read and understand this manual in its entirety before carrying out
any work on the packaging, the machine or the interchangeable
equipment.
BEDIENUNGSANLEITUNG Übersetzung aus dem Original
Bevor Arbeiten an der Verpackung, an der Maschine oder an den
Anbaugeräten vorgenommen werden, muss das vorliegende Handbuch
ganz gelesen und verstanden worden sein.
MANUEL D’UTILISATION Traduction de la langue originale
Avant d’effectuer toute opération sur l’emballage, sur la machine et
sur l’équipement interchangeable, lire et comprendre entièrement ce
manuel.
AFL63
es
pt
MANUAL DE USO Traduzido para o português
Antes de executar qualquer operação na embalagem, na máquina ou
no equipamento intercambiável, leia e compreenda este manual na
íntegra.
sl
PRIROČNIK O UPORABI Prevod izvirnih navodil
Preden opravite kakršenkoli postopek na embalaži, na stroju ali
izmenljivi opremi stroja, morate v celoti prebrati ta priročnik in
razumeti njegovo vsebino.
el
Μετάφραση από το πρωτότυπο
Πριν προχωρήσετε σε οποιαδήποτε εργασία επί της συσκευασίας, του
μηχανήματος ή του εξοπλισμού, διαβάστε και κατανοήστε πλήρως το
παρόν εγχειρίδιο.
ΕΓΧΕΙΡΙΔΙΟ ΧΡΗΣΗΣ

1.11.1 A
B
C
Alcune illustrazioni potrebbero raffigurare la macchina senza ripari per questioni di chiarezza.
La motorizzazione ed alcuni componenti potrebbero non essere del modello acquistato.
IT-
EN- Some illustrations may depict the machine without its cover in the interests of clarity.
The engine and some components may not be the model you purchased.
DE- Einige Abbildungen können aus Gründen der Deutlichkeit die Maschine ohne Schutzeinrichtungen zeigen.
Der Antrieb und einige Bauteile könnten nicht dem erworbenen Modell entsprechen.
FR- Certaines illustrations pourraient représenter la machine sans protections pour des questions de clarté.
La motorisation et certains composants pourraient ne pas faire partie du modèle acheté.
Spegnere la macchina e rimuovere il cappuccio candela e/o la chiave | Switch off the machine and remove the spark plug cap
and/or the key | Die Maschine ausschalten und die Zündkerzenkappe und/oder den Zündschlüssel entfernen | Éteindre la ma-
chine et retirer le capuchon de la bougie et/ou la clé | Desligue a máquina e remova a chave e/ou a tampa da vela de ignição l
Ugasnite stroj in odstranite kapico zažigalne svečke in/ali ključ | Σβήστε το μηχάνημα και αφαιρέστε το καπάκι από το μπουζί και/ή
το κλειδί I
PT- Algumas ilustrações podem representar a máquina sem proteções para facilitar a compreensão.
O motor e alguns componentes podem não ser os do modelo adquirido.
Na nekaterih slikah je stroj morda prikazan brez varoval zaradi nazornosti razlage.
Motor in nekateri sestavni deli morda niso enaki kot pri nabavljenem modelu.
SL-
a seconda del modello acquistato. I depending on the model purchased. I je nach gekauftem Modell I en fonction du modèle
acheté. I de acordo com o modelo adquirido. I Odvisno od nabavljenega modela. I αναλόγως με το μοντέλο που έχει αγοραστεί. I
EL- Ορισμένες από τις εικόνες ενδέχεται να εμφανίζουν το μηχάνημα χωρίς προστασίες για λόγους ευκρίνειας.
Η μηχανοκίνηση και ορισμένα εξαρτήματα ενδέχεται να μην ανήκουν στο μοντέλο που έχει αγοραστεί.

1.21.2 1.31.3
A
B
A
1.
1.
2.
2.
1.41.4
1
2
3
4
5
6
7
7
88
9
9
10
10

3
1.51.5
1.5a1.5a
C
1.
2.
2.12.1 Attenzione: pericolo ferimento mani e piedi. Non eettuare nessuna operazione di qualsiasi
tipo, manutenzione, movimentazione, pulizia, sull’attrezzo quando il motore è acceso.
Warning: risk of hand and feet injury. Do not perform any operation such as servicing, moving,
cleaning on the tool when the engine is on.
Achtung: Hand- und Fussverletzung. Kein Wartungs-, Umlagerungs- und Reinigungsver-
fahren sowie keinen Vorgang jeder Art bei dem Gerät durchführen wenn der Motor ein-
geschaltet ist.
Attention! Danger de blessures aux mains et aux pieds. Ne pas eectuer aucune type
d’opération comme entretien, mouvement, nettoyage de l’outil quand le moteur est en
marche.
Atenção: perigo de ferimentos nas mãos e pés. Não efetue nenhuma operação de
manutenção, movimentação, limpeza no equipamento enquanto o motor estiver ligado.
Opozorilo: tveganje poškodb rok in nog. Vzdrževalna, čistilna in druga dela je potrebno
izvajati zgolj ob izključenem motorju.
Προσοχή: κίνδυνος τραυματισμού χεριών και ποδιών. Μην εκτελείτε καμία εργασία
οποιουδήποτε είδους, συντήρηση, μετακίνηση, καθαρισμό, στο εργαλείο όταν ο κινητήρας
είναι αναμμένος.
C
C
11
11
12
13

20 m
2.22.2 3.13.1
Attenzione: pericolo ferimento arti. Parti rotanti.
Warning: risk of limb injury. Rotating parts!
Achtung: Gliederverletzung Drehende Teile.
Attention! Danger de blessures aux membres. Parties tournantes.
Atenção: perigo de ferimentos dos membros. Partes giratórias.
Pozor: nevarnost poškodbe okončin. Vrteči deli!
Προσοχή: κίνδυνος τραυματισμού των άκρων.
Περιστρεφόμενα μέρη.
4.24.2 4.34.3
4.14.1
8 cm8 cm
5 cm5 cm
GREASE
5 cm5 cm
8 cm8 cm
Manufacturer
Model: xxxx-xxxxxxxxxxx
Type: xxxxx xxxx | xxxxxxxxxxxx
Nr.: xxxxxxxxx-xxxxxx
Weight: xxx kg
Date: aaaa / m
Power: x.xx kW
1
2
3
4
5
6
7
8
14
14
15
15
16
16
17
17
18
19
20
22
21

it
1. INFORMAZIONI GENERALI
1.1 INTRODUZIONE
Ringraziamo per la fiducia accordata ai
nostri prodotti e auguriamo un piacevole
utilizzo della macchina e/o della attrezza-
tura intercambiabile.
Abbiamo creato queste istruzioni per l’u-
so allo scopo di assicurare un funziona-
mento privo d’inconvenienti. Seguendo
attentamente questi consigli, si avrà la
soddisfazione di possedere per molto
tempo una macchina o un’attrezzatura in-
tercambiabile che funziona a dovere.
Le nostre macchine e le nostre attrez-
zature intercambiabili, prima di essere
fabbricate in serie, vengono collaudate in
maniera molto rigorosa e, durante la fab-
bricazione vera e propria, sono sottopo-
ste a severi controlli. Ciò costituisce, per
noi e per l’ultilizzatore, la migliore garan-
zia di qualità.
Questa macchina e/o questa attrezzatura
intercambiabile è stata sottoposta a rigo-
rosi test neutrali nel paese d’origine e ri-
sponde alle norme di sicurezza in vigore.
1.2 IL MANUALE
Il manuale è suddiviso in capitoli e para-
grafi in modo da presentare le informazio-
ni nel modo più chiaro possibile.
Le istruzioni, i disegni e la documentazio-
ne contenuti nel presente manuale sono
di natura tecnica riservata, di stretta pro-
prietà del costruttore (vedere dichiarazio-
ne CE in ultima pagina) e non possono
essere riprodotti in alcun modo, né inte-
gralmente, né parzialmente.
Il manuale d’uso deve essere conservato
con cura e deve accompagnare la mac-
china e/o l’attrezzatura intercambiabile in
tutti i passaggi di proprietà che essa po-
trà avere nella sua vita.
Per favorire ciò il manuale deve essere
maneggiato con cura, con le mani pulite
e non deve essere depositato su superfici
sporche.
Deve essere conservato in ambiente pro-
tetto da umidità e calore e in modo che
sia sempre a portata di mano per il chia-
rimento di eventuali dubbi. Non devono
esserne asportate, modificate o strappate
delle parti.
1.3 SIMBOLOGIA DEL MANUALE
Questo simbolo evidenzia situazioni che
possono influenzare la sicurezza, causa-
re morte e/o lesioni gravi all’operatore.
Questo simbolo evidenzia situazioni che
possono causare lesioni lievi all’opera-
tore e/o danni alla macchina.
Questo simbolo evidenzia indicazioni
speciali per maggiore chiarezza e faci-
lità d’uso.
Le immagini sono indicate dalla specifica
figura (es. 2.12.1).
1.4 DATI DEL COSTRUTTORE
Vedere etichetta CE.
Per informazioni e per ordinazioni di pezzi
di ricambio la preghiamo di far riferimen-
to ai rivenditori di zona citando il numero
d’articolo e il numero di produzione che è
possibile trovare sull’etichetta CE mostra-
ta in 3.13.1 .
1. Identificazione costruttore
2. Modello
3. Codice identificativo prodotto
4. Numero di serie articolo
5. Massa
6. Anno / Mese
7. Potenza motore
8. Tipologia prodotto
2. ISTRUZIONI DI SICUREZZA
Prima del montaggio e la messa in fun-
zione della macchina o dell’attrezzatura
intercambiabile leggere e comprendere
nella sua interezza questo manuale d’u-
so e manutenzione e quello della mac-
china multifunzione sulla quale è monta-
ta questa attrezzatura.
PERICOLO!
È responsabilità del datore di lavoro tra-
smettere tutte le informazioni contenute
in questo manuale all’operatore che uti-
lizzerà la macchina o l’attrezzatura inter-
cambiabile.
Questa macchina e/o questa attrezzatura
intercambiabile soddisfa tutti gli standard
europei in vigore nel periodo di produzio-
PERICOLO!
ATTENZIONE!
INFORMAZIONE!
PERICOLO!
ne. Nonostante ciò un uso improprio o
una manutenzione non adeguata possono
aumentare il rischio di infortunio.
Al fine di evitare pericoli per l’incolumi-
tà delle persone e danni all’attrezzatura
intercambiabile, leggere molto attenta-
mente, comprendere ed osservare le
raccomandazioni contenute nel manuale
relativo alla macchina associata a questa
attrezzatura.
Indicazioni per l’attrezzatura intercam-
biabile:
1. Prima di installare, ispezionare, ripa-
rare, rimuovere o sostituire l’attrezzatura
intercambiabile o delle parti, fermare il
motore lasciando raffreddare la macchi-
na (15-20 minuti) e assicurarsi che non
ci siano parti in movimento, scollegare
il cappuccio della candela e montare la
protezione dell’attrezzatura.
2. Quando si intende maneggiare l’attrez-
zatura per il montaggio, la sostituzione o
la manutenzione indossare dei guanti pro-
tettivi robusti. Evitare in generale il contat-
to con gli utensili dell’attrezzatura e non
mettere mani e piedi vicino agli utensili
in movimento onde evitare amputazioni e
ferimenti.
3. Non utilizzare la macchina associata a
questa attrezzatura se quest’ultima non è
correttamente montata o se non funziona
correttamente.
4. Installare la protezione sull’attrezzatura
se non si usa la macchina.
5. Disinnestare l’attrezzatura rilasciando
la relativa leva quando non si eseguono
operazioni di lavoro o se si avvertono
condizioni di pericolo come ad esempio
l’avvicinamento di estranei nella zona di
pericolo, eventuali malfunzionamenti, visi-
bilità ridotta oppure urto improvviso con-
tro un ostacolo.
6. Disinnestare l’attrezzatura se si attra-
versano strade o viali ghiaiati.
7. Disinnestare l’attrezzatura e spegnere
la macchina se si percepiscono vibrazioni
anomale.
8. Per garantire il livello di sicurezza della
macchina è necessario utilizzare esclusi-
vamente ricambi originali.
Indicazioni per la regolazione e la ma-
nutenzione:
PERICOLO!
Tutte le operazioni di REGOLAZIONE e
MANUTENZIONE vanno eseguite a mo-
tore spento. Rimuova il cappuccio can-
dela o la chiave di accensione (se pre-
sente) per evitare avvii inattesi.

it
ATTENZIONE!
Prima di effettuare operazioni di REGO-
LAZIONE e MANUTENZIONE controlli e
assicuri la stabilità della macchina.
Mantenere serrati tutti i dadi, i bulloni e
le viti per garantire il funzionamento della
macchina in condizioni di sicurezza.
Far utilizzare solo parti di ricambio ori-
ginali Eurosystems. Il proprietario perde
ogni diritto di garanzia qualora utilizzati
ricambi non originali.
Non apportare modifiche strutturali o
adattamenti. Tali modifiche comportano il
decadimento della garanzia e il declino di
ogni responsabilità della ditta costruttrice.
Ci riserviamo il diritto di apportare miglio-
ramenti costruttivi alla macchina e/o all’at-
trezzatura intercambiabile senza apporta-
re modifiche a queste istruzioni.
2.1 DESCRIZIONE E CAMPO D’UTILIZZO
La macchina falciatutto AFL63 è un’at-
trezzatura da giardino utilizzata in com-
binazione con la macchina MLT03 per
interventi di falciatura professionale e par-
ticolarmente impegnativa di erba alta e fol-
ta, cespugli e arbusti in proprietà private.
2.2 USO IMPROPRIO
Non usare la macchina per tagliare cose
diverse da erba.
2.3 AREA DI LAVORO
L’utilizzatore è responsabile della sicurez-
za delle persone, delle cose o degli ani-
mali, che si trovano all’interno della zona
di pericolo della macchina.
Tale zona è definita come l’area interna di
una circonferenza di raggio minimo 20m
con centro l’attrezzo montato sulla mac-
china 3.13.1 .
Quando la macchina è in funzione non
è permesso stare nella zona di pericolo
per alcuna ragione. Solamente l’operato-
re, che abbia letto e compreso il manuale
in tutte le sue parti, è autorizzato a stare
all’interno di tale area e ad occupare l’u-
nica postazione operativa posta, dietro il
manubrio impugnandolo saldamente.
L’operatore deve controllare la zona cir-
costante prima di avviare la macchina e
prestare particolare attenzione a bambini
e animali.
Prima di iniziare il lavoro su di una deter-
minata area, pulirla da oggetti estranei.
Durante il lavoro prestare sempre atten-
zione al terreno e alla zona circostante.
Se si dovessero individuare oggetti inde-
siderati e/o pericolosi, prima di spostarsi
dalla postazione operativa per rimuoverli
spegnere la macchina e metterla in sicu-
rezza prevenendone l’avvio, il movimento
e il ribaltamento.
2.4 ABBIGLIAMENTO
Il reperimento di tali dispositivi di prote-
zione individuale è a cura esclusiva del
cliente o del datore di lavoro.
Durante l’utilizzo della macchina e le
operazioni di manutenzione:
è OBBIGATORIO usare sempre scarpe
antiinfortunistiche, guanti, ortoprotettori
adeguati e indossare calzoni lunghi e re-
sistenti e occhiali protettivi.
Non indossare abbigliamento largo, gioielli,
cravatte, sciarpe, cordoncini pendenti che
potrebbero impigliarsi. Legarsi i capelli.
Durante il disimballaggio e il montaggio:
è OBBLIGATORIO usare sempre scarpe
antiinfortunistiche, guanti e indumenti re-
sistenti.
3. DEFINIZIONE DEI PITTOGRAMMI
2.12.1 2.22.2
PERICOLO!
Mantenere tutte le etichette pulite ed in
buono stato, sostituirle se danneggiate.
INFORMAZIONE!
5. MOVIMENTAZIONE E IMBALLO
Per movimentare l’imballo sollevarlo in 2
o più persone utilizzando le maniglie di-
sposte sul cartone. Il peso LORDO viene
indicato all’interno del capitolo “CARAT-
TERISTICHE TECNICHE”.
ATTENZIONE!
Non ribaltare o far rotolare l’imballo.
Possibile danneggiamento di cofani e/o
organi meccanici.
INFORMAZIONE!
In caso di fornitura di più macchine o at-
trezzature intercambiabili su pallet sban-
calare senza farle cadere a terra. Aiutar-
si eventualmente con un muletto.
6. DISIMBALLAGGIO / MONTAGGIO
1.11.1 1.21.2 1.31.3 1.41.4 1.51.5
1.21.2 1.31.3 1.41.4 MONTAGGIO DEL
FALCIATUTTO: A motore fermo e con la
macchina in posizione orizzontale, inserire
parzialmente il perno (1) nella sede dell’at-
tacco rapido (2) presente sulla macchina.
Montare la cinghia (B) inserendola prima
nella gola della puleggia (3) posta sulla
macchina e successivamente nella gola del-
la puleggia (4) del falciatutto. Fare attenzio-
ne che la cinghia (B) sia all’interno dei perni
(5) e (6) (vedi fig.1.3) quindi portare a fine
Peso LORDO 29,6 kg
Peso NETTO 25 kg
Potenza acustica
Pressione acustica
Vibrazioni
Etichetta dichiara-
zione CE in ultima
pagina
Diametro di taglio Ø630 mm
Altezza di taglio 2 posizioni a 50 e
80 mm
Velocità rotazione
lame e taglio 2300 giri/min
Lame
n.2 lame disposte a
90° tra loro con n.6
coltelli piroettanti alle
estremità
4. CARATTERISTICHE TECNICHE

it
corsa il perno (1). Agganciare le molle (7,
8) nei fori dell’attrezzo, per facilitare questa
operazione occorre fare leva con l’anello
(9) nel foro (10). Vedi figura 1.4 posizione
1 e 2. Per lo smontaggio utilizzare il me-
desimo anello (9), tirando nella direzione
opposta.
Per un corretto funzionamento del siste-
ma frenante occorre che entrambe le
molle siano correttamente agganciate.
In caso di rottura di una o entrambe le
molle procedere alla sostituzione prima
d’usare la macchina.
1.51.5 MONTAGGIO COFANO DI PRO-
TEZIONE: Prendere il cofano di protezione
(C), appoggiarlo sulla vite in coincidenza
con la parte larga del foro. Quando il co-
fano è appoggiato sul carter spingerlo ver-
so la parte piccola del foro, in modo che
le alette si incastrino nelle asole presenti
sul carter. Terminare serrando il dado con
rondella (11). Assicurarsi che il filo innesto
attrezzo (12) sia posizionato all’interno della
sede del cofano (C) e che l’aggancio molla
(13) sia sotto il cofano (C). Nel caso in cui
si debba smontare il cofano di protezione
(C) occorre allentare il dado con rondella
(11), senza svitarlo completamente. Suc-
cessivamente spingere il cofano fino a
quando la parte più larga del foro si trova
sotto al dado (11), quindi rimuovere solle-
vando verso l’alto.
7. USO
Verificare, prima di ogni utilizzo, che le
protezioni telate anteriori e posteriori
non siano usurate o rotte. Se necessario
sostituirle.
Fare riferimento al paragrafo “USO” nel
libretto della macchina associata.
Prima di procedere nella lettura leggere
e comprendere nella sua interezza il ca-
pitolo “ISTRUZIONI DI SICUREZZA”.
8. RIMESSAGGIO
Quando l’attrezzatura intercambiabile
non viene utilizzata per lunghi periodi è
indispensabile proteggere l’utensile con
sostanze anticorrosive ed antiossidanti.
Applicare un leggero strato di olio sulle
lame e/o utensili.
Prima di immagazzinare l’attrezzatura in-
PERICOLO!
PERICOLO!
PERICOLO!
tercambiabile pulirla da foglie e/o terra.
PERICOLO!
Proteggere le parti taglienti e coprire
eventualmente la macchina con teli pro-
tettivi.
9. MANUTENZIONE PERIODICA
Mantenere serrati tutti i dadi, i bulloni e
le viti per garantire il funzionamento della
macchina e/o dell’attrezzatura intercam-
biabile in condizioni di sicurezza.
Prima di procedere nella lettura leggere
e comprendere nella sua interezza il ca-
pitolo “ISTRUZIONI DI SICUREZZA”.
9.1 REGOLAZIONE ALTEZZA TAGLIO
4.14.1
Allentare i dadi posteriori (14), svitare e
togliere le viti anteriori (15) e relativi dadi
(16), quindi far corrispondere uno dei
fori sul tubo di scorrimento (17) col foro
presente sul carter. Utilizzando il foro
superiore l’altezza di taglio risulterà di circa
80 mm, mentre col foro il taglio sarà a 50
mm. Premere sul tubo di scorrimento (17)
in modo da portarlo orizzontale al terreno,
quindi concludere serrando le viti (15) ed i
dadi (16 e 14).
9.2 FRENO
Il tosaerba falciatutto è dotato di un
dispositivo freno lama (18) che blocca
la rotazione della lama al disinnesto
dell’attrezzo. Nel caso il freno non faccia
fermare la lama entro 7 secondi, quindi la
lama continua a girare, agire sul dado (19)
svitandolo. Controllare periodicamente
l’usura del ferodo freno lame (20) e
mantenere ingrassati il perno (21) e il tubo
(22) del sistema frenante.
9.3 AFFILATURA LAMA
4.34.3
Usare guanti di protezione.
Se durante il taglio le punte dell’erba
dovessero risultare ingiallite e strappate,
occorre riaffilare le lame.
Per motivi di sicurezza è possibile affilare
PERICOLO!
4.24.2
ATTENZIONE!
le lame asportando materiale fino ad un
massimo di 6 mm; sotto tale misura è
necessaria la sostituzione. ATTENZIONE:
sostituire i coltelli e relative viti di fissaggio
in caso di urto violento e comunque quando
lo spessore dei coltelli risulti inferiore a 3
mm e/o la larghezza a 30 mm.
IMPORTANTE! IMPIEGARE SOLO RICAMBI
ORIGINALI.
10. PULIZIA E LAVAGGIO
Prima di procedere nella lettura leggere
e comprendere nella sua interezza il ca-
pitolo “ISTRUZIONI DI SICUREZZA”.
Dopo ogni uso è necessario pulire
accuratamente il falciatutto, utilizzando
degli stracci od una robusta spazzola. NON
USARE ACQUA NELLA ZONA ADIACENTE
AL MOTORE.
Prima di lavare e/o pulire la macchina o
l’attrezzatura intercambiabile aspettare
che tutte le parti calde si siano raffred-
date (almeno 20 minuti). Utilizzare aria
compressa o una spugna con detergente
neutro e acqua.
Dopo il lavaggio applicare un leggero
strato di olio sulle lame e/o utensili per
evitare l’ossidazione.
Non utilizzare acqua in pressione per
lavare la macchina e/o l’attrezzatura
intercambiabile. Il motore ed eventuali
impianti elettrici o batterie potrebbero
danneggiarsi.
Evitare l’uso eccessivo di acqua vicino
alle etichette. In caso di danneggiamen-
to occorre sostituirle prima di usare
nuovamente la macchina e/o l’attrezza-
tura intercambiabile.
PERICOLO!
ATTENZIONE!
ATTENZIONE!

it
13. ISTRUZIONI SUPPLEMENTARI
13.1 SMALTIMENTO
Il prodotto al termine del suo ciclo di vita
deve essere smaltito seguendo le norme
vigenti relative allo smaltimento Differen-
ziato e non può essere trattato come un
semplice rifiuto urbano.
Il prodotto deve essere smaltito presso i
centri di raccolta dedicati o deve essere
restituito al rivenditore nel caso si voglia
sostituire il prodotto con un altro equiva-
lente nuovo.
Il prodotto è composto da parti non biode-
gradabili e sostanze che possono inquina-
re l’ambiente circostante se non opportu-
namente smaltite. Inoltre alcuni di questi
materiali possono essere riciclati evitando
l’inquinamento dell’ambiente. É dovere di
tutti contribuire alla salute dell’ambiente.
Il simbolo , quando presente, identi-
fica le apparecchiature elettriche ed elet-
troniche che vanno smaltite separatamen-
te come prescritto dalle norme 2002/95/
CE, 2002/96/CE e 2003/108/CE. Non
gettare tali apparecchiature nei rifiuti mu-
nicipali misti, ma portarle nelle apposite
aree di raccolta differenziata.
Chiedere informazioni alle autorità locali
in merito alle zone dedicate allo smalti-
mento dei rifiuti. Chi non smaltisce il pro-
dotto seguendo quanto indicato in questo
paragrafo ne risponde secondo le norme
vigenti.
13.2 MESSA FUORI SERVIZIO
E SMANTELLAMENTO
La messa fuori servizio e smantellamento
della Macchina e/o dell’attrezzatura in-
tercambiabile oggetto di questo manuale
d’uso consiste nello smontaggio del pro-
dotto da parte di personale autorizzato in
ottemperanza a quanto riportato nel D.Lgs
81/08 (utilizzo dei DPI, ecc.) e nella suc-
cessiva segregazione e smaltimento come
riportato nel paragrafo “SMALTIMENTO”
del presente Manuale di uso e manuten-
zione.
12. POSSIBILI GUASTI E SOLUZIONI
Possibile causa v. capitolo
Il tempo di frenata
della lama è inferiore
ai 7 s
Regolare il freno 9.2
Taglio erba irregolare
Lama non affilata, riaffilare la lama 9.3
Lama danneggiata/usurata, sostituire la lama 9.3
Erba eccessivamente appiattita, cambiare direzione di taglio -
Erba troppo bagnata, lasciarla asciugare -
Il tosaerba falciatutto
non funziona
Cavi non collegati correttamente, controllare i cavi di trasmissione -
Rottura della cinghia Rivolgersi ad officina
specializzata
Il tosaerba falciatut-
to non si arresta al
rilascio della rispetti-
va leva
Molla danneggiata, sostituire 6
Molla non collegata bene, collegarla correttamente 6
Nel caso non si riesca a risolvere il problema contattare il centro assistenza autorizzato più vicino
Ogni quanto v. cap
Controllo serraggio
elementi di fissaggio e
protezioni
Sempre prima di avviare la macchina - controllare che non via siano viti,
bulloni e/o dadi non serrati e che i cofani e i sistemi di protezione siano
integri e correttamente montati
-
Pulizia Dopo ogni utilizzo 10
Sostituzione lama Quando l’affilatura della lama non è più possibile o quando un’ammaccatu-
ra non è recuperabile tramite affilatura 9.3
Affilatura lama Perdita del tagliente della lama o ammaccatura 9.3
11. PROGRAMMA DI MANUTENZIONE

en
1. GENERAL INFORMATION
1.1 INTRODUCTION
We thank you for your confidence in our
products and wish you an enjoyable use
of the machine and/or the interchangea-
ble equipment.
We have created these operating instruc-
tions to ensure trouble-free operation.
Carefully follow these recommendations
for the satisfaction of owning a long-term
properly functioning machine or inter-
changeable equipment.
Our machines and interchangeable equip-
ment are tested very rigorously before be-
ing mass-produced and are subjected to
strict controls during actual manufactur-
ing. This is the best guarantee of quality
for us and for the user.
This machine and/or interchangeable
equipment has been subjected to strict
neutral tests in the country of origin and
meets the safety standards in force.
1.2 THE MANUAL
The manual is divided into chapters and
paragraphs in order to present the infor-
mation as clearly as possible.
The instructions, drawings and documen-
tation contained in this manual are of a
confidential technical nature, strictly the
property of the manufacturer (see EC
declaration on last page) and may not be
wholly or partially reproduced in any way.
The user’s manual must be stored with care
and must accompany the machine and/or the
interchangeable equipment in all the changes
of ownership that it may have through its life.
To facilitate this, the manual must be han-
dled with care, with clean hands and must
not be deposited on dirty surfaces.
It must be stored in an environment protected
from moisture and heat and in such a way that
it is always on hand to clarify any doubts. No
parts should be removed, modified or torn.
1.3 MANUAL SYMBOLS
This symbol highlights situations that
can affect safety, cause death and/or
serious injury to the operator.
DANGER!
This symbol highlights situations that
can cause minor injury to the operator
and/or damage to the machine.
This symbol highlights special indica-
tions for better clarity and ease of use.
The images are indicated by the specific
figures (e.g. 2.12.1).
1.4 MANUFACTURER DATA
See CE label.
For information and to order spare parts,
please contact your local dealer, quoting
the item number and production num-
ber, which can be found on the CE label
shown in 3.13.1 .
1. Manufacturer identification
2. Model
3. Product identification code
4. Item serial number
5. Mass
6. Year / Month
7. Motor power
8. Type of product
2. SAFETY INSTRUCTIONS
Read and understand this use and main-
tenance manual and that of the multi-
function machine on which this equip-
ment is mounted in its entirety before
assembling and operating the machine
or the interchangeable equipment.
DANGER!
It is the responsibility of the employer
to transmit all the information contained
in this manual to the operator who will
use the machine or the interchangeable
equipment.
This machine and/or interchangeable
equipment complies with all European
standards in force during the period of
production. Improper use or maintenance
may nevertheless increase the risk of in-
jury.
In order to avoid dangers for the safety of
people and damage to the interchange-
able equipment, please read very care-
fully, understand and observe the rec-
ommendations contained in the manual
related to the machine associated with
this equipment.
CAUTION!
INFORMATION!
DANGER!
Indications for the interchangeable
equipment:
1. Before installing, inspecting, repairing,
removing or replacing the interchangea-
ble equipment or some parts of it, stop
the engine, letting the machine cool
down (15-20 minutes), and make sure that
there are no moving parts, disconnect
the spark plug cap and fit the equipment
guard.
2. When handling the equipment for the
assembly, replacement or maintenance,
wear sturdy protective gloves. In gener-
al, avoid contact with the equipment tools
and do not put your hands and feet near
the moving tools to avoid amputations and
injuries.
3. Do not use the machine associated with
this equipment if the latter is not correctly
installed or if it does not operate properly.
4. Install the protection on the equipment
if the machine is not used.
5. Disengage the equipment by releasing
the lever when work is not performed or
if dangerous conditions such as the ap-
proach of strangers to the danger area,
any malfunctions, reduced visibility or
sudden impact against an obstacle are
felt.
6. Disengage the equipment if you cross
gravel drives or roads.
7. Disengage the equipment and turn off
the machine if you notice abnormal vibra-
tions.
8. Only original spare parts must be used
to ensure the machine level of safety.
Instructions for adjustment and mainte-
nance:
DANGER!
All ADJUSTMENT and MAINTENANCE
operations must be carried out with the
motor switched off. Remove the spark
plug cap or ignition key (if present) to
avoid unexpected start-up.
CAUTION!
Check and ensure the stability of the
machine before carrying out ADJUST-
MENT or MAINTENANCE operations.
Keep all nuts, bolts and screws tightened
to ensure safe machine operation.
Only use original Eurosystems spare
parts. The owner loses all warranty rights
when using non-original spare parts.
Do not make any structural changes or
adaptations. Such changes will invalidate
the warranty and the manufacturer’s lia-
bility.

en
We reserve the right to make design im-
provements to the machine and/or the in-
terchangeable equipment without making
changes to these instructions.
2.1 DESCRIPTION AND FIELD OF USE
The grassland mower AFL63 is garden
equipment used in combination with the
MLT03 for professional and particularly
demanding mowing of tall, dense grass,
bushes and shrubs on private property.
2.2 IMPROPER USE
Do not use the machine to cut things oth-
er than grass.
2.3 WORK AREA
The user is responsible for the safety of
persons, property and animals within the
machine danger zone.
This zone is defined as the internal area
of a circumference of a minimum radius
of 20m with the tool mounted on the ma-
chine in the centre 3.13.1 .
Do not stand in the danger zone for any
reason while the machine is in operation.
Only the operator, who has read and un-
derstood the manual in all its parts, is au-
thorised to stand within this area and to
occupy the only operating position, locat-
ed behind the handlebar, holding it firmly.
The operator must check the surrounding
area before starting the machine and must pay
particular attention to children and animals.
Before starting work on a certain area,
clean it of foreign objects.
Always pay attention to the ground and the
surrounding area when working. If unde-
sired and/or dangerous objects are de-
tected, switch off the machine and secure
it before leaving the operating position to
remove them, being sure to prevent the
machine from starting, moving or tipping
over.
The procurement of such personal pro-
tective equipment is the sole responsi-
bility of the customer or employer.
During machine use and maintenance
2.4 CLOTHING
INFORMATION!
operations:
The operator MUST always wear suitable
safety shoes, gloves, and hearing protec-
tion devices and wear long, resistant trou-
sers and safety goggles.
Do not wear loose-fitting clothing, jewelry,
ties, scarves, dangling drawstrings that
could get caught by the equipment . Tie up
your hair.
During unpacking and assembly:
The operator MUST always wear resistant
safety shoes, gloves, and clothing.
3. DEFINITION OF PICTOGRAMS
2.12.1 2.22.2
DANGER!
Keep all labels clean and in good condi-
tion, replace them if damaged.
5. HANDLING AND PACKAGING
2 or more people are required to handle
packaging, using the handles on the card-
board box. The GROSS weight is indicated
in the “TECHNICAL FEATURES” chapter.
CAUTION!
Do not overturn or roll the packaging.
Possible damage to covers and/or me-
chanical parts.
INFORMATION!
If more than one machine or interchange-
able equipment is supplied on pallets,
unload without dropping them on the
ground. Use a forklift if necessary.
6. UNPACKING/ASSEMBLY
1.11.1 1.21.2 1.31.3 1.41.4 1.51.5
1.21.2 1.31.3 1.41.4
GRASSLAND MOWER ASSEMBLY: switch
the engine off and put the machine on hori-
zontal position, partially connect the pin (1)
into the quick connection housing (2) you
can find in the machine. Assemble the belt
(B) inserting it first into the machine pul-
ley throat (3) and then into the grassland
mower pulley throat (4). Pay attention the
belt (B) should be placed between (5) and
4. TECHNICAL FEATURES
GROSS weight 29,6 kg
NET weight 25 kg
Sound power
Acoustic pressure
Vibrations
CE declaration label
on the last page
Cutting diameter Ø630 mm
Cutting height 2 positions: 50 and
80 mm
Blades rotating
speed 2300 turns/min
Blades
n.2 blades placed
90° one to the other
equipped with n.6
total pivoting knives

en
(6) pins (look at fig.1.3) then bring the pin
(1) to all its run. Clasp the springs (7, 8) into
the tool holes: to make such operation ea-
sier you need to prize using the ring (9) into
the hole (10). Please look at fig. 1.4 position
1 and 2. For disassembly operations use
the same a.m. ring (9) pulling to the oppo-
site direction.
Both springs must be correctly engaged
for the brake system to function properly.
If one or both springs break, replace
them before using the machine.
1.51.5 PROTECTION COVER ASSEM-
BLY: take the protection cover (C) laying it
on the screw coupling it with the larger part
of the slot. When the cover is laying on the
casing push it towards the smaller side of
the slot so that the fins are embedding into
the slots which are placed on the casing.
Finish the operations tightening the nut with
the washer (11).
Make sure the tool connection wire (12) is
placed inside protection cover (C) seating
and the spring clasp (13) to be under the
cover (C). In case you need to disassemble
the protection cover (C) you need to
loosen the nut with the washer (11) without
completely loosening it. Then push the
protection cover until the largest part of the
slot is under the nut (11) then remove the
cover pushing it to the top.
7. USE
Please verify, before every use, the front
and back protections reinforced with canves
not to be wear-and tear or broken. If it is
necessary, please change them.
See the paragraph “USE” in the manual of
the associated machine.
Before proceeding, read and understand
the chapter “SAFETY INSTRUCTIONS”
in its entirety.
8. STORAGE
When the interchangeable equipment is
not used for long periods, it is essential
to protect the tool with anticorrosive and
antioxidant substances.
Apply a light coat of oil on the blades and/
or tools.
Before storing the interchangeable equip-
DANGER!
DANGER!
DANGER!
ment, clean it from leaves and/or dust.
DANGER!
Protect the sharp parts and cover the
machine with protective sheets if nec-
essary.
9. PERIODIC MAINTENANCE
Keep all nuts, bolts and screws tightened
to ensure safe operation of the machine
and/or interchangeable equipment in safe
conditions.
Before proceeding, read and understand
the chapter “SAFETY INSTRUCTIONS”
in its entirety.
9.1 CUTTING HEIGHT ADJUSTMENT
4.14.1
Loosen the back nuts (14) and unscrew
and take the front screws away (15) and the
corresponding nuts (16) then make one of
the slot to correspond to the tube (17) to the
casing slot. Use the upper slot the cutting
height will be about 80 mm. While using the
slot the cutting height will be about 50 mm.
Press on the tube (17) in order to bring it
horizontal to the ground surface then finish
screwing up the screws (15) and the nuts
(16 and 14).
9.2 BRAKE
4.24.2
The grassland mower is equipped by a
blade brake device (18) which is blocking
the blade rotation when disconnecting the
fittings. If the brake does not make the blade
stop within 7 seconds, and therefore the
blade continues to rotate, please operate
on the nut (19) unscrewing it. Check from
time to time the wear of the blade brake
lining (20) and keep greased bolt the brake
pin (21) and the tube (22).
9.3 BLADE SHARPENING
4.34.3
Wear protective gloves.
If during cutting operations the grass tips
turned yellow or torn you need to sharpen
the blades again.
For safety reasons it is possible to sharpen
DANGER!
CAUTION!
the blades removing the material up to max
6 mm: under such measure it is necessary
to change the blades.
Attention! Change the blades and the
corresponding fixing nuts in case of strong
impact or in any case if the blades thickness
should be less than 3 mm and/or the width
30 mm.
USE ORIGINAL SPARE PARTS ONLY!
10. CLEANING AND WASHING
Before proceeding, read and understand
the chapter “SAFETY INSTRUCTIONS”
in its entirety.
After every use it is necessary to perfectly
clean the grassland mower using some
cloths or a strong brush. Do not use water
in the area surrounding the engine.
Wait for all the hot parts to cool down (at
least 20 minutes) before washing and/or
cleaning the machine or the interchange-
able equipment. Use compressed air or a
sponge with neutral detergent and water.
After washing, apply a light coat of oil on
the blades and/or tools to avoid oxidation.
Do not use pressurised water to wash the
machine and/or interchangeable equip-
ment. Doing so can damage the motor
and any electrical systems or batteries.
Avoid excessive use of water near labels.
In the event of damage, labels must be
replaced before using the machine and/
or the interchangeable equipment again.
DANGER!
CAUTION!
CAUTION!

en
13. ADDITIONAL INSTRUCTIONS
13.1 DISPOSAL
At the end of its life cycle, the product
must be disposed of in accordance with
the regulations in force for Differentiated
waste disposal and cannot be treated as
simple urban waste.
The product must be disposed of at ded-
icated collection points or must be re-
turned to the dealer if you wish to replace
the product with another new equivalent
product.
The product is composed of non-biode-
gradable parts and substances that can
pollute the surrounding environment if not
properly disposed of. In addition, some of
these materials can be recycled to avoid
environmental pollution. It is everyone’s
duty to contribute to the health of the en-
vironment.
When present, the symbol identifies
the electrical and electronic equipment
that must be disposed of separately as
prescribed by standards 2002/95/EC,
2002/96/EC and 2003/108/EC. Do not
dispose of this equipment in unsorted
municipal waste, but take it to appropriate
separate collection areas.
Ask your local authorities for information
about waste disposal areas.
Anyone who does not dispose of the prod-
uct in accordance with this paragraph is
responsible for it in accordance with the
regulations in force.
13.2 DECOMMISSIONING
AND DISMANTLING
The decommissioning and dismantling of
the Machine and/or the interchangeable
equipment covered by this user’s manual
consists in the disassembly of the product
by authorised personnel in compliance
with the provisions of Legislative Decree
81/08 (use of PPE, etc.) and the subse-
quent sorting and disposal as reported
in the “DISPOSAL” paragraph of this Use
and maintenance manual.
12. TROUBLESHOOTING
Possible cause See chapt.
The braking time of
the blade is less than
7 s
Adjust the brake 9.2
Irregular grass
cutting
Blade not sharpened, re-sharpen the blade 9.3
Damaged /worn blade, replace the blade 9.3
Excessively flattened grass, change cutting entry direction -
Excessively wet grass, let it dry out -
The grassland mower
is not working
Cables are not properly connected, check the transmission cables -
Belt broken. Contact a special-
ised workshop.
The grassland mower
does not stop when
releasing the related
lever
Demaged spring, replace it 6
Disconnected spring, connect it properly 6
Contact the nearest authorised service centre if the problem cannot be solved.
How often See chapt.
Checking the tightness of
fasteners and guards
Always before starting the machine - check that there are no untightened
screws, bolts and/or nuts and that the bonnets and protection systems are
intact and correctly fitted.
-
Cleaning After each use 10
Blade replacement When blade sharpening is no longer possible or when a dent cannot be
fixed by sharpening 9.3
Blade sharpening Loss of blade cutting edge or dent 9.3
11. MAINTENANCE PLAN

de
1. ALLGEMEINE INFORMATIONEN
1.1 EINLEITUNG
Wir danken Ihnen für das Vertrauen, das
Sie unseren Produkten entgegengebracht
haben, und wünschen Ihnen einen ange-
nehmen Gebrauch der Maschine und/
oder der Anbaugeräte.
Diese Bedienungsanleitung wurde er-
stellt, um einen störungsfreien Betrieb zu
gewährleisten. Werden diese Anleitungen
befolgt, werden Sie mit Zufriedenheit für
lange Zeit eine einwandfreie Maschine
oder Anbaugeräte besitzen.
Unsere Maschinen und unsere Anbau-
geräte werden vor der Serienherstellung
gründlich geprüft und werden während
der Fertigung strengen Kontrollen unter-
zogen. Dies gewährleistet uns und dem
Anwender allerhöchste Qualität.
Diese Maschine und/oder das Anbaugerät
wurden im Herkunftsland strengen Prüfun-
gen unterzogen und entsprechen den gel-
tenden Sicherheitsvorschriften.
1.2 DAS HANDBUCH
Das Handbuch ist in Kapiteln und Absät-
ze unterteilt, damit die Informationen auf
möglichst klarer Weise dargestellt werden.
Die Anleitungen, Zeichnungen und Do-
kumentation dieses Handbuchs sind
vertraulich zu behandelnde technische
Inhalte, die alleiniges Eigentum des Her-
stellers sind (siehe die EG-Erklärung auf
der letzten Seite) und in keiner Weise we-
der ganz noch in Auszügen reproduziert
werden dürfen.
Das Handbuch muss sorgfältig aufbe-
wahrt werden und muss die Maschi-
ne und/oder die Anbaugeräte bei allen
Wechseln des Eigentümers, die im Laufe
ihres Lebens stattfinden können, beglei-
ten.
Um dies zu ermöglichen muss mit ihm
sorgsam umgegangen werden und soll-
te nicht mit schmutzigen Händen benutzt
werden noch auf schmutzigen Oberflä-
chen abgelegt werden.
Es muss in einer Umgebung aufbewahrt
werden, die weder feucht noch heiß ist.
Zudem muss es zur Klärung von Zweifels-
fällen stets zur Hand sein. Es dürfen keine
Teile weggenommen, geändert oder her-
ausgerissen werden.
1.3 SYMBOLE DER HANDBUCHS
Dieses Symbol weist auf Situationen hin,
die die Sicherheit beeinträchtigen sowie
Tod und/oder schwere Verletzungen des
Anwenders verursachen können.
Dieses Symbol weist auf Situationen hin,
die beim Anwender leichte Verletzungen
und/oder Schäden an der Maschine ver-
ursachen können.
Dieses Symbol hebt besondere Hinwei-
se für eine größere Klarheit und einfa-
chere Nutzung hervor.
Die Abbildungen sind durch die jeweilige
Figur gekennzeichnet (z.B. 2.12.1).
1.4 HERSTELLERDATEN
Siehe EG-Etikett.
Für Informationen oder Ersatzteilbestel-
lungen bitten wir Sie, sich an den jewei-
ligen Gebietshändler zu wenden und die
Artikel- und Herstellungsnummer anzu-
geben, die auf dem EG-Etikett angegeben
sind, das unter 3.13.1 angezeigt ist.
1. Herstellerkennzeichnung
2. Modell
3. Produktkennziffer
4. Seriennummer des Artikels
5. Gewicht
6. Jahr / Monat
7. Motorleistung
8. Produktart
2. SICHERHEITSVORSCHRIFTEN
Vor der Montage und Inbetriebnahme
der Maschine oder des Anbaugeräts die-
se sowie die Bedienungsanleitung der
Multifunktionsmaschine, auf der dieses
Gerät montiert ist, im Ganzen lesen und
verstehen.
Der Arbeitgeber ist dafür verantwortlich,
dass alle in diesem Handbuch enthalte-
ne Informationen dem Bedienungsper-
sonal übermittelt werden, das die Ma-
schine oder das anbaugeräts benutzt.
Diese Maschine und/oder dieses Anbau-
gerät erfüllt alle europäischen Vorschrif-
GEFAHR!
ACHTUNG!
INFORMATIONEN!
GEFAHR!
GEFAHR!
ten, die im Zeitraum der Herstellung in
Kraft waren. Dennoch kann unsachgemä-
ßer Gebrauch oder eine unangemessene
Wartung das Unfallrisiko erhöhen.
Um Gefahren für die Sicherheit von Men-
schen und Beschädigungen an den aus-
tauschbaren Anbaugeräten zu vermeiden,
muss das Bedienungshandbuch der da-
zugehörigen Grundmaschine vollständig
gelesen, verstanden und beachtet wer-
den.
Hinweise für die austauschbaren An-
baugeräte:
1. Bevor die austauschbaren Anbaugeräte
oder andere Teile angebaut, kontrolliert,
repariert, entfernt oder ersetzt werden,
den Motor abstellen und die Maschine
abkühlen lassen (15-20 Minuten). Sicher-
stellen dass keines der Maschinenteile in
Bewegung ist. Zündkerzenstecker abzie-
hen und den Messerschutz anbringen.
2. Wenn das Anbaugerät montiert, aus-
getauscht oder gewartet wird, immer
solide Sicherheitshandschuhe tragen.
Generell Berührungen mit dem Messer-
balken vermeiden. Hände und Füße von
bewegenden Messern fern halten um Am-
putationen oder Schnittverletzungen zu
vermeiden.
3. Die Grundmaschine, die zu diesem
Anbaugerät gehört, darf nicht verwendet
werden, wenn dieses nicht richtig ange-
baut worden ist oder dieses nicht richtig
funktioniert.
4. Wenn die Maschine nicht verwendet
wird, den Messerschutz anbringen.
5. Wenn die Maschine gerade nicht
verwendet wird oder wenn sich eine
Gefahrensituation bildet, wie z.B. die
Annäherung von Personen in den Gefah-
renbereich oder eine unvorhersehbare
Funktionsstörung, verminderte Sicht oder
einen plötzlichen Aufprall gegen ein Hin-
dernis, das Anbaugerät durch lösen des
Bedienhebels abstellen.
6. Beim überqueren von Schotterwegen
das Anbaugerät abstellen.
7. Beim Auftreten ungewöhnlicher Schwin-
gungen sofort das Anbaugerät abschal-
ten und die Grundmachine abstellen.
8. Um Sicherheitsstand der Maschine zu
gewährleisten, dürfen nur Originalersatztei-
le verwendet werden.
Hinweise zur Einstellung und zur Wartung:
GEFAHR!
Alle Arbeiten zur EINSTELLUNG und
WARTUNG sind bei ausgeschaltetem
Motor auszuführen. Die Zündkerzenkap-
pe und/oder den Zündschlüssel (falls
vorhanden) abnehmen, um unbeabsich-

de
tigtes Einschalten zu verhindern.
ACHTUNG!
Vor Beginn von Einstellungs- und War-
tungsarbeiten die Stabilitäts der Maschi-
ne überprüfen und herstellen.
Alle Muttern, Bolzen und Schrauben müs-
sen angezogen sein, um die Maschine si-
cher zu bedienen.
Ausschließlich Originalersatzteile von
Eurosystems verwenden. Der Eigentümer
verliert alle Garantierechte, falls nicht ori-
ginale Ersatzteile verwendet werden.
Keine Änderungen oder Anpassungen an
der Struktur vornehmen. Diese Änderun-
gen führen zum Verfall der Garantie und
Haftung der Herstellerfirma.
Wir behalten uns das Recht vor, Konst-
ruktionsverbesserungen an der Maschine
und/oder an den Anbaugeräten anzubrin-
gen, ohne sie in diesen Anleitungen auf-
zuführen.
2.1
BESCHREIBUNG UND EINSATZBEREICH
Der Allesmäher AFL63 ist ein Gartenge-
rät, das in Kombination mit der Maschine
MLT03 für das professionelle und beson-
ders anspruchsvolle Mähen von hohem,
dichtem Gras, Büschen und Sträuchern
auf Privatgrundstücken eingesetzt wird.
2.2 UNSACHGEMÄSSER GEBRAUCH
Die Maschine ausschließlich zum Gras
mähen verwenden.
2.3 ARBEITSBEREICH
Der Anwender ist für die Sicherheit von
Personen, Gegenständen und Tieren haft-
bar, die sich innerhalb der Gefahrenbe-
reichs der Maschine aufhalten.
Dieser Bereich ist die Fläche mit einem
Radius von 20m um das an der Maschine
montierte Anbaugerät 3.13.1.
Falls die Maschine in Betrieb ist, darf sich
aus keinerlei Gründen im Gefahrenbereich
aufgehalten werden. Nur Bedienungsper-
sonal, das das Handbuch in allen seinen
Teilen gelesen und verstanden hat, hat die
Erlaubnis, sich innerhalb dieses Bereichs
aufzuhalten und die einzige Arbeitsposi-
tion hinter der Lenkstange einzunehmen
und diese festzuhalten.
Das Bedienungspersonal muss den um-
gebenden Bereich prüfen, bevor die Ma-
schine eingeschaltet wird und besonders
auf Kinder und Tiere achten.
Vor Arbeitsbeginn in einem bestimmten
Bereich, Fremdkörpern in ihm beseitigen.
Während der Arbeit immer auf den Boden
und die Umgebung achten. Wenn unge-
wünschte und/oder gefährliche Gegenstän-
de bemerkt werden, muss die Maschine
ausgeschaltet und in Sicherheitszustand
gegen ein Start, eine Bewegung und ein
Umkippen gebracht werden. Dann erst sich
von der Arbeitsposition entfernen.
2.4 ARBEITSKLEIDUNG
Die Bereitstellung dieser persönlichen
Schutzausrüstung liegt ausschließlich
beim Kunden oder dem Arbeitgeber.
Während des Gebrauchs der Maschine
und der Wartungsarbeiten:
MÜSSEN immer Sicherheitsschuhe,
Handschuhe, angemessener Gehör-
schutz sowie lange und robuste Hosen
und Schutzbrille getragen werden.
Keine weite Kleidung, Schmuck, Krawatten,
Halstücher oder hängende Schnüre, die
sich verfangen könnten, tragen.
Haare zusammenbinden oder Haarschutz
tragen.
Während des Entpackens und der Montage:
MÜSSEN immer Sicherheitsschuhe,
Handschuhe und robuste Kleidung getra-
gen werden.
3. BESCHREIBUNG DER PIKTOGRAMME
2.12.1 2.22.2
Alle Aufkleber stets sauber und in gutem
Zustand halten, sollten diese beschädigt
INFORMATIONEN!
GEFAHR!
werden, müssen diese ersetzt werden.
Für die Bewegung die Verpackung mit 2
oder mehr Personen an den Griffen am
Karton anheben. Das BRUTTO-Gewicht
ist im Kapitel „TECHNISCHE MERKMALE“
angegeben.
Die Verpackung nicht stürzen oder kip-
pen, da sonst die Kunststoffhaube und/
oder die Antriebselemente beschädigt
werden können.
INFORMATIONEN!
Bei der Lieferung mehrerer Maschinen
oder Anbaugeräte diese von der Palette
abladen, ohne sie auf den Boden fallen
zu lassen. Unter Umständen einen Gabls-
tapler zu Hilfe nehmen.
6. ENTPACKEN / MONTAGE
1.11.1 1.21.2 1.31.3 1.41.4 1.51.5
1.21.2 1.31.3 1.41.4 MONTAGE DES
SICHELMÄHERS Die Maschine bei stillste-
hendem Motor in waagrechte Position brin-
gen. Den Zapfen der Maschine (1) in den
Schnellanschluss (2) einführen. Dann den
5. BEWEGUNG UND VERPACKUNG
ACHTUNG!
4. TECHNISCHE MERKMALE
BRUTTO Gewicht 29,6 kg
NETTO Gewicht 25 kg
Schallleistung
Schalldruck
Vibrationen
Etikett der EG-Erklä-
rung auf der letzten
Seite
Schnittdurchmesser Ø630 mm
Schnitthöhe 2-stufig, 50 und 80
mm
Klingen- und Be-
triebsdrehzahl
2300 Umdrehungen/
Minute
Klingen
2 zueinander in 90°
angeordnete Klingen
mit 6 Drehmessern
an den Enden

de
Riemen (B) zuerst auf die Riemenscheibe
(3) an der Maschine, dann auf die Riemen-
scheibe (4) des Sichelmähers aufziehen.
Dabei darauf achten, dass der Riemen (B)
innerhalb der Zapfen (5) und (6) (siehe
Abb.1.3) sitzt, dann den Zapfen (1) bis zum
Anschlag bringen. Rückholfedern (7, 8) in
die Bohrungen des Geräts einhaken, dazu
den Ring (9) in die Bohrung (10) drücken.
Siehe Abbildung 1.4 Position 1 und 2. Zum
Abmontieren diesen Ring (9) in die entge-
gengesetzte Richtung ziehen.
Für den ordnungsgemäßen Betrieb des
Bremssystems müssen beide Federn
korrekt eingehängt sein.
Bei einem Bruch einer oder beider Fe-
dern müssen diese vor dem Gebrauch
der Maschine ausgewechselt werden.
1.51.5 MONTAGE DER SCHUTZHAU-
BE: Schutzhaube zur Hand nehmen (C)
und mit der weiten Seite der Bohrung an
der Schraube anordnen. Liegt die Schutz-
haube auf der Schutzverkleidung auf, zur
kleinen Seite der Bohrung si hinschieben,
dass die Laschen in den Ösen der Schutz-
verkleidung einrasten. Zum Schluss die
Mutter mit Unterlegscheibe (11) festziehen.
Sicherstellen, dass der Zünddraht des Ge-
räts (12) in seiner korrekten Lage in der
Schutzhaube liegt (C) und dass die Feder
(13) unter der Haube (C) eingehakt ist. Zum
Abmontieren der Schutzhaube (C) Mutter
mit Unterlegscheibe (11) lockern, aber nicht
vollkommen abschrauben. Anschließend
die gegen die Haube drücken, bis die wei-
te Seite der Bohrung unter der Mutter (11)
liegt, dann die Haube nach oben anheben
und abnehmen.
7. GEBRAUCH
Überprüfen, vor jedem Gebrauch, dass
die Vorder- und Hinterschutze aus
Wachstuch nicht abgenutzt oder gebro-
chen wären. Wenn nötig, müssen sie er-
setzt werden.
Lesen Sie den Abschnitt „GEBRAUCH“ in
der Betriebsanleitung der dazugehörigen
Grundmaschine sorgfältig durch.
Bevor Sie weiterlesen, lesen Sie und
verstehen Sie das gesamte Kapitel „SI-
CHERHEITSANLEITUNGEN“.
GEFAHR!
GEFAHR!
GEFAHR!
8. AUFBWAHRUNG
Wenn das austauschbare Anbaugerät
über einen längeren Zeitraum nicht ver-
wendet wird, ist es unbedingt notwendig
das Gerät, mit einem leichten Gleitöl, ge-
gen entstehenden Rost zu schützen.
Das austauschbare Anbaugerät muss, be-
vor es eingelagert wird, von Blättern und/
oder Erde gereinigt werden.
GEFAHR!
Die schneidenden Teile schützen und
gegebenenfalls die Maschine mit einer
Schutzplane abdecken.
9. REGELMÄSSIGE WARTUNG
Alle Muttern, Bolzen und Schrauben müs-
sen angezogen sein, um die Maschine
und das Anbaugerät sicher zu bedienen.
Bevor Sie weiterlesen, lesen Sie und
verstehen Sie das gesamte Kapitel „SI-
CHERHEITSANLEITUNGEN“.
9.1 EINSTELLUNG DER SCHNITTHÖHE
4.14.1
Die hinteren Muttern (14) lockern, die
vorderen Schrauben (15) und ihre Muttern
(16) aufschrauben und abnehmen, dann
eine der Bohrungen an der Gleitschiene
(17) an der Bohrung der Schutzverkleidung
anordnen. Benutzt man die obere Bohrung
beträgt die Schnitthöhe etwa 80 mm, mit
Bohrung hingegen beträgt die Schnitthöhe
etwa 50 mm. Auf die Gleitschiene (17) so
drücken, dass die waagrecht am Boden
aufliegt, dann abschließend Schrauben (15)
und Muttern (16 und 14) wieder festziehen.
9.2 BREMSE
4.24.2
Der Sichelmäher ist mit einer automati-
schen Messerbremse (18) ausgerüstet.
Mit dieser Vorrichtung wird beim auskup-
peln des Anbaugerätes die Messerwelle
blockiert. Im Fall, dass die Bremse das
Messer nicht innerhalb von 7 Sekunden
anhält, sich das Messer also weiterdreht,
wird die Mutter (19) ein wenig zurück-
geschraubt. Dadurch wird der Bolzen
verlängert und der Anpressdruck wird
erhöht. Den Bremsbelag der Klinge (20)
regelmäßig überprüfen, Zapfen (21) und
GEFAHR!
Leitung (22) der Bremsanlage müssen
stets gut geschmiert sein.
9.3 MEESERSCHÄRFUNG
4.34.3
Schutzhandschuhe tragen.
Wirken die Grasspitzen beim Mähen
vergilbt oder ausgerissen, dann müssen
die Klingen geschliffen werden. Aus
Sicherheitsgründen dürfen die Klingen bis
auf maximal 6 mm abgeschliffen werden
und müssen dann ausgewechselt werden.
ACHTUNG: Nach heftigen Stößen oder
Schlägen oder falls die Messer weniger als 3
mm dick bzw. 30 mm breit sind, müssen die
Messer und ihre Verriegelungsschrauben
ausgewechselt werden.
WICHTIG! AUSSCHLIESSLICH ORIGINALE
ERSATZTEILE VERWENDEN.
10. REINGUNG UND WASCHEN
Bevor Sie weiterlesen, lesen Sie und
verstehen Sie das gesamte Kapitel „SI-
CHERHEITSANLEITUNGEN“.
Den Sichelmäher nach jedem Einsatz
gründlich reinigen, dazu einen Lappen
oder eine feste Bürste verwenden. DEN
MOTORBEREICH NIEMALS MIT WASSER
IN BERÜHRUNG BRINGEN.
Vor dem Waschen und/oder Reinigen der
Maschine oder des Anbaugeräts warten,
bis alle heißen Teile abgekühlt sind (min-
destens 20 Minuten). Druckluft oder einen
Schwamm mit neutralem Reinigungsmittel
und Wasser verwenden.
Nach der Gerätewäsche müssen die Mes-
ser, zum Schutz vor Rost, mit einer dün-
nen Schicht Gleitöl eingesprüht werden.
Keinen Wasserstrahl zur Reinigung der
Maschine und/oder des Anbaugeräts
benutzen. Der Motor oder eventuell vor-
handene Elektroanlagen oder Batterien
könnten beschädigt werden.
In der Nähe der Etketten nicht zu viel
Wasser verwenden. Werden Sie beschä-
digt, müssen sie vor dem erneuten Ge-
brauch der Maschine und/oder des An-
baugeräts ersetzt werden.
ACHTUNG!
GEFAHR!
ACHTUNG!
ACHTUNG!

de
13. ZUSATZANLEITUNGEN
13.1 ENTSORGUNG
Das Produkt muss am Lebensende gemäß
geltender Normen zur Abfalltrennung ent-
sorgt werden und darf nicht als einfachen
Hausabfall behandelt werden.
Das Produkt muss in einer entsprechen-
den Sammelstelle entsorgt werden oder
muss beim Händler abgegeben werden,
wenn es gegen ein anderes, gleichwerti-
ges ersetzt werden soll.
Das Produkt besteht aus nicht biologisch
abbaubaren Teilen und Stoffen, die die
Umwelt verschmutzen können, wenn sie
nicht sachgemäß entsorgt werden.
Zudem können einige dieser Materialien
umweltschonend wiederverwertet werden.
Alle müssen zum Umweltschutz beitragen.
Das Symbol , sofern vorhanden,
kennzeichnet elektrische und elektroni-
sche Geräte, die getrennt entsorgt wer-
den, wie in den Richtlinien 2002/95/
EG, 2002/96/EG und 2003/108/EG vor-
geschrieben. Diese Geräte nicht in den
Haushalzsrestmüll werfen, sondern sie zu
den Stellen zur Abfalltrennung zuführen.
Bei den örtlichen Behörden erhalten Sie
Informationen zu den Stellen für die Ab-
fallentsorgung.
Wer das Produkt nicht gemäß der ge-
machten Angaben entsorgt, werden nach
den geltenden Vorschriften zur Verant-
wortung gezogen.
13.2 AUSSERBETRIEBNAHME
UND VERSCHROTTUNG
Die Außerbetriebnahme und Verschrot-
tung der Maschine und/oder des Anbau-
geräts, die in diesem Handbuch bespro-
chen werden, besteht aus der Zerlegung
des Produkts durch beauftragtes Personal
unter Einhaltung der Gesetzesverordnung
D.Lgs 81/08 (Gebrauch der PSA usw.) und
der nachfolgenden Trennung und Entsor-
gung, wie im Absatz „ENTSORGUNG“ in
diesem Betriebs- und Wartungshandbuch
angegeben.
12. MÖGLICHE DEFEKTE UND LÖSUNGEN
Mögliche Ursache s. Kapitel
Die Bremszeit des
Messers ist unter 7 s Bremseinstellung 9.2
Unregelmäßiger
Grasschnitt
Bei stumpfen und unscharfem Messer - Messer nachschärfen. 9.3
Bei beschädigtem, abgenutztem Mähmesser oder abgebrochenen Messerklin-
gen - Mähmesser ersetzen. 9.3
Bei durch Regen eingedrücktes Gras oder niedrigen Grasbewuchs, Mährichtung
ändern. -
Bei zu nassem Gras - Wiese abtrocknen lassen. -
Der Allesmäherfunk-
tioniert nicht
Bei nicht ordnungsgemäßer Funktion der Bedienhebel, müssen die Bowdenzüge
nachjusteirt werden. -
Riemenriss Wenden Sie sich an
eine Fachwerkstatt
Beim Lösen des Be-
dienhebels bleibt
Der Allesmäher nicht
stehen
Beschädigte Feder, Feder ersetzen. 6
Feder nicht richtig eingehängt, Feder richtig verbinden. 6
Falls das Problem nicht behoben werden kann, sich an das nächstgelegene Kundendienstzentrum wenden
Alle s. Kap.
Kontrolle der Befestigungs-
elemente und Schutzvor-
richtungen
Immer vor dem Start der Maschine überprüfen, dass keine Schrauben, Bol-
zen und/oder Muttern lose sind und dass die Abdeckhauben und Schutz-
systeme unversehrt und richtig montiert sind.
-
Reinigung Nach jedem Gebrauch 10
Messeraustausch Wenn ein Schärfen des Messers nicht mehr möglich ist oder wenn
eine Kerbe nicht mehr durch Schärfen behoben werden kann 9.3
Messerschärfen Verlust der Schnittleistung des Messers oder Kerben 9.3
11. WARTUNGSPLAN

fr
1. INFORMATIONS GÉNÉRALES
1.1 INTRODUCTION
Nous vous remercions pour la confiance
accordée à nos produits et nous vous
souhaitons une utilisation agréable de la
machine et/ou de l’équipement interchan-
geable.
Nous avons créé ces instructions d’utili-
sation dans le but d’assurer un fonction-
nement sans inconvénient. En suivant
attentivement ces conseils, vous aurez
la satisfaction de posséder pendant très
longtemps une machine ou un équipe-
ment interchangeable qui fonctionne cor-
rectement.
Nos machines et nos équipements inter-
changeables, avant d’être fabriqués en
série, sont testés de manière très rigou-
reuse et, pendant la fabrication réelle,
sont soumis à des contrôles sévères.
Cela constitue, pour nous et pour l’utilisa-
teur, la meilleure garantie de qualité.
Cette machine et/ou cet équipement in-
terchangeable a été soumis à des essais
rigoureux neutres dans le pays d’origine
et répond aux normes de sécurité en vi-
gueur.
1.2 LE MANUEL
Le manuel est divisé en chapitres et para-
graphes pour présenter les informations
de la manière la plus claire possible.
Les instructions, les dessins et la docu-
mentation contenus dans le présent ma-
nuel sont de nature technique réservée,
de propriété stricte du constructeur (voir
déclaration CE sur la dernière page) et ne
peuvent jamais être reproduits, ni intégra-
lement ni partiellement.
Le manuel d’utilisation doit être conser-
vé soigneusement et doit accompagner
la machine et/ou l’équipement interchan-
geable dans tous les passages de pro-
priété qu’elle pourra avoir durant sa vie.
Pour cela, le manuel doit être manipulé
avec soin, avec les mains propres et ne
doit pas être posé sur des surfaces sales.
Il doit être conservé dans un environne-
ment protégé de l’humidité et de la cha-
leur et de sorte qu’il soit toujours à por-
tée de main pour éclaircir les éventuels
doutes. Aucune partie de ce manuel ne
devra être retirée, modifiée ou déchirée.
1.3 SYMBOLIQUE DU MANUEL
Ce symbole met en évidence des situa-
tions qui peuvent influencer la sécurité,
causer la mort et/ou les lésions graves
à l’opérateur.
Ce symbole met en évidence des situa-
tions qui peuvent causer des lésions lé-
gères à l’opérateur et/ou des dommages
à la machine.
Ce symbole met en évidence des indi-
cations spéciales pour une plus grande
clarté et facilité d’utilisation.
Les images sont indiquées par la figure
spécifique (par ex. 2.12.1).
1.4 DONNÉES DU CONSTRUCTEUR
Voir étiquette CE.
Pour des informations et pour des com-
mandes de pièces détachées, nous vous
prions de faire référence aux revendeurs
de zone en citant le numéro de l’article et
le numéro de production qu’il est possible
de trouver sur l’étiquette CE montré sur
3.13.1 .
1. Identification du constructeur
2. Modèle
3. Code d’identification du produit
4. Numéro de série de l’article
5. Masse
6. Année/Mois
7. Puissance moteur
8. Typologie du produit
2. INSTRUCTIONS DE SÉCURITÉ
Avant le montage et la mise en fonction de
la machine ou de l’équipement interchan-
geable, lire et comprendre entièrement ce
manuel d’utilisation et d’entretien et celui
de la machine multifonction sur laquelle
est monté cet équipement.
DANGER!
Il est de la responsabilité de l’employeur
de transmettre toutes les informations
contenues dans ce manuel à l’opérateur
qui utilisera la machine ou l’équipement
interchangeable.
Cette machine et/ou cet équipement inter-
changeable satisfait toutes les normes eu-
DANGER!
ATTENTION!
INFORMATION!
DANGER!
ropéennes en vigueur pendant la période
de production. Malgré cela, une utilisation
impropre ou un entretien non approprié
peuvent augmenter le risque de blessure.
Afin d’éviter les dangers pour la sécurité
des personnes et les dommages à l’éq-
uipement interchangeable, lisez attentive-
ment, comprenez et observez les recom-
mandations contenues dans le manuel
d’utilisation de la machine associée à cet
équipement.
Indications pour l’équipement inter-
changeable :
1. Avant d’installer, inspecter, réparer,
enlever ou remplacer l’équipement in-
terchangeables ou les pièces, arrêtez le
moteur en laissant la machine refroidir
(15-20 minutes) et assurez-vous qu’il n’y a
pas des pièces en mouvement, débranc-
hez le capuchon de la bougie et montez la
protection de l’équipement.
2. Pendant la manipulation de l’équipem-
ent pour le montage, le remplacement ou
l’entretien, porter des gants de protection
robustes. En général, évitez tout contact
avec les outils de l’équipement et ne pla-
cez pas vos mains ou vos pieds près des
d’outils en mouvement pour éviter les am-
putations et les blessures.
3. N’utilisez pas la machine associée à
cet équipement si elle n’est pas correcte-
ment installée ou si elle ne fonctionne pas
correctement.
4. Installer la protection sur l’équipement
quand on n’utilise pas la machine.
5. Débranchez l’équipement en relâchant
le levier correspondant quand on ne tra-
vaille pas ou en cas de danger –si par
exemple quelqu’un arrive dans la zone
dangereuse-, en cas de mauvais fonction-
nement, visibilité réduite ou un impact
contre un obstacle.
6. Débranchez l’équipement si vous tra-
versez des routes ou des allées gravillon-
nées.
7. Débranchez l’équipement et arrêtez la
machine en cas de vibrations anomales.
8. Pour garantir le niveau de sécurité de
la machine, il faut utiliser uniquement des
pièces détachées originales.
Indications pour le réglage et l’entretien:
DANGER!
Toutes les opérations de RÉGLAGE et
d’ENTRETIEN doivent être exécutées avec
le moteur à l’arrêt. Retirer le capuchon de
la bougie ou la clé d’allumage (si présente)
pour éviter les démarrages inattendus.

fr
ATTENTION!
Avant d’effectuer les opérations de RÉ-
GLAGE et d’ENTRETIEN, contrôler et
s’assurer de la stabilité de la machine.
Maintenir serrés tous les écrous, les bou-
lons et les vis pour garantir le fonctionne-
ment de la machine dans des conditions
de sécurité.
N’utiliser que des pièces détachées ori-
ginales Eurosystems. Le propriétaire perd
tous ses droits de garantie s’il utilise des
pièces détachées non originales.
Ne pas apporter de modifications structurelles
ou d’adaptations. Ces modifications entraînent
l’annulation de la garantie; le constructeur se
déchargera de toute responsabilité.
Nous nous réservons le droit d’apporter
des améliorations de construction à la
machine et/ou à l’équipement interchan-
geable sans apporter de modifications à
ces instructions.
2.1 DESCRIPTION ET CHAMP
D’UTILISATION
La débroussailleuse AFL63 est un équi-
pement de jardin utilisé en combinaison
avec la machine MLT03 pour des interven-
tions de fauchage professionnel et parti-
culièrement difficile d’herbe haute et touf-
fue, de buissons et d’arbustes dans des
propriétés privées.
2.2 UTILISATION IMPROPRE
Utiliser la machine seulement pour couper
l’herbe.
2.3 ZONE DE TRAVAIL
L’utilisateur est responsable de la sécurité
des personnes, des choses ou des ani-
maux, qui se trouvent à l’intérieur de la
zone de danger de la machine.
Cette zone est définie comme la zone in-
terne d’une circonférence ayant un rayon
minimum de 20m avec pour centre l’outil
monté sur la machine 3.13.1.
Lorsque la machine est en fonction, il n’est
pas permis de rester dans la zone de dan-
ger, quelle qu’en soit la raison. En règle gé-
nérale, l’opérateur, qui a lu et compris dans
son intégralité le manuel, est autorisé à res-
ter à l’intérieur de cette zone et d’occuper
l’unique poste opérationnel placé, derrière
le guidon en l’empoignant solidement.
L’opérateur doit contrôler la zone envi-
ronnante avant de démarrer la machine
et faire particulièrement attention aux en-
fants et aux animaux.
Avant de commencer à travailler sur une zone
déterminée, la nettoyer des objets étrangers.
Pendant le travail, faire très attention au
terrain et à la zone environnante. Si l’on
devait identifier des objets non désirés
et/ou dangereux, avant de se déplacer
du poste opérationnel pour les retirer,
éteindre la machine et la place en sécurité
en empêchant son démarrage, son mou-
vement et son renversement.
2.4 VÊTEMENTS
Le repérage de ces dispositifs de protec-
tion individuelle est du soin exclusif du
client ou de l’employeur.
Pendant l’utilisation de la machine et les
opérations d’entretien:
Il faut TOUJOURS des chaussures de sé-
curité, des gants, des protecteurs de l’ouïe
appropriés et porter des chaussettes lon-
gues et résistantes, ainsi que des lunettes
de protection.
Ne portez pas de vêtements amples, de bi-
joux, de cravates, d’écharpes, de cordon-
nets penchées qui pourraient s’accrocher.
Attacher les cheveux.
Pendant le désemballage et le montage:
Il faut TOUJOURS utiliser des chaussures
de sécurité, des gants et des vêtements
résistants.
3. DÉFINITION DES PICTOGRAMMES
2.12.1 2.22.2
Garder toutes les étiquettes propres et
en bon état ; les remplacer si endomma-
gées.
INFORMATION!
DANGER!
5. DÉPLACEMENT ET EMBALLAGE
Pour déplacer l’emballage, la soulever
à 2 ou plusieurs personnes en utilisant
les poignées déposées sur le carton. Le
poids BRUT est indiqué à l’intérieur du
chapitre « CARACTÉRISTIQUES TECH-
NIQUES».
Ne renversez pas et ne roulez pas l’em-
ballage ; parce que on peut endomma-
ger les capots et/ou les pièces mécan-
iques.
INFORMATION!
En cas de fourniture de plusieurs ma-
chines ou équipements interchan-
geables sur palette, les décharger sans
les faire tomber au sol. S’aider éventuel-
lement avec un chariot élévateur.
6. DÉSEMBALLAGE/MONTAGE
1.11.1 1.21.2 1.31.3 1.41.4 1.51.5
1.21.2 1.31.3 1.41.4 MONTAGE DE LA
DEBROUSAILLEUSE A moteur arrêté et
avec la machine en position horizontale, in-
sérer partiellement le pivot (1) à l’emplace-
ment de l’attache rapide (2) présente sur la
machine. Monter la courroie (B) en l’intro-
ATTENTION!
4. CARACTÉRISTIQUES TECHNIQUES
Poid BRUT 29,6 kg
Poid NET 25 kg
Puissance acoustique
Pression acoustique
Vibrations
Étiquette décla-
ration CE sur la
dernière page
Diamètre de coupe Ø630 mm
Hauteur de coupe 2 positions à 50 et
80 mm
Vitesse rotation
lames 2300 tours/min
Lames
2 lames disposées
à 90°, 6 couteaux
pivotants aux
extrémités

fr
duisant dans la gorge de la poulie (3) située
sur la machine et ensuite dans la gorge de
la poulie (4) de la tondeuse débroussail-
leuse. Faire attention à ce que la courroie
(B) soit à l’intérieur des pivots (5) et (6) (voir
fig.1.3) ensuite amener le pivot (1) jusqu’à la
fin de course. Accrocher les ressorts (7, 8)
dans les interstices de l’outil et pour facili-
ter cette opération il est nécessaire de faire
levier avec l’anneau (9) dans l’interstice
(10). Voir figure 1.4 position 1 et 2. Pour le
démontage utiliser le même anneau (9), en
tirant dans la direction opposée.
Pour un fonctionnement correct du sys-
tème de frein, il faut que les deux res-
sorts soient correctement accrochés.
En cas de rupture d’un ou des deux res-
sorts, procéder au remplacement avant
d’utiliser la machine.
1.51.5 MONTAGE COFFRE DE PRO-
TECTION Prendre le coffre de protection
(C), et l’appuyer sur la vis en la faisant
coïncider avec la partie large de l’interstice.
Lorsque le coffre est appuyé sur le carter
le pousser vers la plus petite partie de l’in-
terstice, de manière à ce que les ailettes
s’encastrent dans les fentes présentes sur
le carter. Terminer en serrant l’écrou avec
la rondelle (11). S’assurer que le câble
d’attelage de l’outil (12) soit positionné à
l’intérieur du siège du coffre (C) et que l’ac-
crochage à ressort (13) soit sous le coffre
(C). Dans le cas de démontage du coffre
de protection (C) il est nécessaire de des-
serrer l’écrou avec la rondelle (11), sans le
dévisser complètement. Ensuite pousser
le coffre jusqu’à ce que la partie large de
l’orifice se trouve sous l’écrou (11), ensuite
extraire en soulevant vers le haut.
7. UTILISATION
Vérifier, avant chaque utilisation, que
les protections en toile antérieures et
postérieures ne soient pas cassé ou
détériorées. Si nécessaire il faut les
remplacer.
Voir le paragraphe “Utilisation” dans le
manuel de la machine associée.
Avant de procéder à la lecture, lire et
comprendre dans son intégralité le cha-
pitre «INSTRUCTIONS DE SÉCURITÉ».
DANGER!
DANGER!
DANGER!
8. STOCKAGE
Quand l’équipement interchangeable
n’est pas utilisé pour des longs périodes,
il faut protéger l’outil avec des substan-
ces anticorrosives et des antioxydants.
Appliquez une légère couche d’huile sur
les lames et / ou les outils.
Avant de ranger l’équipement interchan-
geable, nettoyez-le des feuilles et / ou de
la terre.
DANGER!
Protéger les parties coupantes et cou-
vrir éventuellement la machine avec des
toiles de protection.
9. ENTRETIEN PÉRIODIQUE
Maintenir serrés tous les écrous, les bou-
lons et les vis pour garantir le fonctionne-
ment de la machine et/ou de l’équipement
interchangeable dans des conditions de
sécurité.
Avant de procéder à la lecture, lire et
comprendre dans son intégralité le cha-
pitre «INSTRUCTIONS DE SÉCURITÉ».
9.1 REGLAGE HAUTEUR DE COUPE
4.14.1
Desserrer les écrous postérieurs (14),
dévisser et retirer les vis antérieures (15)
et les écrous relatifs (16), ensuite faire
correspondre un des orifices sur le tuyau
de glissement (17) avec l’orifice présent sur
le carter. En utilisant l’interstice supérieur
la hauteur de coupe sera d’environ 80 mm,
alors qu’avec l’interstice la coupe sera de
50 mm. Appuyer sur le tuyau de glissement
(17) pour l’amener en position horizontale
par rapport au terrain, ensuite serrer les vis
(15) et les écrous (16 et 14).
9.2 FREIN
4.24.2
La tondeuse débroussailleuse est équipée
d’un dispositif frein-lame (18) qui arrête le
roulement de la lame au déclenchement
de l’outil. Si le frein n’arrête pas la lame
sous 7 secondes, et donc que la lame
continue de tourner, il faut dévisser l’écrou
(19). Contrôler régulièrement l’usure de
la garniture de frein des lames (20) et
maintenir un niveau de graissage et de
lubrification appropriés du pivot (21) et du
DANGER!
tuyau (22) du système de freinage.
9.3 AIGUISAGE DE LA LAME
4.34.3
Utiliser des gants de protection.
Si durant la coupe les pointes de l’herbe
devaient devenir jaunes ou arrachées, il
serait alors nécessaire d’affiler les lames.
Pour des raisons de sécurité il est possible
d’affiler les lames en les aiguisant jusqu’à
retirer un maximum de 6 mm de métal, ou
directement de remplacer la lame.
ATTENTION: remplacer les couteaux
et les vis de fixation relatives en cas de
choc violent et dans tous les cas lorsque
l’épaisseur des couteaux est inférieure à 3
mm. et/ou la largeur à 30 mm.
IMPORTANT! UTILISER UNIQUEMENT DES
PIECES DETACHEES D’ORIGINE.
10. NETTOYAGE ET LAVAGE
Avant de procéder à la lecture, lire et
comprendre dans son intégralité le cha-
pitre «INSTRUCTIONS DE SÉCURITÉ».
Après chaque utilisation il est nécessaire
de nettoyer soigneusement la tondeuse
débroussailleuse, en utilisant des chiffons
ou une brosse. NE PAS UTILISER D’EAU
DANS LA ZONE FIGURANT A PROXIMITE
DU MOTEUR.
Avant de laver et/ou nettoyer la machine
ou l’équipement interchangeable, at-
tendre que toutes les pièces chaudes se
soient refroidies (au moins 20 minutes).
Utiliser de l’air comprimé ou une éponge
avec du détergent neutre et de l’eau.
Après le lavage, appliquez une légère
couche d’huile sur les lames et / ou les
outils pour éviter l’oxydation.
Ne pas utiliser de l’eau sous pression
pour laver la machine et/ou l’équipe-
ment interchangeable. Le moteur et les
éventuelles installations électriques ou
batteries pourraient s’endommager.
Éviter l’utilisation excessive d’eau à
proximité des étiquettes. En cas de dom-
mage, il faut le remplacer avant d’utiliser
de nouveau la machine et/ou l’équipe-
ment interchangeable.
ATTENTION!
DANGER!
ATTENTION!
ATTENTION!
La pagina sta caricando ...
La pagina sta caricando ...
La pagina sta caricando ...
La pagina sta caricando ...
La pagina sta caricando ...
La pagina sta caricando ...
La pagina sta caricando ...
La pagina sta caricando ...
La pagina sta caricando ...
La pagina sta caricando ...
La pagina sta caricando ...
La pagina sta caricando ...
La pagina sta caricando ...
La pagina sta caricando ...
La pagina sta caricando ...
La pagina sta caricando ...
-
 1
1
-
 2
2
-
 3
3
-
 4
4
-
 5
5
-
 6
6
-
 7
7
-
 8
8
-
 9
9
-
 10
10
-
 11
11
-
 12
12
-
 13
13
-
 14
14
-
 15
15
-
 16
16
-
 17
17
-
 18
18
-
 19
19
-
 20
20
-
 21
21
-
 22
22
-
 23
23
-
 24
24
-
 25
25
-
 26
26
-
 27
27
-
 28
28
-
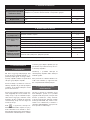 29
29
-
 30
30
-
 31
31
-
 32
32
-
 33
33
-
 34
34
-
 35
35
-
 36
36


in altre lingue
- français: EUROSYSTEMS 9866 Mode d'emploi
- português: EUROSYSTEMS 9866 Instruções de operação
- română: EUROSYSTEMS 9866 Instrucțiuni de utilizare