Posey 8196 Istruzioni per l'uso

Tipo
Istruzioni per l'uso

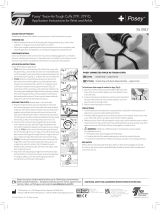
Di seguito troverete brevi informazioni per 8196S, 8196M, 8196L. Questi laccetti di fissaggio Posey per cannula tracheostomica sono disponibili in tre taglie per adattarsi a neonati prematuri fino ad adulti di grossa corporatura. Il loro scopo è quello di tenere in posizione una cannula tracheale. Per l'applicazione, si infila la chiusura a gancio attraverso un'asola della cannula e si fissa al cuscinetto del collo, si incrociano i laccetti sotto il connettore del paziente e si legano sopra di esso. È fondamentale seguire attentamente le politiche della struttura per il monitoraggio del paziente, l'applicazione del prodotto e l'integrità cutanea. Controllare sempre il prodotto per eventuali danni prima dell'uso e non forzare la rimozione della chiusura.

Di seguito troverete brevi informazioni per 8196S, 8196M, 8196L. Questi laccetti di fissaggio Posey per cannula tracheostomica sono disponibili in tre taglie per adattarsi a neonati prematuri fino ad adulti di grossa corporatura. Il loro scopo è quello di tenere in posizione una cannula tracheale. Per l'applicazione, si infila la chiusura a gancio attraverso un'asola della cannula e si fissa al cuscinetto del collo, si incrociano i laccetti sotto il connettore del paziente e si legano sopra di esso. È fondamentale seguire attentamente le politiche della struttura per il monitoraggio del paziente, l'applicazione del prodotto e l'integrità cutanea. Controllare sempre il prodotto per eventuali danni prima dell'uso e non forzare la rimozione della chiusura.

M1395 REV D 2022-01-26
Fig. 1
SWIVEL
OR
ELBOW
FLEX
HOSE
Fig. 2 Fig. 3
POSEY SECURE TIE FOR TRACHEOSTOMY TUBE (One dozen per box):
8196S Small 7-9”, (18-23 cm)
8196M Medium 9-14”, (23-35 cm)
8196L Large 13-19”, (33-48 cm)
DESCRIPTION OF PRODUCT: Posey Secure Tie for Tracheostomy Tube: Three sizes t tiny
premies to large adults. Ensure proper t before use.
INTENDED USE: The Posey Secure Tie is used to hold a tracheal tube in place.
CONTRAINDICATIONS: None
APPLICATION INSTRUCTIONS:
1. Thread the “hook” tape through one slot of the tracheostomy tube and attach the “hook
fastener to the fuzzy side of the neck pad or strap (See Fig. 1). Slot should be at least 3/8”
(1 cm) to allow for easy insertion.
2. Bring the foam neck collar behind the patient’s neck and thread “hook” tape through
other slot in the tracheostomy tube. Secure “hook” fastener to fuzzy side of neck strap or
neck collar.
3. Crisscross the white Secure Ties underneath the patient’s connector (swivel/adapter) or
ex hose that attaches to the trach tube (See Fig. 2).
4. Grasping each end of the Secure Tie, bring over the top of the patient connector (swivel
adapter/elbow) or ex hose. The Secure Tie may be tied at this point in a single tie or a
bow tie around the patient connector as illustrated (See Fig. 3).
WARNING
MONITORING: Be sure to follow your facility’s policies and guidelines for frequency
of patient oring, for proper product application, and skin integrity. ALWAYS monitor
patients carefully to ensure they are not at risk for disrupting lifesaving therapy.
Constant supervision, electronic monitoring and/or the use of a restraint may be
required in conjunction with proper medical supervision per your facility’s policies.
INSPECTION: Inspect before each use; check for broken stitches or parts, or torn, cut
or frayed material. DO NOT use soiled or damaged product.
REMOVAL: Do not force tabs through the slot when removing trach tie. This could
cause accidental extubation or displacement of the tube. If the slot is too small to
allow for easy removal, cut o the hook and loop tab, and pull the tie gently.
Discard if “hook” does not rmly attach to fuzzy backing.
Dispose of the product per facility’s policy if worn or damaged.
Fig. 1
SWIVEL
OR
ELBOW
FLEX
HOSE
Fig. 2 Fig. 3
POSEY SECURE TIE FOR TRACHEOSTOMY TUBE (One dozen per box):
8196S Small 7-9”, (18-23 cm)
8196M Medium 9-14”, (23-35 cm)
8196L Large 13-19”, (33-48 cm)
WARNING
MONITORING: Be sure to follow your facility’s policies and guidelines for frequency
of patient monitoring, for proper product application, and skin integrity. ALWAYS
monitor patients carefully to ensure they are not at risk for disrupting lifesaving
therapy. Constant supervision, electronic monitoring and/or the use of a restraint may
be required in conjunction with proper medical supervision per your facility’s policies.
INSPECTION: Inspect before each use; check for broken stitches or parts, or torn, cut
or frayed material. DO NOT use soiled or damaged product.
REMOVAL: Do not force tabs through the slot when removing trach tie. This could
cause accidental extubation or displacement of the tube. If the slot is too small to
allow for easy removal, cut o the hook and loop tab, and pull the tie gently.
Discard if “hook” does not rmly attach to fuzzy backing.
Dispose of the product per facility’s policy if worn or damaged.
Posey® Secure Tie For Tracheostomy Tube –
8196S, 8196M, 8196L
Report any serious incident related to device use to TIDI Products and the Member State Competent Authority.
Translations of this document in French, Spanish, Dutch, German, Italian, and Portuguese are located at www.tidiproducts.com/IFU.
© Posey Products, LLC. All rights reserved.
TIDI Products, LLC • 570 Enterprise Drive, Neenah, WI 54956 USA
Phone: 1.800.447.6739 • International: +1.920.751.4036 • www.tidiproducts.com
EN
MDSS GmbH
Schigraben 41
30175 Hannover, Germany
EC REP
UK Responsible Person
Emergo Consulting (UK) Limited
c/o Cr360 – UL International
Compass House, Vision Park Histon
Cambridge CB249BZ
United Kingdom
MDSS GmbH
Schigraben 41
30175 Hannover, Germany
EC REP
UK Responsible Person
Emergo Consulting (UK) Limited
c/o Cr360 – UL International
Compass House, Vision Park Histon
Cambridge CB249BZ
United Kingdom
Posey® Secure Tie For Tracheostomy Tube –
8196S, 8196M, 8196L
Melden Sie jeden schwerwiegenden Vorfall im Zusammenhang mit der Verwendung der Vorrichtung an TIDI Products sowie an die zuständige Behörde des Mitgliedsstaates.
Übersetzungen dieses Dokuments in die Sprachen Französisch, Spanisch, Niederländisch, Deutsch, Italienisch und Portugiesisch nden Sie auf www.tidiproducts.com/IFU.
Posey® Befestigungsband – 8196S, 8196M, 8196L
© Posey Products, LLC. Alle Rechte vorbehalten.
TIDI Products, LLC • 570 Enterprise Drive, Neenah, WI 54956 USA
Telefon: +1 800 447 6739 • International: +1.920.751.4036 • www.tidiproducts.com
DE
MDSS GmbH
Schigraben 41
30175 Hannover,
Deutschland
EU REP UK Verantwortliche Person
Emergo Consulting (UK) Limited
c/o Cr360 – UL International
Compass House, Vision Park Histon
Cambridge CB249BZ
Vereinigtes Königreich
Posey® Befestigungsband – 8196S, 8196M, 8196L
Melden Sie jeden schwerwiegenden Vorfall im Zusammenhang mit der Verwendung der Vorrichtung an TIDI Products sowie an die zuständige Behörde des Mitgliedsstaates.
Übersetzungen dieses Dokuments in die Sprachen Französisch, Spanisch, Niederländisch, Deutsch, Italienisch und Portugiesisch nden Sie auf www.tidiproducts.com/IFU.
© Posey Products, LLC. Alle Rechte vorbehalten.
TIDI Products, LLC • 570 Enterprise Drive, Neenah, WI 54956 USA
Telefon: +1 800 447 6739 • International: +1.920.751.4036 • www.tidiproducts.com
DE
MDSS GmbH
Schigraben 41
30175 Hannover,
Deutschland
EU REP UK Verantwortliche Person
Emergo Consulting (UK) Limited
c/o Cr360 – UL International
Compass House, Vision Park Histon
Cambridge CB249BZ
Vereinigtes Königreich
M1395 REV D 2022-01-26
BEFESTIGUNGSBAND FÜR TRACHEOSTOMIEKANÜLE (12 pro Verpackung):
8196S Small 7-9”, (18-23 cm)
8196M Medium 9-14”, (23-35 cm)
8196L Large 13-19”, (33-48 cm)
PRODUKTBESCHREIBUNG: Posey Befestigungsband für
Tracheostomiekanülen: Drei Größen von Frühchen bis zu großen
Erwachsenen. Vor Gebrauch den korrekten Sitz sicherstellen.
BESTIMMUNGSGEMÄSSE ANWENDUNG: Das Po s e y B e fe st i g un gs ba n d
wird zur Fixierung einer Trachealkanüle verwendet.
KONTRAINDIKATIONEN: Keine
ANWENDUNGSHINWEISE:
1. Das Verschlussende des Bands durch einen der Schlitze der
Tracheostomiekanüle ziehen und den Klettverschluss an der faserigen
Seite des Nackenpolsters oder des Nackenbands anbringen (siehe
Abbildung 1). Der Schlitz sollte mindestens 1 cm breit sein, um das
Einfädeln zu erleichtern.
2. Die Nackenauage aus Schaumsto im Nacken des Patienten anlegen
und das andere Verschlussende durch den zweiten Schlitz der
Tracheostomiekanüle ziehen. Den Klettverschluss an der faserigen Seite
des Nackenbands oder der Nackenauage befestigen.
3. Die weißen Befestigungsbänder unterhalb des Konnektors (Drehadapters)
des Patienten oder dem an der Tracheostomiekanüle befestigten
Flexschlauch überkreuzen (siehe Abbildung 2).
4. Die beiden Enden der Befestigungsbänder fassen und über den
Konnektor (Drehadapter/Kniestück) des Patienten oder den
Flexschlauch ziehen. Die Befestigungsbänder können an dieser Stelle
per Einfachknoten oder Schleife, wie abgebildet, um den Konnektor
des Patienten gebunden werden (siehe Abbildung 3).
BEOBACHTUNG: Halten Sie sich hinsichtlich der Regelmäßigkeit der Patientenbeobachtung bei
der entsprechenden Anwendung des Produkts und der Hautintegrität an die in Ihrer Einrichtung
geltenden Vorschrien und Richtlinien. Patienten STETS sorgfältig überwachen, um zu gewährleisten,
dass kein Risiko für eine Unterbrechung der lebensrettenden Therapie besteht. Unter Umständen
ist eine durchgängige Beaufsichtigung, eine elektronische Überwachung und/oder der Einsatz einer
Haltevorrichtung in Verbindung mit der ärztlichen Aufsicht gemäß den in Ihrer Einrichtung geltenden
Vorschrien erforderlich.
KONTROLLE: Vor jedem Gebrauch untersuchen auf: lose Maschen oder Teile, oder gerissenes,
abgeschnittenes oder verschlissenes Material. Verunreinigte oder beschädigte Produkte NICHT
verwenden.
ABLÖSUNG: Die Laschen bei der Abnahme des Trachbands nicht gewaltsam durch den
Schlitz ziehen. Dies könnte zu einer unbeabsichtigten Extubation oder einer Verrückung
der Kanüle führen. Ist der Schlitz zu klein für eine einfache Ablösung, die Laschen des
Klettverschlusses abschneiden und das Band vorsichtig herausziehen.
Nicht gebrauchen, falls der Verschluss nicht fest am faserigen Träger haet.
Das Produkt ist nach Gebrauch oder bei Beschädigung entsprechend den in Ihrer Einrichtung
geltenden Vorschrien zu entsorgen.
WARNUNG
SCHLAUCH
Abb. 3
DREHADAPTER
ODER
KNIESTÜCK
FLEX
Abb. 2
Abb. 1
BEFESTIGUNGSBAND FÜR TRACHEOSTOMIEKANÜLE (12 pro Verpackung):
8196S Small 7-9”, (18-23 cm)
8196M Medium 9-14”, (23-35 cm)
8196L Large 13-19”, (33-48 cm)
PRODUKTBESCHREIBUNG: Posey Befestigungsband für
Tracheostomiekanülen: Drei Größen von Frühchen bis zu großen
Erwachsenen. Vor Gebrauch den korrekten Sitz sicherstellen.
BESTIMMUNGSGEMÄSSE ANWENDUNG: Da s P os e y B e fe s ti g u n gs ba nd
wird zur Fixierung einer Trachealkanüle verwendet.
KONTRAINDIKATIONEN: Keine
ANWENDUNGSHINWEISE:
1. Das Verschlussende des Bands durch einen der Schlitze der
Tracheostomiekanüle ziehen und den Klettverschluss an der faserigen
Seite des Nackenpolsters oder des Nackenbands anbringen (siehe
Abbildung 1). Der Schlitz sollte mindestens 1 cm breit sein, um das
Einfädeln zu erleichtern.
2. Die Nackenauage aus Schaumsto im Nacken des Patienten anlegen
und das andere Verschlussende durch den zweiten Schlitz der
Tracheostomiekanüle ziehen. Den Klettverschluss an der faserigen Seite
des Nackenbands oder der Nackenauage befestigen.
3. Die weißen Befestigungsbänder unterhalb des Konnektors (Drehadapters)
des Patienten oder dem an der Tracheostomiekanüle befestigten
Flexschlauch überkreuzen (siehe Abbildung 2).
4. Die beiden Enden der Befestigungsbänder fassen und über den
Konnektor (Drehadapter/Kniestück) des Patienten oder den
Flexschlauch ziehen. Die Befestigungsbänder können an dieser Stelle
per Einfachknoten oder Schleife, wie abgebildet, um den Konnektor
des Patienten gebunden werden (siehe Abbildung 3).
BEOBACHTUNG: Halten Sie sich hinsichtlich der Regelmäßigkeit der Patientenbeobachtung bei
der entsprechenden Anwendung des Produkts und der Hautintegrität an die in Ihrer Einrichtung
geltenden Vorschrien und Richtlinien. Patienten STETS sorgfältig überwachen, um zu gewährleisten,
dass kein Risiko für eine Unterbrechung der lebensrettenden Therapie besteht. Unter Umständen
ist eine durchgängige Beaufsichtigung, eine elektronische Überwachung und/oder der Einsatz einer
Haltevorrichtung in Verbindung mit der ärztlichen Aufsicht gemäß den in Ihrer Einrichtung geltenden
Vorschrien erforderlich.
KONTROLLE: Vor jedem Gebrauch untersuchen auf: lose Maschen oder Teile, oder gerissenes,
abgeschnittenes oder verschlissenes Material. Verunreinigte oder beschädigte Produkte NICHT
verwenden.
ABLÖSUNG: Die Laschen bei der Abnahme des Trachbands nicht gewaltsam durch den
Schlitz ziehen. Dies könnte zu einer unbeabsichtigten Extubation oder einer Verrückung
der Kanüle führen. Ist der Schlitz zu klein für eine einfache Ablösung, die Laschen des
Klettverschlusses abschneiden und das Band vorsichtig herausziehen.
Nicht gebrauchen, falls der Verschluss nicht fest am faserigen Träger haet.
Das Produkt ist nach Gebrauch oder bei Beschädigung entsprechend den in Ihrer Einrichtung
geltenden Vorschrien zu entsorgen.
WARNUNG
SCHLAUCH
Abb. 3
DREHADAPTER
ODER
KNIESTÜCK
FLEX
Abb. 2
Abb. 1
Notique cualquier acontecimiento grave relacionado con el uso del producto a TIDI Products y a la autoridad competente del Estado miembro que corresponda. Las
traducciones de este documento en francés, español, holandés, alemán, italiano y portugués se encuentran en www.tidiproducts.com/IFU.
Corbata de jación Posey® – 8196S, 8196M, 8196L
ES
UK Persona Responsable
Emergo Consulting (UK) Limited
c/o Cr360 – UL International
Compass House, Vision Park Histon
Cambridge CB249BZ
Reino Unido
© Posey Products, LLC. Reservados todos los derechos.
TIDI Products, LLC • 570 Enterprise Drive, Neenah, WI 54956 EE. UU.
Teléfono: 1.800.447.6739 • Internacional: +1.920.751.4036 • www.tidiproducts.com
MDSS GmbH
Schigraben 41
30175 Hannover,
Alemania
EC REP
Corbata de jación Posey® – 8196S, 8196M, 8196L
Notique cualquier acontecimiento grave relacionado con el uso del producto a TIDI Products y a la autoridad competente del Estado miembro que corresponda. Las
traducciones de este documento en francés, español, holandés, alemán, italiano y portugués se encuentran en www.tidiproducts.com/IFU.
ES
UK Persona Responsable
Emergo Consulting (UK) Limited
c/o Cr360 – UL International
Compass House, Vision Park Histon
Cambridge CB249BZ
Reino Unido
© Posey Products, LLC. Reservados todos los derechos.
TIDI Products, LLC • 570 Enterprise Drive, Neenah, WI 54956 EE. UU.
Teléfono: 1.800.447.6739 • Internacional: +1.920.751.4036 • www.tidiproducts.com
MDSS GmbH
Schigraben 41
30175 Hannover,
Alemania
EC REP
CORBATA DE FIJACIÓN POSEY PARA TUBO DE TRAQUEOTOMÍA
(una docena por caja):
8196S Pequeña 18-23 cm ,(7-9”)
8196M Mediana 23-35 cm, (9-14”)
8196L Grande 33-48 cm, (13-19”)
DESCRIPCIÓN DEL PRODUCTO: Corbata de jación Posey para tubo
de traqueotomía:
Los tres tamaños se adaptan a desde bebés prematuros pequeños hasta
a adultos grandes. Garantiza un ajuste adecuado antes de su uso.
USO PREVISTO: La corbata de jación Posey se usa para mantener
un tubo traqueal en su lugar.
CONTRAINDICACIONES: Ninguna
INSTRUCCIONES DE APLICACIÓN:
1. Pase la cinta del “gancho” a través de una ranura del tubo de
traqueotomía y je el cierre del “gancho” al lado velloso de la almohadilla
para el cuello o la correa (ver la Fig. 1). La ranura debe tener al menos
1 cm (3/8”) para permitir una inserción sencilla.
2. Lleve el collarín de espuma por detrás del cuello del paciente y pase
la cinta del “gancho” a través de la otra ranura del tubo de traqueotomía.
F i j e el c ie r re de “g a n c h o” al l ad o ve l l o so d e l a co r r ea p ar a e l cu e ll o o
el collarín.
3. Entrecruce las corbatas de jación blancas por debajo del conector del
paciente (giratorio/adaptador) o del tubo exible que se conecta al tubo
de traqueotomía (ver la Fig. 2).
4. Agarrando cada extremo de la corbata de jación, pásela por encima de
la parte superior del conector del paciente (adaptador giratorio/codo) o
del tubo exible. La corbata de jación se puede atar en este punto con
un solo lazo o nudo alrededor del conector del paciente, tal como se
ilustra (ver la Fig. 3).
M1395 REV D 2022-01-26
MONITORIZACIÓN: Asegúrese de seguir las políticas y pautas de su centro en lo que respecta a
la frecuencia de la supervisión del paciente, la aplicación adecuada del producto y la integridad
de la piel. Supervise SIEMPRE a los pacientes con atención para asegurarse de que no corran
el riesgo de interrumpir un tratamiento vital. Es posible que se requiera supervisión constante,
monitorización electrónica o el uso de un sistema de sujeción junto con la supervisión médica
adecuada según las políticas de su centro.
INSPECCIÓN: Inspeccione antes de cada uso; verique que no haya puntos o partes rotas, ni
material rasgado, cortado o deshilachado. NO utilice productos sucios o dañados.
EXTRACCIÓN: No fuerce las lengüetas a través de la ranura al retirar la corbata para
traqueotomía. Esto podría causar una extubación o desplazamiento accidental del tubo. Si la
ranura es demasiado pequeña para permitir una extracción fácil, corte la lengüeta del gancho y
el lazo, y tire de la corbata con cuidado.
Deseche el producto si el “gancho” no se adhiere rmemente al respaldo velloso.
Si el producto está desgastado o dañado, deséchelo de acuerdo con la política del centro.
CORBATA DE FIJACIÓN POSEY PARA TUBO DE TRAQUEOTOMÍA
(una docena por caja):
8196S Pequeña 18-23 cm ,(7-9”)
8196M Mediana 23-35 cm, (9-14”)
8196L Grande 33-48 cm, (13-19”)
DESCRIPCIÓN DEL PRODUCTO: Corbata de jación Posey para tubo
de traqueotomía:
Los tres tamaños se adaptan a desde bebés prematuros pequeños hasta
a adultos grandes. Garantiza un ajuste adecuado antes de su uso.
USO PREVISTO: La corbata de jación Posey se usa para mantener
un tubo traqueal en su lugar.
CONTRAINDICACIONES: Ninguna
INSTRUCCIONES DE APLICACIÓN:
1. Pase la cinta del “gancho” a través de una ranura del tubo de
traqueotomía y je el cierre del “gancho” al lado velloso de la almohadilla
para el cuello o la correa (ver la Fig. 1). La ranura debe tener al menos
1 cm (3/8”) para permitir una inserción sencilla.
2. Lleve el collarín de espuma por detrás del cuello del paciente y pase
la cinta del “gancho” a través de la otra ranura del tubo de traqueotomía.
F i j e el c ie r re de “g a n c h o” al l ad o ve l l o so d e l a co r r ea p ar a e l cu e ll o o
el collarín.
3. Entrecruce las corbatas de jación blancas por debajo del conector del
paciente (giratorio/adaptador) o del tubo exible que se conecta al tubo
de traqueotomía (ver la Fig. 2).
4. Agarrando cada extremo de la corbata de jación, pásela por encima de
la parte superior del conector del paciente (adaptador giratorio/codo) o
del tubo exible. La corbata de jación se puede atar en este punto con
un solo lazo o nudo alrededor del conector del paciente, tal como se
ilustra (ver la Fig. 3).
MONITORIZACIÓN: Asegúrese de seguir las políticas y pautas de su centro en lo que respecta a
la frecuencia de la supervisión del paciente, la aplicación adecuada del producto y la integridad
de la piel. Supervise SIEMPRE a los pacientes con atención para asegurarse de que no corran
el riesgo de interrumpir un tratamiento vital. Es posible que se requiera supervisión constante,
monitorización electrónica o el uso de un sistema de sujeción junto con la supervisión médica
adecuada según las políticas de su centro.
INSPECCIÓN: Inspeccione antes de cada uso; verique que no haya puntos o partes rotas, ni
material rasgado, cortado o deshilachado. NO utilice productos sucios o dañados.
EXTRACCIÓN: No fuerce las lengüetas a través de la ranura al retirar la corbata para
traqueotomía. Esto podría causar una extubación o desplazamiento accidental del tubo. Si la
ranura es demasiado pequeña para permitir una extracción fácil, corte la lengüeta del gancho y
el lazo, y tire de la corbata con cuidado.
Deseche el producto si el “gancho” no se adhiere rmemente al respaldo velloso.
Si el producto está desgastado o dañado, deséchelo de acuerdo con la política del centro.
ADVERTENCIA
Fig. 3
Fig. 2
Fig. 1
ADAPT ADOR
GIRTO RIO
O CODO
TUBO
FLEXIBLE
ADVERTENCIA
Fig. 3
Fig. 2
Fig. 1
ADAPT ADOR
GIRTO RIO
O CODO
TUBO
FLEXIBLE
Signalez tout incident grave lié à l’utilisation du dispositif à TIDI Products et à l’autorité compétente de l’État membre.
Les traductions de ce document en français, espagnol, néerlandais, allemand, italien et portugais sont disponibles sur le site www.tidiproducts.com/IFU.
Lien de sécurité Posey® – 8196S, 8196M, 8196L
© Posey Products, LLC. Tous droits réservés.
TIDI Products, LLC • 570 Enterprise Drive, Neenah, WI 54956 USA
Téléphone : +1 800 447 6739 • International : +1 920 751 4036
www.tidiproducts.com
FR
MDSS GmbH
Schigraben 41
30175 Hanovre,
Allemagne
EC REP
UK Responsable
Emergo Consulting (UK) Limited
c/o Cr360 – UL International
Compass House, Vision Park Histon
Cambridge CB249BZ
Royaume-Uni
Signalez tout incident grave lié à l’utilisation du dispositif à TIDI Products et à l’autorité compétente de l’État membre.
Les traductions de ce document en français, espagnol, néerlandais, allemand, italien et portugais sont disponibles sur le site www.tidiproducts.com/IFU.
© Posey Products, LLC. Tous droits réservés.
TIDI Products, LLC • 570 Enterprise Drive, Neenah, WI 54956 USA
Téléphone : +1 800 447 6739 • International : +1 920 751 4036
www.tidiproducts.com
FR
MDSS GmbH
Schigraben 41
30175 Hanovre,
Allemagne
EC REP
UK Responsable
Emergo Consulting (UK) Limited
c/o Cr360 – UL International
Compass House, Vision Park Histon
Cambridge CB249BZ
Royaume-Uni
Lien de sécurité Posey® – 8196S, 8196M, 8196L
LIEN SÉCURISÉ POSEY POUR CANULE DE TRACHÉOSTOMIE
(une douzaine par boîte):
8196S Petit 18-23 cm, (7-9”)
8196M Moyen 23-35 cm, (9-14”)
8196L Large 33-48 cm, (13-19”)
DESCRIPTION DU PRODUIT : Lien de sécurité Posey pour canule de
trachéostomie : Trois tailles sont disponibles pour s’ajuster des prématurés aux
adultes de grande taille. Assurez-vous d’un bon ajustement avant utilisation.
INDICATIONS : le lien de sécurité Posey est utilisé pour maintenir une canule
trachéale en place.
CONTRE-INDICATIONS : Aucune
INSTRUCTIONS D’UTILISATION :
1. Enlez le ruban « crochet » à travers une fente de la canule de
trachéostomie et placez la xation « crochet » sur le côté pelucheux du
tampon ou de la lanière du cou (voir Fig. 1). La fente doit mesurer au moins
1 cm (3/8”) pour permettre une insertion facile.
2. Placez le collier en mousse derrière le cou du patient et enlez le ruban «
crochet » à travers l’autre fente de la canule de trachéostomie. Sécurisez la
xation « crochet » sur le côté pelucheux de la lanière ou du collier du cou.
3. Croisez les liens sécurisés blancs sous le connecteur du patient (pivot/
adaptateur) ou le tuyau exible qui se xe à la canule trachéale (voir Fig. 2).
4. En saisissant chaque extrémité du lien sécurisé, placez-les au-dessus du
connecteur du patient (adaptateur pivotant/coudé) ou du tuyau exible.
Le lien sécurisé peut être xé à ce stade avec un nœud unique ou un nœud
papillon autour du connecteur du patient, comme le montre l’illustration
(voir Fig. 3).
M1395 REV D 2022-01-26
SURVEILLANCE: assurez-vous de suivre les politiques et les directives de votre établissement
concernant la fréquence de la surveillance, l’application correcte du produit et l’intégrité cutanée du
patient. Surveillez TOUJOURS les patients avec soin an de vous assurer qu’ils ne sont pas exposés
à un risque d’interrompre leur traitement vital. Une surveillance constante, une surveillance
électronique et/ou l’utilisation d’une contention peuvent être nécessaires, en parallèle avec une
surveillance médicale correcte, conformément aux politiques de votre établissement.
INSPECTION: inspectez le produit avant chaque utilisation ; vériez que le produit ne présente
pas de mailles ou de parties rompues, de déchirure, de coupure ou d’eilochage. N’utilisez PAS un
produit défectueux ou endommagé.
RETRAIT: Ne pas forcer les languettes à travers les fentes lors du retrait du lien trachéal. Cela
pourrait entraîner une détubation accidentelle ou un déplacement de la canule. Si la fente est trop
petite pour permettre un retrait facile, coupez la languette autoagrippante et tirez doucement sur
le lien.
Éliminez le produit si la partie « crochet » n’est pas fermement xée à l’arrière pelucheux.
Éliminez le produit conformément à la politique de votre établissement s’il est usé ou endommagé.
Fig. 3
Fig. 1
Fig. 2
TUYAU
FLEXIBLE
PIVOT OU
COUDE
LIEN SÉCURISÉ POSEY POUR CANULE DE TRACHÉOSTOMIE
(une douzaine par boîte):
8196S Petit 18-23 cm, (7-9”)
8196M Moyen 23-35 cm, (9-14”)
8196L Large 33-48 cm, (13-19”)
DESCRIPTION DU PRODUIT : Lien de sécurité Posey pour canule de
trachéostomie : Trois tailles sont disponibles pour s’ajuster des prématurés aux
adultes de grande taille. Assurez-vous d’un bon ajustement avant utilisation.
INDICATIONS : le lien de sécurité Posey est utilisé pour maintenir une canule
trachéale en place.
CONTRE-INDICATIONS : Aucune
INSTRUCTIONS D’UTILISATION :
1. Enlez le ruban « crochet » à travers une fente de la canule de
trachéostomie et placez la xation « crochet » sur le côté pelucheux du
tampon ou de la lanière du cou (voir Fig. 1). La fente doit mesurer au moins
1 cm (3/8”) pour permettre une insertion facile.
2. Placez le collier en mousse derrière le cou du patient et enlez le ruban «
crochet » à travers l’autre fente de la canule de trachéostomie. Sécurisez la
xation « crochet » sur le côté pelucheux de la lanière ou du collier du cou.
3. Croisez les liens sécurisés blancs sous le connecteur du patient (pivot/
adaptateur) ou le tuyau exible qui se xe à la canule trachéale (voir Fig. 2).
4. En saisissant chaque extrémité du lien sécurisé, placez-les au-dessus du
connecteur du patient (adaptateur pivotant/coudé) ou du tuyau exible.
Le lien sécurisé peut être xé à ce stade avec un nœud unique ou un nœud
papillon autour du connecteur du patient, comme le montre l’illustration
(voir Fig. 3).
SURVEILLANCE: assurez-vous de suivre les politiques et les directives de votre établissement
concernant la fréquence de la surveillance, l’application correcte du produit et l’intégrité cutanée du
patient. Surveillez TOUJOURS les patients avec soin an de vous assurer qu’ils ne sont pas exposés
à un risque d’interrompre leur traitement vital. Une surveillance constante, une surveillance
électronique et/ou l’utilisation d’une contention peuvent être nécessaires, en parallèle avec une
surveillance médicale correcte, conformément aux politiques de votre établissement.
INSPECTION: inspectez le produit avant chaque utilisation ; vériez que le produit ne présente
pas de mailles ou de parties rompues, de déchirure, de coupure ou d’eilochage. N’utilisez PAS un
produit défectueux ou endommagé.
RETRAIT: Ne pas forcer les languettes à travers les fentes lors du retrait du lien trachéal. Cela
pourrait entraîner une détubation accidentelle ou un déplacement de la canule. Si la fente est trop
petite pour permettre un retrait facile, coupez la languette autoagrippante et tirez doucement sur
le lien.
Éliminez le produit si la partie « crochet » n’est pas fermement xée à l’arrière pelucheux.
Éliminez le produit conformément à la politique de votre établissement s’il est usé ou endommagé.
Fig. 3
Fig. 1
Fig. 2
TUYAU
FLEXIBLE
PIVOT OU
COUDE
MISE EN GARDE
MISE EN GARDE
Segnalare eventuali incidenti gravi correlati all’uso del dispositivo a TIDI Products e all’autorità competente dello stato membro.
Le traduzioni del presente documento in francese, spagnolo, olandese, tedesco, italiano e portoghese sono disponibili al sito www.tidiproducts.com/IFU.
Laccetto di ssaggio Posey® – 8196S, 8196M, 8196L
© Posey Products, LLC. Tutti i diritti riservati.
TIDI Products, LLC • 570 Enterprise Drive, Neenah, WI 54956 USA
Telefono: 1.800.447.6739 • Internazionale: +1.920.751.4036
www.tidiproducts.com
IT
UK Persona responsabile
Emergo Consulting (UK) Limited
c/o Cr360 – UL International
Compass House, Vision Park Histon
Cambridge CB249BZ
Regno Unito
MDSS GmbH
Schigraben 41
30175 Hannover,
Germania
EC REP
Laccetto di ssaggio Posey® – 8196S, 8196M, 8196L
Segnalare eventuali incidenti gravi correlati all’uso del dispositivo a TIDI Products e all’autorità competente dello stato membro.
Le traduzioni del presente documento in francese, spagnolo, olandese, tedesco, italiano e portoghese sono disponibili al sito www.tidiproducts.com/IFU.
© Posey Products, LLC. Tutti i diritti riservati.
TIDI Products, LLC • 570 Enterprise Drive, Neenah, WI 54956 USA
Telefono: 1.800.447.6739 • Internazionale: +1.920.751.4036
www.tidiproducts.com
IT
UK Persona responsabile
Emergo Consulting (UK) Limited
c/o Cr360 – UL International
Compass House, Vision Park Histon
Cambridge CB249BZ
Regno Unito
MDSS GmbH
Schigraben 41
30175 Hannover,
Germania
EC REP
LACCETTO DI SICUREZZA POSEY PER CANNULA TRACHEOSTOMICA (12 per confezione):
8196S Small 18-23 cm, (7-9”)
8196M Medium 23-35 cm, (9-14”)
8196L Large 33-48 cm, (13-19”)
DESCRIZIONE DEL PRODOTTO: laccetto di ssaggio Posey per cannula
tracheostomica. Le tre misure disponibili sono adatte a varie esigenze: dai
neonati prematuri molto piccoli agli adulti di grossa corporatura. Prima
dell’uso accertarsi che il prodotto si adatti correttamente.
USO PREVISTO: il laccetto di ssaggio Posey viene utilizzato per mantenere
la cannula tracheostomica in sede.
CONTROINDICAZIONI: nessuna
ISTRUZIONI PER LAPPLICAZIONE:
1. Far passare il nastro “a gancio” attraverso un’asola della cannula
tracheostomica e ssare la chiusura “a gancio” al lato lanuginoso del
cuscinetto o cinghia per il collo (vedi Fig. 1). La larghezza dell’asola deve
essere di almeno 1 cm (3/8”) per consentire un inserimento agevole.
2. Posizionare il collare in schiuma dietro il collo del paziente e inlare il
nastro “a gancio” attraverso l’altra asola della cannula tracheostomica.
Fissare la chiusura “a gancio” al lato lanuginoso della cinghia per il collo
o del collare.
3. Incrociare i laccetti di ssaggio bianchi sotto il connettore del paziente
(giunto girevole/adattatore) o del tubo essibile che si connette alla
cannula tracheostomica (vedi Fig. 2).
4. Aerrando ciascuna estremità del laccetto di ssaggio, portarle sopra la
parte superiore del connettore del paziente (giunto girevole adattatore/
gomito) o del tubo essibile. Il laccetto di ssaggio può essere legato in
questo punto con un nodo singolo o facendo un occhetto attorno al
connettore paziente, come illustrato (vedi Fig. 3).
M1395 REV D 2022-01-26
MONITORAGGIO: attenersi alle politiche e linee guida della propria struttura in merito alla
frequenza del monitoraggio del paziente, l’applicazione corretta del prodotto e l’integrità della
cute. Monitorare SEMPRE attentamente i pazienti in modo da assicurare che non corrano il rischio
di interrompere la terapia salvavita. Potrebbe rendersi necessaria la supervisione costante, il
monitoraggio elettronico e/o l’uso di uno strumento di contenzione, oltre alla superversione
medica adeguata secondo le politiche della struttura.
ISPEZIONE: ispezionare prima di ogni uso; controllare per la presenza di punti o parti rotte o
materiale lacerato, tagliato o slacciato. NON utilizzare se il prodotto è sporco o danneggiato.
RIMOZIONE: Non forzare le linguette attraverso l’asola durante la rimozione del laccetto per
cannula tracheostomica, poiché ciò potrebbe causare l’estubazione o lo spostamento accidentale
della cannula. Se l’asola è troppo piccola per consentire una rimozione agevole, tagliare il gancio
e la linguetta dell’ansa e tirare delicatamente il laccio.
Gettare via se il “gancio” non aderisce saldamente al supporto lanuginoso.
Se il prodotto fosse usurato o danneggiato, smaltirlo secondo le politiche della struttura
in materia.
Fig. 3
Fig. 1
Fig. 2
GIUNTO
GIREVOLE
O GOMITO
TUBO
FLESSIBLE
LACCETTO DI SICUREZZA POSEY PER CANNULA TRACHEOSTOMICA (12 per confezione):
8196S Small 18-23 cm, (7-9”)
8196M Medium 23-35 cm, (9-14”)
8196L Large 33-48 cm, (13-19”)
DESCRIZIONE DEL PRODOTTO: laccetto di ssaggio Posey per cannula
tracheostomica. Le tre misure disponibili sono adatte a varie esigenze: dai
neonati prematuri molto piccoli agli adulti di grossa corporatura. Prima
dell’uso accertarsi che il prodotto si adatti correttamente.
USO PREVISTO: il laccetto di ssaggio Posey viene utilizzato per mantenere
la cannula tracheostomica in sede.
CONTROINDICAZIONI: nessuna
ISTRUZIONI PER LAPPLICAZIONE:
1. Far passare il nastro “a gancio” attraverso un’asola della cannula
tracheostomica e ssare la chiusura “a gancio” al lato lanuginoso del
cuscinetto o cinghia per il collo (vedi Fig. 1). La larghezza dell’asola deve
essere di almeno 1 cm (3/8”) per consentire un inserimento agevole.
2. Posizionare il collare in schiuma dietro il collo del paziente e inlare il
nastro “a gancio” attraverso l’altra asola della cannula tracheostomica.
Fissare la chiusura “a gancio” al lato lanuginoso della cinghia per il collo
o del collare.
3. Incrociare i laccetti di ssaggio bianchi sotto il connettore del paziente
(giunto girevole/adattatore) o del tubo essibile che si connette alla
cannula tracheostomica (vedi Fig. 2).
4. Aerrando ciascuna estremità del laccetto di ssaggio, portarle sopra la
parte superiore del connettore del paziente (giunto girevole adattatore/
gomito) o del tubo essibile. Il laccetto di ssaggio può essere legato in
questo punto con un nodo singolo o facendo un occhetto attorno al
connettore paziente, come illustrato (vedi Fig. 3).
MONITORAGGIO: attenersi alle politiche e linee guida della propria struttura in merito alla
frequenza del monitoraggio del paziente, l’applicazione corretta del prodotto e l’integrità della
cute. Monitorare SEMPRE attentamente i pazienti in modo da assicurare che non corrano il rischio
di interrompere la terapia salvavita. Potrebbe rendersi necessaria la supervisione costante, il
monitoraggio elettronico e/o l’uso di uno strumento di contenzione, oltre alla superversione
medica adeguata secondo le politiche della struttura.
ISPEZIONE: ispezionare prima di ogni uso; controllare per la presenza di punti o parti rotte o
materiale lacerato, tagliato o slacciato. NON utilizzare se il prodotto è sporco o danneggiato.
RIMOZIONE: Non forzare le linguette attraverso l’asola durante la rimozione del laccetto per
cannula tracheostomica, poiché ciò potrebbe causare l’estubazione o lo spostamento accidentale
della cannula. Se l’asola è troppo piccola per consentire una rimozione agevole, tagliare il gancio
e la linguetta dell’ansa e tirare delicatamente il laccio.
Gettare via se il “gancio” non aderisce saldamente al supporto lanuginoso.
Se il prodotto fosse usurato o danneggiato, smaltirlo secondo le politiche della struttura
in materia.
Fig. 3
Fig. 1
Fig. 2
GIUNTO
GIREVOLE
O GOMITO
TUBO
FLESSIBLE
AVVERTENZA
AVVERTENZA
Meld een ernstig incident in verband met het gebruik van het hulpmiddel aan TIDI Products en de bevoegde instantie in de lidstaat.
Vertalingen van dit document in het Frans, Spaans, Nederlands, Duits, Italiaans en Portugees vindt u op www.tidiproducts.com/IFU.
Posey® – bevestigingsbinder – 8196S, 8196M, 8196L
© Posey Products, LLC. Alle rechten voorbehouden.
TIDI Products, LLC • 570 Enterprise Drive, Neenah, WI 54956 VS
Telefoon: 1.800.447.6739 • Internationaal: +1.920.751.4036 • www.tidiproducts.com
NL
MDSS GmbH
Schigraben 41
30175 Hannover,
Duitsland
EC REP
UK Verantwoordelijke persoon
Emergo Consulting (UK) Limited
c/o Cr360 – UL International
Compass House, Vision Park Histon
Cambridge CB249BZ
Verenigd Koninkrijk
Posey® – bevestigingsbinder – 8196S, 8196M, 8196L
Meld een ernstig incident in verband met het gebruik van het hulpmiddel aan TIDI Products en de bevoegde instantie in de lidstaat.
Vertalingen van dit document in het Frans, Spaans, Nederlands, Duits, Italiaans en Portugees vindt u op www.tidiproducts.com/IFU.
© Posey Products, LLC. Alle rechten voorbehouden.
TIDI Products, LLC • 570 Enterprise Drive, Neenah, WI 54956 VS
Telefoon: 1.800.447.6739 • Internationaal: +1.920.751.4036 • www.tidiproducts.com
NL
MDSS GmbH
Schigraben 41
30175 Hannover,
Duitsland
EC REP
UK Verantwoordelijke persoon
Emergo Consulting (UK) Limited
c/o Cr360 – UL International
Compass House, Vision Park Histon
Cambridge CB249BZ
Verenigd Koninkrijk
POSEY-BEVESTIGINGSBINDER VOOR TRACHEOTOMIEBUIS
(12 stuks per doos):
8196S Small, 18-23 cm (7-9”)
8196M Medium, 23-35 cm (9-14”)
8196L Large, 33-48 cm (13-19”)
PRODUCTBESCHRIJVING: Posey-bevestigingsbinder voor tracheotomiebuis:
In drie maten, voor piepkleine premature patiëntjes tot grote volwassenen.
Controleer voorafgaand aan gebruik de juiste pasvorm.
BEOOGD GEBRUIK: De Posey-bevestigingsbinder wordt gebruikt om de
tracheabuis op zijn plek te houden.
CONTRA-INDICATIES: Geen
GEBRUIKSINSTRUCTIES:
1. Voer het bandje met de “haak” door 1 gleuf van de tracheotomiebuis en
bevestig de haaksluiting aan de pluizige kant van de nekband of het riempje
(zie afb. 1). Om vlot doorgevoerd te kunnen worden, moet de gleuf ten
minste 1 cm (3/8”) breed zijn.
2. Leg de schuimkraag tegen de achterkant de nek van patiënt en voer het
bandje met de “haak” door de andere gleuf in de tracheatomiebuis. Bevestig
de haaksluiting aan het pluizige gedeelte van de nekband of kraag.
3. Leg de witte binders kruislings onder de aansluiting aan de patiënt
(draaimechanisme/adapter) of exibele slang die bevestigd is aan de
tracheabuis (zie afb. 2).
4. Pak beide uiteinden van de binder vast en plaats deze bovenop de
aansluiting van de patiënt (draaimechanisme/adapter/elleboogstuk) of
de exibele slang. De binder kan nu met een enkele knoop of striksluiting
rond de aansluiting van de patiënt gebonden worden, zoals aangegeven
(zie afb. 3).
M1395 REV D 2022-01-26
MONITORING: Volg het beleid en de richtlijnen van uw instelling voor de frequentie waarmee
patiënt gecontroleerd wordt op een correct aangebracht hulpmiddel en integriteit van de huid.
Zorg dat u de patiënt ALTIJD nauwkeurig in de gaten houdt om het risico op het verstoren van
levensreddende therapie te voorkomen. Constante supervisie, elektronische monitoring en/of
gebruik van een onrustband kan nodig zijn in combinatie met de juiste medische supervisie conform
het beleid van uw instellin.
INSPECTIE: Visuele inspectie voorafgaand aan elk gebruik; controleer op losse stiksels, defecte
onderdelen of gescheurd, in- of afgeknipt of rafelig materiaal. Vuile of beschadigde producten
NIET gebruiken.
VERWIJDEREN: Trek de lipjes bij het verwijderen van de trachaeband niet met overmatige kracht
door de gleuf. Dit kan resulteren in onbedoelde extubatie of verschuiven van de buis. Als de gleuf te
klein is voor vlot verwijderen, knip het haakje en de lipsluiting dan af en trek de band voorzichtig los.
Voer het product af als de “haak” niet stevig aan de pluizige achterkant hecht.
Voer het product indien versleten of beschadigd af volgens het beleid van de instelling.
Afb. 1
Afb. 3
Afb. 2
FLEXIBELLE
SLANG
DRAAIMECHANISME
OF ELLEBOOGSTUK
POSEY-BEVESTIGINGSBINDER VOOR TRACHEOTOMIEBUIS
(12 stuks per doos):
8196S Small, 18-23 cm (7-9”)
8196M Medium, 23-35 cm (9-14”)
8196L Large, 33-48 cm (13-19”)
PRODUCTBESCHRIJVING: Posey-bevestigingsbinder voor tracheotomiebuis:
In drie maten, voor piepkleine premature patiëntjes tot grote volwassenen.
Controleer voorafgaand aan gebruik de juiste pasvorm.
BEOOGD GEBRUIK: De Posey-bevestigingsbinder wordt gebruikt om de
tracheabuis op zijn plek te houden.
CONTRA-INDICATIES: Geen
GEBRUIKSINSTRUCTIES:
1. Voer het bandje met de “haak” door 1 gleuf van de tracheotomiebuis en
bevestig de haaksluiting aan de pluizige kant van de nekband of het riempje
(zie afb. 1). Om vlot doorgevoerd te kunnen worden, moet de gleuf ten
minste 1 cm (3/8”) breed zijn.
2. Leg de schuimkraag tegen de achterkant de nek van patiënt en voer het
bandje met de “haak” door de andere gleuf in de tracheatomiebuis. Bevestig
de haaksluiting aan het pluizige gedeelte van de nekband of kraag.
3. Leg de witte binders kruislings onder de aansluiting aan de patiënt
(draaimechanisme/adapter) of exibele slang die bevestigd is aan de
tracheabuis (zie afb. 2).
4. Pak beide uiteinden van de binder vast en plaats deze bovenop de
aansluiting van de patiënt (draaimechanisme/adapter/elleboogstuk) of
de exibele slang. De binder kan nu met een enkele knoop of striksluiting
rond de aansluiting van de patiënt gebonden worden, zoals aangegeven
(zie afb. 3).
MONITORING: Volg het beleid en de richtlijnen van uw instelling voor de frequentie waarmee
patiënt gecontroleerd wordt op een correct aangebracht hulpmiddel en integriteit van de huid.
Zorg dat u de patiënt ALTIJD nauwkeurig in de gaten houdt om het risico op het verstoren van
levensreddende therapie te voorkomen. Constante supervisie, elektronische monitoring en/of
gebruik van een onrustband kan nodig zijn in combinatie met de juiste medische supervisie conform
het beleid van uw instellin.
INSPECTIE: Visuele inspectie voorafgaand aan elk gebruik; controleer op losse stiksels, defecte
onderdelen of gescheurd, in- of afgeknipt of rafelig materiaal. Vuile of beschadigde producten
NIET gebruiken.
VERWIJDEREN: Trek de lipjes bij het verwijderen van de trachaeband niet met overmatige kracht
door de gleuf. Dit kan resulteren in onbedoelde extubatie of verschuiven van de buis. Als de gleuf te
klein is voor vlot verwijderen, knip het haakje en de lipsluiting dan af en trek de band voorzichtig los.
Voer het product af als de “haak” niet stevig aan de pluizige achterkant hecht.
Voer het product indien versleten of beschadigd af volgens het beleid van de instelling.
Afb. 1
Afb. 3
Afb. 2
FLEXIBELLE
SLANG
DRAAIMECHANISME
OF ELLEBOOGSTUK
WAARSCHUWING
WAARSCHUWING
Deve comunicar qualquer incidente grave relacionado com a utilização do dispositivo à TIDI Products e à autoridade competente do Estado-Membro.
Traduções deste documento em francês, espanhol, holandês, alemão, italiano e português encontram-se emwww.tidiproducts.com/IFU.
Faixa de xação Posey® – 8196S, 8196M, 8196L
© Posey Products, LLC. Todos os direitos reservados.
TIDI Products, LLC • 570 Enterprise Drive, Neenah, WI 54956 EUA
Telefone: 1.800.447.6739 • Internacional: +1.920.751.4036 • www.tidiproducts.com
PT
MDSS GmbH
Schigraben 41
30175 Hannover,
Alemanha
CE REP
UK Pessoa responsável
Emergo Consulting (UK) Limited
c/o Cr360 – UL International
Compass House, Vision Park Histon
Cambridge CB249BZ
Reino Unido
Deve comunicar qualquer incidente grave relacionado com a utilização do dispositivo à TIDI Products e à autoridade competente do Estado-Membro.
Traduções deste documento em francês, espanhol, holandês, alemão, italiano e português encontram-se emwww.tidiproducts.com/IFU.
© Posey Products, LLC. Todos os direitos reservados.
TIDI Products, LLC • 570 Enterprise Drive, Neenah, WI 54956 EUA
Telefone: 1.800.447.6739 • Internacional: +1.920.751.4036 • www.tidiproducts.com
PT
MDSS GmbH
Schigraben 41
30175 Hannover,
Alemanha
CE REP
UK Pessoa responsável
Emergo Consulting (UK) Limited
c/o Cr360 – UL International
Compass House, Vision Park Histon
Cambridge CB249BZ
Reino Unido
Faixa de xação Posey® – 8196S, 8196M, 8196L
FAIXA DE FIXAÇÃO POSEY PARA TUBO DE TRAQUEOSTOMIA
(uma dúzia por caixa):
8196S SPequeno, 18-23 cm (7-9”)
8196M Médio, 23-35 cm (9-14”)
8196L Grande, 33-48 cm (13-19”)
DESCRIÇÃO DO PRODUTO: Faixa de xação Posey para tubo de
traqueostomia: Três tamanhos ajustam-se a doentes desde pequenos
bebés prematuros a adultos grandes. Assegure um ajuste adequado antes
da utilização.
UTILIZAÇÃO PRETENDIDA: A faixa de xação Posey é utilizada para manter
um tubo traqueal no lugar.
CONTRAINDICAÇÕES: Nenhuma
INSTRUÇÕES DE APLICAÇÃO:
1. Ene a ta com a face dos “ganchos” através de uma ranhura do tubo de
traqueostomia e prenda o fecho dos “ganchos” à face felpuda da almofada
ou cinta do pescoço (Ver a Fig. 1). A ranhura deve ter pelo menos 1 cm (3/8”)
para permitir uma fácil inserção.
2. Coloque o colar cervical de espuma atrás do pescoço do doente e ene
a ta com a face dos “ganchos” através de outra ranhura no tubo da
traqueostomia. Prenda o fecho com a face dos “ganchos” à face felpuda da
cinta ou do colar cervical.
3. Cruze as faixas de xação brancas por baixo do conector do doente
(adaptador giratório) ou do tubo exível que se prende ao tubo de
traqueostomia (Ver a Fig. 2).
4. Agarrando ambas as extremidades da faixa de xação, passe sobre a parte
superior do conector do doente (adaptador giratório/cotovelo) ou tubo
exível. A faixa de xação pode ser presa neste ponto com um único nó ou
laço ao redor do conector do doente, conforme ilustrado (Ver a Fig. 3).
M1395 REV D 2022-01-26
MONITORIZAÇÃO: Siga sempre as normas e as orientações da sua instituição quanto à
frequência de monitorização dos doentes, para obter uma adequada aplicação do produto e
garantir a integridade da pele. Monitorize SEMPRE os doentes atentamente para garantir que não
correm o risco de interromper o tratamento de socorrismo. Supervisão constante, monitorização
eletrónica e/ou a utilização de imobilização pode ser necessária em conjunto com uma
supervisão médica adequada de acordo com as normas da sua instituição.
INSPEÇÃO: Inspecione antes de cada utilização; verique quanto à presença de pontos ou
componentes danicados, material rasgado, cortadoou desgastado. NÃO utilize produtos sujos
ou danicados.
REMOÇÃO: Não force as abas através da ranhura quando remover a faixa de xação para
traqueostomia. Esta ação pode causar extubação ou deslocamento acidental do tubo. Se a
ranhura for demasiado pequena para permitir uma fácil remoção, corte a aba de velcro e puxe
a faixa de xação suavemente.
Descarte se a face dos “ganchos” não car bem presa à face felpuda.
Elimine o produto segundo as normas da instituição, se car gasto ou danicado.
FAIXA DE FIXAÇÃO POSEY PARA TUBO DE TRAQUEOSTOMIA
(uma dúzia por caixa):
8196S SPequeno, 18-23 cm (7-9”)
8196M Médio, 23-35 cm (9-14”)
8196L Grande, 33-48 cm (13-19”)
DESCRIÇÃO DO PRODUTO: Faixa de xação Posey para tubo de
traqueostomia: Três tamanhos ajustam-se a doentes desde pequenos
bebés prematuros a adultos grandes. Assegure um ajuste adequado antes
da utilização.
UTILIZAÇÃO PRETENDIDA: A faixa de xação Posey é utilizada para manter
um tubo traqueal no lugar.
CONTRAINDICAÇÕES: Nenhuma
INSTRUÇÕES DE APLICAÇÃO:
1. Ene a ta com a face dos “ganchos” através de uma ranhura do tubo de
traqueostomia e prenda o fecho dos “ganchos” à face felpuda da almofada
ou cinta do pescoço (Ver a Fig. 1). A ranhura deve ter pelo menos 1 cm (3/8”)
para permitir uma fácil inserção.
2. Coloque o colar cervical de espuma atrás do pescoço do doente e ene
a ta com a face dos “ganchos” através de outra ranhura no tubo da
traqueostomia. Prenda o fecho com a face dos “ganchos” à face felpuda da
cinta ou do colar cervical.
3. Cruze as faixas de xação brancas por baixo do conector do doente
(adaptador giratório) ou do tubo exível que se prende ao tubo de
traqueostomia (Ver a Fig. 2).
4. Agarrando ambas as extremidades da faixa de xação, passe sobre a parte
superior do conector do doente (adaptador giratório/cotovelo) ou tubo
exível. A faixa de xação pode ser presa neste ponto com um único nó ou
laço ao redor do conector do doente, conforme ilustrado (Ver a Fig. 3).
MONITORIZAÇÃO: Siga sempre as normas e as orientações da sua instituição quanto à
frequência de monitorização dos doentes, para obter uma adequada aplicação do produto e
garantir a integridade da pele. Monitorize SEMPRE os doentes atentamente para garantir que não
correm o risco de interromper o tratamento de socorrismo. Supervisão constante, monitorização
eletrónica e/ou a utilização de imobilização pode ser necessária em conjunto com uma
supervisão médica adequada de acordo com as normas da sua instituição.
INSPEÇÃO: Inspecione antes de cada utilização; verique quanto à presença de pontos ou
componentes danicados, material rasgado, cortadoou desgastado. NÃO utilize produtos sujos
ou danicados.
REMOÇÃO: Não force as abas através da ranhura quando remover a faixa de xação para
traqueostomia. Esta ação pode causar extubação ou deslocamento acidental do tubo. Se a
ranhura for demasiado pequena para permitir uma fácil remoção, corte a aba de velcro e puxe
a faixa de xação suavemente.
Descarte se a face dos “ganchos” não car bem presa à face felpuda.
Elimine o produto segundo as normas da instituição, se car gasto ou danicado.
ADAPT ADOR
GIRATÓRIO OU
COTOVELO
TUBO
FLEXÍVEL
Fig. 1
Fig. 2
Fig. 3
AVISO
ADAPT ADOR
GIRATÓRIO OU
COTOVELO
TUBO
FLEXÍVEL
Fig. 1
Fig. 2
Fig. 3
AVISO
  • Page 1 1
  • Page 2 2
  • Page 3 3
  • Page 4 4
  • Page 5 5
  • Page 6 6
  • Page 7 7

Posey 8196 Istruzioni per l'uso
Tipo
Istruzioni per l'uso
Di seguito troverete brevi informazioni per 8196S, 8196M, 8196L. Questi laccetti di fissaggio Posey per cannula tracheostomica sono disponibili in tre taglie per adattarsi a neonati prematuri fino ad adulti di grossa corporatura. Il loro scopo è quello di tenere in posizione una cannula tracheale. Per l'applicazione, si infila la chiusura a gancio attraverso un'asola della cannula e si fissa al cuscinetto del collo, si incrociano i laccetti sotto il connettore del paziente e si legano sopra di esso. È fondamentale seguire attentamente le politiche della struttura per il monitoraggio del paziente, l'applicazione del prodotto e l'integrità cutanea. Controllare sempre il prodotto per eventuali danni prima dell'uso e non forzare la rimozione della chiusura.