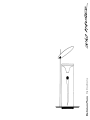
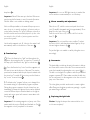
Ingo Maurer Delirium Yum Istruzioni per l'uso
- Tipo
- Istruzioni per l'uso

Delirium Yum Instructions

2 3
Montageanleitung
Bitte vor der Montage aufmerksam lesen und sorg-
fältig aufbewahren!
Instructions for assembly
Please read these instructions carefully before going
any further, and keep them in a safe place for future
reference!
Instructions de montage
Alire attentivement avant le montage et à conserver
soigneusement!
Istruzioni di montaggio
Prima del montaggio leggere attentamente le pre-
senti istruzionieconservarle!
Deutsch Seite 4
English Page 9
Français Page 13
Italiano Pagina 18
Zeichnungen Seite 23
Drawings Page 23
Dessins Page 23
Disegni Pagina23

Befüllen und Aufstellen der Vase
Füllen Sie die Vase bis 5 cm unter die Oberkante mit
destilliertem Wasser (ca. 14 l) und stellen Sie sie vorsich-
tig auf die Mitte der Basis. 3
Wichtig: Die Vase niemals bis zum Rand füllen! Wir emp-
fehlen die Verwendung von destilliertem Wasser, um die
Bildung von Kalkrändern zu vermeiden. Destilliertes Wasser
ist kein Trinkwasser!
Geben Sie 1 Tablette Micropur ins Wasser. Micropur konser-
viert klares Wasser bis zu 6 Monaten. Es deaktiviert Bakterien
und verhindert die Geruchsbildung. Die Wirkung von Micropur
beruht auf der bakteriostatischen und bakteriziden Eigenschaft
von Silber: Silberionen setzen sich an den Zellwänden von
Mikroorganismen fest und verhindern so deren Wachstum.
Lassen Sie den weißen Magnetstab (4)ins Wasser gleiten.
Er wird sich von selbst in der Mitte des Vasenbodens zen-
trieren. 4
Bedienung und Tastenbelegung
:Drücken Sie zuerst die Funktionstaste “Licht” und
stellen Sie dann die gewünschte Helligkeit ein, indem Sie
die Plus- oder Minus-Taste betätigen. Zum Ausschalten
drücken Sie die Funktionstaste “Licht” ein zweites Mal. 5
:Drücken Sie die Funktionstaste “Motor”, und der
Magnetstab beginnt sich am Boden der Vase zu drehen.
Die Drehgeschwindigkeit lässt sich mit der Plus-Taste stei-
gern und mit der Minus-Taste reduzieren. Zum Abschalten
des Motorsdrücken Sie die Funktionstaste “Motor” ein
zweites Mal. 5
P:Mit der Funktionstaste “Programm” können Sie von der
manuellen Einstellung zu einem vorinstallierten Programm-
ablauf wechseln. Während das Programm abläuft, sind die
Achtung: Schließen Sie die Lampe erst nach der Montage
an das Netz an!
Wichtig: Der eingebaute Motor erzeugt ein Magnetfeld,
das sich auf magnetische oder metallische Teile auswirken
kann (z.B. Datenträger, Herzschrittmacher, Uhren etc.).
Halten Sie diese Teile unbedingt von der Lampe fern.
Achtung: Die Leuchte darf nur auf geradem Untergrund
ohne Gefälle aufgestellt werden. Lassen Sie niemals Kinder
oder Tiere unbeaufsichtigt in die Nähe der Lampe!
Einsetzen des Leuchtmittels
Achtung: Das beiliegende Leuchtmittel nicht mit bloßen
Händen berühren (Einbrenngefahr)!
Wichtig: Achten Sie darauf, dass sich keine magnetisierbaren
Metallteile in unmittelbarer Nähe des Motorgehäuses (3)
befinden!
Setzen Sie das Leuchtmittel in die Fassung (1) ein und
achten Sie auf korrekten Sitz. 1
Legen Sie die Corianplatte (2)mit der Oberseite nach
unten auf eine weiche Unterlage. Setzen Sie das Motor-
gehäuse (3)in die Vertiefung der Corianplatte (2)ein und
drücken Sie es gleichmäßig nach unten, bis es hörbar ein-
rastet. Achten Sie darauf, dass das Gehäuse beim Einsetzen
nicht verkantet. 2
Stecken Sie das Netzkabel in die Buchse des Transformators
und den Stecker des Trafokabels in die Buchse des Motor-
gehäuses.
Wichtig: Betreiben Sie die Leuchte nicht ohne die mit
Wasser gefüllte Vase.
DeutschDeutsch
4
4
4
4
Deutsch
5
4
4
4

auf dem Magnetstab aufsitzt; er könnte aus dem Zentrum
springen.
Mit beiliegendem Silber-Glitter können Sie einen Glitzer-
effekt im Wasser erzeugen. Bitte verwenden Sie das
Glitterpulver äußerst sparsam. Eine kleine Prise pro
Wasserfüllung genügt.
Wechsel des Leuchtmittels
Achtung: Den Netzstecker ziehen und die Lampe voll-
ständig abkühlen lassen!
Heben Sie die Vase vorsichtig von der Basis herunter, zie-
hen Sie den Stab mit dem Spiegel aus der Bohrung und
legen Sie die Corianplatte (2) mit der Oberseite nach
unten auf eine weiche Unterlage.
Wichtig: Achten Sie darauf, dass sich keine magnetisierbaren
Metallteile in unmittelbarer Nähe des Motorgehäuses (3)
befinden!
Öffnen Sie das Motorgehäuse (3), indem Sie das Gehäuse
mit beiden Händen gleichmäßig nach oben ziehen, wie in
Zeichnung 9 gezeigt.
Verfahren Sie weiter wie unter “Einsetzen des Leucht-
mittels” beschrieben. 1
Pflege
Verwenden Sie für die Basis ein mildes Spülmittel, jedoch
keine lösungsmittelhaltigen Reiniger.
Wir empfehlen, das destillierte Wasser alle 3 Monate zu
wechseln.Verwenden Sie jedes Mal beiliegende Micropur
Tabletten, wie unter “Befüllen und Aufstellen der Vase”
beschrieben.
Plus/Minus-Tasten deaktiviert. Licht und Motor können je-
doch aus- und wieder eingeschaltet werden. Bei erneutem
Betätigen der Programm-Taste setzen Lichtintensität und
Motordrehzahl dem Programm entsprechend wieder ein. 5
Wichtig: Sollte der rotierende Magnetstab aus dem
Zentrum springen, schalten Sie den Motor aus und gleich
darauf erneut an (2x ): der Magnetstab springt wieder
ins Zentrum zurück.
Wichtig: Sobald eine Lichtintensität von ca. 40% erreicht
ist, schaltet sich automatisch der Motor ein, um das Gerät
zu kühlen.
Montage und Einstellen des Spiegels
Nehmen Sie den Stab (5) mit dem Spiegel und schieben
Sie das Silikongelenk (6) vorsichtig nach unten, bis es etwa
10 cm vor dem Stabende sitzt. 6
Stecken Sie den Stab (5) in die vorgesehene Bohrung der
Basis (1). 7
Wichtig: Fassen Sie nicht in die Spiegelfläche.Um den
Spiegel einzurichten, greifen Sie ihn mit Daumen und
Zeigefinger an Oberseite und Kante, wie in Zeichnung 8
dargestellt.
Projizieren Sie das Licht auf den Tisch oder an eine Wand,
indem Sie den Spiegel entsprechend neigen.
Zubehör
Die beiliegende Kunststoffkugel kann ins Wasser gesetzt
werden und wird sich im Zentrum der Vase auf und ab
bewegen. Die Bewegung lässt sich manuell mit der Motor-
drehzahl steuern ( , +/–). Für den vorinstallierten Pro-
grammablauf (P) ist der Einsatz der Kugel nicht vorgesehen.
Achten Sie bitte darauf, dass die Kugel nicht kontinuierlich
7
DeutschDeutsch
6
Deutsch
4
4
4
4
4
4
4
4

9
Caution: Do not connect the lamp to the power supply
until the assembly is completed.
Important: The built-in motor creates a magnetic field
which may affect magnetic or metallic parts (e.g. data
carriers, pacemakers or watches).These must be kept
away from the lamp.
Caution: The lamp must stand on a flat surface, with no
gradient. Do not leave animals or children unsupervised
near the lamp!
Inserting the light bulb
Caution: Do not touch the bulb with your bare hands
(risk of fingermark damage)!
Important: Ensure that there are no magnetisable metal
parts in the immediate vicinity of the motor housing (3).
Insert the bulb in the socket (1) and ensure that it is firmly
in position. 1
Lay the Corian plate (2) upside-down on a cushioned sur-
face.Fit the motor housing (3) in the recess of the base (2)
and press it down gently until it clicks into position. Make
sure that the housing does not become wedged or jammed
when it is inserted. 2
Plug the power cable into the socket on the transformer,
and the transformer cable into the socket on the motor
housing.
Important: Never operate the lamp without the water-
filled vase.
Filling and setting up the vase
Fill the vase with distilled water (approx. 14 l) up to 5 cm
below the rim and carefully place it at the centre of the
English
Technische Daten
230/125 Volt, max. 35 Watt Halogen, Sockel GU4.
Eventuell notwendige Reparaturen dürfen nur von einer
Elektrofachkraft durchgeführt werden. Die äußere Leitung
darf bei Beschädigung nur von der Ingo Maurer GmbH
ausgetauscht werden.
Deutsch
8
4
4
4
4
4
4

Important: As soon as 40% light intensity is reached, the
motor switches on automatically to cool the lamp.
Mirror assembly and adjustment
Take the rod (5) with the mirror and push the silicone
joint (6) carefully downwards until it is approximately 10 cm
away from the end of the rod. 6
Push the end of the rod (5) into the drill hole in the
base (1). 7
Important: Do not touch the mirror surface. To adjust
the mirror, hold it with thumb and index finger by its top
side and edge as shown in fig. 8.
Project the light onto a table or wall by tilting the mirror
accordingly.
Accessories
The plastic ball provided can be put in the water to bob up
and down at the centre of the vase.The movement can be
controlled manually by adjusting the motor speed ( , +/–).
The ball is not designed for operation with the pre-installed
program sequence (P). Please make sure that the ball does
not sit continuously on the magnetic rod, as the rod could
jump out of the centre.
The silver glitter provided can be used to create a glitter
effect. Please use the glitter powder very sparingly – a pinch
per water-filling is sufficient.
Replacing the light bulb
Caution: Unplug the lamp at the mains and allow it to
cool down completely!
English
11
lamp base. 3
Important: Never fill the vase up to the brim! We recom-
mend using distilled water to avoid limescale formation.
Distilled water is not suitable as drinking water!
Add one Micropur tablet to the water. Micropur preserves
water for up to six months, purifying it of bacteria and pre-
venting odour formation. The effect of Micropur is based on
the bacteriostatic and bactericidal properties of silver: silver
ions attach to the cell walls of micro-organisms and thus
prevent their growth.
Let the white magnetic rod (4) slide into the water. It will
automatically centre in the bottom of the vase. 4
Function keys
:Press the function key “light” and then adjust the
brightness by pressing the plus or minus key.To switch off
the lamp, press the function key “light” a second time. 5
:Press the function key “motor” and the magnetic rod
will start to turn at the bottom of the vase.The rotation
speed can be increased with the plus key and reduced with
the minus key. To switch off the motor, press the function
key “motor” a second time. 5
P :The function key “program” allows you to change from
the manual setting to a preinstalled program sequence.
During the program sequence, the plus /minus keys are
deactivated. However, the light and motor can be switched
on and off. When they are switched back on, the light in-
tensity and motor speed will resume in accordance with
the program. 5
Important: If the rotating magnetic rod jumps out of the
centre,switch the motor off briefly and then back on (2x ):
the magnetic rod will jump back to the centre.
English
10
4
4
4
4
4
4
4
4

Attention: ne connecter la lampe au réseau électrique
qu’une fois le montage terminé!
Important: le moteur incorporé produit un champ mag-
nétique qui peut influencer des parties magnétiques ou
métalliques (p.ex. supports de données, stimulateurs car-
diaques, montres etc.).Tenir obligatoirement ces parties
éloignées de la lampe.
Attention: prière d’installer la lampe uniquement sur une
surface horizontale sans aucune inclinaison. Ne jamais lais-
ser des enfants ou animaux non surveillés à proximité de
la lampe!
Insertion de l’ampoule
Attention: ne pas toucher l’ampoule ci-jointe à main nue
(danger de brûlure)!
Important: veiller à ce qu’aucune partie métallique pou-
vant être magnétisée ne se trouve à proximité immédiate
du boîtier (3) du moteur!
Insérer l’ampoule dans la douille (1) et vérifier qu’elle soit
bien positionnée.1
Poser la plaque en Corian (2) sur une surface souple, la
surface supérieure tournée vers le bas. Placer le boîtier
du moteur (3) dans la cavité de la plaque en Corian (2)
et le pousser uniformément vers le bas jusqu’à ce qu’il
s’enclenche d’une manière perceptible.Vérifier que le
boîtier ne soit pas penché lors de son insertion. 2
Insérer le câble électrique dans la douille du transformateur
et la fiche du câble du transformateur dans la douille du
boîtier du moteur.
Important: ne pas faire fonctionner la lampe sans le vase
rempli d’eau.
Français
13
Carefully lift the vase off the base, pull the rod with the
mirror out of the drill hole and lay the Corian plate (2)
upside-down on a cushioned surface.
Important: Ensure that there are no magnetisable metal
parts in the immediate vicinity of the motor housing (3).
Open the motor housing (3) by lifting it evenly with both
hands, as shown in fig. 9.
Proceed as described above under “Inserting the light
bulb”. 1
Cleaning
The base can be cleaned with a mild detergent. Do not
use cleaners containing solvents.
The distilled water should be replaced every three months.
Use the Micropur tablets supplied, as described under
“Filling and setting up the vase”, every time you replace
the water.
Technical specifications
230/124 V, max. 35 W halogen, GU4 base.
Any repairs that may become necessary must be carried
out by a qualified electrician. In case of damage, the external
power cable may only be replaced by Ingo Maurer GmbH.
12
English
4
4
4
4
4
4

éteints ou être rallumés. En réactivant la touche ‘programme’,
l’intensité lumineuse et la vitesse du moteur se remettent
en marche selon le programme. 5
Important: si la tige magnétique rotative venait à sauter
du centre, éteindre le moteur et le rallumer de suite (2x ):
la tige magnétique saute à nouveau vers le centre.
Important: dès qu’une intensité lumineuse d’env. 40% est
atteinte, le moteur se met en route automatiquement pour
refroidir l’appareil.
Montage et réglage du miroir
Prendre la tige (5) avec le miroir et déplacer prudemment
la jointure en silicone (6) vers le bas à fin que celle-ci soit
positionnée environ à 10 cm avant l’extrémité de la tige. 6
Insérer la tige (5) dans le perçage de la base (1) prévu à
cet effet. 7
Important: ne pas saisir le miroir par la surface. Pour
régler le miroir, le saisir par le pouce et l’index au niveau
du bord supérieur,comme au dessin 8.
Projeter la lumière sur la table ou sur un mur par inclinaison
du miroir.
Accessoires
La balle de matière plastique ci-jointe peut-être placée
dans l’eau; elle se déplacera au centre du vase de haut en
bas. Le mouvement peut être commandé manuellement
par la vitesse du moteur ( , +/–). Pour le déroulement
du programme (P) défini, une utilisation de la sphère n’est
pas prévue.Vérifier que la balle ne repose pas continuelle-
ment sur la tige magnétique; elle pourrait sauter du centre.
Au moyen de paillettes d’argent ci-jointes, il est possible
Français
15
Remplir et positionner le vase
Remplir le vase jusqu’à 5 cm en-dessous du bord supérieur
avec de l’eau distillée (env. 14 l) et le positionner prudem-
ment sur le milieu de la base. 3
Important: ne jamais remplir le vase jusqu’au bord! Nous
recommandons l’utilisation d’eau distillée pour éviter la
formation de dépôts calcaires. L’eau distillée n’est pas
potable!
Ajouter 1 pastille Micropur dans l’eau. Micropur conserve
l’eau claire jusqu’à 6 mois. Il empêche la formation de bac-
téries et d’odeurs. L’effet de Micropur provient de la propriété
bactériostatique et bactéricide de l’argent: les ions d’argent
se posent sur les membranes cellulaires de micro-organismes
et empêchent ainsi leur croissance.
Laisser descendre la tige (4) magnétique blanche dans
l’eau. Elle se dirigera elle-même vers le centre du socle du
vase. 4
Commande et programmation des touches
:appuyer tout d’abord sur la touche ‘lumière’, puis
régler l’intensité désirée en utilisant la touche ‘+/–’. Pour
éteindre la lumière appuyer sur la touche ‘lumière’ une
deuxième fois. 5
:appuyer sur la touche ‘moteur’; la tige magnétique
commence à tourner sur le socle du vase. La vitesse de
rotation peut être augmentée par la touche ‘+’et dimi-
nuée par la touche ‘–’. Pour éteindre le moteur appuyer
sur la touche ‘moteur’ une deuxième fois. 5
P :il est possible de passer du réglage manuel à un pro-
gramme défini grâce à la touche ‘programme’. Lors du
déroulement du programme, les touches +/– sont dé-
activées. La lumière et le moteur peuvent être toutefois
Français
14
4
4
4
4
4
4
4
4

Français
de produire un effet scintillant dans l’eau. Utiliser la poudre
de paillettes avec parcimonie. Une petite prise par plein
d’eau suffit.
Changement de l’ampoule
Attention: retirer la prise et laisser refroidir la lampe
complètement!
Enlever prudemment le vase de la base en le soulevant
et retirer la tige avec miroir du perçage et poser la plaque
en Corian (2) sur une surface souple, la face supérieure
tournée vers le bas.
Important: faire attention à ce qu’aucune partie métalli-
que pouvant être magnétisée ne se trouve à proximité
directe du boîtier du moteur (3)!
Ouvrir le boîtier (3) du moteur en tirant uniformément le
boîtier à deux mains vers le haut, comme au point 9.
Procéder de même qu’au point ‘Insertion de l’ampoule’. 1
Entretien
Utiliser pour la base un produit nettoyant doux, toutefois
pas de nettoyant à base de détergent.
Nous recommandons de changer l’eau distillée tous les
3 mois. Utiliser chaque fois les pastilles Micropur ci-jointes,
comme décrit au point ‘Remplir et positionner le vase’.
Données techniques
230/125 volts, max. 35 watts halogène, culot GU4.
Des réparations éventuellement nécessaires ne sont à
effectuer que par un spécialiste. Si le câble électrique
externe est endommagé, il doit être obligatoirement rem-
16
4
4
4
4
4
4
placé par la société Ingo Maurer GmbH.
Français
17

Attenzione: Montate la lampada prima di collegarla alla
rete elettrica!
Importante: Il motore della lampada genera un campo
magnetico che può influenzare oggetti magnetici o metallici
(p.e. supporti di dati, stimolatori cardiaci, orologi etc.).
Tenete questi oggetti lontani dalla lampada!
Attenzione: Posizionare la lampada solo su una superficie
piana senza pendenza. Non lasciate mai i bambini o animali
nei pressi della lampada senza sorveglianza!
Inserimento della lampadina
Attenzione: Non toccate la lampadina con le mani (si pos-
sono creare zone scure quando si scalda)!
Importante: Controllate che nessun oggetto di metallo
magnetizzabile si trovi nelle immediate vicinanze della sca-
tola del motore (3)!
Inserite la lampadina nel suo portalampada (1) controllando
che sia posizionata correttamente.1
Posizionare la lastra in Corian (2) a testa in giù su una
superficie soffice. Sistemate la scatola del motore (3)
nell’apposita cavità della lastra in Corian (2) e spingete
uniformemente finché non sentite uno scatto evidente.
Controllate che durante l’inserimento, la scatola non si sia
incastrata su un angolo.2
Inserite il cavo di alimentazione nella presa del trasforma-
tore e la spina del cavo trasformatore nella presa della
scatola del motore.
Importante: Non accendete la lampada senza il vaso
riempito di acqua.
Riempimento e posizionamento del vaso
Riempite il vaso fino a 5 cm dal bordo superiore con acqua
distillata (ca. 14 l) e posatelo delicatamente nel centro della
base. 3
Importante: Non riempite mai il vaso fino al bordo su-
periore! Consigliamo l’uso di acqua distillata per evitare la
formazione di depositi di calcare. L’acqua distillata non è
potabile!
Mettete 1 pastiglia di Micropur nell’acqua. Micropur la man-
tiene limpida per 6 mesi. Questo prodotto neutralizza i batteri
impedendo la formazione di odori sgradevoli. L’azione di
Micropur si basa sulle qualità battericida e batteriostatiche
dell’argento: Ioni di argento si depositano sulle pareti delle
cellule dei microrganismi e ne impediscono così la prolifera-
zione.
Mettete ora la barretta magnetica bianca (4) nell’acqua e
lasciatela scendere liberamente sul fondo del vaso, si fermerà
da sola nel centro della base.4
Comandi e funzioni dei tasti
:Schiacciate prima il tasto “Luce” e poi regolate la lumi-
nosità a piacere agendo sui tasti PIÙ e MENO. Per spegnere
la luce schiacciate una seconda volta il tasto “Luce”.
:Schiacciate il tasto “Motore” e la barretta magnetica
comincerà a ruotare sul fondo del vaso. La velocità di rota-
zione viene regolata agendo sul tasto MENO per diminuire
e sul tasto PIÙ per aumentare. Per spegnere il motore
schiacciare una seconda volta sul tasto “Motore”. 5
P :Con il tasto “Programma” si può passare dal controllo
manuale ad una serie di programmi preinstallati. Durante
l’esecuzione dei programmi, i tasti +/– sono disattivati.
Luce e motore possono invece essere spenti. Al momento
4
4
Italiano
19
4
4
18
Italiano
4
4

della successiva accensione, l’intensità luminosa e la velo-
cità del motore saranno come da programma in corso al
momento dello spegnimento. 5
Importante: Se la barretta magnetica, mentre ruota, doves-
se scappare dal centro, spegnete il motore e riancendetelo
di nuovo (2x ): la barretta ri riposizionerà nel centro.
Importante: Non appena sarà raggiunta un’intensità lumi-
nosa del 40 % ca., il motore si accenderà automaticamente
per raffreddare il sistema.
Montaggio e regolazione dello specchio
Prendete l’asta (5) con lo specchio e spingete lo snodo in
silicone (6) con delicatezza verso il basso fino a 10 cm dalla
cima. 6
Inserite l’asta (5) nel foro previsto nella base (1). 7
Importante: Non toccate la superficie a specchio con le
mani. Per regolare la posizione dello specchio, prendetelo
tra pollice e indice sullo spigolo o sulla parte superiore
come descritto sul disegno 8.
Proiettate la luce sul tavolo o sul muro inclinando lo
specchio in relazione.
Accessori
La sfera in plastica bianca può essere messa nell’acqua e
verrà spostata su e giù nel centro del vaso dal vortice for-
mato dalla rotazione della barretta. Questo spostamento
può essere regolato manualmente, agendo sulla velocità di
rotazione del motore ( , +/–). L’impiego della sfera non
è previsto nei programmi preinstallati (P). Controllate che
la sfera non tocchi continuamente la barretta magnetica,
che potrebbe scappare dal centro!
21
Con i brillantini argentati si può ottenere un effetto lucci-
cante nell’acqua. Vi preghiamo di usare questa polvere con
estrema parsimonia: una piccola presa di piastrine è suffi-
ciente per un pieno di acqua.
Sostituzione della lampadina
Attenzione: Staccare la spina e lasciare raffreddare com-
pletamente la lampadina.
Spostate con cautela il vaso dalla base, togliete l’asta dello
specchio dal suo foro nella base e posizionate la lastra in
Corian (2) a testa in giù su una superficie soffice.
Importante: Controllate che nessun oggetto di metallo
magnetizzabile si trovi nelle immediate vicinanze della sca-
tola del motore (3)!
Aprite la scatola del motore (3), alzando la scatola uniforme-
mente con entrambe le mani, come mostrato in figura 9 .
Procedere come indicato nel paragrafo “Inserirmento della
lampadina”. 1
Cura e manutenzione
Per la pulizia della base usate un prodotto detergente senza
solventi.
Vi consigliamo di sostituire l’acqua distillata ogni 3 mesi.
Aggiungere ad ogni cambio una pastiglia di Micropur come
indicato nel paragrafo “Riempimento e posizionamento
del vaso”.
Dati tecnici
230/125 Volt, max 35 Watt alogena, supporto GU4
Eventuali riparazioni possono essere eseguite esclusiva-
mente da un elettricista specializzato. Il cavo esterno
Italiano Italiano
20
4
4
4
4
4
4
4
4
4
4

23
1
2
1
3
2
– se danneggiato – può essere sostituito soltanto dalla
Ingo Maurer GmbH.
22

6
5
5
6
25
+
–P
Licht
Light
Lumière
Luce
Motor
Motor
Moteur
Motore
Plus
Plus
Plus
Più
Minus
Minus
Moins
Meno
Programm
Program
Programme
Programma
24
3
4
4

Ingo Maurer GmbH
Kaiserstrasse 47
80801 München
Germany
Tel. +49. 89. 381606-0
Fax +49. 89. 381606 20
info@ingo-maurer.com
www.ingo-maurer.com
November 2006 Made in Germany
F
Made in Germany
F
Made in Germany
9
3
7
8
26
1
5
-
 1
1
-
 2
2
-
 3
3
-
 4
4
-
 5
5
-
 6
6
-
 7
7
-
 8
8
-
 9
9
-
 10
10
-
 11
11
-
 12
12
-
 13
13
-
 14
14


Ingo Maurer Delirium Yum Istruzioni per l'uso
- Tipo
- Istruzioni per l'uso
in altre lingue
Documenti correlati
-
Ingo Maurer The Tribe: Watapunga Istruzioni per l'uso
-
-
-
-
-
-
-
-