
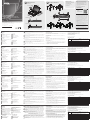
8/16-портовый однорельсовый PS/2-USB VGA KVM-коммутатор CL3108 / CL3116 уменьшенной глубины монтажа с широэкранным ЖК-дисплеем
www.aten.com
Switch KVM LCD widescreen a binario singolo PS/2-USB VGA a profondità ridotta da 8/16 porte CL3108 / CL3116
www.aten.com
Conmutador KVM LCD panorámico de un solo raíl PS/2-USB VGA de corta profundidad con 8/16 puertos CL3108 / CL3116
www.aten.com
CL3108 / CL3116 8/16-Port PS/2-USB VGA Single Rail Breitbild LCD KVM Switch mit kurzer Tiefe
www.aten.com
Commutateur KVM LCD grand écran à un rail VGA PS/2-USB faible profondeur 8/16 ports CL3108 / CL3116
www.aten.com
CL3108 / CL3116 8/16-Port Short Depth PS/2-USB VGA Single Rail WideScreen LCD KVM Switch
www.aten.com
© Copyright 2019 ATEN
®
International Co., Ltd.
ATEN and the ATEN logo are trademarks of ATEN International Co., Ltd. All rights reserved. All
other trademarks are the property of their respective owners.
This product is RoHS compliant.
Part No. PAPE-1223-R10G Printing Date: 05/2019
8/16-Port Short Depth PS/2-USB VGA
Single Rail WideScreen LCD KVM Switch
Quick Start Guide
CL3108 / CL3116
Support and Documentation Notice
All information, documentation, fi rmware,
software utilities, and specifi cations contained in
this package are subject to change without prior
notifi cation by the manufacturer.
To reduce the environmental impact of our
products, ATEN documentation and software can
be found online at
http://www.aten.com/download/
Technical Support
www.aten.com/support
이 기기는 업무용(A급) 전자파적합기기로서 판매자 또는 사용자는 이 점을
주의하시기 바라며, 가정외의 지역에서 사용하는 것을 목적으로 합니다.
Scan for
more information
EMC Information
FEDERAL COMMUNICATIONS COMMISSION INTERFERENCE
STATEMENT:
This equipment has been tested and found to comply with the limits
for a Class A digital device, pursuant to Part 15 of the FCC Rules.
These limits are designed to provide reasonable protection against
harmful interference when the equipment is operated in a commercial
environment. This equipment generates, uses, and can radiate radio
frequency energy and, if not installed and used in accordance with
the instruction manual, may cause harmful interference to radio
communications. Operation of this equipment in a residential area
is likely to cause harmful interference in which case the user will be
required to correct the interference at his own expense.
FCC Caution: Any changes or modifi cations not expressly approved by
the party responsible for compliance could void the user's authority to
operate this equipment.
Warning: Operation of this equipment in a residential environment
could cause radio interference.
This device complies with Part 15 of the FCC Rules. Operation is subject
to the following two conditions:(1) this device mat not cause harmful
interference, and(2) this device must accept any interference received,
including interference that may cause undesired operation.
A
Hardware Review
Front View
1
Handle
2
LCD Display
3
LED Illumination Light Pushbutton
4
LED Illumination Light
5
Port Selection Pushbutton / LEDs
(8 for CL3108, 16 for CL3116)
6
Keyboard
7
Touchpad
8
External Mouse Port/USB Peripheral Port
CL3108 Rear View
1
Power Socket
2
Power Switch
3
KVM Port Section
4
Grounding Terminal
B
Hardware Installation
A standard rack mounting kit is provided with your CL3108 / CL3116 and can be
mounted in 1U of rack space.
1
Attach the left and right mounting brackets to the back of the rack, installing four
screws in the tabs to secure them in place.
2
Two people insert the CL3108 / CL3116, by sliding its left and right side bars into
the mounting brackets.
3
While one person and the brackets hold the weight of the CL3108 / CL3116, have
a second person install four screws in the front tabs to secure the module to the
front of the rack.
Note: Allow at least 5.1 cm on each side for proper ventilation, and at least 12.7
cm at the back for the power cord and cable clearance.
4
Ground the CL3108 / CL3116 by connecting one end of a grounding wire to the
grounding terminal and the other end to a suitable grounded object.
5
Connect any available KVM port to a computer's keyboard, video and mouse ports
using the Custom KVM Cable Sets.
6
Plug the power cord into the CL3108 / CL3116 power socket and into a AC power
source.
Operation
Opening the Console
Pull on the Release Bar on the Upper Handle. Slide the console module out until it
clicks in place, and then raise the LCD Module lid.
Closing the Console
To close the console, lower the LCD Module until it lies fl at, and slide the full
console in.
OSD Functions
OSD functions are used to confi gure and control the OSD. For example, you can
rapidly switch to any port, scan selected ports, limit the list you wish to view,
designate a port as a quick view port, create or edit a port name, or make OSD
setting adjustments.
To access an OSD function:
1. Either click a function key fi eld at the top of the main screen, or press Activate
OSD Mode function keys (by default, press [Ctrl] twice) on the keyboard.
2. In the submenus, make your choice either by double-clicking it, or moving the
highlight bar to the choice and pressing [Enter].
3. Press [Esc] to return to the previous menu level.
9
Power LED
10
Lock LEDs
11
Reset Button
12
Firmware Upgrade Port
13
Firmware Upgrade Switch
14
LCD On/Off Button
15
LCD Controls
CL3116 Rear View
1
Power Socket
2
Power Switch
3
KVM Port Section
4
Grounding Terminal
Hotkey
To invoke Hotkey Setting Mode to do the following:
Number Lock and Minus Keys [Num Lock] + [-]
1. Hold down the [Num Lock] key.
2. Press and release the [-] key.
3. Release the [Num Lock] key.
Press [Esc] to exit Hotkey mode.
HSM Summary Table
Key Function
[number],
[Enter]
Switches access to the port corresponding to the entered number. [number]
= 01-08 (CL3108) or 01-16 (CL3116).
[F1] Enables Windows keyboard emulation (default)
[F2] Enables Mac keyboard emulation.
[F3] Enables Sun keyboard emulation.
[H] / [h] Changes Invoke Hotkey Mode to [Num Lock] + [-] (default) or [Ctrl] + [F12].
[F5] Resets (USB) keyboard and/or mouse.
[T] / [t]
Changes Activate OSD Mode to [Ctrl] [Ctrl] (default) or
[Scroll Lock] [Scroll Lock].
A
Package Contents
1 CL3108 /CL3116 LCD KVM Switch
with Standard Rack Mounting Kit
2 Custom KVM Cables
(VGA, USB; 1.8m/6ft)
1 Firmware Upgrade Cable
1 Power Cord
1 User Instructions
B
CL3108 Rear View
CL3116 Rear View
CL3108 Front View
Hardware Review
Hardware Installation
5
12
13
15
11
10
8
7
6
4
3
9
1
2
1
4
2 3
1
4
2 3
Press the Exit/Light pushbutton for
two seconds to turn the LED light
ON or Off. (Default: On)
EXIT I LIGHT
14
1
2
3
4
6
5
5
CL3116 (Rear)
Important. Before proceeding, download the Installation and
Operation Manual by visiting the website, www.aten.com and
navigating to the product page. The manual includes important
warnings, loading specifi cations and grounding instructions.
A
Aperçu du matériel
Vue de devant
1
Poignée
2
Écran LCD
3
Bouton-poussoir de lumière
d'illumination de LED
4
Lumière d'illumination de LED
5
Bouton-poussoir à sélection de port/LED
(8 pour CL3108, 16 pour CL3116)
6
Clavier
7
Pavé tactile
8
Port de souris externe/Port de
périphérique USB
Vue arrière du CL3108
1
Prise d'alimentation
2
Interrupteur
3
Section port KVM
4
Borne de mise à la terre
B
Installation du matériel
Votre commutateur CL3108 / CL3116 est fourni avec un kit de montage sur bâti
standard et peut ainsi être monté sur un bâti 1U.
1
Fixez les supports de montage gauche et droit à l'arrière du rack, en installant
quatre vis dans les languettes pour les fi xer en place.
2
Deux personnes insèrent le CL3108 / CL3116 en faisant glisser ses barres latérales
gauche et droite dans les supports de montage.
3
Pendant qu'une personne et les supports maintiennent le poids du CL3108 /
CL3116, demandez à une deuxième personne d'installer quatre vis dans les lan-
guettes avant pour fi xer le module à l'avant du rack.
Remarque : Laissez au moins 5,1 cm de chaque côté pour permettre une
ventilation adéquate et au moins 12,7 cm à l'arrière pour le cordon
d'alimentation et les câbles.
4
Reliez le CL3108/CL3116 à la terre en connectant une extrémité du fi l de terre à la
borne de mise à la terre et l'autre extrémité à un objet relié à la terre.
5
Connectez tout port KVM disponible aux ports clavier, vidéo et de souris d’un ordi-
nateur à l’aide de l’Ensemble de câbles KVM.
6
Branchez le cordon d'alimentation dans la prise d’alimentation du CL3108/CL3116
et dans une source d'alimentation secteur.
Fonctionnement
Ouverture de la console
Tirez sur la barre de déblocage sur la poignée supérieure. Faites glisser le module de la console
vers l'extérieur jusqu'à ce qu'il s'enclenche, puis soulevez le couvercle du module LCD.
Fermeture de la console
Pour fermer la console, abaissez le module LCD jusqu'à ce qu'il soit à plat et faites
glisser la console complète vers l'intérieur.
Fonctions OSD
Les fonctions OSD sont utilisées pour confi gurer et contrôler l’OSD. Par exemple,
vous pouvez rapidement passer d’un port à un autre, balayer les ports sélectionnés,
limiter la liste que vous souhaitez affi cher, désigner un port en tant que port à affi
chage rapide, créer ou modifi er un nom de port, ou ajuster le paramétrage de l’OSD.
Pour accéder à une fonction OSD :
1. Cliquez sur un champ de touches de fonction en haut de l’écran principal, ou
appuyez sur Activer les touches de fonction en mode OSD (par défaut, appuyez
deux fois sur [Ctrl]) sur le clavier.
2. Faites votre choix parmi les sous-menus qui apparaissent soit en cliquant sur l’un
d’entre eux soit en déplaçant la barre de surbrillance sur le sous-menu désiré puis
en appuyant sur [Entrée].
3. Appuyez sur [Echap] pour revenir au niveau de menu précédent.
9
LED d'alimentation
10
Verrouiller les LED
11
Bouton Redémarrer
12
Port de mise à niveau du
microprogramme
13
Commutateur de mise à niveau du
microprogramme
14
Bouton Marche / Arrêt LCD
15
Commandes LCD
Vue arrière du CL3116
1
Prise d'alimentation
2
Interrupteur
3
Section port KVM
4
Borne de mise à la terre
Raccourci
Pour invoquer le Mode de réglage des touches raccourcis à faire ce qui suit :
Touches Verrouillage numérique et Moins [Verr num] + [-]
1. Maintenez la touche [Verr num].
2. Appuyez et relâchez la touche [-].
3. Relâchez la touche [Verr num].
Pour quitter le mode Raccourcis clavier, il faut appuyer sur la touche [Echap].
Tableau récapitulatif HSM
Touche Fonction
[numéro],
[Entrée]
Bascule l’accès vers le port correspondant au numéro entré. [numéro] = 01-
08 (CL3108) ou 01-16 (CL3116).
[F1] Active l’émulation de clavier Windows (par défaut).
[F2] Active l’émulation de clavier Mac.
[F3] Active l’émulation de clavier Sun.
[H] / [h]
Modifi e Invoquer le mode de raccourcis en [Verr num] + [-] (par défaut) ou
[Ctrl] + [F12].
[F5] Réinitialise le clavier et/ou la souris (USB).
[T] / [t]
Modifi e Activer le mode OSD en [Ctrl] [Ctrl] (par défaut) ou
[Arrêt défi l] [Arrêt défi l].
A
Hardwareübersicht
Ansicht von vorne
1
Griff
2
LCD Anzeige
3
LED Lampe Drucktaste
4
LED-Lampe
5
Portauswahl Drucktaste / LEDs
(8 für CL3108, 16 für CL3116)
6
Tastatur
7
Touchpad
8
Externer Mausanschluss/USB-Peripherieanschluss
CL3108 Rückseite
1
Netzbuchse
2
Netzschalter
3
KVM-Anschlussauswahl
4
Erdungsanschluss
B
Hardwareinstallation
Zum Lieferumfang des CL3108 / CL3116 gehört ein Standard-Rackmontagekit, um
das Gerät in einem 1U-Einschub installieren zu können.
1
Befestigen Sie die linken und rechten Montagehalterungen an der Rückseite des
Racks und befestigen Sie sie mit vier Schrauben in den Laschen.
2
Zwei Personen setzen den CL3108 / CL3116 ein, indem sie seine linken und
rechten Seitenschienen in die Halterungen schieben.
3
Während eine Person und die Halterungen das Gewicht des CL3108 / CL3116
halten, lassen Sie eine zweite Person vier Schrauben in den vorderen Laschen
anbringen, um das Modul an der Vorderseite des Racks zu befestigen.
Hinweis: Lassen Sie auf jeder Seite mindestens 5,1 cm für eine gute Belüftung und auf
der Rückseite mindestens 12,7 cm für das Netzkabel und den Kabelabstand.
4
Erden Sie den CL3108 / CL3116, indem Sie ein Ende eines Erdungskabels mit dem
Erdungsanschluss und das andere Ende mit einem geeigneten geerdeten Objekt
verbinden.
5
Verbinden Sie jeden verfügbaren KVM-Anschluss mithilfe der benutzerdefi nierten
KVM-Kabelsets mit den Tastatur-, Video- und Mausports eines Computers.
6
Stecken Sie das Netzkabel in die CL3108 / CL3116 Netzbuchse und in eine
Wechselstromquelle.
Bedienung
Öffnen der Konsole
Ziehen Sie an der Entriegelungsleiste am oberen Handgriff. Schieben Sie das Konsolen-
modul heraus, bis es einrastet, und heben Sie dann den Deckel des LCD-Moduls an.
Schließen der Konsole
Um die Konsole zu schließen, senken Sie das LCD-Modul, bis es fl ach liegt, und
schieben Sie die gesamte Konsole hinein.
OSD-Funktionen
OSD-Funktionen werden verwendet, um das OSD zu konfi gurieren und zu steuern.
So können Sie z.B. schnell und einfach auf einen anderen Port umschalten, der
Reihe nach zwischen ausgewählten Ports umschalten lassen, die Liste der anzuzei-
genden Geräte einschränken, einen Port zur Schnellansicht festlegen, Portnamen
erstellen oder bearbeiten sowie die OSD-Einstellungen ändern.
So führen Sie eine OSD-Funktion aus:
1. Klicken Sie entweder auf ein Funktionstastenfeld oben auf dem Hauptbildschirm
oder drücken Sie "OSD-Modus Funktionstasten aktivieren" (standardmäßig zwei-
mal [Strg] drücken) auf der Tastatur.
2. Doppelklicken Sie in den erscheinenden Untermenüs auf die gewünschte Funktion,
oder verschieben Sie die Markierung auf sie. Drücken Sie anschließend die Taste [Enter].
3. Drücken Sie die Taste [Esc], um zur vorigen Menüebene zurückzukehren.
9
Netz-LED
10
LEDs sperren
11
Reset-Taste
12
Port für Firmware-Aktualisierung
13
Schalter für Firmware-Aktualisierung
14
LCD Ein/Aus-Taste
15
LCD-Bedienelemente
CL3116 Rückseite
1
Netzbuchse
2
Netzschalter
3
KVM-Anschlussauswahl
4
Erdungsanschluss
Schnelltaste
So rufen Sie den Tastenkombinationseinstellungsmodus auf, um Folgendes zu tun:
Tasten Num und Minus [Num] + [-]
1. Halten Sie die [Num Lock] Taste gedrückt.
2. Drücken Sie die Taste [-] und lassen Sie sie los.
3. Lassen Sie die [Num-Taste] los.
Drücken Sie die Taste [Esc], um den Hotkey-Modus zu beenden.
HSM-Übersichtstabelle
Taste Funktion
[Nummer],
[Enter]
Schaltet den Zugriff auf den Port entsprechend der eingegebenen Nummer
um. [Nummer] = 01-08 (CL3108) oder 01-16 (CL3116).
[F1] Aktiviert die Emulation der Windows-Tastatur (Standard)
[F2] Aktiviert die Mac-Tastaturemulation.
[F3] Aktiviert die Sun-Tastaturemulation.
[H] / [h] Ändert den Hotkey-Modus auf [Num Lock] + [-] (Standard) oder [Strg] + [F12].
[F5] Setzt die (USB-) Tastatur und/oder Maus zurück.
[T] / [t]
Ändert die Aktivierung des OSD-Modus auf [Strg][Strg] (Standard) oder
[Rollen] [Rollen].
A
Revisión de hardware
Vista frontal
1
Asa
2
Pantalla LCD
3
Pulsador de luz de iluminación LED
4
Luz de iluminación LED
5
Pulsador de selección de puerto / LED
(8 para CL3108, 16 para CL3116)
6
Teclado
7
Panel táctil
8
Puerto de ratón externo /
Puerto periférico USB
CL3108 Vista posterior
1
Entrada de alimentación
2
Interruptor de alimentación
3
Sección de puerto KVM
4
Toma de tierra
B
Instalación de hardware
Con el CL3108 / CL3116 se incluye un kit de montaje en rack estándar para poder
instalar el equipo en un espacio 1U del rack.
1
Acople los soportes de montaje izquierdo y derecho a la parte trasera del bastidor
e instale los cuatro tornillos en las lengüetas para mantenerlas en su sitio.
2
Dos personas deben insertar el CL3108 / CL3116, deslizando sus barras laterales
izquierda y derecha en los soportes de montaje.
3
Mientras una persona y los soportes sujetan el peso de la CL3108 / CL3116, una
segunda persona debe instalar los cuatro tornillos de las lengüetas traseras para
fi jar el módulo a la parte delantera del bastidor.
Nota: Deje al menos 5,1 cm a cada lado para una ventilación adecuada y al
menos 12,7 cm en la parte posterior para el cordón de alimentación y la
separación del cable.
4
Conecte a tierra el CL3108 / CL3116 conectando un extremo de un cable de
conexión a tierra con el terminal de conexión a tierra y el otro extremo con un
objeto conectado a tierra adecuado.
5
Conecte cualquier puerto KVM disponible a los puertos de teclado, vídeo y ratón
de un ordenador utilizando los Juegos de cables para KVM personalizados.
6
Conecte el cable de alimentación la entrada de alimentación del CL3108 / CL3116
y a la fuente de alimentación de CA.
Funcionamiento
Abrir la consola
Tire de la barra de liberación del asa superior. Saque el módulo de la consola hasta
que haga clic en su lugar y luego levante la tapa del módulo LCD.
Cerrar la consola
Para cerrar la consola, baje el módulo LCD hasta que quede en plano y deslice la
consola hasta introducirla por completo.
Funciones del OSD
Las funciones OSD sirven para confi gurar y controlar el menú en pantalla.
Por ejemplo, le permiten cambiar rápidamente al puerto deseado, conmutar
automáticamente entre los puertos seleccionados, limitar la lista que desee
visualizar, designar un puerto como puerto de vista rápida, crear o editar un nombre
de puerto o ajustar los parámetros del menú en pantalla.
Para acceder a una función del menú en pantalla:
1. Haga clic en un campo de botón de función de la parte superior de la pantalla
principal y pulse las teclas de función de activación del modo OSD (de forma
predeterminada, pulse [Ctrl] dos veces).
2. Seleccione la función deseada de los submenús que aparecen, haciendo doble
clic en ella o desplazando la barra resaltada sobre ella y pulse [Intro].
3. Pulse [Esc] para volver al nivel de menú anterior.
9
LED de alimentación
10
LEDs de bloqueo
11
Botón Restablecer
12
Puerto de actualización de fi rmware
13
Interruptor de actualización de
fi rmware
14
Botón de encendido/apagado de LCD
15
Controles LCD
CL3116 Vista posterior
1
Entrada de alimentación
2
Interruptor de alimentación
3
Sección de puerto KVM
4
Toma de tierra
Tecla de acceso rápido
Para invocar el Modo confi guración de teclas de acceso, haga lo siguiente:
Teclas Bloqueo numérico y Menos [Bloq Num] + [-]
1. Mantenga pulsada la tecla [Bloq Num].
2. Presione y suelte la tecla [-].
3. Suelte la tecla [Bloq Num].
Pulse la tecla [Esc] para salir del modo de teclas de acceso directo.
Tabla resumen HSM
Tecla Función
[número],
[Entrar]
Cambia el acceso al puerto correspondiente al número introducido. [número]
= 01-08 (CL3108) o 01-16 (CL3116).
[F1] Habilita la emulación de teclado de Windows (predeterminado)
[F2] Habilita la emulación de teclado Mac.
[F3] Habilita la emulación de teclado de Sun.
[H] / [h]
Cambia la invocación del modo de teclas de acceso directo a [Bloq Num] + [-]
(predeterminado) o [Ctrl] + [F12].
[F5] Restablece el teclado y/o el ratón (USB).
[T] / [t]
Cambia la activación del modo OSD a [Ctrl] [Ctrl] (predeterminado) o
[Bloq Despl] [Bloq Despl].
A
Descrizione hardware
Vista anteriore
1
Asa
2
Schermo LCD
3
Pulsante push luce di illuminazione LED
4
Luce di illuminazione LED
5
Pulsante push di selezione porta/LED
(8 per CL3108, 16 per CL3116)
6
Tastiera
7
Touchpad
8
Porta mouse esterno/Porta periferica USB
CL3108 Vista posteriore
1
Presa di alimentazione
2
Interruttore di accensione
3
Sezione porta KVM
4
Terminale di messa a terra
B
Installazione hardware
Con el CL3108 / CL3116 se incluye un kit de montaje en rack estándar para poder
instalar el equipo en un espacio 1U del rack.
1
Montare le staffe di montaggio sinistra e destra sul retro del rack inserendo le
quattro viti nelle linguette per fi ssarla in posizione.
2
Due persone inseriscono la CL3108 / CL3116, facendo scorrere le barre destra a e
sinistra nelle staffe di montaggio.
3
Con il CL3108 / CL3116 tenuto da una persona e dalle staffe, una seconda perso-
na deve installare le quattro viti nelle linguette anteriori per fi ssare il modulo alla
parte anteriore del rack.
Nota: Lasciare almeno 5,1 cm su ciascun lato per una corretta ventilazione e almeno
12,7 cm sul retro per il cavo di alimentazione e la distanza libera del cavo.
4
Mettere a terra il CL3108 / CL3116 collegando una estremità del cavo di messa a
terra al terminare di messa a terra dell'unità, e l'altra estremità a un oggetto con
messa a terra adeguato.
5
Collegare una porta KVM disponibile alla porta tastiera, video e mouse del compu-
ter utilizzando i seti di cavi KVM personalizzati.
6
Collegare il cavo di alimentazione alla presa di alimentazione del CL3108 / CL3116
e alla sorgente di alimentazione CA.
Funzionamento
Apertura della consolle
Sollevare la barra di rilascio sulla maniglia superiore. Spingere il modulo console verso
l'esterno fi nché non scatta in posizione, quindi sollevare il coperchio del modulo LCD.
Chiusura della console
Per chiudere la console, abbassare il modulo LCD fi no a quando è piatto, quindi
inserire completamente la console.
Funciones del OSD
Le funzioni OSD sono utilizzate per confi gurare e controllare l'OSD. Por ejemplo,
le permiten cambiar rápidamente al puerto deseado, conmutar automáticamente
entre los puertos seleccionados, limitar la lista que desee visualizar, designar un
puerto como puerto de vista rápida, crear o editar un nombre de puerto o ajustar
los parámetros del menú en pantalla.
Para acceder a una función del menú en pantalla:
1. Con il clic sul campo tasto funzione nella parte superiore della schermata prin-
cipale o premendo i tasti funzioni della Modalità OSD attiva (per impostazione
predefi nita, premere due volte [Ctrl]) sulla tastiera.
2. Seleccione la función deseada de los submenús que aparecen, haciendo doble
clic en ella o desplazando la barra resaltada sobre ella y pulse [Intro].
3. Pulse [Esc] para volver al nivel de menú anterior.
9
LED alimentazione
10
Blocco LED
11
Tasto di ripristino
12
Porta aggiornamento fi rmware
13
Interruttore aggiornamento fi rmware
14
Pulsante LCD On / Off
15
Controlli LCD
CL3116 Vista posteriore
1
Presa di alimentazione
2
Interruttore di accensione
3
Sezione porta KVM
4
Terminale di messa a terra
Tasto di scelta rapida
Per richiamare la modalità Impostazione tasti di scelta rapidi procedere come segue:
Teclas Bloqueo numérico y Menos [Bloq Num] + [-]
1. Tenere premuto il tasto [Bloc Num].
2. Premere e rilasciare il tasto [-].
3. Lasciare il tasto [Bloc Num].
Pulse la tecla [Esc] para salir del modo de teclas de acceso directo.
Tabella modalità HSM
Tasto Funzione
[numero],
[Invio]
Passa l'accesso alla porta corrispondente al numero inserito. [numero] = 01-
08 (CL3108) o 01-16 (CL3116).
[F1] Attiva l'emulazione della tastiera Windows (predefi nito)
[F2] Abilita l'emulazione tastiera Mac.
[F3] Abilita l'emulazione tastiera Sun.
[H] / [h]
Cambia Richiama modalità tasti rapidi su [Bloc Num] + [-] (predefi nito) o
[Ctrl] + [F12].
[F5] Ripristina la tastiera e/o il mouse (USB).
[T] / [t]
Cambia la Modalità OSD attiva su [Ctrl] [Ctrl] (predefi nito) o
[Bloc Scorr] [Bloc Scorr].
A
Обзор аппаратного обеспечения
Вид спереди
1
Ручка
2
ЖК-дисплей
3
Кнопка включения светодиодной
подсветки
4
Источник светодиодной подсветки
5
Кнопки/индикаторы выбора портов
(8 для CL3108, 16 для CL3116)
6
Клавиатура
7
Сенсорная панель (тач-пад)
8
Порт для внешней мыши / порт
для периферийных USB-устройств
CL3108 Вид сзади
1
Разъем питания
2
Переключатель питания
3
Область KVM-портов
4
Клемма заземления
B
Установка аппаратного обеспечения
В комплект поставки CL3108 / CL3116 входит стандартный набор для монтажа
в стойке, позволяющий произвести установку в отсеке стойки размером 1U.
1
Прикрепите левый и правый монтажный кронштейны к задним штангам
стойки, завернув четыре винта в петли для фиксации.
2
Установка CL3108 / CL3116 должны выполняться вдвоем, одновременным
задвиганием левой и правой боковой рельсы переключателя в крепежные
кронштейны.
3
Пока один человек удерживает консоль CL3108 / CL3116, закрепленную
на кронштейнах, второй человек спереди закрепляет модуль в стойке,
заворачивая четыре винта в передние петли.
Примечание: Оставьте минимум 5,1 см с каждой стороны для надлежа-
щей вентиляции и минимум 12,7 см с задней стороны для
подсоединения различных кабелей.
4
Заземлите CL3108 / CL3116, подсоединив один конец провода заземления
к клемме заземления, а другой конец — к надежно заземленному объекту.
5
С помощью наборов специальных KVM-кабелей подключите любой до-
ступный KVM-порт к портам клавиатуры, видео и мыши компьютера.
6
Подключите шнур питания к разъему питания CL3108 / CL3116 и к источни-
ку переменного тока.
Эксплуатация
Открытие консоли
Нажмите отпирающую пластину на верхней ручке. Вытяните модуль консо-
ли до характерного щелчка, после чего поднимите крышку ЖК-модуля.
Закрытие консоли
Для закрытия консоли полностью опустите ЖК-модуль и вдвиньте консоль внутрь.
Функции экранного меню
Функции экранного меню используются для настройки и управления. Напри-
мер, можно быстро переключаться между портами, сканировать выбранные
порты, ограничивать просматриваемый список, назначать порт в качестве
порта быстрого просмотра, создавать или редактировать имя порта или
менять настройки экранного меню.
Для доступа к функциям экранного меню:
1. Щелкните поле функциональных клавиш в верхней части главного
экрана, либо нажмите функциональные клавиши для активации режима
экранного меню (по умолчанию дважды нажмите [Ctrl]) на клавиатуре.
2. В появившихся подменю выберите нужный пункт, дважды щелкнув по
нему, или переместив на него курсор меню и нажав [Enter].
3. Для возвращения на предыдущий уровень меню нажмите [Esc].
9
Светодиодный индикатор питания
10
Индикатор клавиш Lock
11
Кнопка сброса
12
Порт для обновления встроенного ПО
13
Переключатель обновления
встроенного ПО
14
Кнопка вкл/выкл ЖК-дисплея
15
Кнопки управления ЖК-дисплеем
CL3116 Вид сзади
1
Разъем питания
2
Переключатель питания
3
Область KVM-портов
4
Клемма заземления
Клавиша быстрого вызова
Чтобы включить режим настройки с использованием клавиш быстрого вызова
(HSM), выполните следующие действия:
Используя комбинацию Number Lock и клавиши с минусом [Num Lock] + [-]
1. Нажмите и удерживайте клавишу [Num Lock].
2. Нажмите и отпустите клавишу [-].
3. Отпустите клавишу [Num Lock].
Нажмите [Esc], чтобы выйти из режима горячих клавиш.
Сводная таблица функций HSM
Клавиша Функция
[номер],
[Enter]
Переключает доступ к порту, соответствующему введенному номеру.
[номер] = 01–08 (CL3108) или 01–16 (CL3116).
[F1] Включает эмуляцию клавиатуры Windows (по умолчанию)
[F2] Включение эмуляции клавиатуры Mac.
[F3] Включение эмуляции клавиатуры Sun.
[H] / [h]
Изменяет сочетание клавиш для включения режима HSM на [Num
Lock] + [-] (по умолчанию) или [Ctrl] + [F12].
[F5] Сброс (USB) клавиатуры и (или) мыши.
[T] / [t]
Изменяет клавиши быстрого вызова для активации режима экранного
меню на [Ctrl] [Ctrl] (по умолчанию) или [Scroll Lock] [Scroll Lock].
La pagina si sta caricando...
-
 1
1
-
 2
2


in altre lingue
- English: ATEN CL3108 Quick start guide
- français: ATEN CL3108 Guide de démarrage rapide
- español: ATEN CL3108 Guía de inicio rápido
- Deutsch: ATEN CL3108 Schnellstartanleitung
- русский: ATEN CL3108 Инструкция по началу работы
- português: ATEN CL3108 Guia rápido
- polski: ATEN CL3108 Skrócona instrukcja obsługi
- 日本語: ATEN CL3108 クイックスタートガイド
- Türkçe: ATEN CL3108 Hızlı başlangıç Kılavuzu