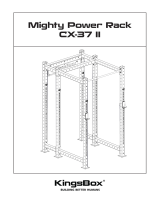
KingsBox KB01MI-012 Assembly Instructions
- Tipo
- Assembly Instructions

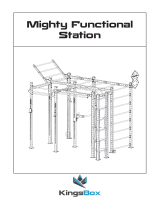
Mighty Outdoor
Mountain

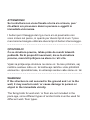
ATTENZIONE!
Se la struttura non viene ssata a terra e/o al muro, puo’
rib-altarsi e/o provocare danni a persone o oggetti in
immediata vicinnanza.
I bulloni per il ssaggio del rig a muro e/o al pavimento non
sono inclusi nel pacco, in quanto per diversi tipi di muro 7 pavi-
men-tazione bisogna utilizzare diversi tipi di bulloni d’ancoraggio.
_ _ _ _ _ _ _ _ _ _ _ _ _ _ _ _ _ _ _ _ _ _ _ _ _ _ _ _ _ _ _ _ _ _ _
OPOZORILO!
Če se struktura prevrne, lahko pride do resnih telesnih
poškodb. Da bi preprečili nevarnost, da se ta struktura
prevrne, mora biti pritrjena na steno in / ali v tla.
Vijaki za pritrjevanje strukture na steno oz. tla niso priloženi, saj
različne sestave zidov oz. tal zahtevajo različne vrste pritrdilnih
elementov. Uporabite take, ki ustrezajo sestavi vaše stene oz. tal.
_ _ _ _ _ _ _ _ _ _ _ _ _ _ _ _ _ _ _ _ _ _ _ _ _ _ _ _ _ _ _ _ _ _ _
WARNING!
If the structure is not secured to the ground and / or to the
wall, it may overturn and / or cause damage to person or
object in the immediate vicinity.
The xing bolts for wall and / or oor are not included in the
pack-age, since dierent types of anchor bolts must be used for
dier-ent wall / oor types.

Position 1
Position 4
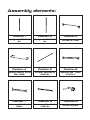
Upright F 2750 KB
Zn
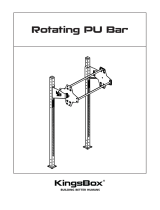
Monkey Mount S PU
Bar 1038
Upright F 3600 KB
Zn
PU Bar Monkey S
1700 Zn
PU Bar S 1700
Position 2
Position 5
Position 3
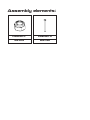
Assembly elements:
Monkey 65° 1700
Profile F
Position 6
Position 7
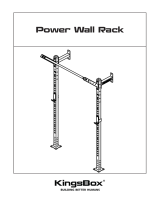
Universal Profile F
1100n
Universal Profile F
1700 Zn
Position 8
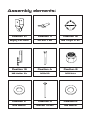
Crown Dip Bar
Position 9

Position 10
Position 13
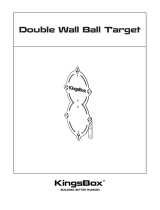
Mighty Iron Hand
WB Holder Zn
Pin Bolt fi 25
M12x110
WB Target III. Zn
Position 11
Position A
Position 12
Assembly elements:
M12 Nuts
Position B
Position C
M12 Washer M8x80 Torban
Position D
M8 Washer
Position E

Position F
M8 Nuts M12x120
Position G
Assembly elements:

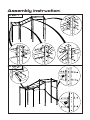
Assembly instruction:
B
C
B
B
C
C
C
A
A
2
8
A
A
B
B
C
8
G
A
6
2
G
A
5
6
B
C
C
1
C
G
7
C
A
G
A
B
B
7
B
C
C
1
C
C
AA
A
A
B
C
BC
3
C
C
A
2
A
B
C
CB
C
A
C
3
A
2
C
4
C
A
A
STEP: 1
STEP: 2

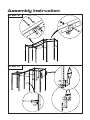
Assembly instruction:
B
C
12
8
C
A
A
AC
C
5
C
C
B
B
F
FE
E
12
13
D
D
BC
BC
C
A
CA
9
11
STEP: 3
STEP: 4
-
 1
1
-
 2
2
-
 3
3
-
 4
4
-
 5
5
-
 6
6
-
 7
7


KingsBox KB01MI-012 Assembly Instructions
- Tipo
- Assembly Instructions
Documenti correlati
-
 KingsBox KB04MI-026 Assembly Instructions
-
 KingsBox KB04MI-011 Assembly Instructions
-
 KingsBox KB06RI-039 Assembly Instructions
-
 KingsBox KB05MI-051 Assembly Instructions
-
 KingsBox KB05MI-037 Assembly Instructions
-
 KingsBox KB06MI-034 Assembly Instructions
-
 KingsBox KB07MI-001 Assembly Instructions
-
 KingsBox KB03MI-011 Assembly Instructions
-
 KingsBox KB02RI-012 Assembly Instructions
-
 KingsBox KB04MI-024 Assembly Instructions


