Dometic CFX100W Professional Istruzioni per l'uso
- Categoria
- Scatole fresche
- Tipo
- Istruzioni per l'uso

CFX100W Professional
Mobile refrigerating appliance
Operating manual . . . . . . . . . . . . . . . . . . . . . 8
Mobiles Kühlgerät
Bedienungsanleitung . . . . . . . . . . . . . . . . .29
Appareil de réfrigération mobile
Notice d’utilisation . . . . . . . . . . . . . . . . . . .52
Aparato móvil de refrigeración
Instrucciones de uso . . . . . . . . . . . . . . . . . .75
Aparelho de refrigeração móvel
Manual de instruções . . . . . . . . . . . . . . . . .98
Apparecchio di refrigerazione
mobile
Istruzioni per l’uso . . . . . . . . . . . . . . . . . . . 121
Mobiel koelapparaat
Gebruiksaanwijzing. . . . . . . . . . . . . . . . . .144
Transportabelt køle-/fryseapparat
Betjeningsvejledning . . . . . . . . . . . . . . . .165
Mobil kyl-/frysprodukt
Bruksanvisning . . . . . . . . . . . . . . . . . . . . . 186
Mobil kjøleboks
Bruksanvisning . . . . . . . . . . . . . . . . . . . . . 207
Siirrettävä kylmäsäilytyslaite
Käyttöohje . . . . . . . . . . . . . . . . . . . . . . . . . 228
Мобильное охлаждающее
устройство
Инструкция по эксплуатации . . . . . . . . . 249
Przenośne urządzenie chłodnicze
Instrukcja obsługi . . . . . . . . . . . . . . . . . . . 273
Mobilný chladiaci spotrebič
Návod na obsluhu. . . . . . . . . . . . . . . . . . . 296
Mobilní chladicí spotřebič
Návod k obsluze . . . . . . . . . . . . . . . . . . . . 318
Mobil hűtőkészülék
Használati utasítás. . . . . . . . . . . . . . . . . . .339
EN
DE
FR
ES
PT
IT
NL
DA
SV
NO
FI
RU
PL
SK
CS
HU
MOBILE COOLING
CFX
DometicCFX100W_OPM_4445102876_EMEA16_20xx-xx-xx.book Seite 1 Donnerstag, 24. Dezember 2020 3:48 15

© 2020 Dometic Group. The visual appearance of the contents of this manual is
protected by copyright and design law. The underlying technical design and the
products contained herein may be protected by design, patent or be patent
pending. The trademarks mentioned in this manual belong to Dometic Sweden AB.
All rights are reserved.
DometicCFX100W_OPM_4445102876_EMEA16_20xx-xx-xx.book Seite 2 Donnerstag, 24. Dezember 2020 3:48 15

CFX100W
3
1 2
3
1
1
2
DometicCFX100W_OPM_4445102876_EMEA16_20xx-xx-xx.book Seite 3 Donnerstag, 24. Dezember 2020 3:48 15

CFX100W
4
SET
+
–
°
1 3 4 5 6 72
3
EMERGENCY
OVERRIDE
NORMAL
USE
100-240V~AC
12/24V DC
2 3 4 51
4
DometicCFX100W_OPM_4445102876_EMEA16_20xx-xx-xx.book Seite 4 Donnerstag, 24. Dezember 2020 3:48 15

CFX100W
5
1.
2.
3.
2.
1.
180°
1.
2.
3.
5
rd
bk
15A
1.
2.
6
DometicCFX100W_OPM_4445102876_EMEA16_20xx-xx-xx.book Seite 5 Donnerstag, 24. Dezember 2020 3:48 15

CFX100W
6
0
0
2
6
10
14
246810121416182022242628
24 V
l/m
Ø/mm²
12 V
7
15A
rd
bk
15A
1
3
2
6
4
5
8
9
1
2
DometicCFX100W_OPM_4445102876_EMEA16_20xx-xx-xx.book Seite 6 Donnerstag, 24. Dezember 2020 3:48 15

CFX100W
7
0
1.
2.
3.
DometicCFX100W_OPM_4445102876_EMEA16_20xx-xx-xx.book Seite 7 Donnerstag, 24. Dezember 2020 3:48 15

EN
CFX100W
8
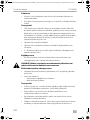
Please read these instructions carefully and follow all instructions, guidelines, and warnings included in this product manual in order to ensure
that you install, use, and maintain the product properly at all times. These instructions MUST stay with this product.
By using the product, you hereby confirm that you have read all instructions, guidelines, and warnings carefully and that you understand and
agree to abide by the terms and conditions as set forth herein. You agree to use this product only for the intended purpose and application
and in accordance with the instructions, guidelines, and warnings as set forth in this product manual as well as in accordance with all appli-
cable laws and regulations. A failure to read and follow the instructions and warnings set forth herein may result in an injury to yourself and
others, damage to your product or damage to other property in the vicinity. This product manual, including the instructions, guidelines, and
warnings, and related documentation, may be subject to changes and updates. For up-to-date product information, please visit
www.dometic.com.
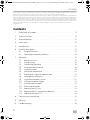
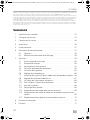
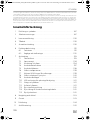
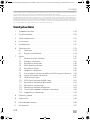
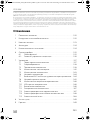
Contents
1 Explanation of symbols. . . . . . . . . . . . . . . . . . . . . . . . . . . . . . . . . . . . . . . . . . .9
2 Safety instructions . . . . . . . . . . . . . . . . . . . . . . . . . . . . . . . . . . . . . . . . . . . . . . .9
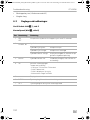
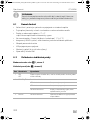
3 Scope of delivery . . . . . . . . . . . . . . . . . . . . . . . . . . . . . . . . . . . . . . . . . . . . . .12
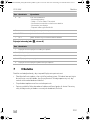
4 Accessories . . . . . . . . . . . . . . . . . . . . . . . . . . . . . . . . . . . . . . . . . . . . . . . . . . .12
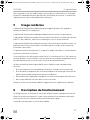
5 Intended use . . . . . . . . . . . . . . . . . . . . . . . . . . . . . . . . . . . . . . . . . . . . . . . . . .12
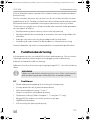
6 Function description. . . . . . . . . . . . . . . . . . . . . . . . . . . . . . . . . . . . . . . . . . . .13
6.1 Scope of functions. . . . . . . . . . . . . . . . . . . . . . . . . . . . . . . . . . . . . . . .13
6.2 Operating and display elements . . . . . . . . . . . . . . . . . . . . . . . . . . . .14
7 Operation . . . . . . . . . . . . . . . . . . . . . . . . . . . . . . . . . . . . . . . . . . . . . . . . . . . .15
7.1 Before initial use . . . . . . . . . . . . . . . . . . . . . . . . . . . . . . . . . . . . . . . . .15
7.2 Saving energy . . . . . . . . . . . . . . . . . . . . . . . . . . . . . . . . . . . . . . . . . . .15
7.3 Connecting the cooler . . . . . . . . . . . . . . . . . . . . . . . . . . . . . . . . . . . .16
7.4 Using the battery monitor . . . . . . . . . . . . . . . . . . . . . . . . . . . . . . . . . .18
7.5 Using the cooler . . . . . . . . . . . . . . . . . . . . . . . . . . . . . . . . . . . . . . . . .19
7.6 Setting the temperature . . . . . . . . . . . . . . . . . . . . . . . . . . . . . . . . . . 20
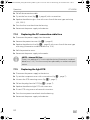
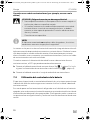
7.7 Enabling WiFi signal for optional app. . . . . . . . . . . . . . . . . . . . . . . . .21
7.8 Set brightness of display. . . . . . . . . . . . . . . . . . . . . . . . . . . . . . . . . . 22
7.9 Using the emergency switch . . . . . . . . . . . . . . . . . . . . . . . . . . . . . . 22
7.10 USB port for power supply . . . . . . . . . . . . . . . . . . . . . . . . . . . . . . . . 22
7.11 Switching off the cooler . . . . . . . . . . . . . . . . . . . . . . . . . . . . . . . . . . 23
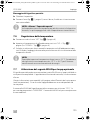
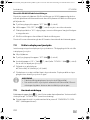
7.12 Defrosting the cooler . . . . . . . . . . . . . . . . . . . . . . . . . . . . . . . . . . . . 23
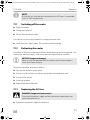
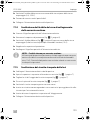
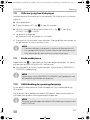
7.13 Replacing the AC fuse. . . . . . . . . . . . . . . . . . . . . . . . . . . . . . . . . . . . 23
7.14 Replacing the DC connection cable fuse. . . . . . . . . . . . . . . . . . . . . 24
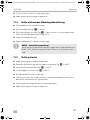
7.15 Replacing the light PCB. . . . . . . . . . . . . . . . . . . . . . . . . . . . . . . . . . . 24
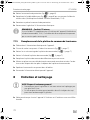
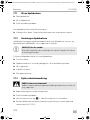
8 Cleaning and maintenance. . . . . . . . . . . . . . . . . . . . . . . . . . . . . . . . . . . . . . 25
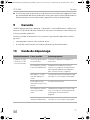
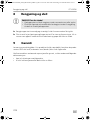
9 Warranty . . . . . . . . . . . . . . . . . . . . . . . . . . . . . . . . . . . . . . . . . . . . . . . . . . . . 25
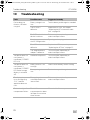
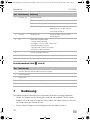
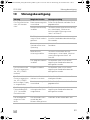
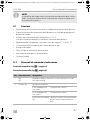
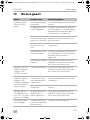
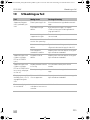
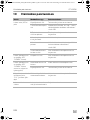
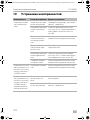
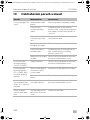
10 Troubleshooting . . . . . . . . . . . . . . . . . . . . . . . . . . . . . . . . . . . . . . . . . . . . . . 26
DometicCFX100W_OPM_4445102876_EMEA16_20xx-xx-xx.book Seite 8 Donnerstag, 24. Dezember 2020 3:48 15

EN
CFX100W Explanation of symbols
9
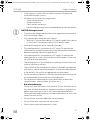
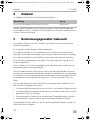
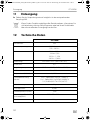
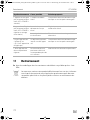
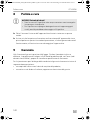
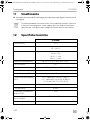
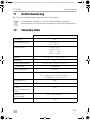
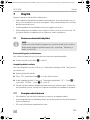
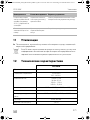
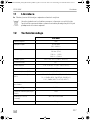
11 Disposal. . . . . . . . . . . . . . . . . . . . . . . . . . . . . . . . . . . . . . . . . . . . . . . . . . . . . 27
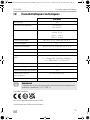
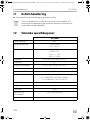
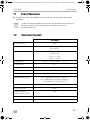
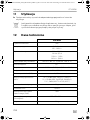
12 Technical data . . . . . . . . . . . . . . . . . . . . . . . . . . . . . . . . . . . . . . . . . . . . . . . . 27
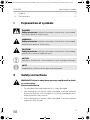
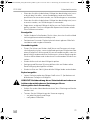
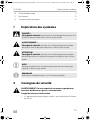
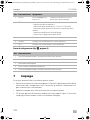
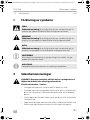
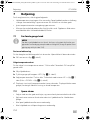
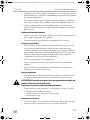
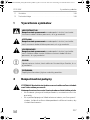
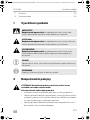
1 Explanation of symbols
D
!
!
A
I
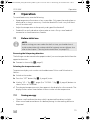
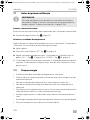
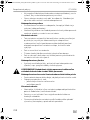
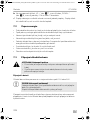
2 Safety instructions
!
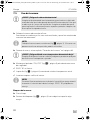
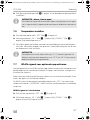
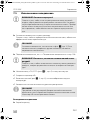
WARNING! Failure to obey these warnings could result in death
or serious injury.
Electrocution hazard
• Do not operate the cooling device if it is visibly damaged.
• If this cooling device's power cable is damaged, it must be replaced
by the manufacturer, a service agent or a similarly qualified person in
order to prevent safety hazards.
• If this cooling device's power cable is damaged, it must be replaced
to prevent safety hazards.
DANGER!
Safety instruction: Indicates a hazardous situation that, if not avoided,
will result in death or serious injury.
WARNING!
Safety instruction: Indicates a hazardous situation that, if not avoided,
could result in death or serious injury.
CAUTION!
Safety instruction: Indicates a hazardous situation that, if not avoided,
could result in minor or moderate injury.
NOTICE!
Indicates a situation that, if not avoided, can result in property damage.
NOTE
Supplementary information for operating the product.
DometicCFX100W_OPM_4445102876_EMEA16_20xx-xx-xx.book Seite 9 Donnerstag, 24. Dezember 2020 3:48 15

EN
Safety instructions CFX100W
10
• This cooling device may only be repaired by qualified personnel.
Improper repairs can lead to considerable hazards.
Fire hazard
• When positioning the device, ensure the supply cord is not trapped or
damaged.
• Do not locate multiple portable socket-outlets or portable power
supplies at the rear of the device.
Health hazard
• This device can be used by children aged from 8 years and above and
persons with reduced physical, sensory or mental capabilities or lack
of experience and knowledge if they have been given supervision or
instruction concerning use of the device in a safe way and understand
the hazards involved.
• Children shall not play with the device.
• Cleaning and user maintenance shall not be made by children without
supervision.
• Children aged from 3 to 8 years are allowed to load and unload
cooling devices.
Explosion hazard
• Do not store any explosive substances such as spray cans with a
flammable propellant in the cooling device.
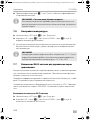
!
CAUTION! Failure to obey these cautions could result in minor or
moderate injury.
Electrocution hazard
• Before starting the cooling device, ensure that the power supply line
and the plug are dry.
• Disconnect the cooling device from the power supply
– before each cleaning and maintenance
– after every use
Health hazard
• Please check if the cooling capacity of the device is suitable for storing
the food or medicine you wish to cool.
• Food may only be stored in its original packaging or in suitable
containers.
• Opening the cooling device for long periods can cause significant
increase of the temperature in the compartments of the device.
DometicCFX100W_OPM_4445102876_EMEA16_20xx-xx-xx.book Seite 10 Donnerstag, 24. Dezember 2020 3:48 15

EN
CFX100W Safety instructions
11
• Clean regularly surfaces that can come in contact with food and
accessible drainage systems.
• If the device is left empty for long periods:
– Switch off the device.
– Defrost the device.
– Clean and dry the device.
– Leave the lid open to prevent mould developing within the device.
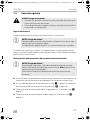
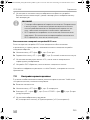
A
NOTICE! Damage hazard
• Check that the voltage specification on the type plate corresponds to
that of the energy supply.
• Only connect the cooling device as follows:
– With the DC connection cable to a DC power supply in the vehicle
– Or with the AC connection cable to an AC power supply
• Never pull the plug out of the socket by the cable.
• If the cooling device is connected to a DC outlet: Disconnect the
cooling device and other power consuming devices from the battery
before connecting a quick charging device.
• If the cooling device is connected to a DC outlet: Disconnect the
cooling device or switch it off when you turn off the engine. Otherwise
you may discharge the battery.
• The cooling device is not suitable for transporting caustic materials or
materials containing solvents.
• The insulation of the cooling device contains flammable cyclopentane
and requires special disposal procedures. Deliver the cooling device
at the end of its life-cycle to an appropriate recycling center.
• Do not use electrical devices inside the cooling device unless they are
recommended by the manufacturer for the purpose.
• Do not place the cooling device near naked flames or other heat
sources (heaters, direct sunlight, gas ovens etc.).
• Risk of overheating!
Ensure at all times that there is a minimum of 50 mm ventilation on all
four sides of the cooling device. Keep the ventilation area free of any
objects that could restrict the air flow to the cooling components.
Do not place the cooling device in closed compartments or areas with
none or minimal air flow.
• Ensure that the ventilation openings are not covered.
• Do not fill the inner container with ice or fluids.
• Never immerse the cooling device in water.
DometicCFX100W_OPM_4445102876_EMEA16_20xx-xx-xx.book Seite 11 Donnerstag, 24. Dezember 2020 3:48 15

EN
Scope of delivery CFX100W
12
• Protect the cooling device and cables against heat and moisture.
• The device shall not to be exposed to rain.
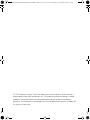
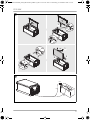
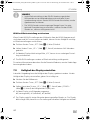
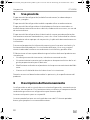
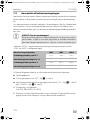
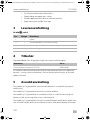
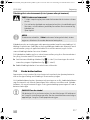
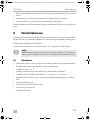
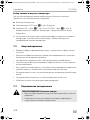
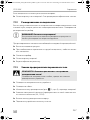
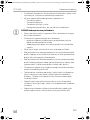
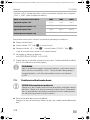
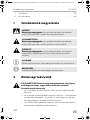
3Scope of delivery
See fig. 1, page 3
4Accessories
Available as accessory (not included in scope of delivery):
Visit the Dometic website (see back page) for information about a WiFi app with
control-, display- and alarm functions. Note that the app may not be available in your
country.
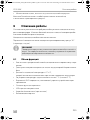
5 Intended use
The mobile refrigerating appliance (also referred to as cooling box) is suitable for
cooling and freezing.
The mobile refrigerating appliance is also suitable for use on boats.
The mobile refrigerating appliance is designed to be operated from a DC power
supply socket of a vehicle, boat or caravan or from AC mains.
The mobile refrigerating appliance is intended to be used by professionals only in
non-household environments but not for display to or access by customers.
This product is only suitable for the intended purpose and application in accordance
with these instructions.
Item Quantity Description
1 1 Cooling box
2 1 Connection cable for DC connection
3 1 Connection cable for AC connection
– 1 Operating manual
Designation Ref. no.
Universal fixing kit (belt system) CFX-UFK 9105304041
DometicCFX100W_OPM_4445102876_EMEA16_20xx-xx-xx.book Seite 12 Donnerstag, 24. Dezember 2020 3:48 15

EN
CFX100W Function description
13
This manual provides information that is necessary for proper installation and/or
operation of the product. Poor installation and/or improper operating or mainte-
nance will result in unsatisfactory performance and a possible failure.
The manufacturer accepts no liability for any injury or damage to the product
resulting from:
• Incorrect assembly or connection, including excess voltage
• Incorrect maintenance or use of spare parts other than original spare parts
provided by the manufacturer
• Alterations to the product without express permission from the manufacturer
• Use for purposes other than those described in this manual
Dometic reserves the right to change product appearance and product
specifications.
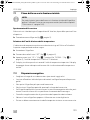
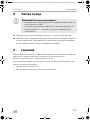
6 Function description
A low maintenance refrigerant circuit with compressor provides the cooling. The
generous insulation and powerful compressor ensure efficient and fast cooling.
The cooler is portable.
The cooler can withstand a short-term inclination of 30°, for example on boats.
I
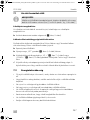
6.1 Scope of functions
• Power supply with priority circuit for connecting to the AC mains
• Three-level battery monitor to protect the vehicle battery
• Display with temperature gauge in °C and °F
switches off automatically at low battery voltage
• Temperature setting: With two buttons in steps of 1 °C (2 °F)
• Integrated WiFi transmitter hence controllable using an app
• Foldable carrying handles
• USB port for power supply
• Emergency switch (where fitted)
• Removable wire basket
NOTE
The cabinet top surface under the lid gasket may feel warm. This is
normal as heating is included to prevent condensation.
DometicCFX100W_OPM_4445102876_EMEA16_20xx-xx-xx.book Seite 13 Donnerstag, 24. Dezember 2020 3:48 15

EN
Function description CFX100W
14
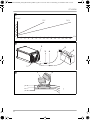
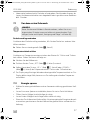
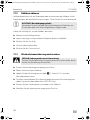
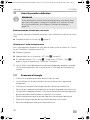
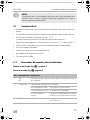
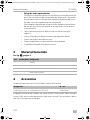
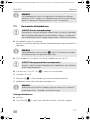
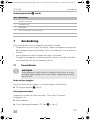
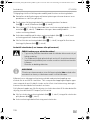
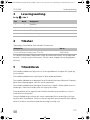
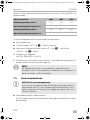
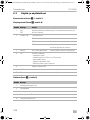
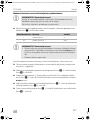
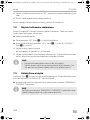
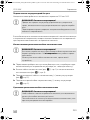
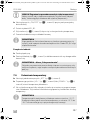
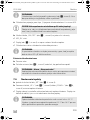
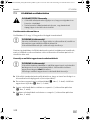
6.2 Operating and display elements
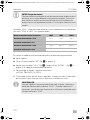
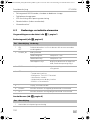
Lid latches: fig. 2 1, page 3
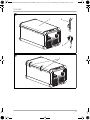
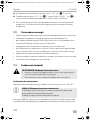
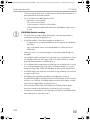
Operating panel (fig. 3, page 4)
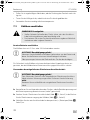
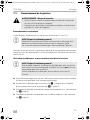
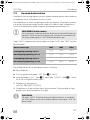
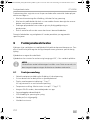
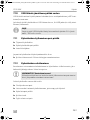
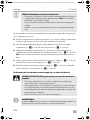
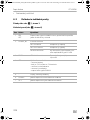
Connection sockets (fig. 4, page 4)
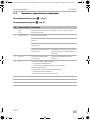
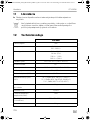
Item Description Explanation
1ON
OFF
Switches the cooler on or off when the button is pressed for
between one and two seconds
2
POWER “P”
Status indication
LED lights up green: Compressor is on
LED lights up orange: Compressor is off
LED flashes orange: Display switched off automatically due
to low battery voltage
3 ERROR LED flashes red: Device is switched on but not ready
for operation
4 SET Selects the input mode
– Temperature setting
– Celsius or Fahrenheit display
– Set battery monitor
– Set brightness of display
– Switch WiFi on or off
5 – Display, shows the information
6 DOWN – Press once to decrease the value
7 UP + Press once to increase the value
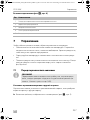
Item Description
1 Connection socket AC voltage supply
2 Fuse holder
3 Emergency switch (when fitted)
4 USB port for power supply
5 Connection socket DC voltage supply
DometicCFX100W_OPM_4445102876_EMEA16_20xx-xx-xx.book Seite 14 Donnerstag, 24. Dezember 2020 3:48 15

EN
CFX100W Operation
15
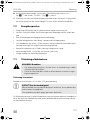
7Operation
To avoid food waste, note the following:
• Keep temperature fluctuation as low as possible. Only open the cooling box as
often and for as long as necessary. Store the foodstuff in such a way that the air
can still circulate well.
• Adjust the temperature to the quantity and type of the foodstuff.
• Foodstuff can easily absorb or release odor or taste. Always store foodstuff
covered or in closed containers/bottles.
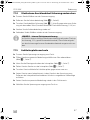
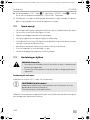
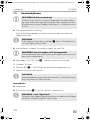
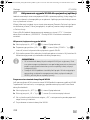
7.1 Before initial use
I
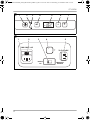
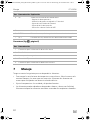
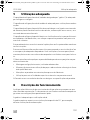
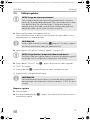
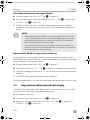
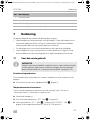
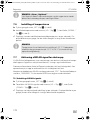
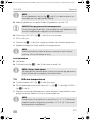
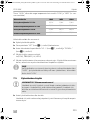
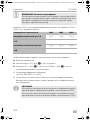
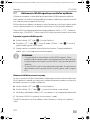
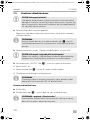
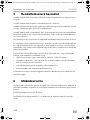
Reversing the lid opening direction
The lid hinges can be moved to the opposite side if you want to open the lid from the
opposite direction.
➤ Proceed as shown (fig. 5, page 5).
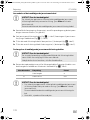
Selecting the temperature units
Temperature display units can be switched between Celsius and Fahrenheit as
follows:
➤ Switch on the cooler.
➤ Press the “SET” button (fig. 3 4, page 4) twice.
➤ Use the “UP +” (fig. 3 7, page 4) or “DOWN –” (fig. 3 6, page 4) buttons to
select Celsius or Fahrenheit.
✔ The selected temperature units then appear in the display for a few seconds. The
display flashes several times before it returns to the current temperature.
7.2 Saving energy
• Choose a well ventilated location which is protected from direct sunlight.
• Allow warm food to cool down first before placing it in the cooling device to
keep cool.
NOTE
Before starting your new cooler for the first time, you should clean it
inside and outside with a damp cloth for hygienic reasons (please also
refer to the chapter “Cleaning and maintenance” on page 25).
DometicCFX100W_OPM_4445102876_EMEA16_20xx-xx-xx.book Seite 15 Donnerstag, 24. Dezember 2020 3:48 15

EN
Operation CFX100W
16
• Do not open the cooling device more often than necessary.
• Do not leave the cooling device open for longer than necessary.
• If the cooler has a basket: For optimal energy consumption, position the basket
according to its position on delivery.
• On a regularly basis, make sure the lid seal still fits properly.
• Defrost the cooler once a layer of ice forms.
• Avoid unnecessarily low temperatures.
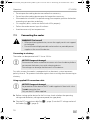
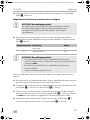
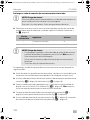
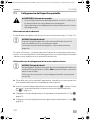
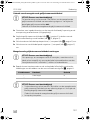
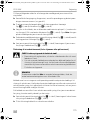
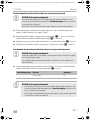
7.3 Connecting the cooler
!
Connecting to a battery
The cooler can be operated with 12 V
g or 24 Vg.
A
For safety reasons the cooler is equipped with an electronic system to prevent
polarity reversal. This protects the cooler against short-circuiting when connecting to
a battery.
Using supplied DC connection cable
A
➤ Before starting up the device for the first time, check whether the operating
voltage and the battery voltage correspond (see type plate).
➤ Plug the DC connection cable (fig. 1 2, page 3) into the DC voltage socket of
the cooler (fig. 4 5, page 4).
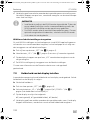
WARNING! Fire hazard!
• When positioning the device, ensure the supply cord is not trapped
or damaged.
• Do not locate multiple portable socket-outlets or portable power
supplies at the rear of the device.
NOTICE! Danger of damage!
Disconnect the cooler and other consumer units from the battery before
you connect the battery to a quick charging device.
Overvoltage can damage the electronics of the device.
NOTICE! Danger of damage!
For protection of the device the DC cable supplied is fitted with a fuse.
Do not remove the fuse.
Only use the DC cable supplied.
DometicCFX100W_OPM_4445102876_EMEA16_20xx-xx-xx.book Seite 16 Donnerstag, 24. Dezember 2020 3:48 15

EN
CFX100W Operation
17
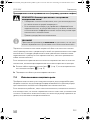
➤ Connect the red cable to the positive (+) battery terminal (fig. 6, page 5).
➤ Connect the black cable to the negative (–) battery terminal (fig. 6, page 5).
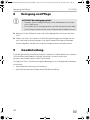
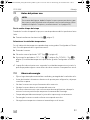
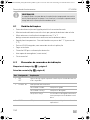
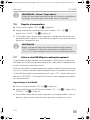
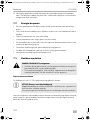
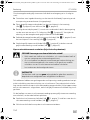
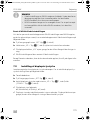
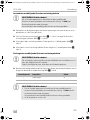
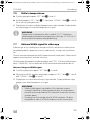
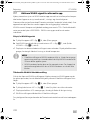
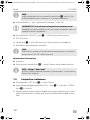
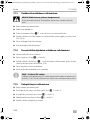
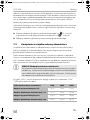
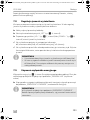
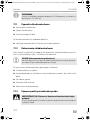
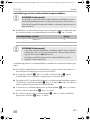
Extended DC hard-wiring
A
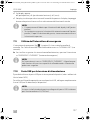
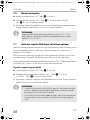
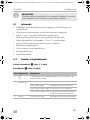
➤ Determine the required cross section of extended wiring in relation to the total
length from cooler to battery supply according to fig. 7, page 6.
A
To extend the DC hard-wiring, proceed as follows:
➤ Before starting up the device for the first time, check whether the operating
voltage and the battery voltage correspond (see type plate).
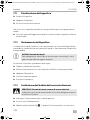
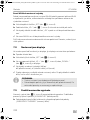
➤ Run the extended wiring from DC cable in-vehicle connection point
(fig. 8 4, page 6) to the battery (fig. 8 6, page 6).
➤ Make sure that the cable to the positive (+) battery terminal is protected with an
additional 15 A fuse (fig. 8 5, page 6) close to the battery. Do not remove the
fuse of the supplied DC cable.
➤ Connect the supplied DC connection cable (fig. 8 2, page 6) to the in-vehicle
connection point (fig. 8 4, page 6).
➤ Plug the DC connection cable (fig. 8 2, page 6) into the DC voltage socket of
the cooler (fig. 8 1, page 6).
NOTICE! Danger of damage!
To avoid drops in voltage and therefore performance, keep the cable as
short as possible and only disconnect it when necessary.
For this reason avoid additional switches, plugs or power strips.
Co-ordinate axis Meaning Unit
l Cable length m
∅ Cable cross section mm²
NOTICE! Danger of damage!
• For protection of the device the DC cable supplied is fitted with a
fuse. Do not remove the fuse.
Only use the DC cable supplied from the cooler to in-vehicle
connection point.
• Make sure that the polarity is correct.
DometicCFX100W_OPM_4445102876_EMEA16_20xx-xx-xx.book Seite 17 Donnerstag, 24. Dezember 2020 3:48 15

EN
Operation CFX100W
18
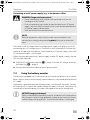
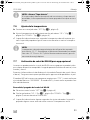
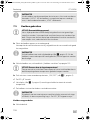
Connecting to an AC power supply (e.g. in the home or office)
D
I
The coolers have an integrated multi-voltage power supply with priority circuit for
connecting to an AC voltage source. The priority circuit automatically switches the
cooler to AC operation if the device is connected to an AC power supply, even if the
DC connection cable is still attached.
When switching between the AC power supply and the DC battery supply, the red
LED may light up briefly.
➤ Plug the AC connection cable (fig. 1 3, page 3) into the AC voltage socket of
the cooler (fig. 4 1, page 4).
➤ Connect the connection cable to the AC power outlet.
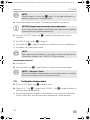
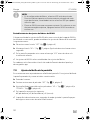
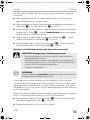
7.4 Using the battery monitor
The device is equipped with a multi-level battery monitor that protects your vehicle
battery against excessive discharging when the device is connected to the on-board
DC supply.
If the cooler is operated when the vehicle ignition is switched off, the cooler switches
off automatically as soon as the supply voltage falls below a set level. The cooler will
switch back on once the battery has been recharged to the restart voltage level.
A
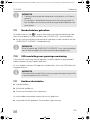
DANGER! Danger of electrocution!
• Never handle plugs and switches with wet hands or if you are
standing on a wet surface.
• If you are operating your cooler on board a boat from a AC power
supply, you must install a residual current circuit breaker between the
AC power supply and the cooler.
Seek advice from a trained technician.
NOTE
Because of potential safety hazards under certain conditions, the
manufacturer strongly recommends against the use of an extension
cord.
NOTICE! Danger of damage!
When switched off by the battery monitor, the battery will no longer be
fully charged. Avoid starting repeatedly or operating current consumers
without longer charging phases. Ensure that the battery is recharged.
DometicCFX100W_OPM_4445102876_EMEA16_20xx-xx-xx.book Seite 18 Donnerstag, 24. Dezember 2020 3:48 15

EN
CFX100W Operation
19
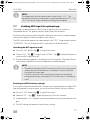
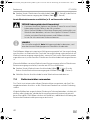
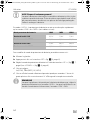
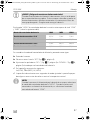
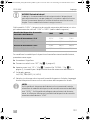
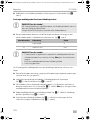
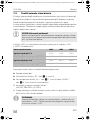
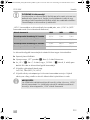
In “HIGH” mode, the battery monitor responds faster than at the levels “LOW” and
“MED” (see the following table).
The battery monitor mode can be selected as follows:
➤ Switch on the cooler.
➤ Press the “SET” button (fig. 3 4, page 4) three times.
➤ Use the “UP +” (fig. 3 7, page 4) or “DOWN –” (fig. 3 6, page 4) buttons to
select the battery monitor mode.
✔ Display will be as follows:
Lo (LOW), ΠEd (MED), Hi (HIGH)
✔ The selected mode then appears in the display for a few seconds. The display
flashes several times before it returns to the current temperature.
I
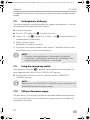
7.5 Using the cooler
A
➤ Place the cooler on a firm foundation.
Make sure that the ventilation slots are not covered and that the heated air can
dissipate.
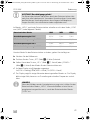
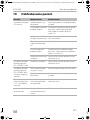
Battery monitor mode LOW MED HIGH
Switch-off voltage at 12 V
10.1 V 11.4 V 11.8 V
Restart-voltage at 12 V
11.1 V 12.2 V 12.6 V
Switch-off voltage at 24 V
21.5 V 24.1 V 24.6 V
Restart voltage at 24 V
23.0 V 25.3 V 26.2 V
NOTE
When the cooler is supplied by the starter battery, select the battery
monitor mode “HIGH”. If the cooler is connected to a supply battery,
the battery monitor mode “LOW” will suffice.
NOTICE! Danger of overheating!
Ensure at all times that there is sufficient ventilation so that the heat that
generated during operation can dissipate. Ensure that the ventilation
slots are not covered. Make sure that the device is sufficiently far away
from walls and other objects so that the air can circulate.
DometicCFX100W_OPM_4445102876_EMEA16_20xx-xx-xx.book Seite 19 Donnerstag, 24. Dezember 2020 3:48 15

EN
Operation CFX100W
20
I
➤ Connect the cooler, see chapter “Connecting the cooler” on page 16.
A
➤ Press the “ON/OFF” button (fig. 3 1, page 4) for between one and two
seconds.
✔ The LED “P” lights up (fig. 3 2, page 4).
✔ The display (fig. 3 5, page 4) switches on and shows the current temperature.
✔ The cooler starts cooling the interior.
I
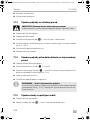
Latching the cooler lid
➤ Close the lid.
➤ Press the latches (fig. 2 1, page 3) down, until they latch in place audibly.
I
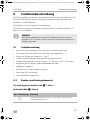
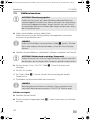
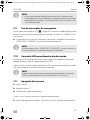
7.6 Setting the temperature
➤ Press the “SET” button (fig. 3 4, page 4) once.
➤ Use the “UP +” (fig. 3 7, page 4) and “DOWN –” (fig. 3 6, page 4) buttons to
select the cooling temperature.
✔ The cooling temperature appears in the display for a few seconds. The display
flashes several times and then the current temperature is displayed again.
NOTE
Place the cooler as shown (fig. 1, page 3). If you operate the box in a
different orientation it can be damaged.
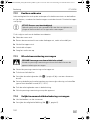
NOTICE! Danger from excessively low temperature!
Ensure that only those objects are placed in the cooler that are intended
to be cooled at the selected temperature.
NOTE
When operating with the battery, the display switches off automatically
if the battery voltage is low. The LED “P” flashes orange.
NOTE – “Lid open” alarm
If the lid is left open for three minutes or more and the device is switched
on, the interior light will flash until the lid is closed.
DometicCFX100W_OPM_4445102876_EMEA16_20xx-xx-xx.book Seite 20 Donnerstag, 24. Dezember 2020 3:48 15
La pagina sta caricando ...
La pagina sta caricando ...
La pagina sta caricando ...
La pagina sta caricando ...
La pagina sta caricando ...
La pagina sta caricando ...
La pagina sta caricando ...
La pagina sta caricando ...
La pagina sta caricando ...
La pagina sta caricando ...
La pagina sta caricando ...
La pagina sta caricando ...
La pagina sta caricando ...
La pagina sta caricando ...
La pagina sta caricando ...
La pagina sta caricando ...
La pagina sta caricando ...
La pagina sta caricando ...
La pagina sta caricando ...
La pagina sta caricando ...
La pagina sta caricando ...
La pagina sta caricando ...
La pagina sta caricando ...
La pagina sta caricando ...
La pagina sta caricando ...
La pagina sta caricando ...
La pagina sta caricando ...
La pagina sta caricando ...
La pagina sta caricando ...
La pagina sta caricando ...
La pagina sta caricando ...
La pagina sta caricando ...
La pagina sta caricando ...
La pagina sta caricando ...
La pagina sta caricando ...
La pagina sta caricando ...
La pagina sta caricando ...
La pagina sta caricando ...
La pagina sta caricando ...
La pagina sta caricando ...
La pagina sta caricando ...
La pagina sta caricando ...
La pagina sta caricando ...
La pagina sta caricando ...
La pagina sta caricando ...
La pagina sta caricando ...
La pagina sta caricando ...
La pagina sta caricando ...
La pagina sta caricando ...
La pagina sta caricando ...
La pagina sta caricando ...
La pagina sta caricando ...
La pagina sta caricando ...
La pagina sta caricando ...
La pagina sta caricando ...
La pagina sta caricando ...
La pagina sta caricando ...
La pagina sta caricando ...
La pagina sta caricando ...
La pagina sta caricando ...
La pagina sta caricando ...
La pagina sta caricando ...
La pagina sta caricando ...
La pagina sta caricando ...
La pagina sta caricando ...
La pagina sta caricando ...
La pagina sta caricando ...
La pagina sta caricando ...
La pagina sta caricando ...
La pagina sta caricando ...
La pagina sta caricando ...
La pagina sta caricando ...
La pagina sta caricando ...
La pagina sta caricando ...
La pagina sta caricando ...
La pagina sta caricando ...
La pagina sta caricando ...
La pagina sta caricando ...
La pagina sta caricando ...
La pagina sta caricando ...
La pagina sta caricando ...
La pagina sta caricando ...
La pagina sta caricando ...
La pagina sta caricando ...
La pagina sta caricando ...
La pagina sta caricando ...
La pagina sta caricando ...
La pagina sta caricando ...
La pagina sta caricando ...
La pagina sta caricando ...
La pagina sta caricando ...
La pagina sta caricando ...
La pagina sta caricando ...
La pagina sta caricando ...
La pagina sta caricando ...
La pagina sta caricando ...
La pagina sta caricando ...
La pagina sta caricando ...
La pagina sta caricando ...
La pagina sta caricando ...
La pagina sta caricando ...
La pagina sta caricando ...
La pagina sta caricando ...
La pagina sta caricando ...
La pagina sta caricando ...
La pagina sta caricando ...
La pagina sta caricando ...
La pagina sta caricando ...
La pagina sta caricando ...
La pagina sta caricando ...
La pagina sta caricando ...
La pagina sta caricando ...
La pagina sta caricando ...
La pagina sta caricando ...
La pagina sta caricando ...
La pagina sta caricando ...
La pagina sta caricando ...
La pagina sta caricando ...
La pagina sta caricando ...
La pagina sta caricando ...
La pagina sta caricando ...
La pagina sta caricando ...
La pagina sta caricando ...
La pagina sta caricando ...
La pagina sta caricando ...
La pagina sta caricando ...
La pagina sta caricando ...
La pagina sta caricando ...
La pagina sta caricando ...
La pagina sta caricando ...
La pagina sta caricando ...
La pagina sta caricando ...
La pagina sta caricando ...
La pagina sta caricando ...
La pagina sta caricando ...
La pagina sta caricando ...
La pagina sta caricando ...
La pagina sta caricando ...
La pagina sta caricando ...
La pagina sta caricando ...
La pagina sta caricando ...
La pagina sta caricando ...
La pagina sta caricando ...
La pagina sta caricando ...
La pagina sta caricando ...
La pagina sta caricando ...
La pagina sta caricando ...
La pagina sta caricando ...
La pagina sta caricando ...
La pagina sta caricando ...
La pagina sta caricando ...
La pagina sta caricando ...
La pagina sta caricando ...
La pagina sta caricando ...
La pagina sta caricando ...
La pagina sta caricando ...
La pagina sta caricando ...
La pagina sta caricando ...
La pagina sta caricando ...
La pagina sta caricando ...
La pagina sta caricando ...
La pagina sta caricando ...
La pagina sta caricando ...
La pagina sta caricando ...
La pagina sta caricando ...
La pagina sta caricando ...
La pagina sta caricando ...
La pagina sta caricando ...
La pagina sta caricando ...
La pagina sta caricando ...
La pagina sta caricando ...
La pagina sta caricando ...
La pagina sta caricando ...
La pagina sta caricando ...
La pagina sta caricando ...
La pagina sta caricando ...
La pagina sta caricando ...
La pagina sta caricando ...
La pagina sta caricando ...
La pagina sta caricando ...
La pagina sta caricando ...
La pagina sta caricando ...
La pagina sta caricando ...
La pagina sta caricando ...
La pagina sta caricando ...
La pagina sta caricando ...
La pagina sta caricando ...
La pagina sta caricando ...
La pagina sta caricando ...
La pagina sta caricando ...
La pagina sta caricando ...
La pagina sta caricando ...
La pagina sta caricando ...
La pagina sta caricando ...
La pagina sta caricando ...
La pagina sta caricando ...
La pagina sta caricando ...
La pagina sta caricando ...
La pagina sta caricando ...
La pagina sta caricando ...
La pagina sta caricando ...
La pagina sta caricando ...
La pagina sta caricando ...
La pagina sta caricando ...
La pagina sta caricando ...
La pagina sta caricando ...
La pagina sta caricando ...
La pagina sta caricando ...
La pagina sta caricando ...
La pagina sta caricando ...
La pagina sta caricando ...
La pagina sta caricando ...
La pagina sta caricando ...
La pagina sta caricando ...
La pagina sta caricando ...
La pagina sta caricando ...
La pagina sta caricando ...
La pagina sta caricando ...
La pagina sta caricando ...
La pagina sta caricando ...
La pagina sta caricando ...
La pagina sta caricando ...
La pagina sta caricando ...
La pagina sta caricando ...
La pagina sta caricando ...
La pagina sta caricando ...
La pagina sta caricando ...
La pagina sta caricando ...
La pagina sta caricando ...
La pagina sta caricando ...
La pagina sta caricando ...
La pagina sta caricando ...
La pagina sta caricando ...
La pagina sta caricando ...
La pagina sta caricando ...
La pagina sta caricando ...
La pagina sta caricando ...
La pagina sta caricando ...
La pagina sta caricando ...
La pagina sta caricando ...
La pagina sta caricando ...
La pagina sta caricando ...
La pagina sta caricando ...
La pagina sta caricando ...
La pagina sta caricando ...
La pagina sta caricando ...
La pagina sta caricando ...
La pagina sta caricando ...
La pagina sta caricando ...
La pagina sta caricando ...
La pagina sta caricando ...
La pagina sta caricando ...
La pagina sta caricando ...
La pagina sta caricando ...
La pagina sta caricando ...
La pagina sta caricando ...
La pagina sta caricando ...
La pagina sta caricando ...
La pagina sta caricando ...
La pagina sta caricando ...
La pagina sta caricando ...
La pagina sta caricando ...
La pagina sta caricando ...
La pagina sta caricando ...
La pagina sta caricando ...
La pagina sta caricando ...
La pagina sta caricando ...
La pagina sta caricando ...
La pagina sta caricando ...
La pagina sta caricando ...
La pagina sta caricando ...
La pagina sta caricando ...
La pagina sta caricando ...
La pagina sta caricando ...
La pagina sta caricando ...
La pagina sta caricando ...
La pagina sta caricando ...
La pagina sta caricando ...
La pagina sta caricando ...
La pagina sta caricando ...
La pagina sta caricando ...
La pagina sta caricando ...
La pagina sta caricando ...
La pagina sta caricando ...
La pagina sta caricando ...
La pagina sta caricando ...
La pagina sta caricando ...
La pagina sta caricando ...
La pagina sta caricando ...
La pagina sta caricando ...
La pagina sta caricando ...
La pagina sta caricando ...
La pagina sta caricando ...
La pagina sta caricando ...
La pagina sta caricando ...
La pagina sta caricando ...
La pagina sta caricando ...
La pagina sta caricando ...
La pagina sta caricando ...
La pagina sta caricando ...
La pagina sta caricando ...
La pagina sta caricando ...
La pagina sta caricando ...
La pagina sta caricando ...
La pagina sta caricando ...
La pagina sta caricando ...
La pagina sta caricando ...
La pagina sta caricando ...
La pagina sta caricando ...
La pagina sta caricando ...
La pagina sta caricando ...
La pagina sta caricando ...
La pagina sta caricando ...
La pagina sta caricando ...
La pagina sta caricando ...
La pagina sta caricando ...
La pagina sta caricando ...
La pagina sta caricando ...
La pagina sta caricando ...
La pagina sta caricando ...
La pagina sta caricando ...
La pagina sta caricando ...
La pagina sta caricando ...
La pagina sta caricando ...
La pagina sta caricando ...
La pagina sta caricando ...
La pagina sta caricando ...
La pagina sta caricando ...
La pagina sta caricando ...
La pagina sta caricando ...
La pagina sta caricando ...
La pagina sta caricando ...
La pagina sta caricando ...
La pagina sta caricando ...
La pagina sta caricando ...
La pagina sta caricando ...
La pagina sta caricando ...
La pagina sta caricando ...
La pagina sta caricando ...
La pagina sta caricando ...
La pagina sta caricando ...
La pagina sta caricando ...
La pagina sta caricando ...
La pagina sta caricando ...
-
 1
1
-
 2
2
-
 3
3
-
 4
4
-
 5
5
-
 6
6
-
 7
7
-
 8
8
-
 9
9
-
 10
10
-
 11
11
-
 12
12
-
 13
13
-
 14
14
-
 15
15
-
 16
16
-
 17
17
-
 18
18
-
 19
19
-
 20
20
-
 21
21
-
 22
22
-
 23
23
-
 24
24
-
 25
25
-
 26
26
-
 27
27
-
 28
28
-
 29
29
-
 30
30
-
 31
31
-
 32
32
-
 33
33
-
 34
34
-
 35
35
-
 36
36
-
 37
37
-
 38
38
-
 39
39
-
 40
40
-
 41
41
-
 42
42
-
 43
43
-
 44
44
-
 45
45
-
 46
46
-
 47
47
-
 48
48
-
 49
49
-
 50
50
-
 51
51
-
 52
52
-
 53
53
-
 54
54
-
 55
55
-
 56
56
-
 57
57
-
 58
58
-
 59
59
-
 60
60
-
 61
61
-
 62
62
-
 63
63
-
 64
64
-
 65
65
-
 66
66
-
 67
67
-
 68
68
-
 69
69
-
 70
70
-
 71
71
-
 72
72
-
 73
73
-
 74
74
-
 75
75
-
 76
76
-
 77
77
-
 78
78
-
 79
79
-
 80
80
-
 81
81
-
 82
82
-
 83
83
-
 84
84
-
 85
85
-
 86
86
-
 87
87
-
 88
88
-
 89
89
-
 90
90
-
 91
91
-
 92
92
-
 93
93
-
 94
94
-
 95
95
-
 96
96
-
 97
97
-
 98
98
-
 99
99
-
 100
100
-
 101
101
-
 102
102
-
 103
103
-
 104
104
-
 105
105
-
 106
106
-
 107
107
-
 108
108
-
 109
109
-
 110
110
-
 111
111
-
 112
112
-
 113
113
-
 114
114
-
 115
115
-
 116
116
-
 117
117
-
 118
118
-
 119
119
-
 120
120
-
 121
121
-
 122
122
-
 123
123
-
 124
124
-
 125
125
-
 126
126
-
 127
127
-
 128
128
-
 129
129
-
 130
130
-
 131
131
-
 132
132
-
 133
133
-
 134
134
-
 135
135
-
 136
136
-
 137
137
-
 138
138
-
 139
139
-
 140
140
-
 141
141
-
 142
142
-
 143
143
-
 144
144
-
 145
145
-
 146
146
-
 147
147
-
 148
148
-
 149
149
-
 150
150
-
 151
151
-
 152
152
-
 153
153
-
 154
154
-
 155
155
-
 156
156
-
 157
157
-
 158
158
-
 159
159
-
 160
160
-
 161
161
-
 162
162
-
 163
163
-
 164
164
-
 165
165
-
 166
166
-
 167
167
-
 168
168
-
 169
169
-
 170
170
-
 171
171
-
 172
172
-
 173
173
-
 174
174
-
 175
175
-
 176
176
-
 177
177
-
 178
178
-
 179
179
-
 180
180
-
 181
181
-
 182
182
-
 183
183
-
 184
184
-
 185
185
-
 186
186
-
 187
187
-
 188
188
-
 189
189
-
 190
190
-
 191
191
-
 192
192
-
 193
193
-
 194
194
-
 195
195
-
 196
196
-
 197
197
-
 198
198
-
 199
199
-
 200
200
-
 201
201
-
 202
202
-
 203
203
-
 204
204
-
 205
205
-
 206
206
-
 207
207
-
 208
208
-
 209
209
-
 210
210
-
 211
211
-
 212
212
-
 213
213
-
 214
214
-
 215
215
-
 216
216
-
 217
217
-
 218
218
-
 219
219
-
 220
220
-
 221
221
-
 222
222
-
 223
223
-
 224
224
-
 225
225
-
 226
226
-
 227
227
-
 228
228
-
 229
229
-
 230
230
-
 231
231
-
 232
232
-
 233
233
-
 234
234
-
 235
235
-
 236
236
-
 237
237
-
 238
238
-
 239
239
-
 240
240
-
 241
241
-
 242
242
-
 243
243
-
 244
244
-
 245
245
-
 246
246
-
 247
247
-
 248
248
-
 249
249
-
 250
250
-
 251
251
-
 252
252
-
 253
253
-
 254
254
-
 255
255
-
 256
256
-
 257
257
-
 258
258
-
 259
259
-
 260
260
-
 261
261
-
 262
262
-
 263
263
-
 264
264
-
 265
265
-
 266
266
-
 267
267
-
 268
268
-
 269
269
-
 270
270
-
 271
271
-
 272
272
-
 273
273
-
 274
274
-
 275
275
-
 276
276
-
 277
277
-
 278
278
-
 279
279
-
 280
280
-
 281
281
-
 282
282
-
 283
283
-
 284
284
-
 285
285
-
 286
286
-
 287
287
-
 288
288
-
 289
289
-
 290
290
-
 291
291
-
 292
292
-
 293
293
-
 294
294
-
 295
295
-
 296
296
-
 297
297
-
 298
298
-
 299
299
-
 300
300
-
 301
301
-
 302
302
-
 303
303
-
 304
304
-
 305
305
-
 306
306
-
 307
307
-
 308
308
-
 309
309
-
 310
310
-
 311
311
-
 312
312
-
 313
313
-
 314
314
-
 315
315
-
 316
316
-
 317
317
-
 318
318
-
 319
319
-
 320
320
-
 321
321
-
 322
322
-
 323
323
-
 324
324
-
 325
325
-
 326
326
-
 327
327
-
 328
328
-
 329
329
-
 330
330
-
 331
331
-
 332
332
-
 333
333
-
 334
334
-
 335
335
-
 336
336
-
 337
337
-
 338
338
-
 339
339
-
 340
340
-
 341
341
-
 342
342
-
 343
343
-
 344
344
-
 345
345
-
 346
346
-
 347
347
-
 348
348
-
 349
349
-
 350
350
-
 351
351
-
 352
352
-
 353
353
-
 354
354
-
 355
355
-
 356
356
-
 357
357
-
 358
358
-
 359
359
-
 360
360
-
 361
361
-
 362
362
-
 363
363
-
 364
364


Dometic CFX100W Professional Istruzioni per l'uso
- Categoria
- Scatole fresche
- Tipo
- Istruzioni per l'uso
in altre lingue
- English: Dometic CFX100W Professional Operating instructions
- français: Dometic CFX100W Professional Mode d'emploi
- español: Dometic CFX100W Professional Instrucciones de operación
- Deutsch: Dometic CFX100W Professional Bedienungsanleitung
- русский: Dometic CFX100W Professional Инструкция по эксплуатации
- Nederlands: Dometic CFX100W Professional Handleiding
- português: Dometic CFX100W Professional Instruções de operação
- slovenčina: Dometic CFX100W Professional Návod na používanie
- dansk: Dometic CFX100W Professional Betjeningsvejledning
- čeština: Dometic CFX100W Professional Operativní instrukce
- polski: Dometic CFX100W Professional Instrukcja obsługi
- svenska: Dometic CFX100W Professional Bruksanvisningar
- suomi: Dometic CFX100W Professional Käyttö ohjeet
Documenti correlati
-
Dometic CFX95 DZ2 Istruzioni per l'uso
-
Dometic CFX Serie Istruzioni per l'uso
-
-
-
-
-
-
Dometic CF11, CF16, CF26 Manuale utente
-
-