Silkn AP-3WD Instructions For Use Manual
- Tipo
- Instructions For Use Manual

EN
DE
FR
NL
ES
PT
GR
TR
IT
NO
SV
DA
EN
DE
FR
NL
ES
PT
GR
TR
IT
NO
SV
DA
MICROPEDI
WET & DRY
EN
INSTRUCTIONS FOR USE
DE
BEDIENUNGSANLEITUNG
FR
INSTRUCTIONS D´UTILISATION
NL
GEBRUIKSINSTRUCTIES
ES
INSTRUCCIONES DE USO
PT
INSTRUÇÕES DE UTILIZAÇÃO
GR
ΟΔΗΓΊΕΣ ΧΡΉΣΗΣ
TR
KULLANIM KILAVUZU
IT
MANUALE OPERATIVO
NO
BRUKSANVISNING
SV
BRUKSANVISNING
DA
BRUGERVEJLEDNING
AP-3WD

2
EN
DE
FR
NL
ES
PT
GR
TR
IT
NO
SV
DA
EN
DE
FR
NL
ES
PT
GR
TR
IT
NO
SV
DA

3
A
1
3
4
5
6
7
8
2
LR06
LR06
9
Dok./Rev.-Nr. 195281_20170222

4
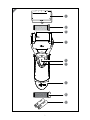
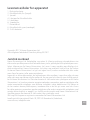
Scope of supply/device parts
1. Protective cap
2. MicroPedi roller, Fine (light grey)
3. Spindle
4. Locking bar for MicroPedi rollers
5. Locking button
6. On/o switch
7. Battery compartment cover
8. MicroPedi roller, Coarse (dark grey)
9. 2x AA batteries
Copyright 2017 © Home Skinovations Ltd.
All rights reserved. Date printed: 03/2017
Legal notice
Home Skinovations Ltd. reserves the right to modify its products or amend specications in
order to improve their performance, reliability or manufacturability. Information supplied by
Home Skinovations Ltd. is deemed to be accurate and reliable at the time of publication. How-
ever, Home Skinovations Ltd. assumes no responsibility for its use. No licence is hereby granted
either tacitly or under any patent or patent rights by Home Skinovations Ltd.
No part of this document may be reproduced or transmitted in any form or by any means,
whether electronic or mechanical, for any purpose without the express written consent of
Home Skinovations Ltd. Data is subject to change without prior notice.
Home Skinovations Ltd. has patents and pending patent applications, trademarks, copyrights
or other intellectual property rights covering the subject matter in this document. The furnish-
ing of this document does not grant you any licence whatsoever for these patents, trademarks,
copyrights or other intellectual property rights unless explicitly stated in a written agreement
concluded with Home Skinovations Ltd. Specications are subject to change without prior notice.
Silk’n and the Silk’n logo are registered trademarks of Home Skinovations Ltd.
InnoEssentials International, Donk 1B, 2991 LE Barendrecht, The Netherlands,
www.silkn.eu, info@silkn.com

5
EN
Table of contents
Overview .........................................................................................................................................................3
Scope of supply/device parts .................................................................................................................. 4
Legal notice .................................................................................................................................................... 4
Table of contents .......................................................................................................................................... 5
General information .................................................................................................................................... 6
Reading and storing the instruction manual...................................................................................................6
Explanation of symbols ................................................................................................................................................. 6
Safety ................................................................................................................................................................ 6
Proper use ..............................................................................................................................................................................6
Safety instructions ............................................................................................................................................................ 7
First use ..........................................................................................................................................................11
Checking the callus remover and package contents ..............................................................................11
Inserting batteries .......................................................................................................................................................... 11
Operation ......................................................................................................................................................11
Selecting MicroPedi roller ......................................................................................................................................... 11
Ejecting and inserting a MicroPedi roller ........................................................................................................ 12
Using the callus remover ........................................................................................................................................... 12
Cleaning and maintenance.....................................................................................................................13
Cleaning the callus remover ................................................................................................................................... 13
Replacing MicroPedi rollers ..................................................................................................................................... 13
Troubleshooting .........................................................................................................................................14
Technical data ..............................................................................................................................................14
Declaration of conformity .......................................................................................................................14
Disposal..........................................................................................................................................................15
Disposing of the packaging .................................................................................................................................... 15
Disposing of the callus remover ........................................................................................................................... 15
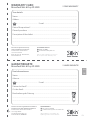
Warranty card ...........................................................................................................................................153
Warranty terms .........................................................................................................................................154

6
EN
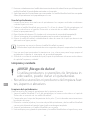
General information
Reading and storing the instruction manual
This instruction manual is supplied for the MicroPedi Wet & Dry (referred to below as the
“callus remover”). It contains important information on using it for the rst time and subse-
quent operation.
Please read the instruction manual carefully, especially the safety information, before using
the callus remover. Failure to take note of the instruction manual may result in serious inju-
ries or in damage to the device. The instruction manual is based on the rules and standards
applicable in the European Union. When outside this territory, please take also note of laws
and guidelines specic to individual countries.
Please keep the manual for future reference. If you pass the callus remover on to someone
else, make sure you let them have this instruction manual as well.
This instruction manual can also be requested as a PDF le via our homepage: www.silkn.eu.
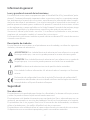
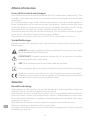
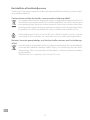
Explanation of symbols
The following symbols and signal words are used in this instruction manual, on the callus
remover itself or on the packaging.
WARNING! This symbol/signal word indicates a medium-risk hazard which, if not
avoided, may cause death or serious injury.
CAUTION! This symbol/signal word indicates a low-risk hazard which, if not avoided,
may cause minor or moderate injury.
NOTE! This signal word warns of possible damage to property.
This symbol provides you with additional useful information about assembly or
operation.
Declaration of conformity (see chapter “Declaration of conformity”):
Products marked with this symbol satisfy all applicable Community legislation of
the European Economic Area.
Safety
Proper use
The callus remover is designed to remove calluses and hard skin on the feet, hands and
elbows. It can be used on both wet and dry skin.
The callus remover is solely intended for home use. It is not suitable for commercial usage,
e.g. chiropody services. Do not use the callus remover outside. The callus remover is not a toy.
To prevent the transmission of diseases, the callus remover and the MicroPedi rollers should
not be used by more than one person.
The callus remover should only be used as described in this instruction manual.
Any other usage is not in line with its proper use and may cause damage to property.

7
EN
The manufacturer or the retailer accepts no liability for damage resulting from improper or
incorrect use.
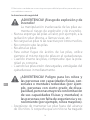
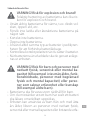
Safety instructions
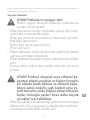
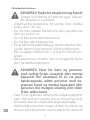
WARNING! Risk of explosion and re!
Improper handling of batteries increases the
risk of explosion and re.
• Never expose the batteries to heat, e.g. direct sun-
shine, naked ame, etc.
• Do not charge batteries or reactivate them by other
means.
• Do not short-circuit batteries.
• Do not open batteries.
• To prevent battery leakage, only ever use the same
type of batteries in the callus remover.
• When inserting batteries, check for correct polarity.
• When batteries are empty, remove from the callus
remover at once.
WARNING! Hazards for children and per-
sons with reduced physical, sensory or
mental capacity (for example, to a certain
extent the disabled, elderly persons with
restricted physical and mental capacity) or
persons lacking in experience or knowl-
edge (for example, older children).
• Make sure to keep batteries out of the reach of
children. If you suspect that a child has swallowed
a battery, seek medical help at once.
• The callus remover can be used by children of eight

8
EN
years and over as well as by persons with reduced
physical, sensory or mental capacity or lacking in
experience or knowledge if they are supervised or
instructed in safe usage of the device and under-
stand the resulting hazards.
• Cleaning and user maintenance must not be per-
formed by children without supervision.
• Keep the callus remover and its accessories out of
the reach of children under the age of eight years.
• The scope of supply include small parts that can
be swallowed as well as packaging lms. Keep
these parts away from children as, if swallowed,
there is a risk of suocation.
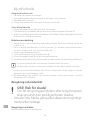
CAUTION! Risk of chemical burns!
Leaking battery uid can harm the skin on
contact or cause injuries to other parts of the
body.
• If a battery has leaked in the callus remover, put
on protective gloves and clean the battery com-
partment with a dry cloth.
• Prevent battery uid from coming into contact
with the skin, eyes and mucous membranes.
• If you have come into contact with battery acid,
immediately rinse the aected areas with plenty
of clean water and seek medical help at once.
• If you won’t be using the callus remover for a while,
take the batteries out of the battery compartment.

9
EN
CAUTION! Risk of injury!
Improper use of the callus remover can result
in injuries and damage to property.
• Holding the rotating MicroPedi rollers on one spot
on your skin for too long may cause minor injury.
• Only use the callus remover on the hands, feet
and elbows and not on any other part of the body.
• Do not use additional treatment products such as
oils or ointments.
• Do not use the callus remover directly on or near
open wounds and skin inammation or to remove
warts.
• Do not use the callus remover on skin that is sore,
irritated or blistered.
• Do not treat your skin continuously with the callus
remover for longer than two to three seconds.
• Stop treatment immediately if you experience
pain or skin irritation.
• Seek medical help in the case of any bleeding or
severe irritation.
• Do not use the callus remover if the MicroPedi
rollers are damaged or worn.
• Long, exible objects, hair and textiles can get
caught in the rotating MicroPedi rollers. Make sure
you keep the callus remover well away from hair,
wigs and other long, exible objects like shoelaces,
string or textile bres.

10
EN
Consult your doctor before using the callus re-
mover if ...
• you suer from allergies, any rash on the hands or
feet, skin irritation or skin diseases such as neuro-
dermatitis, psoriasis, etc.;
• you have diabetes or poor circulation;
• you have a pacemaker;
• you are not sure whether the callus remover is
suitable for you.
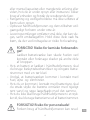
NOTE! Risk of damage!
Improper use of the callus remover may damage
the device.
• Make sure no objects get inside the callus remover
or between the MicroPedi rollers and casing.
• Protect the callus remover from hard knocks, ex-
treme temperatures and direct sunshine.
• Only switch the callus remover on when a Micro-
Pedi roller is inserted.
• Do not use the callus remover in rooms where
people are working with sprays or pure oxygen.
• Switch the callus remover o immediately and stop
using it if you see or smell smoke while operating
the device.
• Only use the callus remover with original accessories.
• Do not open the sealed parts of the callus remover
and do not try to modify the device.
• Do not use the callus remover if damaged.

11
EN
First use
Checking the callus remover and package contents
NOTE! Risk of damage!
Opening the packaging without due care with
a sharp knife or any other pointed objects may
easily damage the callus remover.
• Take great care when opening.
1. Take the callus remover out of the packaging.
2. Check whether all parts supplied are complete (see Fig. A).
3. Check whether the callus remover or individual parts are damaged. If this is the case,
do not use the callus remover. You should then contact the manufacturer at the service
address given on the warranty card.
Inserting batteries
1. Hold the callus remover horizontally.
2. Turn the battery compartment cover (7) anticlockwise and slide o.
3. If necessary, clean the contacts on the batteries and the device before inserting the batteries.
4. Upon insertion into the battery compartment (9), check for correct battery polarity.
5. Fit the battery compartment cover back on and turn clockwise to close tightly. You can
now insert a MicroPedi roller (2 or 8).
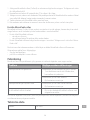
Operation
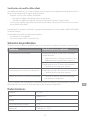
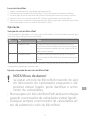
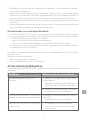
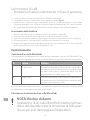
Selecting a MicroPedi roller
The callus remover comes with two MicroPedi rollers. Consult the following table to nd out
which roller is suitable for which treatment purpose.
No. Colour Use
2 Light grey This surface of this MicroPedi roller is ner. Use this
MicroPedi roller to remove rough skin or for treat-
ment after using the dark-grey MicroPedi roller.
8 Dark grey This surface of this MicroPedi roller is coarser. Use
this MicroPedi roller to remove very rough skin.
With very rough skin, we recommend always using the dark-grey MicroPedi roller rst, followed
by the light grey one.

12
EN
Ejecting and inserting a MicroPedi roller
NOTE! Risk of damage!
If you eject an inserted MicroPedi roller from the
spindle of the callus remover while the device is
switched on, you may damage the callus remover.
• Never eject a MicroPedi roller that is still rotating
when the callus remover is switched on.
• Always switch the callus remover o rst before
replacing the MicroPedi roller.
Ejecting MicroPedi roller
1. Check that the callus remover is switched o.
2. Slide down the locking bar for the MicroPedi rollers (4) on the right-hand side of the callus
remover.
3. The MicroPedi roller inside will be ejected.
4. Pull the MicroPedi roller o the spindle (3) of the callus remover by moving outwards.
Inserting MicroPedi roller
1. Fit the required MicroPedi roller (2 or 8) onto the spindle (3) in the casing of the callus remover.
2. Carefully press the MicroPedi roller right onto the spindle until you hear the locking bar for
the MicroPedi rollers (4) click into place.
3. Shake the callus remover lightly to check whether the MicroPedi roller is securely fastened.
The callus remover is now ready for use.
Using the callus remover
1. Clean your skin before treatment with the callus remover. The best results are obtained
when the skin is dry.
2. Fit the required MicroPedi roller (2 or 8) onto the spindle (3) of the callus remover as
described in the chapter “Ejecting and inserting a MicroPedi roller”.
3. Remove the protective cap (1).
4. Press down the locking button (5) on the on/o switch (6).
5. Slide the on/o switch up to switch the callus remover on.
6. Move the MicroPedi roller carefully over the parts of the skin you wish to treat, applying
light pressure.
If you use too much pressure, the MicroPedi roller will stop.
Only ever use on the skin for two or three seconds and then check the result.
7. Once you have nished the treatment or want to take a lengthy break, switch o the

13
EN
callus remover by sliding the on/o switch down.
8. At the end of your skin care session, clean the callus remover as described in the chapter
“Cleaning and maintenance”.
Cleaning and maintenance
NOTE! Risk of damage!
If you use the wrong cleaning products or
cleaning implements, you may damage the cal-
lus remover.
• Do not use hard, rough or abrasive cleaning prod-
ucts or implements.
Cleaning the callus remover
Clean the callus remover whenever you have used it as follows:
1. Take the MicroPedi roller (2 or 8) out of the callus remover as described in the chapter
“Ejecting and inserting a MicroPedi roller”.
2. Check that the battery compartment cover (7) is securely turned to the lock position.
3. Remove any dirt, dust and remnants of skin from the callus remover and the MicroPedi
rollers using a dampened cloth or shortly hold the parts under running lukewarm water.
4. Wipe the callus remover and the MicroPedi roller dry with a cloth.
5. Once clean and dry, store the callus remover and MicroPedi rollers in a cool and dry place.
Replacing MicroPedi rollers
The MicroPedi rollers (2 or 8) should only be used a couple of times depending on the
frequency of use and size of the areas of skin treated.
• Always replace the MicroPedi rollers:
• when the MicroPedi rollers look worn;
• when the MicroPedi rollers start to show cracks or other damages.
• Replace the MicroPedi rollers as described in the chapter “Ejecting and inserting a Micro-
Pedi roller”.
For the best results we always recommend replacing both MicroPedi rollers together.
Original spare parts are available:
• from your retailer,
• on the Silk’n website: www.silkn.eu.

14
EN
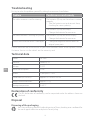
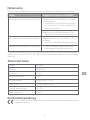
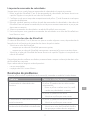
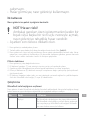
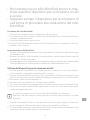
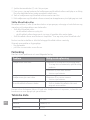
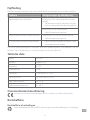
Troubleshooting
First try to solve the problem yourself by taking the measures listed below:
Problem Possible causes and remedy
The callus remover is not functioning. The batteries (9) may not have been inserted
properly.
• Take the batteries out and reinsert them,
checking for correct polarity.
The batteries (9) may be empty.
• Change the batteries for new ones.
The callus remover is running very slowly. The batteries (9) may be almost empty.
• Change the batteries for new ones.
One of the MicroPedi rollers is damaged. • Change damaged MicroPedi rollers for
original spare parts.
If these measures are unsuccessful or your callus remover needs to be repaired, contact
Customer Service via the details on the warranty card.
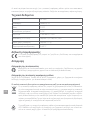
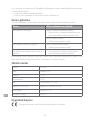
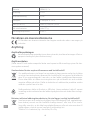
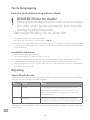
Technical data
Model: AP-3WD
Batteries: LR06/AA, 2×
Voltage: 3 V DC
Power consumption: 3.4 W
Speed: 2,300 rpm +/– 20%
Dimensions (H × W × D): approx. 15.5 × 6.0 × 3.5 cm
Weight without batteries: approx. 127 g
Storage temperature: 0−40 °C
Declaration of conformity
The EU declaration of conformity can be requested under the address shown on
the back.
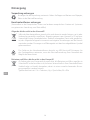
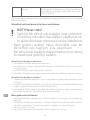
Disposal
Disposing of the packaging
Sort the packaging materials before disposing of them, handing over cardboard for
the waste paper collection and plastics for recycling.

15
EN
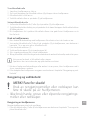
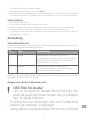
Disposing of the callus remover
(Applicable in the European Union and other European countries with separate waste collection
systems for recyclable materials)
Old devices must not be disposed of with household waste!
If the callus remover can no longer be used, consumers are obliged by law to dispose
of used devices separately from household waste, e.g. by handing it over to a collection
point run by their local authority/municipality. This ensures that such equipment is
recycled in the proper manner and avoids any adverse eect on the environment. This
is why electrical and electronic equipment is marked with the symbol shown here.
The casing of the callus remover is made of ABS plastic. Hand over the casing of the
device for separate collection of this material if your local authority runs such a
recycling scheme.
Batteries including rechargeable ones must not be disposed of with your household
waste!
As a consumer you are obliged by law to hand over all batteries (incl. rechargeable
ones) regardless whether they contain harmful substances* or not, to a collection
point run by your local authority/municipality or to return them to the retailer so
they can be subjected to environmentally sound disposal.
*labelled with: Cd = cadmium, Hg = mercury, Pb = lead

16
DE
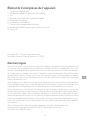
Lieferumfang/Geräteteile
1. Schutzkappe
2. MicroPedi-Rolle, fein (hellgrau)
3. Achse
4. Riegel für MicroPedi-Rollen
5. Sicherungstaste
6. Ein-/Ausschalter
7. Batteriefachverschluss
8. MicroPedi-Rolle, grob (dunkelgrau)
9. 2x AA Batterien
Copyright 2017 © Home Skinovations Ltd.
Alle Rechte vorbehalten. Druckdatum: 03/2017
Rechtlicher Hinweis
Home Skinovations Ltd behält sich das Recht vor, Änderungen an seinen Produkten oder
Spezifikationen zur Verbesserung von Leistung, Betriebssicherheit oder Herstellbarkeit vor-
zunehmen. Durch Home Skinovations Ltd bereitgestellte Informationen werden zum Zeit-
punkt der Veröffentlichung als korrekt und verlässlich angesehen. Die Home Skinovations
Ltd übernimmt allerdings keine Verantwortung für deren Verwendung. Es wird weder still-
schweigend noch unter einem Patent oder unter Patentrechten der Home Skinovations
Ltd eine Lizenz eingeräumt.
Kein Teil dieses Dokuments darf in irgendeiner Form oder mit elektronischen oder mecha-
nischen Mitteln für irgendwelche Zwecke ohne ausdrückliche schriftliche Genehmigung
der Home Skinovations Ltd reproduziert oder übertragen werden.
Änderungen der Daten ohne Vorankündigung sind vorbehalten. Die Home Skinovations
Ltd verfügt über Patente sowie anhängige Patentanmeldungen, Handelsmarken, Urheber-
rechte oder sonstige Rechte geistigen Eigentums, welche Gegenstand dieses Dokumentes
sind. Die Bereitstellung dieses Dokumentes gibt Ihnen keinerlei Lizenz für diese Patente,
Handelsmarken, Urheberrechte oder sonstigen Rechte geistigen Eigentums, sofern dies
nicht ausdrücklich in einer schriftlichen Vereinbarung von Home Skinovations Ltd geregelt
ist. Änderung der technischen Daten ohne Vorankündigung vorbehalten.
Silk‘n und das Silk‘n-Logo sind eingetragene Warenzeichen der Home Skinovations Ltd.
InnoEssentials International, Donk 1B, 2991 LE Barendrecht, The Netherlands,
www.silkn.eu, info@silkn.com.

17
DE
Inhaltsverzeichnis
Übersicht .........................................................................................................................................................3
Lieferumfang/Geräteteile ........................................................................................................................16
Rechtlicher Hinweis ...................................................................................................................................16
Inhaltsverzeichnis.......................................................................................................................................17
Allgemeines .................................................................................................................................................. 18
Bedienungsanleitung lesen und aufbewahren .......................................................................................... 18
Zeichenerklärung ........................................................................................................................................................... 18
Sicherheit ......................................................................................................................................................19
Bestimmungsgemäßer Gebrauch ....................................................................................................................... 19
Sicherheitshinweise ...................................................................................................................................................... 20
Erstinbetriebnahme ..................................................................................................................................23
Hornhautentferner und Lieferumfang prüfen ............................................................................................. 23
Batterien einsetzen ....................................................................................................................................................... 24
Bedienung.....................................................................................................................................................24
MicroPedi-Rolle auswählen ..................................................................................................................................... 24
MicroPedi-Rolle auswerfen und einsetzen .....................................................................................................24
Hornhautentferner benutzen .................................................................................................................................25
Reinigung und Pege ...............................................................................................................................26
Hornhautentferner reinigen ....................................................................................................................................26
MicroPedi-Rollen ersetzen ........................................................................................................................................ 26
Fehlersuche ..................................................................................................................................................27
Technische Daten .......................................................................................................................................27
Konformitätserklärung .............................................................................................................................27
Entsorgung ...................................................................................................................................................28
Verpackung entsorgen ............................................................................................................................................... 28
Hornhautentferner entsorgen ............................................................................................................................... 28
Garantiekarte ............................................................................................................................................ 153
Garantiebedingungen ...........................................................................................................................154

18
DE
Allgemeines
Bedienungsanleitung lesen und aufbewahren
Diese Bedienungsanleitung gehört zu diesem MicroPedi Wet & Dry (im Folgenden nur „Hornhau-
tentferner“ genannt). Sie enthält wichtige Informationen zur Inbetriebnahme und Handhabung.
Lesen Sie die Bedienungsanleitung, insbesondere die Sicherheitshinweise, sorgfältig durch,
bevor Sie den Hornhautentferner einsetzen. Die Nichtbeachtung dieser Bedienungsanlei-
tung kann zu schweren Verletzungen oder zu Schäden am Hornhautentferner führen. Die
Bedienungsanleitung basiert auf den in der Europäischen Union gültigen Normen und Regeln.
Beachten Sie im Ausland auch landesspezifische Richtlinien und Gesetze.
Bewahren Sie die Bedienungsanleitung für die weitere Nutzung auf. Wenn Sie den Horn-
hautentferner an Dritte weitergeben, geben Sie unbedingt diese Bedienungsanleitung mit.
Diese Bedienungsanleitung können Sie auch auf unserer Homepage unter www.silkn.eu im
PDF-Format anfordern.
Zeichenerklärung
Die folgenden Symbole und Signalwörter werden in dieser Bedienungsanleitung, auf dem
Hornhautentferner oder auf der Ver packung verwendet.
WARNUNG! Dieses Signalsymbol/-wort bezeichnet eine Gefährdung mit einem
mittleren Risikograd, die, wenn sie nicht vermieden wird, den Tod oder eine schwere
Verletzung zur Folge haben kann.
VORSICHT! Dieses Signalsymbol/-wort bezeichnet eine Gefährdung mit einem
niedrigen Risikograd, die, wenn sie nicht vermieden wird, eine geringfügige oder mä-
ßige Verletzung zur Folge haben kann.
HINWEIS! Dieses Signalwort warnt vor möglichen Sachschäden.
Dieses Symbol gibt Ihnen nützliche Zusatz informa-tionen zum Zusammenbau
oder zum Betrieb.
Konformitätserklärung (siehe Kapitel „Konformitätserklärung“):
Mit diesem Symbol gekennzeichnete Produkte erfüllen alle anzuwendenden Gemein-
schaftsvorschriften des Europäischen Wirtschaftsraums.
Sicherheit
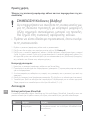
Bestimmungsgemäßer Gebrauch
Der Hornhautentferner ist für die Entfernung von Hornhaut an Füßen, Händen und Ellenbogen
konzipiert. Er kann auf feuchter und trockener Haut verwendet werden.
Der Hornhautentferner ist ausschließlich für den Privatgebrauch bestimmt. Für die gewerb-
liche Anwendung, z. B. für die medizinische Fußpflege, ist er nicht geeignet. Verwenden Sie
den Hornhautentferner nicht im Freien. Der Hornhautentferner ist kein Kinderspielzeug.
Um die Übertragung von Krankheiten zu vermeiden, sollten der Hornhautentferner und die

19
DE
MicroPedi-Rollen nicht von mehreren Personen benutzt werden.
Verwenden Sie den Hornhautentferner nur wie in dieser Bedienungsanleitung beschrieben.
Jede andere Verwendung gilt als nicht bestimmungsgemäß und kann zu Sachschäden führen.
Der Hersteller oder Händler übernimmt keine Haftung für Schäden, die durch nicht bestim-
mungsgemäßen oder falschen Gebrauch entstanden sind.
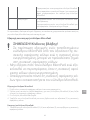
Sicherheitshinweise
WARNUNG! Explosions- und Brandgefahr!
Unsachgemäßer Umgang mit den Batterien
erhöht die Explosions- und Brandgefahr.
• Setzen Sie die Batterien niemals Hitze wie z. B. di-
rekter Sonneneinstrahlung, offenem Feuer o. Ä. aus.
• Laden Sie Batterien nicht auf und reaktivieren Sie
Batterien nicht mit anderen Mitteln.
• Schließen Sie Batterien nicht kurz.
• Öffnen Sie Batterien nicht.
• Um das Auslaufen der Batterien zu verhindern,
benutzen Sie im Hornhautentferner nur Batterien
des gleichen Typs.
• Achten Sie beim Einlegen der Batterien auf die rich-
tige Polarität.
• Entfernen Sie leere Batterien umgehend aus dem
Hornhautentferner.
WARNUNG! Gefahren für Kinder und Per-
sonen mit verringerten physischen, senso-
rischen oder mentalen Fähigkeiten (bei-
spielsweise teilweise Behinderte, ältere
Personen mit Einschränkung ihrer physi-
schen und mentalen Fähigkeiten) oder
Mangel an Erfahrung und Wissen (bei-

20
DE
spielsweise ältere Kinder).
• Bewahren Sie Batterien für Kinder unerreichbar auf.
Wenn Sie vermuten, dass ein Kind eine Batterie ver-
schluckt hat, suchen Sie umgehend einen Arzt auf.
• Der Hornhautentferner kann von Kindern ab acht
Jahren und darüber sowie von Personen mit ver-
ringerten physischen, sensorischen oder menta-
len Fähigkeiten oder Mangel an Erfahrung und
Wissen benutzt werden, wenn sie beaufsichtigt
werden oder bezüglich des sicheren Gebrauchs
des Hornhaut entferners unterwiesen wurden und
die daraus resultierenden Gefahren verstehen.
• Reinigung und Benutzerwartung dürfen nicht
von Kindern ohne Beaufsichtigung durchgeführt
werden.
• Halten Sie den Hornhautentferner und sein Zube-
hör von Kindern unter acht Jahren fern.
• Zum Lieferumfang gehören verschluckbare Klein-
teile sowie Verpackungsfolie. Halten Sie diese Tei-
le von Kindern fern, da beim Verschlucken Ersti-
ckungsgefahr besteht.
VORSICHT! Verätzungsgefahr!
Auslaufende Batterieflüssigkeit kann bei Be-
rührung mit der Haut oder anderen Körper-
teilen Verletzungen verursachen.
• Wenn eine Batterie im Hornhautentferner ausgelau-
fen ist, ziehen Sie Schutzhandschuhe an und reini-
gen Sie das Batteriefach mit einem trockenen Tuch.
La pagina si sta caricando...
La pagina si sta caricando...
La pagina si sta caricando...
La pagina si sta caricando...
La pagina si sta caricando...
La pagina si sta caricando...
La pagina si sta caricando...
La pagina si sta caricando...
La pagina si sta caricando...
La pagina si sta caricando...
La pagina si sta caricando...
La pagina si sta caricando...
La pagina si sta caricando...
La pagina si sta caricando...
La pagina si sta caricando...
La pagina si sta caricando...
La pagina si sta caricando...
La pagina si sta caricando...
La pagina si sta caricando...
La pagina si sta caricando...
La pagina si sta caricando...
La pagina si sta caricando...
La pagina si sta caricando...
La pagina si sta caricando...
La pagina si sta caricando...
La pagina si sta caricando...
La pagina si sta caricando...
La pagina si sta caricando...
La pagina si sta caricando...
La pagina si sta caricando...
La pagina si sta caricando...
La pagina si sta caricando...
La pagina si sta caricando...
La pagina si sta caricando...
La pagina si sta caricando...
La pagina si sta caricando...
La pagina si sta caricando...
La pagina si sta caricando...
La pagina si sta caricando...
La pagina si sta caricando...
La pagina si sta caricando...
La pagina si sta caricando...
La pagina si sta caricando...
La pagina si sta caricando...
La pagina si sta caricando...
La pagina si sta caricando...
La pagina si sta caricando...
La pagina si sta caricando...
La pagina si sta caricando...
La pagina si sta caricando...
La pagina si sta caricando...
La pagina si sta caricando...
La pagina si sta caricando...
La pagina si sta caricando...
La pagina si sta caricando...
La pagina si sta caricando...
La pagina si sta caricando...
La pagina si sta caricando...
La pagina si sta caricando...
La pagina si sta caricando...
La pagina si sta caricando...
La pagina si sta caricando...
La pagina si sta caricando...
La pagina si sta caricando...
La pagina si sta caricando...
La pagina si sta caricando...
La pagina si sta caricando...
La pagina si sta caricando...
La pagina si sta caricando...
La pagina si sta caricando...
La pagina si sta caricando...
La pagina si sta caricando...
La pagina si sta caricando...
La pagina si sta caricando...
La pagina si sta caricando...
La pagina si sta caricando...
La pagina si sta caricando...
La pagina si sta caricando...
La pagina si sta caricando...
La pagina si sta caricando...
La pagina si sta caricando...
La pagina si sta caricando...
La pagina si sta caricando...
La pagina si sta caricando...
La pagina si sta caricando...
La pagina si sta caricando...
La pagina si sta caricando...
La pagina si sta caricando...
La pagina si sta caricando...
La pagina si sta caricando...
La pagina si sta caricando...
La pagina si sta caricando...
La pagina si sta caricando...
La pagina si sta caricando...
La pagina si sta caricando...
La pagina si sta caricando...
La pagina si sta caricando...
La pagina si sta caricando...
La pagina si sta caricando...
La pagina si sta caricando...
La pagina si sta caricando...
La pagina si sta caricando...
La pagina si sta caricando...
La pagina si sta caricando...
La pagina si sta caricando...
La pagina si sta caricando...
La pagina si sta caricando...
La pagina si sta caricando...
La pagina si sta caricando...
La pagina si sta caricando...
La pagina si sta caricando...
La pagina si sta caricando...
La pagina si sta caricando...
La pagina si sta caricando...
La pagina si sta caricando...
La pagina si sta caricando...
La pagina si sta caricando...
La pagina si sta caricando...
La pagina si sta caricando...
La pagina si sta caricando...
La pagina si sta caricando...
La pagina si sta caricando...
La pagina si sta caricando...
La pagina si sta caricando...
La pagina si sta caricando...
La pagina si sta caricando...
La pagina si sta caricando...
La pagina si sta caricando...
La pagina si sta caricando...
La pagina si sta caricando...
La pagina si sta caricando...
La pagina si sta caricando...
La pagina si sta caricando...
La pagina si sta caricando...
La pagina si sta caricando...
La pagina si sta caricando...
La pagina si sta caricando...
La pagina si sta caricando...
La pagina si sta caricando...
La pagina si sta caricando...
La pagina si sta caricando...
La pagina si sta caricando...
La pagina si sta caricando...
La pagina si sta caricando...
La pagina si sta caricando...
La pagina si sta caricando...
La pagina si sta caricando...
La pagina si sta caricando...
-
 1
1
-
 2
2
-
 3
3
-
 4
4
-
 5
5
-
 6
6
-
 7
7
-
 8
8
-
 9
9
-
 10
10
-
 11
11
-
 12
12
-
 13
13
-
 14
14
-
 15
15
-
 16
16
-
 17
17
-
 18
18
-
 19
19
-
 20
20
-
 21
21
-
 22
22
-
 23
23
-
 24
24
-
 25
25
-
 26
26
-
 27
27
-
 28
28
-
 29
29
-
 30
30
-
 31
31
-
 32
32
-
 33
33
-
 34
34
-
 35
35
-
 36
36
-
 37
37
-
 38
38
-
 39
39
-
 40
40
-
 41
41
-
 42
42
-
 43
43
-
 44
44
-
 45
45
-
 46
46
-
 47
47
-
 48
48
-
 49
49
-
 50
50
-
 51
51
-
 52
52
-
 53
53
-
 54
54
-
 55
55
-
 56
56
-
 57
57
-
 58
58
-
 59
59
-
 60
60
-
 61
61
-
 62
62
-
 63
63
-
 64
64
-
 65
65
-
 66
66
-
 67
67
-
 68
68
-
 69
69
-
 70
70
-
 71
71
-
 72
72
-
 73
73
-
 74
74
-
 75
75
-
 76
76
-
 77
77
-
 78
78
-
 79
79
-
 80
80
-
 81
81
-
 82
82
-
 83
83
-
 84
84
-
 85
85
-
 86
86
-
 87
87
-
 88
88
-
 89
89
-
 90
90
-
 91
91
-
 92
92
-
 93
93
-
 94
94
-
 95
95
-
 96
96
-
 97
97
-
 98
98
-
 99
99
-
 100
100
-
 101
101
-
 102
102
-
 103
103
-
 104
104
-
 105
105
-
 106
106
-
 107
107
-
 108
108
-
 109
109
-
 110
110
-
 111
111
-
 112
112
-
 113
113
-
 114
114
-
 115
115
-
 116
116
-
 117
117
-
 118
118
-
 119
119
-
 120
120
-
 121
121
-
 122
122
-
 123
123
-
 124
124
-
 125
125
-
 126
126
-
 127
127
-
 128
128
-
 129
129
-
 130
130
-
 131
131
-
 132
132
-
 133
133
-
 134
134
-
 135
135
-
 136
136
-
 137
137
-
 138
138
-
 139
139
-
 140
140
-
 141
141
-
 142
142
-
 143
143
-
 144
144
-
 145
145
-
 146
146
-
 147
147
-
 148
148
-
 149
149
-
 150
150
-
 151
151
-
 152
152
-
 153
153
-
 154
154
-
 155
155
-
 156
156
-
 157
157
-
 158
158
-
 159
159
-
 160
160
-
 161
161
-
 162
162
-
 163
163
-
 164
164
-
 165
165
-
 166
166
-
 167
167
-
 168
168


Silkn AP-3WD Instructions For Use Manual
- Tipo
- Instructions For Use Manual
in altre lingue
- français: Silkn AP-3WD
- español: Silkn AP-3WD
- Deutsch: Silkn AP-3WD
- Nederlands: Silkn AP-3WD
- português: Silkn AP-3WD
- dansk: Silkn AP-3WD
- Türkçe: Silkn AP-3WD
Documenti correlati
Altri documenti
-
Silk'n FaceTite Instructions For Use Manual
-
Hilti Rollen TS20E Guida utente
-
Silvercrest SHE 3 C3 Operating Instructions Manual
-
Medisana CR 860 Manuale del proprietario
-
-
Silk n TB-1389 Manuale utente
-
Beurer MP59 Manuale del proprietario
-
-
Beurer SR FB1 Footbath Manuale del proprietario
-
BaByliss H700E Manuale utente