Zerowatt-Hoover LB EH 41 Manuale utente
- Categoria
- Lavatrici
- Tipo
- Manuale utente

User instructions
Istruzioni per l’uso
EN
IT
EH 41

CHAPTER
CAPITOLO
1
2
3
4
5
6
7
8
9
10
11
12
13
3
IT
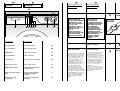
INDICE
Prefazione
Note generali alla consegna
Garanzia
Prescrizioni di sicurezza
Dati tecnici
Messa in opera, installazione
Descrizione comandi
Cassetto detersivo
Selezione/Consigli utili per gli
utenti
Il prodotto
Tabella programmi
Lavaggio
Pulizia e manutenzione
ordinaria
Ricerca guasti
EN
INDEX
Introduction
General points on delivery
Guarantee
Safety Measures
Technical Data
Setting up and Installation
Control Description
Detergent drawer
Selection/Customer
Awareness
The Product
Table of Programmes
Washing
Cleaning and routine
maintenance
Faults Search
2
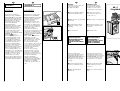
EN
OUR COMPLIMENTS
With the purchase of this
Hoover household
appliance, you have shown
that you will not accept
compromises: you want only
the best.
Hoover is happy to present
their new washing machine,
the result of years of research
and market experience
through direct contact with
Consumers.You have chosen
the quality, durability and
high performance that this
washing machine offers.
Hoover is also able to offer a
vast range of other
household appliances:
washing machines,
dishwashers, washer-dryers,
cookers, microwave ovens.
Traditional ovens and hobs,
refrigerators and freezers.
Ask your local retailer for the
complete catalogue of
Hoover products.
Please read this booklet
carefully as it provides
important guide lines for safe
installation, use and
maintenance and some
useful advise for best results
when using your washing
machine.
Keep this booklet in a safe
place for further consultation.
When contacting Hoover
or a Customer Services
Centre always refer to the
Model, No., and G number (if
applicable of the appliance
see panel).
IT
COMPLIMENTI
Con l’acquisto di questo
elettrodomestico Hoover;
Lei ha dimostrato di non
accettare compromessi:
Lei vuole il meglio.
Hoover é lieta di proporLe
questa nuova lavatrice
frutto di anni di ricerche e di
esperienze maturate sul
mercato, a contatto diretto
con i Consumatori. Lei ha
scelto la qualità, la durata e
le elevate prestazioni che
questa lavatrice Le offre.
Hoover Le propone inoltre
una vasta gamma di
elettrodomestici: lavatrici,
lavastoviglie, lavasciuga,
cucine, forni a microonde,
forni e piani di cottura,
frigoriferi e congelatori.
Chieda al Suo Rivenditore
il catalogo completo dei
prodotti Hoover
La preghiamo di leggere
attentamente le avvertenze
contenute nel presente
libretto in quanto forniscono
importanti indicazioni
riguardanti la sicurezza di
installazione, d’uso, di
manutenzione e alcuni utili
consigli per il migliore utilizzo
della lavatrice.
Conservi con cura questo
libretto per ogni ulteriore
consultazione.
Quando comunica con la
Hoover o con i suoi centri di
assistenza citi sempre il
Modello, il n° e il numero G
(se c’è). Praticamente tutto
ciò che é citato nel
riquadro.

IT
CAPITOLO 2
GARANZIA
L’apparecchio é
corredatoda un certificato
di garanzia che Le permette
di usufruire gratuitamente
del Servizio di Assistenza
Tecnica, salvo l’addebito di
un diritto fisso di chiamata,
per il periodo di un anno
dalla data d’acquisto.
Ricordi di spedire la parte A
del certificato di garanzia,
per la necessaria convalida
entro10 giorni dalla data di
acquisto.
La parte B dovrà essere da
Lei conservata,
debitamente compilata, per
essere esibita al Servizio
Assistenza Tecnica, in caso
di necessità di intervento,
insieme alla ricevuta fiscale
rilasciata dal rivenditore al
momento dell’acquisto.
5
SERVIZIO ASSISTENZA TECNICA
☎
199. 123. 123
EN
CHAPTER 2
GUARANTEE
The appliance is supplied
with a guarantee certificate
which allows free use of the
Technical Assistance Service,
apart from a fixed call out
charge, for a period of one
year from the date of
purchase.
Remember to post part B of
the guarantee certificate
within 10 days of the
purchase date.
Part A should be filled in and
kept by you to be shown if
necessary to the technician
from the Technical Assistance
Service. The sales receipt
should also be kept.
4
SPEDIRE
TRATTENERE
AB
C
EUROPE
Dovunque
tu sia.
E
EN
CHAPTER 1
GENERAL POINTS
ON DELIVERY
On delivery, check that the
following are included with
the machine:
A) INSTRUCTION MANUAL
B) CUSTOMER SERVICE
ADDRESSES
C) GUARANTEE
CERTIFICATES
D) CAP
E) BEND FOR OUTLET TUBE
KEEP THEM IN A SAFE
PLACE
Check that the machine has
not incurred damage during
transport. If this is the case,
contact your nearest Gias
Centre.
D
IT
CAPITOLO 1
NOTE GENERALI
ALLA CONSEGNA
Alla consegna controlli che
con la macchina ci siano:
A) MANUALE
D’ISTRUZIONE
B) INDIRIZZI DI ASSISTENZA
C) CERTIFICATI DI
GARANZIA
D) TAPPO
E) CURVA PER TUBO
SCARICO
CONSERVATELI
e controlli che non abbia
subito danni durante il
trasporto, in caso contrario
chiami il centro Gias più
vicino.

6
EN
CHAPTER 3
SAFETY MEASURES
IMPORTANT:
FOR ALL CLEANING
AND MAINTENANCE
WORK
● Remove the plug
● Turn off the water inlet tap.
● All Hoover appliances are
earthed. Ensure that the main
electricity circuit is earthed.
Contact a qualified
electrician if this is not the
case.
This appliance
complies with Directives
89/336/EEC, 73/23/EEC and
following changes.
● Do not touch the appliance
with wet or damp hands or
feet.
● Do not use the appliance
when bare-footed.
● Extreme care should be
taken if extension leads are
used in bathrooms or shower
rooms. Avoid this where
possible.
WARNING: DURING THE
WASHING CYCLE, THE
WATER CAN REACH A
TEMPERATURE OF 90°C.
● Before opening the washing
machine door, ensure that
there is no water in the drum.
IT
CAPITOLO 3
PRESCRIZIONI DI
SICUREZZA
ATTENZIONE:
PER QUALSIASI
INTERVENTO DI PULIZIA
E MANUTENZIONE
DELLA LAVATRICE
●
Tolga la spina.
●
Chiuda il rubinetto
dell’acqua.
●
Hoover correda tutte le
sue macchine di messa a
terra.
Si assicuri che l’impianto
elettrico sia provvisto di
messa a terra in caso
contrario richieda
l’intervento di personale
qualificato.
Apparecchio
conforme alle Direttive
Europee 89/336/CEE,
73/23/CEE e successive
modifiche.
●
Non tocchi l’apparecchio
con mani, piedi bagnati o
umidi.
●
Non usi l’apparecchio a
piedi nudi.
●
Non usi, se non con
particolare cautela,
prolunghe in locali adibiti a
bagno o doccia.
ATTENZIONE:
DURANTE IL LAVAGGIO
L’ACQUA PUO’ ANDARE
A 90°C.
●
Prima di aprire l’oblò si
assicuri che non vi sia
acqua nel cestello.
7
EN
● Do not use adaptors or
multiple plugs.
● Do not allow the appliance
to be used by children or the
incompetent without due
supervision.
● Do not pull the mains lead
or the appliance itself to
remove the plug from the
socket.
● Do not leave the
appliance exposed to
atmospheric agents (rain, sun
etc.)
● In the case of removal,
never lift the appliance by
the knobs or detersive
drawer.
● During transportation
do not lean the door against
the trolley.
Important!
When the appliance
location is on carpet floors,
attention must be paid so as
to ensure that there is no
obstruction to the bottom
vents.
● Lift the appliance in pairs
as illustrated in the diagram.
● In the case of failure
and/or incorrect operation,
turn the washing machine
off, close the water inlet tap
and do not tamper with the
appliance. Contact a Gias
Technical Assistance Centre
for any repairs and ask for
original spare parts.
Avoidance of these norms
may compromise the safety
of the appliance.
● Should the supply cord
(mains cable) be demaged,
this is to be replaced by a
specific cable available from
the after sales service centre.
IT
●
Non usi adattatori o spine
multiple
●
Non permetta che
l’apparecchio sia usato dai
bambini o da incapaci,
senza sorveglianza.
●
Non tiri il cavo di
alimentazione, o
l’apparecchio stesso, per
staccare la spina dalla presa
di corrente.
●
Non lasci esposto
l’apparecchio ad agenti
atmosferici (pioggia, sole,
ecc...).
●
In caso di trasloco non la
sollevi mai dalle manopole o
dal cassetto del detersivo.
●
Durante il trasporto non
appoggi mai l’oblò al
carrello.
Importante!
Nel caso si installi
l’apparecchio su un
pavimento ricoperto da
tappeti o con moquette, si
deve fare attenzione che le
aperture di ventilazione alla
base dell’apparecchio non
vengano ostruite.
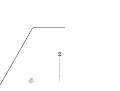
●
Sollevarla in due persone
come illustrato in figura.
●
In caso di guasto e/o di
cattivo funzionamento
dell’apparecchio, lo spenga,
chiuda il rubinetto
dell’acqua e non
manometta
l’elettrodomestico. Per
l’eventuale riparazione si
rivolga solamente a un
centro di Assistenza Tecnica
Gias e richieda l’utilizzo di
ricambi originali.
Il mancato rispetto di quanto
sopra può compromettere la
sicurezza dell’apparecchio.
●
Se il cavo di alimentazione
risultasse danneggiato, dovrà
essere sostituito da un cavo
speciale disponibile presso il
servizio di Assistenza Tecnica.

9
IT
MPa
CAPITOLO 4
8
kg 5
19
2300
2,0
10
400
min. 0,05
max. 0,8
230
l
15l
W
kWh
A
giri/min.
V
PRESSIONE NELL’IMPIANTO
IDRAULICO
TENSIONE
CAPACITA’ DI BIANCHERIA
ASCIUTTA
ACQUA LIVELLO NORMALE
ACQUA LIVELLO
ECONOMICO
POTENZA
ASSORBITA
CONSUMO DI ENERGIA
(PROG. 1)
AMPERE DEL
FUSIBILE DELLA RETE
GIRI DI
CENTRIFUGA
EN
CHAPTER 4
WATER PRESSURE
SUPPLY
VOLTAGE
MAXIMUM WASH
LOAD DRY
NORMAL WATER LEVEL
POWER INPUT
ENERGY CONSUMPTION
(PROG. 1)
POWER CURRENT FUSE
AMP
SPIN
r.p.m.
ECONOMIC WATER LEVEL
52 cm
85 cm
60 cm
EN
CHAPTER 5
SETTING UP
INSTALLATION
Move the machine near its
permanent position without
the packaging base.
Cut tube-holding straps.
Unscrew the central screw
(A); unscrew the 4 lateral
screws (B) and remove the
cross piece (C).
Lean the machine forward
and remove the plastic
bags containing the two
polystyrene blocks at the
sides, pulling downwards.
Press the plug (to be found
in the envelope with the
instructions) into the hole.
WARNING:
DO NOT LEAVE THE
PACKAGING IN THE
REACH OF CHILDREN AS
IT IS A POTENTIAL
SOURCE OF DANGER.
IT
CAPITOLO 5
MESSA IN OPERA
INSTALLAZIONE
Porti la macchina vicino al
luogo di utilizzo senza il
basamento dell’imballo.
Tagli le fascette fermatubo
Svitare la vite centrale (A);
svitare le 4 viti laterali (B) e
rimuovere la traversa (C).
Inclinare la macchina in
avanti e sfilare i sacchetti in
plastica che contengono i
due blocchetti in polistirolo
posti sui 2 lati tirando verso il
basso.
Richiudere il foro utilizzando
il tappo contenuto nella
busta istruzioni.
ATTENZIONE:
NON LASCI ALLA
PORTATA DI BAMBINI
GLI ELEMENTI
DELL’IMBALLAGGIO IN
QUANTO POTENZIALI
FONTI DI PERICOLO.

IT
Livelli la macchina con i
piedini anteriori.
a) Girare in senso orario il
dado per sbloccare la vite
del piedino.
b) Ruotare il piedino e farlo
scendere o salire fino ad
ottenere la perfetta
aderenza al suolo.
c) Bloccare infine il piedino
riavvitando il dado in senso
antiorario, fino a farlo
aderire al fondo della
lavatrice.
Si assicuri che il pulsante
Marcia/Arresto (C) non sia
premuto.
Si assicuri che tutte le
manopole siano in posizione
“0” e l’oblò sia chiuso.
Inserisca la spina.
L’apparecchio deve essere
posto in modo che la spina
sia accessibile ad
installazione avvenuta.
Quindi prema il tasto START
(C), si accenderà la spia di
funzionamento corrente
inserita (G), se non si
accende veda ricerca
guasti.
11
A
B
C
EN
Use front feet to level the
machine with the floor.
a) Turn the nut clockwise to
release the screw adjuster of
the foot.
b) Rotate foot to raise or
lower it until it stands firmly
on the ground.
c) Lock the foot in position
by turning the nut anti-
clockwise until it comes up
against the bottom of the
machine.
Ensure that the Off/On
button (C) is not pressed.
Ensure that all the knobs are
on the “0” position and that
the door is closed.
Insert the plug.
After installation, the
appliance must be
positioned so that the plug is
accessible.
Press the START (C) button.
The power on (G) light will
light up.
If this does not light up see
faults search.
IT
Applichi il foglio di polionda
sul fondo come mostrato in
figura.
Allacci il tubo dell’acqua al
rubinetto.
L’apparecchio deve essere
connesso alla rete idrica
solo con i nuovi tubi di
carico forniti in dotazione.
I vecchi tubi di carico non
devono essere riutilizzati.
ATTENZIONE:
NON APRA
IL RUBINETTO
Accosti la lavatrice al muro
facendo attenzione che
non vi siano curve o
strozzature, allacci il tubo di
scarico al bordo della
vasca.
o meglio a uno scarico fisso;
altezza minima 50 cm, di
diametro superiore al tubo
della lavatrice.
In caso di necessità utilizzare
la curva rigida in dotazione.
10
min 50 cm
max 85 cm
+2,6 mt max
max 100 cm
min 4 cm
EN
Fix the sheet of corrugated
material on the bottom as
shown in picture.
Connect the fill hose
to the tap.
The appliance must be
connected to the water
mains using new hose-sets.
The old hose-sets should not
be reused.
IMPORTANT:
DO NOT TURN THE TAP
ON AT THIS TIME.
Position the washing
machine next to the wall.
Hook the outlet tube to the
edge of the bath tub,
paying attention that there
are no bends or
contractions along the tube.
It is better to connect the
discharge hose to a fixed
outlet of a diameter greater
than that of the outlet tube
and at a height of min. 50
cm. If is necessary to use the
plastic sleeve supplied.

IT
DESCRIZIONE
COMANDI
TASTO APERTURA OBLÒ
ATTENZIONE:
UNO SPECIALE
DISPOSITIVO DI
SICUREZZA IMPEDISCE
L’IMMEDIATA APERTURA
DELL’OBLÒ ALLA FINE
DEL LAVAGGIO,
ALL’INTERRUZIONE
DELLO STESSO ED AL
TERMINE DELLA FASE DI
CENTRIFUGA. DOPO
AVER PREMUTO IL TASTO
MARCIA/ARRESTO
ATTENDA 2 MINUTI
PRIMA DI APRIRE
L’OBLÒ.
TASTO
MARCIA /ARRESTO
TASTO “NON STIRO”
Premendo il pulsante il ciclo
si arresta con acqua in
vasca all’ultimo risciacquo
per tessuti misti e per la lana.
I tessuti rimangono così
immersi nell’acqua evitando
di ammassarsi e di formare
pieghe difficili da togliere.
Rilasciando il pulsante il
ciclo termina con la fase di
scarico e centrifuga
delicata.
Volendo effettuare solo lo
scarico occorre impostare il
programma Z (dopo aver
spento O/I) e rilasciare il
pulsante.
13
C
B
2 min.
EN
DESCRIPTION OF
CONTROL
DOOR OPEN BUTTON
A SPECIAL SAFETY
DEVICE STOPS THE
DOOR FROM OPENING
IMMEDIATELY AT THE
END OF THE WASHING
CYCLE, IF THE
WASHING CYCLE IS
INTERRUPTED OR AT THE
END OF THE SPIN
CYCLE.
PRESS THE OFF/ON
BUTTON AND WAIT FOR
2 MINUTES BEFORE
OPENING THE DOOR.
OFF/ON BUTTON
RINSE HOLD BUTTON
When this button is selected,
the machine stops with the
final rinse water in the drum
for mixed fabrics and wool.
In this way, the fabrics are
left immersed in the water,
preventing them from
creasing, should you be
unavailable to remove them
after spinning. When the
button is released, the
programme finishes by
emptying the water and
giving a delicate spin.If you
just want to empty the water
(i.e. without the spin), release
the On/Off button, select “Z”
and release the Rinse Hold
Button. Press the On/Off
button again to drain the
water.
IT
CAPITOLO 6
COMANDI
Cassetto detersivo
Tasto apertura oblò
Tasto marcia arresto
Tasto “ Non Stiro”
Tasto esclusione centrifuga
Tasto mezzo carico
Segnalazione luminosa di
funzionamento
Manopola di regolazione
della temperatura di
lavaggio
Manopola programmi di
lavaggio
12
A
B
C
D
E
F
G
I
L
EN
CHAPTER 6
CONTROLS
Detergent drawer
Door open button
Off/On button
Rinse hold button
No spin button
Reduced water level
Off/On indicator light
Wash control temperature
knob
Timer knob for wash
programmes
D
A B C D E F I L
G
NON STIRO
APERTURA
OBL
Ò

IT
MANOPOLA DI
REGOLAZIONE DELLA
TEMPERATURA DI LAVAGGIO
PUO’ RUOTARE NEI DUE
SENSI
Questa lavatrice é dotata di
questo dispositivo per
impostare la temperatura di
lavaggio desiderata.
La tabella programmi di
lavaggio indica la
temperatura massima
consigliata per tipo di
lavaggio.
ATTENZIONE QUESTA
TEMPERATURA NON
DEVE MAI ESSERE
SUPERATA
MANOPOLA PROGRAMMI DI
LAVAGGIO
ATTENZIONE:
NON RUOTI MAI LA
MANOPOLA IN SENSO
ANTIORARIO MA LA
RUOTI IN SENSO
ORARIO E NON PREMA
IL TASTO MARCIA (C)
PRIMA DELLA
SELEZIONE DEL
PROGRAMMA.
Le tabelle descrivono il
programma di lavaggio in
base al numero o simbolo
scelto.
15
L
EN
WASH TEMPERATURE
CONTROL KNOB
ROTATES IN BOTH
DIRECTIONS
With this device it is possible
to reduce, but no increase
washing cycle temperature.
The table of programmes
indicate the maximum
temperature advised for
each type of wash.
WARNING: THIS
TEMPERATURE MUST
NEVER BE EXCEEDED
TIMER KNOB FOR WASH
PROGRAMMES
IMPORTANT:
ALWAYS ROTATE THE
KNOB IN A CLOCKWISE
DIRECTION, NEVER IN
AN ANTI-CLOCKWISE
DIRECTION. DO NOT
PRESS THE “ON” BUTTON
(C) BEFORE SELECTING
THE PROGRAMME
The tables describe the
washing programme on the
basis of the number or
symbol chosen.
IT
TASTO ESCLUSIONE
CENTRIFUGA
Inserendo questo tasto si
ottiene l’esclusione di tutte
le centrifughe. Tale
operazione si rivela utile sia
nei programmi 90° che a
60°, nel caso di lavaggio di
tessuti che presentano
particolari trattamenti di
finissaggio (cottonova,
permanent press) o per capi
delicati in fibra mista.
TASTO MEZZO CARICO
Per i piccoli bucati è
possibile ridurre il livello
dell’acqua utilizzata,
agendo sul tasto
1/2, risparmiando così
acqua, detersivo ed energia
elettrica.
La dose di detersivo deve
essere ridotta in proporzione
al carico.
ATTENZIONE: non inserire
il tasto “1/2” per la PURA
LANA e per i tessuti
delicatissimi.
Per i migliori risultati di
lavaggio questi tessuti
richiedono infatti un alto
livello dell’acqua.
SEGNALAZIONE LUMINOSA
DI FUNZIONAMENTO
14
F
G
I
EN
NO SPIN BUTTON
By pressing this button it is
possible to eliminate the spin-
drying on all programmes.
This operation is suitable for
programmes at 90°C and at
60°C in case of special
treated fabrics (cottonova or
permanent press) or for
mixed delicate fabrics.
REDUCED WATER LEVEL
The water level for a small
wash may be reduced right
through the wash from
soaking to rinsing by pressing
the 1/2 pushbutton, this way
you will save electricity,
detergent, and water too.
WARNING: NEVER press the
1/2 pushbutton when you
are washing PURE NEW
WOOL, since wool absorbs
water and therefore needs
all the water the machine will
hold. DO NOT use it for
delicate fabrics either, since
they need the extra water to
float them and protect them.
ON/OFF INDICATOR LIGHT
E
MEZZO
CARICO
PROGRAMMI
ESCLUSIONE
CENTRIFUG
A
TEMPERATURA
LAVAGGIO

cl
IT
16
CAPITOLO 7
CASSETTO
DETERSIVO
Il cassetto detersivo é
suddiviso in 4 vaschette:
- la prima I serve per il
detersivo di prelavaggio
- la seconda II per il
detersivo di lavaggio
ATTENZIONE:
SI RICORDI CHE
ALCUNI DETERSIVI
SONO DI DIFFICILE
ASPORTAZIONE.
IN QUESTO CASO LE
CONSIGLIAMO L’USO
DELL’APPOSITO
CONTENITORE DA
PORRE NEL CESTELLO.
- la terza serve per il
candeggiante
ATTENZIONE:
NELLA TERZA E QUARTA
VASCHETTA METTERE
SOLO PRODOTTI LIQUIDI.
- la quarta
✿✿
serve per
additivi speciali,
ammorbidenti, profumi
inamidanti, azzurranti,
ecc.
cl
EN
CHAPTER 7
DETERGENT
DRAWER
The detergent drawer is
divided into 4
compartments:
- The first I for the prewash
detergent
- The second II for the
main wash detergent
IMPORTANT:
REMEMBER THAT SOME
DETERGENT ARE
DIFFICULT TO REMOVE.
IN THIS CASE WE
ADVISE THE USE OF THE
SPECIAL CONTAINER
TO BE USED INSIDE THE
DRUM.
- The third bleach
compartment
IMPORTANT:
ONLY INTRODUCE
LIQUID PRODUCTS IN
THE THIRD AND FOURTH
COMPARTMENTS.
- The fourth ✿✿ is for
special additives,
softeners, perfumes,
starches, whiteners,
etc.a
17
IT
CAPITOLO 8
SELEZIONE
PROGRAMMI
Per trattare i vari tipi di
tessuto e le varie gradazioni
di sporco, la lavatrice ha 2
fasce di programmi diversi
per tipo di: lavaggio,
temperatura e durata
(vedere tabella programmi
di lavaggio).
1 Tessuti resistenti
I programmi sono realizzati
per sviluppare il massimo
grado di lavaggio e i
risciacqui, intervallati da fasi
di centrifuga, assicurano
una perfetta sciacquatura.
La centrifuga finale assicura
un’ottima strizzatura.
2 Tessuti misti e delicati
Il lavaggio ed il risciacquo
sono ottimizzati nei ritmi di
rotazione del cesto e nei
livelli di acqua.
La centrifuga ad azione
delicata, assicura una
ridotta formazione di pieghe
sui tessuti.
EN
CHAPTER 8
SELECTION
For the various types of
fabrics and various degrees
of dirt the washing machine
has 2 different programme
bands according to: wash
cycle, temperature and
lenght of cycle (see table of
washing cycle
programmes).
1 Resistants Fabrics
The programmes have been
designed for a maximum
wash and the rinses, with
spin intervals, ensure perfect
rinsing.
The final spin gives more
efficient removal of water.
2 Mixed and Delicates
Fabrics
The main wash and the rinse
gives best results thanks to
the rotation rhythms of the
drum and to the water
levels.
A gentle spin will mean that
the fabrics become less
creased.

IT
19
CAPITOLO 9
IL PRODOTTO
ATTENZIONE:
se deve lavare tappetoni,
copriletti o altri indumenti
pesanti é bene non
centrifugare.
Indumenti e biancheria di
lana, per poter essere lavati
in lavatrice, devono essere
contrassegnati con il
simbolo “Pura Lana Vergine”
e avere inoltre l’indicazione
“Non infeltrisce” oppure
“Lavabile in lavatrice”.
ATTENZIONE:
Durante la selezione si
assicuri che:
- nella biancheria da
lavare non vi siano
oggetti metallici (ad
esempio fermagli, spille
di sicurezza, spilli,
monete, ecc.);
- abbottoni federe,
chiuda le cerniere
lampo, gancetti a
occhielli, annodi
cinghie sciolte e lunghi
nastri di vestaglie;
- asporti dalle tendine
anche i rulli di
scorrimento;
- osservi attentamente le
etichette sui tessuti;
- se durante la selezione
vede delle macchie
resistenti, le asporti con
del detersivo speciale o
con un’apposita pasta
di lavaggio.
EN
CHAPTER 9
THE PRODUCT
IMPORTANT:
When washing heavy rugs,
bed spreads and other
heavy articles, it is advisable
not to spin.
To be machine-washed,
woollen garments and other
articles in wool must bear
the “Machine Washable
Label”.
IMPORTANT:
When sorting articles
ensure that:
- there are no metal
objects in the washing
(e.g. brooches, safety
pins, pins, coins etc.).
- cushion covers are
buttoned, zips and
hooks are closed, loose
belts and long tapes on
dressing gowns are
knotted.
- runners from curtains
are removed.
attention is paid to
garment labels.
- when sorting, any tough
stains should be
removed prior to
washing using stain
removers only
recommended on
label.
IT
18
CONSIGLI UTILI
PER GLI UTENTI
Brevi suggerimenti per un
utilizzo del proprio
elettrodomestico nel rispetto
dell’ambiente e con il
massimo risparmio
CARICARE AL MASSIMO LA
PROPRIA LAVABIANCHERIA
Per eliminare eventuali sprechi
di energia, acqua o detersivo
si raccomanda di utilizzare la
massima capacità di carico
della propria lavabiancheria.
E’ possibile infatti risparmiare
fino al 50% di energia con un
carico pieno effettuato con
un unico lavaggio rispetto a
due lavaggi a mezzo carico.
QUANDO SERVE VERAMENTE IL
PRELAVAGGIO?
Solamente per carichi
particolarmente sporchi!
Si risparmia dal 5 al 15% di
energia evitando di
selezionare l’opzione
prelavaggio per biancheria
normalmente sporca.
QUALE TEMPERATURA DI
LAVAGGIO SELEZIONARE?
L’utilizzo di smacchiatori prima
del lavaggio in
lavabiancheria riduce la
necessità di lavare a
temperature superiori a 60°C.
E’ possibile risparmiare fino al
50% utilizzando la
temperatura di lavaggio di
60°C.
EN
CUSTOMER
AWARENESS
A guide environmentally
friendly and economic use of
your appliance.
MAXIMISE THE LOAD SIZE
Achieve the best use of
energy, water, detergent and
time by using the
recommended maximum
load size.
Save up to 50% energy by
washing a full load instead of
2 half loads.
DO YOU NEED TO PRE-WASH?
For heavily soiled laundry
only!
SAVE detergent, time, water
and between 5 to 15%
energy consumption by NOT
selecting Prewash for slight to
normally soiled laundry.
IS A HOT WASH REQUIRED?
Pretreat stains with stain
remover or soak dried in
stains in water before
washing to reduce the
necessity of a hot wash
programme.
Save up to 50% energy by
using a 60°C wash
programme.

SELECT
PROG.
1
2
3
4
5
6
7
8
9
10
11
12
13
14
Z
EN
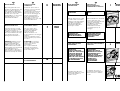
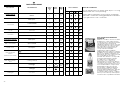
TABLE OF PROGRAMMES
20 21
FABRIC
Resistants fabrics
Cotton, linen
Cotton, mixed
resistants
Cotton, mixed
Cotton
Cotton, linen
Mixed fabrics and
delicates
Mixed, resistants
Cotton, mixed fabrics,
synthetics
Synthetics (nylon,
perlon), mixed cotton
Wollens
Synthetics (Dralon,
Acryl, Trevira)
Mixed, delicate
synthetics, wool
For fabrics that should
not be spin
PROGRAM FOR
Intensive
Heavily soiled
Coloureds fast
Coloureds non fast
Rinsing
Conditioner, fragrance, softener
Fast spin
Heavily soiled
Normally soiled
Lightly soiled
WOOLLENS “machine washable”
Rinsing
Conditioner, fragrance, softener
Slow spin
Pre-wash
Organic stains
bleaching
Drain only
WEIGHT
MAX
kg
5
5
3,5
3,5
-
-
-
2
2
2
1
-
-
-
5
5
-
SELECT
TEMP.
°C
Up to
90°
Up to
90°
Up to
60°
Up to
40°
-
-
-
Up to
60°
Up to
50°
Up to
40°
Up to
40°
-
-
Up to
40°
-
-
-
❙ ❙ ❙
●●●
●●●
●●●
●●●
●
●
●●
●●
●●
●●
●
●
●
❀
CHARGE DETERGENT
1)
1)
1)
CHAPTER 10
Please, read these notes
In case of very dirty underwear, a 3 kg maximum load is
advised.
In the programs as shown in the table, automatic bleaching is
possible by pouring the liquid bleach into the detergent
draw .
1)
Programmes according to IEC directives 456.
PRE

SELEZ.
PROG.
1
2
3
4
5
6
7
8
9
10
11
12
13
14
Z
IT
TABELLA PROGRAMMI
22 23
TIPO DI TESSUTO
Tessuti resistenti
Cotone, lino, canapa
Cotone, misti resistenti
Cotone, misti
Cotone
Cotone, lino
Tessuti misti e delicati
Misti resistenti
Misti, cotone, sintetici
Sintetici (Nylon Perlon)
misti di cotone
Biancheria in lana
Sintetici
(Dralon, Acrylico Trevira)
Misti, sintetici delicati,
lana
Per biancheria da non
centrifugare
PROGRAMMA PER
Intensivo
Molto sporco
Colorati resistenti
Colorati delicati
Risciacqui
Appretto, profumo, ammorbidente
Centrifuga energica
Molto sporco
Sporco normale
Poco sporco
LANA “LAVABILE in LAVATRICE”
Risciacqui
Appretto, profumo, ammorbidente
Centrifuga delicata
Prelavaggio
Candeggio
Solo scarico
CARICO
MAX
kg
5
5
3,5
3,5
-
-
-
2
2
2
1
-
-
-
5
5
-
SELEZ.
TEMP.
°C
Fino a
90°
Fino a
90°
Fino a
60°
Fino a
40°
-
-
-
Fino a
60°
Fino a
50°
Fino a
40°
Fino a
40°
-
-
-
Fino a
40°
-
-
❙ ❙ ❙
●●●
●●●
●●●
●●●
●
●
●●
●●
●●
●●
●
●
●
●
❀
CARICO DETERSIVO
1)
1)
1)
CAPITOLO 10
Note da considerare
In caso di biancheria con elevato grado di sporco é consigliata la
riduzione del carico a non più di 3 kg.
Nei programmi indicati può essere eseguito il candeggio
automatico mettendo il candeggiante liquido nella vaschetta .
1)
Programmi in accordo con IEC 456.
DASH-SCELTO E RACCOMANDATO
DA HOOVER
Quando costruiamo un nuovo modello
di lavatrice, lo sottoponiamo a tutti i
possibili test. Ed uno dei più importanti è quello
che permette ai nostri esperti di
individuare il detersivo idoneo a risolvere
i problemi del bucato. Dash ha saputo
rispondere alle nostre esigenze: far
funzionare bene la lavatrice, non
comprometterne la durata,
raggiungere i migliori risultati di
lavaggio. Questa costante eccellenza
di risultati, che era l’obiettivo principale
del test che abbiamo effettuato, ha
determinato la nostra scelta e la nostra
raccomandazione. La funzione
primaria di un detersivo che risponda a tutte
le esigenze del lavaggio è quella
di collaborare con l’acqua per
rimuovere lo sporco dai tessuti,
trattenendolo in sospensione affinché
sia eliminato al momento dello scarico e
controllare il volume della schiuma che
si forma nella lavatrice, sempre senza
danneggiare le fibre dei capi del
bucato. Dash soddisfa pienamente
queste esigenze, perchè contiene
elementi d’alta qualità, frutto delle più
avanzate ricerche, che assicurano
eccellenti risultati in tutte le condizioni.
Dash lo puoi trovare in polvere, liquido e nella
nuova formula compatta di Dash Ultra.
PRE

IT
ESEMPIO DI USO:
Guardi la tabella dei
programmi di lavaggio,
vedrà come Hoover le
consiglia di comportarsi:
●
Si assicuri che sulle
etichette dei capi ci sia
scritto “60° C”.
●
Apra l’oblò con il tasto (B).
●
Riempia il cestello con 5
kg massimo di biancheria
asciutta
●
Chiuda l’oblò.
ATTENZIONE:
NELL’IMPOSTARE IL
PROGRAMMA SI
ASSICURI CHE IL TASTO
MARCIA/ARRESTO
NON SIA INSERITO.
Selezioni il programma 2:
il programma viene scelto
ruotando la manopola (L) in
SENSO ORARIO e facendo
coincidere il numero del
programma con l’indice.
●
Porti la manopola della
temperatura (I) su 60°C
massimo
●
Apra il cassetto detersivo
(A).
25
60° C
5 kg MAX
EN
EXAMPLE:
The advice of Hoover is set
out in the washing
programme table:
● Ensure that article labels
carry the indication 60°C.
● Open the door by pressing
button (B).
● Load the drum with a
maximum of 5 kg of dry
washing.
● Close the door
IMPORTANT:
WHEN SETTING THE
PROGRAMME ENSURE
THAT THE ON/OFF
BUTTON IS NOT TURNED
ON.
Select programme 2:
Choose the programme by
rotating the knob (L) in a
CLOCKWISE DIRECTION and
make the number of the
programme coincide with
the sign.
● Move the temperature
knob (I) to maximum 60°C
● Open the detergent
drawer (A).
cl
IT
CAPITOLO 11
LAVAGGIO
Supponiamo che il bucato
da lavare sia di COTONE
MOLTO SPORCO (se ha delle
macchie particolarmente
resistenti le asporti con
l’apposita pasta).
Quando solo alcuni capi
presentano macchie che
richiedono un trattamento
con prodotti candeggianti
liquidi, si può procedere a
una smacchiatura
preliminare in lavatrice.
Versare il candeggiante nella
vaschetta e posizionare la
manopola (L) sullo speciale
programma “SMACCHIATURA
PREBUCATO” .
Finito questo trattamento,
aggiungere ai capi
candeggiati il resto della
biancheria e procedere al
bucato normale con il
programma più adatto.
Le consigliamo di non fare un
carico di soli capi in tessuto
di spugna che, assorbendo
molta acqua, diventano
troppo pesanti.
Il carico ammesso per i
tessuti resistenti é di 5 kg
mentre nel caso di tessuti
delicati, si consiglia di non
superare i 2 kg (1 kg nel caso
di capi in “Pura Lana
Vergine” lavabile in
lavatrice), per evitare la
formazione di pieghe difficili
da stirare. Per tessuti molto
delicati é consigliabile
l’utilizzo di un sacchetto di
rete.
24
cl
EN
CHAPTER 11
WASHING
Let us suppose that the
washing consists of HEAVILY
SOILED COTTON (tough stains
should be removed with the
special cream). When only a
limited number of articles
have stains which require
treatment with liquid
bleaching agents,
preliminary removal of stains
can be carried out in the
washing machine. Pour the
bleach into the special
compartment and set the
knob (L) on the special
programme “PRE-WASH STAIN
REMOVAL” .
When this phase has
terminated add the rest of
the washing and proceed
with a normal wash on the
most suitable programme.
It is advisable not to wash a
load made up entirely of
articles in towelling fabric
which absorb a lot of water
and become too heavy.
The maximum load for heavy
fabrics is 5 kg, while, in the
case of delicate fabrics, it is
advisable not to exceed 2 kg
(1 kg in the case of machine
washable articles in “Pure
New Wool”) so as to avoid
the formation of creases
which may be difficult to iron.
A net bag should be used for
particularly delicate fabrics.

IT
CAPITOLO 12
PULIZIA E
MANUTENZIONE
ORDINARIA
Per la Sua lavatrice
all’esterno non usi abrasivi,
alcool e/o diluenti, basta
solo una passata con un
panno umido.
La lavatrice ha bisogno di
pochissime manutenzioni:
●
Pulizia vaschette.
●
Pulizia filtro.
●
Traslochi o lunghi periodi
di fermo macchina.
PULIZIA VASCHETTE
Anche se non strettamente
necessario é bene pulire
saltuariamente le vaschette
da detersivo, candeggiante
e additivi.
Per questa operazione
basta che le estragga con
una leggera forza.
Pulisca tutto il contenuto
sotto un getto d’acqua.
Reinserisca il tutto nella
propria sede.
27
EN
CHAPTER 12
CLEANING AND
ROUTINE
MAINTENANCE
Do not use abrasives, spirits
and/or diluents on the
exterior of the appliance. It is
sufficient to use a damp
cloth.
The washing machine
requires very little
maintenance:
● Cleaning of drawer
compartments.
● Filter cleaning
● Removals or long periods
when the machine is left
standing.
CLEANING OF DRAWER
COMPARTMENTS
Although not strictly
necessary, it is advisable to
clean the detergent, bleach
and additives
compartments occasionally.
Remove the compartments
by pulling gently.
Clean with water.
Put the compartments back
into place
cl
IT
●
Metta nella 2ª vaschetta II
di lavaggio 60 g di detersivo.
●
Metta 100 cc di
candeggina nella
vaschetta candeggio
●
Metta 50 cc dell’additivo
che desidera nella
vaschetta additivo
✿✿
.
●
Chiuda il cassetto
detersivo (A).
●
Si assicuri che il rubinetto
dell’acqua sia aperto.
●
Che lo scarico sia in
posizione regolare.
●
Prema il pulsante di
marcia (C) si accenderà la
segnalazione luminosa (G).
La lavatrice svolgerà il
programma che le ha
ordinato.
●
Al termine prema il tasto
(C) di marcia/arresto, si
spegneranno le segnalazioni
luminose.
●
Attenda 2 minuti circa.
●
Apra l’oblò e tolga i
tessuti.
PER QUALSIASI TIPO DI
LAVAGGIO CONSULTI
SEMPRE LA TABELLA DEI
PROGRAMMI E SEGUA
LA SEQUENZA DELLE
OPERAZIONI COME
INDICATO
26
cl
EN
● Put 60 g in the second II
wash compartment .
● Put 100 cc of bleach in the
bleach compartment.
● Put 50 cc of the desired
additive in the additives
compartment
✿✿
.
● Close the detergent
drawer (A).
● Ensure that the water inlet
tap is turned on.
● And that the discharge
tube is in place.
● Press the “ON” button (C).
The light (G) will come on.
The washing machine will
carry out the set
programme.
● At the end of the
programme, press the
On/Off button (C). The light
will go out.
● Wait 2 minutes.
● Open the door and
remove the washed articles.
FOR ALL TYPES OF
WASH CONSULT THE
PROGRAMME TABLE
AND FOLLOW THE
OPERATIONS IN THE
ORDER INDICATED.

IT
PULIZIA FILTRO
La lavatrice è dotata di uno
speciale filtro in grado di
trattenere i residui più grossi
che potrebbero bloccare lo
scarico (monete, bottoni,
ecc.) che possono così
essere facilmente recuperati.
Quando lo deve pulire si
comporti così:
●
Tolga lo zoccolo come
mostrato in figura.
●
Utilizzi lo zoccolo per
raccogliere l’acqua residua
del filtro.
●
Allenti la vite che fissa il
filtro.
●
Ruoti il filtro in senso
antiorario fino all’arresto, in
posizione verticale.
●
Lo estragga e lo pulisca.
●
Dopo averlo pulito osservi
la tacca e lo rimonti
seguendo in senso contrario
tutte le operazioni
precedentemente descritte.
TRASLOCHI O LUNGHI
PERIODI DI FERMO
MACCHINA
Per eventuali traslochi o
qualora la macchina
restasse ferma a lungo in
luoghi non riscaldati, é
necessario svuotare
completamente da ogni
residuo di acqua tutti i tubi.
A corrente disinserita, stacchi
il tubo dalla fascetta e lo
porti, verso il basso, sul catino,
fino alla completa fuoriuscita
dell’acqua.
Al termine ripeta
l’operazione in senso inverso.
28
EN
FILTER CLEANING
The washing-machine is
equipped with a special filter
to retain large foreign matter
which could clog up the
drain, such as coins, buttons,
etc. These can, therefore,
easily be recovered. The
procedures for cleaning the
filter are as follows:
● Ease off the base as shown
in fig.
● Use the base as a tray to
collect leftover water in filter.
● Loosen the screw holding
the filter.
● Turn the filter anticlockwise
till it stops in vertical position.
● Remove and clean.
● After cleaning, replace by
turning the notch on the end
of the filter clockwise. Then
follow all procedures
described above in reverse
order.
REMOVALS OR LONG PERIODS
WHEN THE MACHINE IS LEFT
STANDING
For eventual removals or
when the machine is left
standing for long periods in
unheated rooms, the drain
hose should be emptied of
all remaining water.
The appliance must be
switched off and unplugged.
A bowl is needed. Detach
the drainage hose from the
clamp and lower it over the
bowl until all the water is
removed.
Repeat the same operation
with the water inlet hose.
29
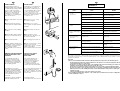
CHAPTER 13
EN
FAULT
If the fault should persist, contact a Gias Technical Assistance Centre. For prompt servicing, give the model of
the washing machine, to be found on the label placed on the cabinet inside of the porthole or on the
guarantee certificate.
Important
1 The use of environment friendly detersives without phosphates may produce the following effects:
- The discharge rinse water may result cloudier due to the presence of zeolites in suspension. This does not
compromise the efficiency of the rinses.
- The presence of white powder (zeolites) on the washing at the end of the washing cycle. This does not
remain incorporated in the fabric and does not alter the colour.
- The presence of foam in the last rinse water which is not necessarily a sign of inadequate rinsing.
- The non-ionic surface-active agents present in the composition of washing machine detersives are often
difficult to remove from the washing itself and, even in small quantities, may produce visible signs of the
formation of foam.
- Carrying out further rinses, in cases such as this, is not useful.
2 If your washing machine fails to function, carry out the above-mentioned checks before calling the Gias
Technical Assistance Service.
1. Does not function
on any
programme
2. Does not load
water
3. Does not discharge
water
4. Water on floor
around washing
machine
5. Does not spin
6. Strong vibrations
during spin
Mains plug not plugged in
Mains switch not on
No power
Electric circuit fuses failure
Load door open
See cause 1
Inlet tap turned off
Timer not set correctly
Discharge tube bent
Odd material blocking filter
Leak from the washer between the tap
and inlet tube
The washing machine has not
discharged water
“No spin” setting (some models only)
Washing machine not perfectly level
Transport bracket not removed
Washing load not evenly distributed
Insert plug
Turn on mains switch
Check
Check
Close load door
Check
Turn on water inlet tap
Set timer on correct position
Straighten discharge tube
Check filter
Replace washer and tighten the tube
on the tap
Wait a few minutes until the machine
discharges water
Turn the programme dial onto spin
setting
Adjust special feet
Remove transport bracket
Distribute the washing evenly
CAUSE
REMEDY

The manufacturer declines all responsibility in the event of any printing mistakes in
this booklet. The manufacturer also reserves the right to make appropriate
modifications to its products without changing the essential characteristics.
La Ditta costruttrice declina ogni responsabilità per eventuali errori di stampa contenuti
nel presente libretto. Si riserva inoltre il diritto di apportare le modifiche che si
renderanno utili ai propri prodotti senza compromettere le caratteristiche essenziali.
30
CAPITOLO 13
IT
ANOMALIA
1. Non funziona con
qualsiasi
programma
2. Non carica acqua
3. Non scarica acqua
4. Presenza di acqua
sul pavimento
attorno alla
lavabiancheria
5. Non centrifuga
6. Forti vibrazioni
durante la
centrifuga
Spina corrente elettrica
non inserita nella presa
Tasto interruttore generale
non inserito
Manca energia elettrica
Valvole impianto elettrico guaste
Sportello aperto
Vedi cause 1
Rubinetto acqua chiuso
Timer non correttamente posizionato
Tubo di scarico piegato
Presenza corpi estranei nel filtro
Perdita della guarnizione posta
tra rubinetto e tubo carico
La lavabiancheria non ha ancora
scaricato l’acqua
“Esclusione centrifuga” inserita
(solo per alcuni modelli)
Lavabiancheria non perfettamente
in piano
Staffe di trasporto
non ancora asportate
Carico biancheria
non uniformemente distribuito
Inserire la spina
Inserire tasto.
Interruttore generale
Controllare
Controllare
Chiudere sportello
Controllare
Aprire il rubinetto acqua
Posizionare timer correttamente
Raddrizzare tubo di scarico
Ispezionare filtro
Sostituire guarnizione e
stringere bene tubo e rubinetto
Attendere alcuni minuti, la macchina
scaricherà
Disinserire tasto
“esclusione centrifuga”
Regolare gli appositi piedini regolabili.
Asportare staffe di trasporto
Distribuire in modo uniforme
la biancheria
CAUSA
RIMEDIO
Se il malfunzionamento dovesse persistere si rivolga al Centro di Assistenza Tecnica Gias comunicando il
modello di lavabiancheria, riportato sulla targhetta posta sul mobile all’interno dell’oblò o sul foglio di garanzia.
Fornendo tali informazioni otterrete un intervento più tempestivo ed efficace.
Attenzione:
1 L’utilizzo di detersivi ecologici senza fosfati può produrre i seguenti effetti:
- l’acqua di scarico dei risciacqui risulta più torbida per la presenza di zeoliti in sospensione senza che
l’efficacia del risciacquo ne risulti pregiudicata
- presenza di polvere bianca (zeoliti) sulla biancheria al termine del lavaggio che non si ingloba nei tessuti e
non ne altera il colore.
- La presenza di schiuma nell’acqua dell’ultimo risciacquo non é necessariamente indice di una cattiva
sciacquatura.
- I tensioattivi anionici presenti nelle formulazioni dei detersivi per lavabiancheria, risultano spesso
difficilmente allontanabili dalla biancheria stessa e, anche in minima quantità, possono produrre vistosi
fenomeni di formazione di schiuma.
- L’esecuzione di ulteriori cicli di risciacquo, in casi come questi, non comporta alcun beneficio.
2 Se la Sua lavabiancheria non funzionasse, prima di chiamare il Centro di Assistenza Tecnica Gias
eseguire i controlli sopradescritti.

02.02 - 41003460 - Printed in Italy - Imprimé en Italie
EN
IT
-
 1
1
-
 2
2
-
 3
3
-
 4
4
-
 5
5
-
 6
6
-
 7
7
-
 8
8
-
 9
9
-
 10
10
-
 11
11
-
 12
12
-
 13
13
-
 14
14
-
 15
15
-
 16
16
-
 17
17


