Gigaset Full Display HD Glass Protector Manuale del proprietario
- Categoria
- Smartphone
- Tipo
- Manuale del proprietario
Questo manuale è adatto anche per


Template Module, Version 1.3, 11.04.2019,
Contents
Gigaset GX290 / LUG AU-IE-UK-International en / A31008-XXXXX-XXXX-X-XXXX / _GX290_LUGIVZ.fm / 2/20/20
2
Contents
Overview . . . . . . . . . . . . . . . . . . . . . . . . . . . . . . . . . . . . . . . . . . . . . . . . . . . . . . . . . . . . . . . . . . . . . . . . . . . . . .3
Gigaset GX290 . . . . . . . . . . . . . . . . . . . . . . . . . . . . . . . . . . . . . . . . . . . . . . . . . . . . . . . . .
. . . . . . . . . . . . . . . . 3
Start screen . . . . . . . . . . . . . . . . . . . . . . . . . . . . . . . . . . . . . . . . . . . . . . . . . . . . . . . . . . . .
. . . . . . . . . . . . . . . . 4
Illustration in the user guide . . . . . . . . . . . . . . . . . . . . . . . . . . . . . . . . . . . . . . . . . . . . . . . . . .
. . . . . . . . . . 5
Safety precautions . . . . . . . . . . . . . . . . . . . . . . . . . . . . . . . . . . . . . . . . . . . . . . . . . . . . . . .
. . . . . . . . . . . . . .6
Getting started . . . . . . . . . . . . . . . . . . . . . . . . . . . . . . . . . . . . . . . . . . . . . . . . . . . . . . . . . . . . . . . . . . . . . . . .9
Using the device . . . . . . . . . . . . . . . . . . . . . . . . . . . . . . . . . . . . . . . . . . . . . . . . . . . . . . . . . . . . . . . . . . . . . 13
Getting to know your device . . . . . . . . . . . . . . . . . . . . . . . . . . . . . . . . . . . . . . . . . . . . . . . . . .
. . . . . . . . 13
Configuring the start screens . . . . . . . . . . . . . . . . . . . . . . . . . . . . . . . . . . . . . . . . . . . . . . . . . .
. . . . . . . . 19
Notifications . . . . . . . . . . . . . . . . . . . . . . . . . . . . . . . . . . . . . . . . . . . . . . . . . . . . . . . . . . .
. . . . . . . . . . . . . . . 22
Apps . . . . . . . . . . . . . . . . . . . . . . . . . . . . . . . . . . . . . . . . . . . . . . . . . . . . . . . . . . . . . .
. . . . . . . . . . . . . . . . . . . . 24
Downloads . . . . . . . . . . . . . . . . . . . . . . . . . . . . . . . . . . . . . . . . . . . . . . . . . . . . . . . . . . . .
. . . . . . . . . . . . . . . 28
Fingerprint sensor . . . . . . . . . . . . . . . . . . . . . . . . . . . . . . . . . . . . . . . . . . . . . . . . . . . . . . .
. . . . . . . . . . . . . . 29
“Do not disturb” . . . . . . . . . . . . . . . . . . . . . . . . . . . . . . . . . . . . . . . . . . . . . . . . . . . . . . . . .
. . . . . . . . . . . . . . 30
Additional functions . . . . . . . . . . . . . . . . . . . . . . . . . . . . . . . . . . . . . . . . . . . . . . . . . . . . . . . . .
. . . . . . . . . 32
Communication . . . . . . . . . . . . . . . . . . . . . . . . . . . . . . . . . . . . . . . . . . . . . . . . . . . . . . . . .
. . . . . . . . . . . . 35
Making calls . . . . . . . . . . . . . . . . . . . . . . . . . . . . . . . . . . . . . . . . . . . . . . . . . . . . . . . . . . .
. . . . . . . . . . . . . . . 35
Contacts . . . . . . . . . . . . . . . . . . . . . . . . . . . . . . . . . . . . . . . . . . . . . . . . . . . . . . . . . . . . . . .
. . . . . . . . . . . . . . . 40
Messages (SMS/MMS) . . . . . . . . . . . . . . . . . . . . . . . . . . . . . . . . . . . . . . . . . . . . . . . . . . . . . . . .
. . . . . . . . . 43
Settings . . . . . . . . . . . . . . . . . . . . . . . . . . . . . . . . . . . . . . . . . . . . . . . . . . . . . . . . . . . .
. . . . . . . . . . . . . . . . . 47
Device . . . . . . . . . . . . . . . . . . . . . . . . . . . . . . . . . . . . . . . . . . . . . . . . . . . . . . . . . . . . . . . . .
. . . . . . . . . . . . . . . 47
Security . . . . . . . . . . . . . . . . . . . . . . . . . . . . . . . . . . . . . . . . . . . . . . . . . . . . . . . . . . . . . . . .
. . . . . . . . . . . . . . . 52
Accounts and location detection . . . . . . . . . . . . . . . . . . . . . . . . . . . . . . . . . . . . . . . . . . . . . . . . . . . .
. . 58
Apps . . . . . . . . . . . . . . . . . . . . . . . . . . . . . . . . . . . . . . . . . . . . . . . . . . . . . . . . . . . . . .
. . . . . . . . . . . . . . . . . . . . 61
Network connections . . . . . . . . . . . . . . . . . . . . . . . . . . . . . . . . . . . . . . . . . . . . . . . . . . . . . . . .
. . . . . . . . . 64
System . . . . . . . . . . . . . . . . . . . . . . . . . . . . . . . . . . . . . . . . . . . . . . . . . . . . . . . . . . . . . . . . .
. . . . . . . . . . . . . . . 75
Appendix . . . . . . . . . . . . . . . . . . . . . . . . . . . . . . . . . . . . . . . . . . . . . . . . . . . . . . . . . . . .
. . . . . . . . . . . . . . . . 79
Customer service United Kingdom and Ireland . . . . . . . . . . . . . . . . . . . . . . . . . . . . . . . . . . . . . . . . . 79
Customer Service & Assistance . . . . . . . . . . . . . . . . . . . . . . . . . . . . . . . . . . . . . . . . . . . . . . . . . .
. . . . . . . 80
Manufacturer's advice . . . . . . . . . . . . . . . . . . . . . . . . . . . . . . . . . . . . . . . . . . . . . . . . . . . . . . . .
. . . . . . . . . 82
Icons . . . . . . . . . . . . . . . . . . . . . . . . . . . . . . . . . . . . . . . . . . . . . . . . . . . . . . . . . . . . .
. . . . . . . . . . . . . . . . . . . . 85
Open Source Software . . . . . . . . . . . . . . . . . . . . . . . . . . . . . . . . . . . . . . . . . . . . . . . . . . . . . . .
. . . . . . . . . 87
Index . . . . . . . . . . . . . . . . . . . . . . . . . . . . . . . . . . . . . . . . . . . . . . . . . . . . . . . . . . . . . . . . . . . . . . . . . . . . . . . . 88
Not all functions described in the user guide are available in all countries or from all
network providers.

Gigaset GX290 / LUG AU-IE-UK-International en / A31008-XXXXX-XXXX-X-XXXX / overview.fm / 2/20/20
Template Module, Version 1.3, 11.04.2019
Gigaset GX290
3
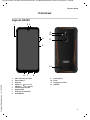
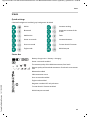
Overview
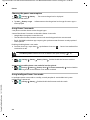
Gigaset GX290
1 SIM / memory card slot 9 Dual camera
2Front camera 10Flash
3 Receiver 11 Fingerprint sensor
4Volume +: Press at top
Volume –: Press bottom
12 Speaker
5 Switching on and off
6 Headset jack
7USB type C connector
8Microphone
1
4
5
9
10
11
876
2 3
12

Template Module, Version 1.3, 11.04.2019,
Start screen
Gigaset GX290 / LUG AU-IE-UK-International en / A31008-XXXXX-XXXX-X-XXXX / overview.fm / 2/20/20
4
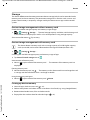
Start screen
Comes with the Google
TM
app and Google Chrome
TM
Google, Google Play, YouTube and other marks are trademarks of Google LLC.
Notifications and Status bar
Icons show the arrival of notifications and various
states ( p. 85)
Access to notifications ( p. 22)
Access to quick settings ( p. 16)
Navigation bar ( p. 16)
Favourites bar
Frequently used apps ( p. 19)
Area for apps and widgets
They can be placed anywhere ( p. 19)
Google
TM
search ( p. 21)

Gigaset GX290 / LUG AU-IE-UK-International en / A31008-XXXXX-XXXX-X-XXXX / user_guide_operating_steps.fm / 2/20/20
Template Module, Version 1.3, 11.04.2019
Illustration in the user guide
5
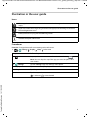
Illustration in the user guide
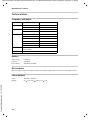
Icons
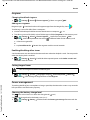
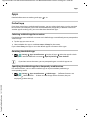
Procedures
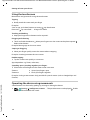
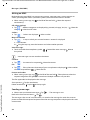
Example: Change the time for transitioning to the idle status
¤ Settings Display Sleep Select time
Warnings, the non-adherence to which can result in damage to devices or personal
injury.
Important information regarding function and appropriate handling or functions
that could generate costs.
Prerequisite for carrying out the following action.
Additional helpful information.
Step Follow this procedure
¤ Swipe up the start screen twice from the Home button .
Note: You can skip this step if the app you want to open is on a
start screen.
¤ Settings Tap the Settings app. The Settings menu opens.
¤ Display Tap the menu entry Display.
¤ Sleep Tap Sleep.
¤ Select time Tap the required time
= Selected, = Not selected

Template Module, Version 1.3, 11.04.2019,
Safety precautions
Gigaset GX290 / LUG AU-IE-UK-International en / A31008-XXXXX-XXXX-X-XXXX / security_LUG.fm / 2/20/20
6
Safety precautions
General information
• For your own safety, only use original, approved accessories from Gigaset for your mobile phone. Using
incompatible accessories can damage the mobile phone and entail hazardous situations. Original acces-
sories can be purchased from Gigaset Customer Service (see Customer service United Kingdom and
Ireland p. 79).
• Permitted temperature range for charging and operation: 0-40°C.
High temperatures can shorten the life of electronic devices and damage the battery; plastic parts can
deform or melt. Using or keeping the mobile phone in refrigerated areas can result in condensation on the
inside of the telephone which will destroy the electronic circuitry.
• Switch off your mobile phone when in potentially explosive areas and observe all warning signs. Poten-
tially explosive areas also include places where switching off vehicle engines is normally recommended. It
is at these kinds of places that flying sparks can be the cause of explosions or fires with resulting injuries,
and there may be a risk to life.
These areas include petrol stations, chemical factories, transport and storage systems for hazardous chem-
icals, spaces under ship decks, areas in which the air contains chemical substances or fine particles (such
as dust or metal powder particles).
• Short-circuiting, disassembling and modifying the mobile phone are not permitted because they present
a risk of injury, electric shock, fire or damage to the charger.
• The USB connection must be established with USB version 2.0 or higher.
• If the mobile telephone becomes hot, changes colour or shape or leaks whilst being used, charged or at
any other time, contact Gigaset Customer Service immediately.
Battery and charging
• The battery is built-in. Do not disassemble, weld and/or modify the battery. Do not keep the mobile tele-
phone where it is exposed to strong mechanical effects.
• The battery electrolyte coming into contact with eyes can cause a loss of eyesight. If electrolyte does enter
an eye, please do not rub the eye with a hand. Immediately wash the affected eye thoroughly with clear
water and consult a doctor. The electrolyte coming into contact with skin (or clothing) presents a risk of
skin burns. Immediately wash the skin or clothing thoroughly with soap and clear water, and consult a
doctor if required.
• The temperature of the mobile phone rises during the charging process. Do not store the mobile tele-
phone in the same place as flammable products as this poses a risk of fire.
• Do not charge the battery for longer than 12 hours.
• Only charge the device indoors. Whilst the phone is charging, do not use the phone for calls or dial any
numbers.
• The socket must be easily accessible during the charging process.
• Electrical storms pose a risk of electric shocks.
• Do not use the charger when the power cable is damaged because this poses a risk of electric shock and
fire.
Headset
Please read these instructions carefully. Failure to comply presents a risk of injury and damage to
a device, as well as breaches of applicable laws.
Please explain the contents of this document as well as the potential risks associated with using
this device to your children.
Dispose of used mobile telephones in line with the instructions (Chapter Waste and environ-
mental protection p. 83).
High volumes can impair hearing. Listening to music or conversation with headphones set to a
loud volume can be unpleasant and permanently impair hearing.
To prevent loss of hearing, do not have the volume turned up too high for long periods.

Gigaset GX290 / LUG AU-IE-UK-International en / A31008-XXXXX-XXXX-X-XXXX / security_LUG.fm / 2/20/20
Template Module, Version 1.3, 11.04.2019
Safety precautions
7
• If you wear headphones whilst out walking or running, please ensure that the cord does not wrap itself
around your body or objects on your person.
• Only wear headphones in dry environments. The static electricity which builds up on the headphones can
discharge via your ears as an electric shock. The static electricity can discharge if you touch the head-
phones with your hand or touch bare metal before connecting with the mobile phone.
Use in hospitals / medical devices
• The function of medical equipment near your mobile phone can be impaired. Bear in mind the technical
conditions of the environment in question (such as in doctors’ surgery).
• If you use a medical device such as a pacemaker, please consult the manufacturer of the product before
using your mobile phone. You will be provided information on the sensitivity of the device to external,
high-frequency energy sources.
• Heart pacemakers, implantable cardioverter defibrillators:
When you switch on your mobile phone, ensure that the distance between the phone and an implant is at
least 152 mm. To reduce potential interference, use the mobile phone on the opposite side to the implant.
Please switch the mobile phone off immediately if interference occurs. Do not keep the mobile phone in
a shirt pocket.
• Hearing aids, cochlear implants:
Some digital wireless devices can interfere with hearing aids and cochlear implants. Please consult the
manufacturers of these products if interference occurs.
• Other medical devices:
If you and the people around you use other medical devices, please contact the relevant manufacturer for
information on whether such devices are protected from radio frequency signals in the environment. You
can also consult your doctor about this.
Emergency calls
• Make sure the mobile phone is switched on and connected to the GSM network. Enter the emergency
number as required and speak.
• Tell the person at the emergency call centre your location.
• Do not end the conversation until the person at the emergency call centre asks you to.
Children and pets
• Keep the mobile phone, chargers and accessories out of the reach of children and pets. Children and/or
pets can swallow the small parts, posing a risk of suffocation and other hazards. A child may only use the
mobile phone under the supervision of an adult.
Playing games
• Playing games on the mobile phone for long periods may mean assuming an unhealthy body posture.
Take a 15 minute break every hour. Stop immediately if you feel unwell during game play. Consult a doctor
straight away if your condition persists.
Aeroplanes, vehicles and road safety
• Switch off your mobile phone in aeroplanes.
Please observe applicable restrictions and regulations. Wireless devices can interfere with the function of
aeronautical equipment. Follow the instructions issued by flight personnel when using your mobile
phone.
• The absolute priority for every vehicle driver and everyone in a vehicle is safety on the roads and for road
users.
Using a mobile phone whilst driving can be distracting and therefore lead to dangerous situations. You
can also be violating applicable laws.
SIM card, memory card and data connector cable
• Do not remove the card from the mobile phone whilst data is being sent or received as this presents a risk
of data loss and damage to the mobile phone or memory card.
• Charges might apply when establishing Internet connections via the SIM card.

Template Module, Version 1.3, 11.04.2019,
Safety precautions
Gigaset GX290 / LUG AU-IE-UK-International en / A31008-XXXXX-XXXX-X-XXXX / security_LUG.fm / 2/20/20
8
Defective devices
• The installation and repair of products are the sole preserves of qualified maintenance personnel.
• Dispose of faulty devices carefully or have them repaired by our Customer Service team. These devices
could interfere with other wireless services.
• Careless handling of the mobile phone, such as dropping it, can shatter the display and damage the elec-
tronic circuitry and sensitive parts inside.
• Do not use the device if the display is cracked or shattered. Fragments of glass or plastic can injure hands
and face.
• In the event of malfunction of your mobile phone, battery or accessories, please contact a Gigaset Service
Centre for an inspection.
Other important information
• Never point the flash light directly at the eyes of people or animals. Pointing a flash light too near to human
eyes poses a risk of temporary loss of eyesight or impairment of vision.
• The device can heat up when running power-intensive apps or programs for longer periods. This is normal
and has no bearing on the performance of the device.
• When the device warms up, please put it aside for a while and stop the program you were running. Coming
into contact with a hot device can cause minor skin irritations such as redness.
• Do not apply lacquer to the mobile phone. Lacquer and paint can damage the parts of the mobile phone
and may cause malfunction.

Gigaset GX290 / LUG AU-IE-UK-International en / A31008-XXXXX-XXXX-X-XXXX / starting.fm / 2/20/20
Template Module, Version 1.3, 11.04.2019
Getting started
9
Getting started
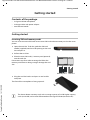
Contents of the package
• A Gigaset GX290 smartphone
• A charger cable with power adapter
• one SIM card needle
Getting started
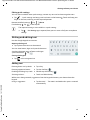
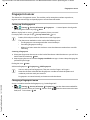
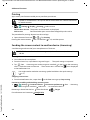
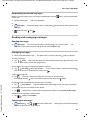
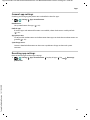
Inserting SIM and memory cards
You can insert two nano SIM cards or one nano SIM card and one memory card in the smart-
phone.
¤ Open the card slot. To do this, poke the SIM card
needle (supplied) into the small opening on the card
slot and press it.
¤ Pull out the card slot.
¤ Place the nano SIM card(s) / memory card (optional)
into the card slot.
Do not exert any force when inserting the SIM or the
memory
card because doing so might damage the card
slot.
¤ Plug the card slot back in and press it until it clicks
into place.
The front of the smartphone is facing upwards.
The device detects memory cards with a storage capacity of 32 GB. Higher capacity
cards (to 256 GB) can be used if formatted on the Gigaset GX290 (not on the PC).
Memory card SIM card
1

Template Module, Version 1.3, 11.04.2019,
Getting started
Gigaset GX290 / LUG AU-IE-UK-International en / A31008-XXXXX-XXXX-X-XXXX / starting.fm / 2/20/20
10
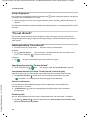
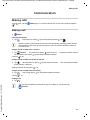
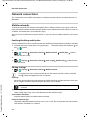
Charging the battery
¤ Remove the cover.
¤ Plug the USB Type C connector on the charger
cable provided into the USB Type C connector
on the smartphone
¤ Connect the power adapter to the USB
connector of the charger cable and connect it to
the power source.
The device is charged once the charge icon in
the Status bar is filled completely.
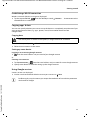
Switching on the device
¤ Keep the On/Off button pressed until the device vibrates.
When you are requested to unlock the SIM card,
¤ use the keypad to enter the PIN of the SIM card
When switching on the device for the first ti
me, a wizard starts which guides you through the
initial configuration.
Wizard for configuring the device
When you switch on your phone for the first time, you are automatically guided through the
most important configuration steps.
Selecting the language
The set language is displayed.
¤ Select another language as required tap Start
Inserting SIM cards
This screen is only shown when no SIM card is inserted:
¤ Insert card now ( p. 9)
Insert SIM card later: Skip
T
he battery is built-in. This means a higher ba
ttery capacity can be realised for the
same device dimensions.
So your phone does not discharge during set-up, keeping it connected to the power
is recommended until set-up is complete.
< Back: Check and change as required settings already configured.
Next > Apply the setting on the screen and ju
mp to the next screen.
Skip Configure the setting later.

Gigaset GX290 / LUG AU-IE-UK-International en / A31008-XXXXX-XXXX-X-XXXX / starting.fm / 2/20/20
Template Module, Version 1.3, 11.04.2019
Getting started
11
Establishing a WLAN connection
Wireless networks (WLANs) in range are displayed.
¤ Tap the required WLAN Enter the WLAN password Connect . . . A connection to the
selected WLAN is established
Copying apps & data
You can now specify whether you want to set up the device as a completely new device or if you
want to copy personal data (e. g. apps, photos, music) from another device or from
Google Clo
ud.
Copying data
¤ Select the required option Select the desired data source
¤ Follow the instructions on the screen.
Setting up a new device
Logging in to an existing Google account
¤ Enter the email address and password of your Google account
or
Creating a new account
¤ Tap Create account Enter the email address and password for a new Google account.
¤ Specify more details to conclude setting up the Google account.
Using Google services
Various services are displayed.
¤ Use the switch to enable/disable the service you want to use Next
You already have an Android smartphone, a Google account or an iPhone.
Performing this step also means you accept the conditions of use and data protection
declaration of Google.

Template Module, Version 1.3, 11.04.2019,
Getting started
Gigaset GX290 / LUG AU-IE-UK-International en / A31008-XXXXX-XXXX-X-XXXX / starting.fm / 2/20/20
12
Setting up protection for the phone
Protect your smartphone from unauthorised use.
Fingerprint
¤ Add fingerprint Next . . . A wizard opens to guide you through the necessary steps.
Additional information p. 29
or
¤ Enter the PIN
or
¤ Select Options for the display lock
¤ Select Pattern | PIN | Password Next
¤ Enter the pattern, PIN or password Next Repeat Confirm
Enabling Google Assistant
Google Assistant answers questions and carries out a range of tasks. This page provides
information about the authorisations required for Google Assistant.
If you want to enable Google Assistant: Tap Ye s, enable.
I
f you do not want to enable Google Assistant: Tap No, thank you.
T
he data used for these settings can be taken from any device logged into the Google account.
You can
change these settings any time in your Google account at
myaccount.google.com.
Setting up other functions
You can now configure other settings, such as set up Google Pay, set the background for the
display or the font, and set up another email account.
Gmail is set up once you log in to
your Google account. If you set up email addresses for other
email accounts, these emails can also be displayed in the Gmail app.
¤ Select provider Enter access details Next
If you do not want to configure any more settings now: Done!
Finally, you can set up facial recognition.
For detailed information on this, refer to p. 53
Your smartphone is now ready to use.

Gigaset GX290 / LUG AU-IE-UK-International en / A31008-XXXXX-XXXX-X-XXXX / operating.fm / 2/20/20
Template Module, Version 1.3, 11.04.2019
Getting to know your device
13
Using the device
Getting to know your device
Switching the device on and off
Switching on
¤ Press and hold the On/Off button . . . The device is started
Unlocking the SIM card
¤ Enter the PIN for the SIM card
Removing notifications (if available)
Notifications p. 22
When a display lock is set up to protect against unauthorised use
¤ Swipe up Unlock the display . . . The start screen is displayed
Display lock: p. 52
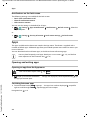
Switching off
¤ Press and hold the On/Off button Tap Power off OK
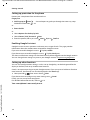
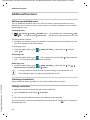
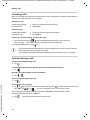
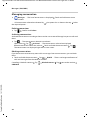
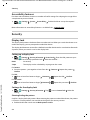
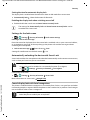
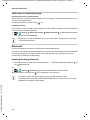
Switching the device to and ending idle mode
Switching the device to idle mode
¤ Briefly press the On/Off button
Setting the period of inactivity for transitioning to idle mode
¤ Settings Display Sleep Select period
Ending idle mode
¤ Briefly press the On/Off button Remove any notifications as required Swipe up
Unlock the display
Clear notification:
¤ Swipe to the left or right
Deal with notification later:
¤ Swipe upwards to the Notifications bar
You can also switch the smartphone to Airplane mode. This only disables the wireless
functions, the other device functions remain available.
If the device is not used for a defined time, it automatically switches to idle mode.
Some apps can be accessed directly from idle mode with a fingerprint ( p. 29).
12:32

Template Module, Version 1.3, 11.04.2019,
Getting to know your device
Gigaset GX290 / LUG AU-IE-UK-International en / A31008-XXXXX-XXXX-X-XXXX / operating.fm / 2/20/20
14
Using the touchscreen
Movements and gestures for using the touchscreen:
Tapping
¤ Briefly touch the screen with your finger
Examples:
Start an app, and select function or setting: tap the element
Enter text: Tap a text field . . . A keypad is shown
Touching and holding
¤ Keep your finger on an element until it responds.
Dragging and releasing
¤ Touch and hold the element Move your finger across the screen to the place required
Release the element
Example: Moving apps on the start screen
Swiping or dragging
¤ Move your finger quickly across the screen without stopping
Example: Switching between the start screens
Double tapping
¤ Tap the screen twice quickly in succession.
App-dependent: e.g. Zoom, select text, ...
Spreading apart / pinching together your fingers
¤ Place two or more fingers on the screen at the same time
Example: Scaling screen content. Only possible for special screens (such as Google Maps and
Chro
me).
Operating the device using movements
Some functions can be used by picking up, turning or shaking the device.
¤ Settings Intelligent assistance . . . The possible actions are displayed Enable
the required actions with the switch
Zoom in:
¤ Spread your fingers apart
Zoom out:
¤ Pinch your fingers together

Gigaset GX290 / LUG AU-IE-UK-International en / A31008-XXXXX-XXXX-X-XXXX / operating.fm / 2/20/20
Template Module, Version 1.3, 11.04.2019
Getting to know your device
15
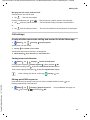
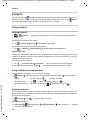
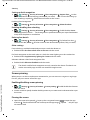
Setting volume and vibration from the Volume button
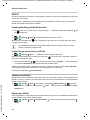
Change the volume for ringtone, music and alarm.
¤ Press the Volume button on the right-hand side of the device . . . the slider bar
for the volume is opened Adjust the volume with the slider bar
Disabling the ringtone
¤ Drag the slider bar all the way down
or: Tap
Switching between ringtone, vibration and mute
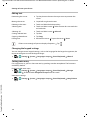
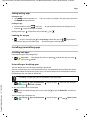
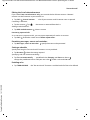
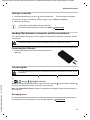
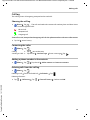
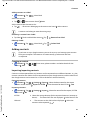
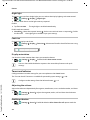
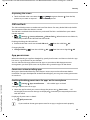
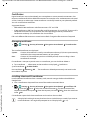
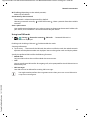
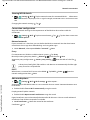
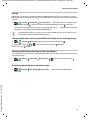
Start screen
A start screen is displayed when you switch on or unlock the
device, and no app is open.
You can create several start screens and configure them as you
wish - to
be able to quickly access favourite apps and content
( p. 19).
Returning to the start screen from any user situation
¤ Tap the Home button in the navigation bar . . . the start
screen open most recently is displayed
Switching between start screens
¤ Swipe left or right to the required start screen.
Disabling the ringtone, enabling vibration:
¤ Tap
Disabling vibration, disabling ringtone (mute):
¤ Tap
Enabling ringtone:
¤ Tap
Configuring advanced audio settings:
¤ Tap . . . menu Settings – Soundopens ( p. 48)
The Google feed is displayed on the very left of the screen.
For the selection of messages shown in the feed, Google uses information from your
device, from other Google products and from data stored in your Google account.
You can specify in Settings which type of information is displayed in your feed.

Template Module, Version 1.3, 11.04.2019,
Getting to know your device
Gigaset GX290 / LUG AU-IE-UK-International en / A31008-XXXXX-XXXX-X-XXXX / operating.fm / 2/20/20
16
Switching between start screens and apps
One or more navigation buttons are at the bottom of every screen depending on the user situ-
ation.
Customising the navigation bar
¤ Settings Navigation bar
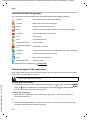
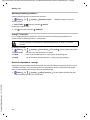
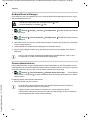
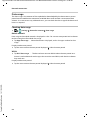
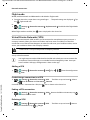
Quick settings
The quick settings enable you to access frequently used settings from all user situations, such as
screen lighting, WLAN, Bluetooth and similar settings.
Opening the quick settings
¤ From the Status bar, swipe down
. . . The most important quick settings are displayed
¤ Swipe down again . . . More quick settings are displayed Swipe left/right to display all the
quick settings
Icons of the quick settings p. 85
Enabling and disabling a function
¤ Tap the setting . . . The symbol for the setting is coloured when it is enabled, and grey when
it is disabled
Changing a setting (if available)
¤ Touch and hold the symbol Change the setting as required
Opens the screen last viewed. You can go back several times (only as far as the start
screen).
Home button
Briefly tap to: Open the start screen which was open last time.
Touch and hold to: Open the Google Assistant Google-Hilfe
Swipe up: Opens an overview of the apps and browser tabs used
last time.
Open an app:
¤ Tap it
Close an app:
¤ Swipe the app up
Swipe up twice: Opens a list of all apps

Gigaset GX290 / LUG AU-IE-UK-International en / A31008-XXXXX-XXXX-X-XXXX / operating.fm / 2/20/20
Template Module, Version 1.3, 11.04.2019
Getting to know your device
17
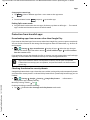
Editing quick settings
You can make available more quick settings, remove any not used and rearrange the icons.
¤ Tap . . . Quick settings not being used are shown at the bottom Touch and keep your
finger on the icon, and drag it to the required position
Restore to default settings: Tap Reset
Finish editing: Tap in the top left
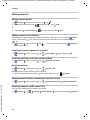
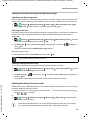
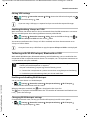
Writing and editing text
Use the Google keypad to write text.
Opening the keypad
¤ Tap a place where text can be entered
You can enter letters, digits and special characters.
Switching between entry of letters and digits /
special charac
ters: Tap
Closing the keypad
¤ Tap in the navigation bar
Adding text
Whilst text is being entered, suggestions from the keypad dictionary are shown above the
keypad.
The required setting is not available as a quick setting:
¤ Tap . . . the Settings app is opened; here you can access all of your smartphone
settings.
Entering letters and symbols:
¤ Tap a key
Entering uppercase letters:
¤ Tap the shift key ( )
Enabling/disabling Caps Lock:
¤ Double tap the shift key ( )
Showing umlauts:
¤ Touch and hold the key
Using a suggestion:
¤ Tap the word . . . The word is included and a space is inserted
automatically

Template Module, Version 1.3, 11.04.2019,
Getting to know your device
Gigaset GX290 / LUG AU-IE-UK-International en / A31008-XXXXX-XXXX-X-XXXX / operating.fm / 2/20/20
18
Editing text
Changing the keypad settings
You can change various keypad settings, such as the language for the keypad assignment, the
response to keypresses and the keypad design.
¤ Settings System Languages& input Virtual keyboard Gboard
Setting voice entry
If an app permits it, you can also enter text by speaking into the microphone. The function is
enabled by default.
Enable/disable voice input:
¤ Settings System Languages& input Virtual keyboard Manage
keyboards Enable/disable Google Voice input with the switch
Voice input settings:
¤ Settings System Languages& input Virtual keyboard Google Voice
input
Positioning the cursor:
¤ Tap the place in the text where you want to position the
cursor
Moving the cursor:
¤ Swipe left or right on the text
Deleting a character:
¤ Touch and hold the backspace key
Selecting text:
¤ Touch and hold a word Select more or less text with tabs
on both sides
Selecting all:
¤ Touch and hold a word Select all
Cutting selected text:
¤ Tap Cut
Copying selected text:
¤ Tap Copy
Pasting text:
¤ Position the cursor Tap on the cursor Paste
If there is not enough of space to display all options: Tap

Gigaset GX290 / LUG AU-IE-UK-International en / A31008-XXXXX-XXXX-X-XXXX / operating.fm / 2/20/20
Template Module, Version 1.3, 11.04.2019
Configuring the start screens
19
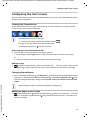
Configuring the start screens
You can create several start screens and configure them as you wish - to be able to quickly access
favourite apps and content.
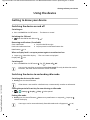
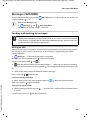
Tailoring the Favourites bar
At the bottom of every start screen is the Favourites bar, from which you are able to quickly
access the apps you use most frequently.
Removing apps from the Favourites bar
¤ Touch an app in the Favourites bar and drag it upwards
¤ Drag the app to the Forget button at the top of the screen and release your finger
or
¤ Drag it to somewhere else on the screen and release your finger
Adding an app
¤ Select the required app Touch and hold the app . . . The start screen is shown in the
background Drag the app to a free space in the Favourites bar and release your finger.
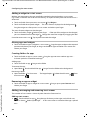
Changing the wallpaper
¤ Touch and hold the wallpaper Tap Wallpapers Select picture from the predefined back-
grounds or a separate photo from the photo gallery Tap Choose wallpaper from Select
what the background/photo is being used for (Home, Lock screen, Home screen and lock
screen)
Adding an app to a start screen
¤ Open the App menu Look for the required app Touch and drag the app . . . The start
screen is displayed in the background Drag the app to a free space in a start screen and
release your finger
Opening the menu with all the apps:
¤ Swipe up the screen twice from the Home button
The apps in the App menu are in alphabetical order.
Scrolling through the list: swipe up or down
More wallpaper images can be downloaded from Google Play.

Template Module, Version 1.3, 11.04.2019,
Configuring the start screens
Gigaset GX290 / LUG AU-IE-UK-International en / A31008-XXXXX-XXXX-X-XXXX / operating.fm / 2/20/20
20
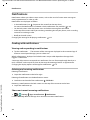
Adding a widget to a start screen
Widgets are components that are specifically intended to be displayed on a start screen,
e.g. a clock, a calendar extract for the current day, an important entry from the contact list or a
dire
ct dial.
¤ Touch and hold a free space on a start screen Tap Widgets
¤ Touch and hold the required widget . . . The start screen is displayed in the background
Drag the widget to a free space in a start screen and release your finger
The sizes of some widgets can be changed:
¤ Touch and hold a widget Release your finger . . . If the size of the widget can be changed,
you see a dotted frame on the edges Change the size of the widget by dragging the dots
Once the correct size is set: Tap anywhere outside the widget
Moving apps and widgets
¤ Touch and hold an app or widget on a start screen Drag the app or widget to the required
position and release your finger, or drag it to the left or right to another start screen and
release your finger
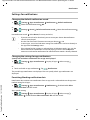
Creating folders for apps
¤ Touch and hold an app on a start screen Drag the app icon over another app icon . . .
A shared symbol is created for both apps
Adding apps:
¤ Touch and hold an app Drag it to the folder
To remove the app:
¤ Open folder Touch and hold the app Drag it from the folder to the background
Renaming a folder:
¤ Open the folder Tap the name . . . The keypad opens Delete the old name Enter
the new name
Removing an app or widget
¤ Touch and hold an app or widget on a start screen Drag it up to option Remove and
release your finger
Adding, rearranging and removing start screens
The number of start screens is shown by dots above the Favourites bar.
Adding start screens
¤ Touch and hold an app Drag the app all the way to the right until a blank start
screen is shown Release your finger . . . A new start screen is created and the app is placed
on it
La pagina sta caricando ...
La pagina sta caricando ...
La pagina sta caricando ...
La pagina sta caricando ...
La pagina sta caricando ...
La pagina sta caricando ...
La pagina sta caricando ...
La pagina sta caricando ...
La pagina sta caricando ...
La pagina sta caricando ...
La pagina sta caricando ...
La pagina sta caricando ...
La pagina sta caricando ...
La pagina sta caricando ...
La pagina sta caricando ...
La pagina sta caricando ...
La pagina sta caricando ...
La pagina sta caricando ...
La pagina sta caricando ...
La pagina sta caricando ...
La pagina sta caricando ...
La pagina sta caricando ...
La pagina sta caricando ...
La pagina sta caricando ...
La pagina sta caricando ...
La pagina sta caricando ...
La pagina sta caricando ...
La pagina sta caricando ...
La pagina sta caricando ...
La pagina sta caricando ...
La pagina sta caricando ...
La pagina sta caricando ...
La pagina sta caricando ...
La pagina sta caricando ...
La pagina sta caricando ...
La pagina sta caricando ...
La pagina sta caricando ...
La pagina sta caricando ...
La pagina sta caricando ...
La pagina sta caricando ...
La pagina sta caricando ...
La pagina sta caricando ...
La pagina sta caricando ...
La pagina sta caricando ...
La pagina sta caricando ...
La pagina sta caricando ...
La pagina sta caricando ...
La pagina sta caricando ...
La pagina sta caricando ...
La pagina sta caricando ...
La pagina sta caricando ...
La pagina sta caricando ...
La pagina sta caricando ...
La pagina sta caricando ...
La pagina sta caricando ...
La pagina sta caricando ...
La pagina sta caricando ...
La pagina sta caricando ...
La pagina sta caricando ...
La pagina sta caricando ...
La pagina sta caricando ...
La pagina sta caricando ...
La pagina sta caricando ...
La pagina sta caricando ...
La pagina sta caricando ...
La pagina sta caricando ...
La pagina sta caricando ...
La pagina sta caricando ...
La pagina sta caricando ...
La pagina sta caricando ...
La pagina sta caricando ...
La pagina sta caricando ...
La pagina sta caricando ...
-
 1
1
-
 2
2
-
 3
3
-
 4
4
-
 5
5
-
 6
6
-
 7
7
-
 8
8
-
 9
9
-
 10
10
-
 11
11
-
 12
12
-
 13
13
-
 14
14
-
 15
15
-
 16
16
-
 17
17
-
 18
18
-
 19
19
-
 20
20
-
 21
21
-
 22
22
-
 23
23
-
 24
24
-
 25
25
-
 26
26
-
 27
27
-
 28
28
-
 29
29
-
 30
30
-
 31
31
-
 32
32
-
 33
33
-
 34
34
-
 35
35
-
 36
36
-
 37
37
-
 38
38
-
 39
39
-
 40
40
-
 41
41
-
 42
42
-
 43
43
-
 44
44
-
 45
45
-
 46
46
-
 47
47
-
 48
48
-
 49
49
-
 50
50
-
 51
51
-
 52
52
-
 53
53
-
 54
54
-
 55
55
-
 56
56
-
 57
57
-
 58
58
-
 59
59
-
 60
60
-
 61
61
-
 62
62
-
 63
63
-
 64
64
-
 65
65
-
 66
66
-
 67
67
-
 68
68
-
 69
69
-
 70
70
-
 71
71
-
 72
72
-
 73
73
-
 74
74
-
 75
75
-
 76
76
-
 77
77
-
 78
78
-
 79
79
-
 80
80
-
 81
81
-
 82
82
-
 83
83
-
 84
84
-
 85
85
-
 86
86
-
 87
87
-
 88
88
-
 89
89
-
 90
90
-
 91
91
-
 92
92
-
 93
93


Gigaset Full Display HD Glass Protector Manuale del proprietario
- Categoria
- Smartphone
- Tipo
- Manuale del proprietario
- Questo manuale è adatto anche per
in altre lingue
Documenti correlati
-
Gigaset Full Display HD Glass Protector (GX290) Guida utente
-
Gigaset Full Display HD Glass Protector (GS290) Guida utente
-
Gigaset GS195 Manuale del proprietario
-
-
-
-
Gigaset GX290 Guida utente
-
-
-