La pagina si sta caricando...

Jumbo Wall Clock
Model: JM889NR
USER MANUAL

1
EN
Jumbo Wall Clock
Model: JM889NR
USER MANUAL
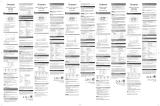
CONTENTS
Introduction ............................................................. 2
Overview .................................................................. 2
Front View ............................................................ 2
Back View ........................................................... 2
LCD Display ......................................................... 3
Getting started ......................................................... 3
Insert Battery ......................................................... 3
Placement Of Unit. ................................................ 3
Clock ........................................................................ 3
Clock Reception ................................................... 3
Set The Clock Manually ........................................ 4
Alarm ........................................................................ 4
Basic Functions .................................................... 4
Displaying Alarm Time .......................................... 4
Set The Alarm ....................................................... 4
Enable/Disable The Alarm .................................... 5
Reset ........................................................................ 5
Precautions ............................................................. 5
Specifications ........................................................ 6
About Oregon Scientific ......................................... 6
FCC Statement ......................................................... 6
Declaration Of Conformity ...................................... 7
Disposal Information For Users ............................. 8
EU-Declaration Of Conformity ................................ 8

2
EN
INTRODUCTION
Thanks for purchasing the Oregon Scientific
TM
Jumbo
Wall Clock (JM889NR).
NOTE
Please keep this manual handy as you use
your new product. It contains practical step-by-step
instructions, as well as technical specifications and
warnings you should know about.
OVERVIEW
FRONT VIEW (FIG 1)
O
Z
N
E
Yr
1
2
3
4
1. Current time and RF signal reception indication
2. Seconds or weekday display
3. Current Date/Alarm Time Display
4. Indoor temperature display
BACK VIEW (FIG 2)
EU UK US
JM 88 9N R
MADE I N C HIN A
12
11
10
9
8
7
6
5
5. Wall-mount hole
6. Alarm: Display and adjust alarm time
7. Clock: Manually adjust current time and date
8. Reset: Returns all settings to default values
9. EU/UK/US: Slide to select the desired clock
reception; time and date setting
10.
/ : Increase/decrease settings; enable/disable
radio reception
11. Battery compartment
12. Table stand
NOTE
Reset the clock after changing the slide switch
position. See Reset section.

3
EN
LCD DISPLAY
Icon Description Explanation
Clock signal
reception
Indicates the condition
of radio reception.
Low Battery Appears when power
is low.
Alarm-on Appears when alarm is
activated.
Alarm Time
Indicator
Appears when alarm time
is displayed.
GETTING STARTED
INSERT BATTERY
1. Remove the battery compartment cover (see FIG 2).
2. Install the batteries, matching the polarities.
3. Press Reset after each battery replacement.
NOTE
Replace the batteries when displays,
or when the display is dim.
PLACEMENT OF UNIT
The clock can be mounted on a wall or stand on a
flat surface.
Method Instruction
Table
Stand
Pull out the table stand (see FIG 2)
at the back of unit, then place the main
unit on a flat surface.
Wall
Mount
a) Position and insert the screw into
the desiredposition.
b) Leave ample space between the
wall and the screwhead. Check the
screw is securely inserted.
c) Fit the unit’s Wall mount hole onto
the screw head.
CLOCK
CLOCK RECEPTION
This clock is designed to synchronize its clock
automatically with a clock signal.
Slide to select the desired region (EU/UK/US).
Region Signal
EU DCF
UK MSF
US WWVB

4
EN
Clock signal reception indicator:
Strong
signal
Weak
signal
No
signal
Receiving
signal
NOTE
It takes 2-10 minutes to receive the clock
signal. If the signal is weak, it could take up to 24 hours
to receive a valid signal.
To enable/disable signal reception:
Press and hold and .
SET THE CLOCK MANUALLY
1. Press and hold / to disable signal reception.
2. Press and hold
Clock. The screen displays ZONE
and the number flashes.
3. Press once or press and hold
/ to adjust the
setting. For EU/UK, the time-zone offset sets the
clock up to +/- 23 hours from the received clock
signal time. For US, the time-zone setting is
0(P),
1(M), 2(C), 3(E).
4. Press
Clock to confirm.
5. Press once or press and hold
/ to adjust the
setting for 12/24h hour format, hour, minute, year,
calendar format (month-day/day-month), month,
date, language and temperature unit (
o
C/
o
F).
6. Press
Clock to confirm.
NOTE
The language options are English (E),
German (D), French (F), Italian (I), and Spanish (S).
To select the display mode:
Press Clock to select between seconds and
weekday display.
NOTE
When the temperature is lower than -5
o
C (29.0
o
F),
the screen displays LL.L. When the temperature is
higher than 50
o
C (122.0
o
F), the screen displays HH.H.
ALARM
BASIC FUNCTIONS
1. When the daily alarm goes off, press Alarm to stop.
2. The alarm will stop after 2 minutes. Then it will go
off again after 8 minutes unless
Alarm is pressed.
DISPLAYING ALARM TIME
1. Press Alarm when the screen displays the current date.
2. To display the current date, press
Clock when the
screen displays the alarm time.
SET THE ALARM
1. Press and hold Alarm. The hour of alarm
display flashes.
2. Press once or press and hold
/ to change
the settings.
3. Press
Alarm to confirm. displays.

5
EN
ENABLE/DISABLE THE ALARM
When the LCD displays the alarm time set. Press
Alarm to enable or disable the daily alarm. displays
when the alarm is enabled.
To disable the alarm, press Alarm when the clock is
in idle. The disappears.
NOTE
When you press Alarm while the alarm goes off,
it only stops the alarm. To disable the alarm, make sure
the clock is in idle.
RESET
Press Reset at the back of the clock using a pointed
object. All settings restore to default.
PRECAUTIONS
• Do not subject the unit to excessive force, shock,
dust, temperature or humidity.
• Do not cover the ventilation holes with any items
such as newspapers, curtains etc.
• Do not immerse the unit in water. If you spill liquid
over it, dry it immediately with a soft, lint-free cloth.
• Do not clean the unit with abrasive or corrosive
materials.
• Do not tamper with the unit’s internal components
This invalidates the warranty.
• Only use fresh batteries. Do not mix new and
old batteries.
• Images shown in this manual may differ from the
actual display.
• When disposing of this product, ensure it is
collected separately for special treatment and not
as normal household waste.
• Placement of this product on certain types of
wood may result in damage to its finish for which
Oregon Scientific will not be responsible. Consult
the furniture manufacturer’s care instructions for
information.
• The contents of this manual may not be reproduced
without the permission of the manufacturer.
• Do not dispose old batteries as unsorted municipal
waste. Collection of such waste separately for
special treatment is necessary.
• Please note that some units are equipped with a
battery safety strip. Remove the strip from the
battery compartment before first use.

6
EN
SPECIFICATIONS
TYPE DESCRIPTION
L x W x H 234 x 220 x 23 mm
Weight 426g
(without battery)
Operation range 0
o
C to 40
o
C (32
o
F to 104
o
F)
Default temperature
unit
o
C (EU/UK)
o
F (US)
Radio frequency
System
DCF
MSF
WWVB
Time format 24/12 Hour with AM/PM
Date format MM:DD/DD:MM
Day-of-week display English/French/German/
Spanish/Italian
Alarm duration 2 minutes
Power 2 x UM-3 (AA) 1.5 V
batteries
ABOUT OREGON SCIENTIFIC
Visit our website (www.oregonscientific.com) to learn
more about Oregon Scientific products.
For any enquiry, please contact our Customer Services
at info.oregonscientific.com.
Oregon Scientific Global Distribution Limited reserves
the right to interpret and construe any contents, terms
and provisions in this user manual and to amend it,
at its sole discretion, at any time without prior notice.
To the extent that there is any inconsistency between
English version and any other language versions, the
English version shall prevail.
FCC STATEMENT
This device complies with Part 15 of the FCC Rules.
Operation is subject to the following two conditions:
(1) This device may not cause harmful interference, and
(2) This device must accept any interference received,
including interference that may cause undesired
operation.
WARNING
Changes or modifications not expressly
approved by the party responsible for compliance could
void the user’s authority to operate the equipment.
NOTE
This equipment has been tested and found
to comply with the limits for a Class B digital device,
pursuant to Part 15 of the FCC Rules. These limits
are designed to provide reasonable protection against
harmful interference in a residential installation.

7
EN
This equipment generates, uses and can radiate radio
frequency energy and, if not installed and used in
accordance with the instructions, may cause harmful
interference to radio communications. However, there
is no guarantee that interference will not occur in a
particular installation. If this equipment does cause
harmful interference to radio or television reception,
which can be determined by turning the equipment
off and on, the user is encouraged to try to correct the
interference by one or more of the following measures:
• Reorient or relocate the receiving antenna.
• Increase the separation between the equipment
and receiver.
• Connect the equipment into an outlet on a
circuit different from that to which the receiver is
connected.
• Consult the dealer or an experienced radio / TV
technician for help.
This Class B digital apparatus complies with Canadian
ICES-3(B)/NMB-3(B)
DECLARATION OF CONFORMITY
The following information is not to be used as contact for
support or sales. Please call our customer service number
(listed on our website at www.oregonscientific.com), or on
the warranty card for this product) for all inquiries instead.
We
Name: Oregon Scientific, Inc.
Address: 10778 SW Manhasset Dr.
Tualatin, Or 97062 USA
Telephone No.: 1-800-853-8883
declare that the product
Product No.: JM889NR
Product Name: Jumbo Wall Clock
Manufacturer: IDT Technology Limited
Address: Block C, 9/F, Kaiser Estate,
Phase 1, 41 Man Yue St.,
Hung Hom, Kowloon,
Hong Kong
is in conformity with Part 15 of the FCC rules.
Operation is subject to the following two conditions:
(1) This device may not cause harmful interference, and
(2) This device must accept any interference
received, including interference that may cause
undesired operation.

8
EN
DISPOSAL INFORMATION FOR USERS
Pursuant to and in accordance with Article 14
of the Directive 2012/19/EU of the European
Parliament on waste electrical and electronic
equipment (WEEE), and pursuant to and in
accordance with Article 20 of the Directive
2006/66/EC of the European Parliament on batteries
and accumulators and waste batteries.
The barred symbol of the rubbish bin shown on the
equipment indicates that, at the end of its useful life, the
product must be collected separately from other waste.
Please note that the batteries / rechargeable batteries
must be removed from the equipment before it is given
as waste. To remove the batteries / accumulators refer
to the specifications in the user manual. Therefore, any
products that have reached the end of their useful life
must be given to waste disposal centres specialising
in separate collection of waste electrical and electronic
equipment, or given back to the dealer when purchasing
a new WEEE, pursuant to and in accordance with
Article 14 as implemented in the country.
The adequate separate collection for the subsequent
start-up of the equipment sent to be recycled, treated
and disposal of in an environmentally compatible way
contributes to preventing possible negative effects on
the environment and health and optimises the recycling
and reuse of components making up the apparatus.
Abusive disposal of the product by the user involves
application of the administrative sanctions according to
the laws in force.
EU-DECLARATION OF CONFORMITY
Hereby, Oregon Scientific, declares that this Jumbo
Wall Clock (Model: JM889NR) is in compliance with
EMC directive 2004/108/EC. A copy of the signedand
dated Declaration of Conformity is available on request
via our Oregon Scientific Customer Service.
COUNTRIES RTTE APPROVED COMPLIED
All EU countries, Switzerland
CH
N
and Norway

1
IT
Orologio da parete Jumbo
Modello: JM889NR
Manuale utente
INDICE
Introduzione ............................................................ 2
Panoramica ............................................................. 2
Visualizzazione Frontale ...................................... 2
Visualizzazione Posteriore ................................... 2
LCD Display ......................................................... 3
Per Cominciare ....................................................... 3
Inserire Le Batterie .............................................. 3
Posizionamento Dell’orologio . ............................. 3
Orologio ................................................................... 3
Ricezione Dell’orologio ........................................ 3
Impostare L’orologio Manualmente ...................... 4
Sveglia ..................................................................... 4
Funzioni Di Base .................................................. 4
Visualizzazione Orario Della Sveglia ................... 5
Impostare La Sveglia ........................................... 5
Accensione / Spegnimento Sveglia ..................... 5
Reset ....................................................................... 5
Precauzioni ............................................................. 5
Specifiche ............................................................... 6
Informazioni Su Oregon Scientific ....................... 6
Dichiarazione Di Conformita’ue ............................ 6

2
IT
INTRODUZIONE
Grazie per aver acquistato Oregon Scientific
TM
Orologio
da parete Jumbo (JM889NR).
NOTA
Si prega di tenere questo manuale a portata di
mano, per sapere come utilizzare il nuovo prodotto.
Esso contiene istruzioni pratiche dettagliate, specifiche
tecniche e avvertenze che è necessario conoscere.
PANORAMICA
VISUALIZZAZIONE FRONTALE (FIG 1)
O
Z
N
E
Yr
1
2
3
4
1. Ora attuale e indicazione di ricezione del segnale RF
2. Visualizzazione di secondi e iniziali del giorno
della settimana
3. Data odierna/ Visualizzazione orario sveglia
4. Visualizzazione della temperatura interna
VISUALIZZAZIONE POSTERIORE (FIG 2)
EU UK US
JM 88 9N R
MADE I N C HIN A
12
11
10
9
8
7
6
5
5. Foro di montaggio a parete
6. Alarm (Sveglia): Visualizzazione /
impostazione sveglia
7. Clock (Orologio): Impostazione manuale di
ora e data
8. Reset: Riporta tutte le impostazioni ai valori
di default
9. EU/UK/US: Ricezione dell’ora desiderata;
impostazione dell’ora e della data
10.
/ : Impostazioni di aumento/diminuzione;
attivare/disattivare la ricezione radio
11. Vano batterie
12. Supporto da tavolo

3
IT
NOTA
Effettuare il Reset dell’orologio, dopo aver spostato
la levetta su EU / UK / US. Per maggiori informazioni,
visualizzare la sezione Reset.
LCD DISPLAY
Icona Descrizione Spiegazione
Ricezione segnale
dell’orologio
Indica la condizione di
ricezione della radio.
Batteria bassa Compare quando la
batteriasi sta
scaricando.
Sveglia attiva Compare quando la
sveglia è attiva.
Indicatore
della sveglia
Compare quando si
visualizza la sveglia.
PER COMINCIARE
INSERIRE LE BATTERIE
1. Togliere il coperchio del vano batteria (vedi figura 2).
2. Installare le batterie, rispettando le polarità.
3. Premere
Reset dopo ogni sostituzione di batteria.
NOTA
Sostituire le batterie quando si visualizza o
quando l’illuminazione dello schermo è basso.
POSIZIONAMENTO DELL’OROLOGIO
L’orologio può essere montato su una parete o essere
posizionato su una superficie piana.
Metoto Istruzioni
Supporto
da tavolo
Estrarre il supporto da tavolo
(vedi figura 2) sul retro dell’unità, quindi
posizionare l’unità principale su una
superficie piana.
Montaggio
a parete
a) Posizionare ed inserire la vite
nella posizione desiderata.
b) Lasciare ampio spazio tra la parete
e la testa della vite. Controllare che
la vite sia inserita saldamente.
c) Montare il foro dell’unità di
montaggio a parete sulla testa
della vite.
OROLOGIO
RICEZIONE DELL’OROLOGIO
Quest’orologio è progettato per essere sincronizzato
automaticamente con un segnale di radiocontrollo.
Far scorrere la levetta per selezionare la regione
desiderata (EU/UK/US).

4
IT
Regione Segnale
EU DCF
UK MSF
US WWVB
Indicatore di ricezione del segnale di radiocontrollo:
Segnale
forte
Segnale
debole
Nessun
segnale
Ricezione
di segnale
NOTA
Il segnale di radiocontrollo viene generalmente
ricevuto dall’orologio dopo 2-10 minuti. Se il segnale è
debole, potrebbero essere necessarie più di 24 ore.
Per attivare/disattivare il segnale di ricezione:
Premere e tenere premuto e .
IMPOSTARE L’OROLOGIO MANUALMENTE
1. Premere e tenere premuto / per disattivare il
segnale di ricezione.
2. Premere e tenere premuto
Clock . Lo schermo
mostra ZONE (ZONA) e il numero lampeggia.
3. Premere una volta o tenere premuto
/ per regolare
l’impostazione. Per EU / UK, l’offset di fuso orario
imposta l’orologio a + / - 23 ore dall’ora del segnale
ricevuto. Per gli Stati Uniti, l’impostazione del fuso
orario è 0 (P), 1 (M), 2 (C), 3 (E).
4. Premere Clock (Orologio) per confermare.
5. Premere una volta o premere e tenere premuto
/ per regolare l’impostazione per il formato
12/24h ore, ore, minuti, anno, formato calendario
(mese-giorno/giorno-mese), mese, data, lingua e
unità di temperatura (
o
C /
o
F ).
6. Premere
Clock (Orologio) per confermare.
NOTA
Le opzioni di lingua sono Inglese (E),
Tedesco (D), Francese(F), Italiano (I), and Spagnolo (S).
Per selezionare la modalità di visualizzazione:
Premere Clock per selezionare tra la visualizzazione
di secondi e giorni feriali.
NOTA
Quando la temperatura è inferiore a
-5
o
C (29.0
o
F), lo schermo mostra LL.L. Quando la
temperatura è maggiore di 50
o
C (122.0
o
F), lo schermo
mostra HH.H.
SVEGLIA
FUNZIONI DI BASE
1. Quando la sveglia suona, premere il tasto Alarm
(Sveglia) per spegnerla.
2. L’allarme si arresta dopo 2 minuti. Poi si spegne di
nuovo dopo 8 minuti se non viene premuto Sveglia.
NOTA
Dopo la seconda volta, la sveglia non si spegne
fino al giorno successivo, indipendentemente dal fatto
che si prema Alarm (Sveglia).

5
IT
VISUALIZZAZIONE ORARIO DELLA SVEGLIA
1. Premere Alarm (Sveglia) a quando lo schermo
mostra la data attuale.
2. Per visualizzare la data attuale, premere
Clock
(Orologio) quando lo schermo mostra l’ora
della sveglia.
IMPOSTARE LA SVEGLIA
1. Premere e tenere premuto Alarm (Sveglia). L’ora
di visualizzazione della Sveglia lampeggia.
2. Premere una volta o premere e tenere premuto
/ per modificare le impostazioni.
3. Premere
Alarm (Sveglia) per confermare.
Si visualizza.
ACCENSIONE / SPEGNIMENTO SVEGLIA
Quando LCD mostra l’impostazione dell’ora della
sveglia, premere
Alarm (Sveglia) per attivare o
disattivare la sveglia giornaliera.
Si visualizza
quando la Sveglia è stata attivata.
Per disattivare la Sveglia, premere Alarm (Sveglia)
quando l’orologio è in stand- by. scompare.
NOTA
Per disattivare la funzione di sveglia, assicurarsi
che l’orologio sia in stand-by; in caso contrario,
premendo il tasto
Alarm (Sveglia) la sveglia si ferma
ma non si disattiva.
RESET
Premere Reset sul retro dell’orologio usando un
oggetto a punta. Tutte le impostazioni vengono
ripristinate in default.
PRECAUZIONI
• Non sottoporre il prodotto a forza eccessiva, urti,
polvere, temperatura o umidità.
• Non coprire i fori di aerazione con oggetti come
giornali, tende, etc.
• Non immergere l’unità in acqua. Se si versa del
liquido sul prodotto, asciugarlo immediatamente
con un panno morbido e privo di lanugine.
• Non pulire l’unità con materiali abrasivi, corrosivi o
contenenti alcool, in quanto possono causare danni.
• Non manomettere i componenti interni dell’unità.
Questo invalida la garanzia.
• Utilizzare solo batterie nuove. Non mischiare
batterie vecchie e nuove.
• Le immagini del manuale possono differire
dalla realtà.
• Al momento dello smaltimento del prodotto,
conferirlo ai centri di raccolta specifici
.
• Il posizionamento del prodotto su determinati tipi
di legno può provocare danni alle finiture per le
quali Oregon Scientific non sarà responsabile.
Consultare le istruzioni fornite dal produttore del
mobile per informazioni.
• Il contenuto di questo manuale non può essere
riprodotto senza il permesso del produttore.

6
IT
• Non smaltire le batterie vecchie come rifiuto non
differenziato. E’ necessario raccoglieretali rifiuti
separatamente per un trattamento speciale.
• Si prega di notare che alcune unità sono dotate di
una striscia di sicurezza della batteria. Rimuovere
la striscia dal componente batteria prima del
primo utilizzo.
SPECIFICHE
TIPO DESCRIZIONE
L x W x H 234 x 220 x 23 mm
Peso 426g (senza batterie)
Intervallo di
temperatura (di
funzionamento)
Da 0
o
C a 40
o
C
(da 32
o
F a 104
o
F)
Unità di
temperatura
o
C (EU/UK)
o
F (US)
Segnale di
radiocontrollo
DCF
MSF
WWVB
Formato dell’ora 24/12 Ora con AM/PM
Formato della data MM:GG/GG:MM
Visualizzazione del
giorno della settimana
Inglese/Francese/Tedesco/
Spagnolo/Italiano
Durata della sveglia 2 minuti
Alimentazione 2 x UM-3 (AA) batterie 1.5 V
INFORMAZIONI SU OREGON SCIENTIFIC
Per ulteriori informazioni sui prodotti Oregon Scientific,
visitate il nostro sito web www.oregonscientific.com
.
Per richiedere informazioni, contattate il nostro Servizio
Clienti all’indirizzo info@oregonscientific.it.
Oregon Scientific Global Distribution Limited si riserva
il diritto di interpretare e definire eventuali contenuti,
termini e disposizioni contenuti in questo manuale per
l’utente e di modificarli, a sua esclusiva discrezione, in
qualsiasi momento e senza preavviso. Nella misura in
cui risultassero incongruenze tra la versione in inglese
e quelle in altre lingue, farà fede la versione in inglese.
DICHIARAZIONE DI CONFORMITA’UE
Con la presente Oregon Scientific dichiara che questo
Orologio da parete Jumbo (Modello: JM889NR) è
conforme ai requisiti essenzialied
alle altre disposizioni
pertinenti stabilite dalla direttiva
2004/108/EC. Una
copia firmata e datata della Dichiarazione di Conformità
è disponibile, su richiesta, tramite il servizio clienti della
Oregon Scientific.
PAESI CONFORMI ALLA DIRETTIVA R&TTE
Tu
tti I Paesi UE, Svizzera CH
e Norvegia N

1
FR
Horloge Murale
Modèle: JM889NR
Mode d’emploi
SOMMAIRE
Introduction ............................................................. 2
Caracteristiques Principales ................................. 2
Vue Avant ............................................................. 2
Vue Arriere .......................................................... 2
Affichage LCD ...................................................... 3
Pour Commencer .................................................... 3
Installation Des Piles ............................................ 3
Placement De L’unite ........................................... 3
Horloge .................................................................... 3
Reception De L’horloge ........................................ 3
Pour Ajuster L’horloge Manuellement .................. 4
Alarme ...................................................................... 5
Fonctions De Base ............................................... 5
Affichage De L’heure De L’alarme ........................ 5
Réglage De L’alarme ........................................... 5
Activation/désactivation De L’alarme ................... 5
Réinitialisation ........................................................ 5
Avertissements ....................................................... 5
Caracteristiques Techniques ................................ 6
À Propos D’oregon Scientific ................................ 7
EU – Déclaration De Conformité ........................... 7

2
FR
INTRODUCTION
Merci d’avoir choisi l’Horloge Murale d’Oregon Scientific
TM
(JM889NR).
REMARQUE
Veuillez conserver ce mode d’emploi
scrupuleusement. Il contient des instructions pratiques
étape par étape, ainsi que les spécifications techniques
et autres avertissements que vous vous devez
de connaitre.
CARACTERISTIQUES PRINCIPALES
VUE AVANT (FIG 1)
O
Z
N
E
Yr
1
2
3
4
1. Affichage de l’heure actuelle et indication de la
réception radio.
2. Sélection entre l’affichage des secondes ou
l’affichage du jour de la semaine
3. Sélection entre l’affichage de la date ou l’affichage
du jour de la semaine
4. Affichage de la température intérieure
VUE ARRIERE (FIG 2)
EU UK US
JM 88 9N R
MADE IN C HINA
12
11
10
9
8
7
6
5
5. Trou de fixation murale
6. Alarm (Alarme): Pour afficher et ajuster l’heure
de l’alarme
7. Clock (Horloge): Pour ajuster manuellement
l’heure et la date actuelles
8. Reset (Réinitialisation): Renvoie les paramètres
aux valeurs par défaut
9. EU/UK/US: Faites glisser pour sélectionner la
réception de l’horloge souhaitée; réglages de la
date et de l’heure
10.
/ : Augmentation / diminution des paramètres;
activation / désactivation de la réception radio
11. Compartiment des piles
12. Support Table
REMARQUE
Réinitialisez l’horloge après avoir changé la
position de l’interrupteur. Voir la section Réinitialisation
.

3
FR
AFFICHAGE LCD
Icone Description Explication
Réception du
signal radio
Indique l’état de la
réception radio.
Icône
d’épuisement
des piles
Apparait lorsque le
niveau des piles
est faible
.
Icône de l’alarme Apparait quand
l’alarme est activée.
Indicateur de
l’heure de l’alarme
Apparait quand
l’alarme est affichée.
POUR COMMENCER
INSTALLATION DES PILES
1. Retirez le couvercle du compartiment à piles
(voir FIG 2).
2. Installez les piles en respectant les indications
de polarité.
3. Appuyez sur Reset (Réinitialisation) après chaque
changement de piles.
REMARQUE
Remplacez les piles lorsque s’affiche,
ou lorsque la luminosité de l’écran est faible.
PLACEMENT DE L’UNITE
Vous pouvez installer l’unité sur un mur ou la poser
sur une surface plane.
Méthode Instruction
Support
Table
Sortez le support table (voir FIG 2)
situe au dos de l’unité, puis placez
l’unité sur une surface plane.
Installation
murale
a) Positionnez et vissez la vis à
l’endroit souhaité.
b) Laissez suffisamment d’espace
entre le mur et la tête de la vis en
testant la sûreté de la vis.
c) Ajustez le trou de fixation pour
installation murale sur la tête de
la vis.
HORLOGE
RECEPTION DE L’HORLOGE
Cet appareil est conçu pour se synchroniser
automatiquement dès qu’il se trouve dans la zone de
réception du signal radio.
Faites glisser l’interrupteur pour choisir une région
(EU/UK/US).

4
FR
Région Signal
EU DCF
UK MSF
US WWVB
Description de la réception radio:
Signal
Fort
Signal
Faible
Pas de
signal
Reception
du signal
REMARQUE
Il faut 2-10 minutes pour recevoir le signal
d’horloge. Si le signal est faible, cela peut prendre
jusqu’à 24 heures pour recevoir un signal valide.
Pour activer/désactiver la réception du signal:
Appuyez sur et maintenez appuyés et .
POUR AJUSTER L’HORLOGE MANUELLEMENT
1. Appuyez sur et maintenez appuyés les boutons
/ pour desactiver la réception du signal.
2. Appuyez sur et maintenez appuyé le bouton
Clock (Horloge). L’écran affiche alors ZONE et
le chiffre clignote.
3. Appuyez une fois sur ou maintenez appuyés
/
pour ajuster les reglages. Pour EU/UK, La fonction
fuseau horaire règle l’horloge à +/- 23 heures de
l’heure du signal reçu. Pour US, les réglages du
fuseau horaire sont 0(P), 1(M), 2(C), 3(E).
4. Appuyez sur Clock (Horloge) pour confirmer.
5. Appuyez une fois sur ou maintenez appuyés
/ pour ajuster les réglages du format de l’heure
12/24h, de l’heure, des minutes, de l’annee, du
format du calendrier (moisjour/ jour-mois), du mois,
de la date, de la langue et de l’unité de température
(
o
C /
o
F ).
6. Appuyez sur
Clock (Horloge) pour confirmer.
REMARQUE
Les options de langue sont les suivantes:
Anglais (
E), Allemand (D), Français (F), Italien (I), et
Espagnol (S).
Pour sélectionner le mode d’affichage:
Appuyez sur Clock (Horloge) pour choisir entre
l’affichage des secondes ou l’affichage du jour de
la semaine.
REMARQUE
Lorsque la température est inferieure
à -5
o
C (29.0
o
F), l’écran affiche LL.L. Lorsque la
température est supérieure à 50
o
C (122.0
o
F), l’écran
affiche
HH.H.

5
FR
ALARME
FONCTIONS DE BASE
1. Lorsque l’alarme quotidienne se déclenche,
appuyez sur Alarm (Alarme) pour l’arrêter.
2. L’alarme cessera immédiatement de sonner après
2 minutes. Mais après 8 minutes, l’alarme sera
déclenchée à nouveau, à moins d’appuyer sur
Alarm (Alarme).
REMARQUE
Après le deuxième déclenchement
de l’alarme, celle-ci ne se déclenchera pas avant le
lendemain, peu importe que la touche Alarm (Alarme)
soit pressée ou non.
AFFICHAGE DE L’HEURE DE L’ALARME
1. Appuyez sur Alarm (Alarme) lorsque l’écran affiche la
date actuelle.
2. Pour afficher la date actuelle, appuyez sur Clock
(Horloge) lorsque l’écran affiche l’heure de l’alarme.
RÉGLAGE DE L’ALARME
1. Appuyez sur et maintenez appuyé le bouton Alarm
(Alarme) pendant 2 secondes. L’affichage de
l’heure de l’alarme se met à clignoter.
2. Appuyez sur et maintenez appuyé
/ pour
modifier les reglages.
3. Appuyez sur Alarm (Alarme) pour confirmer.
L’icone s’affiche alors.
ACTIVATION/DÉSACTIVATION DE L’ALARME
Lorsque l’écran LCD affiche l’heure de l’alarme,
appuyez sur Alarm (Alarme) pour activer ou désactiver
l’alarme quotidienne. L’icône s’affiche lorsque
l’alarme est activée.
Pour désactiver l’alarme, appuyez sur Alarm (Alarme)
lorsque l’horloge est en veille. L’icone disparait.
REMARQUE
Lorsque vous appuyez sur Alarm
(Alarme) lorsque l’alarme se déclenche, cela ne
fait que stopper l’alarme. Pour désactiver l’alarme,
assurez-vous que l’horloge est en veille.
RÉINITIALISATION
Appuyez sur Reset (Réinitialiser) au dos de l’horloge
en utilisant un objet pointu. Les réglages par défaut
seront alors rétablis.
AVERTISSEMENTS
• Ne pas soumettre le produit à une force excessive, à
des chocs, à de la poussière, et à des températures
excessives ou à de l’humidité.
• Ne pas couvrir les trous de ventilation avec des
objets tels que des journaux, des rideaux etc.
• Ne pas immerger l’appareil dans l’eau. Si l’appareil
est mouillé, séchez-le immédiatement avec un
chiffon doux non pelucheux.
/