
ColdMachine 50, 54, 55, 84, 85, 86, 94, 95, 96, CS-NC15
VD-01, VD-02, VD-03, VD-04, VD-05, VD-06, VD-07, VD-08,
VD-09, VD-14N, VD-15, VD-16, VD-18, VD-21
Cooling unit
Installation and Operating Manual. . . . . . . 13
Kühlaggregat
Montage- und Bedienungsanleitung . . . . .36
Groupe frigorifique
Instructions de montage
et de service . . . . . . . . . . . . . . . . . . . . . . . . .60
Unidad frigorífica
Instrucciones de montaje y de uso . . . . . . .85
Unidade de refrigeração
Instruções de montagem e manual de
instruções . . . . . . . . . . . . . . . . . . . . . . . . . . 110
Gruppo refrigerante
Istruzioni di montaggio e d’uso . . . . . . . .134
Koelaggregaat
Montagehandleiding en
gebruiksaanwijzing . . . . . . . . . . . . . . . . . .159
Køleaggregat
Monterings- og betjeningsvejledning . . .183
Kylaggregat
Monterings- och bruksanvisning . . . . . . . 206
Kjøleaggregat
Monterings- og bruksanvisning. . . . . . . . 229
Jäähdytysaggregaatti
Asennus- ja käyttöohje . . . . . . . . . . . . . . . 251
Холодильный агрегат
Инструкция по монтажу и эксплуатации 274
Agregat chłodzący
Instrukcja montażu i obsługi. . . . . . . . . . . 300
Chladiaci agregát
Návod na montáž a uvedenie
do prevádzky. . . . . . . . . . . . . . . . . . . . . . . 325
Chladicí agregát
Návod k montáži a obsluze . . . . . . . . . . . 348
Hűtőkészülék
Szerelési és használati útmutató . . . . . . . 372
EN
DE
FR
ES
PT
IT
NL
DA
SV
NO
FI
RU
PL
SK
CS
HU
REFRIGERATION
COOLING UNIT
DometicColdMachine50-54-55-84-85-86-94-95-96-CS-NC15_IOM_4445100001_EMEA16_20xx-xx-xx.book Page 1 Tuesday, May 4, 2021 7:24 PM

© 2021 Dometic Group. The visual appearance of the contents of this manual is
protected by copyright and design law. The underlying technical design and the
products contained herein may be protected by design, patent or be patent
pending. The trademarks mentioned in this manual belong to Dometic Sweden AB.
All rights are reserved.
DometicColdMachine50-54-55-84-85-86-94-95-96-CS-NC15_IOM_4445100001_EMEA16_20xx-xx-xx.book Page 2 Tuesday, May 4, 2021 7:24 PM

Coldmachine
3
A
1
2
B
2
3
4
5
6
7
0
1
1
2
1
1
2
3
4
5
6
min max
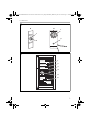
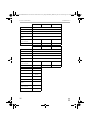
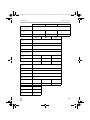
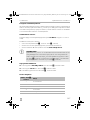
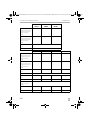
Hauptschalter
Main Switch
Commutateur
principal
Kompressor ein
Compressor on
Compresseur en fonction
Fremdversorgung
External Voltage
Alimentation Extérieure
Speicherabruf
Discharge of Cold Accum.
Décharge de la Plaque
Temperature
Electronic
Control
2
DometicColdMachine50-54-55-84-85-86-94-95-96-CS-NC15_IOM_4445100001_EMEA16_20xx-xx-xx.book Page 3 Tuesday, May 4, 2021 7:24 PM

Coldmachine
4
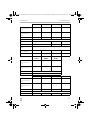
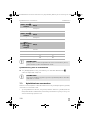
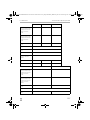
VD-01, VD-04, VD-08
10 mm
10 mm
10 mm
10 mm
10 mm
3
VD-03
min. 30 mm
4
VD-02, VD-05, VD-18, VD-21
10 mm
10 mm
10 mm
5
DometicColdMachine50-54-55-84-85-86-94-95-96-CS-NC15_IOM_4445100001_EMEA16_20xx-xx-xx.book Page 4 Tuesday, May 4, 2021 7:24 PM

Coldmachine
5
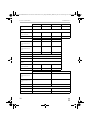
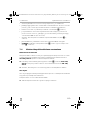
VD-06
6
VD-07, VD-09
10 mm
1/3
2/3
7
VD-14N, VD-15
1/32/3
1
2
3
4
5
8
DometicColdMachine50-54-55-84-85-86-94-95-96-CS-NC15_IOM_4445100001_EMEA16_20xx-xx-xx.book Page 5 Tuesday, May 4, 2021 7:24 PM

Coldmachine
6
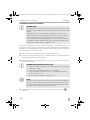
VD-16
F
T
D
C
P
1
gn/ge
br
sw
gr
bl
9
VD-14N, VD-15
1
F
T
D
C
P
gn/ge
gr
bl
br
sw
0
b
a
DometicColdMachine50-54-55-84-85-86-94-95-96-CS-NC15_IOM_4445100001_EMEA16_20xx-xx-xx.book Page 6 Tuesday, May 4, 2021 7:24 PM

Coldmachine
7
2
1
3
c
AB
CD
d
DometicColdMachine50-54-55-84-85-86-94-95-96-CS-NC15_IOM_4445100001_EMEA16_20xx-xx-xx.book Page 7 Tuesday, May 4, 2021 7:24 PM

Coldmachine
8
1. 2.
e
2 mm
3 mm
g
21
21
19
16
f
Ø
/mm²
l/m
12 V
24 V
0 2 4 6 8 10 12 14 16 18 20 22 24 26 28
0
2
6
10
14
h
DometicColdMachine50-54-55-84-85-86-94-95-96-CS-NC15_IOM_4445100001_EMEA16_20xx-xx-xx.book Page 8 Tuesday, May 4, 2021 7:24 PM

Coldmachine
9
VD-01, VD-02, VD-03, VD-04, VD-05,
VD-07, VD-08, VD-09, VD-18 , VD-21
rt
swblgn/ge
sw / b l
2
3
4
5
6
7
0
1
br
12 3
4
i
12 3
4
brgn w s
rt
T
P
C
sw / b l
VD-06
j
DometicColdMachine50-54-55-84-85-86-94-95-96-CS-NC15_IOM_4445100001_EMEA16_20xx-xx-xx.book Page 9 Tuesday, May 4, 2021 7:24 PM

Coldmachine
10
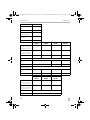
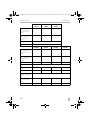
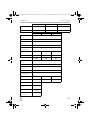
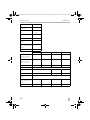
bl br ge gn gr rt sw ws ∨
EN Blue Brown Yellow Green Grey Red Black White or
DE Blau Braun Gelb Grün Grau Rot Schwarz Weiss oder
FR Bleu Marron Jaune Vert Gris Rouge Noir Blanc ou
ES Azul Marrón Amarillo Verde Gris Rojo Negro Blanco o bien
PT Azul Castanho Amarelo Verde Cinzento Vermelho Preto Branco ou
IT Blu Marrone Giallo Verde Grigio Rosso Nero Bianco oppure
NL Blauw Bruin Geel Groen Grijs Rood Zwart Wit of
DA Blå Brun Gul Grøn Grå Rød Sort Hvid eller
SV Blå Brun Gul Grön Grå Röd Svart Vit eller
NO Blå Brun Gul Grønn Grå Rød Svart Hvit eller
FI Sininen Ruskea Keltainen Vihreä Harmaa Punainen Musta Val-
koinen
tai
RU Синий Коричне-
вый
Желтый Зеленый Серый Красный Черный Белый или
PL Niebieski Brązowy Żółty Zielony Szary Czerwony Czarny Biały lub
SK Modrá Hnedá Žltá Zelená Sivá Červená Čierna Biela alebo
CS Modrá Hněda Žlutá Zelená Šedá Červená Černá Bílá nebo
HU Kék Barna Sárga Zöld Szürke Piros Fekete Fehér vagy
DometicColdMachine50-54-55-84-85-86-94-95-96-CS-NC15_IOM_4445100001_EMEA16_20xx-xx-xx.book Page 10 Tuesday, May 4, 2021 7:24 PM

Coldmachine
11
257 mm
81 mm
9,50 mm
9,50 mm
128,50 mm
360 mm
281 mm
k
DometicColdMachine50-54-55-84-85-86-94-95-96-CS-NC15_IOM_4445100001_EMEA16_20xx-xx-xx.book Page 11 Tuesday, May 4, 2021 7:24 PM

Coldmachine
12
~ 215 mm
~ 310 mm
l
DometicColdMachine50-54-55-84-85-86-94-95-96-CS-NC15_IOM_4445100001_EMEA16_20xx-xx-xx.book Page 12 Tuesday, May 4, 2021 7:24 PM

EN
Coldmachine Explanation of symbols
13
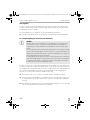
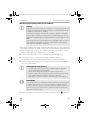
Please read these instructions carefully and follow all instructions, guidelines, and warnings included in this product manual in order to ensure
that you install, use, and maintain the product properly at all times. These instructions MUST stay with this product.
By using the product, you hereby confirm that you have read all instructions, guidelines, and warnings carefully and that you understand and
agree to abide by the terms and conditions as set forth herein. You agree to use this product only for the intended purpose and application
and in accordance with the instructions, guidelines, and warnings as set forth in this product manual as well as in accordance with all appli-
cable laws and regulations. A failure to read and follow the instructions and warnings set forth herein may result in an injury to yourself and
others, damage to your product or damage to other property in the vicinity. This product manual, including the instructions, guidelines, and
warnings, and related documentation, may be subject to changes and updates. For up-to-date product information, please visit
dometic.com.
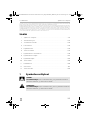
Contents
1 Explanation of symbols . . . . . . . . . . . . . . . . . . . . . . . . . . . . . . . . . . . . . . . . . .13
2 Safety instructions . . . . . . . . . . . . . . . . . . . . . . . . . . . . . . . . . . . . . . . . . . . . . .14
3 Scope of delivery . . . . . . . . . . . . . . . . . . . . . . . . . . . . . . . . . . . . . . . . . . . . . .16
4 Accessories . . . . . . . . . . . . . . . . . . . . . . . . . . . . . . . . . . . . . . . . . . . . . . . . . . .16
5 Intended use . . . . . . . . . . . . . . . . . . . . . . . . . . . . . . . . . . . . . . . . . . . . . . . . . .16
6 Technical description . . . . . . . . . . . . . . . . . . . . . . . . . . . . . . . . . . . . . . . . . . .17
7 Installing the cooling unit . . . . . . . . . . . . . . . . . . . . . . . . . . . . . . . . . . . . . . . .18
8 Using the cooling unit. . . . . . . . . . . . . . . . . . . . . . . . . . . . . . . . . . . . . . . . . . 25
9 Use coolant accumulator . . . . . . . . . . . . . . . . . . . . . . . . . . . . . . . . . . . . . . . 27
10 Warranty . . . . . . . . . . . . . . . . . . . . . . . . . . . . . . . . . . . . . . . . . . . . . . . . . . . . 28
11 Disposal. . . . . . . . . . . . . . . . . . . . . . . . . . . . . . . . . . . . . . . . . . . . . . . . . . . . . 28
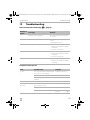
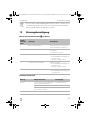
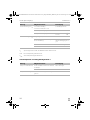
12 Troubleshooting . . . . . . . . . . . . . . . . . . . . . . . . . . . . . . . . . . . . . . . . . . . . . . 29
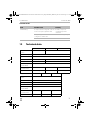
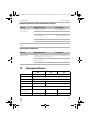
13 Technical data . . . . . . . . . . . . . . . . . . . . . . . . . . . . . . . . . . . . . . . . . . . . . . . . .31
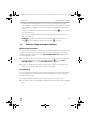
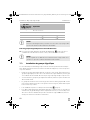
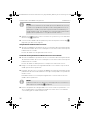
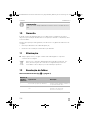
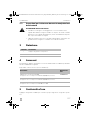
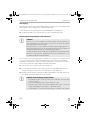
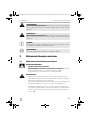
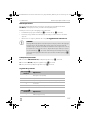
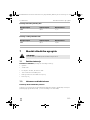
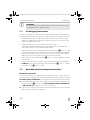
1 Explanation of symbols
D
!
DANGER!
Safety instruction: Indicates a hazardous situation that, if not avoided,
will result in death or serious injury.
WARNING!
Safety instruction: Indicates a hazardous situation that, if not avoided,
could result in death or serious injury.
DometicColdMachine50-54-55-84-85-86-94-95-96-CS-NC15_IOM_4445100001_EMEA16_20xx-xx-xx.book Page 13 Tuesday, May 4, 2021 7:24 PM

EN
Safety instructions Coldmachine
14
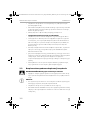
!
A
I
2 Safety instructions
2.1 General safety
D
DANGER!
• Danger of fatalinjuries!
When using the device on boats: if the device is powered by the
mains, ensure that the power supply has a residual current circuit
breaker!
!
WARNING!
• This device may only be installed and repaired by a qualified
technician. Inadequate repairs can lead to considerable hazards.
Should your device need to be repaired, please contact customer
services.
• Do not operate the device if it is visibly damaged.
• Do not open the refrigerant circuit under any circumstances. An
exception to this is when the device has to be disconnected for return
shipping (chapter “Installing the external temperature regulator” on
page 21).
• Set up the device in a dry location where it is protected against splash-
ing water.
• Do not place the device near naked flames or other heat sources
(heaters, direct sunlight, gas ovens etc.).
• Make sure that the compressor is sufficiently ventilated.
• Electronic devices are not toys!
Always keep and use the device out of the reach of children.
CAUTION!
Safety instruction: Indicates a hazardous situation that, if not avoided,
could result in minor or moderate injury.
NOTICE!
Indicates a situation that, if not avoided, can result in property damage.
NOTE
Supplementary information for operating the product.
DometicColdMachine50-54-55-84-85-86-94-95-96-CS-NC15_IOM_4445100001_EMEA16_20xx-xx-xx.book Page 14 Tuesday, May 4, 2021 7:24 PM

EN
Coldmachine Safety instructions
15
• People (including children) whose physical, sensory or mental
capacities or whose lack of experience or knowledge prevent them
from using this product safely should not use it without the supervision
or instruction of a responsible person.
• Before you start up the device for the first time, check that the
operatingvoltage matches the battery voltage (see type plate).
• If the connection cable is damaged, it must be replaced to prevent
possible electrical hazards. Only replace a damaged connection
cable with a connection cable of the same type and specifications.
• Do not store any explosive substances, such as spray cans with
propellants in the device.
2.2 Operating the device safely
D
DANGER! Danger of fatal injuries!
• Do not touch exposed cables with your bare hands. This especially
applies when operating the device from the AC mains.
A
NOTICE!
• Never use cleaners that contain sand, acids or solvents to clean the
evaporator.
• Protect the device against rain and moisture.
• Disconnect the cooling device and other consumer units from the
battery before you connect the quick charging device.
I
NOTE
• Disconnect the device if you are not going to use it for a prolonged
period.
2.3 Safety precautions when handling batteries
!
CAUTION! Danger of injury!
• Batteries contain aggressive and caustic acids. Avoid battery fluid
coming into contact with your body. If your skin does come into
contact with battery fluid, wash the part of your body in question
thoroughly with water.
• If you connect the device to a battery, make sure that no food comes
into contact with the battery acid.
DometicColdMachine50-54-55-84-85-86-94-95-96-CS-NC15_IOM_4445100001_EMEA16_20xx-xx-xx.book Page 15 Tuesday, May 4, 2021 7:24 PM

EN
Scope of delivery Coldmachine
16
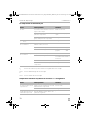
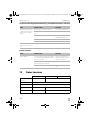
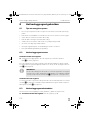
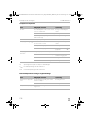
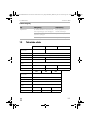
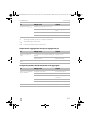
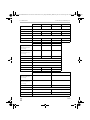
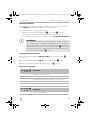
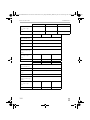
3Scope of delivery
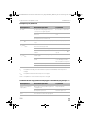
4Accessories
If you wish to operate the cooling unit from the 230 V AC mains, please use one of
the following rectifiers.
Available as accessory (not included in scope of delivery):
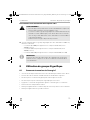
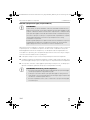
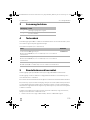
5 Intended use
The cooling unit is suited for building your own refrigerator or cooler.
The cooler unit is suitable for cooling and freezing food. The device is also suitable
for use on boats.
This product is only suitable for the intended purpose and application in accordance
with these instructions.
This manual provides information that is necessary for proper installation and/or
operation of the product. Poor installation and/or improper operating or mainte-
nance will result in unsatisfactory performance and a possible failure.
The manufacturer accepts no liability for any injury or damage to the product
resulting from:
• Incorrect assembly or connection, including excess voltage
• Incorrect maintenance or use of spare parts other than original spare parts
provided by the manufacturer
Quantity Description
1 Cooling unit or evaporator
1 Operating manual
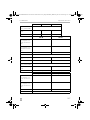
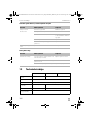
Description Item number
CoolPower EPS100 rectifier
For devices with BD35F compressor (50/80/CS/CS series)
9600000440
CoolPower MPS35 rectifier
For devices with BD35F compressor (50/80/CS/CS series)
9600000445
CoolPower MPS50 rectifier
For devices with BD50F compressor (90 series)
9600000441
DometicColdMachine50-54-55-84-85-86-94-95-96-CS-NC15_IOM_4445100001_EMEA16_20xx-xx-xx.book Page 16 Tuesday, May 4, 2021 7:24 PM

EN
Coldmachine Technical description
17
• Alterations to the product without express permission from the manufacturer
• Use for purposes other than those described in this manual
Dometic reserves the right to change product appearance and product
specifications.
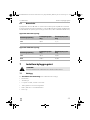
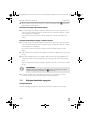
6 Technical description
The cooling units are suitable for use with 12 V or 24 V DC voltage and can therefore
be used for camping or on boats. Furthermore, you can connect them to a 230 V
mains supply via the rectifiers (see chapter “Accessories” on page 16).
When used on boats, the cooling unit can withstand a constant heeling of 30°.
The cooling unit must be used together with an evaporator. In addition, you can use
an accumulator with or without TEC control. The CS-NC15 comprises a cooling unit
and an evaporator.
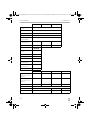
Use the continuously variable thermostat on the evaporator to set the desired
temperature.
The accumulator and TEC program control ensure a high cooling capacity
and improve the unit’s efficiency. The accumulator is charged when there is
a sufficient supply of power (for example when powered by a mains adapter). In the
event of accumulator usage or under-voltage, the coolant is drawn from the
accumulator until it is empty. Thus, no power is taken from the battery during this
time.
The TEC program control always ensures that
• Cold energy is stored if there is excess electrical energy (external supply of power
by a generator).
• The coolant accumulator can be used at any time to ensure that the complete
battery power is used for other consumers.
• Stored cold energy is automatically retrieved to preserve the interior cooling
temperature of the cooling area, once the battery capacity is exhausted.
I
NOTE
Further information on the coolant accumulator can be found in chapter
“Use coolant accumulator” on page 27.
DometicColdMachine50-54-55-84-85-86-94-95-96-CS-NC15_IOM_4445100001_EMEA16_20xx-xx-xx.book Page 17 Tuesday, May 4, 2021 7:24 PM

EN
Installing the cooling unit Coldmachine
18
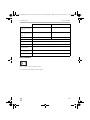
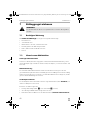
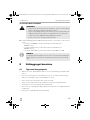
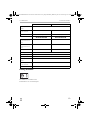
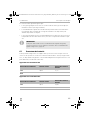
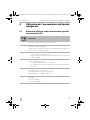
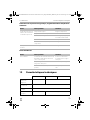
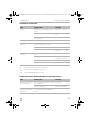
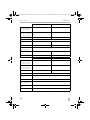
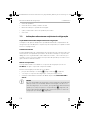
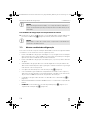
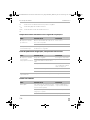
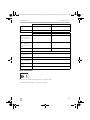
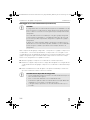
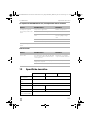
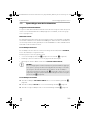
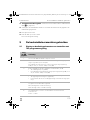
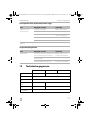
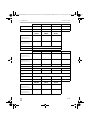
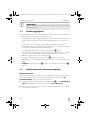
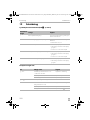
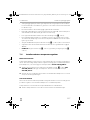
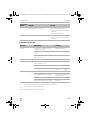
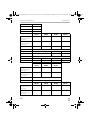
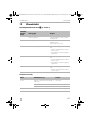
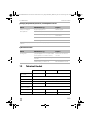
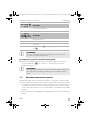
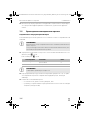
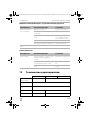
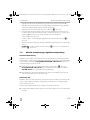
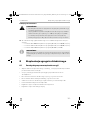
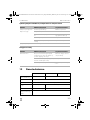
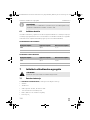
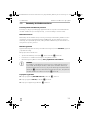
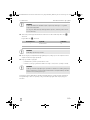
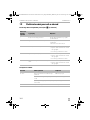
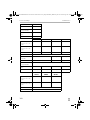
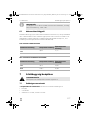
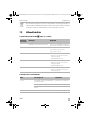
6.1 Battery monitor
The cooling device is equipped with an electronic device to protect against revers-
ing the polarity when connecting to a battery. To protect the battery, the cooling
device switches off automatically if the voltage is insufficient (see following table).
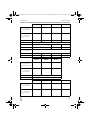
Devices without TEC control
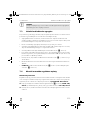
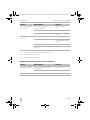
Devices with TEC control
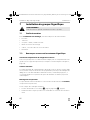
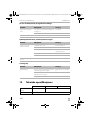
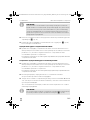
7 Installing the cooling unit
!
7.1 Tools required
For installation and assembly, you will need the following tools:
•Drill
• Screwdriver
• Open-ended spanner: 16 mm, 19 mm and 21 mm
• Sealant and PUR foam
• Cable, cable lugs and cable clips
•Ester oil
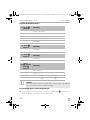
Connection voltage Switch-off voltage Restart voltage
12 V
10.4 V 11.7 V
24 V
22.8 V 24.2 V
Connection voltage Switch-off voltage Restart voltage
12 V
10.7 V 13.0 V
24 V
22.0 V 26.0 V
WARNING!
The installation may only be performed by a qualified technician.
DometicColdMachine50-54-55-84-85-86-94-95-96-CS-NC15_IOM_4445100001_EMEA16_20xx-xx-xx.book Page 18 Tuesday, May 4, 2021 7:24 PM

EN
Coldmachine Installing the cooling unit
19
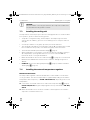
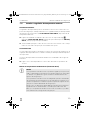
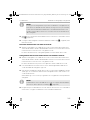
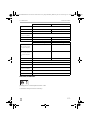
7.2 Notes on the cooling container
Permitted cooling area contents
Make sure that maximum cooling area contents specified are not exceeded for the
respective evaporator type (see chapter “Technical data” on page 31).
Minimum insulation
The maximum cooling area contents are based on a minimum insulation thickness of
35 mm of foam polyurethane with a density of 40 kg/m³. If other insulating materials
are used such as styrofoam, double the wall thickness to attain the same level of heat
insulation.
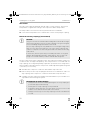
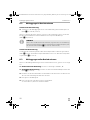
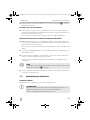
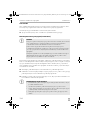
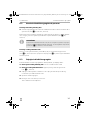
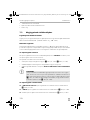
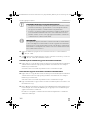
Installing the evaporator
The evaporator must be installed in the cooling container (except CS-NC15, the
evaporator is premounted).
Observe the following in the process:
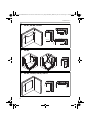
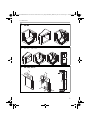
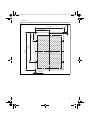
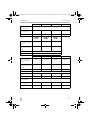
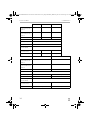
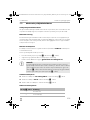
• Correct installation position (fig. 3, page 4 up to fig. 9, page 6)
• Arrangement in the cooling container as far to the top as possible
• Install a least 10 mm from the wall (not VD-14N and VD-15).
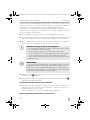
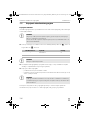
A
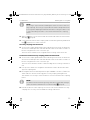
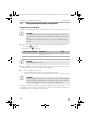
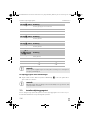
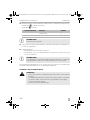
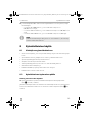
Connecting the evaporator
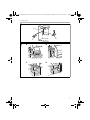
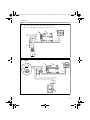
➤ Connect the evaporators VD-14N and VD-15 in accordance with fig. 0,
page 6.
➤ Connect evaporator VD-16 according to fig. 9, page 6.
➤ Connect other evaporators according to fig. i, page 9.
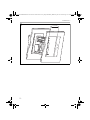
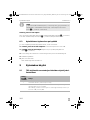
NOTICE!
For cooling units without valve couplings (ready-to install units): Do not
open the refrigerant circuit during installation. You may have to make the
wall openings larger to be able to slide the evaporator through them
(fig. a, page 6). Or alternatively, you create an opening that allows you
to install the cooling lines at the top (fig. b, page 6).
DometicColdMachine50-54-55-84-85-86-94-95-96-CS-NC15_IOM_4445100001_EMEA16_20xx-xx-xx.book Page 19 Tuesday, May 4, 2021 7:24 PM

EN
Installing the cooling unit Coldmachine
20
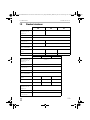
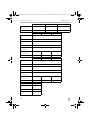
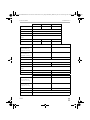
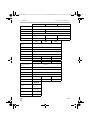
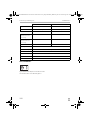
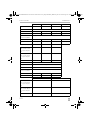
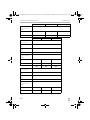
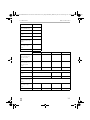
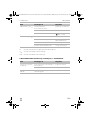
Keys for the illustrations
A
For cooling units with valve couplings
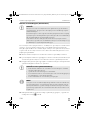
➤ Cut out a hole with a diameter of at least 30 mm (fig. c, page 7) for the cooling
lines. To do this, use a circular cutter.
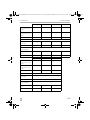
No. in fig. 8,
page 5
Explanation
1 DC fan
2 Thermostat button
3 Connection plug for DC fan
4 Thermostat
5 Connection cable
No. in fig. 9,
page 6
Explanation
1 Connection cable
No. in fig. 0,
page 6
Explanation
1 Connection cable
No. in
fig. i, page 9 and
fig. j, page 9
Explanation
1 Connection block
2 Compressor
3Fan
4 Switch fig. i or TEC controller fig. j
NOTICE!
Carefully insulate and seal off the wall openings after installation to
prevent moisture penetration.
DometicColdMachine50-54-55-84-85-86-94-95-96-CS-NC15_IOM_4445100001_EMEA16_20xx-xx-xx.book Page 20 Tuesday, May 4, 2021 7:24 PM
La pagina sta caricando ...
La pagina sta caricando ...
La pagina sta caricando ...
La pagina sta caricando ...
La pagina sta caricando ...
La pagina sta caricando ...
La pagina sta caricando ...
La pagina sta caricando ...
La pagina sta caricando ...
La pagina sta caricando ...
La pagina sta caricando ...
La pagina sta caricando ...
La pagina sta caricando ...
La pagina sta caricando ...
La pagina sta caricando ...
La pagina sta caricando ...
La pagina sta caricando ...
La pagina sta caricando ...
La pagina sta caricando ...
La pagina sta caricando ...
La pagina sta caricando ...
La pagina sta caricando ...
La pagina sta caricando ...
La pagina sta caricando ...
La pagina sta caricando ...
La pagina sta caricando ...
La pagina sta caricando ...
La pagina sta caricando ...
La pagina sta caricando ...
La pagina sta caricando ...
La pagina sta caricando ...
La pagina sta caricando ...
La pagina sta caricando ...
La pagina sta caricando ...
La pagina sta caricando ...
La pagina sta caricando ...
La pagina sta caricando ...
La pagina sta caricando ...
La pagina sta caricando ...
La pagina sta caricando ...
La pagina sta caricando ...
La pagina sta caricando ...
La pagina sta caricando ...
La pagina sta caricando ...
La pagina sta caricando ...
La pagina sta caricando ...
La pagina sta caricando ...
La pagina sta caricando ...
La pagina sta caricando ...
La pagina sta caricando ...
La pagina sta caricando ...
La pagina sta caricando ...
La pagina sta caricando ...
La pagina sta caricando ...
La pagina sta caricando ...
La pagina sta caricando ...
La pagina sta caricando ...
La pagina sta caricando ...
La pagina sta caricando ...
La pagina sta caricando ...
La pagina sta caricando ...
La pagina sta caricando ...
La pagina sta caricando ...
La pagina sta caricando ...
La pagina sta caricando ...
La pagina sta caricando ...
La pagina sta caricando ...
La pagina sta caricando ...
La pagina sta caricando ...
La pagina sta caricando ...
La pagina sta caricando ...
La pagina sta caricando ...
La pagina sta caricando ...
La pagina sta caricando ...
La pagina sta caricando ...
La pagina sta caricando ...
La pagina sta caricando ...
La pagina sta caricando ...
La pagina sta caricando ...
La pagina sta caricando ...
La pagina sta caricando ...
La pagina sta caricando ...
La pagina sta caricando ...
La pagina sta caricando ...
La pagina sta caricando ...
La pagina sta caricando ...
La pagina sta caricando ...
La pagina sta caricando ...
La pagina sta caricando ...
La pagina sta caricando ...
La pagina sta caricando ...
La pagina sta caricando ...
La pagina sta caricando ...
La pagina sta caricando ...
La pagina sta caricando ...
La pagina sta caricando ...
La pagina sta caricando ...
La pagina sta caricando ...
La pagina sta caricando ...
La pagina sta caricando ...
La pagina sta caricando ...
La pagina sta caricando ...
La pagina sta caricando ...
La pagina sta caricando ...
La pagina sta caricando ...
La pagina sta caricando ...
La pagina sta caricando ...
La pagina sta caricando ...
La pagina sta caricando ...
La pagina sta caricando ...
La pagina sta caricando ...
La pagina sta caricando ...
La pagina sta caricando ...
La pagina sta caricando ...
La pagina sta caricando ...
La pagina sta caricando ...
La pagina sta caricando ...
La pagina sta caricando ...
La pagina sta caricando ...
La pagina sta caricando ...
La pagina sta caricando ...
La pagina sta caricando ...
La pagina sta caricando ...
La pagina sta caricando ...
La pagina sta caricando ...
La pagina sta caricando ...
La pagina sta caricando ...
La pagina sta caricando ...
La pagina sta caricando ...
La pagina sta caricando ...
La pagina sta caricando ...
La pagina sta caricando ...
La pagina sta caricando ...
La pagina sta caricando ...
La pagina sta caricando ...
La pagina sta caricando ...
La pagina sta caricando ...
La pagina sta caricando ...
La pagina sta caricando ...
La pagina sta caricando ...
La pagina sta caricando ...
La pagina sta caricando ...
La pagina sta caricando ...
La pagina sta caricando ...
La pagina sta caricando ...
La pagina sta caricando ...
La pagina sta caricando ...
La pagina sta caricando ...
La pagina sta caricando ...
La pagina sta caricando ...
La pagina sta caricando ...
La pagina sta caricando ...
La pagina sta caricando ...
La pagina sta caricando ...
La pagina sta caricando ...
La pagina sta caricando ...
La pagina sta caricando ...
La pagina sta caricando ...
La pagina sta caricando ...
La pagina sta caricando ...
La pagina sta caricando ...
La pagina sta caricando ...
La pagina sta caricando ...
La pagina sta caricando ...
La pagina sta caricando ...
La pagina sta caricando ...
La pagina sta caricando ...
La pagina sta caricando ...
La pagina sta caricando ...
La pagina sta caricando ...
La pagina sta caricando ...
La pagina sta caricando ...
La pagina sta caricando ...
La pagina sta caricando ...
La pagina sta caricando ...
La pagina sta caricando ...
La pagina sta caricando ...
La pagina sta caricando ...
La pagina sta caricando ...
La pagina sta caricando ...
La pagina sta caricando ...
La pagina sta caricando ...
La pagina sta caricando ...
La pagina sta caricando ...
La pagina sta caricando ...
La pagina sta caricando ...
La pagina sta caricando ...
La pagina sta caricando ...
La pagina sta caricando ...
La pagina sta caricando ...
La pagina sta caricando ...
La pagina sta caricando ...
La pagina sta caricando ...
La pagina sta caricando ...
La pagina sta caricando ...
La pagina sta caricando ...
La pagina sta caricando ...
La pagina sta caricando ...
La pagina sta caricando ...
La pagina sta caricando ...
La pagina sta caricando ...
La pagina sta caricando ...
La pagina sta caricando ...
La pagina sta caricando ...
La pagina sta caricando ...
La pagina sta caricando ...
La pagina sta caricando ...
La pagina sta caricando ...
La pagina sta caricando ...
La pagina sta caricando ...
La pagina sta caricando ...
La pagina sta caricando ...
La pagina sta caricando ...
La pagina sta caricando ...
La pagina sta caricando ...
La pagina sta caricando ...
La pagina sta caricando ...
La pagina sta caricando ...
La pagina sta caricando ...
La pagina sta caricando ...
La pagina sta caricando ...
La pagina sta caricando ...
La pagina sta caricando ...
La pagina sta caricando ...
La pagina sta caricando ...
La pagina sta caricando ...
La pagina sta caricando ...
La pagina sta caricando ...
La pagina sta caricando ...
La pagina sta caricando ...
La pagina sta caricando ...
La pagina sta caricando ...
La pagina sta caricando ...
La pagina sta caricando ...
La pagina sta caricando ...
La pagina sta caricando ...
La pagina sta caricando ...
La pagina sta caricando ...
La pagina sta caricando ...
La pagina sta caricando ...
La pagina sta caricando ...
La pagina sta caricando ...
La pagina sta caricando ...
La pagina sta caricando ...
La pagina sta caricando ...
La pagina sta caricando ...
La pagina sta caricando ...
La pagina sta caricando ...
La pagina sta caricando ...
La pagina sta caricando ...
La pagina sta caricando ...
La pagina sta caricando ...
La pagina sta caricando ...
La pagina sta caricando ...
La pagina sta caricando ...
La pagina sta caricando ...
La pagina sta caricando ...
La pagina sta caricando ...
La pagina sta caricando ...
La pagina sta caricando ...
La pagina sta caricando ...
La pagina sta caricando ...
La pagina sta caricando ...
La pagina sta caricando ...
La pagina sta caricando ...
La pagina sta caricando ...
La pagina sta caricando ...
La pagina sta caricando ...
La pagina sta caricando ...
La pagina sta caricando ...
La pagina sta caricando ...
La pagina sta caricando ...
La pagina sta caricando ...
La pagina sta caricando ...
La pagina sta caricando ...
La pagina sta caricando ...
La pagina sta caricando ...
La pagina sta caricando ...
La pagina sta caricando ...
La pagina sta caricando ...
La pagina sta caricando ...
La pagina sta caricando ...
La pagina sta caricando ...
La pagina sta caricando ...
La pagina sta caricando ...
La pagina sta caricando ...
La pagina sta caricando ...
La pagina sta caricando ...
La pagina sta caricando ...
La pagina sta caricando ...
La pagina sta caricando ...
La pagina sta caricando ...
La pagina sta caricando ...
La pagina sta caricando ...
La pagina sta caricando ...
La pagina sta caricando ...
La pagina sta caricando ...
La pagina sta caricando ...
La pagina sta caricando ...
La pagina sta caricando ...
La pagina sta caricando ...
La pagina sta caricando ...
La pagina sta caricando ...
La pagina sta caricando ...
La pagina sta caricando ...
La pagina sta caricando ...
La pagina sta caricando ...
La pagina sta caricando ...
La pagina sta caricando ...
La pagina sta caricando ...
La pagina sta caricando ...
La pagina sta caricando ...
La pagina sta caricando ...
La pagina sta caricando ...
La pagina sta caricando ...
La pagina sta caricando ...
La pagina sta caricando ...
La pagina sta caricando ...
La pagina sta caricando ...
La pagina sta caricando ...
La pagina sta caricando ...
La pagina sta caricando ...
La pagina sta caricando ...
La pagina sta caricando ...
La pagina sta caricando ...
La pagina sta caricando ...
La pagina sta caricando ...
La pagina sta caricando ...
La pagina sta caricando ...
La pagina sta caricando ...
La pagina sta caricando ...
La pagina sta caricando ...
La pagina sta caricando ...
La pagina sta caricando ...
La pagina sta caricando ...
La pagina sta caricando ...
La pagina sta caricando ...
La pagina sta caricando ...
La pagina sta caricando ...
La pagina sta caricando ...
La pagina sta caricando ...
La pagina sta caricando ...
La pagina sta caricando ...
La pagina sta caricando ...
La pagina sta caricando ...
La pagina sta caricando ...
La pagina sta caricando ...
La pagina sta caricando ...
La pagina sta caricando ...
La pagina sta caricando ...
La pagina sta caricando ...
La pagina sta caricando ...
La pagina sta caricando ...
La pagina sta caricando ...
La pagina sta caricando ...
La pagina sta caricando ...
La pagina sta caricando ...
La pagina sta caricando ...
La pagina sta caricando ...
La pagina sta caricando ...
La pagina sta caricando ...
La pagina sta caricando ...
La pagina sta caricando ...
La pagina sta caricando ...
La pagina sta caricando ...
La pagina sta caricando ...
La pagina sta caricando ...
La pagina sta caricando ...
La pagina sta caricando ...
La pagina sta caricando ...
La pagina sta caricando ...
La pagina sta caricando ...
La pagina sta caricando ...
La pagina sta caricando ...
La pagina sta caricando ...
La pagina sta caricando ...
-
 1
1
-
 2
2
-
 3
3
-
 4
4
-
 5
5
-
 6
6
-
 7
7
-
 8
8
-
 9
9
-
 10
10
-
 11
11
-
 12
12
-
 13
13
-
 14
14
-
 15
15
-
 16
16
-
 17
17
-
 18
18
-
 19
19
-
 20
20
-
 21
21
-
 22
22
-
 23
23
-
 24
24
-
 25
25
-
 26
26
-
 27
27
-
 28
28
-
 29
29
-
 30
30
-
 31
31
-
 32
32
-
 33
33
-
 34
34
-
 35
35
-
 36
36
-
 37
37
-
 38
38
-
 39
39
-
 40
40
-
 41
41
-
 42
42
-
 43
43
-
 44
44
-
 45
45
-
 46
46
-
 47
47
-
 48
48
-
 49
49
-
 50
50
-
 51
51
-
 52
52
-
 53
53
-
 54
54
-
 55
55
-
 56
56
-
 57
57
-
 58
58
-
 59
59
-
 60
60
-
 61
61
-
 62
62
-
 63
63
-
 64
64
-
 65
65
-
 66
66
-
 67
67
-
 68
68
-
 69
69
-
 70
70
-
 71
71
-
 72
72
-
 73
73
-
 74
74
-
 75
75
-
 76
76
-
 77
77
-
 78
78
-
 79
79
-
 80
80
-
 81
81
-
 82
82
-
 83
83
-
 84
84
-
 85
85
-
 86
86
-
 87
87
-
 88
88
-
 89
89
-
 90
90
-
 91
91
-
 92
92
-
 93
93
-
 94
94
-
 95
95
-
 96
96
-
 97
97
-
 98
98
-
 99
99
-
 100
100
-
 101
101
-
 102
102
-
 103
103
-
 104
104
-
 105
105
-
 106
106
-
 107
107
-
 108
108
-
 109
109
-
 110
110
-
 111
111
-
 112
112
-
 113
113
-
 114
114
-
 115
115
-
 116
116
-
 117
117
-
 118
118
-
 119
119
-
 120
120
-
 121
121
-
 122
122
-
 123
123
-
 124
124
-
 125
125
-
 126
126
-
 127
127
-
 128
128
-
 129
129
-
 130
130
-
 131
131
-
 132
132
-
 133
133
-
 134
134
-
 135
135
-
 136
136
-
 137
137
-
 138
138
-
 139
139
-
 140
140
-
 141
141
-
 142
142
-
 143
143
-
 144
144
-
 145
145
-
 146
146
-
 147
147
-
 148
148
-
 149
149
-
 150
150
-
 151
151
-
 152
152
-
 153
153
-
 154
154
-
 155
155
-
 156
156
-
 157
157
-
 158
158
-
 159
159
-
 160
160
-
 161
161
-
 162
162
-
 163
163
-
 164
164
-
 165
165
-
 166
166
-
 167
167
-
 168
168
-
 169
169
-
 170
170
-
 171
171
-
 172
172
-
 173
173
-
 174
174
-
 175
175
-
 176
176
-
 177
177
-
 178
178
-
 179
179
-
 180
180
-
 181
181
-
 182
182
-
 183
183
-
 184
184
-
 185
185
-
 186
186
-
 187
187
-
 188
188
-
 189
189
-
 190
190
-
 191
191
-
 192
192
-
 193
193
-
 194
194
-
 195
195
-
 196
196
-
 197
197
-
 198
198
-
 199
199
-
 200
200
-
 201
201
-
 202
202
-
 203
203
-
 204
204
-
 205
205
-
 206
206
-
 207
207
-
 208
208
-
 209
209
-
 210
210
-
 211
211
-
 212
212
-
 213
213
-
 214
214
-
 215
215
-
 216
216
-
 217
217
-
 218
218
-
 219
219
-
 220
220
-
 221
221
-
 222
222
-
 223
223
-
 224
224
-
 225
225
-
 226
226
-
 227
227
-
 228
228
-
 229
229
-
 230
230
-
 231
231
-
 232
232
-
 233
233
-
 234
234
-
 235
235
-
 236
236
-
 237
237
-
 238
238
-
 239
239
-
 240
240
-
 241
241
-
 242
242
-
 243
243
-
 244
244
-
 245
245
-
 246
246
-
 247
247
-
 248
248
-
 249
249
-
 250
250
-
 251
251
-
 252
252
-
 253
253
-
 254
254
-
 255
255
-
 256
256
-
 257
257
-
 258
258
-
 259
259
-
 260
260
-
 261
261
-
 262
262
-
 263
263
-
 264
264
-
 265
265
-
 266
266
-
 267
267
-
 268
268
-
 269
269
-
 270
270
-
 271
271
-
 272
272
-
 273
273
-
 274
274
-
 275
275
-
 276
276
-
 277
277
-
 278
278
-
 279
279
-
 280
280
-
 281
281
-
 282
282
-
 283
283
-
 284
284
-
 285
285
-
 286
286
-
 287
287
-
 288
288
-
 289
289
-
 290
290
-
 291
291
-
 292
292
-
 293
293
-
 294
294
-
 295
295
-
 296
296
-
 297
297
-
 298
298
-
 299
299
-
 300
300
-
 301
301
-
 302
302
-
 303
303
-
 304
304
-
 305
305
-
 306
306
-
 307
307
-
 308
308
-
 309
309
-
 310
310
-
 311
311
-
 312
312
-
 313
313
-
 314
314
-
 315
315
-
 316
316
-
 317
317
-
 318
318
-
 319
319
-
 320
320
-
 321
321
-
 322
322
-
 323
323
-
 324
324
-
 325
325
-
 326
326
-
 327
327
-
 328
328
-
 329
329
-
 330
330
-
 331
331
-
 332
332
-
 333
333
-
 334
334
-
 335
335
-
 336
336
-
 337
337
-
 338
338
-
 339
339
-
 340
340
-
 341
341
-
 342
342
-
 343
343
-
 344
344
-
 345
345
-
 346
346
-
 347
347
-
 348
348
-
 349
349
-
 350
350
-
 351
351
-
 352
352
-
 353
353
-
 354
354
-
 355
355
-
 356
356
-
 357
357
-
 358
358
-
 359
359
-
 360
360
-
 361
361
-
 362
362
-
 363
363
-
 364
364
-
 365
365
-
 366
366
-
 367
367
-
 368
368
-
 369
369
-
 370
370
-
 371
371
-
 372
372
-
 373
373
-
 374
374
-
 375
375
-
 376
376
-
 377
377
-
 378
378
-
 379
379
-
 380
380
-
 381
381
-
 382
382
-
 383
383
-
 384
384
-
 385
385
-
 386
386
-
 387
387
-
 388
388
-
 389
389
-
 390
390
-
 391
391
-
 392
392
-
 393
393
-
 394
394
-
 395
395
-
 396
396


Dometic ColdMachine 50, 54, 55, 84, 85, 86, 94, 95, 96, CS-NC15 Guida d'installazione
- Tipo
- Guida d'installazione
- Questo manuale è adatto anche per
in altre lingue
Documenti correlati
-
Dometic CS-NC15, CS-NCVM Istruzioni per l'uso
-
Dometic 804K Istruzioni per l'uso
-
-
-
-
-
-
-
-

