
Important! Retain!
**Instructions for use
**Tips/Warranty Information
www.AquaChek.com/Trutest
1-888-AQUACHEK
Instrucciones para la batería SP
Instale 2 baterías “AA” como se ilustra. La colocación incorrecta hará que el medidor no se encienda. USE SÓLO BATERIAS
ALCALINAS.
Instrucciones de uso
1. Pulse ON para encender. La unidad se activará al pulsar el botón. La pantalla indicará “On”
2. Pulse el botón ‘start’ para comenzar y sumerja simultáneamente una cinta de análisis. Retire la cinta inmediatamente y
sacúdala para quitarle el exceso de agua con un movimiento enérgico de muñeca.
3. Coloque la punta de la cinta de análisis hasta el fondo del canal, déjela plana con el lado almohadillado hacia abajo. NO
DESLICE LA TIRA DE ANÁLISIS POR EL VIDRIO.
4. Ahora espere los resultados. (No tenga la cinta sujetada.) Los resultados digitales para Cloro Libre, pH y Alcalinidad total
podrán leerse en cuestión de segundos. Controle el estado de sus resultados para cada uno de los parámetros. El estado
LO=Bajo, OK=Ideal, HI= Alto se muestra a la izquierda de cada valor digital.
Información de las características del producto
Función Memoria (#2, Botón del medio)
• Pulse el botón ‘memory’ para ver sus últimas nueve lecturas.
Mensajes de error
• Si aparece ER en lugar de un valor numérico: el resultado de la prueba está fuera de los valores. El parámetro es muy alto
o muy bajo para ser analizado con exactitud. Compruebe el nivel del estado, LO o HI para determinar cómo tratar su agua.
Repita la prueba tras el tratamiento.
• Si aparece ER2 en la pantalla: hay un error en la lectura de la tira. Asegúrese de seguir correctamente el procedimiento de la
prueba. Utilice sólo tiras para pruebas AquaChek TruTest. No pueden usarse otro tipo de tiras.
• Si aparece ER3 en la pantalla: no se ha colocado ninguna tira o está colocada de forma incorrecta. La posición correcta es con
la almohadilla boca abajo y con la tira bien encajada en la ranura, haciendo tope.
• Si aparece LO en la ubicación TA de la pantalla del medidor TruTest, la carga de las pilas está por debajo del límite aceptable.
Reemplácelas con pilas nuevas.
Uso de la tira para pruebas
• Las tiras para pruebas AquaChek TruTest están calibradas para funcionar sólo con el lector de tiras AquaChek TruTest.
• Cada tira es para un único uso. No sumerja dos veces las tiras. Sumerja la tira únicamente en zonas tranquilas de su piscina.
• Compruebe que siempre tiene tiras nuevas y guárdelas bien cerradas a temperatura ambiente. No agite ni revuelva la cinta
en el agua.
Mantenimiento
• Limpie la ranura para la tira con agua limpia y un algodoncito de vez en cuando.
Así evitará la acumulación.
• Nunca use químicos fuertes o materiales abrasivos en el medidor TruTest.
Almacenamiento
• Guarde el medidor fuera de la luz solar directa para protegerlo de los rayos UVA.
• Si no va a usar el medidor durante varios meses, quite las baterías.
• Este estuche es resistente al agua. Si el medidor cae al agua, quite y seque las baterías y el compartimento para las baterías
antes de su uso.
No tire las baterías a la basura. Por favor, recicle. En Europa, recicle el medidor siguiendo la directiva WEEE
de su país.
CONSEJOS PARA SOLUCIONAR PROBLEMAS
Si las lecturas del TruTest son más altas o más bajas que las esperadas, es posible que estas diferencias sean atribuibles a la
técnica.
Importante:
• Pulse ‘start’ al mismo tiempo que sumerge la cinta de análisis.
• No agite ni revuelva la cinta de análisis cuando la sumerge. Sencillamente sumérjala y retírela.
• No deslice la cinta de análisis por el vidrio.
• Asegúrese de que la almohadilla de la cinta está hacia abajo cuando la coloca en el medidor.
• Entre un análisis y otro, limpie completamente el medidor y el canal, especialmente cuando realice varios análisis
sucesivamente.
Istruzioni per il montaggio delle batterie IT
Installare 2 batterie tipo “AA” come indicato in gura. L’inserimento delle batterie in modo scorretto può impedire l’accensione
dell’analizzatore a causa della conformazione del vano batterie. UTILIZZARE ESCLUSIVAMENTE BATTERIE ALCALINE.
Istruzioni per l’uso
1. Premere Accensione. Accendere l’unità premendo il pulsante di accensione. Il display visualizzerà ‘On” (Acceso).
2. Premere il pulsante start immergendo nel contempo una striscia. Rimuovere immediatamente la striscia reattiva e
scrollare l’acqua in eccesso dalla striscia agitando quest’ultima con un semplice colpetto del polso.
3. Posizionare la punta della striscia nel retro del canale, disporre orizzontalmente, con il tampone sotto. NON FARE SCORRERE
LA STRISCIA REATTIVA LUNGO IL VETRO.
4. Ora, attendere i risultati. (Non reggere la striscia.) I risultati numerici per cloro libero, pH e alcalinità totale verranno tutti
visualizzati entro pochi secondi. Controllare lo stato dei risultati per ogni parametro. Lo stato LO= basso, OK= ideale, HI=
alto viene visualizzato a sinistra di ogni valore numerico.
Caratteristiche e informazioni sul prodotto
Funzione memoria (N. 2, Pulsante centrale)
• Premere il pulsante della memoria per visualizzare le ultime nove letture.
Messaggi di errore
• Il messaggio ER sullo schermo al posto del valore numerico signica che il risultato dell’analisi è fuori dall’intervallo
consentito. Il valore rilevato è pertanto troppo elevato
o troppo basso per essere considerato accurato. Vericare lo stato (LO o HI) per
determinare come trattare di conseguenza l’acqua. Ripetere l’analisi dopo il trattamento.
• Il messaggio ER2 sullo schermo indica un errore nella lettura della striscia reattiva. Assicurarsi di aver seguito correttamente
la procedura di analisi. Utilizzare solo strisce reattive per strumenti AquaChek TruTest. Non è possibile usare altri tipi di strisce.
• Se viene visualizzato ER3 sullo schermo signica che non è stata inserita alcuna striscia o che la striscia non è posizionata
correttamente. La posizione corretta
è con i tamponi di analisi rivolti verso il basso nella fessura e con il tampone superiore allineato con la parte superiore.
• Se solo LO compare nella posizione TA sul display del misuratore TruTest, ciò signica che la tensione della batteria è scesa
sotto il limite consentito. Sostituire con batterie nuove.
U
so della striscia reattiva
• Le strisce reattive AquaChek TruTest sono calibrate per essere usate unicamente con l’analizzatore AquaChek TruTest.
• Ogni striscia è monouso. Non reimmergere la striscia. La striscia va immersa solo in zone calme della piscina o della vasca
termale.
• Conservare correttamente il prodotto – sigillare con il tappo dopo ogni uso e conservare
a temperatura ambiente. Non girare né ruotare la striscia nell’acqua.
Manutenzione
• Pulire di quando in quando la fessura per strisce reattive con acqua dolce e un batuolo di cotone. Ciò impedirà l’eventuale
accumulo di sostanze.
• Evitare il contatto dell’analizzatore TruTest con sostanze chimiche aggressive
e/o materiali abrasivi.
Conservazione
• Proteggere l’analizzatore dall’esposizione ai raggi solari diretti per evitare danni dovuti
a raggi UV.
• Nel caso in cui l’analizzatore non venga usato per diversi mesi, rimuovere le batterie.
• La scatola è impermeabile Se l’analizzatore cade in acqua, rimuovere e asciugare le batterie e il relativo vano prima dell’uso.
Non smaltire le batterie come normali riuti urbani, ma riciclarle. In Europa, riciclare l’analizzatore in conformità alla direttiva
WEEE
in vigore nel proprio paese.
CONSIGLI PER LA RISOLUZIONE DI PROBLEMI
Se i risultati TruTest sono più elevati o più bassi del previsto, è probabile che tali dierenze siano causate dalla tecnica impiegata.
Importante:
• Premere start mentre si sta immergendo la striscia.
• Non girare né ruotare la striscia reattiva durante l’immersione. Immergere semplicemente la striscia e quindi rimuoverla.
• Non fare scorrere la striscia reattiva lungo il vetro.
• Accertarsi che i tamponi sulla striscia siano rivolti verso il basso quando viene posizionata sul misuratore.
• Tra un test e l’altro, pulire accuratamente il misuratore e il canale, in particolar modo se si stanno eseguendo diversi test
l’uno dopo l’altro.
Instalação das pilhas PT
Instale 2 pilhas “AA” conforme o diagrama. A inserção incorreta impedirá que
o medidor seja ligado devido ao desenho do compartimento das pilhas. USE SOMENTE PILHAS ALCALINAS.
Instruções de uso
1. Premir o botão ON (ligar). LIGAR a unidade premindo o botão de ligar/desligar a alimentação eléctrica. O visor exibe a
mensagem “Ligado”.
2. Premir o botão Start (iniciar) e mergulhar uma tira ao mesmo tempo. Retirar imediatamente a tira de análise e sacudir a
água em excesso da tira com um simples movimento do pulso.
3. Colocar a ponta da tira novamente na extremidade posterior do canal, espalmada na horizontal, com a parte almofadada
para baixo. NÃO FAZER DESLIZAR A TIRA DE ANÁLISE AO LONGO DO VIDRO.
4. Agora, basta aguardar pelos resultados. (Não segurar a tira.) Os resultados digitais para Cloro Livre, pH e Alcalinidade Total
irão aparecer em conjunto, no espaço de segundos. Vericar o estado dos resultados para cada parâmetro. O estado LO=Low
(Baixo), OK=Ideal, HI= High (Alto) é exibido à esquerda de cada valor digital.
Funcionalidades e informações do produto
Função de Memória (#2, Botão Central)
• Premir o botão de memória para visualizar as últimas nove leituras.
Mensagens de erro
• Se for exibido ER no lugar de um valor numérico – o resultado do teste está fora do intervalo. O parâmetro é muito alto ou
muito baixo para ser analisado com precisão. Observe o nível do status, LO (baixo) ou HI (alto) para determinar como fazer
o tratamento da água. Refaça o teste após o tratamento.
• Se for exibido ER2 na tela – há um erro na leitura da ta de teste. Certique-se de que está seguindo o procedimento de
teste corretamente. Use somente tas de teste para instrumentos AquaChek TruTest. Nenhuma outra ta de teste pode ser
usada.
• Se for exibido ER3 na tela – não há ta de teste na abertura ou a ta de teste não está posicionada corretamente. A posição
correta é aquela em que a ta está voltada para baixo na abertura com a sua parte superior coincidindo com a parte superior
da abertura.
• Se aparecer apenas LO na localização TA do visor do TruTest Meter, tal indica que a voltagem das pilhas desceu abaixo do
limite permitido. Substituir por pilhas novas.
Uso da ta de teste
• As tas de teste AquaChek TruTest são calibradas para funcionar somente com
o leitor de ta de teste AquaChek TruTest.
• Cada ta deve ser usada somente uma única vez. Não mergulhe a ta mais de uma vez. Mergulhe a ta somente em áreas
calmas de sua piscina ou spa.
• Certique-se de ter um suprimento em condições de uso – mantenha rmemente tampado entre usos e armazene à
temperatura ambiente. Não agitar nem rodopiar a tira em água.
Manutenção
• Limpe ocasionalmente a abertura para tas de teste com água potável e uma haste de algodão. Isto evitará qualquer
acúmulo de impurezas.
• Nunca use produtos químicos fortes e/ou materiais abrasivos no medidor TruTest.
Armazenamento
• Armazene o medidor em lugar longe da luz solar direta para protegê-lo dos danos causados pela radiação UV.
• Se o medidor não vier a ser usado por vários meses, remova as pilhas.
• Este estojo é resistente à água. Se o medidor cair na água, remova e seque as pilhas e o compartilmento de
pilhas antes do uso.
Não jogue as pilhas no lixo. Recicle. Na Europa, recicle o medidor de acordo com a diretriz de descarte de equipamento eletrônico
e elétrico (WEEE
) de seu país.
SUGESTÕES PARA RESOLUÇÕES DE PROBLEMAS
Se as leituras TruTest forem mais altas ou mais baixas do que o previsto, provavelmente tais diferenças devem-se à técnica.
Importante:
• Premir Iniciar, ao mesmo tempo que se mergulha a tira de análise..
• Não agitar nem rodopiar a tira ao mergulhá-la. Apenas mergulhar e retirar a tira.
• Não fazer deslizar a tira de análise ao longo do vidro.
• Certicar-se de que as partes almofadadas da tira estão voltadas para baixo, quando são colocadas sobre o dispositivo
de medição.
• Entre análises, limpar muito bem o dispositivo de medição e o canal, especialmente se estiver a realizar diversas
análises em série.
Einlegen/Wechseln der Batterien DE
Legen Sie zwei LR6-Batteries (Mignonzellen) ein wie in der Abbildung gezeigt. Bei falsch eingelegten Batterien lässt sich das
Messgerät bauartbedingt nicht einschalten. VERWENDEN SIE AUSSCHLIESSLICH ALKALIBATTERIEN.
Bedienungsanweisungen
1. Drücken Sie auf Power ON. Schalten Sie die Einheit EIN, indem Sie den Ein-/Ausschalter drücken. Auf dem Display wird
“ON“ eingeblendet.
2. Drücken Sie auf die Start-Taste und tauchen Sie gleichzeitig den Teststreifen ein. Entnehmen Sie sofort den Teststreifen und
schütteln Sie überschüssiges Wasser mit einer schnellen Bewegung des Handgelenks vom Teststreifen ab.
3. Legen Sie die Spitze des Teststreifens mit der Auageseite (Pads) ach nach unten in das hintere Ende des Kanals. SCHIEBEN
SIE DEN TESTSTREIFEN NICHT ÜBER DAS GLAS.
4. Warten Sie nun auf das Ergebnis. (Halten Sie dabei den Teststreifen nicht fest.) Die digitalen Ergebnisse des freien Chlors, des
pH-Werts und der Gesamtalkalität werden sekundenschnell angezeigt. Überprüfen Sie den Status Ihrer Ergebnisse für jeden
Parameter. Der Status LO=niedrig, OK=ideal, HI=hoch wird links neben jedem digitalen Wert angezeigt.
Produktmerkmale und Informationen
Memory-Funktion (#2, mittlere Taste)
• Drücken Sie auf die Memory-Taste, um die letzten neun Messungen anzuzeigen.
Fehlermeldungen
• Falls anstelle eines Wertes „ER” erscheint, liegt das Testergebnis außerhalb des Bereichs Der Parameter ist zu niedrig oder
zu hoch für eine genaue Analyse. Sie können am Status LO oder HI ablesen, wie das Wasser aufbereitet werden muss.
Wiederholen Sie den Test nach der Aufbereitung.
• Die Anzeige „ER2” bedeutet, dass ein Fehler am Teststreifen vorlag. Stellen Sie sicher, dass der Test korrekt ausgeführt wurde.
Verwenden Sie ausschließlich AquaChek TruTest-Teststreifen. Andere Teststreifen können nicht verwendet werden.
• Die Anzeige „ER3” erscheint, wenn kein Teststreifen eingelegt war oder er in der falsche Position eingelegt wurde. Der
Streifen muss so mit dem Feld nach unten in das Messgerät eingelegt werden, dass das oberste Feld oben mit dem Schlitz
abschließt.
• Falls nur LO in der TA-Anzeige des TruTest-Messgeräts erscheint, ist die Batteriespannung unter den zulässigen Grenzwert
abgesunken. Wechseln Sie die Batterien durch neue aus.
Einsatz von Teststreifen
• AquaChek TruTest-Teststreifen sind ab Werk so kalibriert, dass sie nur mit AquaChek TruTest-Messgeräten eingesetzt werden
können.
• Teststreifen können nur einmal gebraucht werden. Tauchen Sie den Teststreifen nicht wieder ein. Tauchen Sie den Teststreifen
in einem ruhigen Bereich Ihres Pools oder Bades ein.
• Achten Sie auf einen Vorrat frischer Teststreifen. Halten Sie den Deckel fest verschlossen und bewahren Sie die Teststreifen bei
Zimmertemperatur auf. Schwenken oder wirbeln Sie den Teststreifen nicht im Wasser.
Wartung
• Wischen Sie den Teststreifenschlitz gelegentlich mit Wasser und einem Wattestäbchen ab. Damit verhindern Sie, dass sich
Schmutz absetzt.
• Verwenden Sie nie aggressive Chemikalien/oder scheuernde Materialien zur Reinigung des TruTest-Messgeräts.
Lagerung
• Halten Sie das Messgerät bei der Lagerung von direkter Sonneneinstrahlung fern, um es vor Schäden durch UV-Strahlung zu
schützen.
• Wenn Sie das Messgerät für einige Monate nicht benötigen, nehmen Sie die Batterien aus dem Messgerät heraus.
• Das Material ist wasserfest. Wenn das Messgerät in das Wasser fällt, entfernen und trocknen Sie die Batterien und das
Batteriefach, bevor Sie das Messgerät wieder verwenden.
Werfen Sie Batterien nicht in den Hausmüll. Bringen Sie die Batterien zur Wiederverwertung. Beachten Sie bei der Entsorgung des
Gerätes in Europa die WEEE-Richtlinie
(Richtlinie über Elektro- und Elektronik-Altgeräte).
HINWEISE ZUR FEHLERSUCHE
Falls die TruTest-Messungen höher oder niedriger als erwartet sind, so ist das wahrscheinlich auf die Verfahrenstechnik
zurückzuführen.
Wichtig:
• Drücken Sie gleichzeitig auf die Starttaste, wenn Sie den Teststreifen eintauchen.
• Schwenken oder wirbeln Sie den Teststreifen nicht beim Eintauchen. Tauchen Sie den Teststreifen einfach ein und nehmen
Sie ihn wieder heraus.
• Schieben Sie den Teststreifen nicht über das Glas.
• Stellen Sie sicher, dass die Pads auf dem Teststreifen nach unten zeigen, wenn dieser auf das Messgerät gelegt wird.
• Wischen Sie das Messgerät und den Kanal zwischen den Tests sorgfältig ab, vor allem, wenn Sie nacheinander mehrere Tests
durchführen.
Batterij-instructies NL
Plaats 2 “AA”-batterijen volgens het diagram. Als ze verkeerd worden geplaatst, kan de meter door het ontwerp van het
batterijcompartiment niet worden ingeschakeld. GEBRUIK ALLEEN ALKALINEBATTERIJEN.
Gebruiksinstructies
1. Druk op de Aan/uit-knop Schakel de unit aan door indrukken van de Aan/uit-knop. Het displaystaat op ‘Aan”
2. Druk op de startknop en dip tegelijkertijd een strip. Verwijder de teststrip direct en schud het teveel aan water van de
strip met een eenvoudig schudbeweging van de pols.
3. Plaats de tip van de strip in het achtereinde van het kanaal, leg de strip plat, pad met de zijkant omlaag. SCHUIF DE
TESTSTRIP NIET OVER HET GLAS.
4. Wacht op de resultaten. (Houd de strip niet vast.) Digitale resultaten voor vrije chlorine, pH, en totale alkaliniteit verschijnen
samen binnen enkele seconden. Controleer de status van uw resultaten voor elke parameter. De status LO=Laag, OK=Ideaal,
HI= Hoog wordt getoond links van elke digitale waarde.
Productmogelijkheden en informatie
Geheugenfunctie (#2, Middelste knop)
• Druk op de geheugenknop om uw laatste negen aezingen te bekijken.
Foutberichten
• Als ER in plaats van een numerieke waarde wordt weergegeven, valt het testresultaat buiten het bereik. De parameter is te
hoog of te laag om nauwkeurig geanalyseerd te kunnen worden. Let op het statusniveau, LO of HI, om te bepalen hoe u het
water moet behandelen. Voer de test na de behandeling opnieuw uit.
• Als ER2 op het display verschijnt, is er een fout opgetreden bij het lezen van de teststrip. Zorg dat u de testprocedure correct
volgt. Gebruik alleen AquaChek
TruTest-instrumentteststrips. Er kunnen geen andere teststrips worden gebruikt.
• Als ER3 op het display verschijnt, is er geen teststrip geplaatst of is de teststrip in de
verkeerde positie geplaatst. De juiste positie is met de bekleding van de teststrip omlaag in de sleuf met de bovenste
bekleding over de hele lengte tegen de bovenkant.
• Als alleen LO verschijnt in de TA-locatie op het TruTest Meter-display, is de batterijspanning beneden de toegestane grens
gekomen. Vervang de batterijen.
Gebruik van teststrips
• De AquaChek TruTest-teststrips zijn alleen gekalibreerd voor gebruik met de AquaChek TruTest-teststriplezer.
• Elke strip mag maar eenmaal worden gebruikt. Dompel de strip niet opnieuw onder. Dompel de strip alleen onder in rustige
gedeelten van uw zwem- of bubbelbad.
• Houd de teststrips vers. Zorg dat de dop na elk gebruik stevig erop zit en bewaar de teststrips op kamertemperatuur. Sla de
strip niet af en draai er niet mee in water.
Onderhoud
• Reinig de teststripgleuf regelmatig met schoon water en een katoenen doekje. Hiermee voorkomt u de ophoping van vuil.
• Maak de TruTest-meter nooit schoon met krassende chemicaliën en/of schurende middelen.
Opslag
• Bewaar de meter buiten direct zonlicht om te voorkomen dat de meter door UV-stralen wordt beschadigd.
• Als u de meter een aantal maanden niet gaat gebruiken, moet u de batterijen verwijderen.
• Dit is een waterbestendige kast. Als de meter in het water is gevallen, moet u de batterijen verwijderen en de batterijen en
het batterijcompartiment laten drogen voordat u het apparaat weer gebruikt.
Gooi batterijen niet in de afvalbak. Laat ze recyclen. Laat in Europa de meter recyclen volgens de EEE-richtlijn
die in uw land
van toepassing is.
TIPS VOOR PROBLEEMOPLOSSINGEN
Als de TruTest-aezingen hoger of lager zijn dan verwacht, zijn deze verschillen waarschijnlijk te wijten aan de techniek.
Belangrijk:
• Druk Start tegelijkertijd in met het dippen van de teststrip.
• Sla de strip niet af en draai er niet mee in water, wanneer u dipt. Gewoon de strip dippen en verwijderen.
• SCHUIF DE TESTSTRIP NIET OVER HET GLAS.
• Overtuig u ervan dat de pads op de strip omlaag wijzen wanneer deze op de meter geplaatst wordt..
• Wis de meter en het kanaal grondig schoon tussen de testen, vooral indien u verscheidene testen na elkaar uitvoert.
Batteriinstruktioner DK
Installer 2 AA-batterier i overensstemmelse med diagrammet. Hvis batterierne indsættes forkert, kan meteret ikke tændes på
grund af batterihusets design. BRUG KUN ALKALINEBATTERIER.
Brugsvejledning
1. Tryk på tænd-/slukknappen. Tænd for enheden ved at trykke på tænd/slukknappen Der vises ”On” på displayet.
2. Tryk på startknappen og dyp en strimmel samtidig. Tag teststrimlen ud straks, og slå overskydende vand fra den, ligesom når
man slår vand af hænderne.
3. Placer spidsen af strimlen bag i kanalen, adt, og med pudesiden nedad. FØR IKKE TESTSTRIMLEN HEN AD GLASSET.
4. Vent nu på resultaterne. (Hold ikke ved strimlen). Der fremkommer digital visning af resultaterne for fri klorin, pH og
total alkalitet samtidig inden for sekunder. Tjek status for dine resultater for hver parameter. Statusangivelsen LO=Lavt,
OK=Ideelt, HI=Højt vises til venstre for hver digitale værdi.
Produktegenskaber og -information
Hukommelsesfunktion (nr. 2, midterste knap)
• Tryk på hukommelsesknappen for at se dine sidste ni visninger.
Fejlmeddelelser
• Hvis ER vises i stedet for en talværdi, er testresultatet uden for området. Parameteren
er enten for høj eller for lav til at kunne analyseres korrekt. Læg mærke til statusniveauet, LO eller HI, for at afgøre, hvordan
vandet skal behandles. Test igen efter behandlingen.
• Hvis ER2 vises på skærmen, er der en fejl i aæsningen af teststrimlen. Sørg for at følge testproceduren korrekt. Brug kun
AquaChek TruTest instrumentteststrimler. Der kan ikke bruges nogen andre teststrimler.
• Hvis ER3 vises på skærmen, er der ikke nogen strimmel til stede, eller teststrimlen er placeret forkert. Den korrekte position
er med testpudens forside nedad i slotten med den øverste pude hele vejen til toppen.
• Hvis der kun vises LO i TA-området på TruTest måleinstrumentet, er batteristanden under den tilladelige grænse.
Sæt nye batterier i.
Anvendelse af teststrimlen
• AquaChek TruTest teststrimler er kalibreret til kun at fungere med AquaChek TruTest teststrimmellæseren.
• Hver strimmel kan kun bruges én gang. Dyp ikke strimlen igen. Dyp kun strimlen
i rolige områder af poolen eller spabadet.
• Sørg for at have friske forsyninger – sørg for, at kapslen sidder tæt mellem anvendelserne, og opbevar strimlen ved
stuetemperatur. Strimlen må ikke svippes eller svinges rundt i vand.
Vedligeholdelse
• Tør ind imellem teststrimmelslotten af med ferskvand og bomuldsvat. Dette forhindrer, at der dannes ansamlinger.
• Brug ikke skrappe og/eller slibende materialer på TruTest-meteret.
Opbevaring
• Opbevar meteret væk fra direkte sollys for at beskytte meteret mod UV-skader.
• Hvis meteret ikke bruges i ere måneder, skal batterierne ernes.
• Materialet er vandfast. Hvis meteret falder ned i vandet, skal batterierne og batterirummet ernes og tørres, inden meteret
bruges igen.
Bortskaf ikke batterier sammen med almindeligt husholdningsaald. Sørg for at indelevere dem til genanvendelse. I Europa skal
meteret genanvendes i overensstemmelse med det relevante lands implementering af WEEE-direktivet
.
TIP TIL FEJLFINDING
Hvis visningerne på TruTest måleinstrumentet er højere eller lavere end forventet, har sådanne dierencer højst sandsynligt
tekniske årsager.
Vigtigt:
• Tryk på start samtidig med, at du dypper teststrimlen.
• Du må ikke svippe eller svinge strimlen rundt, når den dyppes. Strimlen dyppes blot og ernes igen.
• Før ikke teststrimlen hen ad glasset.
• Sørg for, at puderne på strimlen vender nedad, når strimlen anbringes i måleinstrumentet.
• Efter hver test skal instrumentet og kanalen tørres af, så de(t) bliver ren(t), især hvis du udfører ere tests efter hinanden.
Product Features and Information
Note: Read this instruction manual carefully and keep it available for future reference.
1. Press Power ON
Turn Unit ON by pressing power button. Display will read ‘On”
3. Place tip of strip in back
end of channel, lay at, pad
side down.
DO NOT SLIDE THE TEST STRIP
ACROSS THE GLASS
2. Press start button and dip
a strip at the same time.
Remove test strip immediately and shake excess water
from strip with a simple ick of the wrist.
4. Now Wait for Results. (Do Not Hold onto Strip)
Digital Results for Free Chlorine, pH, and Total Alkalinity will appear together in seconds.
Check the status of your results for each parameter. The status LO=Low, OK=Ideal,
HI= High is displayed to the left of each digital value.
BATTERY INSTRUCTIONS
Install 2 “AA” batteries
per the diagram.
Incorrect insertion will
prevent the meter from
turning on due to the
design of the battery
housing. USE ONLY
ALKALINE BATTERIES.
Use of any other type
of battery may damage
the meter and voids the
warranty.
This symbol, if noted on the instrument, references the instruction manual for
operational and/or safety information.
Product Safety
UL 61010-1 (ETL Listing)
CSA C22.2 No. 61010-1 (ETLc Certication)
Immunity
EN 61326;1998 (EMC Requirements for Electrical Equipment for Measurement Control and Laboratory Use)
per 2004/108/EC EMC: Supporting test records by Hach Company, certied by Hach Company.
Emissions
Per 2004/108/EC EMC: EN 61326:1998 (Electrical Equipment for Measurement control and laboratory use-
EMC requirements) Class “B” emission limits. Supporting test records by Hach Company.
Standards include:
EN 55011 (CISPR 11). Class “B” emission limits
WEEE
Electrical equipment marked with this symbol may not be disposed of in European public disposal systems,
in conformity with the European local and national regulations (EU Directive 2002/96/EC). European electrical
equipment users must now return old or end-of life equipment to the producer for disposal at no charge to the user.
PRECAUTIONARY LABELS
Read all labels and tags attached the instrument. Personal injury or damage to the instrument could occur if not
observed.
MAINTENANCE
• Wipetheteststripslotwithfreshwaterandacottonswaboccasionally.Thiswillpreventanybuildup.
• Neveruseharshchemicalsand/orabrasivematerialsontheTruTestmeter.
STORAGE
• StorethemeteroutofdirectsunlighttoprotectthemeterfromUVdamage.
• Ifmeterwillnotbeusedforseveralmonths,removethebatteries.
• Thisisawaterresistantcase.Ifthemeterfallsintothewater,removeanddrythebatteriesand
battery compartment before use.
Do not dispose of batteries in the trash. Please recycle. In Europe, recycle the meter according to
WEEE
directive in your country.
SPECIFICATIONS:
•Intendedforindoor/outdooruse
•Operatingtemperaturerange:15-40°C
•Batterylife:atleast4months
Range of Results:
Free Chlorine: 0-15 ppm
pH: 6.1-8.8
Total Alkalinity: 0-300 ppm
The AquaChek TruTest Digital Test Strip reader is intended to provide a convenient alternative to visual color
matching, with the ease of a digital display. The meter and test strips can achieve representative readings
of pool and hot tub water conditions when following all directions and using properly stored and handled,
unexpired test strips.
In general, results are comparable to other visual testing methods obtained by a person with good
colormatchingability.WhenthewatersamplebeingtestedisnearoroutsideoftheRangeofResults
boundaries, results may not reect acual water conditions. Consult a pool or hot tub professional when
unusual water conditions, chemisty problems or questionable results occur.
After testing, consider these actions:
•Comparetheresultwiththewaterparameterrangerecommendedperequipmentorchemical
program
•Treatthewaterperchemicalmanufacturer’sinstructions
•Re-testforconrmationoftheresult
•Consultwithapoolorhottubprofessional
For more information on operation of the product, tips on water balance, or to seek customer or technical
support, please visit the website, www.aquachek.com.
MEMORY FUNCTION (#2, MIDDLE BUTTON)
Press memory button to view your last nine readings.
ERROR MESSAGES
• IfERappearsinplaceofanumericalvalue–thetest
result is out of range. The parameter is either too high
or too low to be accurately analyzed. Note the status
level, LO or HI to determine how to treat your water.
Re-test after treatment.
• IfER2appearsonthescreen–thereisanerrorin
reading the test strip. Ensure that you are following the
test procedure correctly. Use only AquaChek TruTest
instrumental test strips. No other test strip can be
used.
• IfER3appearsonthescreen–nostripisinplace
or the test strip is positioned incorrectly. The correct
position is with the test pads face down in the slot with
the top pad all the way to the top.
• IfonlyLOappearsintheTAlocationontheTruTest
Meter display, the battery voltage has dropped below
the permissible limit. Replace with new batteries.
Test Strip Use
• TheAquaChekTruTestteststripsarecalibratedtowork
only with the AquaChek TruTest test strip reader.
• Eachstripmayonlybeusedonce.Donotre-dipthe
strip. Only dip the strip in calm areas of your pool or
spa. Do not swish or swirl strip in water.
• Ensureyouhaveafreshsupply–keepcapontight
between uses and store at
room temperature.
Raising pH with Soda Ash (Sodium Carbonate)
(When pH is under 7.2, add the amount of soda ash indicated below, then retest)
Aumento de pH con carbonato sódico
(Cuando el pH es inferior a 7,2 agregue la cantidad de carbonato sódico indicada a continuación y repita la prueba)
pH
Level
Pool Volume
1,000 gal.
3.8 kL
5,000 gal.
19 kL
10,000 gal.
38 kL
15,000 gal.
57 kL
25,000 gal.
95 kL
7.0 - 7.2
3/4 oz.
21.3 g
4 oz.
113 g
8 oz.
227 g
12 oz.
340 g
1 1/4 lbs.
568 g
6.7 - 7.0
1 1/4 oz.
35.4 g
6 oz.
170 g
12 oz.
340 g
1 lb.
454 g
2 lbs.
908 g
Under 6.7
1 1/2 oz.
42.5 g
8 oz.
227 g
1 lb.
454 g
1 1/2 lbs.
681 g
2 1/2 lbs.
1.1 kg
Lowering pH using Dry Acid (Sodium Bisulfate)
(When pH is over 7.8, add the amount of acid indicated below, then retest)
Disminución de pH con ácido seco (bisulfato de sodio)
(Cuando el pH es superior a 7,8 agregue la cantidad de ácido indicada a continuación y repita la prueba)
pH
Level
Pool Volume
1,000 gal.
3.8 kL
5,000 gal.
19 kL
10,000 gal.
38 kL
15,000 gal.
57 kL
25,000 gal.
95 kL
7.8 - 8.0
0.1 lb.
45 g
0.3 lb.
136 g
0.6 lb.
272 g
0.9 lb.
408 g
1 1/2 lbs.
681 g
8.0 - 8.4
0.2 lb.
91 g
0.5 lb.
227 g
1 lb.
454 g
1 1/2 lbs.
681 g
2 1/2 lbs.
1.1 kg
Over 8.4
0.3 lb.
136 g
0.8 lb.
363 g
1 1/2 lbs.
681 g
2.3 lbs.
1 kg
4 lbs.
1.8 kg
Raising Alkalinity With Sodium Bicarbonate
Aumento de la alcalinidad con bicarbonato de sodio
Increase in
Total Alkalin-
ity in ppm
Pool Volume
1,000 gal.
3.8 kL
5,000 gal.
19 kL
10,000 gal.
38 kL
15,000 gal.
57 kL
25,000 gal.
95 kL
10
2 1/2 oz.
62 g
12 oz.
340 g
1 1/2 lbs.
681 g
2 1/4 lbs.
1 kg
3 3/4 lbs.
1.7 kg
20
4 3/4 oz.
135 g
1 1/2 lbs.
681 g
3 lbs.
1.4 kg
4 1/2 lbs.
2 kg
7 1/2 lbs.
3.4 kg
50
12 oz.
340 g
3 3/4 lbs.
1.7 kg
7 1/2 lbs.
3.4 kg
11 1/4 lbs.
5 kg
18 3/4 lbs.
8.5 kg
Lowering Alkalinity With Dry Acid (Sodium Bisulfate)
Disminución de la alcalinidad con ácido seco (bisulfato de sodio)
Decrease in
Total Alkalin-
ity in ppm
Pool Volume
1,000 gal.
3.8 kL
5,000 gal.
19 kL
10,000 gal.
38 kL
15,000 gal.
57 kL
25,000 gal.
95 kL
10
2 1/2 oz.
62 g
12 3/4 oz.
361 g
1 1/2 lbs.
681 g
2 1/2 lbs.
1.1 kg
4 lbs.
1.8 kg
20
5 oz.
142 g
1 1/2 lbs.
681 g
3 1/4 lbs.
1.5 kg
4 3/4 lbs.
2.2 kg
8 lbs.
3.6 kg
50
12 3/4 oz.
361 g
4 lbs.
1.8 kg
8 lbs.
3.6 kg
12 lbs.
5.4 kg
20 3/4 lbs.
9.4 kg
Superchlorination Chart – Pools
(Amount Needed to Introduce 10 ppm)
Tabla de supercloración – Piscinas
(Cantidad necesaria para incorporar 10 ppm)
Type
of
Chlorine
Pool Volume
5,000 gal.
19 kL
10,000 gal.
38 kL
15,000 gal.
57 kL
25,000 gal.
95 kL
Sodium
Hypochlorite
1 3/4 qts.
1.7 L
3 1/4 qts.
3.0 L
1 1/4 gal.
4.7 L
2 gal.
7.6 L
Dichlor
11 oz.
311 g
1 1/3 lbs.
605 g
2 lbs.
908 g
3 1/3 lbs.
1.5 kg
Calcium
Hypochlorite
10 oz.
284 g
1 1/4 lbs.
568 g
2 lbs.
908 g
3 1/4 lbs.
1.5 kg
Superchlorination Chart – Spas
(Amount Needed to Introduce 10 ppm)
Tabla de supercloración – Spa
(Cantidad necesaria para incorporar 10 ppm)
Type
of
Chlorine
Spa Volume
250 gal.
948 L
500 gal.
1.9 kL
Dichlor
2/3 oz.
18.9 g
1 1/4 oz.
35.1 g
Sodium
Hypochlorite
2 1/2 oz.
74 mL
5 oz.
148 mL
Lithium
Hypochlorite
1 oz.
28.3 g
2 oz.
56.7 g
Chlorination Chart – Spas
(Amount Needed to Introduce 4 ppm)
Tabla de Cloración – Spa
(Cantidad necesaria para incorporar 4 ppm)
Type
of
Chlorine
Spa Volume
250 gal.
948 L
500 gal.
1.9 kL
Dichlor
1/4 oz.
7.0 g
1/2 oz.
14.2 g
Sodium
Hypochlorite
1 oz.
29.6 mL
2 oz.
59.1 mL
Lithium
Hypochlorite
1/2 oz.
14.2 g
1 oz.
28.3 g
Chlorination Chart – Pools
(Amount Needed to Introduce 1 ppm)
Tabla de Cloración – Piscinas
(Cantidad necesaria para incorporar 1 ppm)
Type
of
Chlorine
Pool Volume
5,000 gal.
19 kL
10,000 gal.
38 kL
15,000 gal.
57 kL
25,000 gal.
95 kL
Sodium
Hypochlorite
5 1/2 oz.
163 mL
10 1/2 oz.
310 mL
1/2 qt.
473 mL
3/4 qt.
710 mL
Dichlor
1 oz.
28.3 g
2 1/4 oz.
63.8 g
3 1/4 oz.
92.1 g
5 1/2 oz.
149 g
Calcium
Hypochlorite
1 oz.
28.3 g
2 oz.
56.7 g
3 oz.
85 g
5 oz.
142 g
Trichlor
3/4 oz.
21.2 g
1 1/2 oz.
42.5 g
2 1/4 oz.
63.8 g
3 3/4 oz.
106 g
*WARNING: Exercise extreme caution when handling chemicals.
• Do not add chemicals when swimmers are in the water.
• Never store acids and chlorine compounds next to each other.
• Never mix chemicals together; add chemicals to the water one at a time.
• Handle acid very carefully.
• Wear protective eyewear and keep material away from children.
• Always follow the chemical manufacturer’s directions.
Analyzing Test Results
and Adjusting Pool Water
To keep your pool at its best, test at each end a minimum of
twice a week, and test your spa before each use.
Free Chlorine – Ideal Reading: Pool 1.0 – 3.0 ppm; Spa
3.0 – 5.0 ppm
To maintain a clean and clear pool, keep the free chlorine level in the right range.
Free chlorine is the portion of the total chlorine remaining in chlorinated water that
has not reacted to contaminants – and is “free” to go to work to kill bacteria and other
contaminants.
Shock Treatment – Contrary to popular belief, a strong chlorine smell is not
an indication of too much chlorine in the pool but actually a red ag that a super dose
of chlorine may be required to correct the problem. Shock treatment adds a larger-
than-normal amount of oxidizing chemicals to pool water. The ideal frequency for a
super dose is every week, depending on use and water temperature.
Bromine – Ideal Reading: 2.0 – 6.0 ppm
To obtain bromine result, multiply free chlorine value by 2.2. Bromine is a popular
pool and spa sanitizer often used instead of chlorine. Environmental conditions
(leaves, rain) and usage (how many folks are enjoying the pool or spa) will add
contaminants in the water. Those contaminants will decrease the bromine existing in
the water. Be sure to test the bromine before entering the water. Even if the system
is dormant or not in use, you should test the bromine level at least weekly to prevent
any buildup of bacteria or algae.
pH – Ideal Reading: 7.2 – 7.8
Losing control of pH in the water unleashes a whole series of problems. The pH can
damage metal equipment and plaster walls if it gets out of balance. A swimmer’s
body has a pH between 7.2 and 7.8 so, if the pool water isn’t kept in this range,
swimmers will start to feel irritation of their eyes and skin. Finally, the pH must stay
in the proper range to maximize the eciency of chlorine.
If the pH is low, below 7.2, the water is too acidic and it can damage the piping and
pool surfaces under certain conditions. You can use sodium carbonate (soda ash)
to increase pH when levels are too low. Other chemicals that can raise the pH are
sodium bicarbonate and sodium sesquicarbonate.
See warnings for handling chemicals* ppm=mg/L
Above 7.8, the water is more alkaline (basic) and under certain conditions can form
deposits in the piping and on pool surfaces. Sodium bisulfate and muriatic acid can
lower the pH when it gets too high.
Total Alkalinity – Ideal Reading: 80 – 120 ppm
Total alkalinity is the measure of the water’s ability to resist pH change. If the total
alkalinity is low, the pH will uctuate widely and be dicult to maintain. When total
alkalinity is high, the pH can become dicult to move and the water can be scale
forming.
Increasing Total Alkalinity – Sodium bicarbonate is the most eective and
popular chemical for increasing total alkalinity. Other chemicals that can raise the
total alkalinity are sodium carbonate (soda ash) and sodium sesquicarbonate.
Decreasing Total Alkalinity – When the total alkalinity is too high, you can
lower it by using muriatic acid or sodium bisulfate.
Troubleshooting Guide
Algae
Possible Cause Solution
Green, black or pink algae Treat with algaecide or superchlorinate and backwash.
Yellow/mustard algae Superchlorinate or treat with algaecide. Brush and
vacuum required. Backwash filter.
Corrosion
Possible Cause Solution
Low pH or hardness levels Increase levels to balance water.
High salt or TDS concentrations Add fresh water to dilute.
High chlorine or bromine levels for extended period
of time
Remove source of sanitizer and allow
level to drop. Add fresh water to dilute
if necessary.
Foam on the Water
Possible Cause Solution
Hardness too low Adjust up.
Some algaecides produce foam See manufacturer’s directions.
Source unknown Add defoamer.
Foul Odor
Possible Cause Solution
Foul chlorine odor: chloramine level is too high Shock to eliminate combined chlorine.
Rotten egg smell: excess metals present Add sequestering agent to reduce metal level.
If the problem is...
Optimal Levels
Test Ideal Reading
Free Chlorine – Pool
Free Chlorine – Hot Tub
Bromine
1.0 - 3.0 ppm
3.0 - 5.0 ppm
2.0 - 6.0 ppm
pH 7.2 - 7.8
Total Alkalinity 80 - 120 ppm
Cloudy Water
Possible Cause Solution
High pH, alkalinity, calcium or TDS can
contribute to cloudy water
Reduce levels or add fresh water to dilute.
Reduced filtration Check for blockage and clean traps.
Heavy bather load You may need to superchlorinate.
Unable to Maintain Free Chlorine
(or other primary sanitizer)
Possible Cause Solution
High TDS or pH Reduce levels or add fresh water to dilute.
High combined chlorine level Superchlorinate. May require double dose or more.
Sunlight dissipating chlorine Add cyanuric acid (stabilizer).
Heavy bather loads Increase sanitizer distribution.
High nitrate level increases chlorine demand Add fresh water to dilute.
Colored Water
Possible Cause Solution
Green: algae growth, low free chlorine, or high
nitrate level
Treat with algaecide and/or superchlorinate.
Reddish-brown: high iron or manganese Add sequestering (or chelating) agent.
Blue-green: high copper Add sequestering agent.
Scale Buildup
Possible Cause Solution
Calcium hardness level too high Add fresh water to dilute.
Total alkalinity, pH or TDS too high Adjust down or add fresh water to dilute.
Calcium hardness level too low; rough soft water
scale forms
Increase hardness level.
Metals present in high levels leading to buildup Add sequestering agent to reduce metal content.
Recurring Algae Growth
Possible Cause Solution
High nitrate level Add fresh water to dilute.
Insufficient free chlorine content Maintain an ideal level of free chlorine. Increase dos-
age if necessary.
Leaves, pollen or other organic waste
frequently enters pool system
Keep covered when possible during peak times of
contamination.
High phosphate levels You can add a phosphate control chemical.
Swimmer/bather Skin and Eye Irritation
Possible Cause Solution
High or low pH or alkalinity, or both Maintain pH and alkalinity at ideal levels for optimum
swimmer comfort.
High free chlorine level Remove source and allow level to drop. Add fresh
water to dilute if necessary.
High chloramine (combined chlorine) level Shock (superchlorinate) to remove combined chlorine.
AquaChek TruTest Gives No Free Chlorine Reading, but
DPD Kit Gives a High Free Chlorine Reading
Possible Cause Solution
Very high chloramine level (High combined chlorine
can cause DPD #1 kits to give false readings for free
chlorine.)
The free chlorine reading on your AquaChek meter is
correct! This is a common problem at the beginning
of the season. Test for total chlorine using AquaChek
®
Select
®
or AquaChek
®
7. You may need to shock
the water.
Green Hair
Possible Cause Solution
Elevated copper in the water Test copper level. Reduce copper level with a seques-
tering agent.
Extremely high free chlorine level (around
50 ppm) can bleach hair
If free chlorine level is excessive, keep
bathers out of water until level drops.
Cheap shampoo Find a new hairdresser.
www.AquaChek.com/Trutest
1-888-AquaChek
© 2008 HACH Company, Elkhart, Indiana
To ensure the protection provided by this equipment is not impaired, do not use this
equipment in any manner other than that, which is specied in this manual.
TROUBLE SHOOTING TIPS
If TruTest readings are higher or lower than expected,
these differences are likely due to technique.
Important:
• Pressstartatthesametimeyou’redippingthe
test strip.
• Donotswishorswirltheteststripwhenyoudip.
Simply dip strip and remove.
• Donotslidetheteststripacrosstheglass.
• Makesurethepadsonthestriparefacingdown
when placed on the meter.
• Inbetweentests,thoroughlywipethemeterand
channel clean, especially if you are performing
several tests in succession.

Important! Retain!
**Instructions for use
**Tips/Warranty Information
www.AquaChek.com/Trutest
1-888-AQUACHEK
Instrucciones para la batería SP
Instale 2 baterías “AA” como se ilustra. La colocación incorrecta hará que el medidor no se encienda. USE SÓLO BATERIAS
ALCALINAS.
Instrucciones de uso
1. Pulse ON para encender. La unidad se activará al pulsar el botón. La pantalla indicará “On”
2. Pulse el botón ‘start’ para comenzar y sumerja simultáneamente una cinta de análisis. Retire la cinta inmediatamente y
sacúdala para quitarle el exceso de agua con un movimiento enérgico de muñeca.
3. Coloque la punta de la cinta de análisis hasta el fondo del canal, déjela plana con el lado almohadillado hacia abajo. NO
DESLICE LA TIRA DE ANÁLISIS POR EL VIDRIO.
4. Ahora espere los resultados. (No tenga la cinta sujetada.) Los resultados digitales para Cloro Libre, pH y Alcalinidad total
podrán leerse en cuestión de segundos. Controle el estado de sus resultados para cada uno de los parámetros. El estado
LO=Bajo, OK=Ideal, HI= Alto se muestra a la izquierda de cada valor digital.
Información de las características del producto
Función Memoria (#2, Botón del medio)
• Pulse el botón ‘memory’ para ver sus últimas nueve lecturas.
Mensajes de error
• Si aparece ER en lugar de un valor numérico: el resultado de la prueba está fuera de los valores. El parámetro es muy alto
o muy bajo para ser analizado con exactitud. Compruebe el nivel del estado, LO o HI para determinar cómo tratar su agua.
Repita la prueba tras el tratamiento.
• Si aparece ER2 en la pantalla: hay un error en la lectura de la tira. Asegúrese de seguir correctamente el procedimiento de la
prueba. Utilice sólo tiras para pruebas AquaChek TruTest. No pueden usarse otro tipo de tiras.
• Si aparece ER3 en la pantalla: no se ha colocado ninguna tira o está colocada de forma incorrecta. La posición correcta es con
la almohadilla boca abajo y con la tira bien encajada en la ranura, haciendo tope.
• Si aparece LO en la ubicación TA de la pantalla del medidor TruTest, la carga de las pilas está por debajo del límite aceptable.
Reemplácelas con pilas nuevas.
Uso de la tira para pruebas
• Las tiras para pruebas AquaChek TruTest están calibradas para funcionar sólo con el lector de tiras AquaChek TruTest.
• Cada tira es para un único uso. No sumerja dos veces las tiras. Sumerja la tira únicamente en zonas tranquilas de su piscina.
• Compruebe que siempre tiene tiras nuevas y guárdelas bien cerradas a temperatura ambiente. No agite ni revuelva la cinta
en el agua.
Mantenimiento
• Limpie la ranura para la tira con agua limpia y un algodoncito de vez en cuando.
Así evitará la acumulación.
• Nunca use químicos fuertes o materiales abrasivos en el medidor TruTest.
Almacenamiento
• Guarde el medidor fuera de la luz solar directa para protegerlo de los rayos UVA.
• Si no va a usar el medidor durante varios meses, quite las baterías.
• Este estuche es resistente al agua. Si el medidor cae al agua, quite y seque las baterías y el compartimento para las baterías
antes de su uso.
No tire las baterías a la basura. Por favor, recicle. En Europa, recicle el medidor siguiendo la directiva WEEE
de su país.
CONSEJOS PARA SOLUCIONAR PROBLEMAS
Si las lecturas del TruTest son más altas o más bajas que las esperadas, es posible que estas diferencias sean atribuibles a la
técnica.
Importante:
• Pulse ‘start’ al mismo tiempo que sumerge la cinta de análisis.
• No agite ni revuelva la cinta de análisis cuando la sumerge. Sencillamente sumérjala y retírela.
• No deslice la cinta de análisis por el vidrio.
• Asegúrese de que la almohadilla de la cinta está hacia abajo cuando la coloca en el medidor.
• Entre un análisis y otro, limpie completamente el medidor y el canal, especialmente cuando realice varios análisis
sucesivamente.
Istruzioni per il montaggio delle batterie IT
Installare 2 batterie tipo “AA” come indicato in gura. L’inserimento delle batterie in modo scorretto può impedire l’accensione
dell’analizzatore a causa della conformazione del vano batterie. UTILIZZARE ESCLUSIVAMENTE BATTERIE ALCALINE.
Istruzioni per l’uso
1. Premere Accensione. Accendere l’unità premendo il pulsante di accensione. Il display visualizzerà ‘On” (Acceso).
2. Premere il pulsante start immergendo nel contempo una striscia. Rimuovere immediatamente la striscia reattiva e
scrollare l’acqua in eccesso dalla striscia agitando quest’ultima con un semplice colpetto del polso.
3. Posizionare la punta della striscia nel retro del canale, disporre orizzontalmente, con il tampone sotto. NON FARE SCORRERE
LA STRISCIA REATTIVA LUNGO IL VETRO.
4. Ora, attendere i risultati. (Non reggere la striscia.) I risultati numerici per cloro libero, pH e alcalinità totale verranno tutti
visualizzati entro pochi secondi. Controllare lo stato dei risultati per ogni parametro. Lo stato LO= basso, OK= ideale, HI=
alto viene visualizzato a sinistra di ogni valore numerico.
Caratteristiche e informazioni sul prodotto
Funzione memoria (N. 2, Pulsante centrale)
• Premere il pulsante della memoria per visualizzare le ultime nove letture.
Messaggi di errore
• Il messaggio ER sullo schermo al posto del valore numerico signica che il risultato dell’analisi è fuori dall’intervallo
consentito. Il valore rilevato è pertanto troppo elevato
o troppo basso per essere considerato accurato. Vericare lo stato (LO o HI) per
determinare come trattare di conseguenza l’acqua. Ripetere l’analisi dopo il trattamento.
• Il messaggio ER2 sullo schermo indica un errore nella lettura della striscia reattiva. Assicurarsi di aver seguito correttamente
la procedura di analisi. Utilizzare solo strisce reattive per strumenti AquaChek TruTest. Non è possibile usare altri tipi di strisce.
• Se viene visualizzato ER3 sullo schermo signica che non è stata inserita alcuna striscia o che la striscia non è posizionata
correttamente. La posizione corretta
è con i tamponi di analisi rivolti verso il basso nella fessura e con il tampone superiore allineato con la parte superiore.
• Se solo LO compare nella posizione TA sul display del misuratore TruTest, ciò signica che la tensione della batteria è scesa
sotto il limite consentito. Sostituire con batterie nuove.
U
so della striscia reattiva
• Le strisce reattive AquaChek TruTest sono calibrate per essere usate unicamente con l’analizzatore AquaChek TruTest.
• Ogni striscia è monouso. Non reimmergere la striscia. La striscia va immersa solo in zone calme della piscina o della vasca
termale.
• Conservare correttamente il prodotto – sigillare con il tappo dopo ogni uso e conservare
a temperatura ambiente. Non girare né ruotare la striscia nell’acqua.
Manutenzione
• Pulire di quando in quando la fessura per strisce reattive con acqua dolce e un batuolo di cotone. Ciò impedirà l’eventuale
accumulo di sostanze.
• Evitare il contatto dell’analizzatore TruTest con sostanze chimiche aggressive
e/o materiali abrasivi.
Conservazione
• Proteggere l’analizzatore dall’esposizione ai raggi solari diretti per evitare danni dovuti
a raggi UV.
• Nel caso in cui l’analizzatore non venga usato per diversi mesi, rimuovere le batterie.
• La scatola è impermeabile Se l’analizzatore cade in acqua, rimuovere e asciugare le batterie e il relativo vano prima dell’uso.
Non smaltire le batterie come normali riuti urbani, ma riciclarle. In Europa, riciclare l’analizzatore in conformità alla direttiva
WEEE
in vigore nel proprio paese.
CONSIGLI PER LA RISOLUZIONE DI PROBLEMI
Se i risultati TruTest sono più elevati o più bassi del previsto, è probabile che tali dierenze siano causate dalla tecnica impiegata.
Importante:
• Premere start mentre si sta immergendo la striscia.
• Non girare né ruotare la striscia reattiva durante l’immersione. Immergere semplicemente la striscia e quindi rimuoverla.
• Non fare scorrere la striscia reattiva lungo il vetro.
• Accertarsi che i tamponi sulla striscia siano rivolti verso il basso quando viene posizionata sul misuratore.
• Tra un test e l’altro, pulire accuratamente il misuratore e il canale, in particolar modo se si stanno eseguendo diversi test
l’uno dopo l’altro.
Instalação das pilhas PT
Instale 2 pilhas “AA” conforme o diagrama. A inserção incorreta impedirá que
o medidor seja ligado devido ao desenho do compartimento das pilhas. USE SOMENTE PILHAS ALCALINAS.
Instruções de uso
1. Premir o botão ON (ligar). LIGAR a unidade premindo o botão de ligar/desligar a alimentação eléctrica. O visor exibe a
mensagem “Ligado”.
2. Premir o botão Start (iniciar) e mergulhar uma tira ao mesmo tempo. Retirar imediatamente a tira de análise e sacudir a
água em excesso da tira com um simples movimento do pulso.
3. Colocar a ponta da tira novamente na extremidade posterior do canal, espalmada na horizontal, com a parte almofadada
para baixo. NÃO FAZER DESLIZAR A TIRA DE ANÁLISE AO LONGO DO VIDRO.
4. Agora, basta aguardar pelos resultados. (Não segurar a tira.) Os resultados digitais para Cloro Livre, pH e Alcalinidade Total
irão aparecer em conjunto, no espaço de segundos. Vericar o estado dos resultados para cada parâmetro. O estado LO=Low
(Baixo), OK=Ideal, HI= High (Alto) é exibido à esquerda de cada valor digital.
Funcionalidades e informações do produto
Função de Memória (#2, Botão Central)
• Premir o botão de memória para visualizar as últimas nove leituras.
Mensagens de erro
• Se for exibido ER no lugar de um valor numérico – o resultado do teste está fora do intervalo. O parâmetro é muito alto ou
muito baixo para ser analisado com precisão. Observe o nível do status, LO (baixo) ou HI (alto) para determinar como fazer
o tratamento da água. Refaça o teste após o tratamento.
• Se for exibido ER2 na tela – há um erro na leitura da ta de teste. Certique-se de que está seguindo o procedimento de
teste corretamente. Use somente tas de teste para instrumentos AquaChek TruTest. Nenhuma outra ta de teste pode ser
usada.
• Se for exibido ER3 na tela – não há ta de teste na abertura ou a ta de teste não está posicionada corretamente. A posição
correta é aquela em que a ta está voltada para baixo na abertura com a sua parte superior coincidindo com a parte superior
da abertura.
• Se aparecer apenas LO na localização TA do visor do TruTest Meter, tal indica que a voltagem das pilhas desceu abaixo do
limite permitido. Substituir por pilhas novas.
Uso da ta de teste
• As tas de teste AquaChek TruTest são calibradas para funcionar somente com
o leitor de ta de teste AquaChek TruTest.
• Cada ta deve ser usada somente uma única vez. Não mergulhe a ta mais de uma vez. Mergulhe a ta somente em áreas
calmas de sua piscina ou spa.
• Certique-se de ter um suprimento em condições de uso – mantenha rmemente tampado entre usos e armazene à
temperatura ambiente. Não agitar nem rodopiar a tira em água.
Manutenção
• Limpe ocasionalmente a abertura para tas de teste com água potável e uma haste de algodão. Isto evitará qualquer
acúmulo de impurezas.
• Nunca use produtos químicos fortes e/ou materiais abrasivos no medidor TruTest.
Armazenamento
• Armazene o medidor em lugar longe da luz solar direta para protegê-lo dos danos causados pela radiação UV.
• Se o medidor não vier a ser usado por vários meses, remova as pilhas.
• Este estojo é resistente à água. Se o medidor cair na água, remova e seque as pilhas e o compartilmento de
pilhas antes do uso.
Não jogue as pilhas no lixo. Recicle. Na Europa, recicle o medidor de acordo com a diretriz de descarte de equipamento eletrônico
e elétrico (WEEE
) de seu país.
SUGESTÕES PARA RESOLUÇÕES DE PROBLEMAS
Se as leituras TruTest forem mais altas ou mais baixas do que o previsto, provavelmente tais diferenças devem-se à técnica.
Importante:
• Premir Iniciar, ao mesmo tempo que se mergulha a tira de análise..
• Não agitar nem rodopiar a tira ao mergulhá-la. Apenas mergulhar e retirar a tira.
• Não fazer deslizar a tira de análise ao longo do vidro.
• Certicar-se de que as partes almofadadas da tira estão voltadas para baixo, quando são colocadas sobre o dispositivo
de medição.
• Entre análises, limpar muito bem o dispositivo de medição e o canal, especialmente se estiver a realizar diversas
análises em série.
Einlegen/Wechseln der Batterien DE
Legen Sie zwei LR6-Batteries (Mignonzellen) ein wie in der Abbildung gezeigt. Bei falsch eingelegten Batterien lässt sich das
Messgerät bauartbedingt nicht einschalten. VERWENDEN SIE AUSSCHLIESSLICH ALKALIBATTERIEN.
Bedienungsanweisungen
1. Drücken Sie auf Power ON. Schalten Sie die Einheit EIN, indem Sie den Ein-/Ausschalter drücken. Auf dem Display wird
“ON“ eingeblendet.
2. Drücken Sie auf die Start-Taste und tauchen Sie gleichzeitig den Teststreifen ein. Entnehmen Sie sofort den Teststreifen und
schütteln Sie überschüssiges Wasser mit einer schnellen Bewegung des Handgelenks vom Teststreifen ab.
3. Legen Sie die Spitze des Teststreifens mit der Auageseite (Pads) ach nach unten in das hintere Ende des Kanals. SCHIEBEN
SIE DEN TESTSTREIFEN NICHT ÜBER DAS GLAS.
4. Warten Sie nun auf das Ergebnis. (Halten Sie dabei den Teststreifen nicht fest.) Die digitalen Ergebnisse des freien Chlors, des
pH-Werts und der Gesamtalkalität werden sekundenschnell angezeigt. Überprüfen Sie den Status Ihrer Ergebnisse für jeden
Parameter. Der Status LO=niedrig, OK=ideal, HI=hoch wird links neben jedem digitalen Wert angezeigt.
Produktmerkmale und Informationen
Memory-Funktion (#2, mittlere Taste)
• Drücken Sie auf die Memory-Taste, um die letzten neun Messungen anzuzeigen.
Fehlermeldungen
• Falls anstelle eines Wertes „ER” erscheint, liegt das Testergebnis außerhalb des Bereichs Der Parameter ist zu niedrig oder
zu hoch für eine genaue Analyse. Sie können am Status LO oder HI ablesen, wie das Wasser aufbereitet werden muss.
Wiederholen Sie den Test nach der Aufbereitung.
• Die Anzeige „ER2” bedeutet, dass ein Fehler am Teststreifen vorlag. Stellen Sie sicher, dass der Test korrekt ausgeführt wurde.
Verwenden Sie ausschließlich AquaChek TruTest-Teststreifen. Andere Teststreifen können nicht verwendet werden.
• Die Anzeige „ER3” erscheint, wenn kein Teststreifen eingelegt war oder er in der falsche Position eingelegt wurde. Der
Streifen muss so mit dem Feld nach unten in das Messgerät eingelegt werden, dass das oberste Feld oben mit dem Schlitz
abschließt.
• Falls nur LO in der TA-Anzeige des TruTest-Messgeräts erscheint, ist die Batteriespannung unter den zulässigen Grenzwert
abgesunken. Wechseln Sie die Batterien durch neue aus.
Einsatz von Teststreifen
• AquaChek TruTest-Teststreifen sind ab Werk so kalibriert, dass sie nur mit AquaChek TruTest-Messgeräten eingesetzt werden
können.
• Teststreifen können nur einmal gebraucht werden. Tauchen Sie den Teststreifen nicht wieder ein. Tauchen Sie den Teststreifen
in einem ruhigen Bereich Ihres Pools oder Bades ein.
• Achten Sie auf einen Vorrat frischer Teststreifen. Halten Sie den Deckel fest verschlossen und bewahren Sie die Teststreifen bei
Zimmertemperatur auf. Schwenken oder wirbeln Sie den Teststreifen nicht im Wasser.
Wartung
• Wischen Sie den Teststreifenschlitz gelegentlich mit Wasser und einem Wattestäbchen ab. Damit verhindern Sie, dass sich
Schmutz absetzt.
• Verwenden Sie nie aggressive Chemikalien/oder scheuernde Materialien zur Reinigung des TruTest-Messgeräts.
Lagerung
• Halten Sie das Messgerät bei der Lagerung von direkter Sonneneinstrahlung fern, um es vor Schäden durch UV-Strahlung zu
schützen.
• Wenn Sie das Messgerät für einige Monate nicht benötigen, nehmen Sie die Batterien aus dem Messgerät heraus.
• Das Material ist wasserfest. Wenn das Messgerät in das Wasser fällt, entfernen und trocknen Sie die Batterien und das
Batteriefach, bevor Sie das Messgerät wieder verwenden.
Werfen Sie Batterien nicht in den Hausmüll. Bringen Sie die Batterien zur Wiederverwertung. Beachten Sie bei der Entsorgung des
Gerätes in Europa die WEEE-Richtlinie
(Richtlinie über Elektro- und Elektronik-Altgeräte).
HINWEISE ZUR FEHLERSUCHE
Falls die TruTest-Messungen höher oder niedriger als erwartet sind, so ist das wahrscheinlich auf die Verfahrenstechnik
zurückzuführen.
Wichtig:
• Drücken Sie gleichzeitig auf die Starttaste, wenn Sie den Teststreifen eintauchen.
• Schwenken oder wirbeln Sie den Teststreifen nicht beim Eintauchen. Tauchen Sie den Teststreifen einfach ein und nehmen
Sie ihn wieder heraus.
• Schieben Sie den Teststreifen nicht über das Glas.
• Stellen Sie sicher, dass die Pads auf dem Teststreifen nach unten zeigen, wenn dieser auf das Messgerät gelegt wird.
• Wischen Sie das Messgerät und den Kanal zwischen den Tests sorgfältig ab, vor allem, wenn Sie nacheinander mehrere Tests
durchführen.
Batterij-instructies NL
Plaats 2 “AA”-batterijen volgens het diagram. Als ze verkeerd worden geplaatst, kan de meter door het ontwerp van het
batterijcompartiment niet worden ingeschakeld. GEBRUIK ALLEEN ALKALINEBATTERIJEN.
Gebruiksinstructies
1. Druk op de Aan/uit-knop Schakel de unit aan door indrukken van de Aan/uit-knop. Het displaystaat op ‘Aan”
2. Druk op de startknop en dip tegelijkertijd een strip. Verwijder de teststrip direct en schud het teveel aan water van de
strip met een eenvoudig schudbeweging van de pols.
3. Plaats de tip van de strip in het achtereinde van het kanaal, leg de strip plat, pad met de zijkant omlaag. SCHUIF DE
TESTSTRIP NIET OVER HET GLAS.
4. Wacht op de resultaten. (Houd de strip niet vast.) Digitale resultaten voor vrije chlorine, pH, en totale alkaliniteit verschijnen
samen binnen enkele seconden. Controleer de status van uw resultaten voor elke parameter. De status LO=Laag, OK=Ideaal,
HI= Hoog wordt getoond links van elke digitale waarde.
Productmogelijkheden en informatie
Geheugenfunctie (#2, Middelste knop)
• Druk op de geheugenknop om uw laatste negen aezingen te bekijken.
Foutberichten
• Als ER in plaats van een numerieke waarde wordt weergegeven, valt het testresultaat buiten het bereik. De parameter is te
hoog of te laag om nauwkeurig geanalyseerd te kunnen worden. Let op het statusniveau, LO of HI, om te bepalen hoe u het
water moet behandelen. Voer de test na de behandeling opnieuw uit.
• Als ER2 op het display verschijnt, is er een fout opgetreden bij het lezen van de teststrip. Zorg dat u de testprocedure correct
volgt. Gebruik alleen AquaChek
TruTest-instrumentteststrips. Er kunnen geen andere teststrips worden gebruikt.
• Als ER3 op het display verschijnt, is er geen teststrip geplaatst of is de teststrip in de
verkeerde positie geplaatst. De juiste positie is met de bekleding van de teststrip omlaag in de sleuf met de bovenste
bekleding over de hele lengte tegen de bovenkant.
• Als alleen LO verschijnt in de TA-locatie op het TruTest Meter-display, is de batterijspanning beneden de toegestane grens
gekomen. Vervang de batterijen.
Gebruik van teststrips
• De AquaChek TruTest-teststrips zijn alleen gekalibreerd voor gebruik met de AquaChek TruTest-teststriplezer.
• Elke strip mag maar eenmaal worden gebruikt. Dompel de strip niet opnieuw onder. Dompel de strip alleen onder in rustige
gedeelten van uw zwem- of bubbelbad.
• Houd de teststrips vers. Zorg dat de dop na elk gebruik stevig erop zit en bewaar de teststrips op kamertemperatuur. Sla de
strip niet af en draai er niet mee in water.
Onderhoud
• Reinig de teststripgleuf regelmatig met schoon water en een katoenen doekje. Hiermee voorkomt u de ophoping van vuil.
• Maak de TruTest-meter nooit schoon met krassende chemicaliën en/of schurende middelen.
Opslag
• Bewaar de meter buiten direct zonlicht om te voorkomen dat de meter door UV-stralen wordt beschadigd.
• Als u de meter een aantal maanden niet gaat gebruiken, moet u de batterijen verwijderen.
• Dit is een waterbestendige kast. Als de meter in het water is gevallen, moet u de batterijen verwijderen en de batterijen en
het batterijcompartiment laten drogen voordat u het apparaat weer gebruikt.
Gooi batterijen niet in de afvalbak. Laat ze recyclen. Laat in Europa de meter recyclen volgens de EEE-richtlijn
die in uw land
van toepassing is.
TIPS VOOR PROBLEEMOPLOSSINGEN
Als de TruTest-aezingen hoger of lager zijn dan verwacht, zijn deze verschillen waarschijnlijk te wijten aan de techniek.
Belangrijk:
• Druk Start tegelijkertijd in met het dippen van de teststrip.
• Sla de strip niet af en draai er niet mee in water, wanneer u dipt. Gewoon de strip dippen en verwijderen.
• SCHUIF DE TESTSTRIP NIET OVER HET GLAS.
• Overtuig u ervan dat de pads op de strip omlaag wijzen wanneer deze op de meter geplaatst wordt..
• Wis de meter en het kanaal grondig schoon tussen de testen, vooral indien u verscheidene testen na elkaar uitvoert.
Batteriinstruktioner DK
Installer 2 AA-batterier i overensstemmelse med diagrammet. Hvis batterierne indsættes forkert, kan meteret ikke tændes på
grund af batterihusets design. BRUG KUN ALKALINEBATTERIER.
Brugsvejledning
1. Tryk på tænd-/slukknappen. Tænd for enheden ved at trykke på tænd/slukknappen Der vises ”On” på displayet.
2. Tryk på startknappen og dyp en strimmel samtidig. Tag teststrimlen ud straks, og slå overskydende vand fra den, ligesom når
man slår vand af hænderne.
3. Placer spidsen af strimlen bag i kanalen, adt, og med pudesiden nedad. FØR IKKE TESTSTRIMLEN HEN AD GLASSET.
4. Vent nu på resultaterne. (Hold ikke ved strimlen). Der fremkommer digital visning af resultaterne for fri klorin, pH og
total alkalitet samtidig inden for sekunder. Tjek status for dine resultater for hver parameter. Statusangivelsen LO=Lavt,
OK=Ideelt, HI=Højt vises til venstre for hver digitale værdi.
Produktegenskaber og -information
Hukommelsesfunktion (nr. 2, midterste knap)
• Tryk på hukommelsesknappen for at se dine sidste ni visninger.
Fejlmeddelelser
• Hvis ER vises i stedet for en talværdi, er testresultatet uden for området. Parameteren
er enten for høj eller for lav til at kunne analyseres korrekt. Læg mærke til statusniveauet, LO eller HI, for at afgøre, hvordan
vandet skal behandles. Test igen efter behandlingen.
• Hvis ER2 vises på skærmen, er der en fejl i aæsningen af teststrimlen. Sørg for at følge testproceduren korrekt. Brug kun
AquaChek TruTest instrumentteststrimler. Der kan ikke bruges nogen andre teststrimler.
• Hvis ER3 vises på skærmen, er der ikke nogen strimmel til stede, eller teststrimlen er placeret forkert. Den korrekte position
er med testpudens forside nedad i slotten med den øverste pude hele vejen til toppen.
• Hvis der kun vises LO i TA-området på TruTest måleinstrumentet, er batteristanden under den tilladelige grænse.
Sæt nye batterier i.
Anvendelse af teststrimlen
• AquaChek TruTest teststrimler er kalibreret til kun at fungere med AquaChek TruTest teststrimmellæseren.
• Hver strimmel kan kun bruges én gang. Dyp ikke strimlen igen. Dyp kun strimlen
i rolige områder af poolen eller spabadet.
• Sørg for at have friske forsyninger – sørg for, at kapslen sidder tæt mellem anvendelserne, og opbevar strimlen ved
stuetemperatur. Strimlen må ikke svippes eller svinges rundt i vand.
Vedligeholdelse
• Tør ind imellem teststrimmelslotten af med ferskvand og bomuldsvat. Dette forhindrer, at der dannes ansamlinger.
• Brug ikke skrappe og/eller slibende materialer på TruTest-meteret.
Opbevaring
• Opbevar meteret væk fra direkte sollys for at beskytte meteret mod UV-skader.
• Hvis meteret ikke bruges i ere måneder, skal batterierne ernes.
• Materialet er vandfast. Hvis meteret falder ned i vandet, skal batterierne og batterirummet ernes og tørres, inden meteret
bruges igen.
Bortskaf ikke batterier sammen med almindeligt husholdningsaald. Sørg for at indelevere dem til genanvendelse. I Europa skal
meteret genanvendes i overensstemmelse med det relevante lands implementering af WEEE-direktivet
.
TIP TIL FEJLFINDING
Hvis visningerne på TruTest måleinstrumentet er højere eller lavere end forventet, har sådanne dierencer højst sandsynligt
tekniske årsager.
Vigtigt:
• Tryk på start samtidig med, at du dypper teststrimlen.
• Du må ikke svippe eller svinge strimlen rundt, når den dyppes. Strimlen dyppes blot og ernes igen.
• Før ikke teststrimlen hen ad glasset.
• Sørg for, at puderne på strimlen vender nedad, når strimlen anbringes i måleinstrumentet.
• Efter hver test skal instrumentet og kanalen tørres af, så de(t) bliver ren(t), især hvis du udfører ere tests efter hinanden.
Product Features and Information
Note: Read this instruction manual carefully and keep it available for future reference.
1. Press Power ON
Turn Unit ON by pressing power button. Display will read ‘On”
3. Place tip of strip in back
end of channel, lay at, pad
side down.
DO NOT SLIDE THE TEST STRIP
ACROSS THE GLASS
2. Press start button and dip
a strip at the same time.
Remove test strip immediately and shake excess water
from strip with a simple ick of the wrist.
4. Now Wait for Results. (Do Not Hold onto Strip)
Digital Results for Free Chlorine, pH, and Total Alkalinity will appear together in seconds.
Check the status of your results for each parameter. The status LO=Low, OK=Ideal,
HI= High is displayed to the left of each digital value.
BATTERY INSTRUCTIONS
Install 2 “AA” batteries
per the diagram.
Incorrect insertion will
prevent the meter from
turning on due to the
design of the battery
housing. USE ONLY
ALKALINE BATTERIES.
Use of any other type
of battery may damage
the meter and voids the
warranty.
This symbol, if noted on the instrument, references the instruction manual for
operational and/or safety information.
Product Safety
UL 61010-1 (ETL Listing)
CSA C22.2 No. 61010-1 (ETLc Certication)
Immunity
EN 61326;1998 (EMC Requirements for Electrical Equipment for Measurement Control and Laboratory Use)
per 2004/108/EC EMC: Supporting test records by Hach Company, certied by Hach Company.
Emissions
Per 2004/108/EC EMC: EN 61326:1998 (Electrical Equipment for Measurement control and laboratory use-
EMC requirements) Class “B” emission limits. Supporting test records by Hach Company.
Standards include:
EN 55011 (CISPR 11). Class “B” emission limits
WEEE
Electrical equipment marked with this symbol may not be disposed of in European public disposal systems,
in conformity with the European local and national regulations (EU Directive 2002/96/EC). European electrical
equipment users must now return old or end-of life equipment to the producer for disposal at no charge to the user.
PRECAUTIONARY LABELS
Read all labels and tags attached the instrument. Personal injury or damage to the instrument could occur if not
observed.
MAINTENANCE
• Wipetheteststripslotwithfreshwaterandacottonswaboccasionally.Thiswillpreventanybuildup.
• Neveruseharshchemicalsand/orabrasivematerialsontheTruTestmeter.
STORAGE
• StorethemeteroutofdirectsunlighttoprotectthemeterfromUVdamage.
• Ifmeterwillnotbeusedforseveralmonths,removethebatteries.
• Thisisawaterresistantcase.Ifthemeterfallsintothewater,removeanddrythebatteriesand
battery compartment before use.
Do not dispose of batteries in the trash. Please recycle. In Europe, recycle the meter according to
WEEE
directive in your country.
SPECIFICATIONS:
•Intendedforindoor/outdooruse
•Operatingtemperaturerange:15-40°C
•Batterylife:Approximately4monthswithtypicaluse
Range of Results:
Free Chlorine: 0-15 ppm
pH: 6.1-8.8
Total Alkalinity: 0-300 ppm
The AquaChek TruTest Digital Test Strip reader is intended to provide a convenient alternative to visual color
matching, with the ease of a digital display. The meter and test strips can achieve representative readings
of pool and hot tub water conditions when following all directions and using properly stored and handled,
unexpiredteststrips.
In general, results are comparable to other visual testing methods obtained by a person with good
colormatchingability.WhenthewatersamplebeingtestedisnearoroutsideoftheRangeofResults
boundaries, results may not reect acual water conditions. Consult a pool or hot tub professional when
unusual water conditions, chemisty problems or questionable results occur.
After testing, consider these actions:
•Comparetheresultwiththewaterparameterrangerecommendedperequipmentorchemical
program
•Treatthewaterperchemicalmanufacturer’sinstructions
•Re-testforconrmationoftheresult
•Consultwithapoolorhottubprofessional
For more information on operation of the product, tips on water balance, or to seek customer or technical
support, please visit the website, www.aquachek.com.
MEMORY FUNCTION (#2, MIDDLE BUTTON)
Press memory button to view your last nine readings.
ERROR MESSAGES
• IfERappearsinplaceofanumericalvalue–thetest
result is out of range. The parameter is either too high
or too low to be accurately analyzed. Note the status
level, LO or HI to determine how to treat your water.
Re-test after treatment.
• IfER2appearsonthescreen–thereisanerrorin
reading the test strip. Ensure that you are following the
test procedure correctly. Use only AquaChek TruTest
instrumental test strips. No other test strip can be
used.
• IfER3appearsonthescreen–nostripisinplace
or the test strip is positioned incorrectly. The correct
position is with the test pads face down in the slot with
the top pad all the way to the top.
• IfonlyLOappearsintheTAlocationontheTruTest
Meter display, the battery voltage has dropped below
the permissible limit. Replace with new batteries.
Test Strip Use
• TheAquaChekTruTestteststripsarecalibratedtowork
only with the AquaChek TruTest test strip reader.
• Eachstripmayonlybeusedonce.Donotre-dipthe
strip. Only dip the strip in calm areas of your pool or
spa. Do not swish or swirl strip in water.
• Ensureyouhaveafreshsupply–keepcapontight
between uses and store at
room temperature.
Raising pH with Soda Ash (Sodium Carbonate)
(When pH is under 7.2, add the amount of soda ash indicated below, then retest)
Aumento de pH con carbonato sódico
(Cuando el pH es inferior a 7,2 agregue la cantidad de carbonato sódico indicada a continuación y repita la prueba)
pH
Level
Pool Volume
1,000 gal.
3.8 kL
5,000 gal.
19 kL
10,000 gal.
38 kL
15,000 gal.
57 kL
25,000 gal.
95 kL
7.0 - 7.2
3/4 oz.
21.3 g
4 oz.
113 g
8 oz.
227 g
12 oz.
340 g
1 1/4 lbs.
568 g
6.7 - 7.0
1 1/4 oz.
35.4 g
6 oz.
170 g
12 oz.
340 g
1 lb.
454 g
2 lbs.
908 g
Under 6.7
1 1/2 oz.
42.5 g
8 oz.
227 g
1 lb.
454 g
1 1/2 lbs.
681 g
2 1/2 lbs.
1.1 kg
Lowering pH using Dry Acid (Sodium Bisulfate)
(When pH is over 7.8, add the amount of acid indicated below, then retest)
Disminución de pH con ácido seco (bisulfato de sodio)
(Cuando el pH es superior a 7,8 agregue la cantidad de ácido indicada a continuación y repita la prueba)
pH
Level
Pool Volume
1,000 gal.
3.8 kL
5,000 gal.
19 kL
10,000 gal.
38 kL
15,000 gal.
57 kL
25,000 gal.
95 kL
7.8 - 8.0
0.1 lb.
45 g
0.3 lb.
136 g
0.6 lb.
272 g
0.9 lb.
408 g
1 1/2 lbs.
681 g
8.0 - 8.4
0.2 lb.
91 g
0.5 lb.
227 g
1 lb.
454 g
1 1/2 lbs.
681 g
2 1/2 lbs.
1.1 kg
Over 8.4
0.3 lb.
136 g
0.8 lb.
363 g
1 1/2 lbs.
681 g
2.3 lbs.
1 kg
4 lbs.
1.8 kg
Raising Alkalinity With Sodium Bicarbonate
Aumento de la alcalinidad con bicarbonato de sodio
Increase in
Total Alkalin-
ity in ppm
Pool Volume
1,000 gal.
3.8 kL
5,000 gal.
19 kL
10,000 gal.
38 kL
15,000 gal.
57 kL
25,000 gal.
95 kL
10
2 1/2 oz.
62 g
12 oz.
340 g
1 1/2 lbs.
681 g
2 1/4 lbs.
1 kg
3 3/4 lbs.
1.7 kg
20
4 3/4 oz.
135 g
1 1/2 lbs.
681 g
3 lbs.
1.4 kg
4 1/2 lbs.
2 kg
7 1/2 lbs.
3.4 kg
50
12 oz.
340 g
3 3/4 lbs.
1.7 kg
7 1/2 lbs.
3.4 kg
11 1/4 lbs.
5 kg
18 3/4 lbs.
8.5 kg
Lowering Alkalinity With Dry Acid (Sodium Bisulfate)
Disminución de la alcalinidad con ácido seco (bisulfato de sodio)
Decrease in
Total Alkalin-
ity in ppm
Pool Volume
1,000 gal.
3.8 kL
5,000 gal.
19 kL
10,000 gal.
38 kL
15,000 gal.
57 kL
25,000 gal.
95 kL
10
2 1/2 oz.
62 g
12 3/4 oz.
361 g
1 1/2 lbs.
681 g
2 1/2 lbs.
1.1 kg
4 lbs.
1.8 kg
20
5 oz.
142 g
1 1/2 lbs.
681 g
3 1/4 lbs.
1.5 kg
4 3/4 lbs.
2.2 kg
8 lbs.
3.6 kg
50
12 3/4 oz.
361 g
4 lbs.
1.8 kg
8 lbs.
3.6 kg
12 lbs.
5.4 kg
20 3/4 lbs.
9.4 kg
Superchlorination Chart – Pools
(Amount Needed to Introduce 10 ppm)
Tabla de supercloración – Piscinas
(Cantidad necesaria para incorporar 10 ppm)
Type
of
Chlorine
Pool Volume
5,000 gal.
19 kL
10,000 gal.
38 kL
15,000 gal.
57 kL
25,000 gal.
95 kL
Sodium
Hypochlorite
1 3/4 qts.
1.7 L
3 1/4 qts.
3.0 L
1 1/4 gal.
4.7 L
2 gal.
7.6 L
Dichlor
11 oz.
311 g
1 1/3 lbs.
605 g
2 lbs.
908 g
3 1/3 lbs.
1.5 kg
Calcium
Hypochlorite
10 oz.
284 g
1 1/4 lbs.
568 g
2 lbs.
908 g
3 1/4 lbs.
1.5 kg
Superchlorination Chart – Spas
(Amount Needed to Introduce 10 ppm)
Tabla de supercloración – Spa
(Cantidad necesaria para incorporar 10 ppm)
Type
of
Chlorine
Spa Volume
250 gal.
948 L
500 gal.
1.9 kL
Dichlor
2/3 oz.
18.9 g
1 1/4 oz.
35.1 g
Sodium
Hypochlorite
2 1/2 oz.
74 mL
5 oz.
148 mL
Lithium
Hypochlorite
1 oz.
28.3 g
2 oz.
56.7 g
Chlorination Chart – Spas
(Amount Needed to Introduce 4 ppm)
Tabla de Cloración – Spa
(Cantidad necesaria para incorporar 4 ppm)
Type
of
Chlorine
Spa Volume
250 gal.
948 L
500 gal.
1.9 kL
Dichlor
1/4 oz.
7.0 g
1/2 oz.
14.2 g
Sodium
Hypochlorite
1 oz.
29.6 mL
2 oz.
59.1 mL
Lithium
Hypochlorite
1/2 oz.
14.2 g
1 oz.
28.3 g
Chlorination Chart – Pools
(Amount Needed to Introduce 1 ppm)
Tabla de Cloración – Piscinas
(Cantidad necesaria para incorporar 1 ppm)
Type
of
Chlorine
Pool Volume
5,000 gal.
19 kL
10,000 gal.
38 kL
15,000 gal.
57 kL
25,000 gal.
95 kL
Sodium
Hypochlorite
5 1/2 oz.
163 mL
10 1/2 oz.
310 mL
1/2 qt.
473 mL
3/4 qt.
710 mL
Dichlor
1 oz.
28.3 g
2 1/4 oz.
63.8 g
3 1/4 oz.
92.1 g
5 1/2 oz.
149 g
Calcium
Hypochlorite
1 oz.
28.3 g
2 oz.
56.7 g
3 oz.
85 g
5 oz.
142 g
Trichlor
3/4 oz.
21.2 g
1 1/2 oz.
42.5 g
2 1/4 oz.
63.8 g
3 3/4 oz.
106 g
*WARNING: Exercise extreme caution when handling chemicals.
• Do not add chemicals when swimmers are in the water.
• Never store acids and chlorine compounds next to each other.
• Never mix chemicals together; add chemicals to the water one at a time.
• Handle acid very carefully.
• Wear protective eyewear and keep material away from children.
• Always follow the chemical manufacturer’s directions.
Analyzing Test Results
and Adjusting Pool Water
To keep your pool at its best, test at each end a minimum of
twice a week, and test your spa before each use.
Free Chlorine – Ideal Reading: Pool 1.0 – 3.0 ppm; Spa
3.0 – 5.0 ppm
To maintain a clean and clear pool, keep the free chlorine level in the right range.
Free chlorine is the portion of the total chlorine remaining in chlorinated water that
has not reacted to contaminants – and is “free” to go to work to kill bacteria and other
contaminants.
Shock Treatment – Contrary to popular belief, a strong chlorine smell is not
an indication of too much chlorine in the pool but actually a red ag that a super dose
of chlorine may be required to correct the problem. Shock treatment adds a larger-
than-normal amount of oxidizing chemicals to pool water. The ideal frequency for a
super dose is every week, depending on use and water temperature.
Bromine – Ideal Reading: 2.0 – 6.0 ppm
To obtain bromine result, multiply free chlorine value by 2.2. Bromine is a popular
pool and spa sanitizer often used instead of chlorine. Environmental conditions
(leaves, rain) and usage (how many folks are enjoying the pool or spa) will add
contaminants in the water. Those contaminants will decrease the bromine existing in
the water. Be sure to test the bromine before entering the water. Even if the system
is dormant or not in use, you should test the bromine level at least weekly to prevent
any buildup of bacteria or algae.
pH – Ideal Reading: 7.2 – 7.8
Losing control of pH in the water unleashes a whole series of problems. The pH can
damage metal equipment and plaster walls if it gets out of balance. A swimmer’s
body has a pH between 7.2 and 7.8 so, if the pool water isn’t kept in this range,
swimmers will start to feel irritation of their eyes and skin. Finally, the pH must stay
in the proper range to maximize the eciency of chlorine.
If the pH is low, below 7.2, the water is too acidic and it can damage the piping and
pool surfaces under certain conditions. You can use sodium carbonate (soda ash)
to increase pH when levels are too low. Other chemicals that can raise the pH are
sodium bicarbonate and sodium sesquicarbonate.
See warnings for handling chemicals* ppm=mg/L
Above 7.8, the water is more alkaline (basic) and under certain conditions can form
deposits in the piping and on pool surfaces. Sodium bisulfate and muriatic acid can
lower the pH when it gets too high.
Total Alkalinity – Ideal Reading: 80 – 120 ppm
Total alkalinity is the measure of the water’s ability to resist pH change. If the total
alkalinity is low, the pH will uctuate widely and be dicult to maintain. When total
alkalinity is high, the pH can become dicult to move and the water can be scale
forming.
Increasing Total Alkalinity – Sodium bicarbonate is the most eective and
popular chemical for increasing total alkalinity. Other chemicals that can raise the
total alkalinity are sodium carbonate (soda ash) and sodium sesquicarbonate.
Decreasing Total Alkalinity – When the total alkalinity is too high, you can
lower it by using muriatic acid or sodium bisulfate.
Troubleshooting Guide
Algae
Possible Cause Solution
Green, black or pink algae Treat with algaecide or superchlorinate and backwash.
Yellow/mustard algae Superchlorinate or treat with algaecide. Brush and
vacuum required. Backwash filter.
Corrosion
Possible Cause Solution
Low pH or hardness levels Increase levels to balance water.
High salt or TDS concentrations Add fresh water to dilute.
High chlorine or bromine levels for extended period
of time
Remove source of sanitizer and allow
level to drop. Add fresh water to dilute
if necessary.
Foam on the Water
Possible Cause Solution
Hardness too low Adjust up.
Some algaecides produce foam See manufacturer’s directions.
Source unknown Add defoamer.
Foul Odor
Possible Cause Solution
Foul chlorine odor: chloramine level is too high Shock to eliminate combined chlorine.
Rotten egg smell: excess metals present Add sequestering agent to reduce metal level.
If the problem is...
Optimal Levels
Test Ideal Reading
Free Chlorine – Pool
Free Chlorine – Hot Tub
Bromine
1.0 - 3.0 ppm
3.0 - 5.0 ppm
2.0 - 6.0 ppm
pH 7.2 - 7.8
Total Alkalinity 80 - 120 ppm
Cloudy Water
Possible Cause Solution
High pH, alkalinity, calcium or TDS can
contribute to cloudy water
Reduce levels or add fresh water to dilute.
Reduced filtration Check for blockage and clean traps.
Heavy bather load You may need to superchlorinate.
Unable to Maintain Free Chlorine
(or other primary sanitizer)
Possible Cause Solution
High TDS or pH Reduce levels or add fresh water to dilute.
High combined chlorine level Superchlorinate. May require double dose or more.
Sunlight dissipating chlorine Add cyanuric acid (stabilizer).
Heavy bather loads Increase sanitizer distribution.
High nitrate level increases chlorine demand Add fresh water to dilute.
Colored Water
Possible Cause Solution
Green: algae growth, low free chlorine, or high
nitrate level
Treat with algaecide and/or superchlorinate.
Reddish-brown: high iron or manganese Add sequestering (or chelating) agent.
Blue-green: high copper Add sequestering agent.
Scale Buildup
Possible Cause Solution
Calcium hardness level too high Add fresh water to dilute.
Total alkalinity, pH or TDS too high Adjust down or add fresh water to dilute.
Calcium hardness level too low; rough soft water
scale forms
Increase hardness level.
Metals present in high levels leading to buildup Add sequestering agent to reduce metal content.
Recurring Algae Growth
Possible Cause Solution
High nitrate level Add fresh water to dilute.
Insufficient free chlorine content Maintain an ideal level of free chlorine. Increase dos-
age if necessary.
Leaves, pollen or other organic waste
frequently enters pool system
Keep covered when possible during peak times of
contamination.
High phosphate levels You can add a phosphate control chemical.
Swimmer/bather Skin and Eye Irritation
Possible Cause Solution
High or low pH or alkalinity, or both Maintain pH and alkalinity at ideal levels for optimum
swimmer comfort.
High free chlorine level Remove source and allow level to drop. Add fresh
water to dilute if necessary.
High chloramine (combined chlorine) level Shock (superchlorinate) to remove combined chlorine.
AquaChek TruTest Gives No Free Chlorine Reading, but
DPD Kit Gives a High Free Chlorine Reading
Possible Cause Solution
Very high chloramine level (High combined chlorine
can cause DPD #1 kits to give false readings for free
chlorine.)
The free chlorine reading on your AquaChek meter is
correct! This is a common problem at the beginning
of the season. Test for total chlorine using AquaChek
®
Select
®
or AquaChek
®
7. You may need to shock
the water.
Green Hair
Possible Cause Solution
Elevated copper in the water Test copper level. Reduce copper level with a seques-
tering agent.
Extremely high free chlorine level (around
50 ppm) can bleach hair
If free chlorine level is excessive, keep
bathers out of water until level drops.
Cheap shampoo Find a new hairdresser.
www.AquaChek.com/Trutest
1-888-AquaChek
© 2008 HACH Company, Elkhart, Indiana
To ensure the protection provided by this equipment is not impaired, do not use this
equipment in any manner other than that, which is specied in this manual.
TROUBLE SHOOTING TIPS
IfTruTestreadingsarehigherorlowerthanexpected,
these differences are likely due to technique.
Important:
• Pressstartatthesametimeyou’redippingthe
test strip.
• Donotswishorswirltheteststripwhenyoudip.
Simply dip strip and remove.
• Donotslidetheteststripacrosstheglass.
• Makesurethepadsonthestriparefacingdown
when placed on the meter.
• Inbetweentests,thoroughlywipethemeterand
channel clean, especially if you are performing
several tests in succession.

Important! Retain!
**Instructions for use
**Tips/Warranty Information
www.AquaChek.com/Trutest
1-888-AQUACHEK
Instrucciones para la batería SP
Instale 2 baterías “AA” como se ilustra. La colocación incorrecta hará que el medidor no se encienda. USE SÓLO BATERIAS
ALCALINAS.
Instrucciones de uso
1. Pulse ON para encender. La unidad se activará al pulsar el botón. La pantalla indicará “On”
2. Pulse el botón ‘start’ para comenzar y sumerja simultáneamente una cinta de análisis. Retire la cinta inmediatamente y
sacúdala para quitarle el exceso de agua con un movimiento enérgico de muñeca.
3. Coloque la punta de la cinta de análisis hasta el fondo del canal, déjela plana con el lado almohadillado hacia abajo. NO
DESLICE LA TIRA DE ANÁLISIS POR EL VIDRIO.
4. Ahora espere los resultados. (No tenga la cinta sujetada.) Los resultados digitales para Cloro Libre, pH y Alcalinidad total
podrán leerse en cuestión de segundos. Controle el estado de sus resultados para cada uno de los parámetros. El estado
LO=Bajo, OK=Ideal, HI= Alto se muestra a la izquierda de cada valor digital.
Información de las características del producto
Función Memoria (#2, Botón del medio)
• Pulse el botón ‘memory’ para ver sus últimas nueve lecturas.
Mensajes de error
• Si aparece ER en lugar de un valor numérico: el resultado de la prueba está fuera de los valores. El parámetro es muy alto
o muy bajo para ser analizado con exactitud. Compruebe el nivel del estado, LO o HI para determinar cómo tratar su agua.
Repita la prueba tras el tratamiento.
• Si aparece ER2 en la pantalla: hay un error en la lectura de la tira. Asegúrese de seguir correctamente el procedimiento de la
prueba. Utilice sólo tiras para pruebas AquaChek TruTest. No pueden usarse otro tipo de tiras.
• Si aparece ER3 en la pantalla: no se ha colocado ninguna tira o está colocada de forma incorrecta. La posición correcta es con
la almohadilla boca abajo y con la tira bien encajada en la ranura, haciendo tope.
• Si aparece LO en la ubicación TA de la pantalla del medidor TruTest, la carga de las pilas está por debajo del límite aceptable.
Reemplácelas con pilas nuevas.
Uso de la tira para pruebas
• Las tiras para pruebas AquaChek TruTest están calibradas para funcionar sólo con el lector de tiras AquaChek TruTest.
• Cada tira es para un único uso. No sumerja dos veces las tiras. Sumerja la tira únicamente en zonas tranquilas de su piscina.
• Compruebe que siempre tiene tiras nuevas y guárdelas bien cerradas a temperatura ambiente. No agite ni revuelva la cinta
en el agua.
Mantenimiento
• Limpie la ranura para la tira con agua limpia y un algodoncito de vez en cuando.
Así evitará la acumulación.
• Nunca use químicos fuertes o materiales abrasivos en el medidor TruTest.
Almacenamiento
• Guarde el medidor fuera de la luz solar directa para protegerlo de los rayos UVA.
• Si no va a usar el medidor durante varios meses, quite las baterías.
• Este estuche es resistente al agua. Si el medidor cae al agua, quite y seque las baterías y el compartimento para las baterías
antes de su uso.
No tire las baterías a la basura. Por favor, recicle. En Europa, recicle el medidor siguiendo la directiva WEEE
de su país.
CONSEJOS PARA SOLUCIONAR PROBLEMAS
Si las lecturas del TruTest son más altas o más bajas que las esperadas, es posible que estas diferencias sean atribuibles a la
técnica.
Importante:
• Pulse ‘start’ al mismo tiempo que sumerge la cinta de análisis.
• No agite ni revuelva la cinta de análisis cuando la sumerge. Sencillamente sumérjala y retírela.
• No deslice la cinta de análisis por el vidrio.
• Asegúrese de que la almohadilla de la cinta está hacia abajo cuando la coloca en el medidor.
• Entre un análisis y otro, limpie completamente el medidor y el canal, especialmente cuando realice varios análisis
sucesivamente.
Istruzioni per il montaggio delle batterie IT
Installare 2 batterie tipo “AA” come indicato in gura. L’inserimento delle batterie in modo scorretto può impedire l’accensione
dell’analizzatore a causa della conformazione del vano batterie. UTILIZZARE ESCLUSIVAMENTE BATTERIE ALCALINE.
Istruzioni per l’uso
1. Premere Accensione. Accendere l’unità premendo il pulsante di accensione. Il display visualizzerà ‘On” (Acceso).
2. Premere il pulsante start immergendo nel contempo una striscia. Rimuovere immediatamente la striscia reattiva e
scrollare l’acqua in eccesso dalla striscia agitando quest’ultima con un semplice colpetto del polso.
3. Posizionare la punta della striscia nel retro del canale, disporre orizzontalmente, con il tampone sotto. NON FARE SCORRERE
LA STRISCIA REATTIVA LUNGO IL VETRO.
4. Ora, attendere i risultati. (Non reggere la striscia.) I risultati numerici per cloro libero, pH e alcalinità totale verranno tutti
visualizzati entro pochi secondi. Controllare lo stato dei risultati per ogni parametro. Lo stato LO= basso, OK= ideale, HI=
alto viene visualizzato a sinistra di ogni valore numerico.
Caratteristiche e informazioni sul prodotto
Funzione memoria (N. 2, Pulsante centrale)
• Premere il pulsante della memoria per visualizzare le ultime nove letture.
Messaggi di errore
• Il messaggio ER sullo schermo al posto del valore numerico signica che il risultato dell’analisi è fuori dall’intervallo
consentito. Il valore rilevato è pertanto troppo elevato
o troppo basso per essere considerato accurato. Vericare lo stato (LO o HI) per
determinare come trattare di conseguenza l’acqua. Ripetere l’analisi dopo il trattamento.
• Il messaggio ER2 sullo schermo indica un errore nella lettura della striscia reattiva. Assicurarsi di aver seguito correttamente
la procedura di analisi. Utilizzare solo strisce reattive per strumenti AquaChek TruTest. Non è possibile usare altri tipi di strisce.
• Se viene visualizzato ER3 sullo schermo signica che non è stata inserita alcuna striscia o che la striscia non è posizionata
correttamente. La posizione corretta
è con i tamponi di analisi rivolti verso il basso nella fessura e con il tampone superiore allineato con la parte superiore.
• Se solo LO compare nella posizione TA sul display del misuratore TruTest, ciò signica che la tensione della batteria è scesa
sotto il limite consentito. Sostituire con batterie nuove.
U
so della striscia reattiva
• Le strisce reattive AquaChek TruTest sono calibrate per essere usate unicamente con l’analizzatore AquaChek TruTest.
• Ogni striscia è monouso. Non reimmergere la striscia. La striscia va immersa solo in zone calme della piscina o della vasca
termale.
• Conservare correttamente il prodotto – sigillare con il tappo dopo ogni uso e conservare
a temperatura ambiente. Non girare né ruotare la striscia nell’acqua.
Manutenzione
• Pulire di quando in quando la fessura per strisce reattive con acqua dolce e un batuolo di cotone. Ciò impedirà l’eventuale
accumulo di sostanze.
• Evitare il contatto dell’analizzatore TruTest con sostanze chimiche aggressive
e/o materiali abrasivi.
Conservazione
• Proteggere l’analizzatore dall’esposizione ai raggi solari diretti per evitare danni dovuti
a raggi UV.
• Nel caso in cui l’analizzatore non venga usato per diversi mesi, rimuovere le batterie.
• La scatola è impermeabile Se l’analizzatore cade in acqua, rimuovere e asciugare le batterie e il relativo vano prima dell’uso.
Non smaltire le batterie come normali riuti urbani, ma riciclarle. In Europa, riciclare l’analizzatore in conformità alla direttiva
WEEE
in vigore nel proprio paese.
CONSIGLI PER LA RISOLUZIONE DI PROBLEMI
Se i risultati TruTest sono più elevati o più bassi del previsto, è probabile che tali dierenze siano causate dalla tecnica impiegata.
Importante:
• Premere start mentre si sta immergendo la striscia.
• Non girare né ruotare la striscia reattiva durante l’immersione. Immergere semplicemente la striscia e quindi rimuoverla.
• Non fare scorrere la striscia reattiva lungo il vetro.
• Accertarsi che i tamponi sulla striscia siano rivolti verso il basso quando viene posizionata sul misuratore.
• Tra un test e l’altro, pulire accuratamente il misuratore e il canale, in particolar modo se si stanno eseguendo diversi test
l’uno dopo l’altro.
Instalação das pilhas PT
Instale 2 pilhas “AA” conforme o diagrama. A inserção incorreta impedirá que
o medidor seja ligado devido ao desenho do compartimento das pilhas. USE SOMENTE PILHAS ALCALINAS.
Instruções de uso
1. Premir o botão ON (ligar). LIGAR a unidade premindo o botão de ligar/desligar a alimentação eléctrica. O visor exibe a
mensagem “Ligado”.
2. Premir o botão Start (iniciar) e mergulhar uma tira ao mesmo tempo. Retirar imediatamente a tira de análise e sacudir a
água em excesso da tira com um simples movimento do pulso.
3. Colocar a ponta da tira novamente na extremidade posterior do canal, espalmada na horizontal, com a parte almofadada
para baixo. NÃO FAZER DESLIZAR A TIRA DE ANÁLISE AO LONGO DO VIDRO.
4. Agora, basta aguardar pelos resultados. (Não segurar a tira.) Os resultados digitais para Cloro Livre, pH e Alcalinidade Total
irão aparecer em conjunto, no espaço de segundos. Vericar o estado dos resultados para cada parâmetro. O estado LO=Low
(Baixo), OK=Ideal, HI= High (Alto) é exibido à esquerda de cada valor digital.
Funcionalidades e informações do produto
Função de Memória (#2, Botão Central)
• Premir o botão de memória para visualizar as últimas nove leituras.
Mensagens de erro
• Se for exibido ER no lugar de um valor numérico – o resultado do teste está fora do intervalo. O parâmetro é muito alto ou
muito baixo para ser analisado com precisão. Observe o nível do status, LO (baixo) ou HI (alto) para determinar como fazer
o tratamento da água. Refaça o teste após o tratamento.
• Se for exibido ER2 na tela – há um erro na leitura da ta de teste. Certique-se de que está seguindo o procedimento de
teste corretamente. Use somente tas de teste para instrumentos AquaChek TruTest. Nenhuma outra ta de teste pode ser
usada.
• Se for exibido ER3 na tela – não há ta de teste na abertura ou a ta de teste não está posicionada corretamente. A posição
correta é aquela em que a ta está voltada para baixo na abertura com a sua parte superior coincidindo com a parte superior
da abertura.
• Se aparecer apenas LO na localização TA do visor do TruTest Meter, tal indica que a voltagem das pilhas desceu abaixo do
limite permitido. Substituir por pilhas novas.
Uso da ta de teste
• As tas de teste AquaChek TruTest são calibradas para funcionar somente com
o leitor de ta de teste AquaChek TruTest.
• Cada ta deve ser usada somente uma única vez. Não mergulhe a ta mais de uma vez. Mergulhe a ta somente em áreas
calmas de sua piscina ou spa.
• Certique-se de ter um suprimento em condições de uso – mantenha rmemente tampado entre usos e armazene à
temperatura ambiente. Não agitar nem rodopiar a tira em água.
Manutenção
• Limpe ocasionalmente a abertura para tas de teste com água potável e uma haste de algodão. Isto evitará qualquer
acúmulo de impurezas.
• Nunca use produtos químicos fortes e/ou materiais abrasivos no medidor TruTest.
Armazenamento
• Armazene o medidor em lugar longe da luz solar direta para protegê-lo dos danos causados pela radiação UV.
• Se o medidor não vier a ser usado por vários meses, remova as pilhas.
• Este estojo é resistente à água. Se o medidor cair na água, remova e seque as pilhas e o compartilmento de
pilhas antes do uso.
Não jogue as pilhas no lixo. Recicle. Na Europa, recicle o medidor de acordo com a diretriz de descarte de equipamento eletrônico
e elétrico (WEEE
) de seu país.
SUGESTÕES PARA RESOLUÇÕES DE PROBLEMAS
Se as leituras TruTest forem mais altas ou mais baixas do que o previsto, provavelmente tais diferenças devem-se à técnica.
Importante:
• Premir Iniciar, ao mesmo tempo que se mergulha a tira de análise..
• Não agitar nem rodopiar a tira ao mergulhá-la. Apenas mergulhar e retirar a tira.
• Não fazer deslizar a tira de análise ao longo do vidro.
• Certicar-se de que as partes almofadadas da tira estão voltadas para baixo, quando são colocadas sobre o dispositivo
de medição.
• Entre análises, limpar muito bem o dispositivo de medição e o canal, especialmente se estiver a realizar diversas
análises em série.
Einlegen/Wechseln der Batterien DE
Legen Sie zwei LR6-Batteries (Mignonzellen) ein wie in der Abbildung gezeigt. Bei falsch eingelegten Batterien lässt sich das
Messgerät bauartbedingt nicht einschalten. VERWENDEN SIE AUSSCHLIESSLICH ALKALIBATTERIEN.
Bedienungsanweisungen
1. Drücken Sie auf Power ON. Schalten Sie die Einheit EIN, indem Sie den Ein-/Ausschalter drücken. Auf dem Display wird
“ON“ eingeblendet.
2. Drücken Sie auf die Start-Taste und tauchen Sie gleichzeitig den Teststreifen ein. Entnehmen Sie sofort den Teststreifen und
schütteln Sie überschüssiges Wasser mit einer schnellen Bewegung des Handgelenks vom Teststreifen ab.
3. Legen Sie die Spitze des Teststreifens mit der Auageseite (Pads) ach nach unten in das hintere Ende des Kanals. SCHIEBEN
SIE DEN TESTSTREIFEN NICHT ÜBER DAS GLAS.
4. Warten Sie nun auf das Ergebnis. (Halten Sie dabei den Teststreifen nicht fest.) Die digitalen Ergebnisse des freien Chlors, des
pH-Werts und der Gesamtalkalität werden sekundenschnell angezeigt. Überprüfen Sie den Status Ihrer Ergebnisse für jeden
Parameter. Der Status LO=niedrig, OK=ideal, HI=hoch wird links neben jedem digitalen Wert angezeigt.
Produktmerkmale und Informationen
Memory-Funktion (#2, mittlere Taste)
• Drücken Sie auf die Memory-Taste, um die letzten neun Messungen anzuzeigen.
Fehlermeldungen
• Falls anstelle eines Wertes „ER” erscheint, liegt das Testergebnis außerhalb des Bereichs Der Parameter ist zu niedrig oder
zu hoch für eine genaue Analyse. Sie können am Status LO oder HI ablesen, wie das Wasser aufbereitet werden muss.
Wiederholen Sie den Test nach der Aufbereitung.
• Die Anzeige „ER2” bedeutet, dass ein Fehler am Teststreifen vorlag. Stellen Sie sicher, dass der Test korrekt ausgeführt wurde.
Verwenden Sie ausschließlich AquaChek TruTest-Teststreifen. Andere Teststreifen können nicht verwendet werden.
• Die Anzeige „ER3” erscheint, wenn kein Teststreifen eingelegt war oder er in der falsche Position eingelegt wurde. Der
Streifen muss so mit dem Feld nach unten in das Messgerät eingelegt werden, dass das oberste Feld oben mit dem Schlitz
abschließt.
• Falls nur LO in der TA-Anzeige des TruTest-Messgeräts erscheint, ist die Batteriespannung unter den zulässigen Grenzwert
abgesunken. Wechseln Sie die Batterien durch neue aus.
Einsatz von Teststreifen
• AquaChek TruTest-Teststreifen sind ab Werk so kalibriert, dass sie nur mit AquaChek TruTest-Messgeräten eingesetzt werden
können.
• Teststreifen können nur einmal gebraucht werden. Tauchen Sie den Teststreifen nicht wieder ein. Tauchen Sie den Teststreifen
in einem ruhigen Bereich Ihres Pools oder Bades ein.
• Achten Sie auf einen Vorrat frischer Teststreifen. Halten Sie den Deckel fest verschlossen und bewahren Sie die Teststreifen bei
Zimmertemperatur auf. Schwenken oder wirbeln Sie den Teststreifen nicht im Wasser.
Wartung
• Wischen Sie den Teststreifenschlitz gelegentlich mit Wasser und einem Wattestäbchen ab. Damit verhindern Sie, dass sich
Schmutz absetzt.
• Verwenden Sie nie aggressive Chemikalien/oder scheuernde Materialien zur Reinigung des TruTest-Messgeräts.
Lagerung
• Halten Sie das Messgerät bei der Lagerung von direkter Sonneneinstrahlung fern, um es vor Schäden durch UV-Strahlung zu
schützen.
• Wenn Sie das Messgerät für einige Monate nicht benötigen, nehmen Sie die Batterien aus dem Messgerät heraus.
• Das Material ist wasserfest. Wenn das Messgerät in das Wasser fällt, entfernen und trocknen Sie die Batterien und das
Batteriefach, bevor Sie das Messgerät wieder verwenden.
Werfen Sie Batterien nicht in den Hausmüll. Bringen Sie die Batterien zur Wiederverwertung. Beachten Sie bei der Entsorgung des
Gerätes in Europa die WEEE-Richtlinie
(Richtlinie über Elektro- und Elektronik-Altgeräte).
HINWEISE ZUR FEHLERSUCHE
Falls die TruTest-Messungen höher oder niedriger als erwartet sind, so ist das wahrscheinlich auf die Verfahrenstechnik
zurückzuführen.
Wichtig:
• Drücken Sie gleichzeitig auf die Starttaste, wenn Sie den Teststreifen eintauchen.
• Schwenken oder wirbeln Sie den Teststreifen nicht beim Eintauchen. Tauchen Sie den Teststreifen einfach ein und nehmen
Sie ihn wieder heraus.
• Schieben Sie den Teststreifen nicht über das Glas.
• Stellen Sie sicher, dass die Pads auf dem Teststreifen nach unten zeigen, wenn dieser auf das Messgerät gelegt wird.
• Wischen Sie das Messgerät und den Kanal zwischen den Tests sorgfältig ab, vor allem, wenn Sie nacheinander mehrere Tests
durchführen.
Batterij-instructies NL
Plaats 2 “AA”-batterijen volgens het diagram. Als ze verkeerd worden geplaatst, kan de meter door het ontwerp van het
batterijcompartiment niet worden ingeschakeld. GEBRUIK ALLEEN ALKALINEBATTERIJEN.
Gebruiksinstructies
1. Druk op de Aan/uit-knop Schakel de unit aan door indrukken van de Aan/uit-knop. Het displaystaat op ‘Aan”
2. Druk op de startknop en dip tegelijkertijd een strip. Verwijder de teststrip direct en schud het teveel aan water van de
strip met een eenvoudig schudbeweging van de pols.
3. Plaats de tip van de strip in het achtereinde van het kanaal, leg de strip plat, pad met de zijkant omlaag. SCHUIF DE
TESTSTRIP NIET OVER HET GLAS.
4. Wacht op de resultaten. (Houd de strip niet vast.) Digitale resultaten voor vrije chlorine, pH, en totale alkaliniteit verschijnen
samen binnen enkele seconden. Controleer de status van uw resultaten voor elke parameter. De status LO=Laag, OK=Ideaal,
HI= Hoog wordt getoond links van elke digitale waarde.
Productmogelijkheden en informatie
Geheugenfunctie (#2, Middelste knop)
• Druk op de geheugenknop om uw laatste negen aezingen te bekijken.
Foutberichten
• Als ER in plaats van een numerieke waarde wordt weergegeven, valt het testresultaat buiten het bereik. De parameter is te
hoog of te laag om nauwkeurig geanalyseerd te kunnen worden. Let op het statusniveau, LO of HI, om te bepalen hoe u het
water moet behandelen. Voer de test na de behandeling opnieuw uit.
• Als ER2 op het display verschijnt, is er een fout opgetreden bij het lezen van de teststrip. Zorg dat u de testprocedure correct
volgt. Gebruik alleen AquaChek
TruTest-instrumentteststrips. Er kunnen geen andere teststrips worden gebruikt.
• Als ER3 op het display verschijnt, is er geen teststrip geplaatst of is de teststrip in de
verkeerde positie geplaatst. De juiste positie is met de bekleding van de teststrip omlaag in de sleuf met de bovenste
bekleding over de hele lengte tegen de bovenkant.
• Als alleen LO verschijnt in de TA-locatie op het TruTest Meter-display, is de batterijspanning beneden de toegestane grens
gekomen. Vervang de batterijen.
Gebruik van teststrips
• De AquaChek TruTest-teststrips zijn alleen gekalibreerd voor gebruik met de AquaChek TruTest-teststriplezer.
• Elke strip mag maar eenmaal worden gebruikt. Dompel de strip niet opnieuw onder. Dompel de strip alleen onder in rustige
gedeelten van uw zwem- of bubbelbad.
• Houd de teststrips vers. Zorg dat de dop na elk gebruik stevig erop zit en bewaar de teststrips op kamertemperatuur. Sla de
strip niet af en draai er niet mee in water.
Onderhoud
• Reinig de teststripgleuf regelmatig met schoon water en een katoenen doekje. Hiermee voorkomt u de ophoping van vuil.
• Maak de TruTest-meter nooit schoon met krassende chemicaliën en/of schurende middelen.
Opslag
• Bewaar de meter buiten direct zonlicht om te voorkomen dat de meter door UV-stralen wordt beschadigd.
• Als u de meter een aantal maanden niet gaat gebruiken, moet u de batterijen verwijderen.
• Dit is een waterbestendige kast. Als de meter in het water is gevallen, moet u de batterijen verwijderen en de batterijen en
het batterijcompartiment laten drogen voordat u het apparaat weer gebruikt.
Gooi batterijen niet in de afvalbak. Laat ze recyclen. Laat in Europa de meter recyclen volgens de EEE-richtlijn
die in uw land
van toepassing is.
TIPS VOOR PROBLEEMOPLOSSINGEN
Als de TruTest-aezingen hoger of lager zijn dan verwacht, zijn deze verschillen waarschijnlijk te wijten aan de techniek.
Belangrijk:
• Druk Start tegelijkertijd in met het dippen van de teststrip.
• Sla de strip niet af en draai er niet mee in water, wanneer u dipt. Gewoon de strip dippen en verwijderen.
• SCHUIF DE TESTSTRIP NIET OVER HET GLAS.
• Overtuig u ervan dat de pads op de strip omlaag wijzen wanneer deze op de meter geplaatst wordt..
• Wis de meter en het kanaal grondig schoon tussen de testen, vooral indien u verscheidene testen na elkaar uitvoert.
Batteriinstruktioner DK
Installer 2 AA-batterier i overensstemmelse med diagrammet. Hvis batterierne indsættes forkert, kan meteret ikke tændes på
grund af batterihusets design. BRUG KUN ALKALINEBATTERIER.
Brugsvejledning
1. Tryk på tænd-/slukknappen. Tænd for enheden ved at trykke på tænd/slukknappen Der vises ”On” på displayet.
2. Tryk på startknappen og dyp en strimmel samtidig. Tag teststrimlen ud straks, og slå overskydende vand fra den, ligesom når
man slår vand af hænderne.
3. Placer spidsen af strimlen bag i kanalen, adt, og med pudesiden nedad. FØR IKKE TESTSTRIMLEN HEN AD GLASSET.
4. Vent nu på resultaterne. (Hold ikke ved strimlen). Der fremkommer digital visning af resultaterne for fri klorin, pH og
total alkalitet samtidig inden for sekunder. Tjek status for dine resultater for hver parameter. Statusangivelsen LO=Lavt,
OK=Ideelt, HI=Højt vises til venstre for hver digitale værdi.
Produktegenskaber og -information
Hukommelsesfunktion (nr. 2, midterste knap)
• Tryk på hukommelsesknappen for at se dine sidste ni visninger.
Fejlmeddelelser
• Hvis ER vises i stedet for en talværdi, er testresultatet uden for området. Parameteren
er enten for høj eller for lav til at kunne analyseres korrekt. Læg mærke til statusniveauet, LO eller HI, for at afgøre, hvordan
vandet skal behandles. Test igen efter behandlingen.
• Hvis ER2 vises på skærmen, er der en fejl i aæsningen af teststrimlen. Sørg for at følge testproceduren korrekt. Brug kun
AquaChek TruTest instrumentteststrimler. Der kan ikke bruges nogen andre teststrimler.
• Hvis ER3 vises på skærmen, er der ikke nogen strimmel til stede, eller teststrimlen er placeret forkert. Den korrekte position
er med testpudens forside nedad i slotten med den øverste pude hele vejen til toppen.
• Hvis der kun vises LO i TA-området på TruTest måleinstrumentet, er batteristanden under den tilladelige grænse.
Sæt nye batterier i.
Anvendelse af teststrimlen
• AquaChek TruTest teststrimler er kalibreret til kun at fungere med AquaChek TruTest teststrimmellæseren.
• Hver strimmel kan kun bruges én gang. Dyp ikke strimlen igen. Dyp kun strimlen
i rolige områder af poolen eller spabadet.
• Sørg for at have friske forsyninger – sørg for, at kapslen sidder tæt mellem anvendelserne, og opbevar strimlen ved
stuetemperatur. Strimlen må ikke svippes eller svinges rundt i vand.
Vedligeholdelse
• Tør ind imellem teststrimmelslotten af med ferskvand og bomuldsvat. Dette forhindrer, at der dannes ansamlinger.
• Brug ikke skrappe og/eller slibende materialer på TruTest-meteret.
Opbevaring
• Opbevar meteret væk fra direkte sollys for at beskytte meteret mod UV-skader.
• Hvis meteret ikke bruges i ere måneder, skal batterierne ernes.
• Materialet er vandfast. Hvis meteret falder ned i vandet, skal batterierne og batterirummet ernes og tørres, inden meteret
bruges igen.
Bortskaf ikke batterier sammen med almindeligt husholdningsaald. Sørg for at indelevere dem til genanvendelse. I Europa skal
meteret genanvendes i overensstemmelse med det relevante lands implementering af WEEE-direktivet
.
TIP TIL FEJLFINDING
Hvis visningerne på TruTest måleinstrumentet er højere eller lavere end forventet, har sådanne dierencer højst sandsynligt
tekniske årsager.
Vigtigt:
• Tryk på start samtidig med, at du dypper teststrimlen.
• Du må ikke svippe eller svinge strimlen rundt, når den dyppes. Strimlen dyppes blot og ernes igen.
• Før ikke teststrimlen hen ad glasset.
• Sørg for, at puderne på strimlen vender nedad, når strimlen anbringes i måleinstrumentet.
• Efter hver test skal instrumentet og kanalen tørres af, så de(t) bliver ren(t), især hvis du udfører ere tests efter hinanden.
Product Features and Information
Note: Read this instruction manual carefully and keep it available for future reference.
1. Press Power ON
Turn Unit ON by pressing power button. Display will read ‘On”
3. Place tip of strip in back
end of channel, lay at, pad
side down.
DO NOT SLIDE THE TEST STRIP
ACROSS THE GLASS
2. Press start button and dip
a strip at the same time.
Remove test strip immediately and shake excess water
from strip with a simple ick of the wrist.
4. Now Wait for Results. (Do Not Hold onto Strip)
Digital Results for Free Chlorine, pH, and Total Alkalinity will appear together in seconds.
Check the status of your results for each parameter. The status LO=Low, OK=Ideal,
HI= High is displayed to the left of each digital value.
BATTERY INSTRUCTIONS
Install 2 “AA” batteries
per the diagram.
Incorrect insertion will
prevent the meter from
turning on due to the
design of the battery
housing. USE ONLY
ALKALINE BATTERIES.
Use of any other type
of battery may damage
the meter and voids the
warranty.
This symbol, if noted on the instrument, references the instruction manual for
operational and/or safety information.
Product Safety
UL 61010-1 (ETL Listing)
CSA C22.2 No. 61010-1 (ETLc Certication)
Immunity
EN 61326;1998 (EMC Requirements for Electrical Equipment for Measurement Control and Laboratory Use)
per 2004/108/EC EMC: Supporting test records by Hach Company, certied by Hach Company.
Emissions
Per 2004/108/EC EMC: EN 61326:1998 (Electrical Equipment for Measurement control and laboratory use-
EMC requirements) Class “B” emission limits. Supporting test records by Hach Company.
Standards include:
EN 55011 (CISPR 11). Class “B” emission limits
WEEE
Electrical equipment marked with this symbol may not be disposed of in European public disposal systems,
in conformity with the European local and national regulations (EU Directive 2002/96/EC). European electrical
equipment users must now return old or end-of life equipment to the producer for disposal at no charge to the user.
PRECAUTIONARY LABELS
Read all labels and tags attached the instrument. Personal injury or damage to the instrument could occur if not
observed.
MAINTENANCE
• Wipetheteststripslotwithfreshwaterandacottonswaboccasionally.Thiswillpreventanybuildup.
• Neveruseharshchemicalsand/orabrasivematerialsontheTruTestmeter.
STORAGE
• StorethemeteroutofdirectsunlighttoprotectthemeterfromUVdamage.
• Ifmeterwillnotbeusedforseveralmonths,removethebatteries.
• Thisisawaterresistantcase.Ifthemeterfallsintothewater,removeanddrythebatteriesand
battery compartment before use.
Do not dispose of batteries in the trash. Please recycle. In Europe, recycle the meter according to
WEEE
directive in your country.
SPECIFICATIONS:
•Intendedforindoor/outdooruse
•Operatingtemperaturerange:15-40°C
•Batterylife:atleast4months
Range of Results:
Free Chlorine: 0-15 ppm
pH: 6.1-8.8
Total Alkalinity: 0-300 ppm
The AquaChek TruTest Digital Test Strip reader is intended to provide a convenient alternative to visual color
matching, with the ease of a digital display. The meter and test strips can achieve representative readings
of pool and hot tub water conditions when following all directions and using properly stored and handled,
unexpired test strips.
In general, results are comparable to other visual testing methods obtained by a person with good
colormatchingability.WhenthewatersamplebeingtestedisnearoroutsideoftheRangeofResults
boundaries, results may not reect acual water conditions. Consult a pool or hot tub professional when
unusual water conditions, chemisty problems or questionable results occur.
After testing, consider these actions:
•Comparetheresultwiththewaterparameterrangerecommendedperequipmentorchemical
program
•Treatthewaterperchemicalmanufacturer’sinstructions
•Re-testforconrmationoftheresult
•Consultwithapoolorhottubprofessional
For more information on operation of the product, tips on water balance, or to seek customer or technical
support, please visit the website, www.aquachek.com.
MEMORY FUNCTION (#2, MIDDLE BUTTON)
Press memory button to view your last nine readings.
ERROR MESSAGES
• IfERappearsinplaceofanumericalvalue–thetest
result is out of range. The parameter is either too high
or too low to be accurately analyzed. Note the status
level, LO or HI to determine how to treat your water.
Re-test after treatment.
• IfER2appearsonthescreen–thereisanerrorin
reading the test strip. Ensure that you are following the
test procedure correctly. Use only AquaChek TruTest
instrumental test strips. No other test strip can be
used.
• IfER3appearsonthescreen–nostripisinplace
or the test strip is positioned incorrectly. The correct
position is with the test pads face down in the slot with
the top pad all the way to the top.
• IfonlyLOappearsintheTAlocationontheTruTest
Meter display, the battery voltage has dropped below
the permissible limit. Replace with new batteries.
Test Strip Use
• TheAquaChekTruTestteststripsarecalibratedtowork
only with the AquaChek TruTest test strip reader.
• Eachstripmayonlybeusedonce.Donotre-dipthe
strip. Only dip the strip in calm areas of your pool or
spa. Do not swish or swirl strip in water.
• Ensureyouhaveafreshsupply–keepcapontight
between uses and store at
room temperature.
Raising pH with Soda Ash (Sodium Carbonate)
(When pH is under 7.2, add the amount of soda ash indicated below, then retest)
Aumento de pH con carbonato sódico
(Cuando el pH es inferior a 7,2 agregue la cantidad de carbonato sódico indicada a continuación y repita la prueba)
pH
Level
Pool Volume
1,000 gal.
3.8 kL
5,000 gal.
19 kL
10,000 gal.
38 kL
15,000 gal.
57 kL
25,000 gal.
95 kL
7.0 - 7.2
3/4 oz.
21.3 g
4 oz.
113 g
8 oz.
227 g
12 oz.
340 g
1 1/4 lbs.
568 g
6.7 - 7.0
1 1/4 oz.
35.4 g
6 oz.
170 g
12 oz.
340 g
1 lb.
454 g
2 lbs.
908 g
Under 6.7
1 1/2 oz.
42.5 g
8 oz.
227 g
1 lb.
454 g
1 1/2 lbs.
681 g
2 1/2 lbs.
1.1 kg
Lowering pH using Dry Acid (Sodium Bisulfate)
(When pH is over 7.8, add the amount of acid indicated below, then retest)
Disminución de pH con ácido seco (bisulfato de sodio)
(Cuando el pH es superior a 7,8 agregue la cantidad de ácido indicada a continuación y repita la prueba)
pH
Level
Pool Volume
1,000 gal.
3.8 kL
5,000 gal.
19 kL
10,000 gal.
38 kL
15,000 gal.
57 kL
25,000 gal.
95 kL
7.8 - 8.0
0.1 lb.
45 g
0.3 lb.
136 g
0.6 lb.
272 g
0.9 lb.
408 g
1 1/2 lbs.
681 g
8.0 - 8.4
0.2 lb.
91 g
0.5 lb.
227 g
1 lb.
454 g
1 1/2 lbs.
681 g
2 1/2 lbs.
1.1 kg
Over 8.4
0.3 lb.
136 g
0.8 lb.
363 g
1 1/2 lbs.
681 g
2.3 lbs.
1 kg
4 lbs.
1.8 kg
Raising Alkalinity With Sodium Bicarbonate
Aumento de la alcalinidad con bicarbonato de sodio
Increase in
Total Alkalin-
ity in ppm
Pool Volume
1,000 gal.
3.8 kL
5,000 gal.
19 kL
10,000 gal.
38 kL
15,000 gal.
57 kL
25,000 gal.
95 kL
10
2 1/2 oz.
62 g
12 oz.
340 g
1 1/2 lbs.
681 g
2 1/4 lbs.
1 kg
3 3/4 lbs.
1.7 kg
20
4 3/4 oz.
135 g
1 1/2 lbs.
681 g
3 lbs.
1.4 kg
4 1/2 lbs.
2 kg
7 1/2 lbs.
3.4 kg
50
12 oz.
340 g
3 3/4 lbs.
1.7 kg
7 1/2 lbs.
3.4 kg
11 1/4 lbs.
5 kg
18 3/4 lbs.
8.5 kg
Lowering Alkalinity With Dry Acid (Sodium Bisulfate)
Disminución de la alcalinidad con ácido seco (bisulfato de sodio)
Decrease in
Total Alkalin-
ity in ppm
Pool Volume
1,000 gal.
3.8 kL
5,000 gal.
19 kL
10,000 gal.
38 kL
15,000 gal.
57 kL
25,000 gal.
95 kL
10
2 1/2 oz.
62 g
12 3/4 oz.
361 g
1 1/2 lbs.
681 g
2 1/2 lbs.
1.1 kg
4 lbs.
1.8 kg
20
5 oz.
142 g
1 1/2 lbs.
681 g
3 1/4 lbs.
1.5 kg
4 3/4 lbs.
2.2 kg
8 lbs.
3.6 kg
50
12 3/4 oz.
361 g
4 lbs.
1.8 kg
8 lbs.
3.6 kg
12 lbs.
5.4 kg
20 3/4 lbs.
9.4 kg
Superchlorination Chart – Pools
(Amount Needed to Introduce 10 ppm)
Tabla de supercloración – Piscinas
(Cantidad necesaria para incorporar 10 ppm)
Type
of
Chlorine
Pool Volume
5,000 gal.
19 kL
10,000 gal.
38 kL
15,000 gal.
57 kL
25,000 gal.
95 kL
Sodium
Hypochlorite
1 3/4 qts.
1.7 L
3 1/4 qts.
3.0 L
1 1/4 gal.
4.7 L
2 gal.
7.6 L
Dichlor
11 oz.
311 g
1 1/3 lbs.
605 g
2 lbs.
908 g
3 1/3 lbs.
1.5 kg
Calcium
Hypochlorite
10 oz.
284 g
1 1/4 lbs.
568 g
2 lbs.
908 g
3 1/4 lbs.
1.5 kg
Superchlorination Chart – Spas
(Amount Needed to Introduce 10 ppm)
Tabla de supercloración – Spa
(Cantidad necesaria para incorporar 10 ppm)
Type
of
Chlorine
Spa Volume
250 gal.
948 L
500 gal.
1.9 kL
Dichlor
2/3 oz.
18.9 g
1 1/4 oz.
35.1 g
Sodium
Hypochlorite
2 1/2 oz.
74 mL
5 oz.
148 mL
Lithium
Hypochlorite
1 oz.
28.3 g
2 oz.
56.7 g
Chlorination Chart – Spas
(Amount Needed to Introduce 4 ppm)
Tabla de Cloración – Spa
(Cantidad necesaria para incorporar 4 ppm)
Type
of
Chlorine
Spa Volume
250 gal.
948 L
500 gal.
1.9 kL
Dichlor
1/4 oz.
7.0 g
1/2 oz.
14.2 g
Sodium
Hypochlorite
1 oz.
29.6 mL
2 oz.
59.1 mL
Lithium
Hypochlorite
1/2 oz.
14.2 g
1 oz.
28.3 g
Chlorination Chart – Pools
(Amount Needed to Introduce 1 ppm)
Tabla de Cloración – Piscinas
(Cantidad necesaria para incorporar 1 ppm)
Type
of
Chlorine
Pool Volume
5,000 gal.
19 kL
10,000 gal.
38 kL
15,000 gal.
57 kL
25,000 gal.
95 kL
Sodium
Hypochlorite
5 1/2 oz.
163 mL
10 1/2 oz.
310 mL
1/2 qt.
473 mL
3/4 qt.
710 mL
Dichlor
1 oz.
28.3 g
2 1/4 oz.
63.8 g
3 1/4 oz.
92.1 g
5 1/2 oz.
149 g
Calcium
Hypochlorite
1 oz.
28.3 g
2 oz.
56.7 g
3 oz.
85 g
5 oz.
142 g
Trichlor
3/4 oz.
21.2 g
1 1/2 oz.
42.5 g
2 1/4 oz.
63.8 g
3 3/4 oz.
106 g
*WARNING: Exercise extreme caution when handling chemicals.
• Do not add chemicals when swimmers are in the water.
• Never store acids and chlorine compounds next to each other.
• Never mix chemicals together; add chemicals to the water one at a time.
• Handle acid very carefully.
• Wear protective eyewear and keep material away from children.
• Always follow the chemical manufacturer’s directions.
Analyzing Test Results
and Adjusting Pool Water
To keep your pool at its best, test at each end a minimum of
twice a week, and test your spa before each use.
Free Chlorine – Ideal Reading: Pool 1.0 – 3.0 ppm; Spa
3.0 – 5.0 ppm
To maintain a clean and clear pool, keep the free chlorine level in the right range.
Free chlorine is the portion of the total chlorine remaining in chlorinated water that
has not reacted to contaminants – and is “free” to go to work to kill bacteria and other
contaminants.
Shock Treatment – Contrary to popular belief, a strong chlorine smell is not
an indication of too much chlorine in the pool but actually a red ag that a super dose
of chlorine may be required to correct the problem. Shock treatment adds a larger-
than-normal amount of oxidizing chemicals to pool water. The ideal frequency for a
super dose is every week, depending on use and water temperature.
Bromine – Ideal Reading: 2.0 – 6.0 ppm
To obtain bromine result, multiply free chlorine value by 2.2. Bromine is a popular
pool and spa sanitizer often used instead of chlorine. Environmental conditions
(leaves, rain) and usage (how many folks are enjoying the pool or spa) will add
contaminants in the water. Those contaminants will decrease the bromine existing in
the water. Be sure to test the bromine before entering the water. Even if the system
is dormant or not in use, you should test the bromine level at least weekly to prevent
any buildup of bacteria or algae.
pH – Ideal Reading: 7.2 – 7.8
Losing control of pH in the water unleashes a whole series of problems. The pH can
damage metal equipment and plaster walls if it gets out of balance. A swimmer’s
body has a pH between 7.2 and 7.8 so, if the pool water isn’t kept in this range,
swimmers will start to feel irritation of their eyes and skin. Finally, the pH must stay
in the proper range to maximize the eciency of chlorine.
If the pH is low, below 7.2, the water is too acidic and it can damage the piping and
pool surfaces under certain conditions. You can use sodium carbonate (soda ash)
to increase pH when levels are too low. Other chemicals that can raise the pH are
sodium bicarbonate and sodium sesquicarbonate.
See warnings for handling chemicals* ppm=mg/L
Above 7.8, the water is more alkaline (basic) and under certain conditions can form
deposits in the piping and on pool surfaces. Sodium bisulfate and muriatic acid can
lower the pH when it gets too high.
Total Alkalinity – Ideal Reading: 80 – 120 ppm
Total alkalinity is the measure of the water’s ability to resist pH change. If the total
alkalinity is low, the pH will uctuate widely and be dicult to maintain. When total
alkalinity is high, the pH can become dicult to move and the water can be scale
forming.
Increasing Total Alkalinity – Sodium bicarbonate is the most eective and
popular chemical for increasing total alkalinity. Other chemicals that can raise the
total alkalinity are sodium carbonate (soda ash) and sodium sesquicarbonate.
Decreasing Total Alkalinity – When the total alkalinity is too high, you can
lower it by using muriatic acid or sodium bisulfate.
Troubleshooting Guide
Algae
Possible Cause Solution
Green, black or pink algae Treat with algaecide or superchlorinate and backwash.
Yellow/mustard algae Superchlorinate or treat with algaecide. Brush and
vacuum required. Backwash filter.
Corrosion
Possible Cause Solution
Low pH or hardness levels Increase levels to balance water.
High salt or TDS concentrations Add fresh water to dilute.
High chlorine or bromine levels for extended period
of time
Remove source of sanitizer and allow
level to drop. Add fresh water to dilute
if necessary.
Foam on the Water
Possible Cause Solution
Hardness too low Adjust up.
Some algaecides produce foam See manufacturer’s directions.
Source unknown Add defoamer.
Foul Odor
Possible Cause Solution
Foul chlorine odor: chloramine level is too high Shock to eliminate combined chlorine.
Rotten egg smell: excess metals present Add sequestering agent to reduce metal level.
If the problem is...
Optimal Levels
Test Ideal Reading
Free Chlorine – Pool
Free Chlorine – Hot Tub
Bromine
1.0 - 3.0 ppm
3.0 - 5.0 ppm
2.0 - 6.0 ppm
pH 7.2 - 7.8
Total Alkalinity 80 - 120 ppm
Cloudy Water
Possible Cause Solution
High pH, alkalinity, calcium or TDS can
contribute to cloudy water
Reduce levels or add fresh water to dilute.
Reduced filtration Check for blockage and clean traps.
Heavy bather load You may need to superchlorinate.
Unable to Maintain Free Chlorine
(or other primary sanitizer)
Possible Cause Solution
High TDS or pH Reduce levels or add fresh water to dilute.
High combined chlorine level Superchlorinate. May require double dose or more.
Sunlight dissipating chlorine Add cyanuric acid (stabilizer).
Heavy bather loads Increase sanitizer distribution.
High nitrate level increases chlorine demand Add fresh water to dilute.
Colored Water
Possible Cause Solution
Green: algae growth, low free chlorine, or high
nitrate level
Treat with algaecide and/or superchlorinate.
Reddish-brown: high iron or manganese Add sequestering (or chelating) agent.
Blue-green: high copper Add sequestering agent.
Scale Buildup
Possible Cause Solution
Calcium hardness level too high Add fresh water to dilute.
Total alkalinity, pH or TDS too high Adjust down or add fresh water to dilute.
Calcium hardness level too low; rough soft water
scale forms
Increase hardness level.
Metals present in high levels leading to buildup Add sequestering agent to reduce metal content.
Recurring Algae Growth
Possible Cause Solution
High nitrate level Add fresh water to dilute.
Insufficient free chlorine content Maintain an ideal level of free chlorine. Increase dos-
age if necessary.
Leaves, pollen or other organic waste
frequently enters pool system
Keep covered when possible during peak times of
contamination.
High phosphate levels You can add a phosphate control chemical.
Swimmer/bather Skin and Eye Irritation
Possible Cause Solution
High or low pH or alkalinity, or both Maintain pH and alkalinity at ideal levels for optimum
swimmer comfort.
High free chlorine level Remove source and allow level to drop. Add fresh
water to dilute if necessary.
High chloramine (combined chlorine) level Shock (superchlorinate) to remove combined chlorine.
AquaChek TruTest Gives No Free Chlorine Reading, but
DPD Kit Gives a High Free Chlorine Reading
Possible Cause Solution
Very high chloramine level (High combined chlorine
can cause DPD #1 kits to give false readings for free
chlorine.)
The free chlorine reading on your AquaChek meter is
correct! This is a common problem at the beginning
of the season. Test for total chlorine using AquaChek
®
Select
®
or AquaChek
®
7. You may need to shock
the water.
Green Hair
Possible Cause Solution
Elevated copper in the water Test copper level. Reduce copper level with a seques-
tering agent.
Extremely high free chlorine level (around
50 ppm) can bleach hair
If free chlorine level is excessive, keep
bathers out of water until level drops.
Cheap shampoo Find a new hairdresser.
www.AquaChek.com/Trutest
1-888-AquaChek
© 2008 HACH Company, Elkhart, Indiana
To ensure the protection provided by this equipment is not impaired, do not use this
equipment in any manner other than that, which is specied in this manual.
TROUBLE SHOOTING TIPS
If TruTest readings are higher or lower than expected,
these differences are likely due to technique.
Important:
• Pressstartatthesametimeyou’redippingthe
test strip.
• Donotswishorswirltheteststripwhenyoudip.
Simply dip strip and remove.
• Donotslidetheteststripacrosstheglass.
• Makesurethepadsonthestriparefacingdown
when placed on the meter.
• Inbetweentests,thoroughlywipethemeterand
channel clean, especially if you are performing
several tests in succession.
La pagina si sta caricando...
-
 1
1
-
 2
2
-
 3
3
-
 4
4
-
 5
5
-
 6
6
-
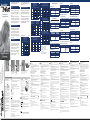 7
7
-
 8
8
-
 9
9
-
 10
10
-
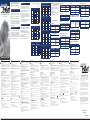 11
11


in altre lingue
- English: AquaChek NP207 Operating instructions
- español: AquaChek NP207 Instrucciones de operación
- Deutsch: AquaChek NP207 Bedienungsanleitung
- Nederlands: AquaChek NP207 Handleiding
- português: AquaChek NP207 Instruções de operação
- dansk: AquaChek NP207 Betjeningsvejledning
Documenti correlati

Altri documenti
-
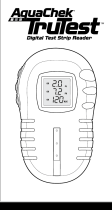 Hach TruTest Manuale utente
-
Bestway Lay-Z-Spa Manuale del proprietario
-
-
Bestway 60059 Manuale del proprietario
-
Davey COMM1000 Istruzioni per l'uso
-
Lovibond 00386481 - MD1x0/200 - Chlorine HR (KI) T, Aluminium PP, Bromine T, Chlorine dioxide T, Chlorine L, Chlorine T, Copper T, Iron in Mo PP (224), Iron LR L (A), Molybdate HR L, Molybdate LR PP, Ozone T, Polyacrylate L, Sulphate PP, Triazole PP, Zinc L Manuale utente
-
-
-
-
