VERCIEL GI36E Manuale del proprietario
- Categoria
- Tosa erba
- Tipo
- Manuale del proprietario

6035000-0206
MANUALE ISTRUZIONI -
ISTRUZIONI ORIGINALI
INSTRUCTION MANUAL -
TRANSLATE
O
f
T
h
E
ORIGINAL
INSTRUCTIONS
MODE D'EMPLOI -
TRADUIT DU MODE ORIGINAL
BEDIENUNGSSANLEITUNGEN -
ÜBERSETZT AUS DEM
h
INWEISE
I
BEDIENINGS
h
ANDLEIDING -
Vertaald uit de oorspronkelijke gebruiksaanwijzing
MANUAL DE INSTRUCCIONES -
TRADUCIDO DEL INSTRUCCIONES ORIGINALES
MANUAL DE INSTRUÇÕES -
TRADUZIDO DO INSTRUÇÕES ORIGINAL
ΕΓΧΕΙΡΙΔΙΟ ΟΔΗΓΙΩΝ -
μ
Ε
τάφΡά
σΗ
ά
π
Ο
τΟ
πΡΩ
τ
Ο
τυπΟ
ΟΔΗΓΙΕσ
Leggere attentamente le presenti istruzioni
prima del primo impiego.
Read this operators manual careful before
the rst use.
Lire avec attention ces instructions avant la
première utilisation
Vor der Anwendung die vorliegenden Anweisun-
gen aufmerksam lesen.
I
gb
f
d
nl
e
p
gR
Lees aandachtig deze instructies door alvorens het
apparaat voor het eerst in gebruik te nemen.
Leer con cuidado estas instrucciones antes de la
primera utilización.
Leia com atenção estas instruções antes de utilizar
pela primeira vez o aparelho.
Πριν χρησιμοποιήσετε το μηχάνημα για πρώτη
φορά, διαβάστε προσεκτικά αυτές τις οδηγίες.
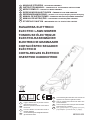
RASAERBA ELETTRICO
ELECTRIC LAWN MOWER
TONDEUSE ÉLECTRIQUE
ELEKTRO-RASENMÄhER
ELEKTRISChE GRASMAAIER
CORTACÉSPED SEGADOR
ELÉCTRICO
CORTA-RELVAS ELÉCTRICO
ΗΛΕΚτΡΙΚΟ ΧΛΟΟΚΟπτΙΚΟ
gb
f
d
nl
e
p
gR

2
F
I
D
GB
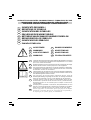
SIGNIFICATO DEI SIMBOLI
DEFINITIONS OF SYMBOLS
SIGNIFICATION DES SYMBOLES
ERKLÄRUNG DER WARNSYMBOLE
BETEKENIS VAN DE WAARSCHUWINGSSYMBOLEN
DEFINICIOND DE LOS SIMBOLOS
SIGNIFICADO DOS SÍMBOLOS
ÓÇÌÁÓÉÁ ÓÕÌÂÏËÙÍ
NL
E
P
GR
AVVERTENZE!
WARNINGS!
AVVERTISSEMENT!
WARNUNG!
WAARSCHUWINGEN!
ADVERTENCIAS!
ADVERTENCIAS!
ÐÑÏÅÉÄÏÐÏÉÇÓÅÉÓ!
F
I
D
GB
NL
E
P
GR
Chiunque utilizzi il tosaerba deve prima leggere attentamente il manuale di
istruzioni e manutenzione e familiarizzarsi completamente con i comandi
per un uso corretto del tosaerba.
Read the operating and service instruction manual carefully. Be thoroughly
familiar with the controls and the proper use of the equipment.
Lire soigneusement les instructions du manuel d’entretien et d’utilisation
Se familiariser complètement avec le fonctionnement des commandes
et l'utilisation correcte de la tondeuse.
Jeder Benutzer der rasenmäher muss zunächst aufmerksam die Betriebs-
und Wartungsanleitung lesen und sich für einen korrekten Gebrauch mit
allen Bedienungsteilen vertraut machen.
Alle personen die de grasmaaier gebruiken dienen eerst de
bedieningshandleiding zorgvuldig door te lezen om volledig vertrouwd te
raken met de instructies voor een correct gebruik van de grasmaaier.
Cualquier persona, antes de utilizar la cortacéspedes, tiene que leer
atentamente el presente manual de instrucciones y mantenimiento y
familiarizarse bien con los mandos para un empleo correcto de la
cortacéspedes.
Qualquer pessoa que utilize a corta relvas, deve primeiramente, ler com
atenção o manual de instruções e manutenção e familiarizarse completa-
mente com os comandos para um uso correcto uso da corta relvas.
Ïðïéïó ×ñçóéìïðïéåé ôï ×ëïïêïðôéêï ðñåðåé ðñïçãïõìåíùó íá äéáâáóåé
ðñïóåêôéêá ôï åã×åéñéäéï ïäçãéùí êáé óõíôçñçóçó êáé íá åîïéêåéùèåé ìå
ôá ×åéñéóôçñéá ãéá ôç óùóôç ×ñçóç ôïõ ×ëïïêïðôéêï.
I
GB
F
D
NL
E
P
GR
SEGNALETICA DI SICUREZZA - WARNING SYMBOLS - SYMBOLES DE SECURIE
WARNZEICHEN - WAARSCHUWINGSYMBOLEN - SEÑALIZACIÓN DE
SEGURIDAD - SINAIS DE SEGURANÇA - ÓÇÌÁÔÁ ÁÓÖÁËÅÉÁÓ

3
PERICOLO - Non mettere in moto e non utilizzare il rasaerba in prossi-
mità di persone, specialmente bambini o animali.
DANGER - Never use the rotary lawnmower while people, especially
children, or pets are nearby.
DANGER - Ne pas mettre en marche et ne pas utiliser la tondeuse quand
des personnes, surtout des enfants ou des animaux, se trouvent à
proximité.
GEFAHR - Setzen Sie die rasenmäher nicht in Betrieb, wenn sich in der
Nähe Personen, insbesondere Kinder, oder Tiere aufhalten.
GEVAAR - De grasmaaier niet starten of gebruiken in de nabijheid van
personen, en met name van kinderen en dieren.
PELIGRO - No poner en marcha ni utilizar la cortacéspedes si hay
personas, especialmente niños, o animales en los alrededores.
PERIGO - Não ligar e nem utilizar a corta relvas em proximidade de pessoas,
especialmente crianças ou animais.
I
GB
F
D
NL
E
P
GR
I
GB
F
D
NL
E
P
GR
SEGNALETICA DI SICUREZZA - WARNING SYMBOLS - SYMBOLES DE SECURIE
WARNZEICHEN - WAARSCHUWINGSYMBOLEN - SEÑALIZACIÓN DE
SEGURIDAD - SINAIS DE SEGURANÇA -
PERICOLO - Disconnettere sempre la macchina dalla rete elettrica prima
di pulirla, esaminarla, aggiunstarla o quando il cavo si danneggia o si
DANGER – Beware of sharp blades - remove plug from mains before
maintenance or if cord is damaged.
DANGER - Attention aux lames tranchantes - Débrancher lela fiche de
,
prise de courant avant maintenance ou en cas de détérioration du cable
GEFAHR – Vor dem Reinigen, Prüfen, Reparieren oder Hi bei verheddertem
Speisekabel stets den Netzstecker ziehen.
GEVAAR - Zet de machine altijd eerst uit en haal de stekker uit het stop-
contact voordat u hem gaat schoonmaken, onderdelen gaat verwijderen of
de machine gaat repareren. Doe dit ook als het snoer beschadigd is of
PELIGRO – Desenchufar siempre la máquina de la línea eléctrica antes de
limpiarla, examinarla, ajustarla o cuando el cable se averíe o enganche.
PERIGO– Desligue a máquina da rede eléctrica antes de efectuar
impiglia.
beklemd is geraakt.
qualquer operação de

4
SEGNALETICA DI SICUREZZA - WARNING SYMBOLS - SYMBOLES DE SECURIE
WARNZEICHEN - WAARSCHUWINGSYMBOLEN - SEÑALIZACIÓN DE
SEGURIDAD - SINAIS DE SEGURANÇA -
GB
F
D
NL
E
P
GR
I
Maintenir le cable souple d’ alimentation éloigné des organes
de coupe
Keep supply flexible cord away from cutting means
Attenzione - Mantenere il cavo di alimentazione lontano dagli
organi taglio
Anschlussleitung von schneidwerkzeugen fernhalten.
Houd de aansluitkabel uit de buurt van maaigereedschappen
Mantener alejado el conductor de alimentacion de las
herramientas de corte
Manter o cabo elèctrico longe das farramentas de corte

SEGNALETICA DI SICUREZZA - WARNING SYMBOLS - SYMBOLES DE SECURIE
WARNZEICHEN - WAARSCHUWINGSYMBOLEN - SEÑALIZACIÓN DE
SEGURIDAD - SINAIS DE SEGURANÇA -
E
GR
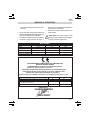
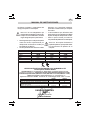
Eliminação de aparelhos utilizados
1. Quando este símbolo com a lixeira de refugos atravessada com uma cruz
é aplicado sobre um produto, isto signica que este está coberto pela
directiva Europeia 2002/96/EC.
2. Todos os produtos eléctricos e electrónicos devem ser eliminados
separadamente dos outros através de canais especícos indicados pelas
autoridades das Prefeituras locais.
3. A correcta eliminação dos aparelhos eléctricos utilizados evitará
potenciais consequências negativas no meio ambiente e na saúde
humana.
4. Para obter as necessárias informações relativas à eliminação dos
aparelhos eléctricos utilizados, convidamos-lhes a contactar as secções
dos ofícios das respectivas Prefeituras encarregadas ou o Revendedor
onde foi adquirido este produto.
NL
P
4a

SEGNALETICA DI SICUREZZA - WARNING SYMBOLS - SYMBOLES DE SECURIE
WARNZEICHEN - WAARSCHUWINGSYMBOLEN - SEÑALIZACIÓN DE
SEGURIDAD - SINAIS DE SEGURANÇA -
I
GB
F
D
4b

5/60
ENGLISH
ITALIANO
DEUTSCH
FRANÇAIS
NEDERLANDS
ESPAÑOL
PORTUGUÊS
ÅËËÇÍÉÊÁ

6/60
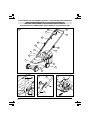
A
4
1
3
14
9
13
14
10
12
11
8
15
15
9
6
5
B
9
1
6
C
15
9
8
D
4
21
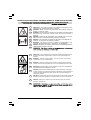
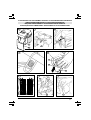
ILLUSTRATIONS FOR THE ASSEMBLY PROCESS - ILLUSTRAZIONI PER IL MONTAGGIO
ABBILDUNGEN ZUR MONTAGE - ILLUSTRATIONS DE MONTAGE
MONTAGE-AFBEELDINGEN - ILUSTRACIONES PARA EL MONTAJE
ILUSTRAÇÕES PARA A MONTAGEM - ÖÙÔÏÃÑÁÖÉÅÓ ÃÉÁ ÔÇ ÓÕÍÁÑÌÏËÏÃÇÓÇ

7/60
ILLUSTRATIONS FOR THE ASSEMBLY PROCESS - ILLUSTRAZIONI PER IL MONTAGGIO
ABBILDUNGEN ZUR MONTAGE - ILLUSTRATIONS DE MONTAGE
MONTAGE-AFBEELDINGEN - ILUSTRACIONES PARA EL MONTAJE
ILUSTRAÇÕES PARA A MONTAGEM - ÖÙÔÏÃÑÁÖÉÅÓ ÃÉÁ ÔÇ ÓÕÍÁÑÌÏËÏÃÇÓÇ
H L M
E1
F G
12
11
10
17
16
20
E3
E2
18
19

8/60
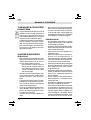
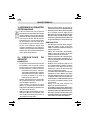
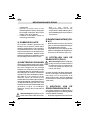
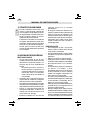
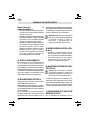
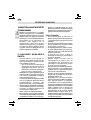
1) KNOW YOUR MOWER
Read all of this manual carefully,
observing all the recommended safety
instructions before, during and after
using your mower, and maintain your
mower in good working order.
Familiarise yourself with the controls
on your mower before attempting to
operate it, but above all, be sure you
know how to stop your mower in an
emergency.
Retain this user manual and all other
literature supplied with your mower for
future reference.
2) SAFETY INSTRUCTIONS
TRAINING
• Never allow children or persons who
are unfamiliar with this type of mower
to use it, nor anyone who has not read
this user manual.
Do not allow children, animals or
other persons near your mower
when in use - always keep them at
least 6m (20ft) away from the
cutting area.
• Remember that the operator is
responsible for accidents or hazards
occurring to other people or their
property.
• Your mower is designed for use on AC
(mains) electrical supplies only - do not
attempt to use it on any other supply.
• Use a power cable H05 RN-F or H05 VV-
F or greater, with minimum cross section
of 2x1.5 mm2 and max length of 20 m.
• Plug your mower into a power point -
never a lighting socket.
• Never carry your mower by the cable
or jerk the cable to seperate the
connectors. Keep the cable away from
heat sources, oils or sharp edges.
Check the condition of your cable
before use and do not use if damaged.
PREPARATION
• To protect your feet, always wear stout
shoes or boots - freshly cut grass is
damp and slippery.
• Rubber or man-made footwear will
enhance your safety.
• Do not operate your mower barefoot or
in open sandals.
• Use protective equipment. Wear safety
spectacles or goggles whilst operating
your mower. Use ear protection if the
sound level seems uncomfortable
when using your mower.
• Use a face mask if dusty.
• Wear long trousers to protect your legs
- any debris left on the lawn or cutting
path may be picked up and ejected by
the blade.
• The power supply cable should be
regularly inspected for signs of damage
or ageing, and only used if in good
condition.
• Always keep the power supply cable
away from the blades - be aware of its
position at all times.
• Always be sure your mower is in a safe
operating condition.
Before using your mower, disconnect
it from the electrical supply and visually
check that the blade, blade nut and
cutter assembly are not worn or
damaged. A damaged blade or worn
blade nut is a major hazard and must
be replaced. Also check that the blade
nut is securely fastened.
INSTRUCTION MANUAL
UK

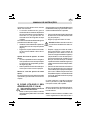
9/60
• Always check that your lawn or cutting
path is clear of all sticks, stones, wire
and other debris. Contact with such
debris may be dangerous as it may
damage your mower and could be
thrown by the blade.
OPERATION
• When tilting the handle downwards to
start your mower, do not tilt it more
than is absolutely necessary. Always
ensure that both hands are in the
operating position and feet are well
away from the blades before returning
your mower to the ground.
Your mower will continue to run for
a short time after releasing the
switch lever. Always allow your
mower to stop on its own.
• Release the switch lever to turn your
mower off and remove the plug from
the mains:
• Whenever you leave your mower
unattended.
• Before checking, cleaning,
adjusting or working on your mower.
• Before clearing a blockage.
• If your mower starts to vibrate
abnormally (check immediately).
• After striking a foreign object,
inspect your mower for damage
and make repairs as necessary.
• Never run your mower whilst lying on
its side or attempt to stop the blade -
always allow it to stop on its own.
• Do not put hands or feet near or under
rotating parts.
• Keep clear of discharge openings at
all times.
• Start your mower carefully according
to the instructions and with your feet
well away from the blade.
• Do not use your mower in the rain and
do not allow it to get wet. Avoid using
your mower in wet grass, if possible.
• Use your mower only in daylight or
good artificial light.
• Do not pull your mower towards you
or walk backwards when in operation.
• Do not cross gravel paths or roads
whilst the blade is rotating.
• Always be sure of your footing,
particularly on slopes.
• Always cut across the face of slopes,
never up and down. Exercise extreme
caution when changing direction on
slopes.
• Do not cut excessively steep slopes
and always wear non-slip footwear.
• Check the grassbag/box for wear or
damage and replace if necessary.
• Never use your mower without the
grassbag/box in place.
• Walk, never run. Do not force your
mower.
• Never pick up or carry your mower
while the motor is running.
• Ensure the blade has stopped rotating
and take extreme care before lifting your
mower for and during transportation.
• Never operate your mower with
defective guards or shields.
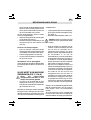
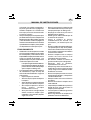
MAINTENANCE AND STORAGE
• Store your mower in a dry place when
not in use, out of the reach of children.
• Do not use solvents or cleaning fluids
to clean your mower - use a blunt
scraper to remove grass and dirt.
Always disconnect from the electrical
supply before cleaning.
• Do not operate your mower if any parts
UK
INSTRUCTION MANUAL

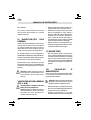
10/60
are defective; discard all defective parts
and fit new parts before use.
• Keep all nuts, bolts and screws tight
to be sure your mower is in a safe
working condition.
3) DOUBLE INSULATION
Your mower is double insulated. This
means that all external metal parts are
electrically isolated from the power supply.
This is achieved by placing an extra
insulation barrier between the electrical
and mechanical parts. Double insulation
means greater electrical safety and
obviates the necessity of having your
mower earthed.
4) ELECTRICAL SAFETY
Always switch the appliance off before
disconnecting any plug, socket or
extension.
Increased safety can be obtained by having
a qualified electrician install a high sensitivity
(30mA) circuit breaker in the house wiring.
If you do not have such a circuit breaker
installed, or you do not wish to have one
installed, then we strongly recommend that
the electrical power to your mower be
supplied through a high sensitivity (30mA)
residual current device (RCD). The RCD is
designed to provide a high degree of perso-
nal protection against harmful electric
current should fault conditions occur.
Warning! The use of an RCD or other
circuit breaker unit does not release
the operator of your mower from the
safety instructions and safe working
practices given in this manual.
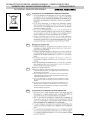
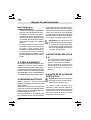
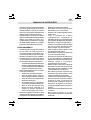
5) HANDLE ASSEMBLY (FIG. B
& C)
• Fit the lower supports (9) in the two holes
in the machine body and fasten them
with the screws provided.
• Join the upper grip (8) to the lower
supports (9) by means of the wing nuts
and bolts provided.
6) HEIGHT OF CUT
ADJUSTMENT (FIG. D)
Warning! Disconnect your mower
from the electrical supply before
making any adjustment and allow the
blade to stop rotating. Cutting blades
are sharp.
The wheels are already pre-mounted. To
select a height of cut, move the wheels
(4) into the slot required using the spring
system (21). To ensure an even cut,
please make sure that all four wheels are
placed in the same position.
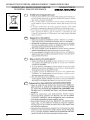
7) GRASSBOX ASSEMBLY
(FIG. E)
Read the safety instructions at the
beginning of this manual before using this
accessory.
• The grass collection basket consists of
a plastic and cloth container (18)
supported by a "U" rod (19) which must
be put together before fitting to the
INSTRUCTION MANUAL
UK

11/60
machine body.
To assemble the grass collection basket
proceed as follows:
• Fit the support rod in the specific holes
in the plastic cover (Fig. E1).
• Fasten the elastic profiles stitched to
the cloth onto the "U" rod (Fig. E2).
Fitting the grassbox to your mower:
• Raise the spring loaded rear door, move
the basket up to the machine body and
fasten it on to the coupling hooks (Fig.
E3).
• Release the rear door so the basket is
fastened in position.
Removing the grassbox from your
mower:
The full basket can be moved by raising
the door (5) and freeing the basket from
its support.
8) HOW TO USE YOUR
MOWER (FIG. F, G & H)
Observe all of the relevant warnings
when using your mower.
• Push the loop of cable through the slot
from the opposite side of the restraint
hook (Fig. F), position the loop over
the hook and pull the cable back
through the slot. Your cable will now
be restrained.
We recommend the directional method of
operation to obtain the maximum cutting
performance from your mower and to re-
duce the risk of the trailing the extension
lead from entering the cutting path.
• Place the bulk of the supply cable on
the lawn close to the starting point (see
Fig. H, position 1).
• Hold the handle assembly with both
hands.
Warning! Do not attempt to operate
your mower with one hand - you must
guide it with both hands.
• Tilt the handle downwards to slightly
raise the front of your mower and to
reduce the risk of lawn damage whilst
starting, depress the safety lock-off
button (12) on the switchbox (10) and
whilst still depressed pull the switch
lever (11) towards you. Your mower will
start and you can now allow the lock-
off button to be released and lower your
mower to its proper cutting position,
and commence cutting.
• Proceed down the cutting area as
shown in Fig. Ha, working from position
1 towards position 2 and, on reaching
position 2, turn to the right and proceed
towards position 3. Continue to the end
of the cutting area, turn to the left and
proceed towards position 4. Continue
in the same manner as shown in Fig.
Ha, always working away from the
cable. Do not adopt the method as
shown in Fig. Hb, working towards the
cable, as this is dangerous practice.
Your mower will continue to operate whilst
you are pulling the switch lever. To stop
your mower release the switch lever.
When you have finished using your mower
we recommend that you clean all debris
UK
INSTRUCTION MANUAL

12/60
from it before putting it away. Refer to the
'Care and maintenance' section.
Note: To obtain the best results cut your
lawn or grass area regularly and do not
cut when the grass is wet.
If, when grass cutting, loose grass is seen
to be scattering from beneath your mower,
the grassbox is probably full and should
be emptied.
9) BLADE MAINTENANCE
The steel blade is designed to give a fine
finish in long or tough grass. The blade
will continue to cut even when it has
become blunt or burred. There is no need
for it to be razor sharp.
If, however, because of damage or wear
the cutting performance deteriorates, then
your mower may require a new blade, or
at least the existing blade to be sharpened.
We recommend that the steel blade is
sharpened or a new blade fitted at the
beginning of each season.
Warning! When fitting a new blade
use only original replacement part
specified for your mower - do not
attempt to fit any other blade.
10) FITTING A NEW BLADE
(FIG. L & M)
Observe all the relevant warnings
before changing the blade.
Warning! Disconnect your mower
from the electrical supply before
changing the blade.
• Turn your mower over on its side so
that the underside of the mower body
(1) is exposed.
• Using a cloth placed over the blade or
heavy duty gloves to protect your
hands, grip the blade and, using the
spanner provided, loosen and remove
the nut (16) from the motor spindle.
Turn the nut in an anti-clockwise
direction to loosen it.
• Fit the blade and special Belleville
washer (Fig. M) back on in the right
direction.
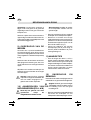
11) HANDY HINTS
• On long grass, above 10cm (4 inches),
use two cuts to get a close finish. We
recommend that the first cut should be
taken with the blade set at maximum
height of cut and the second taken with
it set at medium or close. This will pro-
ve to be easier and give a better overall
finish to your lawn.
12) CARE AND MAINTENANCE
The advice given in this section covers the
general care and maintenance of the main
body of your mower.
Warning! Do not use an extension
cable which shows signs of damage.
Fit a new cable completely - do not
make any permanent or temporary
repairs.
INSTRUCTION MANUAL
UK

13/ 60
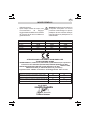
01-01-2010
SANDRI GARDEN
srl
Direttore Generale
Alberto Cattaneo
• Always keep your mower clean and
free from grass cuttings, especially the
underside of the cutter deck and the
air vents.
• Check all electrical cables at regular
intervals, looking for signs of wear,
abrasion or other damage.
• At the end of each cutting session we
recommend that the build up of grass
on the underside of the cutter cover is
removed using a blunt scraper.
• Clean all plastic components with a
damp cloth.
Caution: Do not use solvents or
cleaning fluids as these may damage
the plastic components of your
mower.
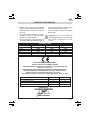
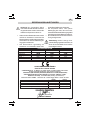
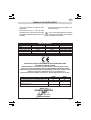
TECHNICAL DATA
GI3000 GI3000 GI3600
Weight
Voltage 230 V 230 V 230 V
Power imput 850 W 1000 W
1200 W, 1300W, 1400W
Rpm 2950 2950 2950
Insulation class 2 2 2
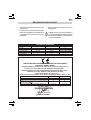
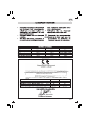
DECLARATION OF CONFORMITY
Rotary Lawnmower GI3000 / GI3600
SANDRIGARDEN srl, via Manzoni 22, 36027 ROSA' (VI) ITALIA declares that
these tools conform to:
2006/95/EC (EN60335-2-77:2006, EN50366:2003),
2004/108/EC (EN61000-3-2:2007, EN61000-3-3+A1:2002,
EN55014-1:2008,
EN55014-2+A1:2002),
2000/14/EC (Annex VI, procedure 1).
Notified Body: CESMA – via Gorizia 49 - 42100 Reggio Emilia – Italia – N° 1232
2006/42/EC (EN 836:2006)
GI3000 GI3600
L
wA
(acoustic power) EN ISO 3744 (K=0.5) 93 93
L
wA
(guaranteed) (K=0.5) 94 94
L
pA
(sound pressure) EN ISO 11201(K=0.5) 81 81
Hand/arm weighted vibration value according to EN 1033 (K=0.5):
<2,5 m/s
2
<2,5 m/s
2
UK
INSTRUCTION MANUAL

14/60
I
MANUALE ISTRUZIONI
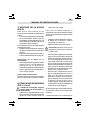
1) IMPARARE A CONOSCERE
LA MACCHINA
Leggere attentamente tutto il manuale di
istruzioni e osservare tutte le precauzioni
di sicurezza (avvertenze) prima, durante
e dopo l'utilizzo dell'utensile e mantenerlo
sempre in buone condizioni d'utilizzo.
Familiarizzare con tutti i comandi dell'uten-
sile prima di iniziare ad usarlo, ma soprat-
tutto assicurarsi di sapere come spegner-
lo in caso di emergenza. Conservare que-
sto manuale e tutti i depliants forniti per
ogni riferimento futuro.
2) NORME DI SICUREZZA
ISTRUZIONE
• Non lasciare mai che l'apparecchio venga
utilizzato da bambini o persone che non
abbiano dimestichezza con lo stesso e
che non abbiano letto le istruzioni.
Non permettere a bambini, animali o
altre persone di stazionare nelle vici-
nanze dell'apparecchio in uso - tenerli
sempre a una distanza minima di 6m
dalla zona di taglio.
• Ricordarsi che l'operatore/utente è legal-
mente responsabile dei pericoli o danni
arrecati a persone o a cose di loro pro-
prietà.
• L'apparecchio è previsto per essere utiliz-
zato solo con un'alimentazione (rete elet-
trica) a corrente alternata. Non utilizzare
fonti di alimentazione diverse.
• Usare un cavo di alimentazione di costru-
zione H05 RN-F oppure H05 VV-F o su-
periore, con sezione minima di 2x1,5 mm
2
e lunghezza max di 20 m.
• Inserire la spina in una presa di alimenta-
zione.
• Non trascinare mai l'apparecchio tirando-
lo per il cavo né strappare quest'ultimo per
staccare i connettori. Tenere il cavo lonta-
no da fonti di calore, olii od oggetti con
spigoli taglienti. Verificarne le condizioni e
non impiegarlo se risulta danneggiato.
PREPARAZIONE
• Per proteggere i piedi indossare sempre
scarpe o stivali resistenti - l'erba tagliata di
fresco è umida e scivolosa.
• Impiegare dispositivi di protezione indivi-
duale. Indossare occhiali di sicurezza du-
rante l'uso dell'apparecchio.
• Indossare una mascherina protettiva se si
genera pulviscolo.
• Indossare protezioni per le orecchie se,
durante l'uso dell'apparecchio, la
rumorosità raggiunge un livello fastidioso.
• L'operatore non deve azionare l'apparec-
chio a piedi nudi o con sandali aperti.
• Indossare pantaloni lunghi per proteggere
le gambe; i detriti rimasti sul prato o nella
zona di taglio possono venire raccolti e
scagliati dalle lame.
• Controllare regolarmente il cavo di alimen-
tazione per identificare eventuali segni di
danni o usura, e impiegarlo soltanto se in
buone condizioni.
• Tenere sempre il cavo di alimentazione a
distanza dalle lame - e controllarne la po-
sizione ogni volta.
• Accertarsi che l'apparecchio funzioni sem-
pre in buone condizioni di sicurezza.
Prima di usare l'utensile disinnestarlo dal-
la rete elettrica e controllare la lama e le
parti ruotanti per verificare la presenza di
eventuali segni di danni o di logorio. Una
lama danneggiata e dei bulloni allentati
costituiscono elementi di pericolo. Verifi-
care anche che la lama sia ben fissata.

15/60
I
MANUALE ISTRUZIONI
• Non avvicinare le mani o i piedi né metterli
sotto le parti rotanti.
• Tenersi sempre a distanza dalle aperture
di scarico.
• Avviare l'apparecchio con attenzione se-
guendo le istruzioni e tenendo i piedi a
debita distanza dalle lame.
• Non usare l'apparecchio quando piove o
in presenza di umidità né, se possibile,
sull'erba bagnata.
• Usare l'apparecchio solo di giorno o in pre-
senza di una buona illuminazione artificia-
le.
• Non tirare verso di sé l'apparecchio né cam-
minare all'indietro durante l'uso.
• Non attraversare mai sentieri di ghiaia o
strade durante la rotazione delle lame.
• Controllare la sicurezza dei propri punti
d'appoggio, soprattutto sui pendii.
• Tagliare sempre in direzione trasversale
rispetto al pendio, mai in verticale. Cam-
biare direzione in pendenza con estrema
cautela.
• Non tagliare su pendii troppo ripidi e in-
dossare sempre calzature antiscivolo.
• Controllate frequentemente sul cesto
raccoglierba eventuali segni di usura o dan-
ni e sostituitelo se necessario.
• Non usate mai la macchina senza il ce-
sto raccoglierba montato.
• Camminate, non correte. Non forzate la
macchina.
• Non sollevare o trasportare l'apparecchio
con il motore in funzione. Quando si pro-
cede a tale operazione accertarsi che le
lame abbiano smesso di ruotare.
• Per il trasporto sollevare l'unità con estre-
ma cautela.
• Non utilizzare mai l'apparecchio con pro-
tezioni difettose.
Controllare frequentemente che tutte le viti
e i bulloni siano ben stretti.
• Controllare sempre che nel prato o nella
zona di taglio non vi siano ramoscelli, pie-
tre, filo e altri detriti. L'apparecchio potreb-
be proiettarli all'esterno danneggiandosi e
creando una situazione pericolosa.
FUNZIONAMENTO
• Quando per l'avviamento si inclina il mani-
co verso il basso o a lato, non compiere
movimenti più ampi del necessario.
Accertarsi sempre che entrambe le mani
si trovino nella posizione giusta per l'uso e
che i piedi siano ben lontani dalle lame
prima di rimettere in posizione l'apparec-
chio.
Dopo aver sbloccato la leva di coman-
do l'apparecchio continuerà a funzio-
nare per breve tempo. Aspettare che
si fermi da solo.
• Per spegnere l'apparecchio sbloccare la
leva di comando e staccare la spina dalla
presa di rete:
• Quando si lascia l'apparecchio incu-
stodito.
• Prima di effettuare operazioni di con-
trollo, pulizia, regolazione e intervento
sull'apparecchio.
• Prima di togliere un'ostruzione.
• Se l'apparecchio inizia a vibrare in modo
anormale (effettuare un controllo im-
mediato).
• Dopo aver colpito un corpo estraneo.
Controllare eventuali danni all'apparec-
chio ed effettuare le riparazioni neces-
sarie.
• Non azionare l'apparecchio appoggiato su
un lato né tentare di arrestare le lame -
aspettare sempre che si fermi da solo.

16/60
MANUTENZIONE E CONSERVA-
ZIONE
• Riponete la macchina non in uso in un
luogo asciutto e lontano dalla portata dei
bambini.
• Non usate solventi o altre sostanze chi-
miche per pulire l'utensile - usate un
raschietto non appuntito per rimuovere erba
e detriti. Disinserite sempre la spina dalla
presa di alimentazione prima di procede-
re alla pulizia dell'utensile.
• Non utilizzate la macchina con parti difet-
tose. Sostituite sempre le parti difettose
prima dell'uso.
• Controllate che tutti i dadi e le viti siano
sempre serrati, per essere sicuri che l'uten-
sile sia in condizioni efficienti.
3) DOPPIO ISOLAMENTO
L'apparecchio è dotato di un doppio isolamen-
to. In altre parole una barriera supplementare,
collocata tra i componenti elettrici e quelli
meccanici, isola elettricamente dall'alimenta-
zione tutti i particolari metallici esterni. Il dop-
pio isolamento offre una maggiore sicurezza
elettrica rendendo superfluo il collegamento
a terra dell'apparecchio.
4) SICUREZZA ELETTRICA
Spegnere sempre l'apparecchio prima di stac-
care qualsiasi spina, presa o prolunga.
Per aumentare ulteriormente la sicurezza far
installare da un elettricista specializzato un
interruttore ad alta sensibilità (30mA) nell'im-
pianto domestico.
Se non si desidera tale installazione, oppure
non è stata effettuata, si consiglia caldamente
di alimentare l'apparecchio mediante un di-
spositivo per corrente residua ad alta sensibi-
lità (RCD), ideato per fornire un elevato grado
di protezione personale contro gli effetti inde-
siderati della corrente elettrica in caso di gua-
sti.
Avvertenza! L'impiego del RCD o di al-
tri dispositivi interruttori non esenta l'ope-
ratore dall'osservare le istruzioni di sicu-
rezza e le norme per il funzionamento
sicuro contenute nel presente manuale.
5) MONTAGGIO IMPUGNATU-
RA (FIG. B & C)
• Inserire i supporti inferiori (9) nei due fori
del corpo macchina e fissarli con le viti in
dotazione.
• Unire l'impugnatura superiore (8) ai sup-
porti inferiori (9) per mezzo dei galletti e
bulloni in dotazione.
6) REGOLAZIONE ALTEZZA DI
TAGLIO (FIG. D)
Attenzione! Scollegare la spina dalla pre-
sa di corrente prima di ogni regolazione
e attendere che le lame si siano ferma-
te. Le lame sono molto affilate.
Le ruote sono già pre-montate. Per scegliere
l'altezza di taglio, spostate le ruote (4) nel-
l'asola desiderata usando il sistema a molla
(21). Per garantire un taglio omogeneo, ac-
certatevi che tutte le quattro ruote siano mes-
se nella stessa posizione.
I
MANUALE ISTRUZIONI

17/60
7) MONTAGGIO DEL CESTO
RACCOGLIERBA (FIG. E)
Prima di impiegare questo accessorio legge-
re le istruzioni di sicurezza all'inizio del pre-
sente manuale.
• Il cesto raccoglierba è costituito da un
contenitore in plastica e tela (18) soste-
nuto da un tondino ad "U" (19) che devono
essere assemblati prima di essere colle-
gati al corpo macchina.
Per assemblare il cesto raccoglierba proce-
dere come segue:
• Inserire il tondino di supporto negli apposi-
ti fori del coperchio in plastica (Fig. E1).
• Agganciare i profili elastici cuciti alla tela
al tondino ad "U" (Fig. E2).
Aggancio del cesto raccoglierba al
corpo macchina:
• Alzare lo sportello posteriore caricato a
molla, avvicinare il cesto al corpo macchi-
na e agganciarlo agli appositi ganci di in-
nesto (Fig. E3).
• Rilasciare lo sportello posteriore in modo
che fissi il cesto in posizione.
Rimozione del cesto raccoglierba dal
corpo macchina:
È possibile rimuovere il cesto pieno sollevan-
do lo sportello (5) e liberando il cesto dal suo
supporto.
8) COME UTILIZZARE IL
RASAERBA (FIG. F, G & H)
Osservate sempre tutte le norme di
sicurezza durante l'utilizzo del vo-
stro rasaerba.
• Inserire l'anello di cavo attraverso la fessu-
ra sul lato opposto del gancio di serraggio
(Fig. F), posizionare l'anello sopra al gan-
cio e tirare il cavo indietro attraverso la fes-
sura il cavo è ora saldamente bloccato.
Vi consigliamo di procedere al lavoro secon-
do le direzioni indicate in figura H per ottenere
le prestazioni migliori dalla vostra macchina e
per ridurre il rischio di essere intralciati dai
cavi di prolunga.
• Ponete la matassa dal cavo elettrico sul
giardino vicino al punto di partenza (Fig.
H, posizione 1).
• Tenete entrambe le mani sull'impugnatu-
ra.
Attenzione! Non tentate mai di utilizza-
re la macchina con una sola mano - gui-
datela con entrambe le mani.
• Ruotate l'impugnatura verso il basso per
sollevare leggermente la parte frontale del
rasaerba per ridurre i rischi di danneggiare
il terreno accendendo l'utensile. Il rasaerba
è dotato di tasto esclusione interruttore
(10) posto sulla scatola interruttore, tenen-
dolo premuto tirate verso di voi la leva in-
terruttore (11). Il motore si accende e po-
tete rilasciare il tasto esclusione interrut-
tore, abbassate la macchina in posizione
ed iniziate il lavoro.
• Procedete al lavoro come mostrato in Fig.
Ha, procedendo dalla posizione 1 verso la
posizione 2 dalla quale girerete a destra
raggiungendo la posizione 3. Continuate
fino alla fine dell'area di lavoro, girate a si-
nistra e raggiungete la posizione 4. Conti-
nuate sempre nel modo illustrato dalla Fig.
Ha, avanzando sempre lontano dal cavo.
Non utilizzate il metodo illustrato dalla Fig.
Hb in quanto è pericoloso.
MANUALE ISTRUZIONI
I

18/60
La macchina resterà in funzione fino a che
terrete premuta la leva interruttore. Per fer-
marla, rilasciate la leva.
Avendo terminato di usare il rasaerba, vi consi-
gliamo di rimuovere tutti i detriti prima di riporlo.
Vi consigliamo di consultare la sezione "Cura
e manutenzione" in questo manuale.
Nota: Per ottenere i risultati migliori, tagliate
regolarmente l'erba e non tagliate quando l'er-
ba è umida.
Se, durante il taglio, noterete che dell'erba vie-
ne scagliata dai lati della macchina, è proba-
bile che il cesto sia pieno.
9) MANUTENZIONE DELLA
LAMA
Le lame in acciaio sono disegnate per dare
buona finitura su erba alta o dura. La lama
continuerà a tagliare anche una volta perso il
filo. Non è necessario che sia affilatissima.
Ma nel caso che le prestazioni siano sensi-
bilmente ridotte dalle cattive condizioni della
lama allora è consigliabile procedere alla so-
stituzione o riaffilatura delle lame.
Consigliamo di riaffilare o sostituire la lama in
acciaio all'inizio di ogni stagione.
Attenzione! Utilizzare solo lame e parti
originali specificate per il vostro modello
- non montare mai altre lame.
10) MONTAGGIO DI LAME
NUOVE (FIG. L & M)
Osservare tutte le attenzioni specifi-
che prima di cambiare la lama.
Attenzione! Scollegare la spina dalla
presa.
• Capovolgere il rasaerba in modo che la
parte inferiore del rasaerba sia rivolta ver-
so l'alto.
• Usando un panno posto sopra la lama o
dei guanti pesanti per proteggere le mani,
prendere la lama e usando la chiave forni-
ta allentare e rimuovere il bullone
dall'alberino del motore (Fig. L). Girare il
dado in senso antiorario per allentarlo.
• Rimontare la lama e la speciale rondella a
tazza (Fig. M) mantenendo per entrambe
il corretto senso di montaggio.
11) CONSIGLI E SUGGERIMEN-
TI UTILI
• Sull'erba alta, sopra i 10cm. fate due tagli
per ottenere una migliore finitura. Si consi-
glia di fare il primo taglio con la lama posi-
zionata sulla massima altezza di taglio ed
il secondo ad una altezza di taglio inter-
media. Questo vi permetterà di dare al prato
un taglio più facile e di migliore aspetto.
12) CURA E MANUTENZIONE
Le note contenute in questo capitolo si riferi-
scono alla cura generale del vostro rasaerba.
Attenzione! Non usare prolunghe che
mostrino segni di deterioramento - sosti-
tuire sempre il cavo completo non effet-
I
MANUALE ISTRUZIONI
La pagina sta caricando ...
La pagina sta caricando ...
La pagina sta caricando ...
La pagina sta caricando ...
La pagina sta caricando ...
La pagina sta caricando ...
La pagina sta caricando ...
La pagina sta caricando ...
La pagina sta caricando ...
La pagina sta caricando ...
La pagina sta caricando ...
La pagina sta caricando ...
La pagina sta caricando ...
La pagina sta caricando ...
La pagina sta caricando ...
La pagina sta caricando ...
La pagina sta caricando ...
La pagina sta caricando ...
La pagina sta caricando ...
La pagina sta caricando ...
La pagina sta caricando ...
La pagina sta caricando ...
La pagina sta caricando ...
La pagina sta caricando ...
La pagina sta caricando ...
La pagina sta caricando ...
La pagina sta caricando ...
La pagina sta caricando ...
La pagina sta caricando ...
La pagina sta caricando ...
La pagina sta caricando ...
La pagina sta caricando ...
La pagina sta caricando ...
La pagina sta caricando ...
La pagina sta caricando ...
La pagina sta caricando ...
La pagina sta caricando ...
La pagina sta caricando ...
La pagina sta caricando ...
La pagina sta caricando ...
La pagina sta caricando ...
La pagina sta caricando ...
-
 1
1
-
 2
2
-
 3
3
-
 4
4
-
 5
5
-
 6
6
-
 7
7
-
 8
8
-
 9
9
-
 10
10
-
 11
11
-
 12
12
-
 13
13
-
 14
14
-
 15
15
-
 16
16
-
 17
17
-
 18
18
-
 19
19
-
 20
20
-
 21
21
-
 22
22
-
 23
23
-
 24
24
-
 25
25
-
 26
26
-
 27
27
-
 28
28
-
 29
29
-
 30
30
-
 31
31
-
 32
32
-
 33
33
-
 34
34
-
 35
35
-
 36
36
-
 37
37
-
 38
38
-
 39
39
-
 40
40
-
 41
41
-
 42
42
-
 43
43
-
 44
44
-
 45
45
-
 46
46
-
 47
47
-
 48
48
-
 49
49
-
 50
50
-
 51
51
-
 52
52
-
 53
53
-
 54
54
-
 55
55
-
 56
56
-
 57
57
-
 58
58
-
 59
59
-
 60
60
-
 61
61
-
 62
62


VERCIEL GI36E Manuale del proprietario
- Categoria
- Tosa erba
- Tipo
- Manuale del proprietario
in altre lingue
- English: VERCIEL GI36E Owner's manual
- français: VERCIEL GI36E Le manuel du propriétaire
- español: VERCIEL GI36E El manual del propietario
- Deutsch: VERCIEL GI36E Bedienungsanleitung
- Nederlands: VERCIEL GI36E de handleiding
- português: VERCIEL GI36E Manual do proprietário