Ricoh P 501 Guida d'installazione
- Categoria
- Stampanti laser / LED
- Tipo
- Guida d'installazione
Questo manuale è adatto anche per

Setup Guide
Setup Guide
For safe and correct use, be sure to read “Safety
Information” before using the machine.
EN
Installationsanleitung
Für eine sichere und korrekte Verwendung lesen
Sie unbedingt die “Sicherheitshinweise” vor der
Verwendung dieses Geräts.
DE
Manuel d’installation
Pour une utilisation correcte et en toute sécurité,
veillez à bien lire les “Consignes de sécurité”
avant d’utiliser l’appareil.
FR
Guida all’installazione
Per un uso sicuro e corretto, leggere le
“Informazioni sulla sicurezza” prima di utilizzare la
macchina.
IT
Guía de instalación
Para un uso seguro y correcto, lea “Información
de seguridad” antes de utilizar la máquina.
ES
Guia d’instal·lació
Per fer-ne un ús segur i correcte, recordeu llegir
la “Informació de seguretat” abans d’utilitzar la
màquina.
CA

2
EN
DE
FR
IT
ES
CA
1.
Preparing/Vorbereiten/Préparation/Preparazione/Preparativos/Preparació
Confirm the components.
• SetupGuide(Thismanual)
• SafetyInformation
• CD-ROM
• Powercord
Confirm the environmental
conditions.
• Installthemachineinaplacewhere
thetemperatureandhumidityaround
themachineiswithinthepermissible
range(whitearea)shownabove.
(Bluearea:Recommendedrange)
• Installthemachineonalevelspot
wherethedifferenceinheightis
within3mm.
Confirm the space.
Komponenten
• Installationsanleitung(diese
Anleitung)
• Sicherheitshinweise
• CD-ROM
• Netzkabel
Umgebungsbedingungen
• StellenSiedasGerätaneinemOrt
auf,andemdieTemperaturunddie
Luftfeuchtigkeitimobengezeigten
zulässigenBereich(weißerBereich)
liegt.(BlauerBereich:empfohlener
Bereich)
• StellenSiedasGerätaneiner
ebenenStellemiteinermaximalen
Höhendifferenzvon3mmauf.
Abstände
Vérifiez les composants.
• Manueld'installation(leprésent
manuel)
• Consignesdesécurité
• CD-ROM
• Cordond'alimentation
Vérifiez les conditions
environnementales.
• Installezl’appareildansunendroit
oùlatempératureetl’humidité
ambiantessontdanslaplagedes
valeursadmissibles(zoneblanche)
indiquéesci-dessus.(Zonebleue:
plagerecommandée)
• Installezl’appareilsurunesurface
planedontladifférencedeniveau
estinférieureà3mm.
Vérifiez le lieu d'installation.
Verificare i componenti.
• Guidaall'installazione(ilpresente
manuale)
• Informazionisullasicurezza
• CD-ROM
• Cavodialimentazione
Verificare le condizioni
ambientali.
• Installarelamacchinainunluogo
incuilatemperaturael'umidità
circostantirientrinonell'intervallo
consentito(Areabianca)sopra
indicato.(Areablu:intervallo
consigliato)
• Installarelamacchinasuuna
superficiepianailcuidislivello
massimoè3mm.
Verificare lo spazio circostante.
Confirme los componentes.
• Guíadeinstalación(estemanual)
• Informacióndeseguridad
• CD-ROM
• Cabledealimentación
Confirme las condiciones del
entorno.
• Instalelamáquinaenunlugarenel
quelatemperaturaylahumedadque
rodeenlamáquinaesténdentrode
loslímitespermitidos(áreablanca)
mostradosanteriormente.(Área
azul:límitesrecomendados)
• Instalelamáquinaenunpunto
nivelado,dondeladiferenciade
alturaseainferiora3mm.
Confirme el espacio.
Confirmeu els components.
• Guiad'instal·lació(aquestmanual)
• Informaciósobreseguretat
• CD-ROM
• Cabled'alimentació
Confirmeu les condicions
ambientals.
• Instal·leulamàquinaenunlloc
onlatemperaturailahumitatal
seuvoltantestiguindinsdelrang
admissible(Àreablanca)quees
mostraadalt.(Àreablava:Límit
recomanat)
• Instal·leulamàquinaenunpunton
ladiferènciad'alçadasiguiinferiora
3mm.
Confirmeu l'espai.
1
DVK204
DVL236
2
DVL227
220-240 V, 5.3 A, 50/60 Hz
120-127 V, 10 A, 60 Hz
2
DVL205
3
DYR011
35 cm
(13.8 inches)
40 cm
(15.7 inches)
47 cm
(18.5 inches)

3
EN
DE
FR
IT
ES
CA
2.
Installing the Machine/Aufstellen des Geräts/Installation de l’appareil/Installazione della macchina/Instalación de la
máquina/Instal·lació de la màquina
Setup/Einrichten/Configuration/Impostazione/
Configuración/Configuració
Hold the inset grips on both
sides of the machine with
two people as shown above,
and slowly lift and move the
machine.
Lower the machine slowly when
positioning it.
Do not put anything in the space around
the machine, so that you can load
paper, replace consumables, and clear
paper jams easily.
Remove all the narrow adhesive
tapes and protective sheet from
the outside of the machine.
Press the front cover open
button on the right side of the
machine, and then open the
front cover.
Heben Sie das Gerät mit einer
zweiten Person an den dafür
vorgesehenen Griffen an beiden
Seiten des Geräts langsam an
und transportieren Sie es.
Senken Sie das Gerät beim
Positionieren langsam ab.
Platzieren Sie nichts im Bereich rund
um das Gerät, damit Sie problemlos
Papier einlegen, Verbrauchsmaterialien
auswechseln und Papierstaus beheben
können.
Entfernen Sie alle schmalen
Klebebänder und die Schutzfolie
von der Außenseite des Geräts.
Drücken Sie an der rechten Seite
des Geräts auf die Taste zum
Öffnen der vorderen Abdeckung
und öffnen Sie die vordere
Abdeckung.
L'imprimante doit être déplacée
par deux personnes, en utilisant
les poignées latérales, comme
indiqué ci-dessus. Soulevez puis
déplacez lentement l’appareil.
Abaissez l’appareil lentement
lorsque vous le mettez en place.
Ne mettez rien à proximité de l’appareil
afin de pouvoir facilement charger le
papier, remplacer les consommables et
supprimer les incidents papier.
Retirez tous les rubans adhésifs
et le film protecteur à l’extérieur
de l’appareil.
Appuyez sur le bouton
d’ouverture du capot avant situé
sur la droite de l’appareil, puis
ouvrez le capot avant.
Afferrare le impugnature poste
su entrambi i lati della macchina
con l'aiuto di un'altra persona
come mostrato sopra, quindi
sollevare e spostare lentamente
la macchina.
Sollevare la macchina
lentamente quando la si
posiziona.
Non collocare oggetti nello spazio
intorno alla macchina, in modo da poter
caricare la carta, sostituire i consumabili
e rimuovere gli inceppamenti della carta
con facilità.
Rimuovere tutti i nastri adesivi
e il foglio protettivo dall'esterno
della macchina.
Premere il pulsante di apertura
dello sportello anteriore sul lato
destro della macchina, quindi
aprire lo sportello anteriore.
Sostenga los agarres integrados
de ambos lados de la máquina
mediante dos personas, como
se muestra anteriormente, y
levante y mueva la máquina
despacio.
Baje la máquina lentamente al
colocarla.
No coloque nada alrededor de la
máquina, para que pueda cargar,
cambiar los consumibles y eliminar los
atascos de papel con facilidad.
Retire todas las cintas adhesivas
y la lámina de protección del
exterior de la máquina.
Presione el botón de apertura
de la tapa delantera situado en
el lado derecho de la máquina
y, a continuación, abra la tapa
delantera.
Agafeu les anses internes
situades a ambdós costats
de la màquina entre dues
persones, tal com es mostra
a dalt, aixequeu-la i moveu-la
lentament.
Abaixeu la màquina poc a poc
en col·locar-la.
No col·loqueu res al voltant de la
màquina, de manera que pugueu
carregar paper, substituir els
consumibles i solucionar fàcilment els
encallaments de paper.
Retireu les cintes adhesives i el
full protector de l'exterior de la
màquina.
Premeu el botó d'obertura de la
tapa davantera situat al costat
dret de la màquina i, tot seguit,
obriu la tapa.
1
DYQ013
2
DYR012
35 cm
(13.8 inches)
10 cm
(4.0 inches)
35 cm
(13.8 inches)
10 cm
(4.0 inches)
20 cm
(7.9 inches)
3
DYQ015
4
1
2
DYQ016

4
Setup/Einrichten/Configuration/Impostazione/Configuración/Configuració
EN
DE
FR
IT
ES
CA
Pull out the tape straight
towards you.
Toner adheres to the edge of the tape.
Be careful not to touch it.
•An error occurs if you do not pull out the
tape.
Close the front cover.
Ziehen Sie das Klebeband direkt
in Ihre Richtung.
Toner haftet am Rand des Klebebands.
Achten Sie darauf, diesen nicht zu
berühren.
•Es wird ein Fehler angezeigt, wenn Sie
das Klebeband nicht herausziehen.
Schließen Sie die vordere
Abdeckung.
Tirez la bande adhésive vers
vous.
Du toner adhère sur le bord de la
bande. Veillez à ne pas le toucher.
•Si vous ne retirez pas la bande
adhésive, une erreur se produira.
Refermez le capot avant.
Togliere il nastro tirandolo verso
di sé.
Il toner aderisce al bordo del nastro.
Fare attenzione a non toccarlo.
•Senonsitoglieilnastro,sivericaun
errore.
Chiudere lo sportello anteriore.
Tire de la cinta hacia usted.
El tóner se adhiere al borde de la cinta.
No lo toque.
•Si no tira de la cinta para sacarla, se
producirá un error.
Cierre la tapa frontal.
Estireu de la cinta cap a
vosaltres.
El tòner s'adhereix a la vora de la cinta.
Aneu amb compte de no tocar-lo.
•Es produeix un error si no traieu la cinta.
Tanqueu la tapa davantera.
5
DYQ017
6
DYQ018
3

5
EN
DE
FR
IT
ES
CA
3.
Loading Paper/Einlegen von Papier/Charger le papier/Caricamento della carta/Carga de papel/Càrrega de paper
Pull out the tape straight
towards you.
Toner adheres to the edge of the tape.
Be careful not to touch it.
•An error occurs if you do not pull out the
tape.
Close the front cover.
Ziehen Sie das Klebeband direkt
in Ihre Richtung.
Toner haftet am Rand des Klebebands.
Achten Sie darauf, diesen nicht zu
berühren.
•Es wird ein Fehler angezeigt, wenn Sie
das Klebeband nicht herausziehen.
Schließen Sie die vordere
Abdeckung.
Tirez la bande adhésive vers
vous.
Du toner adhère sur le bord de la
bande. Veillez à ne pas le toucher.
•Si vous ne retirez pas la bande
adhésive, une erreur se produira.
Refermez le capot avant.
Togliere il nastro tirandolo verso
di sé.
Il toner aderisce al bordo del nastro.
Fare attenzione a non toccarlo.
•Senonsitoglieilnastro,sivericaun
errore.
Chiudere lo sportello anteriore.
Tire de la cinta hacia usted.
El tóner se adhiere al borde de la cinta.
No lo toque.
•Si no tira de la cinta para sacarla, se
producirá un error.
Cierre la tapa frontal.
Estireu de la cinta cap a
vosaltres.
El tòner s'adhereix a la vora de la cinta.
Aneu amb compte de no tocar-lo.
•Es produeix un error si no traieu la cinta.
Tanqueu la tapa davantera.
Pull the paper tray carefully until
it stops. Lift the front side of the
tray, and then pull it out of the
machine.
Pinch the lever of the back fence
and align it with the paper size.
Next, pinch the lever of the right
fence and align the right and left
fences with the paper size.
Load the paper print side down.
•Do not stack paper over the limit mark
(the mark in the balloon shown above).
Rotate the paper size dial, which
is located at the front right of
the tray, so that the size and the
feed direction of the paper in the
paper tray can be seen from the
window.
Ziehen Sie das Papiermagazin
vorsichtig bis zum Anschlag
heraus. Heben Sie die vordere
Seite des Magazins an und
ziehen Sie es dann aus dem
Gerät.
Betätigen Sie den Hebel des
Rückanschlags und stellen Sie
ihn auf das richtige Papierformat
ein. Betätigen Sie dann den
Hebel des rechten Anschlags
und stellen Sie den rechten und
den linken Anschlag auf das
Papierformat ein.
Legen Sie das Papier mit der
Druckseite nach unten zeigend
ein.
•Stapeln Sie das Papier nicht über
die Begrenzungsmarkierung (siehe
Markierung in der Sprechblase oben)
hinaus.
Stellen Sie das Papierformat-
Wählrad, das sich vorn rechts
am Magazin befindet, so ein,
dass das Format und die
Einzugsrichtung des Papiers
im Papiermagazin im Fenster
angezeigt wird.
Tirez délicatement le magasin
jusqu'à son arrêt. Soulevez
l'avant du magasin, puis sortez-
le de l’appareil.
Pincez le levier du guide arrière
et alignez-le sur le format papier.
Pincez le levier du guide droit
et alignez les guides droit et
gauche sur le format papier.
Chargez le papier, la face à
imprimer vers le bas.
•Ne chargez pas de papier au-delà de la
limite (marque dans la bulle indiquée ci-
dessus).
Faites tourner le cadran du
format papier, situé à droite
sur la face avant du magasin
afin que le format et le sens
d’alimentation du papier dans le
magasin soient visibles à travers
la fenêtre.
Estrarre delicatamente il vassoio
carta finché non si arresta.
Sollevare la parte anteriore
del vassoio ed estrarlo dalla
macchina.
Premere la leva della guida
posteriore e allinearla con il
formato della carta. Quindi,
premere la leva della guida
destra e allineare le guide destra
e sinistra con il formato della
carta.
Caricare la carta con il lato di
stampa rivolto verso il basso.
•Non impilare la carta oltre il segno di
limite (il segno indicato nella figura
sopra).
Ruotare il quadrante del formato
carta, situato nella parte
anteriore destra del vassoio, in
modo che dalla piccola finestra
siano visibili il formato e la
direzione di alimentazione della
carta nel vassoio carta.
Tire de la bandeja de papel con
cuidado hasta que llegue al
tope. Eleve la parte delantera de
la bandeja y tire para sacarla de
la máquina.
Agarre la palanca del tope
trasero y alinéela con el tamaño
del papel. A continuación, agarre
la palanca de la guía derecha
y alinee las guías derecha e
izquierda con el tamaño del
papel.
Cargue el papel con la cara de
impresión hacia abajo.
•No apile papel más allá de la marca
límite (la marca del globo mostrada
arriba).
Gire el selector de tamaño
de papel, situado en la parte
delantera derecha de la bandeja,
de forma que el tamaño y la
dirección de alimentación del
papel en la bandeja de papel
se puedan ver a través de la
ventana.
Traieu la safata de paper fins
que s'aturi. Aixequeu la part de
davant de la safata i extraieu-la
de la màquina.
Agafeu la palanca del topall
posterior i alineeu-lo amb la
mida del paper. Tot seguit,
agafeu la palanca de la guia
dreta i alineeu les guies dreta i
esquerra amb la mida del paper.
Carregueu el paper amb la cara
que s'ha d'imprimir cap avall.
•No apileu el paper sobre la marca límit
(mireu el globus a dalt).
Gireu el selector de mida del
paper, que es troba a la part
davantera dreta de la safata, de
manera que es pugui veure la
mida i la direcció d'alimentació
del paper a la safata des de la
finestra.
1
DYQ019
2
DVL229
3
DVK220
4
A5
DVL230

6
Setup/Einrichten/Configuration/Impostazione/Configuración/Configuració
EN
DE
FR
IT
ES
CA
Lifting the front side of the tray,
insert it into the machine, and
then push it in carefully until it
stops.
Heben Sie die Vorderseite des
Magazins an, setzen Sie es in
das Gerät ein und schieben
Sie es dann vorsichtig bis zum
Anschlag in das Gerät.
Soulevez l’avant du magasin,
puis faites-le glisser
délicatement dans l’appareil
jusqu’à son arrêt.
Sollevando la parte anteriore del
vassoio, inserirlo nella macchina
e spingerlo delicatamente finché
non si arresta in posizione.
Levante la parte delantera de la
bandeja, insértela en la máquina
y, a continuación, empújela
suavemente hasta que se
detenga.
Aixequeu la part frontal de la
safata i, tot seguit, introduïu-la
dins de la màquina i pressioneu
fins que s’aturi.
5
DYQ020

7
EN
DE
FR
IT
ES
CA
4.
Turning the Power On/Einschalten/Mise sous tension/Accensione/Encendido de la máquina/Encesa de la màquina
Lifting the front side of the tray,
insert it into the machine, and
then push it in carefully until it
stops.
Heben Sie die Vorderseite des
Magazins an, setzen Sie es in
das Gerät ein und schieben
Sie es dann vorsichtig bis zum
Anschlag in das Gerät.
Soulevez l’avant du magasin,
puis faites-le glisser
délicatement dans l’appareil
jusqu’à son arrêt.
Sollevando la parte anteriore del
vassoio, inserirlo nella macchina
e spingerlo delicatamente finché
non si arresta in posizione.
Levante la parte delantera de la
bandeja, insértela en la máquina
y, a continuación, empújela
suavemente hasta que se
detenga.
Aixequeu la part frontal de la
safata i, tot seguit, introduïu-la
dins de la màquina i pressioneu
fins que s’aturi.
Connect the power cord to the
power connector at the back of
the machine.
Connect the power cord to the
wall outlet.
Press the main power switch.
The machine starts up. Following the
start screen, the language select screen
appears.
When installing option, see “Installing
and Setting Options”, Setup in the web
manual.
Verbinden Sie das Netzkabel
mit dem Stromanschluss an der
Rückseite des Geräts.
Stecken Sie den
Netzkabelstecker in die
Steckdose.
Drücken Sie den Hauptschalter.
Das Gerät fährt hoch. Nach dem
Startbildschirm wird der Sprachauswahl-
Bildschirm angezeigt.
Wenn Optionen installiert werden, im
entsprechenden Abschnitt im Online-
Handbuch nachlesen.
Branchez le câble d’alimentation
à la prise d’alimentation à
l’arrière de l’appareil.
Branchez le câble d'alimentation
sur la prise de courant murale.
Appuyez sur l'interrupteur
principal d’alimentation.
L'appareil démarre. Après l’écran
d’accueil, l’écran de sélection de langue
s’affiche.
Pour l’installation des options, reportez-
vous au manuel d'installation sur
internet.
Collegare il cavo di
alimentazione al connettore di
alimentazione sul retro della
macchina.
Collegare il cavo di
alimentazione alla presa a muro.
Premere l'interruttore di
alimentazione principale.
La macchina si accende. Dopo
la schermata iniziale, compare la
schermata di selezione della lingua.
Per installare un'opzione, vedere
Installazione nel manuale online.
Conecte el cable de alimentación
al conector de alimentación
situado en la parte trasera de la
máquina.
Conecte el cable de alimentación
a la toma de corriente de pared.
Pulse el interruptor de
alimentación principal.
La máquina se pone en funcionamiento.
Tras la pantalla de inicio aparece la
pantalla de selección de idioma.
Al instalar un elemento opcional,
consulte Configuración en el manual de
la web.
Connecteu el cable d'alimentació
al connector d'alimentació situat
a la part posterior de la màquina.
Connecteu el cable d'alimentació
a la presa de corrent.
Premeu el botó d'alimentació
principal.
La màquina s'engegarà. Després de la
pantalla d'inici, apareixerà la pantalla de
selecció d'idioma.
Quan instal·leu l'opció, consulteu el
manual web.
1
DYQ021
2
DVL204
3
DYQ022
4

8
EN
DE
FR
IT
ES
CA
6.
Time Zone/Zeitzone/Fuseau horaire/Fuso orario/Zona
horaria/Zona horària
5.
Language/Sprache/Langue/Lingua/Idioma/Idioma
Press the [ ] or [ ] key to
select the language that you
want to use, and then press the
[OK] key.
English screens are used in this manual
for example.
Press the right selection key
([Start]).
Press the [ ] or [ ] key to
select [Time Zone], and then
press the [OK] key.
Press the [
] or [ ] key to enter
the time zone, and then press
the [OK] key.
Drücken Sie auf die Taste [
]
oder [
], um die zu verwendende
Sprache auszuwählen, und dann
auf die Taste [OK].
Die Bildschirme in Englisch in diesem
Handbuch dienen lediglich als Beispiel.
Drücken Sie auf die rechte
Auswahltaste ([Start]).
Drücken Sie die Taste [ ] oder
[
], um [Zeitzone] auszuwählen,
und dann die Taste [OK].
Drücken Sie auf die Taste
[
] oder [ ], um die Zeitzone
einzugeben, und dann auf die
Taste [OK].
Appuyez sur la touche [
] ou
[
] pour sélectionnez la langue
que vous souhaitez utiliser, puis
appuyez sur la touche [OK].
Dans ce manuel, des écrans en anglais
sont utilisés à titre d’exemple.
Appuyez sur la touche de
sélection de droite ([Départ]).
Appuyez sur la touche [ ] ou
[
] pour sélectionner [Fuseau
horaire], puis appuyez sur la
touche [OK].
Appuyez sur la touche [
] ou
[
] pour saisir le fuseau horaire,
puis appuyez sur la touche [OK].
Premere il tasto [
] o [ ] per
selezionare la lingua desiderata,
quindi premere il tasto [OK].
In questo manuale vengono utilizzate
come esempi le schermate in lingua
inglese.
Premere il tasto di selezione a
destra ([Avvio]).
Premere il tasto [ ] o [ ] per
selezionare [Fuso orario], quindi
premere il tasto [OK].
Premere il tasto [
] o [ ] per
inserire il fuso orario, quindi
premere il tasto [OK].
Pulse la tecla [
] o [ ] para
seleccionar el idioma que desea
usar y, a continuación, pulse la
tecla [OK].
En este manual se utilizan las pantallas
en inglés a modo de ejemplo.
Pulse la tecla de selección
derecha ([Inicio]).
Pulse la tecla [ ] o [ ] para
seleccionar [Zona horaria] y a
continuación pulse [OK].
Pulse la tecla [
] o [ ] para
introducir la zona horaria y, a
continuación, pulse la tecla [OK].
Premeu la tecla [
] o [ ] per
seleccionar l'idioma que vulgueu
fer servir i després premeu [OK].
En aquest manual s'utilitzen pantalles
en anglès com a exemple.
Premeu la tecla de selecció
dreta ([Inici]).
Premeu la tecla [ ] o [ ] per
seleccionar [Zona horària] i
després premeu [OK].
Premeu la tecla [
] o [ ]
per introduir la zona horària i
després premeu [OK].
1
DYR013
2
DYR014
[Start] Installation
Settings. You can
Change the settings
later.
StartBack
1
DYR015
2
DYR016
Initial Settings/Erste Einstellungen/Paramètres initiaux/Impostazioni iniziali/Ajustes iniciales/
Paràmetres inicials

9
EN
DE
FR
IT
ES
CA
7.
Date and Time/Datum und Uhrzeit/Date et heure/Data e ora/Fecha y hora/Data i hora
Press the [ ] or [ ] key to
select the language that you
want to use, and then press the
[OK] key.
English screens are used in this manual
for example.
Press the right selection key
([Start]).
Press the [ ] or [ ] key to
select [Time Zone], and then
press the [OK] key.
Press the [
] or [ ] key to enter
the time zone, and then press
the [OK] key.
Drücken Sie auf die Taste [
]
oder [
], um die zu verwendende
Sprache auszuwählen, und dann
auf die Taste [OK].
Die Bildschirme in Englisch in diesem
Handbuch dienen lediglich als Beispiel.
Drücken Sie auf die rechte
Auswahltaste ([Start]).
Drücken Sie die Taste [ ] oder
[
], um [Zeitzone] auszuwählen,
und dann die Taste [OK].
Drücken Sie auf die Taste
[
] oder [ ], um die Zeitzone
einzugeben, und dann auf die
Taste [OK].
Appuyez sur la touche [
] ou
[
] pour sélectionnez la langue
que vous souhaitez utiliser, puis
appuyez sur la touche [OK].
Dans ce manuel, des écrans en anglais
sont utilisés à titre d’exemple.
Appuyez sur la touche de
sélection de droite ([Départ]).
Appuyez sur la touche [ ] ou
[
] pour sélectionner [Fuseau
horaire], puis appuyez sur la
touche [OK].
Appuyez sur la touche [
] ou
[
] pour saisir le fuseau horaire,
puis appuyez sur la touche [OK].
Premere il tasto [
] o [ ] per
selezionare la lingua desiderata,
quindi premere il tasto [OK].
In questo manuale vengono utilizzate
come esempi le schermate in lingua
inglese.
Premere il tasto di selezione a
destra ([Avvio]).
Premere il tasto [ ] o [ ] per
selezionare [Fuso orario], quindi
premere il tasto [OK].
Premere il tasto [
] o [ ] per
inserire il fuso orario, quindi
premere il tasto [OK].
Pulse la tecla [
] o [ ] para
seleccionar el idioma que desea
usar y, a continuación, pulse la
tecla [OK].
En este manual se utilizan las pantallas
en inglés a modo de ejemplo.
Pulse la tecla de selección
derecha ([Inicio]).
Pulse la tecla [ ] o [ ] para
seleccionar [Zona horaria] y a
continuación pulse [OK].
Pulse la tecla [
] o [ ] para
introducir la zona horaria y, a
continuación, pulse la tecla [OK].
Premeu la tecla [
] o [ ] per
seleccionar l'idioma que vulgueu
fer servir i després premeu [OK].
En aquest manual s'utilitzen pantalles
en anglès com a exemple.
Premeu la tecla de selecció
dreta ([Inici]).
Premeu la tecla [ ] o [ ] per
seleccionar [Zona horària] i
després premeu [OK].
Premeu la tecla [
] o [ ]
per introduir la zona horària i
després premeu [OK].
Press the [ ] or [ ] key to
select [Date and Time], and then
press the [OK] key.
Press the [
] or [ ] key to enter
the date, month, and year, and
then press the [OK] key.
Press the [
] or [ ] key to enter
the time, and then press the [OK]
key.
Drücken Sie auf die Taste
[
] oder [ ], um [Datum und
Uhrzeit] auszuwählen, und dann
die Taste [OK].
Drücken Sie auf die Taste
[
] oder [ ], um das Datum, den
Monat und das Jahr einzugeben,
und dann auf die Taste [OK].
Drücken Sie auf die Taste
[
] oder [ ], um die Uhrzeit
einzugeben, und dann auf die
Taste [OK].
Appuyez sur la touche [
] ou
[
] pour sélectionner [Date
et heure], puis appuyez sur la
touche [OK].
Appuyez sur la touche [
] ou
[
] pour saisir la date, le mois
et l'année, puis appuyez sur la
touche [OK].
Appuyez sur la touche [
] ou
[
] pour saisir l'heure, puis
appuyez sur la touche [OK].
Premere il tasto [
] o [ ] per
selezionare [Data e ora], quindi
premere il tasto [OK].
Premere il tasto [
] o [ ] per
inserire la data, il mese e l'anno,
quindi premere il tasto [OK].
Premere il tasto [
] o [ ] per
inserire l'ora, quindi premere il
tasto [OK].
Pulse la tecla [
] o [ ] para
seleccionar [Fecha y hora] y, a
continuación, pulse la tecla [OK].
Pulse la tecla [
] o [ ] para
introducir la fecha, el mes y el
año y, a continuación, pulse la
tecla [OK].
Pulse la tecla [
] o [ ] para
introducir la hora y, a
continuación, pulse la tecla [OK].
Premeu la tecla [
] o [ ] per
seleccionar [Data i hora] i
després premeu [OK].
Premeu la tecla [
] o [ ] per
introduir la data, el mes i l'any, i
després premeu [OK].
Premeu la tecla [
] o [ ] per
introduir l'hora i després premeu
[OK].
1
DYR017
2
DYR018
3
DYR019
4

10
EN
DE
FR
IT
ES
CA
8.
Daylight Saving Time/Sommerzeit/Heure d’été/Ora legale/Horario de verano/Horari d’estiu
Press the [ ] or [ ] key to
select [Daylight Saving Time],
and then press the [OK] key.
Press the [
] or [ ] key to
select [Active/Inactive], and then
press the [OK] key.
Press the [
] or [ ] key to
select [Active] or [Inactive], and
then press the [OK] key.
If you select [Inactive], press the right
selection key ([Exit]) to complete the
setting.
Configure the settings
for daylight saving time if
necessary.
You can set the [Start Time], [End
Time], and [Offset].
Press the right selection key
([Exit]).
When the daylight saving time settings
are complete, the screen returns to the
installation settings screen.
Drücken Sie auf die Taste
[
] oder [ ], um [Sommerzeit]
auszuwählen, und dann auf die
Taste [OK].
Drücken Sie auf die Taste
[
] oder [ ], um [Aktiv/Inaktiv]
auszuwählen, und dann auf die
Taste [OK].
Drücken Sie auf die Taste
[
] oder [ ], um [Aktiv] oder
[Inaktiv] auszuwählen, und dann
auf die Taste [OK].
Wenn Sie [Inaktiv] auswählen, drücken
Sie auf die rechte Auswahltaste ([Verl.]),
um die Einstellung abzuschließen.
Konfigurieren Sie die
Einstellungen für die
Sommerzeit nach Bedarf.
Sie können die Optionen [Startzeit],
[Endzeit] und [Zeitverschiebung]
festlegen.
Drücken Sie auf die rechten
Auswahltaste ([Verl.]).
Wenn Sie mit der Einstellung
der Sommerzeit fertig sind, kehrt
das Gerät zum Bildschirm für die
Installationseinstellungen zurück.
Appuyez sur la touche [ ] ou
[
] pour sélectionner [Heure
d'été], puis appuyez sur la
touche [OK].
Appuyez sur la touche [
] ou
[
] pour sélectionner [Actif/
Inactif], puis appuyez sur la
touche [OK].
Appuyez sur la touche [
] ou
[
] pour sélectionner [Actif]
ou [Inactif], puis appuyez sur la
touche [OK].
Si vous sélectionnez [Inactif], appuyez
sur la touche de sélection de droite
([Sortie]) pour terminer la configuration.
Configurez les paramètres pour
l’heure d’été, le cas échéant.
Vous pouvez configurer [Heure de
début], [Heure de fin] et [Décalage].
Appuyez sur la touche de
sélection de droite ([Sortie]).
Une fois la configuration de l’heure d’été
terminée, l’écran revient à l’écran de
configuration de l’installation.
Premere il tasto [ ] o [ ] per
selezionare [Ora legale], quindi
premere il tasto [OK].
Premere il tasto [
] o [ ] per
selezionare [Attivo/Non attivo],
quindi premere il tasto [OK].
Premere il tasto [
] o [ ] per
selezionare [Attivo] o [Non
attivo], quindi premere il tasto
[OK].
Se si seleziona [Non attivo], premere
il tasto di selezione destro ([Esci]) per
completare l'impostazione.
Configurare le impostazioni
relative all'ora legale, se
necessario.
È possibile impostare [Ora di inizio], [Ora
di fine] e [Differenza].
Premere il tasto di selezione
destro ([Esci]).
Una volta completate le impostazioni
dell'ora legale, si ritorna alla schermata
delle impostazioni di installazione.
Pulse la tecla [ ] o [ ] para
seleccionar [Horario de verano]
y a continuación pulse [OK].
Pulse la tecla [
] o [ ] para
seleccionar [Activo/Inactivo] y, a
continuación, pulse la tecla [OK].
Pulse la tecla [
] o [ ] para
seleccionar [Activo] o [Inactivo]
y, a continuación, pulse la tecla
[OK].
Si selecciona [Inactivo], pulse la tecla
de selección derecha ([Salir]) para
finalizar el ajuste.
Si es necesario, configure los
ajustes del horario de verano.
Puede definir los valores de [Hora de
inicio], [Hora de fin] y [Compensación].
Pulse la tecla de selección
derecha ([Salir]).
Una vez establecidos los ajustes del
horario de verano, la pantalla vuelve a
la pantalla de los ajustes de instalación.
Premeu la tecla [ ] o [ ] per
seleccionar [Horari d'estiu] i
després premeu [OK].
Premeu la tecla [
] o [ ] per
seleccionar [Actiu/Inactiu] i
després premeu [OK].
Premeu la tecla [
] o [ ] per
seleccionar [Actiu] o [Inactiu] i
després premeu [OK].
Si seleccioneu [Inactiu], premeu la tecla
de selecció dreta ([Surt]) per finalitzar la
configuració.
Configureu els paràmetres de
l'horari d'estiu si cal.
Podeu definir la [Hora d'inici], la [Hora
finalització] i el [Diferència horària].
Premeu la tecla de selecció
dreta ([Surt]).
Un cop finalitzada la configuració de
l'horari d'estiu, es tornarà a mostrar
la pantalla de configuració de la
instal·lació.
1
DYR020
DYR021
2
DYR022
3
DYR023
4
DYR024

11
EN
DE
FR
IT
ES
CA
Initial Settings/Erste Einstellungen/Paramètres initiaux/Impostazioni iniziali/Ajustes iniciales/Paràmetres inicials
Press the [ ] or [ ] key to
select [Daylight Saving Time],
and then press the [OK] key.
Press the [
] or [ ] key to
select [Active/Inactive], and then
press the [OK] key.
Press the [
] or [ ] key to
select [Active] or [Inactive], and
then press the [OK] key.
If you select [Inactive], press the right
selection key ([Exit]) to complete the
setting.
Configure the settings
for daylight saving time if
necessary.
You can set the [Start Time], [End
Time], and [Offset].
Press the right selection key
([Exit]).
When the daylight saving time settings
are complete, the screen returns to the
installation settings screen.
Drücken Sie auf die Taste
[
] oder [ ], um [Sommerzeit]
auszuwählen, und dann auf die
Taste [OK].
Drücken Sie auf die Taste
[
] oder [ ], um [Aktiv/Inaktiv]
auszuwählen, und dann auf die
Taste [OK].
Drücken Sie auf die Taste
[
] oder [ ], um [Aktiv] oder
[Inaktiv] auszuwählen, und dann
auf die Taste [OK].
Wenn Sie [Inaktiv] auswählen, drücken
Sie auf die rechte Auswahltaste ([Verl.]),
um die Einstellung abzuschließen.
Konfigurieren Sie die
Einstellungen für die
Sommerzeit nach Bedarf.
Sie können die Optionen [Startzeit],
[Endzeit] und [Zeitverschiebung]
festlegen.
Drücken Sie auf die rechten
Auswahltaste ([Verl.]).
Wenn Sie mit der Einstellung
der Sommerzeit fertig sind, kehrt
das Gerät zum Bildschirm für die
Installationseinstellungen zurück.
Appuyez sur la touche [ ] ou
[
] pour sélectionner [Heure
d'été], puis appuyez sur la
touche [OK].
Appuyez sur la touche [
] ou
[
] pour sélectionner [Actif/
Inactif], puis appuyez sur la
touche [OK].
Appuyez sur la touche [
] ou
[
] pour sélectionner [Actif]
ou [Inactif], puis appuyez sur la
touche [OK].
Si vous sélectionnez [Inactif], appuyez
sur la touche de sélection de droite
([Sortie]) pour terminer la configuration.
Configurez les paramètres pour
l’heure d’été, le cas échéant.
Vous pouvez configurer [Heure de
début], [Heure de fin] et [Décalage].
Appuyez sur la touche de
sélection de droite ([Sortie]).
Une fois la configuration de l’heure d’été
terminée, l’écran revient à l’écran de
configuration de l’installation.
Premere il tasto [ ] o [ ] per
selezionare [Ora legale], quindi
premere il tasto [OK].
Premere il tasto [
] o [ ] per
selezionare [Attivo/Non attivo],
quindi premere il tasto [OK].
Premere il tasto [
] o [ ] per
selezionare [Attivo] o [Non
attivo], quindi premere il tasto
[OK].
Se si seleziona [Non attivo], premere
il tasto di selezione destro ([Esci]) per
completare l'impostazione.
Configurare le impostazioni
relative all'ora legale, se
necessario.
È possibile impostare [Ora di inizio], [Ora
di fine] e [Differenza].
Premere il tasto di selezione
destro ([Esci]).
Una volta completate le impostazioni
dell'ora legale, si ritorna alla schermata
delle impostazioni di installazione.
Pulse la tecla [ ] o [ ] para
seleccionar [Horario de verano]
y a continuación pulse [OK].
Pulse la tecla [
] o [ ] para
seleccionar [Activo/Inactivo] y, a
continuación, pulse la tecla [OK].
Pulse la tecla [
] o [ ] para
seleccionar [Activo] o [Inactivo]
y, a continuación, pulse la tecla
[OK].
Si selecciona [Inactivo], pulse la tecla
de selección derecha ([Salir]) para
finalizar el ajuste.
Si es necesario, configure los
ajustes del horario de verano.
Puede definir los valores de [Hora de
inicio], [Hora de fin] y [Compensación].
Pulse la tecla de selección
derecha ([Salir]).
Una vez establecidos los ajustes del
horario de verano, la pantalla vuelve a
la pantalla de los ajustes de instalación.
Premeu la tecla [ ] o [ ] per
seleccionar [Horari d'estiu] i
després premeu [OK].
Premeu la tecla [
] o [ ] per
seleccionar [Actiu/Inactiu] i
després premeu [OK].
Premeu la tecla [
] o [ ] per
seleccionar [Actiu] o [Inactiu] i
després premeu [OK].
Si seleccioneu [Inactiu], premeu la tecla
de selecció dreta ([Surt]) per finalitzar la
configuració.
Configureu els paràmetres de
l'horari d'estiu si cal.
Podeu definir la [Hora d'inici], la [Hora
finalització] i el [Diferència horària].
Premeu la tecla de selecció
dreta ([Surt]).
Un cop finalitzada la configuració de
l'horari d'estiu, es tornarà a mostrar
la pantalla de configuració de la
instal·lació.
Proceed the setup according to the function you want to use.
Fahren Sie mit der Einrichtung des Geräts entsprechend der zu verwendenden Funktion fort.
Procédez à la configuration selon la fonction que vous souhaitez utiliser.
Proseguire l’installazione in base alla funzione che si desidera utilizzare.
Defina la configuración según la función que quiera utilizar.
Continueu la configuració segons la funció que vulgueu utilitzar.
You cannot use Wired LAN and Wireless LAN at the same time.
Sie können „Kabelgebundenes LAN“ und „W-LAN“ nicht gleichzeitig verwenden.
Vous ne pouvez pas utiliser un LAN filaire et un LAN sans fil simultanément.
Non è possibile utilizzare le reti Wired LAN e Wireless LAN contemporaneamente.
No puede usar la LAN con cable y la LAN inalámbrica al mismo tiempo.
No podeu utilitzar LAN amb fil i LAN sense fil alhora.
Wired LAN
Wireless LAN
USB
9. Network (Wired LAN) -→Seepage12.
9. Netzwerk (Kabelgebundenes LAN) -→SieheSeite12.
9. Réseau (LAN filaire) -→Voirpage12.
9. Rete (Wired LAN) -→Vederepagina12.
9. Red (LAN con cable) -→Consultelapágina12.
9. Xarxa (LAN amb fil) -→Vegeulapàgina12.
9. Network (Wireless LAN) -→Seepage15.
9. Netzwerk (Wireless LAN) -→SieheSeite15.
9. Réseau (LAN sans fil) -→Voirpage15.
9. Rete (Wireless LAN) -→Vederepagina15.
9. Red (LAN inalámbrica) -→Consultelapágina15.
9. Xarxa (LAN sense fil) -→Vegeulapàgina15.
Press the right selection key ([Exit]), and then go to “10. Installing
the Printer Driver”. →Seepage18.
Drücken Sie auf die rechte Auswahltaste ([Verl.]) und gehen Sie
dann zu „10. Installieren des Druckertreibers“. →SieheSeite18.
Appuyez sur la touche de sélection de droite ([Sortie]), puis passez
à « 10. Installation du pilote d’impression ». →Voirpage18.
Premere il tasto di selezione destro ([Esci]), quindi andare a
“10. Installazione del driver della stampante”. →Vederepagina18.
Pulse la tecla de selección derecha ([Salir]) y, a continuación,
diríjase a “10. Instalación del driver de impresora”. →Consultela
página18.
Premeu la tecla de selecció dreta ([Surt]) i després aneu a «10.
Instal·lació del diver d’impressora». →Vegeulapàgina18.
Only for machines that support Wireless LAN./
Nur für Geräte, die Wireless LAN unterstützen./
Uniquement pour les appareils prenant en
charge le LAN sans fil./Solo per le macchine
che supportano la rete Wireless LAN./Solo para
máquinas compatibles con LAN inalámbrica./
Només per a màquines compatibles amb LAN
sense fil.

12
EN
DE
FR
IT
ES
CA
9.
Network (Wired LAN)/Netzwerk (Kabelgebundenes LAN)/Réseau (LAN filaire)/Rete (Wired LAN)/Red (LAN con cable/Xarxa
(LAN amb fil)
Press the [ ] or [ ] key to
select [Network], and then press
the [OK] key.
Press the [
] or [ ] key to
select [LAN Settings], and then
press the [OK] key.
Press the [
] or [ ] key to
select [Wired LAN], and then
press the [OK] key.
Connect the LAN cable to the
Ethernet port at the back side of
the machine.
Drücken Sie auf die Taste
[
] oder [ ], um [Netzwerk]
auszuwählen, und dann auf die
Taste [OK].
Drücken Sie auf die Taste
[
] oder [ ], um [LAN-
Einstellungen] auszuwählen,
und dann auf die Taste [OK].
Drücken Sie auf die Taste
[
] oder [ ], um [Kabelgebund.
LAN] auszuwählen, und drücken
Sie dann die Taste [OK].
Schließen Sie das LAN-Kabel an
den Ethernet-Anschluss an der
Rückseite des Geräts an.
Appuyez sur la touche [
] ou
[
] pour sélectionner [Réseau],
puis appuyez sur la touche [OK].
Appuyez sur la touche [
] ou
[
] pour sélectionner
[Paramètres LAN], puis appuyez
sur la touche [OK].
Appuyez sur la touche [
] ou
[
] pour sélectionner [LAN
filaire], puis appuyez sur la
touche [OK].
Branchez le câble LAN au port
Ethernet à l’arrière de l’appareil.
Premere il tasto [
] o [ ]
per selezionare [Rete], quindi
premere il tasto [OK].
Premere il tasto [
] o [ ] per
selezionare [Impostazioni LAN],
quindi premere il tasto [OK].
Premere il tasto [
] o [ ] per
selezionare [Wired LAN], quindi
premere il tasto [OK].
Collegare il cavo LAN alla
porta Ethernet sul retro della
macchina.
Pulse la tecla [
] o [ ] para
seleccionar [Red] y, a
continuación, pulse [OK].
Pulse la tecla [
] o [ ] para
seleccionar [Ajustes de LAN] y,
a continuación, pulse [OK].
Pulse la tecla [
] o [ ] para
seleccionar [LAN con cable] y a
continuación pulse [OK].
Conecte el cable LAN al puerto
Ethernet de la parte trasera de la
máquina.
Premeu la tecla [
] o [ ] per
seleccionar [Xarxa] i després
premeu [OK].
Premeu la tecla [
] o [ ] per
seleccionar [Paràmetres LAN] i
després premeu [OK].
Premeu la tecla [
] o [ ] per
seleccionar [LAN amb fil] i
després premeu [OK].
Connecteu el cable LAN al port
Ethernet situat a la part posterior
de la màquina.
1
DYR025
2
DYR026
3
DYR027
4
DYQ024

13
Initial Settings/Erste Einstellungen/Paramètres initiaux/Impostazioni iniziali/Ajustes iniciales/Paràmetres inicials
EN
DE
FR
IT
ES
CA
Press the [ ] or [ ] key to
select [Network], and then press
the [OK] key.
Press the [
] or [ ] key to
select [LAN Settings], and then
press the [OK] key.
Press the [
] or [ ] key to
select [Wired LAN], and then
press the [OK] key.
Connect the LAN cable to the
Ethernet port at the back side of
the machine.
Drücken Sie auf die Taste
[
] oder [ ], um [Netzwerk]
auszuwählen, und dann auf die
Taste [OK].
Drücken Sie auf die Taste
[
] oder [ ], um [LAN-
Einstellungen] auszuwählen,
und dann auf die Taste [OK].
Drücken Sie auf die Taste
[
] oder [ ], um [Kabelgebund.
LAN] auszuwählen, und drücken
Sie dann die Taste [OK].
Schließen Sie das LAN-Kabel an
den Ethernet-Anschluss an der
Rückseite des Geräts an.
Appuyez sur la touche [
] ou
[
] pour sélectionner [Réseau],
puis appuyez sur la touche [OK].
Appuyez sur la touche [
] ou
[
] pour sélectionner
[Paramètres LAN], puis appuyez
sur la touche [OK].
Appuyez sur la touche [
] ou
[
] pour sélectionner [LAN
filaire], puis appuyez sur la
touche [OK].
Branchez le câble LAN au port
Ethernet à l’arrière de l’appareil.
Premere il tasto [
] o [ ]
per selezionare [Rete], quindi
premere il tasto [OK].
Premere il tasto [
] o [ ] per
selezionare [Impostazioni LAN],
quindi premere il tasto [OK].
Premere il tasto [
] o [ ] per
selezionare [Wired LAN], quindi
premere il tasto [OK].
Collegare il cavo LAN alla
porta Ethernet sul retro della
macchina.
Pulse la tecla [
] o [ ] para
seleccionar [Red] y, a
continuación, pulse [OK].
Pulse la tecla [
] o [ ] para
seleccionar [Ajustes de LAN] y,
a continuación, pulse [OK].
Pulse la tecla [
] o [ ] para
seleccionar [LAN con cable] y a
continuación pulse [OK].
Conecte el cable LAN al puerto
Ethernet de la parte trasera de la
máquina.
Premeu la tecla [
] o [ ] per
seleccionar [Xarxa] i després
premeu [OK].
Premeu la tecla [
] o [ ] per
seleccionar [Paràmetres LAN] i
després premeu [OK].
Premeu la tecla [
] o [ ] per
seleccionar [LAN amb fil] i
després premeu [OK].
Connecteu el cable LAN al port
Ethernet situat a la part posterior
de la màquina.
Press the right selection key
([Next]).
Select the method to set the IP
address.
Auto-Obtain (DHCP):
Obtains an IP address automatically.
Manual Configuration:
Specify an IP address manually. You
can select a value by pressing [
]/[ ]/
[
]/[ ] key.
Confirm the message on the
screen, and then press the right
selection key ([Exit]).
Press the [
] or [ ] key to
select [USB Port], and then
press the [OK] key.
Drücken Sie auf die rechte
Auswahltaste ([Weiter]).
Wählen Sie das Verfahren zum
Festlegen der IP-Adresse aus.
Autom. Einholen (DHCP):
Die IP-Adresse wird automatisch
abgerufen.
Manuelle Konfiguration:
Legen Sie die IP-Adresse manuell
fest. Sie können ein Wert auswählen,
indem Sie auf die Taste [
]/[ ]/[ ]/
[
] drücken.
Bestätigen Sie die Meldung
auf dem Bildschirm und
drücken Sie dann auf die rechte
Auswahltaste ([Verl.]).
Drücken Sie auf die Taste [
]
oder [
], um [USB-Anschluss]
auszuwählen, und dann auf die
Taste [OK].
Appuyez sur la touche de
sélection de droite ([Suivant]).
Sélectionnez la méthode de
configuration de l’adresse IP.
Attribution auto (DHCP) :
Permet d’obtenir automatiquement une
adresse IP.
Configuration manuelle :
Spécifiez une adresse IP manuellement.
Vous pouvez sélectionnez une valeur
en appuyant sur la touche [
]/[ ]/[ ]/
[
].
Confirmez le message à l’écran,
puis appuyez sur la touche de
sélection de droite ([Sortie]).
Appuyez sur la touche [
] ou
[
] pour sélectionner [Port
USB], puis appuyez sur la
touche [OK].
Premere il tasto di selezione
destro ([Avanti]).
Selezionare il metodo di
impostazione dell'indirizzo IP.
Auto-ottieni (DHCP):
Consente di ottenere un indirizzo IP
automaticamente.
Configurazione manuale:
Specificare manualmente un indirizzo
IP. È possibile selezionare un valore
premendo i tasti [
]/[ ]/[ ]/[ ].
Confermare il messaggio sullo
schermo, quindi premere il tasto
di selezione destro ([Esci]).
Premere il tasto [
] o [ ] per
selezionare [Porta USB], quindi
premere il tasto [OK].
Pulse la tecla de selección
derecha ([Siguiente]).
Seleccione el método con el que
desea establecer la dirección IP.
Auto obtener (DHCP):
obtiene una dirección IP
automáticamente.
Configuración manual:
especifica una dirección IP
manualmente. Puede pulsar la tecla
[
]/[ ]/[ ]/[ ] para seleccionar un
valor.
Confirme el mensaje en la
pantalla y, a continuación, pulse
la tecla de selección derecha
([Salir]).
Pulse la tecla [
] o [ ] para
seleccionar [Puerto USB] y a
continuación pulse [OK].
Premeu la tecla de selecció
dreta ([Seg.]).
Seleccioneu el mètode per
establir l'adreça IP.
Obtenir auto (DHCP):
Obté una adreça IP automàticament.
Configuració manual:
Especifiqueu una adreça IP
manualment. Podeu seleccionar un
valor amb la tecla [
]/[ ]/[ ]/[ ].
Confirmeu el missatge de la
pantalla i, tot seguit, premeu la
tecla de selecció dreta ([Surt]).
Premeu la tecla [
] o [ ] per
seleccionar [Port USB] i després
premeu [OK].
5
DYR028
6
DYR029
7
DYR030
8
DYR041

14
EN
DE
FR
IT
ES
CA
Press the [ ] or [ ] key to
select [Active] or [Inactive], and
then press the [OK] key.
Select [Active] if you will connect the
machine and your computer via USB
connection.
If the Wireless LAN board is installed, the
screen for setting a direct connection
appears so you can specify whether to
enable direct connections.
When the network connection
is complete, press the right
selection key ([Exit]).
Confirm the message on the
screen, and then press the right
selection key ([Exit]).
You can scroll the message by pressing
[
] and [ ] key.
Press the right selection key
([Exit]), and then press the right
selection key ([Restart]).
Wired LAN setting is complete. Go to
page18.
Drücken Sie auf die Taste [ ]
oder [
], um [Aktiv] oder [Inaktiv]
auszuwählen, und dann auf die
Taste [OK].
Wählen Sie [Aktiv] aus, wenn Sie das
Gerät und den Computer über eine
USB-Verbindung verbinden wollen.
Wenn die W-LAN-Platine installiert ist,
wird der Bildschirm zum Einrichten einer
Direktverbindung angezeigt. Dort können
Sie festlegen, ob Direktverbindungen
aktiviert sein sollen.
Wenn die Netzwerkverbindung
hergestellt ist, drücken Sie auf
die rechte Auswahltaste ([Verl.]).
Bestätigen Sie die Meldung
auf dem Bildschirm und
drücken Sie dann auf die rechte
Auswahltaste ([Verl.]).
Sie können die Meldung durchblättern,
indem Sie auf die Tasten [
] und [ ]
drücken.
Drücken Sie auf die rechte
Auswahltaste ([Verl.]) und dann
auf die rechte Auswahltaste
([Neustart]).
Die Einstellung des kabelgebundenen
LAN ist abgeschlossen. Gehen Sie zu
Seite18.
Appuyez sur la touche [ ] ou
[
] pour sélectionner [Actif]
ou [Inactif], puis appuyez sur la
touche [OK].
Sélectionnez [Actif] si vous souhaitez
connecter l’appareil et votre ordinateur
via une connexion USB.
Si la carte de LAN sans fil est installée,
l’écran pour la configuration d’une
connexion directe s’affiche afin que vous
puissiez spécifier si vous souhaitez activer
les connexions directes.
Lorsque la connexion au réseau
est terminée, appuyez sur la
touche de sélection de droite
([Sortie]).
Confirmez le message à l’écran,
puis appuyez sur la touche de
sélection de droite ([Sortie]).
Vous pouvez parcourir le message en
appuyant sur les touches [
] et [ ].
Appuyez sur la touche de
sélection de droite ([Sortie])
puis appuyez sur la prochaine
touche de sélection de droite
([Redémar.]).
La configuration du LAN filaire est
terminée.Passezàlapage18.
Premere il tasto [ ] o [ ] per
selezionare [Attivo] o [Non attivo],
quindi premere il tasto [OK].
Selezionare [Attivo] se si intende
collegare la macchina e il computer
tramite connessione USB.
Se è installata la scheda Wireless LAN,
viene visualizzata la schermata per
l'impostazione di una connessione diretta
in modo da poter specificare se abilitare le
connessioni dirette.
Una volta completata la
connessione di rete, premere il
tasto di selezione destro ([Esci]).
Confermare il messaggio sullo
schermo, quindi premere il tasto
di selezione destro ([Esci]).
È possibile scorrere il messaggio
premendo il tasto [
] e [ ].
Premere il tasto di selezione
destro ([Esci]), quindi premere
nuovamente il tasto di selezione
destro ([Riavvia]).
L'impostazione della rete Wired LAN è
completata.Andareapagina18.
Pulse la tecla [ ] o [ ] para
seleccionar [Activo] o [Inactivo]
y, a continuación, pulse la tecla
[OK].
Seleccione [Activo] si va a conectar la
máquina y el ordenador mediante una
conexión USB.
Si está instalada la tarjeta de LAN
inalámbrica, aparecerá la pantalla para
establecer una conexión directa para
que pueda especificar si desea permitir
conexiones directas.
Una vez finalizada la conexión
de red, pulse la tecla de
selección derecha ([Salir]).
Confirme el mensaje en la
pantalla y, a continuación, pulse
la tecla de selección derecha
([Salir]).
Puede pulsar las teclas [ ] y [ ] para
desplazar el mensaje.
Pulse la tecla de selección
derecha ([Salir]) y, a
continuación, pulse la tecla de
selección derecha ([Reiniciar]).
La configuración de la LAN con cable
hafinalizado.Diríjasealapágina18.
Premeu la tecla [ ] o [ ] per
seleccionar [Actiu] o [Inactiu] i
després premeu [OK].
Seleccioneu [Actiu] si connectareu la
màquina a l'ordinador mitjançant una
connexió USB.
Si teniu la targeta de LAN sense fil
instal·lada, apareixerà la pantalla per
configurar una connexió directa i podreu
especificar si voleu activar les connexions
directes.
Un cop finalitzada la connexió
de xarxa, premeu la tecla de
selecció dreta ([Surt]).
Confirmeu el missatge de la
pantalla i, tot seguit, premeu la
tecla de selecció dreta ([Surt]).
Podeu desplaçar el missatge amb les
tecles [
] i [ ].
Premeu la tecla de selecció
dreta ([Surt]) i, tot seguit,
premeu la tecla de selecció dreta
([Reinicia]).
S'ha completat la configuració de LAN
ambfil.Aneualapàgina18.
9
DYR042
10
DYR031
11
DYR032
DYR049
12
DYR033
DYR034

15
EN
DE
FR
IT
ES
CA
Press the [ ] or [ ] key to
select [Active] or [Inactive], and
then press the [OK] key.
Select [Active] if you will connect the
machine and your computer via USB
connection.
If the Wireless LAN board is installed, the
screen for setting a direct connection
appears so you can specify whether to
enable direct connections.
When the network connection
is complete, press the right
selection key ([Exit]).
Confirm the message on the
screen, and then press the right
selection key ([Exit]).
You can scroll the message by pressing
[
] and [ ] key.
Press the right selection key
([Exit]), and then press the right
selection key ([Restart]).
Wired LAN setting is complete. Go to
page18.
Drücken Sie auf die Taste [ ]
oder [
], um [Aktiv] oder [Inaktiv]
auszuwählen, und dann auf die
Taste [OK].
Wählen Sie [Aktiv] aus, wenn Sie das
Gerät und den Computer über eine
USB-Verbindung verbinden wollen.
Wenn die W-LAN-Platine installiert ist,
wird der Bildschirm zum Einrichten einer
Direktverbindung angezeigt. Dort können
Sie festlegen, ob Direktverbindungen
aktiviert sein sollen.
Wenn die Netzwerkverbindung
hergestellt ist, drücken Sie auf
die rechte Auswahltaste ([Verl.]).
Bestätigen Sie die Meldung
auf dem Bildschirm und
drücken Sie dann auf die rechte
Auswahltaste ([Verl.]).
Sie können die Meldung durchblättern,
indem Sie auf die Tasten [
] und [ ]
drücken.
Drücken Sie auf die rechte
Auswahltaste ([Verl.]) und dann
auf die rechte Auswahltaste
([Neustart]).
Die Einstellung des kabelgebundenen
LAN ist abgeschlossen. Gehen Sie zu
Seite18.
Appuyez sur la touche [ ] ou
[
] pour sélectionner [Actif]
ou [Inactif], puis appuyez sur la
touche [OK].
Sélectionnez [Actif] si vous souhaitez
connecter l’appareil et votre ordinateur
via une connexion USB.
Si la carte de LAN sans fil est installée,
l’écran pour la configuration d’une
connexion directe s’affiche afin que vous
puissiez spécifier si vous souhaitez activer
les connexions directes.
Lorsque la connexion au réseau
est terminée, appuyez sur la
touche de sélection de droite
([Sortie]).
Confirmez le message à l’écran,
puis appuyez sur la touche de
sélection de droite ([Sortie]).
Vous pouvez parcourir le message en
appuyant sur les touches [
] et [ ].
Appuyez sur la touche de
sélection de droite ([Sortie])
puis appuyez sur la prochaine
touche de sélection de droite
([Redémar.]).
La configuration du LAN filaire est
terminée.Passezàlapage18.
Premere il tasto [ ] o [ ] per
selezionare [Attivo] o [Non attivo],
quindi premere il tasto [OK].
Selezionare [Attivo] se si intende
collegare la macchina e il computer
tramite connessione USB.
Se è installata la scheda Wireless LAN,
viene visualizzata la schermata per
l'impostazione di una connessione diretta
in modo da poter specificare se abilitare le
connessioni dirette.
Una volta completata la
connessione di rete, premere il
tasto di selezione destro ([Esci]).
Confermare il messaggio sullo
schermo, quindi premere il tasto
di selezione destro ([Esci]).
È possibile scorrere il messaggio
premendo il tasto [
] e [ ].
Premere il tasto di selezione
destro ([Esci]), quindi premere
nuovamente il tasto di selezione
destro ([Riavvia]).
L'impostazione della rete Wired LAN è
completata.Andareapagina18.
Pulse la tecla [ ] o [ ] para
seleccionar [Activo] o [Inactivo]
y, a continuación, pulse la tecla
[OK].
Seleccione [Activo] si va a conectar la
máquina y el ordenador mediante una
conexión USB.
Si está instalada la tarjeta de LAN
inalámbrica, aparecerá la pantalla para
establecer una conexión directa para
que pueda especificar si desea permitir
conexiones directas.
Una vez finalizada la conexión
de red, pulse la tecla de
selección derecha ([Salir]).
Confirme el mensaje en la
pantalla y, a continuación, pulse
la tecla de selección derecha
([Salir]).
Puede pulsar las teclas [ ] y [ ] para
desplazar el mensaje.
Pulse la tecla de selección
derecha ([Salir]) y, a
continuación, pulse la tecla de
selección derecha ([Reiniciar]).
La configuración de la LAN con cable
hafinalizado.Diríjasealapágina18.
Premeu la tecla [ ] o [ ] per
seleccionar [Actiu] o [Inactiu] i
després premeu [OK].
Seleccioneu [Actiu] si connectareu la
màquina a l'ordinador mitjançant una
connexió USB.
Si teniu la targeta de LAN sense fil
instal·lada, apareixerà la pantalla per
configurar una connexió directa i podreu
especificar si voleu activar les connexions
directes.
Un cop finalitzada la connexió
de xarxa, premeu la tecla de
selecció dreta ([Surt]).
Confirmeu el missatge de la
pantalla i, tot seguit, premeu la
tecla de selecció dreta ([Surt]).
Podeu desplaçar el missatge amb les
tecles [
] i [ ].
Premeu la tecla de selecció
dreta ([Surt]) i, tot seguit,
premeu la tecla de selecció dreta
([Reinicia]).
S'ha completat la configuració de LAN
ambfil.Aneualapàgina18.
9.
Network (Wireless LAN)/Netzwerk (W-LAN)/Réseau (LAN sans fil)/Network (Wireless LAN)/Red (LAN inalámbrica)/Xarxa
(LAN sense fil)
Press the [ ] or [ ] key to
select [Network], and then press
the [OK] key.
Press the [
] or [ ] key to
select [LAN Settings], and then
press the [OK] key.
Press the [
] or [ ] key to
select [Wireless LAN], and then
press the [OK] key.
Press the [
] or [ ] key to
select how to connect the
machine to the network, and
then press the [OK] key.
Follow the on screen message and
connect to the network.
For details, see Setup in the web
manual.
SSID/Password:
Detected networks are listed. Select a
network from the list.
Push Button Method:
When you press push button that is on
your router, the machine is connected to
the network.
PIN Code Method:
Displays a PIN code on the screen.
Enter the PIN code into your router..
Drücken Sie auf die Taste [ ] oder
[
], um [Netzwerk] auszuwählen,
und dann auf die Taste [OK].
Drücken Sie auf die Taste
[
] oder [ ], um [LAN-
Einstellungen] auszuwählen,
und dann auf die Taste [OK].
Drücken Sie auf die Taste [
]
oder [
], um [Wireless LAN]
auszuwählen, und dann auf die
Taste [OK].
Drücken Sie auf die Taste [
]
oder [
], um auszuwählen, wie
das Gerät mit dem Netzwerk
verbunden wird, und dann auf
die Taste [OK].
Folgen Sie den Anweisungen auf
dem Bildschirm und stellen Sie eine
Verbindung zum Netzwerk her.
Weitere Einzelheiten dazu finden Sie im
entsprechenden Abschnitt im Online-
Handbuch.
SSID/Passwort:
Erkannte Netzwerke werden aufgelistet.
Wählen Sie ein Netzwerk aus der Liste
aus.
Knopfdruck-Methode:
Wenn Sie den Knopf an Ihrem Router
drücken, wird das Gerät mit dem
Netzwerk verbunden.
PIN-Code-Methode:
Zeigt einen PIN-Code auf dem
Bildschirm an. Geben Sie den PIN-Code
in Ihren Router ein.
Appuyez sur la touche [ ] ou
[
] pour sélectionner [Réseau],
puis appuyez sur la touche [OK].
Appuyez sur la touche [
] ou
[
] pour sélectionner
[Paramètres LAN], puis appuyez
sur la touche [OK].
Appuyez sur la touche [
] ou
[
] pour afficher [LAN ss fil],
puis appuyez sur la touche [OK].
Appuyez sur la touche [
] ou
[
] pour sélectionner le mode
de connexion de l’appareil au
réseau, puis appuyez sur la
touche [OK].
Suivez les messages à l’écran et
connectez-vous au réseau.
Pour plus d’informations, voir le manuel
Configuration sur internet.
SSID/Mot de passe :
Les réseaux détectés sont affichés.
Sélectionnez un réseau dans la liste.
Méthode à l’aide du bouton-poussoir :
Lorsque vous appuyez sur le bouton-
poussoir sur votre routeur, l’appareil est
connecté au réseau.
Méthode du code PIN :
Affiche un code PIN sur l'écran.
Saisissez le code PIN dans votre routeur.
Premere il tasto [ ] o [ ]
per selezionare [Rete], quindi
premere il tasto [OK].
Premere il tasto [
] o [ ] per
selezionare [Impostazioni LAN],
quindi premere il tasto [OK].
Premere il tasto [
] o [ ] per
selezionare [Wireless LAN],
quindi premere il tasto [OK].
Premere il tasto [
] o [ ] per
selezionare come connettere
la macchina alla rete, quindi
premere il tasto [OK].
Seguire il messaggio sullo schermo e
connettersi alla rete.
Per ulteriori informazioni, vedere
Installazione nel manuale online.
SSID/Password:
Vengono elencate le reti rilevate.
Selezionare una rete dall'elenco.
Metodo Push Button:
Quando si preme il pulsante sul router,
la macchina si connette alla rete.
Metodo Codice PIN:
Viene visualizzato un codice PIN sullo
schermo. Inserire il codice PIN nel
router.
Pulse la tecla [ ] o [ ]
para seleccionar [Red] y, a
continuación, pulse [OK].
Pulse la tecla [
] o [ ] para
seleccionar [Ajustes de LAN] y,
a continuación, pulse [OK].
Pulse la tecla [
] o [ ] para
seleccionar [LAN inalámbrica] y,
a continuación, pulse [OK].
Pulse la tecla [
] o [ ] para
seleccionar cómo desea
conectar la máquina a la red y, a
continuación, pulse la tecla [OK].
Siga el mensaje mostrado en la pantalla
y conecte la máquina a la red.
Para obtener más información, consulte
configuración en el manual web.
SSID/Contraseña:
se muestra una lista de las redes
detectadas. Seleccione una red de la
lista.
Mediante botón de comando:
cuando pulse el botón del router, la
máquina se conectará a la red.
Mediante Código PIN:
Muestra un código PIN en la pantalla.
introduzca el código PIN en su router.
Premeu la tecla [ ] o [ ] per
seleccionar [Xarxa] i després
premeu [OK].
Premeu la tecla [
] o [ ] per
seleccionar [Paràmetres LAN] i
després premeu [OK].
Premeu la tecla [
] o [ ] per
seleccionar [LAN sense fil] i
després premeu [OK].
Premeu la tecla [
] o [ ] per
seleccionar com connectar la
màquina a la xarxa i després
premeu [OK].
Seguiu el missatge de la pantalla i
connecteu-vos a la xarxa.
Per obtenir més informació, consulteu el
manual web.
SSID/Contrasenya:
S'enumeren les xarxes detectades.
Seleccioneu una xarxa de la llista.
Mètode de botó d'ordre:
Quan premeu el botó d'ordre del router,
la màquina es connecta a la xarxa.
Mètode de codi PIN:
Mostra un codi PIN a la pantalla.
Introduïu el codi PIN al router.
1
DYR025
2
DYR035
DYR036
3
DYR037
Wireless LAN S.:
11
Push Button Method
SSID/Password
PIN Code Method

16
EN
DE
FR
IT
ES
CA
Confirm the message on the
screen, and then press the right
selection key ([Exit]).
Press the [
] or [ ] key to
select [USB Port], and then
press the [OK] key.
Press the [
] or [ ] key to
select [Active] or [Inactive], and
then press the [OK] key.
Select [Active] if you will connect the
machine and your computer via USB
connection.
Press the [ ] or [ ] key to
select [Direct Connection
Setting], and then press the [OK]
key.
Bestätigen Sie die Meldung
auf dem Bildschirm und
drücken Sie dann auf die rechte
Auswahltaste ([Verl.]).
Drücken Sie auf die Taste [
]
oder [
], um [USB-Anschluss]
auszuwählen, und dann auf die
Taste [OK].
Drücken Sie auf die Taste [
]
oder [
], um [Aktiv] oder
[Inaktiv] auszuwählen, und dann
auf die Taste [OK].
Wählen Sie [Aktiv] aus, wenn Sie das
Gerät und den Computer über eine
USB-Verbindung verbinden wollen.
Drücken Sie auf die
Taste [
] oder [ ], um
[Direktverbindungseinstellung]
auszuwählen, und dann auf die
Taste [OK].
Confirmez le message à l’écran,
puis appuyez sur la touche de
sélection de droite ([Sortie]).
Appuyez sur la touche [
] ou
[
] pour sélectionner [Port
USB], puis appuyez sur la
touche [OK].
Appuyez sur la touche [
] ou
[
] pour sélectionner [Actif]
ou [Inactif], puis appuyez sur la
touche [OK].
Sélectionnez [Actif] si vous souhaitez
connecter l’appareil et votre ordinateur
via une connexion USB.
Appuyez sur la touche [ ] ou
[
] pour sélectionner [Param.
connexion directe], puis
appuyez sur la touche [OK].
Confermare il messaggio sullo
schermo, quindi premere il tasto
di selezione destro ([Esci]).
Premere il tasto [
] o [ ] per
selezionare [Porta USB], quindi
premere il tasto [OK].
Premere il tasto [
] o [ ] per
selezionare [Attivo] o [Inattivo],
quindi premere il tasto [OK].
Selezionare [Attivo] se si intende
collegare la macchina e il computer
tramite connessione USB.
Premere il tasto [ ] o [ ] per
selezionare [Impost.connessione
diretta], quindi premere il tasto
[OK].
Confirme el mensaje en la
pantalla y, a continuación, pulse
la tecla de selección derecha
([Salir]).
Pulse la tecla [
] o [ ] para
seleccionar [Puerto USB] y a
continuación pulse [OK].
Pulse la tecla [
] o [ ] para
seleccionar [Activo] o [Inactivo]
y, a continuación, pulse la tecla
[OK].
Seleccione [Activo] si va a conectar la
máquina y el ordenador mediante una
conexión USB.
Pulse la tecla [ ] o [ ] para
seleccionar [Direct Connection
Setting] (Ajuste de conexión
directa) y, a continuación, pulse
[OK].
Confirmeu el missatge de la
pantalla i, tot seguit, premeu la
tecla de selecció dreta ([Surt]).
Premeu la tecla [
] o [ ] per
seleccionar [Port USB] i després
premeu [OK].
Premeu la tecla [
] o [ ] per
seleccionar [Actiu] o [Inactiu] i
després premeu [OK].
Seleccioneu [Actiu] si connectareu la
màquina a l'ordinador mitjançant una
connexió USB.
Premeu la tecla [ ] o [ ]
per seleccionar [Paràmetres
Connexió Direct] i després
premeu [OK].
4
DYR038
Wireless LAN setting was
complete.
Exit
5
DYR043
6
DYR042
7
DYR044

17
Initial Settings/Erste Einstellungen/Paramètres initiaux/Impostazioni iniziali/Ajustes iniciales/Paràmetres inicials
EN
DE
FR
IT
ES
CA
Confirm the message on the
screen, and then press the right
selection key ([Exit]).
Press the [
] or [ ] key to
select [USB Port], and then
press the [OK] key.
Press the [
] or [ ] key to
select [Active] or [Inactive], and
then press the [OK] key.
Select [Active] if you will connect the
machine and your computer via USB
connection.
Press the [ ] or [ ] key to
select [Direct Connection
Setting], and then press the [OK]
key.
Bestätigen Sie die Meldung
auf dem Bildschirm und
drücken Sie dann auf die rechte
Auswahltaste ([Verl.]).
Drücken Sie auf die Taste [
]
oder [
], um [USB-Anschluss]
auszuwählen, und dann auf die
Taste [OK].
Drücken Sie auf die Taste [
]
oder [
], um [Aktiv] oder
[Inaktiv] auszuwählen, und dann
auf die Taste [OK].
Wählen Sie [Aktiv] aus, wenn Sie das
Gerät und den Computer über eine
USB-Verbindung verbinden wollen.
Drücken Sie auf die
Taste [
] oder [ ], um
[Direktverbindungseinstellung]
auszuwählen, und dann auf die
Taste [OK].
Confirmez le message à l’écran,
puis appuyez sur la touche de
sélection de droite ([Sortie]).
Appuyez sur la touche [
] ou
[
] pour sélectionner [Port
USB], puis appuyez sur la
touche [OK].
Appuyez sur la touche [
] ou
[
] pour sélectionner [Actif]
ou [Inactif], puis appuyez sur la
touche [OK].
Sélectionnez [Actif] si vous souhaitez
connecter l’appareil et votre ordinateur
via une connexion USB.
Appuyez sur la touche [ ] ou
[
] pour sélectionner [Param.
connexion directe], puis
appuyez sur la touche [OK].
Confermare il messaggio sullo
schermo, quindi premere il tasto
di selezione destro ([Esci]).
Premere il tasto [
] o [ ] per
selezionare [Porta USB], quindi
premere il tasto [OK].
Premere il tasto [
] o [ ] per
selezionare [Attivo] o [Inattivo],
quindi premere il tasto [OK].
Selezionare [Attivo] se si intende
collegare la macchina e il computer
tramite connessione USB.
Premere il tasto [ ] o [ ] per
selezionare [Impost.connessione
diretta], quindi premere il tasto
[OK].
Confirme el mensaje en la
pantalla y, a continuación, pulse
la tecla de selección derecha
([Salir]).
Pulse la tecla [
] o [ ] para
seleccionar [Puerto USB] y a
continuación pulse [OK].
Pulse la tecla [
] o [ ] para
seleccionar [Activo] o [Inactivo]
y, a continuación, pulse la tecla
[OK].
Seleccione [Activo] si va a conectar la
máquina y el ordenador mediante una
conexión USB.
Pulse la tecla [ ] o [ ] para
seleccionar [Direct Connection
Setting] (Ajuste de conexión
directa) y, a continuación, pulse
[OK].
Confirmeu el missatge de la
pantalla i, tot seguit, premeu la
tecla de selecció dreta ([Surt]).
Premeu la tecla [
] o [ ] per
seleccionar [Port USB] i després
premeu [OK].
Premeu la tecla [
] o [ ] per
seleccionar [Actiu] o [Inactiu] i
després premeu [OK].
Seleccioneu [Actiu] si connectareu la
màquina a l'ordinador mitjançant una
connexió USB.
Premeu la tecla [ ] o [ ]
per seleccionar [Paràmetres
Connexió Direct] i després
premeu [OK].
Press the [ ] or [ ] key to
select [Active] or [Inactive], and
then press the [OK] key.
Select [Active] if you will use Direct
Connection.
When the network connection
is complete, press the right
selection key ([Exit]).
Confirm the message on the
screen, and then press the right
selection key ([Exit]).
You can scroll the message by pressing
[
] and [ ] key.
Press the right selection key
([Exit]), and then press the right
selection key ([Restart]).
Wireless LAN setting is complete. Go to
page18.
Drücken Sie auf die Taste [ ]
oder [
], um [Aktiv] oder
[Inaktiv] auszuwählen, und dann
auf die Taste [OK].
Wählen Sie [Aktiv], wenn Sie eine
Direktverbindung verwenden wollen.
Wenn die Netzwerkverbindung
hergestellt ist, drücken Sie auf
die rechte Auswahltaste ([Verl.]).
Bestätigen Sie die Meldung
auf dem Bildschirm und
drücken Sie dann auf die rechte
Auswahltaste ([Verl.]).
Sie können durch die Meldung blättern,
indem Sie auf die Tasten [
] und [ ]
drücken.
Drücken Sie auf die rechte
Auswahltaste ([Verl.]) und dann
auf die rechte Auswahltaste
([Neustart]).
Die Einstellung des W-LAN ist
abgeschlossen.GehenSiezuSeite18.
Appuyez sur la touche [ ] ou
[
] pour sélectionner [Actif]
ou [Inactif], puis appuyez sur la
touche [OK].
Sélectionnez [Actif] si vous souhaitez
utiliser une connexion directe.
Lorsque la connexion au réseau
est terminée, appuyez sur la
touche de sélection de droite
([Sortie]).
Confirmez le message à l’écran,
puis appuyez sur la touche de
sélection de droite ([Sortie]).
Vous pouvez parcourir le message en
appuyant sur les touches [
] et [ ].
Appuyez sur la touche de
sélection de droite ([Sortie])
puis appuyez sur la prochaine
touche de sélection de droite
([Redémar.]).
La configuration du LAN sans fil est
terminée.Passezàlapage18.
Premere il tasto [ ] o [ ] per
selezionare [Attivo] o [Non
attivo], quindi premere il tasto
[OK].
Selezionare [Attivo] se si intende
utilizzare la Connessione diretta.
Una volta completata la
connessione di rete, premere il
tasto di selezione destro ([Esci]).
Confermare il messaggio sullo
schermo, quindi premere il tasto
di selezione destro ([Esci]).
È possibile scorrere il messaggio
premendo i tasti [
] e [ ].
Premere il tasto di selezione
destro ([Esci]), quindi premere
nuovamente il tasto di selezione
destro ([Riavvia]).
L'impostazione della rete Wireless LAN
ècompletata.Andareapagina18.
Pulse la tecla [ ] o [ ] para
seleccionar [Activo] o [Inactivo]
y, a continuación, pulse la tecla
[OK].
Si va a utilizar la conexión directa,
seleccione [Activo].
Una vez finalizada la conexión
de red, pulse la tecla de
selección derecha ([Salir]).
Confirme el mensaje en la
pantalla y, a continuación, pulse
la tecla de selección derecha
([Salir]).
Puede pulsar la tecla [ ] y [ ] para
desplazar el mensaje.
Pulse la tecla de selección
derecha ([Salir]) y, a
continuación, pulse la tecla de
selección derecha ([Reiniciar]).
El ajuste de la LAN inalámbrica ha
finalizado.Diríjasealapágina18.
Premeu la tecla [ ] o [ ] per
seleccionar [Actiu] o [Inactiu] i
després premeu [OK].
Seleccioneu [Actiu] si utilitzareu la
connexió directa.
Un cop finalitzada la connexió
de xarxa, premeu la tecla de
selecció dreta ([Surt]).
Confirmeu el missatge de la
pantalla i, tot seguit, premeu la
tecla de selecció dreta ([Surt]).
Podeu desplaçar-vos pel missatge
mitjançant les tecles [
] i [ ].
Premeu la tecla de selecció
dreta ([Surt]) i, tot seguit,
premeu la tecla de selecció dreta
([Reinicia]).
S'ha completat la configuració de LAN
sensefil.Aneualapàgina18.
8
DYR045
9
DYR039
10
DYR032
DYR049
11
DYR033
DYR034

18
EN
DE
FR
IT
ES
CA
10.
Installing the Printer Driver (How to install)/Installieren des Druckertreibers (Installationsanleitung)/Installation du pilote d’impression (Procédure d’installation)/
Installazione del driver della stampante (Come installare)/Instalación del driver de impresora (Método de instalación)/Instal·lació del driver d’impressora (Com instal·lar)
Preparations for Printing/Druckvorbereitungen/Préparations pour l’impression/Preparazione alla stam-
pa/Preparativos para la impresión/Preparació per a la impressió
Specify how to install the printer driver./ Legen Sie fest, wie der Druckertreiber installiert werden soll./ Définir la méthode d’installation du pilote
d’impression./ Specificare come installare il driver della stampante./ Especifique cómo va a instalar el driver de impresora./ Especifiqueu com
instal·lar el driver de la impressora.
This chapter explains how to install the printer driver when using Windows. If you are using OS X, see Driver Installation Guide in the web manual.
In diesem Kapitel wird erläutert, wie der Druckertreiber bei Verwendung von Windows installiert wird. Wenn Sie OS X verwenden, lesen Sie im
entsprechenden Abschnitt zur Treiberinstallation im Online-Handbuch nach.
Ce chapitre explique comment installer le pilote d’impression sous Windows. Si vous utilisez OS X, consultez le manuel en ligne.
Questo capitolo spiega come installare il driver della stampante se si utilizza Windows. Se si utilizza OS X, consultare la Guida all’installazione dei driver nel
manuale online.
Este capítulo explica cómo instalar el driver de impresora al usar Windows. Si está utilizando macOS, consulte la Guía de instalación del driver en el manual
web.
Aquest capítol explica com instal·lar el driver de la impressora si utilitzeu Windows. Si feu servir OS X, consulteu la Driver Installation Guide al manual web.
CD-ROM
Online/Online/
En ligne/Online/
Online/Online
Install the printer driver that is on the supplied CD-ROM. (See page 19.)
Installieren Sie den Druckertreiber, der sich auf der mitgelieferten CD-ROM befindet. (Siehe Seite 19.)
Installez le pilote d’impression fourni sur le CD-ROM. (Voir page 19.)
Installare il driver della stampante incluso nel CD-ROM in dotazione. (Vedere pagina 19.)
Instale el driver de impresora del CD-ROM incluido. (Consulte la página 19).
Instal·leu el driver de la impressora contingut al CD-ROM subministrat. (Consulteu la pàgina 19).
Installing the printer driver by using the Device Software Manager on the supplied CD-ROM (See page 21.)
The Device Software Manager is a support tool for installing the latest driver. You can use Device Software
Manager with your Windows operating system to automatically search for and install the appropriate printer driver.
You can install Device Software Manager from the supplied CD-ROM.
• To use Device Software Manager, your computer must be connected to the Internet.
• You can install Device Software Manager from our website as well.
• If an updated printer driver is released, the appropriate printer driver is found automatically so you can install it.
Installieren des Druckertreibers mit dem Device Software Manager auf der mitgelieferten CD-ROM (Siehe
Seite 21.)
Der Device Software Manager ist ein Hilfsprogramm zum Installieren des neuesten Treibers. Sie können den
Device Software Manager auf Ihrem Windows-Betriebssystem nutzen, um automatisch nach dem entsprechenden
Druckertreiber zu suchen und diesen zu installieren. Sie können den Device Software Manager von der
mitgelieferten CD-ROM installieren.
• Um den Device Software Manager verwenden zu können, muss Ihr Computer mit dem Internet verbunden sein.
• Sie können den Device Software Manager auch von unserer Website installieren.
• Falls ein aktualisierter Druckertreiber veröffentlicht wird, wird der entsprechende Druckertreiber automatisch
gefunden, sodass Sie diesen installieren können.
Installation du pilote d’impression à l’aide du Device Software Manager sur le CD-ROM fourni (voir page 21.)
Le Device Software Manager est un outil permettant d’installer le pilote le plus récent. Vous pouvez utiliser le
Device Software Manager avec votre système d’exploitation Windows pour rechercher et installer automatiquement
le pilote d’impression adéquat. Vous pouvez installer Device Software Manager à partir du CD-ROM fourni.
• Pour utiliser le Device Software Manager, votre ordinateur doit être connecté à Internet.
• Vous pouvez également installer Device Software Manager à partir de notre site Web.
• Si un pilote d’imprimante mis à jour est publié, le pilote d’imprimante adéquat est trouvé automatiquement afin
que vous puissiez l’installer.
Installazione del driver della stampante tramite Device Software Manager incluso nel CD-ROM in
dotazione (vedere pagina 21)
Device Software Manager è uno strumento di supporto per l’installazione del driver più recente. È possibile
utilizzare Device Software Manager con il sistema operativo Windows per cercare e installare automaticamente il
driver della stampante appropriato. È possibile installare Device Software Manager dal CD-ROM in dotazione.
• Per utilizzare Device Software Manager, il computer deve essere connesso a Internet.
• È possibile installare Device Software Manager anche dal sito web di Ricoh.
• Se viene rilasciato un driver della stampante aggiornato, viene individuato automaticamente il driver della
stampante appropriato in modo da poterlo installare.
Instalación del driver de impresora con el Device Software Manager del CD-ROM incluido (consulte la página 21).
Device Software Manager es una herramienta de soporte para instalar el driver más reciente. Puede usar
Device Software Manager con el sistema operativo Windows para buscar e instalar automáticamente el driver de
impresora adecuado. Puede instalar Device Software Manager desde el CD-ROM incluido.
• Para poder usar Device Software Manager, su ordenador debe estar conectado a Internet.
• También puede instalar Device Software Manager desde nuestro sitio web.
• Si se publica un driver de impresora actualizado, se encuentra automáticamente el driver de impresora
adecuado para que pueda instalarlo.
Instal·lació del driver d’impressora mitjançant el Device Software Manager contingut al CD-ROM
subministrat (consulteu la pàgina 21).
El Device Software Manager és una eina de suport per instal·lar el driver més recent. Podeu fer servir el Device
Software Manager del dispositiu amb el sistema operatiu Windows per cercar i instal·lar automàticament el driver
d’impressora adequat. Podeu instal·lar Device Software Manager des del CD-ROM subministrat.
• Per utilitzar Device Software Manager, l’ordinador ha d’estar connectat a internet.
• També podeu instal·lar el Device Software Manager des del nostre lloc web.
• Si es publica un driver d’impressora actualitzat, el driver de la impressora adequat es detecta automàticament
perquè el pugueu instal·lar.

19
EN
DE
FR
IT
ES
CA
Insert the CD-ROM into your computer.
If you are asked to select an operation for
the CD-ROM, select [Setup.exe] to start
the installation.
•To use USB connection, press the
machine’s [Menu] key and go to [Host
Interface],[USBPort]andtoconrmthe
setting is [Active].
Select the language to use. When the installer starts up,
click [Install from Disk].
Specify whether to connect the
computer via a network or by a
USB cable.
Installation starts.
Legen Sie die CD-ROM in das CD-
ROM-Laufwerk des Computers ein.
Wenn Sie aufgefordert werden, eine Option
für die CD-ROM auszuwählen, wählen Sie
[Setup.exe], um die Installation zu starten.
• Zur Verwendung einer USB-Verbindung
drücken Sie auf die Taste [Menü] des Geräts
und gehen Sie [Host-Schnittstelle] und
[USB-Anschluss] und überprüfen Sie, ob die
Einstellung auf [Aktiv] gesetzt ist.
Wählen Sie die zu verwendende
Sprache aus.
Startet das
Installationsprogramm,
klicken Sie auf [Von Festplatte
installieren].
Legen Sie fest, ob die
Verbindung zum Computer über
ein Netzwerk oder ein USB-
Kabel hergestellt werden soll.
Die Installation wird gestartet.
Insérez le CD-ROM dans votre
ordinateur.
Si l’ordinateur vous demande de sélectionner
une tâche pour le CD-ROM, sélectionnez
[Setup.exe] pour démarrer l’installation.
• Pour utiliser une connexion USB, appuyez
sur la touche [Menu] de l’appareil et
rendez-vous dans [Interface hôte], [Port
USB] afin de confirmer que le paramètre
est [Actif].
Sélectionnez la langue à utiliser. Lorsque l’assistant d’installation
démarre, cliquez sur [Installer
depuis le disque].
Spécifiez si vous souhaitez vous
connecter à l’ordinateur via le
réseau ou par câble USB.
L'installation démarre.
Inserire il CD-ROM nel computer in uso.
Se viene richiesto di selezionare
un'operazione per il CD-ROM, selezionare
[Setup.exe] per avviare l'installazione.
•Per utilizzare la connessione USB,
premere il tasto [Menu] della macchina
e accedere a [Interfaccia host], [Porta
USB]evericarechel’impostazionesia
[Attivo].
Selezionare la lingua desiderata. All'avvio del programma di
installazione, fare clic su [Installa
da disco].
Specificare se collegare il
computer tramite una rete o un
cavo USB.
L'installazione si avvia.
Inserte el CD-ROM en su ordenador.
Si se le pide que seleccione una
operación para el CD-ROM, seleccione
[Setup.exe] para iniciar la instalación.
•Para usar la conexión USB, pulse la
tecla [Menú] de la máquina y vaya a
[Host Interface] (Interface host), [Puerto
USB] y confirme que el ajuste es
[Activo].
Seleccione el idioma que desea
utilizar.
Cuando se inicie el instalador,
haga clic en [Instalar desde
disco].
Especifique si desea conectar
con el ordenador a través de la
red o mediante un cable USB.
Comenzará el proceso de instalación.
Inseriu el CD-ROM a l'ordinador.
Si se us demana que seleccioneu una
operació per al CD-ROM, seleccioneu
[Setup.exe] per iniciar la instal·lació.
•Per utilitzar la connexió USB, premeu
la tecla [Menú] de la màquina i aneu a
[Interfíciehost],[PortUSB]iconrmeu
que el paràmetre és [Actiu].
Seleccioneu l'idioma que voleu
utilitzar.
Quan s'obri l'instal·lador, feu clic
a [Instal·lar des de disc].
Especifiqueu si voleu connectar
l'ordinador a través d'una xarxa
o un cable USB.
Comença la instal·lació.
1
DVK238
2 3 4
10.
Installing the Printer Driver (CD-ROM)/Installieren des Druckertreibers (CD-ROM)/Installation du pilote d’impression (CD-ROM)/Installazione del
driver della stampante (CD-ROM)/Instalación del driver de impresora (CD-ROM)/Instal·lació del driver d’impressora (CD-ROM)

20
EN
DE
FR
IT
ES
CA
•If you connect the computer by a USB
cable, do not connect the cable until you
are instructed to do so on the screen.
•If you connect the computer via a
Wireless LAN, do not connect any
cables, even though the message to do
so appears during the installation.
When the [Install Printer Driver]
screen appears, select [Add a
new printer] and proceed the
installation.
When the [Printer Initial Settings]
screen appears, specify the
optional devices attached to the
machine or the paper settings
for trays as necessary.
Proceed the installation by following the
guidance on the screen.
Installation is complete when the
[Complete] screen appears.
•Falls Sie den Computer über ein USB-
Kabel verbinden, schließen Sie das
Kabel erst an, wenn Sie über den
Bildschirm dazu angewiesen werden.
•Wenn Sie den Computer per W-LAN
verbinden, schließen Sie keine Kabel
an, auch wenn Sie während der
Installation durch eine Meldung dazu
aufgefordert werden.
Wenn der Bildschirm
[Druckertreiber installieren]
angezeigt wird, wählen Sie [Neuen
Drucker hinzufügen] aus, und
fahren Sie mit der Installation fort.
Wenn der Bildschirm [Drucker-
Grundeinstellungen] angezeigt
wird, legen Sie die optionalen
Komponenten, die am Gerät
befestigt sind, oder die
Papiereinstellungen für die
Magazine nach Bedarf fest.
Fahren Sie mit der Installation fort, indem Sie
den Anweisungen auf dem Bildschirm folgen.
Die Installation ist abgeschlossen, wenn
der Bildschirm [Abgeschlossen] angezeigt
wird.
•Si vous vous connectez à l’ordinateur
via un câble USB, ne branchez pas le
câble avant d'y avoir été invité.
•Si vous vous connectez à l’ordinateur
viaunLANsansl,nebranchezaucun
câble, même si un message vous y
invitants’afchependantl’installation.
Lorsque l'écran [Installez le
pilote d'imprimante] s’affiche,
sélectionnez [Ajouter une
nouvelle imprimante] et
procédez à l'installation.
Lorsque l'écran [Paramètres
d’imprimante initiaux] s’affiche,
spécifiez les périphériques
optionnels reliés à l’appareil ou
les paramètres papier pour les
magasins, selon les besoins.
Procédez à l’installation en suivant les
directives à l’écran.
L’installation est terminée lorsque
l'écran [Terminé] s'affiche.
•Se si collega il computer tramite un
cavoUSB,noncollegareilcavonché
non viene richiesto sullo schermo.
•Se si connette il computer tramite una
rete Wireless LAN, non collegare alcun
cavo anche se il relativo messaggio
compare durante l'installazione.
Quando viene visualizzata la
schermata [Installa il driver
stampante], selezionare
[Aggiungi una nuova stampante]
e procedere con l'installazione.
Quando viene visualizzata
la schermata [Impostazioni
iniziali stampante], specificare
i dispositivi opzionali collegati
alla macchina o le impostazioni
della carta per i vassoi in base
alle esigenze.
Procedere con l'installazione seguendo
le istruzioni sullo schermo.
L'installazione è completa quando
compare la schermata [Completata].
•Si establece conexión con el ordenador
mediante un cable USB, no conecte el
cable hasta que se le pida que lo haga
en la pantalla.
•Si conecta el ordenador mediante
una LAN inalámbrica, no conecte
ningún cable, ni siquiera si durante la
instalación aparece un mensaje que le
indica que lo haga.
Cuando aparezca la pantalla
[Instalar el controlador de
impresora], seleccione [Agregar
una nueva impresora] y continúe
con la instalación.
Cuando aparezca la pantalla
[Configuración inicial de
impresora], especifique los
dispositivos opcionales
conectados a la máquina o los
ajustes de papel de las bandejas
según sea necesario.
Siga las indicaciones de la pantalla para
continuar con la instalación.
La instalación habrá finalizado cuando
aparezca la pantalla [Configuración
completada].
•Si connecteu l'ordinador mitjançant
un cable USB, no connecteu el cable
fins que se us indiqui que ho feu a la
pantalla.
•Si connecteu l'ordinador a través d'una
LANsensel,noconnecteucapcable,
tot i que aparegui el missatge durant la
instal·lació.
Quan aparegui la pantalla
[Instal·la el driver de la
impressora], seleccioneu
[Addició impressora nova] i
procediu a la instal·lació.
Quan aparegui la pantalla
[Paràmetres inicials impressora],
especifiqueu els dispositius
opcionals connectats a la
màquina o els paràmetres del
paper de les safates, segons
sigui necessari.
Procediu amb la instal·lació tot seguint
les indicacions a la pantalla.
La instal·lació s'ha completat quan
apareix la pantalla [Completa].
5 4
La pagina si sta caricando...
La pagina si sta caricando...
La pagina si sta caricando...
La pagina si sta caricando...
-
 1
1
-
 2
2
-
 3
3
-
 4
4
-
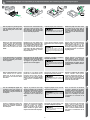 5
5
-
 6
6
-
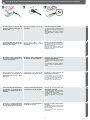 7
7
-
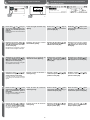 8
8
-
 9
9
-
 10
10
-
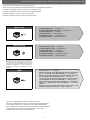 11
11
-
 12
12
-
 13
13
-
 14
14
-
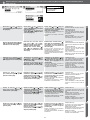 15
15
-
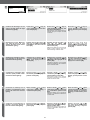 16
16
-
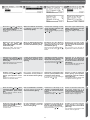 17
17
-
 18
18
-
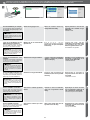 19
19
-
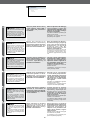 20
20
-
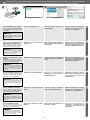 21
21
-
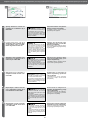 22
22
-
 23
23
-
 24
24


Ricoh P 501 Guida d'installazione
- Categoria
- Stampanti laser / LED
- Tipo
- Guida d'installazione
- Questo manuale è adatto anche per
in altre lingue
- English: Ricoh P 501 Installation guide
- français: Ricoh P 501 Guide d'installation
- español: Ricoh P 501 Guía de instalación
- Deutsch: Ricoh P 501 Installationsanleitung