9
Rigs
While using HeadRush MX5, a rig is a preset: the combination of assigned models—the amps,
cabs, impulse responses, and effects—and the parameter settings of each of them. You can
create, edit, save, and load rigs, making it easy to recall the perfect sound for each part of your
performance.
Each rig has 11 slots, each of which can have one model (amp, cab, or effect) assigned to it.
Assigned slots will show graphical representations of the models, and empty slots will show a
symbol.
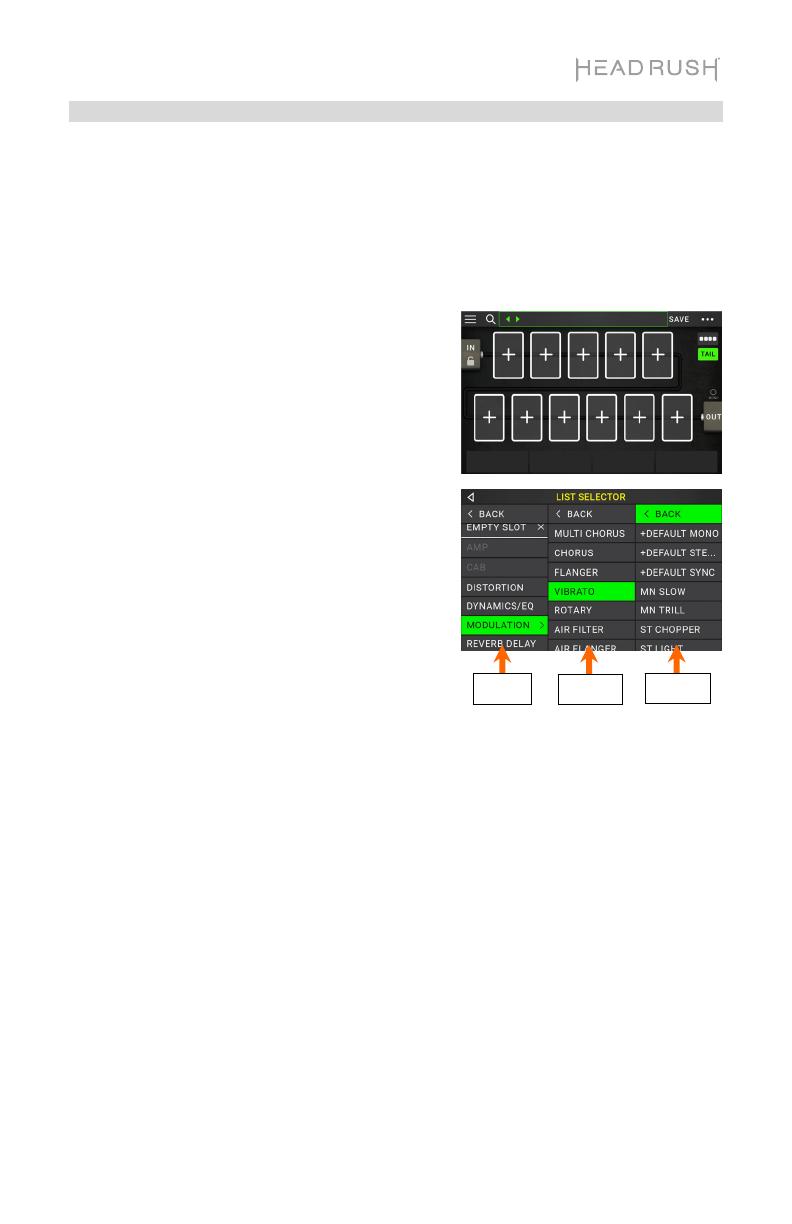
Creating a New Rig
To create a new rig, tap the button in the upper-
right corner of the screen, and tap New Rig.
To assign a model (amp, cab, or effect) to an empty
slot:
1. Tap the empty slot ().
2. In the list that appears, tap the type of model you
want to assign: Amp, Cab, IR (impulse response),
or effect (Distortion, Dynamics/EQ, Modulation,
Reverb/Delay, FX-Loop, or Expression).
3. In the list that appears, tap the model you want
to assign.
4. In the next list that appears, tap the preset you
want to load for that model.
If you load an amp or cab to a slot with an empty
adjacent slot, a matching amp or cab will be loaded
automatically to the other slot. After that, you can
configure them independently: you can separate them in
the signal chain, you can change the type of the amp or
cab, and you can delete each model separately.
Optimizing Your Signal Chain
The signal chain is the path that the audio signal follows from your guitar through your selected
models and ends at the outputs of HeadRush MX5. You can use the touchscreen to arrange
your selected models in any sequence, but you may find that some configurations will sound
better than others.
Here are some common model placement suggestions for creating tones with HeadRush MX5:
• Dynamics (e.g., compressors), filters (e.g., wah, pitch shifters), and volume pedals
generally are placed at the beginning of the signal chain. Alternatively, you can place
volume pedals at the end of the signal chain to provide a slight variance in functionality.
• Gain-based effects (e.g., overdrive/distortion, fuzz) usually come next.
• Equalization (EQ) is often used to shape the tonal characteristics of overdrive/distortion
and fuzz effects, so put an EQ after them. Alternatively, place it before them to shape the
guitar’s general tone—cutting unwanted frequencies—before the gain pedals.
• Modulation effects like flangers, phasers, and chorus are typically placed next.
• Time-based effects like delays and reverbs are generally placed near the end of the
signal chain.
• An amp and a cab (or an amp and impulse response) are often placed at the very end of
the signal chain, although you can place it wherever you want.
Type Model Presets


