
4 5
Deutsch
Bitte lesen Sie vor Gebrauch des Gerätes die
Bedienungsanleitung sorgfältig durch und be-
wahren Sie diese zur weiteren Nutzung oder für
nachfolgende Eigentümer auf.
Sie hilft Ihnen, das Gerät von Anfang an sinnvoll und richtig
zu gebrauchen und Fehlbedienungen zu vermeiden.
Bitte beachten Sie insbesondere die Sicherheitshinweise
in dieser Bedienungsanleitung. Die Bedienungsanleitung
nden Sie auch auf der Leifheit-Homepage unter
www.leifheit.de
Herzlichst
Ihr Leifheit-Team
Leifheit AG
Leifheitstraße 1
56377 Nassau/Lahn
Deutschland
Inhaltsverzeichnis
A
B
C
D
E
F
G
H
I
J
K
L
M
Lieferumfang .................................... 5
Produktbeschreibung. . . . . . . . . . . . . . . . . . . . . . . . . . . . . 5
Technische Daten ................................ 6
Bestimmungsgemäßer Gebrauch ................. 6
Sicherheitshinweise .............................. 6
Funktionsweise .................................. 7
Vor dem Gebrauch. . . . . . . . . . . . . . . . . . . . . . . . . . . . . . . . 7
Anwendung ...................................... 7
Reinigung und Wartung. . . . . . . . . . . . . . . . . . . . . . . . . . . 8
Störungshilfe ................................... 10
Wichtige Hinweise ...............................11
Entsorgung ......................................11
Konformität / Konformitätserklärung .............11
ALieferumfang
Akku-Saugwischer Regulus Aqua PowerVac
Bedienungsanleitung
Prüfen Sie den Inhalt anhand des Lieferumfangs
auf Vollständigkeit und mögliche Transportschäden.
Sollten Sie einen Transportschaden feststellen,
verwenden Sie das Gerät nicht, sondern wenden
Sie sich umgehend an den Kundenservice.
[1]
Ein/Aus-Taste
[2]
Saugmodus-Taste I/II
[3]
Wasserhebel
[4]
Griff
[5]
Entriegelungstaste Frischwassertank
[6]
Frischwassertank
[7]
Schmutzwassertank
[8]
Lüftungsabdeckung
[9]
Bodendüse
[10]
Betriebsanzeige
[11]
Entriegelungstaste Schmutzwassertank
[12]
Abdeckung Reinigungswalze
[13]
Adapter Ladegerät
[14]
Hohlstecker Ladegerät
[15]
Ladebuchse
[16]
Saugkanal
[17]
Transporträder
[18]
Düsen Wasserauslass
[19]
Halterung Reinigungswalze
[20]
Reinigungswalze
[21]
Entriegelungstaste Abdeckung Reinigungswalze
[22]
Parkstation
[23]
Deckel Frischwassertank
[24]
Griff Frischwassertank
[25]
Schwammlterhalter
[26]
Schwammlter
[27]
Deckel Schmutzwassertank
[28]
Schwimmer
[29]
Griff Schmutzwassertank
[30]
Überlaufschutz
[31]
Reinigungsbürste
[32]
Zubehöraufbewahrung*
[33]
Eckengleiter*
[34]
Wischbezug für Eckengleiter*
Produktbeschreibung
B
D
* Regulus Aqua PowerVac Pro

6 7
Sicherheitshinweise
E
Bei der Verwendung eines elektrischen
Gerätes sind grundlegende Sicherheits-
maßnahmen immer zu beachten:
1.
Verwenden Sie das Gerät nur, wie in die-
ser Anleitung beschrieben.
2.
Gebrauchen Sie das Gerät niemals, wenn
Kabel, Stecker, Gehäuse oder Ladeadap-
ter beschädigt sind.
3.
Reparaturen dürfen nur durch autori-
sierte Kundendiensttechniker erfolgen.
Öffnen Sie das Grundgerät nie selbst-
ständig. Die einzelnen Komponenten des
Grundgerätes dürfen nicht zerlegt, repa-
riert oder umgebaut werden.
4.
Dieses Gerät enthält Batterien, die nicht
ausgetauscht werden können.
5.
Das Gerät darf nur mit dem mitgelie-
ferten Ladegerät geladen werden. Ver-
gewissern Sie sich, dass die auf dem
Typenschild des Netzteils angegebene
Spannung der Netzspannung entspricht.
6.
Achten Sie darauf, dass das Gerät sowie
das Netzteil nicht nass werden. Bedie-
nen Sie das Gerät oder Netzteil nicht mit
feuchten oder nassen Händen.
7.
Lagern, laden oder nutzen Sie das Gerät nicht
im Freien oder in nassen Räumen, wie Ba-
dezimmern o.ä., sondern stets bei Zimmer-
temperatur und an einem trockenen Ort.
8.
Verwenden Sie das Gerät nicht in der
Nähe von brennbaren Gasen.
9.
Schützen Sie das Gerät vor starker Hitze
und setzen Sie es keiner direkten Son-
neneinstrahlung aus.
10.
Dieses Gerät ist für Benutzer (einschl.
Kinder ab 8 Jahre ) mit eingeschränkten
physischen, sensorischen oder psychi-
schen Fähigkeiten bzw. ohne jegliche
Erfahrung oder Vorwissen nur dann ge-
eignet, wenn eine angemessene Aufsicht
oder ausführliche Anleitung zur Benut-
zung des Geräts durch eine verantwort-
liche Person sichergestellt ist.
11.
Achten Sie darauf, dass Kinder nicht mit
dem Gerät spielen.
12.
Kinder nicht ohne Beaufsichtigung mit
dem Gerät lassen.
13.
Trennen Sie das Gerät vor der Reinigung
oder Wartung vom Netz.
14.
Berühren Sie die rotierende Reinigungs-
walze nicht, wenn das Gerät eingeschal-
tet ist.
15.
Achten Sie darauf, dass die laufende
Reinigungswalze nicht mit Körperteilen
(z.B. Haare, Finger) oder Kleidungsstü-
cken in Berührung kommt.
16.
Achten Sie darauf, dass Sie keine Kör-
perteile (z.B. Finger) beim Reinigen,
beispielsweise von der Bodendüse, ein-
klemmen oder quetschen.
17.
Achten Sie darauf, dass sich keine Ge-
genstände (z.B. Kabel, lange Fransen)
in der Reinigungswalze verfangen, da
sonst die Gefahr besteht, dass diese
oder das Gerät beschädigt werden.
18.
Bewahren Sie das Gerät für Kinder unzu-
gänglich auf. Lassen Sie das Gerät nicht
unbeaufsichtigt, wenn es eingeschaltet
ist.
19.
Verpackungsmaterial wie Plastikbeutel
und Ähnliches von Kindern fernhalten.
Es besteht Erstickungsgefahr.
Modell .........Regulus Aqua PowerVac/ Regulus Aqua PowerVac Pro
Akku ............................................... Li-Ion, 24V 2,5Ah
Laufzeit ........................................ ~26 min (Eco-Mode)
Leistung ..................................................... 120 W
Spannung ....................................................... 24V
Ladezeit ....................................................... ~ 3 h
Volumen Frischwassertank ................................... 500 ml
Volumen Schmutzwassertank ............................... 400 ml
Gewicht Regulus Aqua PowerVac ............................... 3,3 kg
Gewicht Regulus Aqua PowerVac Pro ........................... 3,5 kg
Technische Daten
C
Bitte beachten Sie, dass dieses Produkt nur für den Haus-
haltsgebrauch bestimmt ist. Leifheit gibt keine Hersteller-
Gewährleistung bei gewerblicher Nutzung.
•
Das Gerät dient ausschließlich dem Saugwischen von
trockenem sowie feuchtem Sauggut auf wasserunemp-
ndlichen und versiegelten Böden. Diese sind Fliesen,
PVC, Linoleum, Laminat und versiegeltes Holz.
•
Verwenden Sie das Gerät nicht zum Aufsaugen brennbarer
Flüssigkeiten, scharfkantiger oder spitzer Gegenstände,
heißer oder kalter Asche und brennender Zigaretten.
•
Das Gerät darf nicht zum Absaugen von Menschen oder
Tieren verwendet werden.
•
Decken Sie Luftansaugöffnungen oder Luftaustrittsöff-
nungen des eingeschalteten Geräts nicht ab. Achten Sie
darauf, dass diese nicht durch Verschmutzungen ver-
schlossen werden.
•
Verwenden Sie das Gerät nur mit von Leifheit zugelasse-
nem Zubehör und Ersatzteilen.
•
Platzieren Sie das Gerät immer auf der dazugehörigen
Parkstation auf einer harten und ebenen Fläche.
•
Achten Sie beim Laden des Geräts auf ausreichend
Abstand zu Hitze- und Feuchtigkeitsquellen.
•
Achten Sie bitte darauf, dass keine spitzen Gegenstände in
der Reinigungswalze oder den Rädern festhängen, die den
Boden beschädigen könnten.
•
Betreiben Sie das Gerät nie ohne Filter.
Jede darüber hinausgehende Verwendung gilt als nicht be-
stimmungsgemäß und kann zu Beschädigungen oder Verlet-
zungen führen. Für hieraus resultierende Schäden haftet der
Hersteller nicht; das Risiko hierfür trägt allein der Benutzer.
Bestimmungsgemäßer
Gebrauch
D
Das Gerät verbindet Saugen, Wischen und Trocknen in einem
Arbeitsschritt. Es verfügt über ein 2-Tank-System mit einem
separaten Frisch- und Schmutzwassertank.
Bei Betätigung des Wasserhebels wird das Frischwasser auf
die Reinigungswalze gegeben. Somit kann die Wassermenge
individuell für jede Bodenart eingestellt werden. Die rotieren-
de Reinigungswalze entfernt Staub, trockenen und feuchten
Schmutz, sowie eingetrocknete Flecken.
Die Saugfunktion saugt die Reinigungswalze ab und be-
fördert den Schmutz in den Schmutzwassertank. Dadurch
wischen Sie immer mit einer sauberen Reinigungswalze und
frischem Wasser.
Abbildung 1
Griff (4) und Kabel in das Gerät bis zum Einrasten
einsetzen.
AUFLADEN
Während des Ladens das Gerät nicht reinigen und warten.
Das Gerät vor der ersten Verwendung und nach jeder Ver-
wendung direkt wieder vollständig auaden.
Abbildung 2
Hohlstecker des mitgelieferten Ladegeräts (14) in die Lade-
buchse (15) des Geräts stecken.
Adapter des Ladegeräts (13) in die Steckdose stecken.
Abbildung 3
Betriebsanzeige (10) blinkt langsam grün während des
Ladevorgangs.
Nach 3 Stunden ist das Gerät vollständig geladen. Die
Betriebsanzeige leuchtet dann durchgehend 2 Minuten,
danach erlischt das Licht.
Funktionsweise
Vor dem Gebrauch
F
G
FRISCHWASSERTANK FÜLLEN
Abbildung 4
Entriegelungstaste (5) drücken, um Frischwassertank (6) am
Griff (24) zu entnehmen.
Deckel des Frischwassertanks (23) öffnen.
Abbildung 5
Frischwassertank mit max 60°C warmen Wasser befüllen.
Nach Bedarf nicht schäumende Reinigungsmittel in niedriger
Dosierung hinzugeben.
ACHTUNG: Achten Sie auf die Dosierungsvor-
gaben der Reinigungsmittel. Keine aggres-
siven Reinigungs- oder Desinfektionsmittel
verwenden. Wir empfehlen Leifheit Univer-
salreiniger.
Anwendung
H
Leifheit AG
Leifheitstraße 1
D-56377 Nassau, Germany
Amtsgericht Montabaur
HRB 2857
Ladeadapter
Symbolerklärung ...........................
Modellkennung . . . . . . . . . . . . . . . . . . . . . . . . . . . . . . . .
Eingangsspannung ............................
Eingangswechselstromfrequenz ...............
Ausgangsspannung ...........................
Ausgangsstrom ...............................
Ausgangsleistung .............................
Durchschnittliche Ezienz im Betrieb ...........
Ezienz bei geringer Last (10 %) ................
Leistungsaufnahme bei Nulllast ................
= externes Netzteil
YLS0241A-E260092
AC 100-240 V
50/60 Hz
DC 26,0 V
0,92 A
23,92 W
86,57%
78,86%
0,09 W

8 9
SCHMUTZWASSERTANK ENTLEEREN
UND FILTER REINIGEN
Abbildung 12
Zum Ausschalten des Geräts die An-/Aus-Taste (1) ein
weiteres Mal drücken.
Schmutzwassertank (7) entnehmen.
Dazu Entriegelungstaste (11) nach unten drücken und Tank
am Griff (29) herausziehen.
Abbildung 13
Deckel (27) vom Schmutzwassertank (7) abheben.
Schmutzwassertank ausleeren.
Bei Ablagerungen die Reinigungsbürste (31) verwenden.
Abbildung 14
Schwammlterhalter (25) aus dem Deckel des Schmutz-
wassertanks (27) entnehmen.
Schwammlter (26) aus dem Schwammlterhalter entneh-
men.
Abbildung 15
Je nach Verschmutzungsgrad alle Teile der Schmutzwasser-
tankeinheit (7, 25, 26, 27, 28, 30) unter ießendem Wasser
auswaschen.
Abbildung 16
Vor dem Zusammensetzen und Einsetzen der ausgebauten
Teile alle Teile vollständig an der Luft trocken lassen.
ACHTUNG: Zur Vermeidung von Geruchs-
bildung Schmutzwassertankeinheit nach
Gebrauch entnehmen und auswaschen. Nur
vollständig getrocknete Teile wieder in das
Gerät einsetzen.
Abbildung 17
Schwammlter (26), Schwammlterhalter (25), Deckel (27)
und Schmutzwassertank (7) wieder zusammensetzen.
Abbildung 18
Schmutzwassertankeinheit wieder in das Gerät einsetzen
bis sie hörbar einrastet.
REINIGUNGSWALZE ENTNEHMEN UND REINIGEN
Abbildung 19
Walzenabdeckung (12) entfernen, um die Reinigungswalze
(20) zu entnehmen.
Zum Abnehmen der Abdeckung Entriegelungstaste (21)
drücken und Abdeckung entfernen.
Abbildung 20
Reinigungswalze (20) mithilfe der Walzenhalterung (19)
am Rand entnehmen.
Dazu die Halterung nach oben aus der Führung ziehen.
Abbildung 21
Reinigungswalze (20) und ggf. Reinigungswalzenabdeckung
(12) unter ießendem Wasser auswaschen.
Reinigungswalze vor dem erneuten Einsetzen vollständig
trocknen lassen.
Ggf. in Zubehöraufbewahrung (32) trocknen lassen und
aufbewahren.
ACHTUNG: Zur Vermeidung von Geruchs-
bildung Reinigungswalze nach Gebrauch
entnehmen und auswaschen. Nur die voll-
ständig getrocknete Reinigungswalze
wieder in das Gerät einsetzen.
SAUGKANAL REINIGEN
Abbildung 22
Verschmutzungen an den Düsen (18) und dem Saugkanal
(16) bei herausgenommener Reinigungswalze mit einem
feuchten Tuch entfernen.
REINIGUNGSWALZE EINSETZEN UND
WALZENABDECKUNG SCHLIESSEN
Abbildung 23
Sicherstellen, dass das Gerät ausgeschaltet ist und
nicht lädt.
Reinigungswalze (20) zuerst in die runde Aufnahme ein-
setzen und anschließend die Walzenhalterung (19) in die
Führung einsetzen
Abbildung 24
Nasen der Walzenabdeckung (12) am unteren Ende in die
passenden Aufnahmen einsetzen und Abdeckung schließen
bis sie hörbar einrastet.
AUTO-WASH PROGRAM
Verwenden Sie zusätzlich zur Reinigung Ihres Gerätes re-
gelmäßig das AUTO-WASH PROGRAM. Bei Verwendung des
Programms kann auch etwas Essig oder Essigreiniger in den
Frischwassertank hinzugegeben werden.
Entleeren Sie vor Verwendung des AUTO-WASH PROGRAM
immer den Schmutzwassertank (7) und setzen Sie ihn an-
schließend wieder in das Gerät ein.
Abbildung 25
Frischwassertank (6) bis zur AUTO-WASH MAX Linie mit
Wasser befüllen.
Tankdeckel (23) schließen und Frischwassertank einsetzen
bis er hörbar einrastet.
Abbildung 26
Gerät auf die dazugehörige Parkstation (22) stellen.
An-/Aus-Taste (1) zusammen mit Saugmodus-Taste I/II (2)
3 Sekunden lang gedrückt halten und loslassen sobald das
Gerät das AUTO-WASH PROGRAM startet. Die Betriebsanzei-
ge blinkt dann grün.
Abbildung 27
Nach 60 Sekunden endet das Programm und das Gerät
schaltet sich aus.
Anschließend Schmutzwassertank (7) und Reinigungswalze
(20) entnehmen und auswaschen.
GRIFF DEMONTIEREN
Griff nach dem Zusammenbau nicht mehr abnehmen. Das
Demontieren des Griffs ist nur vorgesehen, wenn das Gerät
zu Servicezwecken verschickt werden muss.
Abbildung 28
Schraube auf der Rückseite des Gerätes (4) lösen und
entfernen.
Schraubendreher in die Öffnung des Schraubenlochs
stecken.
Mit leichtem Druck lässt sich die Arretierung des Griffs
lösen und der Griff herausziehen.
Reinigung und Wartung
I
Abbildung 6
Tankdeckel (23) schließen und Frischwassertank (6) einset-
zen bis er hörbar einrastet.
BODEN REINIGEN
Abbildung 7
Zum Einschalten des Geräts die An-/Aus-Taste (1) einmal
drücken.
Die Betriebsanzeige leuchtet nach dem Einschalten grün.
Optional: Saugmodus-Taste (2) einmal drücken, um bei
stärkeren Verschmutzungen auf Fliesen-/Steinböden in
den Turbo-Modus zu wechseln. Die Betriebsanzeige blinkt
dann langsam grün. Zurückschalten in Eco-Modus durch
erneutes Betätigen der Saugmodus-Taste.
Abbildung 8
Gerät nach hinten neigen, um es aus der Standposition zu
lösen.
Abbildung 9
Wasserhebel (3) drücken, um die Reinigungswalze (20)
individuell zu befeuchten.
Vor Beginn des Bodenreinigens, Wasserhebel einige Sekun-
den gedrückt halten ohne das Gerät zu bewegen, um die
Walze vorab schnell und gleichmäßig zu befeuchten.
Gerät zur Bodenreinigung in ruhigen und gleichmäßigen
Bewegungen vor und zurück schieben.
Wenn die Feuchtigkeit der Reinigungswalze nachlässt, Was-
serhebel erneut drücken und solange gedrückt halten bis die
gewünschte Feuchtigkeit wieder erreicht ist.
Füllstand des Schmutzwassertanks (7) darf die maximale
Füllhöhe nicht überschreiten.
Abbildung 10
Bei Reinigungspausen das Gerät immer auf die dazugehörige
Parkstation (22) stellen, um die Bildung von Wasserecken
durch Restwasser im Gerät auf dem Boden zu vermeiden.
Abbildung 11
Ist der Schmutzwassertank (7) bis zur Max Linie gefüllt, wird
ein Meldesystem (
k
Tank Control Technology) aktiviert.
Dadurch blinkt die Betriebsanzeige (10) orange und die Rei-
nigungswalze stoppt 3-mal für ein paar Sekunden, danach
stoppt die Walze ganz.
Schmutzwassertank spätestens dann leeren.

10 11
Störung Mögliche Ursache / Lösung
Gerät startet nicht.
k
Der Akku wurde nicht geladen.
Laden Sie den Akku.
Die Betriebsanzeige
(10) blinkt orange.
k
Die Reinigungswalze (20) ist
blockiert. Bitte entfernen Sie
die Walze und lösen Sie die
Blockierung.
k
Der Akku ist fast leer, laden Sie
das Gerät nach.
Die Betriebsanzeige
(10) blinkt orange
und die Reinigungs-
walze (20) stoppt
3-mal für ein paar
Sekunden, danach
stoppt die Walze
ganz.
k
Tank Control Technology: Der
Schmutzwassertank (7) ist
voll. Bitte entleeren Sie den
Schmutzwassertank.
Der Schmutzwas-
sertank (7) lässt sich
nicht in das Gerät
einsetzen.
k
Prüfen Sie, ob der Deckel (27)
und der Schwammlter (25)
korrekt eingesetzt sind.
Störung Mögliche Ursache / Lösung
Es läuft Wasser
aus der Lüftungs-
abdeckung (8).
k
Der Schmutzwassertank (7)
ist voll. Bitte entleeren Sie den
Tank.
Es lässt sich wenig
oder kein Wasser
per Wasserhebel
hinzugeben.
k
Der Frischwassertank (6) ist
leer. Füllen Sie Wasser nach.
k
Die Düsen (18) sind blockiert.
Bitte entfernen Sie festsitzen-
den Schmutz vor den Düsen.
Kalkablagerungen können
vorsichtig mithilfe einer
Büroklammer durch Durchsto-
ßen der Öffnungen entfernt
werden.
k
Bitte verwenden Sie regelmä-
ßig das AUTO-WASH PROGRAM,
um die Kanäle und Düsen im
Inneren des Geräts sauber zu
halten.
Auf dem Boden
bleibt Schaum
zurück.
k
Bitte geben Sie weniger Reini-
gungsmittel bei oder verwen-
den Sie Leifheit Universalreini-
ger speziell für Regulus Aqua
PowerVac.
Das Gerät nimmt
kein Wasser mehr
vom Boden auf.
k
Der Schmutzwassertank (7)
ist voll. Bitte entleeren Sie den
Tank.
Das Gerät schaltet
sich nach ca. 60
Sekunden selbst-
ständig aus.
k
Das AUTO-WASH PROGRAM
wurde gestartet. Starten Sie
das Gerät erneut, indem Sie
kurz auf die An-/Aus- Taste
drücken.
Sonstige Störung
k
Wenden Sie sich an den
Leifheit-Service.
STÖRUNGSHILFE
JEntsorgung
Konformitätserklärung
Das Symbol auf dem Produkt oder seiner Verpa-
ckung weist gemäß Richtlinie 2012/19 EU darauf
hin, dass dieses Produkt und der darin verbaute
Akku nicht als normaler Haushaltsabfall zu be-
handeln sind, sondern an einer Annahmestelle
für das Recycling von elektrischen und elektro-
nischen Geräten abgegeben werden müssen.
Weitere Informationen erhalten Sie über Ihre Gemeinde,
die kommunalen Entsorgungsbetriebe oder das Geschäft,
in dem Sie das Produkt gekauft haben.
L
M
Hiermit erklärt Leifheit, dass sich dieses Gerät in Über-
einstimmung mit den grundlegenden Anforderungen des
Produktsicherheitsgesetzes und den übrigen einschlägigen
Bestimmungen und Richtlinien bendet. Die EU-Konformi-
tätserklärung nden Sie unter www.leifheit.de.
KUNDENSERVICE
Bei Fragen und Anregungen steht Ihnen
unser Leifheit-Service gerne zur Verfügung:
Mo – Fr: 08:00 - 17:00 Uhr
kostenlose Service-Hotline:
00800 537 37 373
(D/F/NL/CZ/E/I/PL)
oder kostenpichtig
Internationale Rufnummer: 0049 2604 977 0
Internet: www.leifheit.de
WICHTIGE HINWEISE
K
•
Der Akku darf nur mit dem mitgelieferten Lade-
gerät aufgeladen werden. Das Ladegerät ist nur
in Verbindung mit dem Leifheit Akku-Saugwi-
scher Regulus Aqua PowerVac zu verwenden.
•
Laden Sie das Gerät vor der ersten Verwendung
und nach jeder Verwendung direkt wieder voll-
ständig auf.
•
Lagern Sie das Gerät nach vollständiger Ent-
ladung des Akkus nicht ungenutzt über einen
Zeitraum länger als 6 Monate.
Filterreinigung
•
Reinigen Sie die Reinigungswalze, den
Schwammlter und andere Filterteile regelmä-
ßig nach Gebrauch.
•
Lassen Sie die Reinigungswalze und alle Filter-
teile vollständig trocknen, bevor Sie sie wieder in
den Akku-Saugwischer einsetzen.
Reinigung des Gerätes
•
Das Gerät enthält elektrische Bauteile. Nicht
unter ießendem Wasser reinigen!
•
Reinigen Sie das Gerät mit einem feuchten Tuch.
•
Tauchen Sie das Gerät auf keinen Fall in Wasser ein.
Abstellen des Gerätes
•
Stellen Sie das Gerät nur auf einen ebenen und
festen Untergrund ab.
•
Um empndliche Böden vor Austreten von Rest-
wasser aus dem Gerät zu schützen, stellen Sie
den Akku-Saugwischer während der Reinigungs-
pausen und nach dem Reinigen immer auf die
dazugehörige Parkstation.
Verwendung von Reinigungsmittel
•
Verwenden Sie bei Bedarf nur nicht schäumende
Reinigungsmittel in niedriger Dosierung.
•
Achten Sie auf die Dosierungsvorgaben der
Reinigungsmittel. Keine aggressiven Reinigungs-
oder Desinfektionsmittel verwenden. Wir emp-
fehlen Leifheit Universalreiniger.
ACHTUNG
Folgende Hinweise sind im Umgang mit
Lithium-Ionen-Akkus immer zu beachten:
Der Akku darf nicht beschädigt oder geöff-
net werden, hierdurch kann es zu einem
Kurzschluss kommen. Es besteht Feuerge-
fahr, es können giftige gesundheitsgefähr-
dende Substanzen austreten. Die Akkus
dürfen nicht in Feuer gelangen sowie
direkter, starker Sonnenein strahlung und
Hitze ausgesetzt werden.
WARNUNG!
VERWENDEN SIE DAS GERÄT NIEMALS IM
NUR TEILWEISE ZUSAMMENGEBAUTEN
ZUSTAND!
Der Schwimmer (28)
wurde angezogen,
das Gerät saugt
nicht mehr, aber die
Tank Control Techno-
logy springt nicht an.
k
Der Schwammlter (25) ist
durch übermäßige Nässe oder
Schmutzpartikel blockiert. Bit-
te reinigen und trocknen Sie
den Schwammlter.
k
Der Schwimmer (28) wurde
angezogen und das Gerät wur-
de dabei zu schnell aus- und
wieder angeschaltet.
Bitte schalten Sie das Gerät für
einen Moment aus und warten
Sie bis der Schwimmer sich
wieder in der Ausgangslage
bendet, bevor Sie das Gerät
wieder starten.
Die Tank Control
Technology springt
an, obwohl der
Schmutzwassertank
(7) noch nicht voll
ist.
k
Bei ruckartigen Bewegungen
(z.B. stärkeres Anstoßen an
Möbeln) kann die Tank Control
Technology versehentlich
reagieren. Bitte schalten Sie
das Gerät für einen Moment
aus und warten Sie bis der
Schwimmer (28) sich wieder
in der Ausgangslage bendet,
bevor sie das Gerät wieder
starten. Achten Sie darauf,
nicht zu stark an Möbeln oder
sonstigem anzustoßen.

12 13
Table of contents
A
B
C
D
E
F
G
H
I
J
K
L
M
Scope of supply ................................. 12
Product overview
...............................12
Technical specications
......................... 13
Intended use . . . . . . . . . . . . . . . . . . . . . . . . . . . . . . . . . . . . 13
Safety information .............................. 13
Operation. . . . . . . . . . . . . . . . . . . . . . . . . . . . . . . . . . . . . . . 14
Before use ...................................... 14
Application ..................................... 14
Cleaning and maintenance. . . . . . . . . . . . . . . . . . . . . . . .15
Troubleshooting. . . . . . . . . . . . . . . . . . . . . . . . . . . . . . . . . 17
Important information. . . . . . . . . . . . . . . . . . . . . . . . . . . 18
Disposal ........................................ 18
Conformity / Declaration of Conformity .......... 18
AScope of supply
Leifheit cordless Vac & Wipe Operating instructions
Check the contents against the parts list for completeness
and for any damage during shipping.
If you discover any shipping damage, do not use the
appliance and contact Customer Service immediately.
[1] On / Off button
[2] Vacuum mode button I/II
[3] Water lever
[4] Handle
[5] Fresh water tank release lever
[6] Fresh water tank
[7] Dirty water tank
[8] Ventilation cover
[9] Floor head
[10] Operating display
[11] Dirty water tank release lever
[12] Cleaning roller cover
[13] Charger adapter
[14] Charger hollow connector
[15] Charge socket
[16] Vacuum Channel
[17] Transport wheels
[18] Water outlet nozzles
[19] Cleaning roller holder
[20] Cleaning roller
[21] Cleaning roller cover release button
[22] Park station
[23] Fresh water tank cover
[24] Fresh water tank handle
[25] Sponge lter holder
[26] Sponge lter
[27] Dirty water tank cover
[28] Float
[29] Dirty water tank handle
[30] Spilling protection adapter
[31] Cleaning brush
[32] Accessory holder
*
[33] Edge cleaner
*
[34] Wiper cover for the edge cleaner
*
Product overview
B
English
Please read the operating instructions carefully
before using this appliance and store these for
later reference or for the benet of subsequent
owners.
They will help you to use the device sensibly and correctly
from the get go and avoid faulty operation.
Please pay particular attention to the safety instructions
provided in this manual. The operating instructions can be
found on the Leifheit homepage under www.leifheit.com.
Sincerely,
The Leifheit Team
Leifheit AG
Leifheitstraße 1
56377 Nassau/Lahn
Germany
GB
Safety instructions
E
Fundamental safety measures must
be observes when using an electrical
appliance:
1.
Use the appliance only as described in
these instructions.
2.
Never use the appliance if the cable,
connector, housing or power supply
unit are damaged.
3.
Repairs may only be carried out by
authorised customer services techni-
cians. Never open the basic unit single-
handedly. The individual components
of the basic unit must not be disassem-
bled, repaired or altered.
4.
This device contains batteries that
cannot be replaced.
5.
The appliance may only be charged
using the charger supplied. Make sure
that the voltage specified on the
rating plate of the power supply unit
corresponds with the mains voltage.
6.
Make sure that the appliance as well as
the power supply unit do not get wet.
Do not operate the appliance or power
supply unit with moist or wet hands.
Technical specications
C
Please note that this product is only intended for household
use. Leifheit will not provide any manufacturer’s warranty
for commercial use.
•
The appliance serves exclusively vacuum wiping of dry
as well as moist vacuum material on water-resistant and
sealed oors. These are tiles, PVC, linoleum, laminate and
sealed wood.
•
Do not use the application to vacuum ammable uids,
sharp-edged or tipped objects, hot or cold ash and
burning cigarettes.
•
The appliance must not be used to vacuum persons or
animals.
•
Never cover the air inlet openings or air outlet openings
of the appliance switched on. Make sure that these are
not clogged by dirt.
•
Use the appliance only with Leifheit approved accesso-
ries and spare parts.
•
Always position the appliance at the corresponding park
station on a hard and level surface.
•
When charging the appliance, ensure for sufcient
distance to heat and moisture sources.
•
Please take care that no tipped objects catch in the
cleaning roller or the wheels that could damage the oor.
•
Never operate the appliance without lter.
Any use beyond this is considered as not intended and may
lead to damage or injury. The manufacturer shall not be
liable for any damages resulting from such use; the user is
solely responsible for damage from improper use.
Intended use
D
Model ......................................Regulus Aqua PowerVac
Rechargeable battery ...............................Li-Ion, 24V 2,5Ah
Operating time ................................. ~22 min (Eco-Mode)
Output .......................................................120 W
Voltage ........................................................24V
Charge time ...................................................~ 3 h
Fresh water tank volume .....................................500 ml
Dirty water tank volume .....................................400 ml
Weight Regulus Aqua PowerVac ................................3,3 k
Weight Regulus Aqua PowerVac Pro .............................3,5 k
Charge adapter
Explanation of the symbol ................
Model identifier ...........................
Input voltage ..............................
Input AC frequency ........................
Output voltage ............................
Output current ............................
Output power .............................
Average active eciency ...................
Eciency at low load (10 %) ................
No-load power consumption ...............
Manufacturer’s name or trade mark, commercial
registration number and address
Leifheit AG
Leifheitstraße 1
D-56377 Nassau, Germany
Amtsgericht Montabaur
HRB 2857
= external power supply
YLS0241A-E260092
AC 100-240 V
50/60 Hz
DC 26,0 V
0,92 A
23,92 W
86,57%
78,86%
0,09 W
* Regulus Aqua PowerVac Pro

14 15
EMPTY THE DIRTY WATER TANK AND CLEAN THE FILTER
Figure 12
To switch off the appliance, press the On / Off button (1)
once again.
Remove the dirty water tank (7).
For this purpose, press the release button (11) down and pull
the tank out on handle (30).
Figure 13
Lift the cover (27) from the dirty water tank (7).
Empty the dirty water tank.
Use the cleaning brush (31) in case of deposit build-up.
Figure 14
Remove the sponge lter holder (25) from the cover of the
dirty water tank (27).
Remove the sponge lter (26) from the sponge lter holder.
Figure 15
Depending on the degree of soiling, rinse out all parts
of the dirty water tank unit (7, 25, 26, 27, 28, 30) under
running water.
Figure 16
Before putting back together and insertion of the parts
removed, allow all parts to completely dry in the air.
CAUTION: To avoid the formation of odour,
remove the dirty water tank unit after use
and rinse out. Insert only completely dried
parts back in the appliance.
Figure 17
Reassemble the sponge lter (26), sponge lter holder (25),
cover (27) and dirty water tank (7).
Figure 18
Reinsert the dirty water tank back into the appliance until
you hear it engaging.
Cleaning and maintenance
I
Figure 7
To switch on the appliance, press the On / Off button (1) once.
The operating display illuminates green after switching on.
Optional: Press the vacuum mode button (2) once in order
to the turbo mode if tiled / stone oors have more stubborn
dirt. Then the operating display ashes green slowly. Switch
back to Eco mode by pressing the vacuum button again.
Figure 8
Tilt the appliance to the rear to release it from the stand
position.
Figure 9
Press the water lever (3) to moisten the cleaning roller
(20) as needed
Before starting to clean the floor, keep the water
lever pressed for several seconds without moving the
appliance in order to quickly and evenly moisten the
roller in advance.
To clean the floor, push the appliance back and forth
in steady and equal movements.
If the moisture of the cleaning roller reduces, press the
water lever again and keep it pressed until the desired
moisture is reached again.
The fill level of the dirty water tank (7) must not exceed
the maximum fill level.
Figure 10
During cleaning breaks, always place the appliance at
the corresponding park station (22) in order to avoid the
formation of water stains to the floor from the residual
water in the appliance.
Figure 11
Once the dirty water tank (7) is filled to the Max. line,
a notification system (
k Tank Control Technology) is
activated. As a result, the operating display (10) flashes
orange and the cleaning roller stops 3 times for a few
seconds and then the roller stops completely.
Now the dirty water tank must be emptied at the latest.
7.
Do not store, charge or use the
appliance outdoors or in wet rooms
such as bathrooms or similar, but
always at room temperature and in
a dry location.
8.
Do not use the application in the
vicinity of flammable gases.
9.
Protect the appliance against intensive
heat and do not expose it to direct sun-
light.
10.
This appliance is only suitable for
users (also children aged 8 years and
above) with limited physical, sensory
or physical abilities or with lack of
experience or knowledge if they are
supervised appro priately or have been
instructed in the use of the appliance
by a responsible person.
11.
Make sure that children do not play
with the appliance.
12.
Do not leave children unattended with
the appliance.
13.
Unplug the appliance from the power
outlet before cleaning or maintenance.
14.
Do not touch the rotating cleaning
roller when the appliance is switched
on.
15.
Make sure that the running cleaning
roller does not make contact with body
parts (e.g. hair, fingers) or items of
clothing.
16.
During cleaning, make sure that no
body parts (e.g. fingers) are trapped
or crushed by the floor head.
17.
Make sure that no objects (e.g. cables,
long fringes) catch in the cleaning
roller otherwise there is a risk that this
or the appliance are damaged.
18.
Store the appliance out of reach of
children. Do not leave the appliance
unattended when it is switched on.
19.
Keep packaging material such as
plastic bags and similar away from
children. There is a risk of suffocation.
Figure 1
Insert the handle (4) and cable into the appliance until
they engage.
CHARGING
During charging, do not clean or maintain the appliance. Fully
charge the appliance before the rst use and after each use.
Figure 2
Insert the hollow connector of the charger (14) supplied
into the charging socket (15) of the appliance.
Insert the adapter of the charger (13) in the socket
Figure 3
Operating display (10) ashes green slowly during the
charging process.
The appliance is fully charged after 3 hours. Then the
operating display illuminates continuously for 2 minutes,
then the light goes out.
Before use
G
FILLING THE FRESH WATER TANK
Figure 4
Press release button (5) to remove the fresh water tank (6)
on the handle (24).
Open the cover of the fresh water tank (23).
Figure 5
Fill the fresh water tank with max. 60°C hot water.
If required, add non-foaming cleaning agent with low dosage.
CAUTION: Observe the dosing specications
of the cleaning agent. Do not use aggressive
cleaning agents or disinfectants. We recom-
mend Leifheit universal cleaner.
Figure 6
Close the tank cover (23) and insert the fresh water tank
(6) until you hear it engaging.
Application
H
The appliance combines vacuuming and wiping in one work
step. It is equipped with a 2-tank system with a separate
fresh and dirty water tank.
By actuating the water lever, the fresh water is spread over
the cleaning roller. This allows the amount of water to be
set for every oor type. The rotating cleaning roller removes
dust, dry and moist dirt as well as dried stains.
The vacuum function sucks on the cleaning roller and trans-
ports the dirt into the dirty water tank. This allows you to
always wipe with a clean cleaning roller and fresh water.
Operation
F

16 17
REMOVING AND CLEANING THE CLEANING ROLLER
Figure 19
Remove roller cover (12) in order to remove the cleaning
roller (20).
To remove the cover, press release button (21) and remove
the cover.
Figure 20
Using the roller holder (19), remove the cleaning roller (20)
at the edge.
For this purpose, pull the holder upwards out of the guide.
Figure 21
Rinse the cleaning roller (20) and, if necessary, the cleaning
roller cover (12) under running water.
Allow the roller to completely dry before using again.
When necessary, allow to dry and then store in the accesso-
ry holder (32).
CAUTION: To avoid the formation of odour,
remove the cleaning roller after use and
rinse out. Insert only the completely dried
cleaning roller back in the appliance.
CLEANING THE VACUUM CHANNEL
Figure 22
When the cleaning roller is taken out, remove any soiling
on the nozzles (18) and vacuum channel (16) using a moist
cloth.
INSERTING THE CLEANING ROLLER AND CLOSING
THE ROLLER COVER
Figure 23
Make sure that the appliance is switched off and is
not charging.
First insert the cleaning roller (20) in the round mount
and then insert the roller holder (19) in the guide.
Figure 24
Insert the tabs of the roller cover (12) at the bottom end
in the matching mount and close the cover until you hear
it engaging
AUTO-WASH PROGRAM
In addition to cleaning your appliance, also use the
AUTO-WASH PROGRAM at regular intervals. When using the
program, some vinegar or vinegar cleaner can also be added
to the fresh water tank.
Before using the AUTO-WASH PROGRAM, always empty
the dirty water tank and put it tank back in. (7).
Figure 25
Fill the fresh water tank (6) with water up to the
AUTO-WASH MAX line.
Close the tank cover (23) and insert the fresh water tank
until you hear it engaging.
Figure 26
Place the appliance on the corresponding park position (22).
Keep the On / Off button (1) pressed together with the
Vacuum mode button I/II
(2) for 3 seconds and then let go
as soon as the appliance starts the AUTO-WASH PROGRAM.
Then the operating display ashes green.
Figure 27
After 60 seconds, the program ends and the appliance
switches off.
Then remove the dirty water tank (7) and cleaning roller (20)
and wash-out.
DISASSEMBLING THE HANDLE
After assembling, do not remove the handle. Disassembly
of the handle is only intended if the appliance has to be
sent in for service purposes.
Figure 28
Loosen and remove the screw on the rear side of the appli-
ance.
Insert the screwdriver in the opening of the screw hole.
By applying slight pressure, the locking mechanism of the
handle can be released and the handle can be pulled out.
Malfunction Possible cause / Solution
The appliance does
not start.
k
The rechargeable battery has
not been charged. Charge the
rechargeable battery.
The operating dis-
play ashes orange.
k
The cleaning roller (20) is
blocked. Please remove the
roller and solve the blockage
k
The rechargeable battery is
empty; recharge the appliance.
The operating dis-
play ashes orange
and the cleaning
roller stops 3 times
for a few seconds
and then the roller
stops completely.
k
Tank Control Technology:
The dirty water tank (7) is full.
Please empty the dirty
water tank.
The dirty water tank
cannot be reinserted
in the appliance.
k
Check if the cover (27) and the
sponge lter (25) have been
inserted correctly.
The oat (28) has
been tightened,
the appliance has
stopped suction,
but the Tank Control
Technology does not
start
k
The sponge lter (25) is
blocked by excessive moisture
or dirt particles. Please clean
and dry the sponge lter.
k
The oat (28) has been
tightened and the appliance
has been switched off and on
too quickly. Please switch off
the appliance for a moment
and wait until the oat is in the
initial position before starting
the appliance again.
The Tank Control
Technology starts
even though the
waste water tank (7)
is not yet full.
k
T he Tank Control Technology
may react inadvertently in
the event of jerky movements
(e.g. strong bumping against
furniture). Please switch off
the appliance for a moment
and wait until the oat (28)
is back in its original position
before starting the appliance
again. Take care not to bump
too hard against furniture or
other objects.
Malfunction Possible cause / Solution
Water is running out
of the ventilation
cover.
k
The dirty water (7) tank is full.
Please empty the tank.
Little or no water
can be added using
the water lever.
k
The fresh water (6) tank is
empty. Rell with water.
k
The nozzles (18) are blocked.
Please remove the stuck pro-
tection in front of the nozzles.
Lime deposits can be carefully
removed using a paper clip
by inserting it through the
openings.
k
Please use the
AUTO-WASH PROGRAM at
regular intervals in order to
keep the channels and nozzles
inside the appliance clean.
Foam remains
on the oor.
k
Please add less cleaning agent
or use the Leifheit universal
cleaner especially for the
Regulus Aqua PowerVac.
The appliance does
not absorb water
from the oor
k
The dirty water (7) tank is full.
Please empty the tank.
The appliance swit-
ches off automati-
cally after approx.
60 seconds.
k
The AUTO-WASH PROGRAM
has been started. Restart the
appliance by briey pressing
the on / off button.
Other faults k
Please contact Leifheit Service.
TROUBLESHOOTING
J
CUSTOMER SERVICES
If you have any questions or suggestions,
our Leifheit Service is at your disposal:
Mon – Fri: 08:00 - 17:00
(tall-free)
Service hotline:
00800 537 37 373
(D/F/NL/CZ/E/I/PL)
(liable for costs)
International phone number: 0049 2604 977 0
Internet: www.leifheit.com

18 19
Disposal
Conformity /
Declaration of Conformity
The symbol on the product or its packaging
indicates that in accordance with Directive
2012/19 EU, this product and the integrated
rechargeable battery must not be treated
as normal household waste but should be
handed over to a collection point for recycling
electrical and electronic devices.
L
M
Leifheit hereby declares that this appliance is in conformity
with the basic requirements of the German Product Safety
Act and other applicable provisions and Directives.
he EU Declaration of Conformity can be found under
www.leifheit.com.
You can receive additional information from your muni-
cipality, municipal waste disposal company or the shop
where you bought the product F
Français
Avant d'utiliser l'appareil, veuillez lire attentive-
ment le mode d’emploi et conservez-le dans un
endroit sûr pour toute utilisation ultérieure ou
pour les prochains propriétaires.
Il vous aide à utiliser l’appareil dès le départ de manière utile
et correcte et à éviter toute mauvaise manipulation.
Veuillez porter une attention particulière aux consignes de
sécurité du présent mode d’emploi. Le mode d’emploi est
également disponible sur la page d'accueil de Leifheit à
l'adresse www.leifheit.de.
Cordialement,
Votre équipe Leifheit
Leifheit AG
Leifheitstraße 1
56377 Nassau/Lahn
Allemagne
Sommaire
A
B
C
D
E
F
G
H
I
J
K
L
M
Matériel livré ....................................19
Description du produit. . . . . . . . . . . . . . . . . . . . . . . . . . . .19
Données techniques ............................. 20
Utilisation conforme à la destination .............20
Consignes de sécurité ...........................20
Fonctionnement .................................21
Avant utilisation ................................ 21
Emploi. . . . . . . . . . . . . . . . . . . . . . . . . . . . . . . . . . . . . . . . . . .21
Nettoyage et maintenance. . . . . . . . . . . . . . . . . . . . . . . 22
Dépannage .....................................24
Informations importantes ....................... 25
Élimination ..................................... 25
Conformité / Déclaration de conformité. . . . . . . . . . 25
AMatériel livré
Aspirateur laveur sans l Regulus Aqua PowerVac
Mode d'emploi
Vériez le contenu du matériel livré quant à son
exhaustivité et à des dommages dus au transport.
Si vous constatez des dommages dus au transport,
n'utilisez pas l'appareil, mais contactez immédiatement
le service client.
[1]
Touche Marche/Arrêt
[2]
Touche I/II du mode d’aspiration
[3]
Levier d’eau
[4]
Poignée
[5]
Touche de déverrouillage du réservoir d'eau propre
[6]
Réservoir d'eau propre
[7]
Réservoir d'eau sale
[8]
Capot de ventilation
[9]
Buse de sol
[10]
Voyant d'alimentation
[11]
Touche de déverrouillage du réservoir d'eau sale
[12]
Capot du rouleau de nettoyage
[13]
Adaptateur du chargeur
[14]
Fiche creuse du chargeur
[15]
Prise de charge
[16]
Canal aspirant
[17]
Roues de transport
[18]
Buses de sortie d'eau
[19]
Support du rouleau de nettoyage
[20]
Rouleau de nettoyage
[21]
Touche de déverrouillage du capot
du rouleau de nettoyage
[22]
Station de stationnement
[23]
Couvercle du réservoir d’eau propre
[24]
Poignée du réservoir d'eau propre
[25]
Porte-ltre éponge
[26]
Filtre éponge
[27]
Couvercle du réservoir d’eau sale
[28]
Flotteur
[29]
Poignée du réservoir d'eau sale
[30]
Protection antidébordement
[31]
Brosse de nettoyage
[32]
Porte-accessoires*
[33]
Nettoyeur de coins*
[34]
Serpillère nettoyeur de coins*
Description du produit
B
IMPORTANT
INFORMATION
K
• The rechargeable battery must only be charged
with the charger provided. The charger should
only be used in conjunction with the Leifheit
cordless Vac & Wipe.
• Fully charge the appliance before the rst use
and again directly after each use.
• Do not store the appliance after fully discharging
the rechargeable battery unused over a period
longer than 6 months.
Cleaning the lter
• Clean the cleaning roller, the sponge lter and
other lter parts regularly after use.
• Allow the cleaning roller and all parts the lter to
dry completely before reinserting them back into
the cordless Vac & Wipe.
Cleaning the appliance
• The appliance contains electrical components.
Never clean under running water!
• Clean the appliance with a moist cloth.
• Do not immerse the appliance in water under any
circumstances.
Parking the appliance
• Only place the appliance on a at and rm sur-
face underground.
• To protect sensitive oors against remaining wa-
ter running out of the appliance, always place the
cordless Vac & Wipe on the park station during
cleaning breaks and after cleaning.
Use of cleaning agents
• Where required, use only non-foaming cleaning
agent with low dosage.
• Observe the dosing specications of the cleaning
agent. Do not use aggressive cleaning agents or
disinfectants. We recommend Leifheit universal
cleaner.
CAUTION
The following instructions must always
be observed with lithium-ion batteries:
The rechargeable battery must not be
damaged or opened; doing so can cause
a short circuit.
There is risk of re. Toxic substances
hazardous to health can escape. The
rechargeable battery must not be put in
a re as well as exposed to direct, strong
sun radiation and heat.
WARNING!
NEVER USE THE APPLIANCE IN ONLY PARTI-
ALLY ASSEMBLED CONDITION!
* Regulus Aqua PowerVac Pro

20 21
Consignes de sécurité
E
Lors de l'utilisation d'un appareil électrique,
les mesures de sécurité de base doivent tou-
jours être respectées :
1.
Utilisez l’appareil uniquement comme dé-
crit dans le présent mode d’emploi.
2.
N'utilisez jamais l'appareil si le câble, la
che, le boîtier ou l'adaptateur du chargeur
sont endommagés.
3.
Les réparations ne peuvent être effectuées
que par des techniciens de maintenance
agréés. N'ouvrez jamais l'appareil de base
vous-même. Les composants
individuels de l'appareil de base ne
doivent pas être démontés, réparés ou
transformés.
4.
Cet appareil contient des batteries qui ne
peuvent pas être remplacées.
5.
L'appareil ne peut être chargé qu'avec le
chargeur fourni. Assurez-vous que la ten-
sion indiquée sur la plaque
signalétique du bloc d'alimentation
correspond à la tension du secteur.
6.
Assurez-vous que l'appareil et le bloc d’ali-
mentation ne sont pas mouillés.
N’utilisez pas l'appareil ou le bloc d'alimen-
tation avec les mains humides ou mouil-
lées.
7.
Ne rangez pas, ne chargez pas et n'utili-
sez pas l'appareil en extérieur ou dans des
pièces humides, telles que des salles de
bains ou similaires, mais toujours à tempé-
rature ambiante et dans un endroit sec.
8.
N'utilisez pas l'appareil à proximité de gaz
inammables.
9.
Protégez l'appareil des fortes chaleurs
et ne l'exposez pas aux rayons directs
du soleil.
10.
Cet appareil convient aux utilisateurs
(y compris les enfants de 8 ans et plus)
ayant des capacités physiques, senso-
rielles ou psychologiques limitées, sans
expériences ou connaissances préalables,
uniquement si un encadrement adéquat
ou des instructions détaillées sur l'utilisa-
tion de l'appareil par une personne res-
ponsable sont garantis.
11.
Assurez-vous que les enfants ne jouent
pas avec l'appareil.
12.
Ne laissez pas les enfants sans surveil-
lance avec l'appareil.
13.
Débranchez l'appareil du secteur avant
de procéder au nettoyage ou à la mainte-
nance.
14.
Ne touchez pas le rouleau de nettoyage
rotatif lorsque l’appareil est allumé.
15.
Assurez-vous que le rouleau de nettoyage
rotatif n’entre pas en contact avec des
parties du corps (comme les cheveux, les
doigts) ou les vêtements.
16.
Veillez lors du nettoyage à ne pas pincer
ou écraser une partie du corps (comme les
doigts), par exemple, dans la buse
de sol.
17.
Assurez-vous qu'aucun objet (tel qu’un
câble, une longue frange) n’est coincé dans
le rouleau de nettoyage, sinon vous risquez
de l'endommager ou d'endommager l'ap-
pareil.
18.
Rangez l'appareil hors de la portée des
enfants. Ne laissez pas l'appareil sans sur-
veillance lorsqu'il est sous tension.
19.
Gardez les matériaux d'emballage tels que
les sacs en plastique et autres objets hors
de la portée des enfants. Il existe
un risque d'étouffement.
Données techniques
C
Veuillez noter que ce produit est exclusivement destiné à
un usage domestique. Leifheit n’offre aucune garantie du
fabricant en cas d’utilisation commerciale.
• L’appareil est utilisé exclusivement pour aspirer/laver des
matières sèches et humides sur des sols résistants à l'eau
et imperméables. Il s’agit de carrelage, PVC, linoléum, sol
stratié et bois vitrié.
•
N’utilisez pas l'appareil pour aspirer des liquides inam-
mables, des objets tranchants ou pointus, des cendres
chaudes ou froides ni des cigarettes allumées.
•
L’appareil ne doit pas être utilisé pour aspirer des humains
ou des animaux.
•
Ne couvrez pas les ouvertures d’aspiration d’air ni les
ouvertures de sortie d’air de l’appareil sous tension.
Assurez-vous qu'ils ne soient pas obturés par des saletés.
•
Utilisez l'appareil uniquement avec des accessoires et des
pièces détachées autorisés par Leifheit.
•
Posez toujours l'appareil sur la station de stationnement
associée sur une surface dure et plane.
• Lors du chargement de l'appareil, assurez-vous qu'une
distance sufsante est respectée avec les sources de
chaleur et d'humidité.
• Veillez à ne pas coincer d'objets tranchants dans le
rouleau de nettoyage ou les roues, ce qui pourrait
endommager le sol.
•
N'utilisez jamais l'appareil sans ltre.
Toute autre utilisation est considérée comme non conforme
et peut entraîner des dommages ou des blessures. Le fabri-
cant n'est pas responsable des dommages qui en résultent ;
le risque est exclusivement assumé par l'utilisateur.
Utilisation conforme
à la destination
D
L'appareil combine l'aspiration, laver et sécher en une seule
étape. Il dispose d'un système à 2 réservoirs avec des
réservoirs séparés d'eau propre et d'eau sale.
Lors de l'utilisation du levier d'eau, de l'eau propre est ajou-
tée au rouleau de nettoyage. Ainsi, la quantité d'eau peut
être ajustée individuellement pour chaque type de sol.
Le rouleau de nettoyage rotatif élimine la poussière, les
saletés sèches et humides, ainsi que les taches sèches.
La fonction d'aspiration aspire le rouleau de nettoyage et
transporte la saleté vers le réservoir d’eau sale. Ainsi, vous
lavez toujours avec un rouleau de nettoyage propre et de
l'eau propre.
Figure 1
Insérer la poignée (4) et le câble dans l'appareil jusqu'à ce
qu'ils s'enclenchent.
CHARGEMENT
Ne procéder à aucun nettoyage ni à aucune maintenance de
l'appareil pendant la charge. Recharger complètement l'appa-
reil avant la première utilisation et après chaque utilisation.
Figure 2
Insérer la che creuse du chargeur fourni (14) dans la
prise du chargeur (15) de l'appareil.
Brancher l’adaptateur du chargeur (13) dans la prise de secteur.
Figure 3
Le voyant d’alimentation (10) clignote lentement en vert pen-
dant la charge.
Après 3 heures, l'appareil est complètement chargé.
Le voyant d'alimentation s'allume en continu pendant
2 minutes, puis s'éteint.
Fonctionnement
Avant utilisation
F
G
REMPLIR LE RÉSERVOIR D'EAU PROPRE
Figure 4
Appuyer sur la touche de déverrouillage (5) pour retirer le
réservoir d’eau propre (6) situé sur la poignée (24).
Ouvrir le couvercle du réservoir d'eau propre (23).
Figure 5
Remplir le réservoir d'eau propre avec de l'eau chaude à
60°C maximum.
Si nécessaire, ajouter des produits de nettoyage non mous-
sants à faible dosage.
ATTENTION : Respectez les spécications de
dosage des produits de nettoyage. N’utili-
sez pas d’agents de nettoyage ou de désin-
fection agressifs. Nous recommandons le
nettoyant universel Leifheit.
Emploi
H
Modèle ......................................Regulus Aqua PowerVac
Batterie ................................Li-ion rechargeable, 24V 2,5Ah
Durée ............................................~ 22 min (mode éco)
Puissance .....................................................120 W
Tension .........................................................24V
Temps de charge ............................................... ~ 3 h
Volume du réservoir d’eau propre ..............................500 ml
Volume du réservoir d’eau sale ................................400 ml
Poids Regulus Aqua PowerVac .................................3,3 kg
Poids Regulus Aqua PowerVac Pro .............................. 3,5 kg
Adaptateur de charge
Explication du symbole .......................
Référence du modèle .........................
Tension d’entrée .............................
Fréquence du CA d’entrée ....................
Tension de sortie .............................
Courant de sortie ............................
Puissance de sortie ..........................
Rendement moyen en mode actif .............
Rendement à faible charge (10 %) .............
Consommation électrique hors charge ........
Leifheit AG
Leifheitstraße 1
D-56377 Nassau, Germany
Amtsgericht Montabaur
HRB 2857
= alimentation externe
YLS0241A-E260092
AC 100-240 V
50/60 Hz
DC 26,0 V
0,92 A
23,92 W
86,57%
78,86%
0,09 W

22 23
VIDER LE RÉSERVOIR D'EAU SALE ET NETTOYER LE FILTRE
Figure 12
Pour mettre l'appareil hors tension, appuyer une nouvelle
fois sur la touche Marche/Arrêt (1).
Retirer le réservoir d'eau sale (7).
Pour ce faire, appuyer sur la touche de déverrouillage (11)
vers le bas et retirer le réservoir par la poignée (29).
Figure 13
Soulever le couvercle (27) du réservoir d'eau sale (7).
Vider le réservoir d'eau sale.
Utilisez la brosse de nettoyage (31) pour éliminer des accu-
mulations de saletés.
Figure 14
Retirer le porte-ltre éponge (25) du couvercle du réservoir
d'eau sale (27).
Retirer le ltre d’éponge (26) du porte-ltre d’éponge.
Figure 15
En fonction du degré de saleté, nettoyer toutes les parties
du réservoir d'eau sale (7, 25, 26, 27, 28, 30) sous l'eau
courante.
Figure 16
Avant d'assembler et d'installer les pièces démontées, les
laisser sécher complètement à l'air.
ATTENTION : Pour éviter les odeurs, retirer
le réservoir d'eau sale après utilisation et le
rincer. N'insérer que des pièces complète-
ment sèches dans l'appareil.
Figure 17
Remonter le ltre éponge (26), le porte-ltre éponge (25),
le couvercle (27) et le réservoir d’eau sale (7).
Figure 18
Insérer l'unité du réservoir d'eau sale dans l'appareil jusqu'à
ce qu'il s'enclenche.
RETIRER ET NETTOYER LE ROULEAU DE NETTOYAGE
Figure 19
Ôter le capot du rouleau (12) pour retirer le rouleau de
nettoyage (20).
Pour retirer le capot, appuyer sur la touche de déverrouil-
lage (21) et décrocher le capot.
Figure 20
Retirer le rouleau de nettoyage (20) au bord à l’aide du
support de rouleau (19).
Pour ce faire, tirer le support vers le haut hors du guide.
Figure 21
Laver le rouleau de nettoyage (20) et, si nécessaire, rincer
le couvercle du rouleau (12) sous l'eau courante.
Laisser sécher le rouleau de nettoyage complètement avant
de le réinsérer.
Laissez se sécher les accessoires dans le porte accessoires
(32), puis rangez l’ensemble.
ATTENTION : Pour éviter les odeurs, retirer
le rouleau de nettoyage après utilisation et
le rincer. Réinstaller le rouleau de nettoyage
dans l'appareil seulement s’il est complète-
ment sec.
NETTOYER LE CANAL D'ASPIRATION
Figure 22
Éliminer toute trace de saleté sur les buses (18) et le canal
d'aspiration (16) avec un chiffon humide lorsque le rouleau
de nettoyage a été retiré.
INSÉRER LE ROULEAU DE NETTOYAGE ET LE COUVERCLE
DU ROULEAU
Figure 23
S’assurer que l'appareil est hors tension et qu’il ne
charge pas.
Insérer d’abord le rouleau de nettoyage (20) dans le support
de réception rond, puis insérer le support de rouleau (19)
dans le guide.
Figure 24
Insérer les ergots du capot du rouleau (12) dans les supports
de réception appropriés à l'extrémité inférieure et fermer le
capot jusqu'à ce qu'il s'enclenche.
PROGRAMME AUTO-WASH
En plus de nettoyer votre appareil, utiliser régulièrement
le programme AUTO-WASH. Lors de l'utilisation du pro-
gramme, un peu de vinaigre ou de produit de nettoyage au
vinaigre peuvent également être ajoutés au réservoir d'eau
propre.
Vider toujours le réservoir d’eau sale (7) avant d'utiliser le
programme AUTO-WASH, puis le réinstaller dans l'appareil.
Figure 25
Remplir le réservoir d’eau propre (6) jusqu’à la ligne
AUTO-WASH MAX avec de l’eau.
Fermer le couvercle du réservoir (23) et insérer le réservoir
d’eau propre jusqu’à ce qu’il s’enclenche.
Figure 26
Poser l'appareil sur la station de stationnement associée (22).
Appuyer pendant 3 secondes sur la touche Marche/Arrêt (1)
avec la touche du mode d'aspiration I/II (2) et le relâcher dès
que l'appareil lance le programme AUTO-WASH. Le voyant
d'alimentation clignote alors en vert.
Figure 27
Après 60 secondes, le programme se termine et l'appareil
s'éteint.
Retirer ensuite le réservoir d'eau sale (7) et le rouleau de
nettoyage (20), puis les rincer.
DÉMONTER LA POIGNÉE
Ne pas retirer la poignée après l'assemblage. Le démontage
de la poignée n'est prévu que lorsque l'appareil doit être
expédié pour réparation.
Figure 28
Desserrer et retirer la vis située à l'arrière de l'appareil (4).
Insérer un tournevis dans l'ouverture de la vis.
La poignée peut être déverrouillée avec une légère pression,
puis retirée.
Nettoyage et entretien
I
Figure 6
Fermer le couvercle du réservoir (23) et insérer le réservoir
d’eau propre (6) jusqu’à ce qu’il s’enclenche.
NETTOYER LE SOL
Figure 7
Pour mettre l'appareil sous tension, appuyer une fois sur la
touche Marche/Arrêt (1).
Le voyant d'alimentation s'allume en vert après la mise sous
tension.
En option : Appuyer une fois sur la touche du mode d'as-
piration (2) pour passer en mode turbo en cas de fort
encrassement des sols en carrelage ou en pierre. Le voyant
d'alimentation clignote alors lentement en vert. Revenir
en mode éco en appuyant à nouveau sur la touche du mode
d'aspiration.
Figure 8
Incliner l'appareil vers l'arrière pour le libérer de sa position
debout.
Figure 9
Appuyer sur le levier d’eau (3) pour humidier le rouleau de
nettoyage (20) individuellement.
Avant de commencer à nettoyer le sol, maintenir le levier
d'eau appuyé pendant quelques secondes sans déplacer
l'appareil pour humidier préalablement le rouleau de ma-
nière rapide et uniforme.
Pour nettoyer le sol, déplacer l’appareil en avant et en ar-
rière avec des mouvements doux et réguliers.
Si l'humidité du rouleau de nettoyage diminue, appuyer à
nouveau sur le levier d'eau et le maintenir enfoncé jusqu'à
ce que l'humidité souhaitée soit atteinte.
Le niveau de remplissage du réservoir d'eau sale (7) ne doit
pas dépasser le niveau de remplissage maximal.
Figure 10
Pendant les pauses de nettoyage, poser toujours l’appareil
sur la station de stationnement correspondante (22) an
d’empêcher la formation de taches d’eau sur le sol par l’eau
résiduelle dans l’appareil.
Figure 11
Si le réservoir d’eau sale (7) est rempli au maximum, un sys-
tème de notication (
k
Tank Control Technology) est activé.
Le voyant d'alimentation (10) clignote alors en orange et le
rouleau de nettoyage s'arrêtera 3 fois pendant quelques
secondes, puis s'arrête complètement.
Vider le réservoir d’eau sale au plus tard à ce moment-là.

24 25
Veuillez noter ce qui suit pour l’élimination :
Le symbole sur le produit ou son emballage
indique, conformément à la directive 2012/19
UE, que ce produit et le module de batterie qu’il
contient ne doivent pas être traités comme des
déchets ménagers normaux, mais doivent être
renvoyés à un point de collecte pour le recyclage
des équipements électriques et électroniques.
Pour plus d’informations, contactez votre commune,
l’entreprise de gestion municipale des déchets ou le
magasin où vous avez acheté le produit.
Emballage:
Mode d’emploi :
Électriques et électroniques:
Dysfonctionnement Cause possible / solution
L'appareil ne démar-
re pas.
k
La batterie n'est pas chargée.
Charger la batterie.
Le voyant
d’alimentation (10)
clignote en orange.
k
Le rouleau de nettoyage (20)
est bloqué. Veuillez retirer le
rouleau et libérez le verrouil-
lage.
k
La batterie est faible, rechar-
gez l'appareil.
Le voyant
d'alimentation (10)
clignote en orange et
le rouleau de netto-
yage (20) s'arrêtera
3 fois pendant quel-
ques secondes, puis
le rouleau s'arrête
complètement.
k
Tank Control Technology :
Le réservoir d'eau sale (7) est
plein. Veuillez vider le réser-
voir d'eau sale.
Le réservoir d’eau
sale (7) ne peut pas
être inséré dans
l'appareil.
k
Vériez que le couvercle (27)
et le ltre d’éponge (25) sont
insérés correctement.
Le otteur (28) a été
resserré, l’appareil
n’aspire plus, mais la
Tank Control Techno-
logy ne se lance pas.
k
Le ltre éponge (25) est
bloqué par une imprégnation
excessive ou des particules
de saleté. Veuillez nettoyer et
sécher le ltre éponge.
k
Le otteur (28) a été resser-
ré et l’appareil a été éteint
puis remis en service trop
rapidement. Veuillez éteindre
l’appareil pendant un moment
et attendez que le otteur soit
à nouveau dans sa position
initiale avant de remettre l’ap-
pareil en service.
La Tank Control
Technology se lance
alors que le réser-
voir d’eau sale (7)
n’est pas encore
plein.
k
En cas de mouvements
brusques (comme un choc
brusque contre un meuble), la
Tank Control Technology peut
réagir involontairement. Veuil-
lez éteindre l’appareil pendant
un moment et attendez que
le otteur (28) soit à nou-
veau dans sa position initiale
avant de remettre l’appareil
en service. Attention à ne pas
heurter trop brusquement les
meubles ou autres objets.
Dysfonctionnement Cause possible / solution
Il y a de l'eau qui
coule du capot de
ventilation (8).
k
Le réservoir d'eau sale (7) est
plein. Veuillez vider le réser-
voir.
Peu ou aucune eau
ne peut être ajoutée
en actionnant le
levier d'eau.
k
Le réservoir d'eau propre (6)
est vide. Remplissez-le d'eau.
k
Les buses (18) sont bloquées.
Veuillez enlever la saleté
coincée devant les buses. Les
dépôts de calcaire peuvent
être soigneusement éliminés
en perçant les ouvertures à
l'aide d'un trombone.
k
Utilisez régulièrement le
AUTO-WASH PROGRAM pour
garder les canaux et les buses
à l'intérieur de l'appareil pro-
pres.
De la mousse reste
sur le sol.
k
Veuillez ajouter moins de pro-
duit de nettoyage ou utilisez
le nettoyant universel Leifheit
spécialement conçu pour Re-
gulus Aqua PowerVac.
L‘appareil n’aspire
plus d‘eau du sol.
k
Le réservoir d‘eau sale (7) est
plein. Veuillez vider le réser-
voir.
L‘appareil s‘éteint
automatiquement
après environ 60
secondes.
k
Le AUTO-WASH PROGRAM
a été lancé. Redémarrez
l‘appareil en appuyant briève-
ment sur la touche Marche/
Arrêt.
Autre panne
k
Contactez le service après-
vente de Leifheit.
DÉPANNAGE
JÉlimination
Déclaration
de conformité :
L
M
Leifheit déclare par la présente que cet appareil est
conforme aux exigences essentielles de la loi sur la sécurité
des produits et des autres réglementations et directives en
vigueur. La déclaration de conformité UE est disponible à
l'adresse www.leifheit.de.
SERVICE CLIENT
Pour toute question et suggestion, l’équipe Leifheit
est à votre entière disposition :
Lu – Ve : 08:00 - 17:00
Service d'assistance téléphonique gratuit :
00800 537 37 373
(D/F/NL/CZ/E/I/PL)
ou payant
Numéro de téléphone international : 0049 2604 977 0
URL : www.leifheit.de
INFORMATIONS
IMPORTANTES
K
•
La batterie ne doit être chargée qu'avec le char-
geur fourni. Le chargeur ne doit être utilisé qu’avec
l’aspirateur/laveur sans l Leifheit Regulus Aqua
PowerVac.
•
Rechargez complètement l'appareil avant la pre-
mière utilisation et après chaque utilisation.
•
Après décharge complète de la batterie, ne ran-
gez pas l'appareil sans l’utiliser pendant plus de
6 mois.
Nettoyage du ltre
•
Nettoyez le rouleau de nettoyage, le ltre éponge
et les autres composants du ltre régulièrement
après utilisation.
•
Laissez le rouleau de nettoyage et toutes les
pièces du ltre sécher complètement avant de
les réinsérer dans l’aspirateur/laveur sans l.
Nettoyage de l'appareil
•
L'appareil contient des composants électriques.
Ne pas nettoyer sous l'eau courante !
•
Nettoyez l'appareil avec un chiffon humide.
•
Ne plongez jamais l'appareil dans l'eau.
Ranger l'appareil
•
Poser l'appareil uniquement sur une surface
plane et ferme.
•
An de protéger les sols sensibles de toute fuite
d'eau résiduelle de l'appareil, posez toujours
l’aspirateur/laveur sans l sur la station de sta-
tionnement correspondante pendant les pauses
de nettoyage et après le nettoyage.
Utilisation des produits de nettoyage
•
Si nécessaire, utilisez uniquement des produits
de nettoyage non moussants à faible dose.
•
Respectez les spécications de dosage des
produits de nettoyage. N’utilisez pas d’agents
de nettoyage ou de désinfection agressifs. Nous
recommandons le nettoyant universel Leifheit.
ATTENTION
Les instructions suivantes doivent tou-
jours être respectées lors de la manipula-
tion de batteries lithium-ion :
La batterie ne doit pas être endommagée
ou ouverte, cela pourrait provoquer un
court-
circuit. Il existe un risque d'incendie, des
substances toxiques nocives pour la santé
pouvant s'échapper. Les batteries ne
doivent pas être exposées au feu ou à la
lumière directe du soleil ni à la chaleur.
AVERTISSEMENT !
N’UTILISEZ JAMAIS L’APPAREIL DANS UN
ÉTAT SEULEMENT PARTIELLEMENT
ASSEMBLÉ !
MODE D´EMPLOI
FR
ÉLÉMENTS D´EMBALLAGE
FR
Points de collecte sur www.quefairedemesdechets.fr
!
REPRISE
À LA LIVRAISON À DÉPOSER
EN MAGASIN À DÉPOSER
EN DÉCHÈTERIE
OU OU
Cet appareil
se recycle
FR

26 27
NL
Nederlands
Lees voordat u het apparaat gaat gebruiken
eerst de bedieningshandleiding zorgvuldig door
en bewaar deze voor verder gebruik of voor vol-
gende bezitters.
Deze helpt u om het apparaat van begin af aan zinvol en
correct te gebruiken en verkeerde bedieningen te vermijden.
Raadpleeg in het bijzonder de veiligheidsinstructies in deze
bedieningshandleiding. De bedieningshandleiding vind u
tevens op de Leifheit homepage op www.leifheit.de
Met hartelijke groeten
uw Leifheit-team
Leifheit AG
Leifheitstraße 1
56377 Nassau/Lahn
Duitsland
Inhoudsopgave
A
B
C
D
E
F
G
H
I
J
K
L
M
Leveringsomvang ............................... 26
Productbeschrijving ............................. 26
Technische gegevens . . . . . . . . . . . . . . . . . . . . . . . . . . . . 27
Reglementair gebruik. . . . . . . . . . . . . . . . . . . . . . . . . . . . 27
Veiligheidsinstructies ........................... 27
Werking ........................................ 28
Voorafgaand aan gebruik ........................ 28
Toepassing ..................................... 28
Reiniging en onderhoud .........................29
Storingshulp . . . . . . . . . . . . . . . . . . . . . . . . . . . . . . . . . . . . 31
Belangrijke aanwijzingen ........................ 32
Afvoer ..........................................32
Conformiteit / Conformiteitsverklaring. . . . . . . . . . . 32
ALeveringsomvang
Accu-zuigwisser Regulus Aqua PowerVac
Bedieningshandleiding
Controleer de verpakkingsinhoud aan de hand van de leve-
ringsomvang op volledigheid en eventuele transportschade.
Bij constatering van transportschade het apparaat niet
gebruiken, maar onmiddellijk contact opnemen met de klan-
tenservice.
[1]
Aan/Uit-knop
[2]
Zuigmodus-knop I/II
[3]
Waterhendel
[4]
Greep
[5]
Ontgrendelingsknop verswatertank
[6]
Verswatertank
[7]
Vuilwatertank
[8]
Ventilatieafdekking
[9]
Bodemsproeier
[10]
Bedrijfsindicatie
[11]
Ontgrendelingsknop vuilwatertank
[12]
Afdekking reinigingswals
[13]
Adapter oplader
[14]
Holle stekker oplader
[15]
Laadbus
[16]
Zuigkanaal
[17]
Transportwieltjes
[18]
Sproeier wateruitlaat
[19]
Houder reinigingswals
[20]
Reinigingswals
[21]
Ontgrendelingsknop afdekking reinigingswals
[22]
Parkeerstation
[23]
Deksel verswatertank
[24]
Greep verswatertank
[25]
Sponslterhouder
[26]
Sponslter
[27]
Deksel vuilwatertank
[28]
Vlotter
[29]
Greep vuilwatertank
[30]
Overloopbeveiliging
[31]
Reinigingsborstel
[32]
Accessoire-houder *
[33]
Hoekenreiniger *
[34]
Dweil voor de hoekenreiniger *
Productbeschrijving
B
Veiligheidsinstructies
E
Bij het gebruik van een elektrisch apparaat
dienen altijd fundamentele veiligheidsmaat-
regelen in acht te worden genomen.
1.
Gebruik het apparaat uitsluitend zoals in
deze gebruikshandleiding beschreven.
2.
Gebruik het apparaat nooit, als de kabel,
stekker, behuizing of laadadapter bescha-
digd zijn.
3.
Reparaties mogen uitsluitend door
geautoriseerde klantenservicemon-
teurs worden uitgevoerd Open het basis-
apparaat nooit zelf. De afzonderlijke com-
ponenten van het basisapparaat mogen
niet gedemonteerd, gerepareerd of omge-
bouwd worden.
4.
Dit apparaat bevat niet-vervangbare
accu’s/batterijen.
5.
Het apparaat mag alleen met de meege-
leverde oplader worden opgeladen. Con-
troleer of de op het typeplaatje van de
netvoedingsadapter aangegeven spanning
overeenstemt met de netspanning.
6.
Let erop dat het apparaat en de netvoe-
dingsadapter niet nat worden. Bedien het
apparaat of de netvoedingsadapter niet
met vochtige of natte handen.
Technische specificaties
C
N.B.: Dit product is uitsluitend bestemd voor huishoudelijk
gebruik. Leifheit verleent geen fabrieksgarantie bij gebruik
voor commerciële doeleinden.
•
Het apparaat dient uitsluitend voor het zuigwissen van
droog en vochtig zuigmateriaal op waterbestendige en
afgedichte vloeren. Bedoeld zijn tegels, PVC, linoleum,
laminaat en afgedicht hout.
•
Gebruik het apparaat niet voor het opzuigen van brand-
bare vloeistoffen, scherp gerande of puntige voorwerpen,
hete of koude as en brandende sigaretten
•
Het apparaat mag niet worden gebruikt voor het afzuigen
van mensen of dieren.
•
Dek luchtinzuigopeningen of luchtuitlaatopeningen van
het ingeschakelde apparaat niet af. Let erop dat deze
openingen niet door vuilafzetting verstopt raken.
•
Gebruik het apparaat uitsluitend met door Leifheit goed-
gekeurde accessoires en reservedelen.
•
Plaats het apparaat altijd in het bijbehorende parkeersta-
tion op een harde en effen ondergrond.
•
Let bij het opladen van het apparaat op voldoende afstand
tot hitte- en vochtigheidsbronnen.
•
Let erop dat er geen puntige voorwerpen in de reinigings-
wals of de wielen vastraken die de vloer kunnen bescha-
digen.
•
Gebruik het apparaat nooit zonder lter.
Ieder ander of verderreikend gebruik geldt als niet-regle-
mentair en kan leiden tot beschadigingen of lichamelijk
letsel. Voor hieruit voortvloeiende schade aanvaardt de
fabrikant generlei aansprakelijkheid; het risico draagt in dat
geval uitsluitend de exploitant.
Reglementair gebruik
D
Model .......................................Regulus Aqua PowerVac
Accu ................................................Li-Ion, 24V 2,5Ah
Looptijd .........................................~22 min (Eco-Mode)
Vermogen ....................................................120 W
Spanning .......................................................24V
Oplaadtijd ..................................................... ~ 3 h
Volume verswatertank .......................................500 ml
Volume vuilwatertank ........................................ 400 ml
Gewicht Regulus Aqua PowerVac .................................3,3 k
Gewicht Regulus Aqua PowerVac Pro .............................3,5 k
Laadadapter
Verklaring van symbol ........................
Typeaanduiding: ..............................
Voedingsspanning ............................
Voedingsfrequentie ..........................
Uitgangsspanning ...........................
Uitgangsstroom .............................
Uitgangsvermogen ...........................
Gemiddelde actieve eciëntie ................
Eciëntie bij lage belasting (10 %) ............
Energieverbruik in niet-belaste toestand ......
Leifheit AG
Leifheitstraße 1
D-56377 Nassau, Germany
Amtsgericht Montabaur
HRB 2857
= externe voeding
AC 100-240 V
50/60 Hz
DC 26,0 V
0,92 A
23,92 W
86,57%
78,86%
0,09 W
* Regulus Aqua PowerVac Pro

28 29
7.
Het apparaat niet in de open lucht of in
natte ruimten, zoals badkamers e.d., op-
bergen, opladen of gebruiken, maar altijd
bij kamertemperatuur en op een droge
plaats.
8.
Gebruik het apparaat niet in de nabijheid
van brandbare gassen.
9.
Bescherm het apparaat tegen sterke hitte
en stel het niet bloot aan rechtstreekse
zonnestraling.
10.
Dit apparaat is voor gebruikers (kinderen
vanaf 8 jaar inbegrepen) met een lichame-
lijke, sensorische of geestelijke handicap
of met beperkte ervaring en kennis om-
trent het gebruik alleen geschikt, indien
adequaat toezicht of een grondige uitleg
en instructie in het gebruik van het appa-
raat door een verantwoordelijke persoon
is gewaarborgd.
11.
Let erop dat kinderen niet met het appa-
raat (kunnen) spelen.
12.
Kinderen het apparaat niet zonder toezicht
laten gebruiken.
13.
Koppel het apparaat voorafgaand aan rei-
niging of onderhoud van het stroomnet.
14.
Raak de roterende reinigingswals niet aan,
als het apparaat is ingeschakeld.
15.
Let erop dat de draaiende reinigingswals
niet met lichaamsdelen (bijv. hoofdhaar,
vingers) of kledingstukken in aanraking
komt.
16.
Let erop dat er bij het reinigen geen li-
chaamsdelen (bijv. vingers) in de bodem-
sproeier vastgeklemd of bekneld raken.
17.
Let erop dat er geen voorwerpen (bijv.
kabels, lange franjes) in de reinigingswals
vastraken, omdat er anders het gevaar
bestaat dat ze of het apparaat beschadigd
raken.
18.
Berg het apparaat buiten bereik van kin-
deren op. Laat het apparaat niet zonder
toezicht, wanneer het is ingeschakeld.
19.
Verpakkingsmateriaal, zoals plastic zakken
en dergelijke, buiten bereik van kinderen
houden. Er bestaat verstikkingsgevaar.
Het apparaat combineert zuigen, dweilen en drogen in één
werkstap. Het beschikt over een 2-tank-systeem met een
separate vers- en vuilwatertank.
Bij bediening van de waterhendel wordt verswater op de
reinigingswals gebracht. Op die manier kan de waterhoe-
veelheid voor elk vloertype individueel worden ingesteld. De
roterende reinigingswals verwijdert stof, droog en vochtig
vuil, en ingedroogde vlekken.
De zuigfunctie zuigt de reinigingswals af en transporteert
het vuil naar de vuilwatertank. Daardoor wist u altijd met
een schone reinigingswals en vers schoon water.
Afbeelding 1
Greep (4) en kabel in het apparaat aanbrengen tot deze
vastklikken.
OPLADEN
Tijdens het laden het apparaat niet reinigen en servicen. Het
apparaat voorafgaand aan het eerste gebruik en vervolgens
na elke gebruiksbeurt direct weer volledig opladen.
Afbeelding 2
Holle stekker van de meegeleverde oplader (14) in de laad-
bus (15) van het apparaat steken.
Adapter van de oplader (13) in de contactdoos steken.
Afbeelding 3
Bedrijfsindicatie (10) knippert langzaam groen tijdens het
opladen.
Na 3 uur is het apparaat volledig opgeladen. De bedrijfsin-
dicatie brandt dan 2 minuten permanent, daarna dooft het
lampje.
Werking
Voorafgaand aan gebruik
F
G
VERSWATERTANK VULLEN
Afbeelding 4
Ontgrendelingsknop (5) indrukken, om de verswatertank (6)
bij de greep (24) uit te nemen.
Deksel van de verswatertank (23) openen.
Afbeelding 5
Verswatertank met max 60°C warm water vullen.
Naar behoefte niet schuimend reinigingsmiddel in een lage
dosering toevoegen.
N.B.: Let op de doseerinstructies van de
einigingsmiddelen. Gebruik geen agressieve
reinigings- of ontsmettingsmiddelen. Wij
adviseren Leifheit alles reiniger.
Afbeelding 6
Tankdeksel (23) sluiten en verswater.
Toepassing
H
VUILWATERTANK LEDIGEN EN FILTER REINIGEN
Afbeelding 12
Om het apparaat uit te schakelen, de Aan/Uit-knop (1) nog-
maals indrukken.
Vuilwatertank (7) uitnemen.
Daartoe de ontgrendelingsknop (11) omlaag drukken en de
tank bij de greep (29) naar buiten trekken.
Afbeelding 13
Deksel (27) van de vuilwatertank (7) aftillen.
Vuilwatertank ledigen.
Gebruik de reinigingsborstel (31) om afzettingen te verwij-
deren.
Afbeelding 14
Sponslterhouder (25) uit het deksel van de vuilwatertank
(27) nemen.
Sponslter (26) uit de sponslterhouder nemen.
Afbeelding 15
Afhankelijk van de vervuilingsgraad alle componenten van
de vuilwatertankunit (7, 25, 26, 27, 28, 30) onder stromen
water afspoelen.
Afbeelding 16
Alvorens alle gedemonteerde componenten te assembleren
en weer terug te plaatsen, deze eerst volledig aan de lucht
laten drogen.
N.B.: Ter vermijding van geurvorming de vuil-
waterunit na gebruik uitnemen en uitwas-
sen. Uitsluitend volledig gedroogde compo-
nenten weer in het apparaat terugplaatsen.
Afbeelding 17
Sponslter (26), sponslterhouder (25), deksel (27) en vuil-
watertank (7) weer assembleren.
Afbeelding 18
Vuilwatertankunit weer in het apparaat terugplaatsen, tot
deze hoorbaar vastklikt.
Reiniging en onderhoud
I
VLOER REINIGEN
Afbeelding 7
Om het apparaat in te schakelen, de Aan-/Uit-knop (1) één
keer indrukken.
De bedrijfsindicatie brandt na het inschakelen groen.
Optioneel: Zuigmodus-knop (2) één keer indrukken, om bij
sterkere vervuiling op tegel-/steenvloeren in de Turbo-mo-
dus om te schakelen. De bedrijfsindicatie knippert dan lang-
zaam groen. Terugschakelen in de Eco-modus door opnieuw
indrukken van de de Zuigmodus-knop.
Afbeelding 8
Apparaat achterover kantelen, om het uit de staande positie
los te maken.
Afbeelding 9
Waterhendel (3) indrukken, om de reinigingswals (20) indivi-
dueel te bevochtigen.
Voorafgaand aan de vloerreiniging de waterhendel enkele
seconden ingedrukt houden zonder het apparaat te bewe-
gen, om de wals vooraf snel en gelijkmatig te bevochtigen.
Apparaat voor vloerreiniging in rustige en gelijkmatige be-
wegingen voor- en achteruit duwen.
Zodra de vochtigheid van de reinigingswals minder wordt,
de waterhendel opnieuw indrukken en net zo lang ingedrukt
houden, tot de de gewenste vochtigheid weer bereikt is.
Het vulpeil van de vuilwatertank (7) mag de maximale vul-
hoogte niet overschrijden.
Afbeelding 10
Tijdens reinigingspauzes het apparaat altijd op het bijbe-
horende parkeerstation (22) plaatsen, om de vorming van
watervlekken op de vloer door restwater in het apparaat te
voorkomen.
Afbeelding 11
Is de vuilwatertank (7) tot aan de Max-lijn gevuld, wordt een
meldingssysteem (
k
Tank Control Technology) geactiveerd.
Daardoor knippert de bedrijfsindicatie (10) oranje en de
reinigingswals stopt 3 keer gedurende een paar seconden,
daarna stopt de wals geheel.
Vuilwatertank uiterlijk dan ledigen.

30 31
REINIGINGSWALS UITNEMEN EN REINIGEN
Afbeelding 19
Walsafdekking (12) verwijderen, om de reinigingswals (20)
uit te nemen.
Om de afdekking af te nemen, de ontgrendelingsknop (21)
indrukken en afdekking verwijderen.
Afbeelding 20
Reinigingswals (20) met behulp van de walshouder (19)
bij de rand uitnemen.
Daartoe de houder omhoog uit de geleiding trekken.
Afbeelding 21
Reinigingswals (20) en evt. reinigingswalsafdekking (12)
onder stromend water afspoelen.
Reinigingswals voorafgaand aan het terugplaatsen volledig
laten drogen.
Laat de accessoires in de houder (32) drogen en berg daarna
het geheel veilig op.
N.B.: Ter vermijding van geurvorming de
reinigingswals na gebruik uitnemen en uit-
wassen. Uitsluitend volledig gedroogde
reinigingswals weer in het apparaat terug-
plaatsen.
ZUIGKANAAL REINIGEN
Afbeelding 22
Vervuilingen op de sproeiers (18) en het zuigkanaal (16) bij
uitgenomen reinigingswals met een vochtige doek verwij-
deren.
REINIGINGSWALS INPLAATSEN EN WALSAFDEKKING SLU-
ITEN
Afbeelding 23
Controleer dat het apparaat is uitgeschakeld en niet wordt
opgeladen.
Reinigingswals (20) eerst in de ronde opname plaatsen en
vervolgens de walshouder (19) in de geleiding zetten
Afbeelding 24
Neuzen van de walsafdekking (12) op het onderste uiteinde
in de bijbehorende opnames plaatsen en de afdekking slui-
ten tot deze hoorbaar vastklikt.
AUTO-WASH PROGRAM
Gebruik in aanvulling op de reiniging van uw apparaat
tevens regelmatig het AUTO-WASH PROGRAM. Bij gebruik
van het programma kan ook wat azijn of azijnreiniger in de
verswatertank worden bijgedoseerd.
Ledig voorafgaand aan gebruik van het AUTO-WASH
PROGRAM altijd eerst de vuilwatertank (7) en plaats deze
vervolgens weer terug in het apparaat.
Afbeelding 25
Verswatertank (6) tot aan de AUTO-WASH MAX lijn met
water vullen.
Tankdeksel (23) sluiten en verswatertank inplaatsen, tot
deze hoorbaar vastklikt.
Afbeelding 26
Apparaat op het bijbehorende parkeerstation (22) plaatsen.
Aan-/Uit-knop (1) samen met de zuigmodus-knop I/II (2) 3
seconden ingedrukt houden en los laten, zodra het apparaat
het AUTO-WASH PROGRAM start. De bedrijfsindicatie knip-
pert vervolgens groen.
Afbeelding 27
Na 60 seconden eindigt het programma en het apparaat
schakelt uit.
Vervolgens vuilwatertank (7) en reinigingswals (20) uitne-
men en uitwassen.
GREEP DEMONTEREN
Greep na assemblage niet meer afnemen. Het demonteren
van de greep is alleen nodig, wanneer het apparaat voor
onderhoudsdoeleinden moet worden verzonden.
Afbeelding 28
Schroef aan de achterzijde van het apparaat (4) losdraaien
en verwijderen.
Schroevendraaier in de opening van het schroefgat steken.
Met lichte druk kan de vergrendeling van de greep
worden losgezet waarna de greep naar buiten kan
worden getrokken.
Storing Mogelijke oorzaak / Oplossing
Apparaat start niet.
k
De accu werd niet opgeladen.
Laad de accu op.
De bedrijfsindicatie
(10) knippert oranje.
k
De reinigingswals (20) is
geblokkeerd. Verwijder de wals
en maak de blokkering los.
k
De accu is bijna leeg, laad het
apparaat bij.
Die bedrijfsindicatie
(10) knippert oranje
en de reinigingswals
(20) stopt 3 geer
gedurende enkele
seconden, daarna
stopt de wals vol-
ledig.
k
Tank Control Technology: De
vuilwatertank (7) is vol. Ledig
de vuilwatertank.
De vuilwatertank (7)
laat zich niet in het
apparaat plaatsen.
k
Controleer, of het deksel (27)
en het sponslter (25) correct
zijn aangebracht.
De vlotter (28) werd
aangetrokken, het
apparaat zuigt niet
meer, maar de Tank
Control Technology
start niet.
k
Het sponslter (25) wordt
door te veel vocht of vuilde-
eltjes geblokkeerd. Het spons-
ter reinigen en vervolgens
drogen.
k
De vlotter (28) werd aange-
trokken en het apparaat werd
daarbij te snel snel uit- en
weer ingeschakeld. Scha-
kel het apparaat even uit en
wacht tot de vlotter zich weer
in de uitgangspositie bevindt,
voordat u het apparaat opni-
euw start.
De Tank Control
Technology start,
hoewel de vuilwa-
tertank (7) nog niet
vol is.
k
Bij abrupte bewegingen (bijv.
krachtig stoten stegen meu-
bels) kan de Tank Control Tech-
nology per ongeluk reageren.
Schakel het apparaat even uit
en wacht tot de vlotter (28)
zich weer in de uitgangspositie
bevindt, voordat u het ap-
paraat opnieuw start. Let erop
dat u niet te krachtig tegen
meubels e.d. aanstoot.
Storing Mogelijke oorzaak / Oplossing
Er loopt water
uit de ventilatieaf-
dekking (8).
k
De vuilwatertank (7) is vol.
Ledig de tank.
Er laat zich weinig
of geen water via de
waterhendel bijdo-
seren.
k
De verswatertank (6) is leeg.
Vul water bij.
k
De sproeiers (18) zijn geblok-
keerd. Verwijder het vastge-
koekte vuil vóór de sproeiers.
Kalkafzettingen kunnen be-
hoedzaam worden verwijderd
door de openingen met behulp
van een paperclip door te
prikken.
k
Gebruik regelmatig het
AUTO-WASH PROGRAM, om
de kanalen en sproeiers in het
inwendige van het apparaat
schoon te houden.
Op de vloer blijft
schuim achter.
k
Doseer minder reinigingsmid-
del of gebruik Leifheit alles-
reiniger speciaal voor Regulus
Aqua PowerVac.
Het apparaat neemt
geen water meer op
vanaf de vloer.
k
De vuilwatertank (7) is vol.
Ledig de tank.
Het apparaat scha-
kelt na ca. 60 secon-
den zelfstandig uit.
k
Het AUTO-WASH PROGRAM
werd gestart. Start het ap-
paraat opnieuw, door kort de
Aan-/Uit-knop in te drukken.
Overige storingen
k
Neem contact op met de
Leifheit Service.
STORINGSHULP
J
KLANTENSERVICE
Bij vragen of suggesties is onze Leifheit Service u graag
behulpzaam:
ma - vr 08:00 - 17:00 uur
gratis service hotline:
00800 537 37 373
(D/F/NL/CZ/E/I/PL)
Of tegen vast tarief
Internationaal telefoonnummer: 0049 2604 977 0
Internet: www.leifheit.de

32 33
•
De accu mag uitsluitend met de meegeleverde
oplader worden opgeladen. De oplader mag uit-
sluitend in combinatie met de Leifheit accu-zuig-
wisser Regulus Aqua PowerVac worden gebruikt.
•
Laad het apparaat voorafgaand aan het eer-
ste gebruik en ervolgens na elke gebruiksbeurt
direct weer volledig op.
•
Sla het apparaat na volledige ontlading van de
accu niet ongebruikt op gedurende een periode
langer dan dan 6 maanden.
Filterreiniging
•
Reinig de reinigingswals, het sponslter en an-
dere ltercomponenten geregeld na gebruik.
•
Laat de reinigingswals en alle ltercomponen-
ten volledig drogen, alvorens deze weer in de
accu-zuigwisser terug te plaatsen.
Reiniging van het apparaat
•
Het apparaat bevat elektrische componenten.
Niet onder stromend water reinigen!
•
Reinig het apparaat met een vochtige doek.
•
Dompel het apparaat in geen geval onder in water.
Wegzetten van het apparaat
•
Zet het apparaat uitsluitend op een stevige en
vlakke, effen ondergrond weg.
•
Om kwetsbare vloeren tegen uitstromen van
restwater uit het apparaat te beschermen,
plaatst u de accu-zuigwisser gedurende rei-
nigingspauzes en na het reinigen altijd op het
bijbehorende parkeerstation.
Gebruik van reinigingsmiddelen
•
Gebruik zo nodig niet schuimende reinigingsmid-
delen in een lage dosering.
•
Let op de doseerinstructies van de reinigings-
middelen. Gebruik geen agressieve reinigings- of
ontsmettingsmiddelen. Wij adviseren Leifheit
allesreiniger.
LET OP
Neem beslist de volgende aanwijzingen
het gebruik van lithium-ion-accu’s in acht.
De accu mag niet beschadigd of geopend
worden, omdat hierdoor kortsluiting kan
worden veroorzaakt. Er bestaat brand-
gevaar, er kunnen giftige, gezondheids-
bedreigende stoffen vrijkomen. De accu's
mogen niet in vuur geraken en niet aan
directe, sterke zonnestraling en hitte wor-
den blootgesteld.
WAARSCHUWING!
GEBRUIK HET APPARAAT NOOIT IN GEDEEL-
TELIJK GEASSEMBLEERDE TOESTAND!
CZ
Česky
Než začnete přístroj používat, nejdříve si peč-
livě přečtěte tento návod k obsluze a uschovej-
te si jej pro pozdější použití nebo pro budoucího
vlastníka přístroje.
Návod vám pomůže používat přístroj od samého začátku ro-
zumně a správně a také vyhnout se chybám při jeho obsluze.
Dodržujte zejména v něm uvedená bezpečnostní upozorně-
ní. Návod k obsluze najdete též na domovské stránce rmy
Leifheit www.leifheit.de
Se srdečnými pozdravy
Váš tým Leifheit
Leifheit AG
Leifheitstraße 1
56377 Nassau/Lahn
Německo
Obsah
A
B
C
D
E
F
G
H
I
J
K
L
M
Rozsah dodávky ................................. 33
Popis výrobku. . . . . . . . . . . . . . . . . . . . . . . . . . . . . . . . . . . 33
Technické údaje ................................. 34
Použití v souladu s určeným účelem. . . . . . . . . . . . . . 34
Bezpečnostní upozornění. . . . . . . . . . . . . . . . . . . . . . . . 34
Jak přístroj funguje . . . . . . . . . . . . . . . . . . . . . . . . . . . . . . 35
Než začnete přístroj používat. . . . . . . . . . . . . . . . . . . . 35
Použití. . . . . . . . . . . . . . . . . . . . . . . . . . . . . . . . . . . . . . . . . . 35
Čištění a údržba ................................. 36
Co dělat v případě závady. . . . . . . . . . . . . . . . . . . . . . . . 38
Důležité informace . . . . . . . . . . . . . . . . . . . . . . . . . . . . . . 39
Likvidace .......................................39
Shoda / Prohlášení o shodě. . . . . . . . . . . . . . . . . . . . . . 39
A
Akumulátorový vysavač s mopem Regulus Aqua PowerVac
Návod k obsluze
Podle rozsahu dodávky zkontrolujte, jestli něco nechybí, a
také jestli případně nedošlo k nějakým škodám při přepravě.
Zjistíte-li nějaké poškození, které vzniklo při přepravě,
nepoužívejte přístroj a okamžitě se spojte se zákaznickým
servisem.
[1]
tlačítko ZAP/VYP
[2]
tlačítko režimu VYSÁVÁNÍ I/II
[3]
páčka pro dávkování vody
[4]
rukojeť
[5]
tlačítko pro odblokování nádržky na čistou vodu
[6]
nádržka na čistou vodu
[7]
nádržka na špinavou vodu
[8]
větrací kryt
[9]
podlahová tryska
[10]
ukazatel stavu provozu
[11]
tlačítko pro odblokování nádržky na špinavou vodu
[12]
kryt čisticího válečku
[13]
adaptér nabíječky
[14]
dutá zástrčka nabíječky
[15]
nabíjecí pouzdro
[16]
sací kanál
[17]
přepravní kolečka
[18]
trysky pro vypouštění vody
[19]
držák čisticího válečku
[20]
čisticí váleček
[21]
tlačítko pro odblokování krytu čisticího válečku
[22]
parkovací stanice
[23]
víko nádržky na čerstvou vodu
[24]
rukojeť nádržky na čistou vodu
[25]
držák houbového ltru
[26]
houbový ltr
[27]
víko nádržky na špinavou vodu
[28]
plovák
[29]
rukojeť nádržky na špinavou vodu
[30]
pojistka proti přelití
[31]
Čisticí kartáč
[32] Stojan pro uložení příslušenství
*
[33]
Nástavce pro vytírání rohů *
[34]
Vytírací návlek *
B
Rozsah dodávky
Popis výrobku
Afvoer
Conformiteitsverklaring
De icoon op het product of de verpakking atten-
deert er conform richtlijn 2012/19 EU op dat dit
product en de hierin geïnstalleerde accu niet als
normaal huishoudelijk afval gelden, maar bij een
inzamelingspunt voor recycling van elektrische
en elektronische apparaten moeten worden
ingeleverd.
Verdere informatie is verkrijgbaar bij uw gemeente, de ge-
meentelijke afvalverwijderingsdiensten of de winkel waar
u u het product gekocht heeft.
L
M
Hierbij verklaart Leifheit dat dit apparaat voldoet aan de
fundamentele eisen van de productveiligheidswet en aan
de overige relevante voorschriften en richtlijnen. De EU-
conformiteitsverklaring vindt u op www.leifheit.de.
BELANGRIJKE
AANWIJZINGEN
K
* Regulus Aqua PowerVac Pro

34 35
Bezpečnostní upozornění
E
Při použití elektrického přístroje je vždy nutné
dodržovat základní bezpečnostní opatření:
1.
Přístroj používejte jen tak, jak je popsáno
v tomto návodu.
2.
Nikdy nepoužívejte přístroj, je-li poškozen
kabel, konektor, kryt nebo nabíjecí adaptér.
3.
Opravy smí provádět pouze autorizovaný
technik oddělení služeb zákazníkům. Vy
sami základní přístroj nikdy neotvírejte. Je
zakázáno rozebírat, opravovat nebo pře-
stavovat jednotlivé komponenty základní-
ho přístroje.
4.
Toto zařízení obsahuje baterie, které nelze
vyměnit.
5.
K nabíjení přístroje se smí používat pouze
nabíječka dodaná společně s přístrojem.
Ujistěte se, že napětí uvedené na typovém
štítku síťového zdroje odpovídá síťovému
napětí.
6.
Dávejte pozor, aby přístroj ani síťový zdroj
nebyly mokré. Neobsluhujte přístroj ani síťo-
vý zdroj s vlhkýma nebo mokrýma rukama.
7.
Neskladujte, nenabíjejte ani nepouží-
vejte přístroj venku nebo v mokrých
místnostech, jako jsou koupelny apod.,
ale vždy při pokojové teplotě a na suchém
místě.
8.
Nepoužívejte přístroj v blízkosti hořlavých
plynů.
9.
Chraňte přístroj před prudkým horkem a
nevystavujte jej přímému slunečnímu zá-
ření.
10.
Tentopřístrojjeprouživatele(včetnědětí
vevěkuod8let)somezenýmifyzickými,
senzorickýmičipsychickýmischopnost-
mi,resp.bezjakýchkolizkušenostínebo
předchozíchznalostíurčenjenvpřípadě,
žejeodpovědnouosobouzajištěnpřimě-
řenýdohlednebodůkladnéuvedenído
zacházeníspřístrojem.
11.
Ohlídejte, aby si s přístrojem nehrály děti.
12.
Nenechávejte děti samotné bez dozoru s
přístrojem.
13.
Před čištěním nebo údržbou odpojte pří-
stroj od sítě.
14.
Nedotýkejte se rotujícího čisticího válečku
v době, kdy je přístroj zapnutý.
15.
Dávejte pozor, aby se rotující čisticí váleček
nedostal do kontaktu s částmi těla (např.
vlasy, prsty) nebo částmi oblečení.
16.
Dávejte pozor, aby při čistění, popř. kvůli
podlahové trysce, nedošlo k přiskřípnutí
nebo přimáčknutí částí těla (např. prsty).
17.
Dávejte pozor, aby se v čisticím válečku
nezachytily žádné předměty (např. kabe-
ly, dlouhé třásně), protože jinak hrozí, že
dojde k jejich poničení nebo poškození
přístroje.
18.
Uchovávejte přístroj mimo dosah dětí.
Neponechávejte přístroj bez dozoru, je-li
zapnutý.
19.
Obalový materiál jako plastové sáčky a
podobně uchovávejte mimo dosah dětí.
Hrozí nebezpečí udušení.
Technické údaje
C
Upozorňujeme, že tento výrobek je určen pouze pro použití
v domácnosti. Firma Leifheit neposkytuje záruční plnění
v případě komerčního použití.
•
Přístroj slouží výhradně k vysávání a vytírání suchého a
vlhkého materiálu z voděodolných a uzavřených podlah,
jako je dlažba, PVC, linoleum, laminát a uzavřené dřevo.
•
Nepoužívejte přístroj k vysávání hořlavých kapalin,
předmětů s ostrými hranami nebo špičatých předmětů,
horkého ani studeného popelu a hořících cigaret.
•
Přístroj se nesmí používat k vysávání lidí nebo zvířat.
•
U zapnutého přístroje nezakrývejte vstupní ani výstupní
otvory vzduchu. Dávejte pozor, aby nedošlo k jejich
uzavření nečistotami.
•
Používejte přístroj pouze s příslušenstvím a náhradními
díly schválenými rmou Leifheit.
•
Ukládejte přístroj vždy na příslušnou parkovací stanici
umístěnou na tvrdé a rovné ploše.
•
Pamatujte na to, aby byl přístroj při nabíjení v dostatečné
vzdálenosti od zdrojů tepla a vlhkosti.
• Dávejte pozor, aby se v čisticím válečku nebo v kolečkách
nezachytily žádné špičaté předměty, které by mohly po-
škodit podlahu.
•
Nikdy neprovozujte přístroj bez ltru.
Jakékoli použití nad tento vymezený rámec se považuje za
použití v rozporu s určeným účelem a může vést k poškození
nebo poranění. Výrobce neručí za takto vzniklé škody; riziko
v souvislosti s tím nese výhradně uživatel.
Použití v souladu
s určeným účelem
D
Obrázek 1
Rukojeť (4) a kabel vložte do přístroje, dokud neuslyšíte
zacvaknutí.
NABÍJENÍ
Neprovádějte čištění ani údržbu přístroje během jeho nabí-
jení. Přístroj před prvním použitím a po každém použití zase
rovnou nabijte na maximum.
Obrázek 2
Dutou zástrčku dodané nabíječky (14) zasuňte do nabíjecího
pouzdra (15) přístroje.
Adaptér nabíječky (13) zastrčte do zásuvky.
Obrázek 3
Během nabíjení bliká ukazatel stavu provozu (10) pomalu a
zeleně.
Po třech hodinách je přístroj nabitý na maximum. Ukaza-
tel stavu provozu pak svítí nepřetržitě dvě minuty, potom
světlo zhasne.
Jak přístroj funguje
Než začnete přístroj
používat
F
G
NAPLNĚNÍ NÁDRŽKY NA ČISTOU VODU
Obrázek 4
Po stisknutí tlačítka pro odblokování (5) odeberte za rukojeť
(24) nádržku na čistou vodu (6).
Otevřete víko nádržky na čistou vodu (23).
Obrázek 5
Naplňte nádržku vodou teplou maximálně 60 °C.
Podle potřeby přidejte nepatrné množství pěnícího čisticího
prostředku.
POZOR: Pamatujte na předepsané dávkování
čisticího prostředku. Nepoužívejte agresivní
čisticí nebo dezinfekční prostředky. Doporu-
čujeme univerzální čistič Leifheit.
Použití
H
Přístroj spojuje vysávání, vytírání a sušení v jednom pracov-
ním kroku. Přístroj je vybaven dvoufázovým systémem se sa-
mostatnou nádržkou na čistou vodu a samostatnou nádržkou
na špinavou vodu.
Při stlačení páčky pro dávkování vody se na čisticí váleček do-
stane dávka čisté vody. Tím lze individuálně nastavit množ-
ství vody pro každý druh podlahy. Rotující čisticí váleček od-
straňuje prach, suché a vlhké nečistoty, ale i zaschlé skvrny.
Díky funkci vysávání je čisticí váleček odsáván a nečistoty
přepraveny do nádržky na špinavou vodu. To znamená, že bu-
dete neustále vytírat čistým čisticím válečkem a čistou vodou.
Model .......................................Regulus Aqua PowerVac
Akumulátor .............................. lithium-iontový, 24 V 2,5 Ah
Doba běhu .......................................~22 min (režim EKO)
Výkon ........................................................120 W
Napětí ..........................................................24 V
Doba nabíjení .................................................. ~ 3 h
Objem nádržky na čistou vodu ................................ 500 ml
Objem nádržky na špinavou vodu .............................400 ml
Hmotnost Regulus Aqua PowerVac .............................3,3 kg
Hmotnost Regulus Aqua PowerVac Pro ......................... 3,5 kg
Nabíjecí adaptér
Vysvětlení symbolů ................
Identifikační značka modelu .................
Vstupní napětí ..............................
Vstupní frekvence ...........................
Výstupní napětí .............................
Výstupní proud .............................
Výstupní výkon .............................
Průměrná účinnost v aktivním režimu ........
Účinnost při malém zatížení (10 %) ..........
Spotřeba energie ve stavu bez zátěže ........
Leifheit AG
Leifheitstraße 1
D-56377 Nassau, Germany
Amtsgericht Montabaur
HRB 2857
= externí napájení
YLS0241A-E260092
AC 100-240 V
50/60 Hz
DC 26,0 V
0,92 A
23,92 W
86,57%
78,86%
0,09 W

36 37
VYPRÁZDNĚNÍ NÁDRŽKY NA ŠPINAVOU VODU
A VYČIŠTĚNÍ FILTRU
Obrázek 12
Přístroj se vypíná dalším stisknutím tlačítka ZAP/VYP (1).
Vyjměte nádržku na špinavou vodu (7).
Kvůli tomu stlačte tlačítko pro odblokování (11) směrem dolů
a potom vytáhněte nádržku za rukojeť (29).
Obrázek 13
Zvedněte víko (27) nádržky na špinavou vodu (7).
Vyprázdněte nádržku na špinavou vodu.
V případě usazenin použijte čisticí kartáč (31).
Obrázek 14
Z víka nádržky na špinavou vodu (27) vyjměte držák hou-
bového ltru (25).
Vyndejte houbový ltr (26) z držáku.
Obrázek 15
Podle míry ušpinění všechny díly jednotky nádržky na špi-
navou vodu (7, 25, 26, 27, 28, 30) vymyjte pod tekoucí vodou.
Obrázek 16
Před smontováním rozebraných dílů a jejich vložením do
přístroje nechte nejdříve všechny díly pořádně vysušit na
vzduchu.
POZOR: Pro zamezení tvorby zápachu jed-
notku nádržky na špinavou vodu po použití
vyjměte a vymyjte. Do přístroje vkládejte
zpátky jen důkladně vyschlé díly.
Obrázek 17
Houbový ltr (26), držák houbového ltru (25), víko (27) a
nádržku na špinavou vodu (7) smontujte opět dohromady.
Obrázek 18
Jednotku nádržky na špinavou vodu opět nasaďte do pří-
stroje, dokud slyšitelně nezacvakne.
VYJMUTÍ A VYČIŠTĚNÍ ČISTICÍHO VÁLEČKU
Obrázek 19
Odstraňte kryt válečku (12), pak budete moci vyndat čisticí
váleček (20).
Předtím nejdříve stlačte tlačítko pro odblokování (21) a poté
sundejte kryt.
Obrázek 20
S pomocí držáku (19) vyndejte z jedné strany čisticí váleček
(20), tahejte při tom
držák válečku směrem nahoru z vedení.
Obrázek 21
Pod tekoucí vodou vyperte čisticí váleček (20) a popř. vymyj-
te i kryt čisticího válečku (12).
Čisticí váleček před jeho opětovným vložením nechte pořád-
ně vyschnout.
V případě potřeby nechte uschnout ve stojanu pro uložení
příslušenství (32).
POZOR: Pro zamezení tvorby zápachu čisticí
váleček po použití vyjměte a vymyjte. Do pří-
stroje nasazujte opět jen důkladně vyschlý
čisticí váleček.
ČIŠTĚNÍ SACÍHO KANÁLU
Obrázek 22
Když je čisticí váleček vyjmutý, vezměte vlhký hadřík a od-
straňte jím nečistoty na tryskách (18) a sacím kanálu (16).
VLOŽENÍ ČISTICÍHO VÁLEČKU A ZAVŘENÍ KRYTU VÁLEČKU
Obrázek 23
Ujistěte se, že je přístroj vypnutý a nenabíjí se.
Čisticí váleček (20) nejdříve vložte do zaobleného úchytu a
potom vložte držák válečku (19) do vedení.
Obrázek 24
Výstupky krytu válečku (12) na spodním konci vložte do ur-
čených úchytů a kryt zavřete, dokud slyšitelně nezacvakne.
AUTO-WASH PROGRAM
Kromě čištění přístroje pravidelně používejte také program
automatického mytí (AUTO-WASH PROGRAM). Při použití
programu lze přidat do nádržky na čistou vodu také trochu
octa nebo octového čističe.
Před použitím programu automatického mytí vyprázdněte
vždy nádržku na špinavou vodu (7) a pak ji opět vložte do
přístroje.
Obrázek 25
Nádržku na čistou vodu (6) naplňte vodou až po rysku AU-
TO-WASH MAX.
Zavřete víko nádržky (23) a nasaďte nádržku na čistou vodu,
dokud slyšitelně nezacvakne.
Obrázek 26
Odstavte přístroj na příslušnou parkovací stanici (22).
Tlačítko ZAP/VYP (1) přidržte po dobu tří sekund stisknu-
té společně s tlačítkem režimu VYSÁVÁNÍ I/II (2) a tlačítka
uvolněte, jakmile přístroj spustí AUTO-WASH PROGRAM.
Ukazatel stavu provozu pak začne blikat zeleně.
Obrázek 27
Po 60 sekundách program skončí a přístroj se vypne.
Hned poté nádržku na špinavou vodu (7) a čisticí váleček
(20) vyjměte a vymyjte.
DEMONTÁŽ RUKOJETI
Po smontování rukojeť již nesundavejte. Demontování
rukojeti se předpokládá jen v případě, kdy se přístroj musí
odeslat za účelem provedení servisu.
Obrázek 28
Šroub na zadní straně přístroje (4) povolte a vyndejte.
Šroubovák zasuňte do otvoru se závitem.
Mírným tlakem lze povolit aretaci rukojeti a rukojeť
vytáhnout.
Čištění a údržba
I
Obrázek 6
Zavřete víko nádržky (23) a nasaďte nádržku na čistou vodu
(6) tak, aby bylo slyšet zacvaknutí.
ČIŠTĚNÍ PODLAHY
Obrázek 7
Přístroj se zapíná jedním stisknutím tlačítka ZAP/VYP (1).
Po zapnutí svítí ukazatel stavu provozu zeleně.
Volitelně: V případě výskytu větších nečistot na podlaze z
obkladů nebo kamenné podlaze přepněte přístroj jedním
stisknutím tlačítka režimu VYSÁVÁNÍ (2) do režimu TURBO.
Ukazatel stavu provozu pak začne pomalu blikat zeleně. K
přepnutí zpět do režimu EKO stačí jen znovu stisknout tlačít-
ko režimu VYSÁVÁNÍ.
Obrázek 8
Pro uvolnění přístroje z parkovací polohy nakloňte přístroj
dozadu.
Obrázek 9
Stiskněte páčku pro dávkování vody (3), tím individuálně
zvlhčíte čisticí váleček (20).
Než začnete čistit podlahu, přidržte páčku pro dávkování
vody po dobu několika sekund stisknutou, aniž byste přitom
přístrojem pohybovali. Díky tomu se váleček napřed rychle a
rovnoměrně zvlhčí.
Nyní se můžete pustit do čištění podlahy klidným a
rovnoměrným posouváním přístroje dopředu a dozadu.
Pokud se zdá, že čisticí váleček již není dostatečně vlhký,
stiskněte znovu páčku pro dávkování vody a přidržte ji
stisknutou tak dlouho, dokud nebude mít váleček znovu
požadovanou vlhkost.
Stav naplnění nádržky na špinavou vodu (7) nesmí překročit
rysku pro maximální výšku hladiny.
Obrázek 10
Budete-li dělat přestávky při čištění, přístroj vždy odstavte
na příslušnou parkovací stanici (22). Zamezíte tím tvorbě
skvrn na podlaze způsobených zbytkovou vodou v přístroji.
Obrázek 11
Je-li nádržka na špinavou vodu (7) naplněna až po rysku
MAX, aktivuje se signalizační systém (
k
Tank Control
Technology – technologie kontroly nádrže). Kvůli tomu začne
ukazatel stavu provozu (10) svítit oranžově a čisticí váleček
se nejdříve třikrát na pár sekund zastaví, až se zastaví úplně.
Nejpozději pak nádržku na špinavou vodu vyprázdněte.

38 39
Závada Možná příčina / řešení
Přístroj se nespouští.
k
Akumulátor se nenabil. Nabijte
akumulátor.
Ukazatel stavu
provozu (10) bliká
oranžově.
k
Čisticí váleček (20) je zablo-
kovaný. Vyndejte váleček a
povolte blokování.
k
Akumulátor je téměř vybitý,
dobijte přístroj.
Ukazatel sta-
vu provozu (10)
bliká oranžově a
čisticí váleček (20)
se třikrát na pár
sekund zastaví, až
se váleček zastaví
úplně.
k
Tank Control Technology (tech-
nologie kontroly nádržky):
Nádržka na špinavou vodu (7)
je plná. Vyprázdněte nádržku
na špinavou vodu.
Nedaří se nasadit
nádržku na špinavou
vodu (7) do přístroje.
k
Zkontrolujte, jestli je správně
vloženo víko (27) a houbový
ltr (25).
Pływak (28) został
napięty, urządzenie
już nie zasysa, ale
Tank Control Techno-
logy nie uruchamia
się.
k
Filtr gąbkowy (25) jest zablo-
kowany przez nadmiar wilgoci
lub cząsteczki brudu. Wyczyść
i osusz ltr gąbkowy.
k
Pływak (28) został napięty i
urządzenie zostało wyłączo-
ne i ponownie włączone zbyt
szybko. Wyłącz na chwilę
urządzenie i poczekaj, aż
pływak powróci do pozycji
wyjściowej, zanim ponownie
uruchomisz urządzenie.
Tank Control Techno-
logy uruchamia się,
chociaż zbiornik
brudnej wody (7) nie
jest jeszcze pełny.
k
Tank Control Technology może
omyłkowo zareagować na
gwałtowne ruchy (np. mocne
uderzenia o meble). Wyłącz na
chwilę urządzenie i poczekaj,
aż pływak (28) powróci do
pozycji wyjściowej, zanim po-
nownie uruchomisz urządze-
nie. Uważaj, aby nie uderzać
zbyt mocno o meble lub inne
przedmioty.
Závada Možná příčina / řešení
Z větracího krytu
uniká voda (8).
k
Nádržka na špinavou vodu (7)
je plná. Vyprázdněte nádržku.
Dávkování vody po-
mocí příslušné páčky
nefunguje vůbec
nebo jen omezeně.
k
Nádržka na čerstvou vodu (6)
je prázdná. Doplňte vodu.
k
Trysky jsou zablokované (18).
Odstraňte nečistotu usaze-
nou před tryskami. Usazeniny
vápníku můžete opatrně od-
stranit kancelářskou sponkou
protlačením otvorů.
k
Používejte pravidelně
AUTO-WASH PROGRAM.
Kanály a trysky uvnitř přístroje
tak budou udržovány čisté.
Na dně zůstává
pěna.
k
Přidávejte méně čisticího
prostředku anebo používejte
univerzální čistič Leifheit
určený speciálně pro přístroj
Regulus Aqua PowerVac.
Přístroj už neabsor-
buje vůbec žádnou
vodu ze dna.
k
Nádržka na špinavou vodu (7)
je plná. Vyprázdněte nádržku.
Přístroj se po cca
60 sekundách sám
vypne.
k
Byl spuštěn AUTO-WASH PROGRAM.
Spusťte znovu přístroj tak, že
krátce stisknete tlačítko ZAP/
VYP.
Ostatní závady
k
Obraťte se na zákaznický
servis rmy Leifheit.
CO DĚLAT V PŘÍPADĚ ZÁVADY
JLikvidace
Prohlášení o shodě
Symbol na výrobku nebo jeho obalu upozorňu-
je podle směrnice 2012/19 EU na to, že tento
výrobek a v něm zabudovaný akumulátor se
nesmí likvidovat jako běžný domácí odpad,
ale musí být odevzdán na odběrném místě za
účelem recyklace elektrických a elektronických
přístrojů.
Bližší informace obdržíte od své obce, komunálních podni-
ků specializujících se na likvidaci takového odpadu nebo v
obchodě, v němž jste tento výrobek zakoupili.
L
M
Firma Leifheit prohlašuje, že je tento přístroj ve shodě se zá-
kladními požadavky zákona o bezpečnosti výrobků a ostat-
ních příslušných ustanovení a směrnic. Prohlášení o shodě
s evropskými normami naleznete na www.leifheit.de.
ZÁKAZNICKÝ SERVIS
V případě dotazů a podnětů je vám ochotně
k dispozici náš ákaznický servis:
Po–Pá: 08:00 – 17:00 hodin
bezplatná servisní horká linka:
00800 537 37 373
(D/F/NL/CZ/E/I/PL)
nebo zpoplatněné volání
Mezinárodní telefonní číslo: 0049 2604 977 0
Internet: www.leifheit.de
DŮLEŽITÉ
INFORMACE
K
•
K nabíjení akumulátoru se smí používat pouze
nabíječka dodaná společně s přístrojem. Nabí-
ječku lze používat jen společně s akumulátoro-
vým vysavačem s mopem Regulus Aqua Power-
Vac od rmy Leifheit.
•
Přístroj před prvním použitím a po každém pou-
žití opět rovnou nabijte na maximum.
•
Po úplném vybití akumulátoru neskladujte pří-
stroj nepoužívaný déle než 6 měsíců.
Čištění ltru
•
Pravidelně po použití čistěte čisticí váleček, hou-
bový ltr a ostatní části ltru.
•
Počkejte, až čisticí váleček a všechny části ltru
důkladně vyschnou, teprve pak je opět můžete vlo-
žit zpět do akumulátorového vysavače s mopem.
Čištění přístroje
•
Přístroj obsahuje elektrické součástky. Zákaz
čištění pod tekoucí vodou!
•
Přístroj čistěte vlhkým hadříkem.
•
V žádném případě nikdy neponořujte přístroj do vody.
Odstavení přístroje
•
Odstavujte přístroj pouze na rovném a pevném
podkladu.
•
Kvůli ochraně citlivých podlah, aby na ně ne-
vytekla zbytková voda z přístroje, odstavujte
akumulátorový vysavač s mopem během pře-
stávek při čištění a po čištění vždy na příslušnou
parkovací stanici.
Použití čisticích prostředků
•
V případě potřeby použijte pouze nepěnící čisticí
prostředek, a to ve velmi malém množství.
•
Pamatujte na předepsané dávkování čisticího
prostředku. Nepoužívejte agresivní čisticí nebo
dezinfekční prostředky. Doporučujeme univer-
zální čistič Leifheit.
POZOR
Při manipulaci s lithium-iontovými aku-
mulátorovými bateriemi je nutné mít vždy
na paměti tato upozornění:
Akumulátorová baterie nesmí být poško-
zena ani se nesmí otvírat, může kvůli tomu
dojít ke zkratu. Hrozí nebezpečí požáru a
únik jedovatých, zdraví škodlivých látek.
Akumulátorové baterie se nesmí dostat do
ohně ani být vystaveny přímému, prudkému
slunečnímu záření a vysokým teplotám.
VAROVÁNÍ!
NIKDY NEPOUŽÍVEJTE PŘÍSTROJ JEN
V ČÁSTEČNĚ SMONTOVANÉM STAVU!

40 41
SK
Slovenský
Pred použitím zariadenia si pozorne prečítajte
návod na obsluhu a uschovajte si ho na ďalšie
použitie alebo pre iného majiteľa.
Pomôže vám rozumne a správne používať zariadenie hneď
od začiatku a vyhnúť sa nesprávnej obsluhe.
Venujte zvláštnu pozornosť bezpečnostným pokynom v
tomto návode. Návod na obsluhu nájdete aj na domovskej
stránke spoločnosti Leifheit www.leifheit.de.
S pozdravom
Váš tím spoločnosti Leifheit
Leifheit AG
Leifheitstraße 1
56377 Nassau/Lahn
Nemčija
Obsah
A
B
C
D
E
F
G
H
I
J
K
L
M
Rozsah dodávky ................................. 40
Popis výrobku. . . . . . . . . . . . . . . . . . . . . . . . . . . . . . . . . . . 40
Technické údaje ................................. 41
Použitie v súlade s určením ...................... 41
Bezpečnostné pokyny ........................... 41
Funkcia ......................................... 42
Pred použitím . . . . . . . . . . . . . . . . . . . . . . . . . . . . . . . . . . . 42
Používanie . . . . . . . . . . . . . . . . . . . . . . . . . . . . . . . . . . . . . . 42
Čistenie a údržba. . . . . . . . . . . . . . . . . . . . . . . . . . . . . . . . 43
Pomoc pri poruche .............................. 45
Dôležité pokyny .................................46
Likvidácia . . . . . . . . . . . . . . . . . . . . . . . . . . . . . . . . . . . . . . . 46
Zhoda/vyhlásenie o zhode. . . . . . . . . . . . . . . . . . . . . . . 46
ARozsah dodávky
Akumulátorový vysávač a čistič Regulus Aqua PowerVac
Návod na obsluhu
Pri vybaľovaní obsahu z obalu skontrolujte, či je zariadenie
kompletné a či pri preprave nedošlo k jeho poškodeniu.
Ak zistíte poškodenie pri preprave, zariadenie nepoužívajte
a ihneď sa obráťte na zákaznícky servis.
[1]
Tlačidlo ZAP/VYP
[2]
Tlačidlo sacieho režimu I/II
[3]
Páčka na aplikáciu vody
[4]
Rukoväť
[5]
Odblokovacie tlačidlo nádoby na čistú vodu
[6]
Nádoba na čistú vodu
[7]
Nádoba na znečistenú vodu
[8]
Kryt prúdenia vzduchu
[9]
Podlahová hubica
[10]
Signalizácia prevádzkového stavu
[11]
Odblokovacie tlačidlo nádoby na znečistenú vodu
[12]
Kryt čistiaceho valca
[13]
Adaptér nabíjačky
[14]
Konektor nabíjačky
[15]
Nabíjacia zásuvka
[16]
Sacia trubica
[17]
Posuvné kolieska
[18]
Odtok vody hubice
[19]
Držiak čistiaceho valca
[20]
Čistiaci valec
[21]
Odblokovacie tlačidlo krytu čistiaceho valca
[22]
Odkladacia základňa
[23]
Uzáver nádoby na čistú vodu
[24]
Rukoväť nádoby na čistú vodu
[25]
Držiak penového ltra
[26]
Penový lter
[27]
Uzáver nádoby na znečistenú vodu
[28]
Plavák
[29]
Rukoväť nádoby na znečistenú vodu
[30]
Ochrana proti pretečeniu
[31]
Čistiaca kefka
[32] Úschovňa príslušenstva
*
[33]
Č
ističa rohov
*
[34] Mop čističa rohov
*
Popis výrobku
B
Bezpečnostné pokyny
E
Pri použití elektrického zariadenia je potreb-
né vždy dodržiavať základné bezpečnostné
opatrenia:
1.
Zariadenie používajte iba tak, ako je popí-
sané v tomto návode.
2.
Nikdy nepoužívajte zariadenie, keď je po-
škodený kábel, konektor, kryt alebo nabíja-
cí adaptér.
3.
Opravy môžu vykonávať len autorizovaní
technickí pracovníci zákazníckeho
servisu. Základné zariadenie nikdy
neotvárajte sami. Jednotlivé kompo-
nenty základného zariadenia sa nesmú
rozoberať, opravovať ani prestavovať.
4.
Toto zariadenie obsahuje batérie, ktoré sa
nedajú vymeniť.
5.
Zariadenie je možné nabíjať iba prilože-
nou nabíjačkou. Ubezpečte sa, že napätie
uvedené na typovom štítku sieťového dielu
zodpovedá sieťovému napätiu.
6.
Dbajte na to, aby sa zariadenie ani sieťový
diel nenamočili. Neobsluhujte zariadenie
ani sieťový diel s mokrými alebo vlhkými
rukami.
7.
Neskladujte, nenabíjajte ani nepoužívajte
zariadenie vonku alebo vo vlhkom pro-
stredí, ako napr. kúpeľne a iné, ale vždy pri
izbovej teplote a na suchom mieste.
Technické údaje
C
Dbajte na to, že tento výrobok je určený iba na použitie
v domácnosti. Spoločnosť Leifheit neposkytuje žiadnu záru-
ku výrobcu pri komerčnom používaní.
•
Zariadenie slúži výhradne na vytieranie a vysávanie
suchej a mokrej špiny na vodeodolných a ošetrených pod-
lahách. Ide o obklady, PVC, linoleum, laminát a ošetrené
drevo.
•
Nepoužívajte zariadenie na nasávanie horľavých kvapa-
lín, ostrých alebo špicatých predmetov, horúceho alebo
studeného popola a horiacich cigariet.
•
Zariadenie sa nesmie používať na vysávanie ľudí alebo
zvierat.
•
Nezakrývajte nasávacie otvory vzduchu ani výstupné ot-
vory vzduchu, keď je zariadenie zapnuté. Dbajte na to, aby
sa otvory neupchali nečistotami.
•
Zariadenie používajte iba so schváleným príslušenstvom
a náhradnými dielmi od spoločnosti Leifheit.
•
Umiestnite zariadenie vždy na príslušnú odkladaciu zá-
kladňu na pevnú a rovnú plochu.
•
Pri nabíjaní zariadenia dbajte na dostatočnú vzdialenosť
od zdrojov tepla a vlhkosti.
•
Dbajte na to, aby na čistiacom valci ani na kolesách neboli
zachytené žiadne ostré predmety, ktoré by mohli poškodiť
podlahu.
•
Zariadenie nikdy nepoužívajte bez ltra.
Každé nad rámcové použitie sa považuje za použitie v roz-
pore s určením a môže viesť k poškodeniam alebo zrane-
niam. Za takto vzniknuté škody výrobca neručí; riziko nesie
sám používateľ.
Použitie v súlade
s určením
D
Model .......................................Regulus Aqua PowerVac
Akumulátor .........................................Li-Ion, 24V 2,5Ah
Doba chodu ......................................~22 min (režim Eco)
Výkon ......................................................... 120 W
Napätie .........................................................24V
Doba nabíjania ................................................. ~ 3 h
Objem nádoby na čistú vodu ..................................500 ml
Objem nádoby na znečistenú vodu .............................400 ml
Hmotnosť Regulus Aqua PowerVac .............................3,3 kg
Hmotnosť Regulus Aqua PowerVac Pro ......................... 3,5 kg
Nabíjací adaptér
Vysvetlenie symbolov .........................
Identifikačný kód modelu ......................
Vstupné napätie ...............................
Frekvencia vstupného striedavého prúdu .......
Výstupné napätie . . . . . . . . . . . . . . . . . . . . . . . . . . . . . .
Výstupný prúd ................................
Výstupný výkon ...............................
Priemerná účinnosť v aktívnom režime .........
Účinnosť pri nízkej záťaži (10 %) ................
Spotreba energie v stave bez záťaže ............
Leifheit AG
Leifheitstraße 1
D-56377 Nassau, Germany
Amtsgericht Montabaur
HRB 2857
= externé napájanie
YLS0241A-E260092
AC 100-240 V
50/60 Hz
DC 26,0 V
0,92 A
23,92 W
86,57%
78,86%
0,09 W
* Regulus Aqua PowerVac Pro

42 43
8.
Nepoužívajte zariadenie v blízkosti horľa-
vých plynov.
9.
Chráňte zariadenie pred silným teplom
a nevystavujte ho priamemu slnečnému
žiareniu.
10.
Totozariadeniejeprepoužívateľov(vrát.
detíod8rokov)sobmedzenýmifyzickými,
zmyslovýmialebopsychickýmischopnos-
ťami,príp.prepoužívateľovbezakejkoľ-
vek skúsenosti alebo predchádzajúcich
vedomostívhodnéibavtedy,keďzodpo-
vednáosobazabezpečíprimeranýdozor
alebopodrobnýnávodnapoužívanie
zariadenia.
11.
Dbajte na to, aby sa deti nehrali so za-
riadením.
12.
Nenechávajte deti v blízkosti zariadenia
bez dozoru.
13.
Pred čistením alebo údržbou odpojte
zariadenie zo siete.
14.
Nedotýkajte sa rotujúceho čistiaceho
valca, keď je zariadenie zapnuté.
15.
Dbajte na to, aby sa spustený čistiaci
valec nedostal do kontaktu s telom (napr.
vlasy, prsty) alebo kusmi oblečenia.
16.
Dbajte na to, aby ste pri čistení neza-
chytili alebo nestlačili žiadne časti tela
(napríklad prsty), napríklad do podlaho-
vej hubice.
17.
Dbajte na to, aby sa do čistiaceho valca
nezachytili žiadne predmety (napr. káble,
dlhé strapce), inak hrozí nebezpečenstvo
poškodenia zachytených vecí alebo za-
riadenia.
18.
Uschovávajte zariadenie tak, aby bolo pre
deti neprístupné. Nenechajte zariadenie
bez dozoru, keď je zapnuté.
19.
Obalový materiál, ako napr. plastové
vrecko a iné, držte v dostatočnej
vzdialenosti od detí. Hrozí nebezpečen-
stvo udusenia.
Zariadenie spája vysávanie, vytieranie a sušenie podlahy
do jedného kroku. Má 2-nádržový systém so samostatnou
nádobou na čistú a znečistenú vodu.
Pri stlačení páčky na aplikáciu vody sa čistá voda dostáva
do čistiaceho valca. Množstvo vody je teda možné nastaviť
individuálne pre každý typ podlahy. Rotujúci čistiaci valec
odstraňuje prach, suchú a vlhkú nečistotu, ako aj zaschnuté
škvrny.
Sacia funkcia odsáva čistiaci valec a dopravuje nečistoty do
nádoby na znečistenú vodu. Preto vždy umývajte s čistým
čistiacim valcom a čistou vodou.
Obrázok 1
Rukoväť (4) a kábel nasaďte na zariadenie tak, že s kliknutím
zapadne.
NABÍJANIE
Počas nabíjania nevykonávajte čistenie ani údržbu zariade-
nia. Pred prvým použitím a hneď po každom použití zariade-
nie opäť úplne nabite.
Obrázok 2
Vložte konektor dodanej nabíjačky (14) do nabíjacej zásuvky
(15) zariadenia.
Adaptér nabíjačky (13) zapojte do zásuvky.
Obrázok 3
Signalizácia prevádzkového stavu (10) počas nabíjania po-
maly bliká na zeleno.
Po 3 hodinách je zariadenie úplne nabité. Signalizácia pre-
vádzkového stavu svieti nepretržite 2 minúty, potom svetlo
zhasne.
Funkcia
Pred použitím
F
G
NAPLNENIE NÁDOBY NA ČISTÚ VODU
Obrázok 4
Stlačte odblokovacie tlačidlo (5), aby ste vybrali nádobu na
čistú vodu (6) za rukoväť (24).
Otvorte uzáver nádoby na čistú vodu (23).
Obrázok 5
Naplňte nádobu na čistú vodu vodou s maximálnou teplotou
60 °C.
V prípade potreby pridajte nepenivé čistiace prostriedky do
spodného dávkovača.
POZOR: Dbajte na špecikácie dávkovania
čistiacich prostriedkov. Nepoužívajte žiadne
agresívne čistiace ani dezinfekčné prostried-
ky. Odporúčame univerzálny čistič Leifheit.
Obrázok 6
Zatvorte uzáver nádoby (23) a vložte nádobu na čistú vodu
(6), až kým nebudete počuť kliknutie.
Používanie
H
VYPRÁZDNENIE NÁDOBY NA ZNEČISTENÚ VODU A
ČISTENIE FILTRA
Obrázok 12
Zariadenie vypnete jedným stlačením tlačidla ZAP/VYP (1).
Vyberte nádobu na znečistenú vodu (7).
Stlačte odblokovacie tlačidlo (11) smerom dole a vytiahnite
nádobu za rukoväť (29).
Obrázok 13
Zdvihnite uzáver (27) z nádoby na znečistenú vodu (7).
Vyprázdnite nádobu na znečistenú vodu.
Pri usadeninách použite čistiacu kefku (31).
Obrázok 14
Vyberte držiak penového ltra (25) z uzáveru nádoby na
znečistenú vodu (27).
Vyberte penový lter (26) z držiaka penového ltra.
Obrázok 15
V závislosti od stupňa znečistenia umyte všetky časti
nádoby na znečistenú vodu (7, 25, 26, 27, 28, 30) pod
tečúcou vodou.
Obrázok 16
Pred zložením a založením rozobratých častí nechajte
všetky časti úplne uschnúť na vzduchu.
POZOR: Aby ste predišli tvoreniu zápachu,
po použití zariadenia vyberte jednotku na
znečistenú vodu a umyte ju. Do zariadenia
vkladajte iba úplne suché časti.
Obrázok 17
Penový lter (26), držiak penového ltra (25), uzáver (27) a
nádobu na znečistenú vodu (7) opäť zložte do samostatnej
jednotky.
Obrázok 18
Jednotku znečistenej vody opäť vložte do zariadenia, až kým
nebudete počuť kliknutie.
Čistenie a údržba
I
ČISTENIE PODLAHY
Obrázok 7
Zariadenie zapnete jedným stlačením tlačidla ZAP/VYP (1).
Po zapnutí svieti signalizácia prevádzkového stavu na
zeleno.
Voliteľné: Jedným stlačením tlačidla sacieho režimu 2)
prepnete zariadenie do režimu Turbo pre ťažké znečistenie
obkladov a kamenných podláh. Signalizácia prevádzkového
stavu pomaly bliká na zeleno. Zariadenie prepnete naspäť
do režimu Eco opätovným stlačením tlačidla sacieho režimu.
Obrázok 8
Nakloňte zariadenie dozadu, aby ste ho uvoľnili zo základnej
polohy.
Obrázok 9
Stlačte páčku na aplikáciu vody (3), aby ste individuálne
navlhčili čistiaci valec (20).
Pred začatím čistenia podlahy držte páčku na aplikáciu vody
stlačenú niekoľko sekúnd bez toho, aby ste zariadenie posu-
nuli, aby ste predtým valec rýchlo a rovnomerne navlhčili.
Posúvajte zariadenie na čistenie podlahy dopredu a dozadu
pokojnými a rovnomernými pohybmi.
Ak sa vlhkosť čistiaceho valca zníži, znova stlačte páčku na
aplikáciu vody a držte ju stlačenú, až kým opäť nedosiahnete
požadovanú vlhkosť.
Úroveň naplnenia nádoby na znečistenú vodu (7) nesmie
prekročiť maximálnu hranicu.
Obrázok 10
Počas prestávok pri čistení vždy umiestnite spotrebič na prí-
slušnú odkladaciu základňu (22), aby ste nezašpinili podlahu
zvyškovou vodou v spotrebiči a tým zabránili tvoreniu fľakov
na podlahe.
Obrázok 11
Ak je nádoba na znečistenú vodu (7) naplnená na maximálnu
úroveň, aktivuje sa oznamovací systém (
k
Tank Control
Technology). V dôsledku toho bude signalizácia prevádz-
kového stavu (10) blikať na oranžovo a čistiaci valec sa
zastaví 3-krát na niekoľko sekúnd, potom sa valec úplne
zastaví.
Najneskôr potom vyprázdnite nádobu na znečistenú vodu.
La pagina sta caricando ...
La pagina sta caricando ...
La pagina sta caricando ...
La pagina sta caricando ...
La pagina sta caricando ...
La pagina sta caricando ...
La pagina sta caricando ...
La pagina sta caricando ...
La pagina sta caricando ...
La pagina sta caricando ...
La pagina sta caricando ...
La pagina sta caricando ...
La pagina sta caricando ...
La pagina sta caricando ...
La pagina sta caricando ...
La pagina sta caricando ...
La pagina sta caricando ...
La pagina sta caricando ...
La pagina sta caricando ...
La pagina sta caricando ...
La pagina sta caricando ...
La pagina sta caricando ...
La pagina sta caricando ...
La pagina sta caricando ...
La pagina sta caricando ...
La pagina sta caricando ...
La pagina sta caricando ...
La pagina sta caricando ...
La pagina sta caricando ...
La pagina sta caricando ...
La pagina sta caricando ...
La pagina sta caricando ...
La pagina sta caricando ...
La pagina sta caricando ...
La pagina sta caricando ...
La pagina sta caricando ...
La pagina sta caricando ...
La pagina sta caricando ...
La pagina sta caricando ...
La pagina sta caricando ...
La pagina sta caricando ...
La pagina sta caricando ...
La pagina sta caricando ...
La pagina sta caricando ...
La pagina sta caricando ...
La pagina sta caricando ...
La pagina sta caricando ...
La pagina sta caricando ...
La pagina sta caricando ...
La pagina sta caricando ...
La pagina sta caricando ...
-
 1
1
-
 2
2
-
 3
3
-
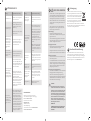 4
4
-
 5
5
-
 6
6
-
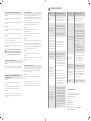 7
7
-
 8
8
-
 9
9
-
 10
10
-
 11
11
-
 12
12
-
 13
13
-
 14
14
-
 15
15
-
 16
16
-
 17
17
-
 18
18
-
 19
19
-
 20
20
-
 21
21
-
 22
22
-
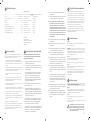 23
23
-
 24
24
-
 25
25
-
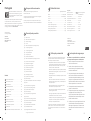 26
26
-
 27
27
-
 28
28
-
 29
29
-
 30
30
-
 31
31
-
 32
32
-
 33
33
-
 34
34
-
 35
35
-
 36
36
-
 37
37
-
 38
38
-
 39
39
-
 40
40
-
 41
41
-
 42
42
-
 43
43
-
 44
44
-
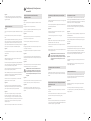 45
45
-
 46
46
-
 47
47
-
 48
48
-
 49
49
-
 50
50
-
 51
51
-
 52
52
-
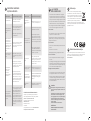 53
53
-
 54
54
-
 55
55
-
 56
56
-
 57
57
-
 58
58
-
 59
59
-
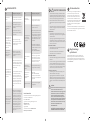 60
60
-
 61
61
-
 62
62
-
 63
63
-
 64
64
-
 65
65
-
 66
66
-
 67
67
-
 68
68
-
 69
69
-
 70
70
-
 71
71


in altre lingue
Altri documenti
-
LEIFHEIT 11914 Manuale utente
-
-
-
Sony EPA-5CR Manuale del proprietario
-
LEIFHEIT 51004 Manuale utente
-
-
COMAC 26BT-32BT Manuale utente
-
LEIFHEIT M Air Active Express Ironing Board Medium Istruzioni per l'uso
-
Minuteman E14115 Manuale utente
-
LEIFHEIT 3233 Manuale utente