15
Additional Information
Precautions
• If your car has been parked in direct sunlight,
allow the unit to cool off before operating it.
• Power antenna (aerial) will extend automatically
while the unit is operating.
Moisture condensation
On a rainy day or in a very damp area, moisture
condensation may occur inside the lenses and
display of the unit. Should this occur, the unit will
not operate properly. In such a case, remove the disc
and wait for about an hour until the moisture has
evaporated.
To maintain high sound quality
Be careful not to splash juice or other soft drinks
onto the unit or discs.
Notes on discs
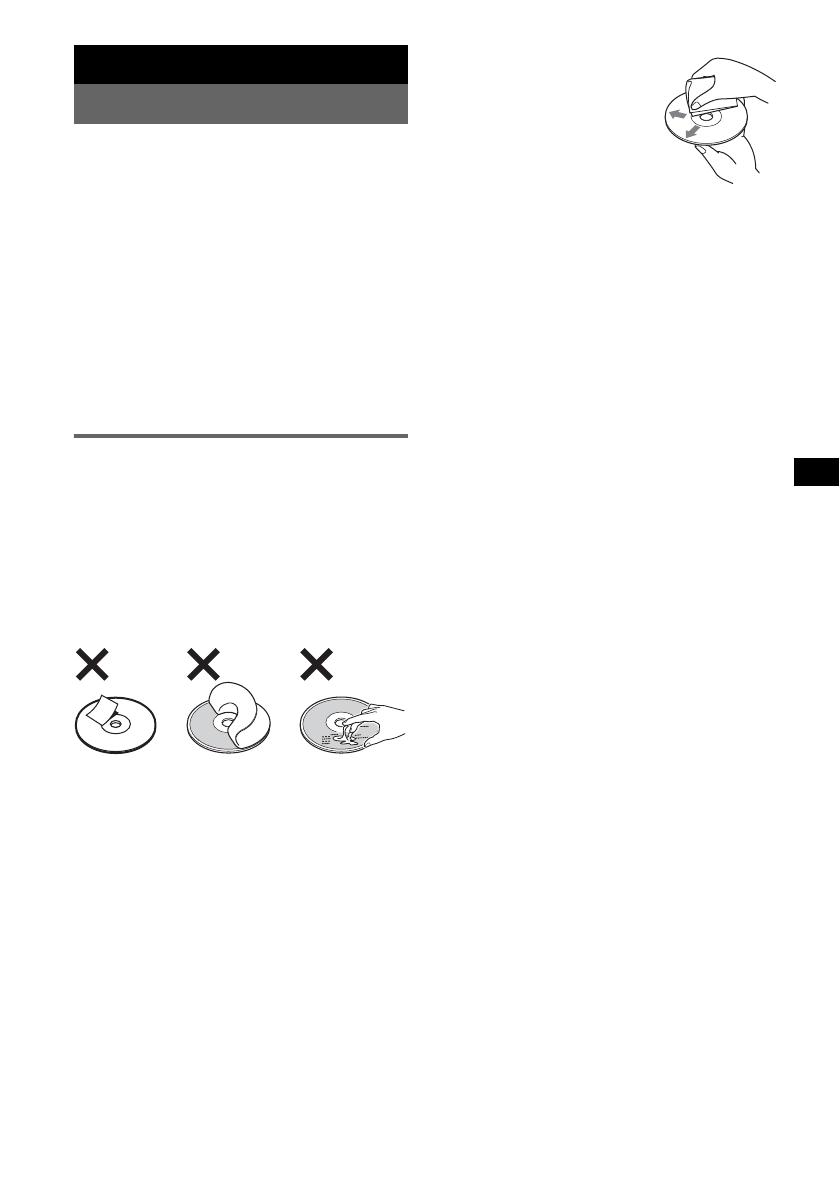
• To keep a disc clean, do not touch its surface.
Handle the disc by its edge.
• Keep your discs in their cases or disc magazines
when not in use.
• Do not subject discs to heat/high temperature.
Avoid leaving them in a parked car or on a
dashboard/rear tray.
• Do not attach labels, or use discs with sticky ink/
residue. Such discs may stop spinning when used,
causing a malfunction, or may ruin the disc.
• Do not use any discs with labels or stickers
attached.
The following malfunctions may result from using
such discs:
– Inability to eject a disc (due to a label or sticker
peeling off and jamming the eject mechanism).
– Inability to read audio data correctly (e.g.,
playback skipping, or no playback) due to heat
shrinking of a sticker or label causing a disc to
warp.
• Discs with non-standard shapes (e.g., heart,
square, star) cannot be played on this unit.
Attempting to do so may damage the unit. Do not
use such discs.
• You cannot play 8 cm (3
1
/4 in) CDs.
• Before playing, clean the discs
with a commercially available
cleaning cloth. Wipe each disc
from the center out. Do not use
solvents such as benzine,
thinner, commercially available
cleaners, or antistatic spray
intended for analog discs.
Notes on CD-R/CD-RW discs
• Some CD-Rs/CD-RWs (depending on the
equipment used for its recording or the condition
of the disc) may not play on this unit.
• You cannot play a CD-R/a CD-RW that is not
finalized.
• The unit is compatible with the ISO 9660 level 1/
level 2 format, Joliet/Romeo in the expansion
format, and Multi Session.
• The maximum number of:
– folders (albums): 150 (including root and empty
folders).
– files (tracks) and folders contained in a disc: 300
(if a folder/file names contain many characters,
this number may become less than 300).
– displayable characters for a folder/file name is
32 (Joliet), or 64 (Romeo).
• When the disc is recorded in Multi Session, only
the first track of the first session format is
recognized and played (any other format is
skipped). The priority of the format is CD-DA,
ATRAC CD and MP3/WMA/AAC.
– When the first track is a CD-DA, only CD-DA of
the first session is played.
– When the first track is not a CD-DA, an ATRAC
CD or MP3/WMA/AAC session is played. If the
disc has no data in any of these formats, “NO
MUSIC” is displayed.
Music discs encoded with copyright
protection technologies
This product is designed to play back discs that
conform to the Compact Disc (CD) standard.
Recently, various music discs encoded with
copyright protection technologies are marketed by
some record companies. Please be aware that among
those discs, there are some that do not conform to
the CD standard and may not be playable by this
product.
Note on DualDiscs
A DualDisc is a two sided disc product which
mates DVD recorded material on one side with
digital audio material on the other side. However,
since the audio material side does not conform to
the Compact Disc (CD) standard, playback on this
product is not guaranteed.


