Cub Cadet 13B726JD603 Manuale utente
- Categoria
- Tosa erba
- Tipo
- Manuale utente

MTD Products Aktiengesellschaft • Saarbrücken • Germany
I 21
769-07901G


a
b


EN
FR
DE
NL
IT
ES
SV
DA
NO
FI
PT
EL
HU
PL
English ............................. 8
(Original operating instructions)
Français ............................. 18
(Notice d’instructions originale)
Deutsch ............................. 29
(Originalbetriebsanleitung)
Nederlands ........................... 40
(Originele gebruiksaanwijzing)
Italiano ............................. 51
(Istruzioni per l’uso originali)
Español ............................. 62
(Instrucciones de funcionamiento originales)
Svenska ............................. 73
(Originalbruksanvisning)
Dansk ............................. 83
(Originale driftsvejledning)
Norsk ............................. 93
(Originale driftsanvisningen)
Suomi ............................. 103
(Alkuperäinen käyttöohjekirja)
Português ............................ 113
(Instruções de serviço originais)
Ελληνικά............................. 124
(Αυθεντικές οδηγίες χειρισμού)
Magyar ............................. 135
(Eredeti üzemeltetési útmutató)
Polski ............................. 146
(Oryginalna instrukcja obsługi)

8
For your safety
EN
Contents
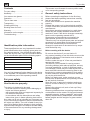
Identification plate information
These specications are very important for subse-
quent identication when ordering spare parts and
for customer service. You will nd the rating plate
under the driver’s seat. Copy all information stated
on the identication plate into the following space.
You can nd these and further details on the device
in the separate CE declaration of conformity, which
is a constituent part of this operating manual.
For your safety
Use the device properly
This device is designed to be used
- as a lawn tractor for mowing lawns belonging to
house and leisure gardens,
- with accessories which are approved expressly for
use with this lawn tractor,
- In accordance with the descriptions and safety
instructions given in these operating instructions.
Any other use is not an intended use. Improper use
is not covered by the warranty and the manufacturer
will reject any liability. The user is liable for any inju-
ries to third parties and/or damage to their property.
Unauthorised changes to the device exclude liability
of the manufacturer for any resulting damage and/
or injury.
This mower is not licensed for use on public roads
or for transporting people.
General safety instructions
Before operating the appliance for the rst time,
please read these operating instructions carefully
and act accordingly.
Inform other users how to operate the machine
properly.
Operate the mower only in the technical condition
in which it has been provided and delivered by the
manufacturer.
Keep these operating instructions in a safe place
where they are readily available whenever the
machine is used. If the device changes ownership,
hand over the operating manual with it.
Spare parts and accessories must satisfy the
requirements specied by the manufacturer.
Therefore only use original spare parts and original
accessories or spare parts and accessories that
have been authorised by the manufacturer.
Arrange for repair work to be carried out by a spe-
cialist workshop only.
Before working with the device
Do not use the device if you are tired or ill.
Any person intending to use this device must not be
under the inuence of intoxicants such as alcohol,
drugs or medicines.
Persons under the age of 16 are not permitted to
operate this mower.
This device is not intended for use by persons
(including children) with reduced physical, sensory
or mental capabilities, or lack of experience and/
or knowledge, unless they are under supervision or
have received instructions concerning how to use
the device by a person responsible for their safety.
Children should be supervised to ensure that they
do not play with the device.
Before you begin work, make sure that you are
familiar with all attachments and operating controls
as well as their functions.
Store fuel only in approved containers and never
close to sources of heat (e.g. stoves or hot-water
boilers).
Replace the exhaust unit, tank or fuel cap if they
become damaged.
Observe guidelines when connecting towed items
or attachments to the mower. Driving performance,
especially steering, braking capability, and overall
stability are aected by attachments, towed items,
ballast weights and the weight of a grass catcher
when full.
For your safety ....................................................... 8
Assembly .............................................................. 10
Your mower at a glance .........................................11
Operation .............................................................. 12
Tips on lawn care ................................................. 14
Transporting ......................................................... 14
Cleaning/servicing ................................................ 15
Shutting down the unit .......................................... 16
Warranty ............................................................... 17
Information on the engine ..................................... 17
Troubleshooting .................................................... 17

9
For your safety
EN
When working with the device
When working with or on the unit, wear appropri-
ate work clothes (e.g. safety boots, long trousers,
tight-tting clothing, goggles and hearing protection).
Working without ear protection may result in loss of
hearing.
Do not operate the mower unless it is in perfect and
safe working order.
Never change the engine settings pre-congured in
the factory.
Do not rell the fuel tank while the engine is running
or still hot.
Only refuel the mower outside.
Prevent naked ames and spark formation, and do
not smoke.
Make sure that at all times there are no persons,
especially children, or animals in the working area.
Check the terrain on which the mower is to be used
and remove all objects which could be thrown out by
the mower. This will avoid endangering people and
damaging the mower.
Do not mow on slopes with an incline greater than
20%. Working on slopes is dangerous; the mower
may overturn or slip. Start o slowly and brake
gently on slopes. Keep the clutch engaged and
proceed slowly when driving downhill. Do not travel
across the face of a slope; always drive straight up
and down.
Operate this mower only in daylight or good articial
light.
The device is not licensed for transporting people.
Before carrying out any work on the mower
Protect yourself against injury. Before all work on
this device.
- Switch o the engine.
- Withdraw the ignition key.
- Actuate the parking brake.
- Wait until all moving parts have come to a stand-
still; the engine must have cooled down.
- Pull the spark plug connector o the engine so
that the engine cannot inadvertently start.
After working with the device
Do not leave the mower unattended until you have
turned o the engine, applied the parking brake and
removed the ignition key.
Safety devices
Safety equipment is designed for your protection
and must always be in functioning order.
You must not modify safety devices in any way or
bypass their function.
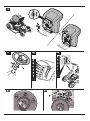
Safety features are:
Discharge flap/mulch locking part
Fig. 6
These components protect you from injury by the
cutter or ejected objects. The unit may be operated
with the attached discharge ap (a) or the mulch
locking part (b) only.
Safety locking system
The safety locking system will only allow the engine
to start when
- The driver is sitting on the seat.
- the parking brake has been actuated,
- the direction-of-travel lever is set to "N",
- the discharge ap, the mulch locking component
or a grass catcher (optional) is tted,
- the cutter deck has been switched o.
The safety interlock system switches the engine
o as soon as the operator leaves his seat without
actuating the parking brake or switching o the
cutter deck.
If mowers do not feature the OCR function or if
the OCR function is deactivated, the safety inter-
lock system will prevent reversing while the cutter
deck is switched on (automatic switching o of the
motor). Therefore, switch o the cutter deck before
reversing.
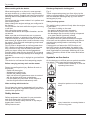
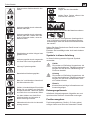
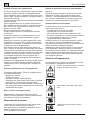
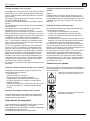
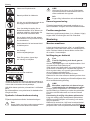
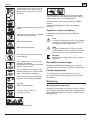
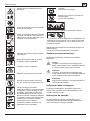
Symbols on the device
On the device you will nd various symbols as adhe-
sive labels. They have the following meanings:
Caution! Before switching on, read the
operating instructions!
Keep third parties out of the danger
area!
Injury hazard due to rotating blades or
other moving parts.

10
Assembly
EN
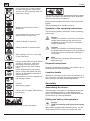
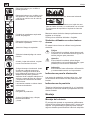
Injury hazard due to rotating blades
or other moving parts. Keep hands
and feet out of the openings when the
machine is running.
MAX 20%
Working on steep slopes can be
dangerous.
Injury hazard due to grass or solid
objects thrown out by mower.
Caution! Danger of explosion.
Battery acid/risk of chemical burns.
When getting on and o, never step
on the cutter deck.
Danger! Unintended activation. Before
working on the device, unplug the
spark plug connector. Keep your
hands and feet away from rotating
parts.
Before beginning any work on this
device, remove the ignition key and
observe all information contained in
these instructions.
3E
Old batteries must not be disposed of
with domestic waste.
Caution!
Wear safety goggles.
Danger! No re, sparks, naked ames,
nor smoking
Before tipping the device, remove the battery.
The mower may only be operated with attached grass
catcher connected to the discharge chute, discharge
ap or mulch locking component.
Ensure these symbols mounted on the unit remain
legible.
Replace damaged or illegible symbols.
Symbols in the operating instructions
The following symbols are used in these operating
instructions:
Danger
Draws your attention to sources of potential
danger associated with the task you are
undertaking at the time which constitute a
danger to persons.
Caution
Draws your attention to potential hazards
associated with the task you are undertaking
at the time which could result in damage to
the mower.
Note
This indicates important information and
application tips.
Disposal instructions
Dispose of packaging remnants, old mowers, etc. in
accordance with local regulations.
Location details
Whenever a location on the mower is specied (e.g.
left, right), this is always from the perspective of the
driver, sitting in the seat, and facing forward.
Assembly
Assembling the device
The assembly of the device is illustrated at the end
of the operating manual or on a supplementary
sheet. The illustrations may dier in detail from the
mower which you have purchased.
Putting the battery into operation
Danger
Risk of poisoning and injury from battery
acid
Wear safety goggles and protective gloves. Do not
allow battery acid to come into contact with skin.

11
Your mower at a glance
EN
If you get battery acid on your face or in your eyes,
wash o immediately with cold water and consult a
doctor.
If you accidentally swallow battery acid, drink plenty
of water and consult a doctor immediately.
Store batteries out of the reach of children.
Never tilt the battery, as battery acid may run out.
Hand over any remaining battery acid to your dealer
or to a waste management company.
Caution
Risk of re, explosion and corrosion
caused by battery acid and gases emitted
by battery acid
Immediately clean parts of the mower splashed
by battery acid. Battery acid is corrosive. Do not
smoke, keep burning and hot objects away.
Possible short-circuit when working on the
battery
Do not place any tools or metal objects on the
battery.
Disconnect and connect the battery in the correct
sequence.
Only operate the battery with the battery-terminal
cover tted (depending on the model, as a cover ap
on the positive terminal or as a complete protective
battery cover) .
Disconnection
■First disconnect the black cable (–), then the red
cable (+).
Connection
■First connect the red cable (+), then the black
cable (–).
The battery is lled with battery acid and sealed at
the factory. But even a “maintenance-free” battery
needs servicing to ensure it has a certain service
life.
■Keep the battery clean.
■Avoid tipping the battery over Electrolyte liquid will
run out of even a “sealed” battery if it is tilted.
■Before starting up the device for the rst time,
charge the battery using a 12V battery charger
(maximum charging current 1.1A) for a period of
12 to 14 hours.
After charging the battery, rst pull out the battery
charger plug, then disconnect the battery (see
also operating instructions for the battery charger).
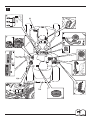
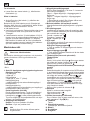
Your mower at a glance
Caution! Damage to the device.
This rst describes the functions of the controls
and display elements. Do not execute any of these
functions yet!
Fig. 1
1 Lever for speed settings/parking brake
Speed (Figure 4a):
Low speed
= Lever to "1".
High speed
= Lever to "6" or "7" (optional).
Increase speed
= Adjust drive positions without actuating the
clutch/brake pedal.
Reduce speed
= Adjust drive positions by actuating the clutch/
brake pedal (depress halfway).
Parkingbrake(g.4b):
Actuate the parking brake: Fully depress clutch/
brake pedal, push lever for speed setting to
. Release the parking brake: Fully depress clutch/
brake pedal, push lever to a speed setting.
2 Clutch/brake pedal
Clutching = Depress pedal halfway.
Braking = Depress pedal all the way.
Note
Is also used to activate/deactivate the park-
ing brake.
3 Cutting height adjustment lever
Using the lever set the dierent cutting height
levels (1 to max. 5 - depending on model).
Level 1 = Lowest cutting height - cutter deck all
the way down.
Level 5* = Highest cutting height - cutter deck all
the way up.
(* Depending on model. Highest number corre-
sponds to the highest cutting height.)
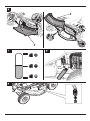
4 Tank contents display (depending on model)
The inspection window indicates the level of fuel
in the fuel tank (Figure 7).
5 Direction-of-travel lever
Do not make any adjustments until the device is
at a standstill. To do this, fully depress and hold
down the brake pedal.
Forwards = Lever to “F/ ”
Idling = Lever to “N”
Reverse = Lever to “R/ ”
6 PTO lever
The PTO lever mechanically switches the cutter
deck on and o.
Switchothecutterdeck
= Press lever out of recess and pull all the way
backwards.
Switch on the cutter deck .
= Slowly press lever forwards and engage in
recess.

12
Operation
EN
7 Ignition lock (depending on model)
Ignition lock
Fig. 5a
Starting: Turn key to the right until the engine is
running, then release. Key is turned to .
Stopping: Turn the key to the left, to .
Ignition lock with OCR function (depending on
model)
Fig. 5b
This ignition lock features an OCR function
(= user-controlled mowing in reverse gear).
Starting: Turn key to the right until the engine is
running, then release. The key at (normal)
allows mowing in the drive direction.
OCR position: Turn key to left from the normal
position to reverse mowing position and
press the switch (1). The indicator light (2) comes
on and indicates to the user that the device can
now mow in reverse and forward gear.
Stopping: Turn the key to the left, to .
8 Throttle
Set engine speed continuously.
Fast engine speed = .
Slow engine speed = .
9 Choke (depending on model)
To start a cold engine, pull the choke (9a) or set
the throttle to position (9b).
10 Fuel cap
Refuel
11 Oilllerneck
Fill up the oil and check the oil level
12 Battery
13 Can holder
14 Trailer coupling
Operation
Follow the instructions in the engine handbook!
Danger
Risk of injury
No person, especially children, and/or animals
should be allowed to stand close to the mower while
it is in use. They could be injured by stones or simi-
lar objects that might be thrown out.
Children must never be allowed to operate the
mower.
Be particularly careful when mowing in reverse gear
(devices with OCR switch). There must be nobody in
the working area of the unit.
Never empty the grass catcher attachment while the
cutter deck is running.
While emptying the grass catcher attachment, you or
other persons may be injured by ejected clippings.
When mowing on steep slopes, there is a risk of the
mower tipping over and you could be injured as a
result. Do not drive across the face of a slope, but
only straight up and down. The device should not
be driven on slopes with a maximum incline greater
than 20%. Do not turn the mower round while you
are still on the slope.
If the ground is wet the mower could slip due to
reduced traction and overturn. Only cut the grass
when the ground is dry.
Excessive speed can increase the risk of an
accident.
When mowing closed to the lawn edges, maintain
a safe distance at all times e.g. close to particularly
steep slopes, trees, bushes and hedges.
Pay particular attention when you are travelling in
reverse while mowing at the same time.
Inspect the ground on which the device is going to
be used and remove any loose objects that could be
picked up and thrown out again by the device.
If the cutter strikes a foreign object (e.g. stone) or if
the mower starts vibrating unusually:
Immediately switch o the engine. Before continuing
to use the device, have it checked for damage by a
specialist workshop
When rotary mowing, never stand in front of the
grass discharge openings.
Never place your hands or feet on or under rotating
parts.
Switch o the engine and remove the ignition key
and the spark-plug connector before loosening
obstructions or removing blockages from the dis-
charge channel.
Do not use the mower in adverse weather condi-
tions, e.g. if there is a risk of rain or a storm.
Danger of carbon monoxide asphyxiation
Run the internal combustion engine outdoors only.
Danger of explosion and risk of re
Petrol vapour is explosive and petrol itself is
extremely ammable.
Fill up will petrol before you start the engine. Do not
remove the fuel cap while the engine is running or
if it is still hot. Fill the fuel tank only after the engine
has been switched o and allowed to cool down.
Prevent naked ames and spark formation, and do
not smoke. Only refuel the device outside. Do not
start the engine if any petrol has been spilt. Push the
device away from the area where the petrol was spilt
and wait until the petrol fumes have evaporated.
To prevent a re hazard, keep the following parts
free from grass and leaking oil: Engine, exhaust, fuel
tank.
Danger
Injury hazard due to defective device
Do not operate the mower if it is not in perfect work-
ing order. Before operating the unit, always carry out
a visual inspection. Pay particular attention to safety
devices, the cutting mechanism and its supporting
brackets, operating controls and threaded connec-
tions, and check that they are not damaged and are
securely attached.
Replace damaged parts before operating.
Danger
Risk of injury
While the engine is running or hot, do not check,
inspect or service/adjust the mower.

13
Operation
EN
Operating times
Comply with the national/municipal regula-
tions concerning the times when the appli-
ance may be used (if required, contact your
local authority).
Before operating the unit, always
Check:
■all guards,
■the engine oil level (see engine manual),
■the fuel level,
■the tyre pressure,
■ventilation slots in the engine area for dirt and
grass clippings.
Fill up with fuel and check the oil level
Note
The engine has already been lled with oil at
the factory - please check the oil; if required
rell.
■Fill up with lead-free petrol. See engine manual.
■Fill fuel tank up to max. 2.5 cm below the lower
edge of the inlet nozzle.
■Close fuel tank tightly.
■Check the oil level. The oil level must be between
the “Full/Max.” and “Add/Min.” mark (Also see
engine manual).
Check tyre pressure
Note
For production reasons the tyre pressure
may be higher than required.
■Check tyre pressure. If required, correct (see
section “Maintenance”):
- front: 1.0 bar
- rear: 0.7 bar
Adjusting the driver’s seat
Fig. 2
■Move seat to the required position.
Adjusting the steering wheel (depend-
ing on model)
Fig. 3
■Press the locking button and move the steering
wheel to the desired position (a, b, c).
Note
Ensure that the locking button engages
correctly!
Starting the engine
Note
Some models have no choke. The engine
is automatically set to the particular starting
process.
■Turn on the fuel tap (if tted – see engine manual).
■Sit on the driver’s seat.
■Switch o and raise the cutter deck:
- Move PTO lever to the O position .
- Set cutting height adjustment lever to “5” (cutter
deck up).
■Actuate the parking brake.
■Move direction of travel lever to “N”.
■Move throttle to .
■If the engine is cold, pull out the choke or set the
throttle to .
■Turn the ignition key to until the engine is
running (attempt to start the engine for max. 5
seconds, wait 10 seconds before attempting to
start the engine again).
When the engine is running, set the ignition key to
/ .
■As soon as the engine is running, slowly push
back the choke/throttle until the engine is running
smoothly.
Stopping the engine
■Move the throttle to the middle position.
■Leave the engine running for approx. 20 seconds.
■Set ignition key to .
■Remove the ignition key.
■Before leaving the mower, actuate the parking
brake.
Driving
Danger
Abrupt starting, sudden stopping, and driving at an
excessively high speed increases the risk of acci-
dents and may damage the device. Be particularly
careful when reversing. Never set/adjust the driver’s
seat while the unit is moving.
Caution! Damage to the device.
Never change the direction of travel without rst
bringing the mower to a standstill.
■Start the engine as indicated.
■Release the parking brake: Fully depress clutch/
brake pedal, push lever to a speed setting.
■Move the direction of travel lever to the corre-
sponding position.
■Slowly release the clutch/brake pedal, the unit
moves o.

14
Tips on lawn care
EN
Stopping the mower
■Depress the clutch/brake pedal until the unit
stops.
Mowing
■In normal mode / (see Operation, ignition
lock): Before reversing the machine, switch o and
raise the cutter deck.
■In reverse mowing mode (see Oper-
ation, ignition lock): Exercise extreme caution
when reverse mowing and do not activate unless
absolutely necessary.
■Do not change direction when the mower is
coasting or driving.
■Start the engine as indicated.
■To ensure adequate power output, move the
throttle to .
■Release the parking brake: Fully depress clutch/
brake pedal, push lever to a speed setting.
■Move the direction-of-travel lever to “F”/ forwards.
■Switch on the cutter deck:
- Switch on PTO .
■Lower the cutter deck.
■Slowly release the clutch/brake pedal, the unit
moves o.
General
When adjusting the cutting height and travel speed,
ensure that the mower is not overloaded. To ensure
problem-free mowing, the cutting height and driving
speed must be adjusted according to the length,
type and moisture of the clippings. If blockages
occur, reduce the driving speed and increase the
cutting height.
Switching the device off
■Stop the mower.
■Step on the brake pedal and actuate the parking
brake.
■Switch o and raise the cutter deck.
■Move the throttle to the middle position.
■After 20 seconds set ignition key to .
■Remove the ignition key.
Note
Leave engine to cool down before placing
the mower in an enclosed space.
Accessories (optional)
Risk of injury from the cutter
Wear safety gloves.
Mulching
Fig. 6
Accessories: Mulch locking part
■Move cutting height adjustment lever to “1” (cutter
deck down).
■Remove the discharge duct (a).
■Attach mulch locking part (b).
Tips on lawn care
Here are some tips to help you keep your lawn look-
ing healthy and ensure uniform growth.
Mowing
A lawn is made up of various dierent types of
grass. If you mow more frequently, the grown of
strongly-rooting grasses is favoured resulting in rm
turf. If you only rarely cut the grass, you will encour-
age the development of high-growing types of grass
and other weeds (e.g., clover and daisies).
The normal height of a lawn is approx. 4-5 cm. Only
1/3 of the total height should be mown; therefore
cut 7–8 cm long grass to normal height. Preferably
do not cut the lawn shorter than 4 cm, otherwise the
turf will be damaged in a dry period. If the grass has
grown particularly high (e.g. during a holiday period),
cut it back to its normal height in stages.
Mulching (using the accessories)
With mulching, the grass is cut into small pieces
(approx. 1 cm) during mowing and is left on the
ground. Lots of nutrients in the cut grass are
retained.
For the best possible result the grass must always
be kept short, see also section “Mowing”.
Follow the instructions for mulching below:
- Do not mow wet grass.
- Never mow more than max. 2 cm of the total
grass length.
- Mow slowly.
- Use maximum engine speed.
- Clean the cutter deck regularly.
Transporting
Drive the mower only short distances otherwise
transport it by vehicle. Transport the device on a
transport vehicle over long distances.
Note: The mower is not approved for public thor-
oughfares in accordance with national road legisla-
tion (StVO).

15
Cleaning/servicing
EN
Short distances
Danger
Solid objects may be hit/propelled by the rotating
cutter deck causing damage.
■Switch o the cutter deck before driving the
mower.
Long distances
Warning: Transport damages
The mode of transport used (e.g. transport vehicle,
loading ramp) must be in accordance with guide-
lines (refer to the respective operating instructions).
During transport the device must be secured against
slipping.
Never change the direction of travel without rst
bringing the mower to a standstill.
Environmental hazard due to leaked fuel
The device must not be tilted when it is transported.
■Prepare a suitable transport vehicle.
■Attach the loading ramp to the vehicle.
■Manually push the mower in neutral onto the
loading surface.
■Actuate the parking brake.
■Secure the power tool against slipping.
Cleaning/servicing
Danger
Injury hazard if engine is started inadver-
tently
Protect yourself against injury. Before all work on
this device.
- Switch o the engine.
- Withdraw the ignition key.
- Actuate the parking brake.
- Wait until all moving parts have come to a stand-
still; the engine must have cooled down.
- Pull the spark plug connector o the engine so
that the engine cannot inadvertently start.
Caution
Do not clean the device with a high-pressure
cleaner.
Cleaning
Note
After use, always thoroughly clean the
mower.
- Park the mower on rm and level ground.
- Actuate the parking brake.
Cleaning the cutter deck
Danger
Injury hazard due to sharp cutting blades
Wear safety gloves.
Caution when cleaning the cutters.
Warning: Motor damage
The device must not be tilted to an angle greater
than 30°. This might cause fuel to run into the com-
bustion chamber and could lead to engine damage.
■Raise the cutter deck fully.
■Clean the cutting compartment with a scrubbing
brush, hand brush or cloth.
Cutters with cleaning nozzle (according to the
model)
Fig. 9
Place the mower on an even surface free of debris,
stones, etc., and engage the locking brake.
1. Use a commercially available quick-release cou-
pling to attach a water hose. Turn on water.
2. Start the engine.
3. Lower the cutter deck, and switch on for a few
minutes.
4. Switch OFF the cutter deck and engine.
5. Detach the water hose.
Repeat steps 1 to 5 for the second cleaning nozzle
(if provided).
At the end of cleaning process (steps 1 to 5):
■Raise the cutters to the top.
■Start the engine, and switch on the cutter deck for
a few minutes to dry it.
Maintenance
Observe the servicing instructions in the engine
manual. At the end of the season, have the mower
inspected and serviced by a service centre.
Caution
Engine oil is hazardous to the environ-
ment
After changing the oil, take the waste oil to a waste
oil collecting point or to a waste disposal company.
Batteries are an environmental hazard
Do not throw used batteries away with domestic
waste. Hand over used batteries to your dealer or to
a waste management company. Remove the battery
before scrapping the mower.
Using jump leads
Danger
Never bridge a defective or frozen battery with jump
leads. Ensure that the machines and the jump lead
clips do not touch that the ignitions are switched o.
■Connect the red jump lead to the positive ter-
minal (+) of the at battery and the donor battery.

16
Shutting down the unit
EN
■Connect the black jump lead rst to the negative
terminal (–) of the donor battery. Connect the
other clip to the frame of the engine block of the
vehicle with the at battery (as far away from the
battery as possible).
Note
If the donor battery is installed in a vehicle,
this vehicle must not be started during the
jump starting process.
■Start the vehicle with the at battery and actuate
the parking brake.
■Disconnect the jump leads in reverse sequence.
Tyre pressure
Caution
Never exceed the maximum permitted tyre pressure
(see tyre wall). When pumping up the tyres, do not
stand in front of or over the tyre.
The recommended operating tyre pressure is:
- front: 1.0 bar
- rear: 0.7 bar
Excessive tyre pressure reduces the service life of
the tyres. Always check the tyre pressure before
driving.
After 5 operating hours
■First engine oil change. See engine manual for
subsequent intervals. Use the oil channel (op-
tional, Fig. 8) to drain.
After 10 operating hours
■Lubricate all rotating and bearing points (operating
lever, height adjustment of the cutter deck ...) with
several drops of light oil.
■Clean battery terminals.
Every 25 operating hours
■Lubricate all blade shafts, tensioning pulleys and
tensioning pulley holders via the grease nipples
using grease type 251H EP. Arrange for this work
to be carried out by a specialist workshop.
■Apply multipurpose grease to the teeth on the
steering gear.
■Lubricate the steering linkage with a few drops of
light oil.
■Lubricate the wheel bearings and front wheel axes
with a multipurpose grease applied to the grease
nipples.
Every 50 operating hours
■Dirt and grass remnants must be removed from
the drive gear by a specialist workshop.
If required
Charge the battery
If you are not using the device for a prolonged
period, removal of the battery from the device and
charging prior to storage is recommended, as well
as every 2 months during storage, and before start-
ing up the device again.
Note
Follow the instructions in the operating man-
ual for your battery charger.
Replace fuses
■Replace defective fuses only with ones of an
equal rating.
Once a season
■Apply multipurpose grease to the teeth on the
steering gear.
■Lubricate the steering linkage with a few drops of
light oil.
■Lubricate all rotating and bearing points (operating
lever, height adjustment of the cutter deck ...) with
several drops of light oil.
■Clean the spark plug and check the gap between
the electrodes or replace the plug. See engine
handbook.
■The rear axles must be lubricated with a spe-
cial-purpose (water-repellent) grease in a spe-
cialist workshop.
■The cutting blade must be sharpened or replaced
by a specialist workshop.
Shutting down the unit
Caution
Material damage to the device
Only store the mower once the engine has cooled in
a clean and dry room or area.
During prolonged storage, e.g. in winter, ensure that
the device is protected against rust.
After the season or if the device will not be used for
more than a month:
■Clean the mower and grass catcher attachment.
■Wipe all metal parts with an oily rag or spray them
with oil to protect them from rust.
■Charge battery with a battery charger.
■When shutting down the appliance for the winter,
remove the battery, charge it and store in a dry/cool
location (protected from frost). Charge the battery
every 4–6 weeks as well as before re-installing it.
■Drain the fuel (outdoors only) and shut down the
engine as described in the engine manual.
■Inate tyres according to the specications on the
tyre walls. If tyres have no specications on the
tyre walls, inate to a pressure of 0.9 bar.
■Store the mower in a clean, dry room.

17
Warranty
EN
Warranty
The warranty rules issued by our company or the
importer apply to every country.
Under the terms of the warranty we will repair faults
on your device free of charge, insofar as material or
manufacturing defects are the cause.
To make a claim under warranty please contact your
seller or your nearest branch.
Information on the engine
The engine manufacturer is liable for all engine-re-
lated problems with respect to power, power mea-
surement, technical specications, warranty and
service. Information can be found in the owner’s/
user handbook supplied separately by the engine
manufacturer.
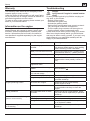
Troubleshooting
Danger
Injury hazard if engine is started inadver-
tently
Protect yourself against injury. Before carrying out
any work on this mower
- Switch o the engine.
- Withdraw the ignition key.
- Actuate the parking brake.
- Wait until all moving parts have come to a stand-
still; the engine must have cooled down.
- Pull the spark plug connector o the engine so
that the engine cannot inadvertently start.
Faults which occur while you are using your mower
often have simple causes which you should know
and may be able to rectify yourself. If you are in any
doubt however, your specialist workshop will be
happy to provide assistance.
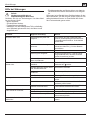
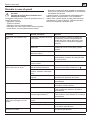
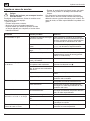
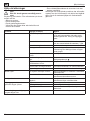
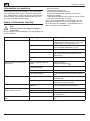
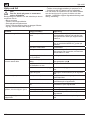
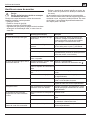
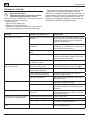
Problem Possible cause(s) Remedy
Starter does not turn. Safety locking system has
actuated. To start the engine, sit on the driver’s seat,
fully depress brake pedal or apply parking
brake. Switching o the cutter deck.
Battery not connected correctly. Connect red cable to the (+) battery termi-
nal and black cable to (–) battery terminal.
Discharged or low battery. Charge the battery.
Fuse has tripped. Replace fuse. If the fuse blows repeatedly,
determine the cause (usually a short-cir-
cuit).
Loose earth cable between
engine and frame. Connect earth cable.
Starter turns but engine does not
start. Choke and throttle in wrong
position. Pull out choke.
Move throttle to .
Carburettor not receiving any
fuel, fuel tank empty. Top up with fuel.
Defective or dirty spark plug. Check spark plug; see engine manual.
No ignition spark. Arrange for the ignition to be checked in a
specialist workshop.
Engine producing smoke. Too much oil in engine. Switch the device o immediately.
Check engine oil level.
Engine defective. Switch the device o immediately. Arrange
for a specialist workshop to check the
engine.
Strong vibrations. Damaged blade shaft or defec-
tive cutter. Switch the device o immediately. Defec-
tive parts must be replaced by a specialist
workshop.
Cutter deck does not discharge
grass or cuts unevenly. Engine speed too low. Increase throttle.
Travelling speed too high. Set to a lower travelling speed.
Cutting blade is blunt. Arrange for a specialist workshop to sharp-
en or replace the blade.
Engine is running; cutter deck
is not mowing. V-belt torn. The V-belt must be replaced in a specialist
workshop.

18
Pour votre sécurité
FR
Sommaire
Indications à propos de la plaque signa-
létique
Ces indications sont très importantes pour l’iden-
tication ultérieure de l’appareil en vue de la com-
mande des pièces de rechange de l’appareil et pour
le service après-vente. Vous trouverez la plaque
signalétique sous le siège du conducteur. Veuillez
reporter dans le champ ci-dessous toutes les indi-
cations gurant sur la plaque signalétique de votre
appareil.
Ces indications ainsi que d’autres indications à
propos de l’appareil gurent sur la déclaration de
conformité CE séparée, qui fait partie intégrante de
la présente notice d’utilisation.
Pour votre sécurité
Utilisation correcte de l'appareil
Cet appareil est destiné à servir
- de tondeuse autoportée pour tondre les surfaces
gazonnées du jardin de la maison et d'un jardin
d'agrément,
- avec des accessoires expressément homologués
pour cette tondeuse à gazon autoportée,
- conformément aux descriptions et aux consignes
de sécurité gurant dans les présentes instruc-
tions d'emploi.
Toute autre utilisation est non conforme. Toute
utilisation non conforme à la destination prévue
implique la perte de la garantie et le refus du fabri-
cant d'assumer une quelconque responsabilité.
L’utilisateur répond de tous les dommages occasion-
nés aux tiers et à leurs biens.
Les modications apportées arbitrairement à l'appa-
reil dégagent le fabricant de toute responsabilité à
l'égard des dommages en résultant.
Cet appareil n’est pas autorisé à fonctionner sur la
voie publique ni à transporter des passagers.
Consignes de sécurité générales
Avant la première utilisation de l’appareil, lisez atten-
tivement la présente notice d’utilisation dans son
intégralité et respectez toutes les consignes qu’elle
contient.
Informez les autres utilisateurs de son utilisation
correcte.
N’utilisez l’appareil que dans l’état technique prescrit
et livré par le fabricant.
Conservez soigneusement ce mode d'emploi et gar-
dez-le à portée de main pour chaque intervention.
En cas de changement de propriétaire, remettez-lui
également le mode d’emploi avec l’appareil.
Les pièces de rechange et les accessoires doivent
satisfaire aux exigences dénies par le fabricant.
N’utilisez donc que des pièces de rechange et
accessoires d’origine ou des pièces de rechange et
accessoires homologués par le fabricant.
Conez exclusivement les réparations à un atelier
spécialisé.
Avant le travail avec l’appareil
En cas de fatigue ou de maladie, il est interdit d’utili-
ser l’appareil.
Les personnes utilisant l’appareil ne doivent pas se
trouver sous l’emprise de substances psychoactives
(p. ex. alcool, drogues ou médicaments).
L’utilisation de cet appareil est interdite aux per-
sonnes âgées de moins de 16 ans.
Cet appareil n’est pas destiné à être utilisé par des
personnes (y compris les enfants) présentant des
capacités physiques, sensorielles ou mentales res-
treintes, ou en l’absence de l’expérience et/ou des
connaissances requises, sauf si elles sont surveil-
lées par une personne responsable de leur sécurité,
ou si elles ont reçu de sa part des instructions sur la
façon d’utiliser l’appareil.
Surveiller les enfants an de garantir qu’ils ne jouent
pas avec l’appareil.
Avant de commencer le travail, familiarisez-vous
avec tous les équipements et éléments de com-
mande ainsi que leurs fonctions.
Ne stockez le carburant que dans des récipients
autorisés à cet eet et jamais à proximité de sources
de chaleur (p. ex. fours ou accumulateurs d'eau
chaude).
En cas de détérioration, remplacez le tuyau d’échap-
pement, le réservoir de carburant ou le bouchon de
réservoir.
Accouplez les remorques ou appareils rapportés en
respectant les prescriptions.
Pour votre sécurité .............................................. 18
Montage................................................................ 21
Vue d’ensemble de votre appareil ........................ 21
Utilisation .............................................................. 22
Conseils pour l'entretien de la pelouse ................. 25
Transport .............................................................. 25
Nettoyage / Maintenance...................................... 25
Mise hors service.................................................. 27
Garantie ................................................................ 27
Information sur le moteur...................................... 27
Dérangements et remèdes ................................... 28

19
Pour votre sécurité
FR
Ces derniers, la remorque ou les poids de ballast
ainsi que les bacs de ramassage pleins inuencent
le comportement de conduite de l’appareil, notam-
ment sa maniabilité, sa capacité de freinage et sa
propension au renversement.
Pendant le travail avec l’appareil
Lorsque vous vous servez de l’appareil ou le mani-
pulez, portez des vêtements de travail appropriés
tels que des chaussures de sécurité, des pantalons
longs, des vêtements moulants, des lunettes de
protection et une protection auditive.
Le fait de travailler sans casque anti-bruit risque
d'entraîner une perte auditive.
Utilisez uniquement l’appareil à condition qu’il soit
dans un état technique irréprochable.
Ne modiez jamais les réglages du moteur précon-
gurés en usine.
Ne faites jamais le plein lorsque le moteur tourne ou
lorsqu'il est chaud.
Remplissez le réservoir uniquement en plein air.
Evitez toute amme nue ainsi que la production
d’étincelles et ne fumez pas.
Assurez-vous qu’aucune personne, notamment des
enfants, ni des animaux ne se trouvent dans la zone
de travail.
Examinez le terrain sur lequel doit passer le trac-
teur et retirez-en tous les objets susceptibles d’être
happés puis catapultés. Vous éviterez ainsi toute
mise en danger de personnes et tous dommages
sur l’appareil.
Ne tondez pas sur des pentes ayant une déclivité
supérieure à 20 %. Le travail sur les pentes est
dangereux ; l’appareil peut basculer ou glisser. Sur
les pentes, démarrer et freiner toujours le plus en
douceur possible, laisser le moteur embrayé dans
les descentes et rouler lentement. Ne roulez jamais
transversalement à la pente, mais toujours unique-
ment vers la montée et vers la descente.
Avec l’appareil, ne travaillez que de jour ou avec un
éclairage articiel susant.
L’appareil n’est pas homologué pour le transport de
personnes.
Avant tous les travaux sur l'appareil
Protégez-vous contre les blessures. Avant tous les
travaux sur cet appareil.
- Arrêtez le moteur.
- Retirez la clé de contact.
- Serrez le frein de stationnement.
- Attendre que toutes les pièces mobiles se soient
entièrement immobilisées ; le moteur doit avoir
refroidi.
- Débranchez la cosse de la bougie d'allumage
sur le moteur pour en empêcher tout démarrage
intempestif.
Après le travail avec l’appareil
Ne descendez de l’appareil qu’après avoir éteint
le moteur, serré le frein à main et retiré la clé de
contact.
Dispositifs de sécurité
Les dispositifs de sécurité servent à vous protéger
et doivent toujours être opérationnels.
Il est interdit d'apporter des modications aux dispo-
sitifs de sécurité ou de détourner leur fonction.
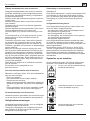
Voici les dispositifs de sécurité :
Clapet d’éjection / Pièce obturatrice pour le
mulching
Figure 6
Ces pièces vous protègent contre les blessures par
la lame ou par des objets catapultés. L’appareil ne
pourra être exploité qu’avec le clapet d’éjection (a)
monté ou la pièce obturatrice (b) pour le paillage.
Système de coupure de sécurité
Le système de coupure de sécurité ne permet le
démarrage du moteur que
- si le conducteur a pris place sur son siège,
- le frein de stationnement est actionné,
- le levier inverseur du sens de roulage se trouve
sur « N »,
- le clapet d’éjection, la pièce obturatrice pour le
paillage ou le canal d’éjection sont montés,
- le mécanisme de coupe est désactivé.
Le système de coupure de sécurité éteint le moteur
dès que l’utilisateur quitte le siège sans actionner
le frein à main et sans désactiver le mécanisme de
coupe.
Sur les appareils sans fonction OCR ou dont la fonc-
tion OCR a été désactivée, le système de coupure
de sécurité empêche de partir en marche arrière
avec le mécanisme de coupe enclenché (coupure
automatique du moteur). Pour cette raison, désacti-
vez le mécanisme de coupe avant la marche arrière.
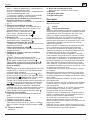
Symboles sur l’appareil
Diérents symboles sont apposés sur l’appareil
sous forme d’autocollants. Voici l’explication de ces
symboles :
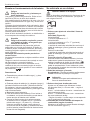
Attention ! Veuillez lire la notice d’ins-
tructions avant l’utilisation !

20
Pour votre sécurité
FR
Éloignez les tiers de la zone dange-
reuse !
Risque de blessures dû aux lames ou
aux pièces en rotation.
Risque de blessures dû aux lames
ou aux pièces en rotation. Ne jamais
garder les mains et les pieds dans les
orices lorsque la machine fonctionne.
MAX 20%
Le travail sur les pentes à forte déclivi-
té peut être dangereux.
Risque de blessure par l’herbe ou par
des objets durs éjectés.
Attention ! Risque d’explosion.
Acide de batterie / Risque de brûlures
chimiques.
Pour monter ou descendre de l’appa-
reil, ne jamais utiliser le mécanisme
de coupe comme marchepied.
Danger ! Mise en marche accidentelle.
Avant les travaux sur l’appareil,
débranchez la cosse de la bougie d’al-
lumage. Tenez vos mains et vos pieds
à l’écart des pièces en rotation.
Avant tous les travaux sur l’appareil,
retirer la clé de contact et respecter
les consignes dans le présent manuel.
3E
Les batteries usées ne doivent pas
être mises aux ordures ménagères.
Prudence !
Portez des lunettes de protection.
Danger ! Il est interdit de faire un feu,
des étincelles, d’utiliser une amme
nue et de fumer !
Avant le basculement de l’appareil, démonter la
batterie.
L’emploi de l’appareil n’est autorisé que si celui-ci
est équipé du bac de ramassage d’herbe branché à
l’orice d’éjection, au clapet d’éjection ou à la pièce
obturatrice pour paillage.
Veillez à ce que ces symboles soient toujours parfai-
tement lisibles sur l’appareil.
Remplacez les symboles abîmés ou illisibles.
Symboles utilisés dans la notice
La présente notice utilise les symboles suivants :
Danger
Ce symbole attire votre attention sur les
dangers liés aux activités décrites, qui
constituent un danger pour les personnes.
Attention
Ce symbole désigne des risques liés aux
activités décrites et qui peuvent entraîner un
endommagement de l’appareil.
Remarque
Caractérise les informations et conseils
d’utilisation importants.
Consigne pour la mise au rebut
Éliminez les restes d’emballage produits, les appa-
reils usagés etc. d'après les prescriptions locales.
La pagina si sta caricando...
La pagina si sta caricando...
La pagina si sta caricando...
La pagina si sta caricando...
La pagina si sta caricando...
La pagina si sta caricando...
La pagina si sta caricando...
La pagina si sta caricando...
La pagina si sta caricando...
La pagina si sta caricando...
La pagina si sta caricando...
La pagina si sta caricando...
La pagina si sta caricando...
La pagina si sta caricando...
La pagina si sta caricando...
La pagina si sta caricando...
La pagina si sta caricando...
La pagina si sta caricando...
La pagina si sta caricando...
La pagina si sta caricando...
La pagina si sta caricando...
La pagina si sta caricando...
La pagina si sta caricando...
La pagina si sta caricando...
La pagina si sta caricando...
La pagina si sta caricando...
La pagina si sta caricando...
La pagina si sta caricando...
La pagina si sta caricando...
La pagina si sta caricando...
La pagina si sta caricando...
La pagina si sta caricando...
La pagina si sta caricando...
La pagina si sta caricando...
La pagina si sta caricando...
La pagina si sta caricando...
La pagina si sta caricando...
La pagina si sta caricando...
La pagina si sta caricando...
La pagina si sta caricando...
La pagina si sta caricando...
La pagina si sta caricando...
La pagina si sta caricando...
La pagina si sta caricando...
La pagina si sta caricando...
La pagina si sta caricando...
La pagina si sta caricando...
La pagina si sta caricando...
La pagina si sta caricando...
La pagina si sta caricando...
La pagina si sta caricando...
La pagina si sta caricando...
La pagina si sta caricando...
La pagina si sta caricando...
La pagina si sta caricando...
La pagina si sta caricando...
La pagina si sta caricando...
La pagina si sta caricando...
La pagina si sta caricando...
La pagina si sta caricando...
La pagina si sta caricando...
La pagina si sta caricando...
La pagina si sta caricando...
La pagina si sta caricando...
La pagina si sta caricando...
La pagina si sta caricando...
La pagina si sta caricando...
La pagina si sta caricando...
La pagina si sta caricando...
La pagina si sta caricando...
La pagina si sta caricando...
La pagina si sta caricando...
La pagina si sta caricando...
La pagina si sta caricando...
La pagina si sta caricando...
La pagina si sta caricando...
La pagina si sta caricando...
La pagina si sta caricando...
La pagina si sta caricando...
La pagina si sta caricando...
La pagina si sta caricando...
La pagina si sta caricando...
La pagina si sta caricando...
La pagina si sta caricando...
La pagina si sta caricando...
La pagina si sta caricando...
La pagina si sta caricando...
La pagina si sta caricando...
La pagina si sta caricando...
La pagina si sta caricando...
La pagina si sta caricando...
La pagina si sta caricando...
La pagina si sta caricando...
La pagina si sta caricando...
La pagina si sta caricando...
La pagina si sta caricando...
La pagina si sta caricando...
La pagina si sta caricando...
La pagina si sta caricando...
La pagina si sta caricando...
La pagina si sta caricando...
La pagina si sta caricando...
La pagina si sta caricando...
La pagina si sta caricando...
La pagina si sta caricando...
La pagina si sta caricando...
La pagina si sta caricando...
La pagina si sta caricando...
La pagina si sta caricando...
La pagina si sta caricando...
La pagina si sta caricando...
La pagina si sta caricando...
La pagina si sta caricando...
La pagina si sta caricando...
La pagina si sta caricando...
La pagina si sta caricando...
La pagina si sta caricando...
La pagina si sta caricando...
La pagina si sta caricando...
La pagina si sta caricando...
La pagina si sta caricando...
La pagina si sta caricando...
La pagina si sta caricando...
La pagina si sta caricando...
La pagina si sta caricando...
La pagina si sta caricando...
La pagina si sta caricando...
La pagina si sta caricando...
La pagina si sta caricando...
La pagina si sta caricando...
La pagina si sta caricando...
La pagina si sta caricando...
La pagina si sta caricando...
La pagina si sta caricando...
La pagina si sta caricando...
La pagina si sta caricando...
La pagina si sta caricando...
-
 1
1
-
 2
2
-
 3
3
-
 4
4
-
 5
5
-
 6
6
-
 7
7
-
 8
8
-
 9
9
-
 10
10
-
 11
11
-
 12
12
-
 13
13
-
 14
14
-
 15
15
-
 16
16
-
 17
17
-
 18
18
-
 19
19
-
 20
20
-
 21
21
-
 22
22
-
 23
23
-
 24
24
-
 25
25
-
 26
26
-
 27
27
-
 28
28
-
 29
29
-
 30
30
-
 31
31
-
 32
32
-
 33
33
-
 34
34
-
 35
35
-
 36
36
-
 37
37
-
 38
38
-
 39
39
-
 40
40
-
 41
41
-
 42
42
-
 43
43
-
 44
44
-
 45
45
-
 46
46
-
 47
47
-
 48
48
-
 49
49
-
 50
50
-
 51
51
-
 52
52
-
 53
53
-
 54
54
-
 55
55
-
 56
56
-
 57
57
-
 58
58
-
 59
59
-
 60
60
-
 61
61
-
 62
62
-
 63
63
-
 64
64
-
 65
65
-
 66
66
-
 67
67
-
 68
68
-
 69
69
-
 70
70
-
 71
71
-
 72
72
-
 73
73
-
 74
74
-
 75
75
-
 76
76
-
 77
77
-
 78
78
-
 79
79
-
 80
80
-
 81
81
-
 82
82
-
 83
83
-
 84
84
-
 85
85
-
 86
86
-
 87
87
-
 88
88
-
 89
89
-
 90
90
-
 91
91
-
 92
92
-
 93
93
-
 94
94
-
 95
95
-
 96
96
-
 97
97
-
 98
98
-
 99
99
-
 100
100
-
 101
101
-
 102
102
-
 103
103
-
 104
104
-
 105
105
-
 106
106
-
 107
107
-
 108
108
-
 109
109
-
 110
110
-
 111
111
-
 112
112
-
 113
113
-
 114
114
-
 115
115
-
 116
116
-
 117
117
-
 118
118
-
 119
119
-
 120
120
-
 121
121
-
 122
122
-
 123
123
-
 124
124
-
 125
125
-
 126
126
-
 127
127
-
 128
128
-
 129
129
-
 130
130
-
 131
131
-
 132
132
-
 133
133
-
 134
134
-
 135
135
-
 136
136
-
 137
137
-
 138
138
-
 139
139
-
 140
140
-
 141
141
-
 142
142
-
 143
143
-
 144
144
-
 145
145
-
 146
146
-
 147
147
-
 148
148
-
 149
149
-
 150
150
-
 151
151
-
 152
152
-
 153
153
-
 154
154
-
 155
155
-
 156
156
-
 157
157


Cub Cadet 13B726JD603 Manuale utente
- Categoria
- Tosa erba
- Tipo
- Manuale utente
in altre lingue
- français: Cub Cadet 13B726JD603 Manuel utilisateur
- español: Cub Cadet 13B726JD603 Manual de usuario
- Nederlands: Cub Cadet 13B726JD603 Handleiding
- português: Cub Cadet 13B726JD603 Manual do usuário
- dansk: Cub Cadet 13B726JD603 Brugermanual
- polski: Cub Cadet 13B726JD603 Instrukcja obsługi
- svenska: Cub Cadet 13B726JD603 Användarmanual
Altri documenti
-
Toro 12-32 Rear Engine Rider Manuale utente
-
-
-
Husqvarna YTH2348-917289560 Manuale del proprietario
-
-
Murray 425615x50A Instruction book
-
-
Wolf Garten S 96.130 T Manuale del proprietario
-
Weed Eater HD12538F Manuale utente
-
EINHELL ST 16 Istruzioni per l'uso