
WATCH S1 User Manual . 01

Manual de usuario de Xiaomi Watch S1 .15
Manuale utente Xiaomi Watch S1 .29
Xiaomi Watch S1 Benutzerhan dbuch .43
Instrukcja obsługi zegarka Xiaomi Watch S1 .100
Gebruikershandleiding van Xiaomi Watch S1 .114
Xiaomi Watch S1 Kullanım Kılavuzu .142
Brugervejledning til Xiaomi Watch S1 .156
Manuel d’utilisation de XiaomiWatchS1 .57
Руководство пользователя Смарт-часов XiaomiWatchS1 .
71
Посібник користувача Смарт-годинника XiaomiWatchS1 .
86
Manual do utilizador do Smartwatch XiaomiWatchS1 .
128

Xiaomi Watch S1 bruksanvisning .170
Xiaomi Watch S1 – brukerhåndbok .198
Manual de utilizare a ceasului Xiaomi S1 .212
Εγχειρίδιο χρήστη ρολογιού Xiaomi S1 .226
Uživatelská příručka k hodinkám Xiaomi S1 .240
Manual do Usuário do Relógio Xiaomi Watch S1 .254
Xiaomi
ﻦﻣ S1 ﺔﻋﺎﺳ مﺪﺨﺘﺴﻣ ﻞﻴﻟد .268
Xiaomi Watch S1 -älykellon käyöopas .184

01
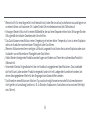
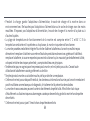
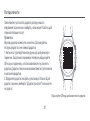
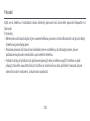
Read this manual carefully before use, and retain it for future reference. For more detailed
information about the watch, please connect it with the app and view the instructions.
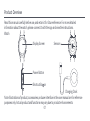
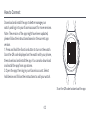
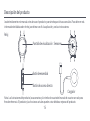
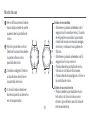
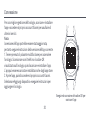
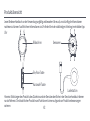
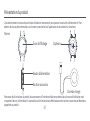
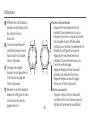
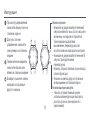
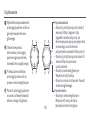
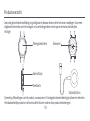
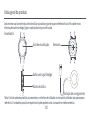
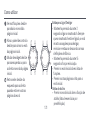
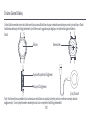
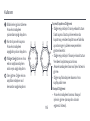
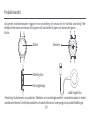
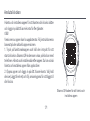
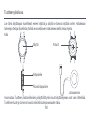
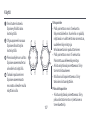
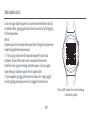
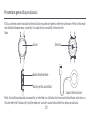
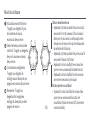
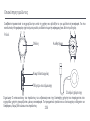
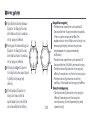
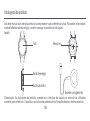
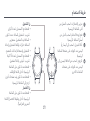
Product Overview
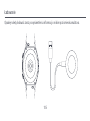
Watch
Display Screen Sensors
Shortcut Buon
Charging Dock
Note: Illustrations of product, accessories, and user interface in the user manual are for reference
purposes only. Actual product and functions may vary due to product enhancements.
Power Buon

02
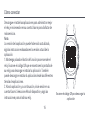
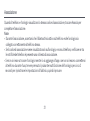
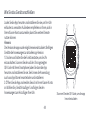
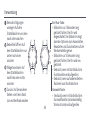
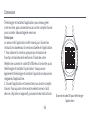
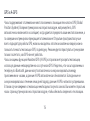
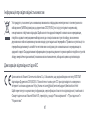
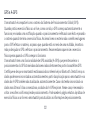
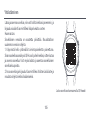
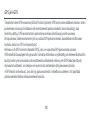
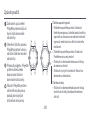
How to Connect
Download and install the app to beer manage your
watch, and log in to your Xiaomi account for more services.
Note: The version of the app might have been updated,
please follow the instructions based on the current app
version.
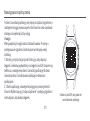
1. Press and hold the function buon to turn on the watch.
Scan the QR code displayed on the watch with your phone,
then download and install the app. You can also download
and install the app from app stores.
2. Open the app, then log in your Xiaomi account. Select
Add device and follow the instructions to add your watch.
Scan the QR code to download the app

03
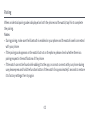
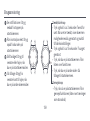
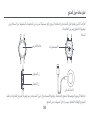
Pairing
When an identical pairing code is displayed on both the phone and the watch, tap Pair to complete
the pairing.
Notes:
• During pairing, make sure the Bluetooth is enabled on your phone and the watch is well connected
with your phone.
• If the pairing code appears on the watch but not on the phone, please check whether there is a
pairing request in the notifications of the phone.
• If the watch cannot be found while adding it to the app, or cannot connect with your phone during
use, please press and hold the function buon of the watch for approximately 3 seconds to restore
it to factory seings, then try again.

04
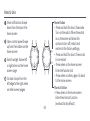
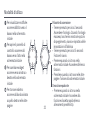
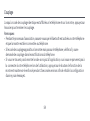
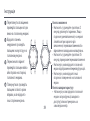
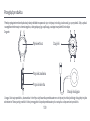
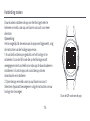
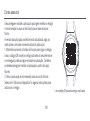
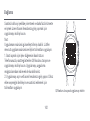
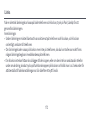
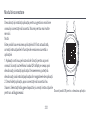
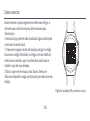
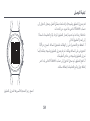
How to Use
View notifications: Swipe
down from the top on the
home screen
Open control panel: Swipe
up from the boom on the
home screen
Switch widget: Swipe le
or right when on the home
screen page
Go back: Swipe from the
le edge to the right when
on other screen pages
Power Buon
Shortcut Buon
• Press and hold for about 3 seconds:
Turn on the watch. When the watch
is on, the screen will show the
options to turn off, restart and
restore to the factory seings.
• Press and hold for about 15 seconds:
Force restart.
• Press when on the home screen:
Enter the function list.
• Press when on other pages: Go back
to the home screen.
• Press when on the home screen:
Enter the shortcut function
(workout list by default).

05
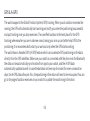
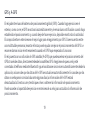
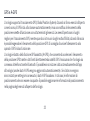
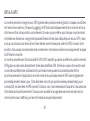
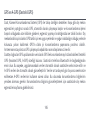
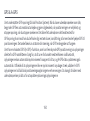
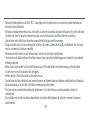
GPS & A-GPS
The watch supports the Global Position System (GPS) tracking. When you do outdoor exercises like
running, the GPS will automatically start working and notify you when the positioning is successful,
and quit tracking once you stop exercises. The open field outdoor is the best place for the GPS
tracking; whereas when you are in a dense crowd, raising your arm up can beer help GPS to the
positioning. It is recommended to start your workout only when the GPS starts working.
The watch has an Assisted GPS (A-GPS) feature which can accelerate GPS positioning via the data
directly from the GPS satellites. Make sure your watch is connected with the phone via the Bluetooth,
the data can be automatically synchronized from app to your watch, and the A-GPS data
automatically updated as well. In case the data has not been synchronized for seven consecutive
days, the A-GPS data will expire. If so, the positioning information will need to be re-acquired. You can
go to the page of outdoor exercises on your watch to update the positioning information.

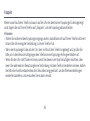
06
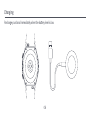
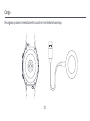
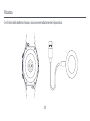
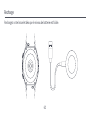
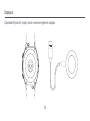
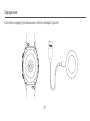
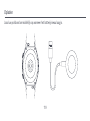
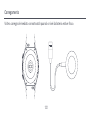
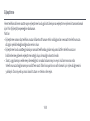
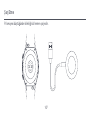
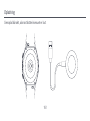
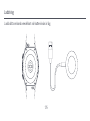
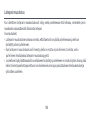
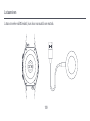
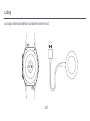
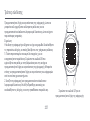
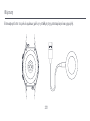
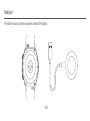
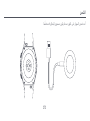
Charging
Recharge your band immediately when the baery level is low.

07
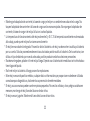
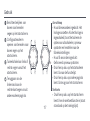
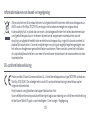
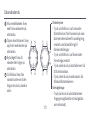
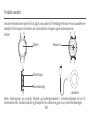
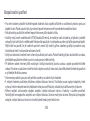
Safety Precautions
• For daily use, comfortably tighten the watch around your wrist about one-finger width away from your wrist
bone. Adjust the strap to ensure the heart rate sensor can collect data normally.
• When using the watch to measure your heart rate, please hold your wrist still.
• The watch has a water resistance rating of 5ATM (50 meters in depth). It can be worn in the swimming pool,
while swimming near the shore, or during other shallow-water activities. However, It cannot be used in hot
showers, sauna, or diving. Furthermore, remember to avoid the watch being directly impacted by swi
currents during water sports. The water-resistant function is not permanent and may decline over time.
• The touchscreen of the watch does not support underwater operations. When the watch comes into contact
with water, use a so cloth to wipe away excess water from its surface before use.
• During daily use, avoid wearing the watch too tightly. Keep its contact area dry and regularly clean the strap
with water. Immediately stop using the watch and seek medical assistance if the contact area on your skin
shows signs of redness or swelling.
• The product information is listed on the back case of the watch for your reference.
• Please use the included charging dock to charge the watch. Only use the power adapters that comply with
the local safety standards or certified and supplied by qualified manufacturers.

08
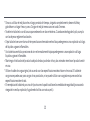
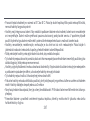
• Keep the power adapter, charging dock, and watch in a dry environment while charging. Do not touch the
power adapter or charging dock with wet hands. Do not expose the power adapter, charging dock, and watch
to rain or other liquids.
• The operating temperature of the watch is 0oC to 45oC. If the ambient temperature is too high or too low, the
watch may malfunction.
• The watch has a built-in baery. To avoid damage to the baery or the watch, do not disassemble and replace
the baery by yourself. Only the authorized service providers can replace the baery; otherwise, it will cause
potential dangers even personal injuries if a wrong type of baery is used.
• Do not disassemble, strike, crush or throw the watch into a fire. Stop using the baery immediately if there is
any swelling or fluid leakage.
• Never throw the watch or its baery into a fire so as to avoid an explosion.
• This watch is not a medical device, any data or information provided by the watch should not be used as a basis
for diagnosis, treatment, and prevention of diseases.
• The watch and its accessories may contain small parts. To avoid choking or other hazards or damages caused
by the children, keep the watch out of the reach of children.
• The watch is not a toy. Keep it out of reach of children.

09
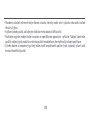
• If the watch will not be used for an extended period, turn it off aer fully charging and then store it in a cool and
dry place. Recharge the watch at least once every 3 months.
• Do not put the baery in trash that is disposed of in landfills. When disposing of the baery, comply with local
laws or regulations.
• Leaving a baery in an extremely high temperature surrounding environment that can result in an explosion or
the leakage of flammable liquid or gas.
• A baery subjected to extremely low air pressure that may result in an explosion or the leakage of flammable
liquid or gas.
• Keep the product's indicator away from the eyes of children and animals while the product is in use.
• Please use the original charging cable in accordance with the specifications described in the manual. The
charging cable cannot be used to charge other products, nor can it be used with chargers that exceed the
input specifications.
• Replacement of a baery with an incorrect type that can defeat a safeguard (such as catching fire, explosion,
leakage of corrosive electrolyte etc).

10
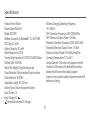
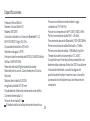
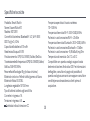
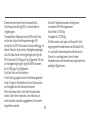
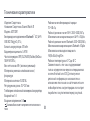
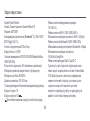
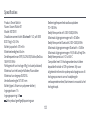
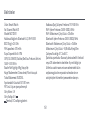
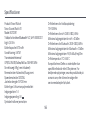
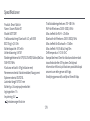
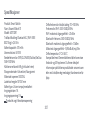
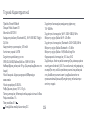
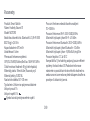
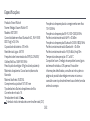
Specifications
ProductSmart Watch
Name: Xiaomi Watch S1
Model: M2112W1
Wireless Connectivity: Bluetooth® 5.2 , Wi-Fi IEEE
802.11b/g/n 2.4 GHz
Baery Capacity: 470 mAh
Water Resistance: 5 ATM
Transmiing Frequency of GPS/GLONASS/Galileo/
BeiDou: 1559–1610 MHz
Watch Net Weight: 69 g (Including strap)
Strap Materials: Calfskin leather/Fluorine rubber
Buckle Material: SUS316L
Adjustable Length: 157–241 mm
Baery Type: Lithium-ion polymer baery
Input Current: 1 A
Input Voltage: 5 V
The symbol indicates DC voltage
Wireless Charging Operating Frequency:
110–148 KHz
Wi-Fi Operation Frequency: 2400–2483.5 MHz
Wi-Fi Maximum Output Power: <20 dBm
Bluetooth Operation Frequency: 2400–2483.5 MHz
Bluetooth Maximum Output Power: <13 dBm
Maximum Output Power: -16.95 dBuA/m@10m
Operating Temperature: 0°C to 45°C
Compatible with: This watch only supports certain
Android or iOS systems. For detailed information,
please check this watch's product page on
www.mi.com or consult sales/customer service staff
before purchasing.

11
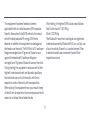
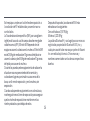
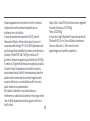
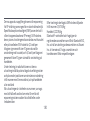
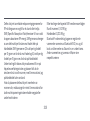
This equipment has been tested and meets
applicable limits for radio frequency (RF) exposure.
Specific Absorption Rate (SAR) refers to the rate at
which the body absorbs RF energy. SAR limits
depend on whether this equipment is used against
the head or on the wrist. The SAR limit is 2.0 was per
kilogram averaged over 10 grams of tissue for use
against the head and 4.0 was per kilogram
averaged over 10 grams of tissue for use on the wrist.
During testing, this equipment radios are set to their
highest transmission levels and placed in positions
that simulate use next to the mouth, with 5 mm
separation, and on the wrist, with no separation.
When placing this equipment near your mouth, keep
at least 5 mm of separation to ensure exposure levels
remain at or below the as-tested levels.
Aer testing, the highest SAR values are as follows:
Next to the mouth: 0.147 W/kg
Wrist: 0.222 W/kg
The Bluetooth® word mark and logos are registered
trademarks owned by Bluetooth SIG, Inc. and any use
of such marks by Xiaomi Inc. is under license. Other
trademarks and trade names are those of their
respective owners.

12
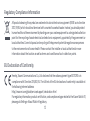
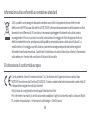
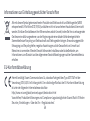
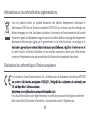
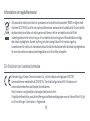
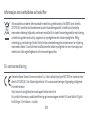
Regulatory Compliance Information
EU Declaration of Conformity
All products bearing this symbol are waste electrical and electronic equipment (WEEE as in directive
2012/19/EU) which should not be mixed with unsorted household waste. Instead, you should protect
human health and the environment by handing over your waste equipment to a designated collection
point for the recycling of waste electrical and electronic equipment, appointed by the government or
local authorities. Correct disposal and recycling will help prevent potential negative consequences
to the environment and human health. Please contact the installer or local authorities for more
information about the location as well as terms and conditions of such collection points.
Hereby, Xiaomi Communications Co., Ltd. declares that the radio equipment type M2112W1 is in
compliance with Directive 2014/53/EU. The full text of the EU declaration of conformity is available at
the following internet address:
hp://www.mi.com/global/service/support/ declaration.html
For regulatory information, product certification, and compliance logos related to the Xiaomi Watch S1,
please go to Seings >About Watch>Regulatory.

13
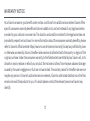
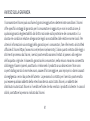
WARRANTY NOTICE
As a Xiaomi consumer, you benefit under certain conditions from additional warranties. Xiaomi offers
specific consumer warranty benefits which are in addition to, and not instead of, any legal warranties
provided by your national consumer law. The duration and conditions related to the legal warranties are
provided by respective local laws. For more information about the consumer warranty benefits, please
refer to Xiaomi's official website hps://www.mi.com/en/service/warranty/. Except as prohibited by laws
or otherwise promised by Xiaomi, the aer-sales services shall be limited to the country or region of the
original purchase. Under the consumer warranty, to the fullest extent permied by law, Xiaomi will, at its
discretion, repair, replace or refund your product. Normal wear and tear, force majeure, abuse or damage
caused by the user's negligence or fault are not warranted. The contact person for the aer-sale service
may be any person in Xiaomi's authorized service network, Xiaomi's authorized distributors or the final
vendor who sold the products to you. If in doubt please contact the relevant person as Xiaomi may
identify.

14
The present warranties do not apply in Hong Kong and Taiwan.
Products which were not duly imported and/or were not duly manufactured by Xiaomi and/or were
not duly acquired from Xiaomi or a Xiaomi’s official seller are not covered by the present warranties. As
per applicable law you may benefit from warranties from the non-official retailer who sold the product.
Therefore, Xiaomi invites you to contact the retailer from whom you purchased the product.
For the information not covered in this quick start guide, please go to www.mi.com
For detailed information on the above functions, please scan the QR code or connect the watch with
the app to view the instructions.

15
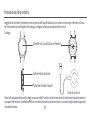
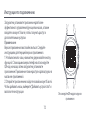
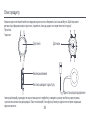
Descripción del producto
Reloj
Pantalla de visualización Sensores
Botón de encendido
Botón de acceso directo
Cargador
Lea detenidamente este manual antes de usar el producto y consérvelo para futuras consultas. Para obtener más
información detallada sobre el reloj, conéctese con él a la aplicación y vea las instrucciones.
Nota: Las ilustraciones del producto, los accesorios y la interfaz de usuario del manual de usuari o son solo para
fines de referencia. El producto y las funciones actuales pueden variar debido a mejoras del producto.

16
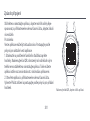
Cómo conectar
Escanee el código QR para descargar la
a plicación
Descargue e instale las aplicaciones para administrar mejor
el reloj, e inicie sesión en su cuenta Xiaomi para disfrutar de
más servicios.
Nota:
La versión de la aplicación puede haber sido actualizada,
siga las instrucciones basadas en la versión actual de la
aplicación.
1. Mantenga pulsado el botón de función para encender el
reloj. Escanee el código QR que se muestra en la pantalla de
su reloj para descargar e instalar la aplicación. También
puede descargar e instalar la aplicación desde las diferentes
tiendas de aplicaciones.
2. Abra la aplicación y, a continuación, inicie sesión en su
cuenta Xiaomi. Seleccione Añadir dispositivo y siga las
instrucciones para añadir su reloj.

17
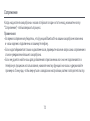
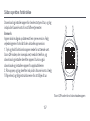
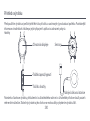
Vinculación
Cuando aparezca el mismo código de vinculación en el teléfono y en el reloj, pulse Vincular para
finalizar la vinculación.
Notas:
•
Durante la vinculación, asegúrese de que el Bluetooth está activado en el teléfono y que el reloj está
bien
conectado al teléfono.
• Si el código de vinculación aparece en el reloj pero no en el teléfono, compruebe si hay alguna
solicitud de vinculación en las notificaciones del teléfono.
• Si al añadir el dispositivo en la aplicación, no puede encontrar el reloj o si no puede conectarlo al
teléfono cuando lo esté usando, mantenga pulsado el botón de función durante tres segundos
aproximadamente para restaurar los ajustes de fábrica e inténtelo de nuevo.
La pagina si sta caricando...
La pagina si sta caricando...
La pagina si sta caricando...
La pagina si sta caricando...
La pagina si sta caricando...
La pagina si sta caricando...
La pagina si sta caricando...
La pagina si sta caricando...
La pagina si sta caricando...
La pagina si sta caricando...
La pagina si sta caricando...
La pagina si sta caricando...
La pagina si sta caricando...
La pagina si sta caricando...
La pagina si sta caricando...
La pagina si sta caricando...
La pagina si sta caricando...
La pagina si sta caricando...
La pagina si sta caricando...
La pagina si sta caricando...
La pagina si sta caricando...
La pagina si sta caricando...
La pagina si sta caricando...
La pagina si sta caricando...
La pagina si sta caricando...
La pagina si sta caricando...
La pagina si sta caricando...
La pagina si sta caricando...
La pagina si sta caricando...
La pagina si sta caricando...
La pagina si sta caricando...
La pagina si sta caricando...
La pagina si sta caricando...
La pagina si sta caricando...
La pagina si sta caricando...
La pagina si sta caricando...
La pagina si sta caricando...
La pagina si sta caricando...
La pagina si sta caricando...
La pagina si sta caricando...
La pagina si sta caricando...
La pagina si sta caricando...
La pagina si sta caricando...
La pagina si sta caricando...
La pagina si sta caricando...
La pagina si sta caricando...
La pagina si sta caricando...
La pagina si sta caricando...
La pagina si sta caricando...
La pagina si sta caricando...
La pagina si sta caricando...
La pagina si sta caricando...
La pagina si sta caricando...
La pagina si sta caricando...
La pagina si sta caricando...
La pagina si sta caricando...
La pagina si sta caricando...
La pagina si sta caricando...
La pagina si sta caricando...
La pagina si sta caricando...
La pagina si sta caricando...
La pagina si sta caricando...
La pagina si sta caricando...
La pagina si sta caricando...
La pagina si sta caricando...
La pagina si sta caricando...
La pagina si sta caricando...
La pagina si sta caricando...
La pagina si sta caricando...
La pagina si sta caricando...
La pagina si sta caricando...
La pagina si sta caricando...
La pagina si sta caricando...
La pagina si sta caricando...
La pagina si sta caricando...
La pagina si sta caricando...
La pagina si sta caricando...
La pagina si sta caricando...
La pagina si sta caricando...
La pagina si sta caricando...
La pagina si sta caricando...
La pagina si sta caricando...
La pagina si sta caricando...
La pagina si sta caricando...
La pagina si sta caricando...
La pagina si sta caricando...
La pagina si sta caricando...
La pagina si sta caricando...
La pagina si sta caricando...
La pagina si sta caricando...
La pagina si sta caricando...
La pagina si sta caricando...
La pagina si sta caricando...
La pagina si sta caricando...
La pagina si sta caricando...
La pagina si sta caricando...
La pagina si sta caricando...
La pagina si sta caricando...
La pagina si sta caricando...
La pagina si sta caricando...
La pagina si sta caricando...
La pagina si sta caricando...
La pagina si sta caricando...
La pagina si sta caricando...
La pagina si sta caricando...
La pagina si sta caricando...
La pagina si sta caricando...
La pagina si sta caricando...
La pagina si sta caricando...
La pagina si sta caricando...
La pagina si sta caricando...
La pagina si sta caricando...
La pagina si sta caricando...
La pagina si sta caricando...
La pagina si sta caricando...
La pagina si sta caricando...
La pagina si sta caricando...
La pagina si sta caricando...
La pagina si sta caricando...
La pagina si sta caricando...
La pagina si sta caricando...
La pagina si sta caricando...
La pagina si sta caricando...
La pagina si sta caricando...
La pagina si sta caricando...
La pagina si sta caricando...
La pagina si sta caricando...
La pagina si sta caricando...
La pagina si sta caricando...
La pagina si sta caricando...
La pagina si sta caricando...
La pagina si sta caricando...
La pagina si sta caricando...
La pagina si sta caricando...
La pagina si sta caricando...
La pagina si sta caricando...
La pagina si sta caricando...
La pagina si sta caricando...
La pagina si sta caricando...
La pagina si sta caricando...
La pagina si sta caricando...
La pagina si sta caricando...
La pagina si sta caricando...
La pagina si sta caricando...
La pagina si sta caricando...
La pagina si sta caricando...
La pagina si sta caricando...
La pagina si sta caricando...
La pagina si sta caricando...
La pagina si sta caricando...
La pagina si sta caricando...
La pagina si sta caricando...
La pagina si sta caricando...
La pagina si sta caricando...
La pagina si sta caricando...
La pagina si sta caricando...
La pagina si sta caricando...
La pagina si sta caricando...
La pagina si sta caricando...
La pagina si sta caricando...
La pagina si sta caricando...
La pagina si sta caricando...
La pagina si sta caricando...
La pagina si sta caricando...
La pagina si sta caricando...
La pagina si sta caricando...
La pagina si sta caricando...
La pagina si sta caricando...
La pagina si sta caricando...
La pagina si sta caricando...
La pagina si sta caricando...
La pagina si sta caricando...
La pagina si sta caricando...
La pagina si sta caricando...
La pagina si sta caricando...
La pagina si sta caricando...
La pagina si sta caricando...
La pagina si sta caricando...
La pagina si sta caricando...
La pagina si sta caricando...
La pagina si sta caricando...
La pagina si sta caricando...
La pagina si sta caricando...
La pagina si sta caricando...
La pagina si sta caricando...
La pagina si sta caricando...
La pagina si sta caricando...
La pagina si sta caricando...
La pagina si sta caricando...
La pagina si sta caricando...
La pagina si sta caricando...
La pagina si sta caricando...
La pagina si sta caricando...
La pagina si sta caricando...
La pagina si sta caricando...
La pagina si sta caricando...
La pagina si sta caricando...
La pagina si sta caricando...
La pagina si sta caricando...
La pagina si sta caricando...
La pagina si sta caricando...
La pagina si sta caricando...
La pagina si sta caricando...
La pagina si sta caricando...
La pagina si sta caricando...
La pagina si sta caricando...
La pagina si sta caricando...
La pagina si sta caricando...
La pagina si sta caricando...
La pagina si sta caricando...
La pagina si sta caricando...
La pagina si sta caricando...
La pagina si sta caricando...
La pagina si sta caricando...
La pagina si sta caricando...
La pagina si sta caricando...
La pagina si sta caricando...
La pagina si sta caricando...
La pagina si sta caricando...
La pagina si sta caricando...
La pagina si sta caricando...
La pagina si sta caricando...
La pagina si sta caricando...
La pagina si sta caricando...
La pagina si sta caricando...
La pagina si sta caricando...
La pagina si sta caricando...
La pagina si sta caricando...
La pagina si sta caricando...
La pagina si sta caricando...
La pagina si sta caricando...
La pagina si sta caricando...
La pagina si sta caricando...
La pagina si sta caricando...
La pagina si sta caricando...
La pagina si sta caricando...
La pagina si sta caricando...
La pagina si sta caricando...
La pagina si sta caricando...
La pagina si sta caricando...
La pagina si sta caricando...
La pagina si sta caricando...
La pagina si sta caricando...
La pagina si sta caricando...
La pagina si sta caricando...
La pagina si sta caricando...
La pagina si sta caricando...
La pagina si sta caricando...
La pagina si sta caricando...
La pagina si sta caricando...
La pagina si sta caricando...
La pagina si sta caricando...
La pagina si sta caricando...
La pagina si sta caricando...
La pagina si sta caricando...
La pagina si sta caricando...
La pagina si sta caricando...
La pagina si sta caricando...
La pagina si sta caricando...
La pagina si sta caricando...
La pagina si sta caricando...
La pagina si sta caricando...
La pagina si sta caricando...
La pagina si sta caricando...
La pagina si sta caricando...
La pagina si sta caricando...
La pagina si sta caricando...
La pagina si sta caricando...
-
 1
1
-
 2
2
-
 3
3
-
 4
4
-
 5
5
-
 6
6
-
 7
7
-
 8
8
-
 9
9
-
 10
10
-
 11
11
-
 12
12
-
 13
13
-
 14
14
-
 15
15
-
 16
16
-
 17
17
-
 18
18
-
 19
19
-
 20
20
-
 21
21
-
 22
22
-
 23
23
-
 24
24
-
 25
25
-
 26
26
-
 27
27
-
 28
28
-
 29
29
-
 30
30
-
 31
31
-
 32
32
-
 33
33
-
 34
34
-
 35
35
-
 36
36
-
 37
37
-
 38
38
-
 39
39
-
 40
40
-
 41
41
-
 42
42
-
 43
43
-
 44
44
-
 45
45
-
 46
46
-
 47
47
-
 48
48
-
 49
49
-
 50
50
-
 51
51
-
 52
52
-
 53
53
-
 54
54
-
 55
55
-
 56
56
-
 57
57
-
 58
58
-
 59
59
-
 60
60
-
 61
61
-
 62
62
-
 63
63
-
 64
64
-
 65
65
-
 66
66
-
 67
67
-
 68
68
-
 69
69
-
 70
70
-
 71
71
-
 72
72
-
 73
73
-
 74
74
-
 75
75
-
 76
76
-
 77
77
-
 78
78
-
 79
79
-
 80
80
-
 81
81
-
 82
82
-
 83
83
-
 84
84
-
 85
85
-
 86
86
-
 87
87
-
 88
88
-
 89
89
-
 90
90
-
 91
91
-
 92
92
-
 93
93
-
 94
94
-
 95
95
-
 96
96
-
 97
97
-
 98
98
-
 99
99
-
 100
100
-
 101
101
-
 102
102
-
 103
103
-
 104
104
-
 105
105
-
 106
106
-
 107
107
-
 108
108
-
 109
109
-
 110
110
-
 111
111
-
 112
112
-
 113
113
-
 114
114
-
 115
115
-
 116
116
-
 117
117
-
 118
118
-
 119
119
-
 120
120
-
 121
121
-
 122
122
-
 123
123
-
 124
124
-
 125
125
-
 126
126
-
 127
127
-
 128
128
-
 129
129
-
 130
130
-
 131
131
-
 132
132
-
 133
133
-
 134
134
-
 135
135
-
 136
136
-
 137
137
-
 138
138
-
 139
139
-
 140
140
-
 141
141
-
 142
142
-
 143
143
-
 144
144
-
 145
145
-
 146
146
-
 147
147
-
 148
148
-
 149
149
-
 150
150
-
 151
151
-
 152
152
-
 153
153
-
 154
154
-
 155
155
-
 156
156
-
 157
157
-
 158
158
-
 159
159
-
 160
160
-
 161
161
-
 162
162
-
 163
163
-
 164
164
-
 165
165
-
 166
166
-
 167
167
-
 168
168
-
 169
169
-
 170
170
-
 171
171
-
 172
172
-
 173
173
-
 174
174
-
 175
175
-
 176
176
-
 177
177
-
 178
178
-
 179
179
-
 180
180
-
 181
181
-
 182
182
-
 183
183
-
 184
184
-
 185
185
-
 186
186
-
 187
187
-
 188
188
-
 189
189
-
 190
190
-
 191
191
-
 192
192
-
 193
193
-
 194
194
-
 195
195
-
 196
196
-
 197
197
-
 198
198
-
 199
199
-
 200
200
-
 201
201
-
 202
202
-
 203
203
-
 204
204
-
 205
205
-
 206
206
-
 207
207
-
 208
208
-
 209
209
-
 210
210
-
 211
211
-
 212
212
-
 213
213
-
 214
214
-
 215
215
-
 216
216
-
 217
217
-
 218
218
-
 219
219
-
 220
220
-
 221
221
-
 222
222
-
 223
223
-
 224
224
-
 225
225
-
 226
226
-
 227
227
-
 228
228
-
 229
229
-
 230
230
-
 231
231
-
 232
232
-
 233
233
-
 234
234
-
 235
235
-
 236
236
-
 237
237
-
 238
238
-
 239
239
-
 240
240
-
 241
241
-
 242
242
-
 243
243
-
 244
244
-
 245
245
-
 246
246
-
 247
247
-
 248
248
-
 249
249
-
 250
250
-
 251
251
-
 252
252
-
 253
253
-
 254
254
-
 255
255
-
 256
256
-
 257
257
-
 258
258
-
 259
259
-
 260
260
-
 261
261
-
 262
262
-
 263
263
-
 264
264
-
 265
265
-
 266
266
-
 267
267
-
 268
268
-
 269
269
-
 270
270
-
 271
271
-
 272
272
-
 273
273
-
 274
274
-
 275
275
-
 276
276
-
 277
277
-
 278
278
-
 279
279
-
 280
280
-
 281
281
-
 282
282
-
 283
283
-
 284
284
-
 285
285
-
 286
286
-
 287
287
-
 288
288


in altre lingue
- português: Xiaomi M2112W1 Manual do usuário
- dansk: Xiaomi M2112W1 Brugermanual
- română: Xiaomi M2112W1 Manual de utilizare
Documenti correlati
-
Xiaomi S1 Manuale utente
-
Xiaomi Mi Watch White (BHR4723GL) Manuale utente
-
Xiaomi Redmi Watch 3 Manuale utente
-
Xiaomi Mi Smart Band 5 Manuale utente
-
-
-
-
-