Overmax OV-CAMSPOT 4.0 PTZ WHITE Manuale del proprietario
- Categoria
- Router
- Tipo
- Manuale del proprietario

Camspot 4.0 PTZ
Instrukcja obsługi
User Manual
Bedienungsanleitung
Manuale d’uso
Manuel de l’Utilisateur
Manual de usuario
Handleiding
Посібник користувача
Vartotojo vadovas
Korisnički priručnik
IT
UK
EN
ES
HR
PL
FR
LT
DE
NL
Manuel de l’Utilisateur
Manual de usuario
Посібник користувача
Vartotojo vadovas
Korisnički priručnik

PL: Produkt zgodny zwymaganiami dyrektyw Unii Europejskiej.
Zgodnie zDyrektywą 2012/19/UE, niniejszy produkt podlega zbiórce selektywnej.
Produktu nie należy wyrzucać wraz zodpadami komunalnymi, gdyż może stanowić
on zagrożenie dla środowiska i zdrowia ludzi. Zużyty produkt należy oddać do
punktu recyklingu urządzeń elektrycznych ielektronicznych.
EN: The product complies with requirements of EU directives.
Pursuant to the Directive 2012/19/EU, this product is subject to selective collection.
The product must not be disposed of along with domestic waste as it may pose
athreat to the environment and human health. The worn-out product must be
handed over to the electrics and electronics recycling center.
DE: Das Produkt stimmt mit den Richtlinien der Europäischen Union.
Gemäß der Richtlinie 2012/19/UE unterliegt das Produkt einer getrennten
Sammlung. Das Produkt darf man nicht zusammen mit kommunalen Abfällen
entsorgen, weil das die Gefahr für die Umwelt und die Gesundheit der Menschen
bilden kann. Das verbrauchte Produkt soll man in einem entsprechenden
Rücknahmepunkt für Elektro- und Elektronik-Altgeräte zurückgeben.
IT: Prodotto conforme ai requisiti delle direttive dell’Unione Europea.
In conformità alla direttiva 2012/19/UE, questo prodotto è soggetto a raccolta
dierenziata. Il prodotto non deve essere smaltito con i rifiuti domestici perché
può costituire una minaccia per l’ambiente e la salute umana. Si prega di restituire
il vecchio prodotto al punto di raccolta applicabile per il riciclaggio di apparecchiature
elettriche ed elettroniche.
FR: Le produit est conforme aux exigences des directives de l’Union européenne.
Conformément à la Directive 2012/19/UE, le présent produit est soumis à la
collecte séparée. Il convient de ne pas jeter le produit avec les déchets ménagers,
car il peut constituer un danger pour l’environnement et la sainte humaine. Le
produit usé devrait être remis au point de recyclage des appareils électriques et
électroniques.

ES: El producto cumple los requisitos de las directivas de la Unión Europea.
De acuerdo con la Directiva 2012/19/UE, este producto está sujeto a recogida
selectiva. El producto no debe eliminarse con los residuos municipales, ya que
puede suponer una amenaza para el medio ambiente y la salud humana. Por
favor, entrega el producto que ya no vayas autilizar aun centro de reciclaje de
dispositivos eléctricos yelectrónicos.
NL: Product in overeenstemming met de eisen van de richtlijnen van de Europese Unie.
In overeenstemming met Richtlijn 2012/19/EU moet dit product gescheiden
worden ingezameld. Het product mag niet met het huisvuil worden weggegooid
omdat het een bedreiging kan vormen voor het milieu en de volksgezondheid.
Lever uw oude product in bij het daarvoor bestemde inzamelpunt voor recycling
van elektrische en elektronische apparatuur.
UK: Продукт відповідає вимогам директив Європейського Союзу.
Відповідно до Директиви 2012/19/ЄС цей продукт підлягає вибірковому
збору. Продукт не слід утилізувати разом із побутовими відходами, оскільки
це може становити загрозу навколишньому середовищу та здоров’ю людей.
Використаний продукт слід здати до пункту переробки електричних та
електронних пристроїв.
LT: Produktas atitinka Europos Sąjungos direktyvų reikalavimus.
Pagal 2012/19 / ES Direktyvą šis produktas yra rūšiuojamas. Produkto negalima
išmesti su komunalinėmis atliekomis, nes tai gali kelti grėsmę aplinkai ir žmonių
sveikatai. Panaudotą gaminį reikia nugabenti į elektros ir elektroninės įrangos
perdirbimo punktą.
HR: Proizvod je sukladan propisima Direktive Europske Unije.
Sukladno Direktivi 2012/19/UE ovaj proizvod spada uselektivno skupljanje. Proizvod
se ne smije bacati skupa s drugim komunalnim otpadom, jer može predstavljati
prijetnju za okoliš iljudsko zdravlje. Potrošeni proizvod je potrebno odnijeti ucentar
za zbrinjavanje električnih ielektroničkih uređaja.

A1
2
3
B
1
Tuya Smart app Overmax Control app
1
5
10
2
6
7
9
8
3
4

2
3

5
4

6
1
4 5 6 7
2
3

6
7
8 9 10
12
16
20
14
18
22
11
13
17
21
15
19

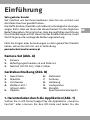
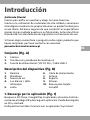
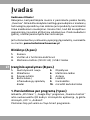
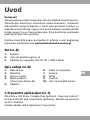
PL
Wprowadzenie
Drogi Kliencie!
Dziękujemy za obdarzenie nas zaufaniem iwybranie marki Overmax.
Dzięki wykorzystaniu wysokiej jakości materiałów inowoczesnych
rozwiązań technologicznych oddajemy wTwoje ręce produkt
idealny do codziennego użytkowania. Jesteśmy pewni, że dzięki
ogromnej staranności wykonania spełni on Twoje wymagania.
Przed użyciem produktu zapoznaj się dokładnie zponiższą
instrukcją obsługi.
Jeśli masz jakiekolwiek uwagi lub pytania do zakupionego produktu,
skontaktuj się znami: [email protected]
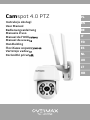
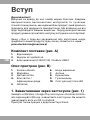
Zestaw (rys. A)
1. Kamera
2. Śruby x4 i kołki montażowe x4
3. Zasilacz (12V DC 2A) / Przewód USB-C
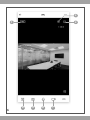
Opis urządzenia (rys. B)
1. Reset
2. Mikrofon
3. Czujnik światła
4. Białe światło / Diody na
podczerwień
5. Obiektyw
6. Przewód zasilający
7. Antena
8. Wspornik
9. Głośnik
10. Gniazdo karty microSD
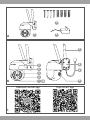
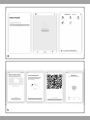
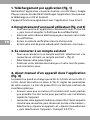
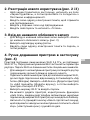
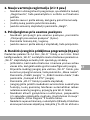
1. Pobieranie przez aplikację (rys. 1)
Wyszukaj w iOS Store / Google Play aplikację „Overmax Control”
albo zeskanuj QR kod i ściągnij aplikację. Możesz ją ściągnąć na
iOS i Android.
Urządzenie działa również z aplikacją Tuya Smart.

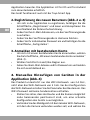
PL
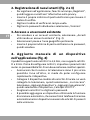
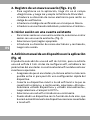
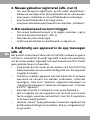
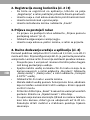
2. Rejestracja nowego użytkownika (rys. 2 i 3)
•
W celu zarejestrowania się do aplikacji kliknij w pole „Zarejestruj”
a następnie przeczytaj i zaakceptuj Politykę Prywatności.
• Wpisz adres e-mail w celu otrzymania kodu weryfikacyjnego.
• Wpisz kod weryfikacyjny w puste pole.
• Wpisz indywidualne hasło i wybierz „Zakończ”.
3. Logowanie do istniejącego konta
• W celu zalogowania się na istniejące konto, wybierz „Zaloguj
się używając istniejącego konta” (rys. 2).
• Wybierz odpowiedni kraj/region.
• Wpisz adres e-mail oraz hasło, a następnie zaloguj się.
4. Ręczne dodawanie urządzenia w aplikacji (rys. 4)
Produkt obsługuje tylko sieć Wi-Fi 2.4 GHz, nie obsługuje natomiast
sieci Wi-Fi 5 GHz. Przed skonfigurowaniem Wi-Fi, ustaw parametry
routera. Hasło Wi-Fi nie powinno zawierać znaków specjalnych.
•
Upewnij się, że router i kamera są jak najbliżej siebie, aby
umożliwić szybką konfigurację urządzenia.
•
Połącz urządzenie mobilne z lokalną siecią Wi-Fi, do której
będzie połączona kamera, następnie wybierz „Mój dom”.
Wybierz „Dodaj urządzenie” i ”Dodaj ręcznie”, a następnie
wybierz urządzenie „Camspot 4.0 PTZ”.
• Wybierz sieć Wi-Fi i wpisz hasło.
•
Istnieje możliwość dodania urządzenia za pomocą funkcji Auto
skan, wybór której sprawi, że telefon automatycznie wyszuka
znajdujące się w pobliżu urządzenia podłączone do sieci Wi-Fi.
•
Wciśnij i przytrzymaj przez 5 sekund przycisk „Reset”, aby
przywrócić ustawienia fabryczne. Kliknij „Następny krok” i
przejdź dalej.
•
W celu sparowania kamery, zeskanuj QR kod z ekranu telefonu
przez obiektyw kamery, trzymając go w odległości 15-20 cm
od siebie. W trakcie skanowania staraj się trzymać telefon
komórkowy w stabilnej pozycji.

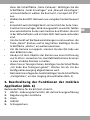
PL
•
Kiedy usłyszysz sygnał dźwiękowy, kliknij „Słyszałem dźwięk”.
Poczekaj, aż urządzenie zakończy konfigurację.
•
Po dodaniu urządzenia kliknij „Zakończ”, aby zakończyć
dodawanie urządzenia (rys. 5).
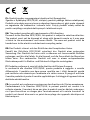
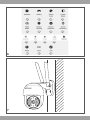
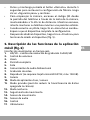
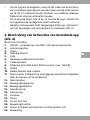
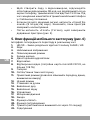
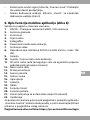
5. Opis funkcji aplikacji mobilnej (rys. 6)
Interfejs podglądu w czasie rzeczywistym:
1. HD/SD – zmiana rozdzielczości nagrywania FullHD / HD
2. Regulacja głośności
3. Zoom
4. Pełny ekran
5. Zdjęcie
6. Dwukierunkowa komunikacja audio
7. Nagrywanie wideo
8. Odtwórz (wymagana karta microSD FAT32, maks. 128 GB)
9. Galeria
10. Jasny/ciemny tryb aplikacji
11.
Tryb prywatny (umożliwia ograniczenie transferu danych
wyłączając kamerę)
12. Tryb nocny
13. Śledzenie ruchu
14. Czujnik ruchu
15. Czujnik dźwięku
16. Sterowanie
17. Lokalizacje
18. Chmura
19. Funkcje Smart
20. Funkcja patrolu
21. Alarm (wyłącza się automatycznie po 10 sekundach)
22. Edycja
Aby mieć dostęp po podglądu obrazu z kamery przez przeglądarkę
internetową, włącz aplikacje „Overmax Control”, kliknij dodaj
urządzenie, następnie zeskanuj kod QR wyświetlany w przeglądarce
Twojego komputera.

PL
Podgląd kamer na żywo pod linkiem:
https://ipc-eu.ismartlife.me/login
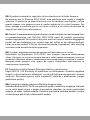
Montaż
•
Aby zamontować kamerę na ścianie, przykręć wspornik kamery
do sufitu/ściany (rys. 7).
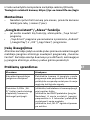
Funkcja Google Assistant/Alexa
•
W przypadku chęci korzystania z niniejszej funkcji, należy
pobrać aplikację Tuya Smart.
• Aplikacja Tuya Smart jest bezpłatna i dostępna dla urządzeń
Android (Google Play) oraz iOS (App Store).
Zapisywanie nagrań
Filmy nagrane na karcie pamięci należy w pierwszej kolejności
zapisać w pamięci urządzenia mobilnego przez aplikację Overmax
Control. Dane na karcie są szyfrowane, niezapisanie ich w pamięci
urządzenia uniemożliwi późniejszy odczyt.
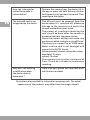
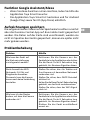
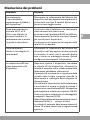
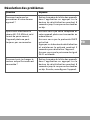
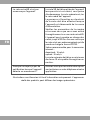
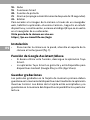
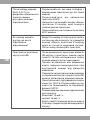
Rozwiązywanie problemów
Pytanie Odpowiedź
Jak przywrócić ustawienia
fabryczne w urządzeniu?
Usuń kamerę z listy urządzeń w aplikacji lub
wciśnij i przytrzymaj przycisk reset przez 8
sekund, aż usłyszysz komunikat dźwiękowy.
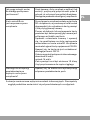
Po wybraniu sieci Wi-Fi
2.4GHz i wpisaniu
poprawnego hasła kamera
nadal nie może się
połączyć.
Upewnij się, że telefon i kamera są
podłączone do tej samej sieci.
Upewnij się, że włączony został protokół
DHCP.
Wciśnij i przytrzymaj przycisk reset przez 5
sekund aby zresetować urządzenie.
Upewnij się, że siła sygnału Wi-Fi jest
wysoka.

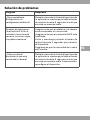
PL
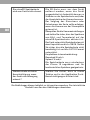
Jak mogę zmienić router,
do którego podłączona
jest kamera?
Usuń kamerę z listy urządzeń w aplikacji lub
wciśnij i przytrzymaj przycisk reset przez 8
sekund, aż usłyszysz komunikat dźwiękowy.
Następnie ponownie skonfiguruj urządzenie.
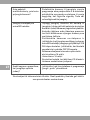
Karta microSD nie
jest rozpoznana przez
urządzenie.
Po wyłączeniu urządzenia należy wyjąc kartę
SD z urządzenia, w przeciwnym razie można
doprowadzić do uszkodzenia karty pamięci
i/lub płyty głównej kamery.
Proces wkładania lub wyjmowania karty
powinien być dokonywany gdy kamera jest
odłączona od źródła zasilania.
Sprawdź ustawienia kamery i upewnij
się, że umożliwione zostało zapisywanie
materiałów na karcie microSD. Urządzenie
może obsługiwać karty o pojemności 128 GB.
Upewnij się, że karta nie jest uszkodzona i
obsługuje format FAT32.
Zalecana wartość połączenia internetowego:
download:16 mb/s
upload: 16 mb/s
Karta pamięci musi być minimum 10. klasy
i być przystosowana do zapisu ciągłego.
Dlaczego nie otrzymuję
powiadomienia po
wykryciu ruchu przez
urządzenie?
Upewnij się, że telefon oraz aplikacja mają
włączone powiadomienia push.
Ilustracje zamieszczone wyłącznie w celach informacyjnych. Rzeczywisty
wygląd produktów może różnić się od przedstawionych na zdjęciach.

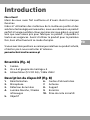
EN
Introduction
Dear customer!
Thank you for placing trust in us and choosing Overmax.
Thanks to high-quality materials and modern solutions, we provide
you with aproduct perfect for everyday use. We are convinced
that the product will satisfy your requirements as it has been
manufactured with utmost care. Before you use the product, please
read this manual carefully.
Should you have any remarks or questions concerning the product,
please do not hesitate to contact us: [email protected]
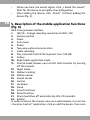
The set (fig. A)
1. Camera
2. Screws x4 and mounting pins x4
3. Power supply (12V DC 2A) / USB-C cable
Device description (fig. B)
1. Reset
2. Microphone
3. Light sensor
4. White light / Infrared
diodes
5. Lens
6. Power cord
7. Antenna
8. Bracket
9. Speaker
10. MicroSD card slot
1. Downloading by application (fig. 1)
Search for the „Overmax Control” app in the iOS Store / Google Play
or scan the QR code and download the app. You can download it
for iOS and Android.
The device works also with the Tuya Smart app.

EN
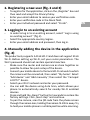
2. Registering a new user (fig. 2 and 3)
•
To register for the application, click on the „Register” box and
then read and accept the Privacy Policy.
• Enter your email address to receive your verification code.
• Enter your verification code in the blank field.
• Enter your individual password and select “Finish”.
3. Logging in to an existing account
• In order to log in to an existing account, select “Log in using
an existing account” (fig. 2).
• Select the appropriate country/region.
• Enter your email address and password, then log in.
4. Manually adding the device in the application
(fig. 4)
The product only supports 2.4GHz Wi-Fi and does not support 5GHz
Wi-Fi. Before setting up Wi-Fi, set your router parameters. The
Wi-Fi password should not contain special characters.
•
Make sure the router and camera are as close together as
possible to allow for quick setup of the device.
•
Connect your mobile device to the local Wi-Fi network to which
the camera will be connected, then select “My home”. Select
“Add device” and “Add manually”, then select the “Camspot
4.0 PTZ” device.
• Select your Wi-Fi network and enter your password.
•
You can add the device using Auto Scan, which allows your
phone to automatically search for nearby Wi-Fi enabled
devices.
•
Press and hold the „Reset” button for 5 seconds to restore the
factory settings. Click „Next step” and continue.
• To pair the camera, scan the QR code from the phone screen
through the camera lens, holding the camera 15-20cm away. Try
to hold your mobile phone in a stable position while scanning.

EN
•
When you hear the sound signal, click „I heard the sound”.
Wait for the device to complete the configuration.
•
After adding the device, click „Finish” to finish adding the
device (fig. 5).
5. Description of the mobile application functions
(fig. 6)
Real-time preview interface:
1. HD/SD – change recording resolution FullHD / HD
2. Volume control
3. Zoom
4. Full screen
5. Photo
6. Two-way audio communication
7. Video recording
8. Play (microSD card FAT32 required, max. 128 GB)
9. Gallery
10. Bright/dark application mode
11.
Private mode (allows you to limit data transfer by turning
o the camera)
12. Night mode
13. Motion tracking
14. Motion sensor
15. Sound sensor
16. Control
17. Locations
18. Cloud
19. Smart functions
20. Patrol function
21. Alarm (switches o automatically after 10 seconds)
22. Edition
In order to access the camera view via a web browser, turn on the
„Overmax Control” application, click on add the device, then scan

EN
the QR code displayed in the browser of your computer.
Live camera preview at: https://ipc-eu.ismartlife.me/login
Mounting
• To mount the camera on a wall, screw the camera bracket to
the ceiling/wall (fig. 7).
Google Assistant/Alexa function
•
If you wish to use this function, you will need to download
the Tuya Smart app.
• The Tuya Smart app is free and available for Android (Google
Play) and iOS (App Store) devices.
Record saving
Videos recorded on the memory card must at first be saved in the
mobile device memory through OverMax Control application. Data
on the card are encoded so if you fail to save them in the device
memory, you will not be able to read them afterwards.
Troubleshooting
Question Answer
How do I restore the
factory settings on my
device?
Remove the camera from the device list in the
app or press and hold the reset button for 8
seconds until you hear the sound.
After selecting the
2.4GHz Wi-Fi network
and entering the correct
password, the camera still
cannot connect.
Make sure your phone and camera are
connected to the same network.
Make sure that the DHCP protocol is enabled.
Press and hold the reset button for 5 seconds
to reset the device.
Make sure the Wi-Fi signal strength is high.

EN
How can I change the
router the camera is
connected to?
Remove the camera from the device list in
the app or press and hold the reset button
for 8 seconds until you hear the sound. Then
reconfigure the device.
The microSD card is not
recognized by the device.
The SD card must be removed from the
device when it is switched o, otherwise
damage to the memory card and/or the
camera motherboard may result.
The process of inserting or removing the
card should be done when the camera is
disconnected from the power source.
Check the camera settings and make sure
you have enabled saving to a microSD card.
The device can support up to 128GB cards.
Make sure the card is not damaged and
supports the FAT32 format.
Recommended Internet connection value:
download: 16 mbps
upload: 16 mbps
The memory card must be a minimum of
Class 10 and be suitable for continuous
recording.
Why am I not receiving
a notification when
the device detects
movement?
Make sure your phone and app have push
notifications enabled.
Illustrations are provided for information purposes only. The actual
appearance of the products may dier from the images shown.

DE
Einführung
Sehr geehrter Kunde!
Wir möchten uns bei Ihnen bedanken, dass Sie uns vertraut und
die Marke Overmax gewählt haben.
Die Stoe höchster Qualität und moderne technologische Lösungen
sorgen dafür, dass wir Ihnen das ideale Produkt für den täglichen
Bedarf übergeben. Wir sind sicher, dass die sorgfältige Ausführung
Ihre Anforderungen erfüllt. Bevor Sie das Produkt benutzen, lesen
Sie bitte genau die vorliegende Bedienungsanleitung.
Falls Sie Fragen oder Anmerkungen zu dem gekauften Produkt
haben, setzen Sie sich mit uns in Verbindung:
Kamera-Set (Abb. A)
1. Kamera
2. Befestigungsschrauben x4 und Dübel x4
3. Netzteil (12V DC 2A) / USB-C-Kabel
Gerätebeschreibung (Abb. B)
1. Reset-Taste
2. Mikrofon
3. Lichtsensor
4. Weißes Licht /
Infrarot-LEDs
5. Objektiv
6. Netzkabel
7. Antenne
8. Halterung
9. Lautsprecher
10. MicroSD-
Speicherkartensteckplatz
1. Herunterladen durch die Applikation (Abb. 1)
Suchen Sie in iOS Store/Google Play die Applikation „Overmax
Control“ oder scannen Sie den QR-Code und laden Sie die

DE
Applikation herunter. Die Applikation ist für iOS und für Android
zum Herunterladen erhältlich.
Das Gerät funktioniert auch mit der Tuya Smart App.
2. Registrierung des neuen Benutzers (Abb. 2 u. 3)
• Um sich in der Applikation zu registrieren, betätigen Sie die
Schaltfläche „Registrieren“ und lesen und akzeptieren Sie
anschließend die Datenschutzerklärung.
•
Geben Sie Ihre E-Mail-Adresse ein, um den Verifizierungscode
zu erhalten.
• Geben Sie den Verifizierungscode in das leere Feld ein.
•
Geben Sie Ihr individuelles Passwort ein und betätigen Sie die
Schaltfläche „Fertigstellen“.
3. Anmelden mit bestehendem Konto
• Um sich mit einem bestehenden Konto anzumelden, wählen
Sie die Schaltfläche „Mit einem bestehenden Konto anmelden“
(Abb. 2).
• Wählen Sie bitte Ihr Land/Ihre Region aus.
•
Geben Sie Ihre E-Mail-Adresse und Ihr Passwort ein und melden
Sie sich anschließend an.
4. Manuelles Hinzufügen von Geräten in der
Applikation (Abb. 4)
Das Produkt unterstützt nur das WiFi-Netzwerk von 2.4 GHz,
nicht aber das WiFi-Netzwerk von 5 GHz. Vor der Konfiguration
des WiFi-Netzwerks stellen Sie die Parameter des Routers ein. Das
WiFi-Passwort soll keine Sonderzeichen enthalten.
• Stellen Sie sicher, dass der Router und die Kamera möglichst
nahe beieinander positioniert sind, um eine schnelle
Konfiguration des Geräts zu ermöglichen.
•
Verbinden Sie das Mobilgerät mit dem lokalen WiFi-Netzwerk,
mit dem die Kamera verbunden werden soll, und wählen Sie
La pagina si sta caricando...
La pagina si sta caricando...
La pagina si sta caricando...
La pagina si sta caricando...
La pagina si sta caricando...
La pagina si sta caricando...
La pagina si sta caricando...
La pagina si sta caricando...
La pagina si sta caricando...
La pagina si sta caricando...
La pagina si sta caricando...
La pagina si sta caricando...
La pagina si sta caricando...
La pagina si sta caricando...
La pagina si sta caricando...
La pagina si sta caricando...
La pagina si sta caricando...
La pagina si sta caricando...
La pagina si sta caricando...
La pagina si sta caricando...
La pagina si sta caricando...
La pagina si sta caricando...
La pagina si sta caricando...
La pagina si sta caricando...
La pagina si sta caricando...
La pagina si sta caricando...
La pagina si sta caricando...
La pagina si sta caricando...
La pagina si sta caricando...
La pagina si sta caricando...
La pagina si sta caricando...
La pagina si sta caricando...
La pagina si sta caricando...
La pagina si sta caricando...
La pagina si sta caricando...
La pagina si sta caricando...
La pagina si sta caricando...
La pagina si sta caricando...
La pagina si sta caricando...
La pagina si sta caricando...
La pagina si sta caricando...
La pagina si sta caricando...
La pagina si sta caricando...
La pagina si sta caricando...
-
 1
1
-
 2
2
-
 3
3
-
 4
4
-
 5
5
-
 6
6
-
 7
7
-
 8
8
-
 9
9
-
 10
10
-
 11
11
-
 12
12
-
 13
13
-
 14
14
-
 15
15
-
 16
16
-
 17
17
-
 18
18
-
 19
19
-
 20
20
-
 21
21
-
 22
22
-
 23
23
-
 24
24
-
 25
25
-
 26
26
-
 27
27
-
 28
28
-
 29
29
-
 30
30
-
 31
31
-
 32
32
-
 33
33
-
 34
34
-
 35
35
-
 36
36
-
 37
37
-
 38
38
-
 39
39
-
 40
40
-
 41
41
-
 42
42
-
 43
43
-
 44
44
-
 45
45
-
 46
46
-
 47
47
-
 48
48
-
 49
49
-
 50
50
-
 51
51
-
 52
52
-
 53
53
-
 54
54
-
 55
55
-
 56
56
-
 57
57
-
 58
58
-
 59
59
-
 60
60
-
 61
61
-
 62
62
-
 63
63
-
 64
64


Overmax OV-CAMSPOT 4.0 PTZ WHITE Manuale del proprietario
- Categoria
- Router
- Tipo
- Manuale del proprietario
in altre lingue
Documenti correlati
-
Overmax Camspot 4.9 Manuale utente
-
-
-
-
-
-
-
-
-
Altri documenti
-
Calex Halo Slimme Ceiling Light Guida d'installazione
-
 Calex 8712879154877 Manuale utente
-
ZOSI C518 Guida utente
-
XEGA S204G Manuale utente
-
Lionelo Babyline 6.2 Manuale utente
-
XEGA XG-02 Manuale utente
-
PNI PT202L Manuale utente
-
Tuya 15980 Guida d'installazione
-
Telefunken TF29 Manuale utente
-
Tuya LED FAN Guida d'installazione
