Bosch KGN36HI32 HC Home Connect leaflet

Tipo
HC Home Connect leaflet

Questo manuale è adatto anche per

Quick Start
Guide
DE Verbinden Sie Ihr Hausgerät – mit der Zukunft 2
EN Connect your appliance – to the future. 12
IT Collegate il vostro elettrodomestico – con il futuro. 22
ES Conecte su electrodoméstico con el futuro. 32
FR Connectez votre appareil ménager – à l’avenir. 42
2 | DE
Herzlichen Glückwunsch zu Ihrem Kühlgerät von morgen, das schon heute Ihren Alltag erleichtert und angenehmer macht.
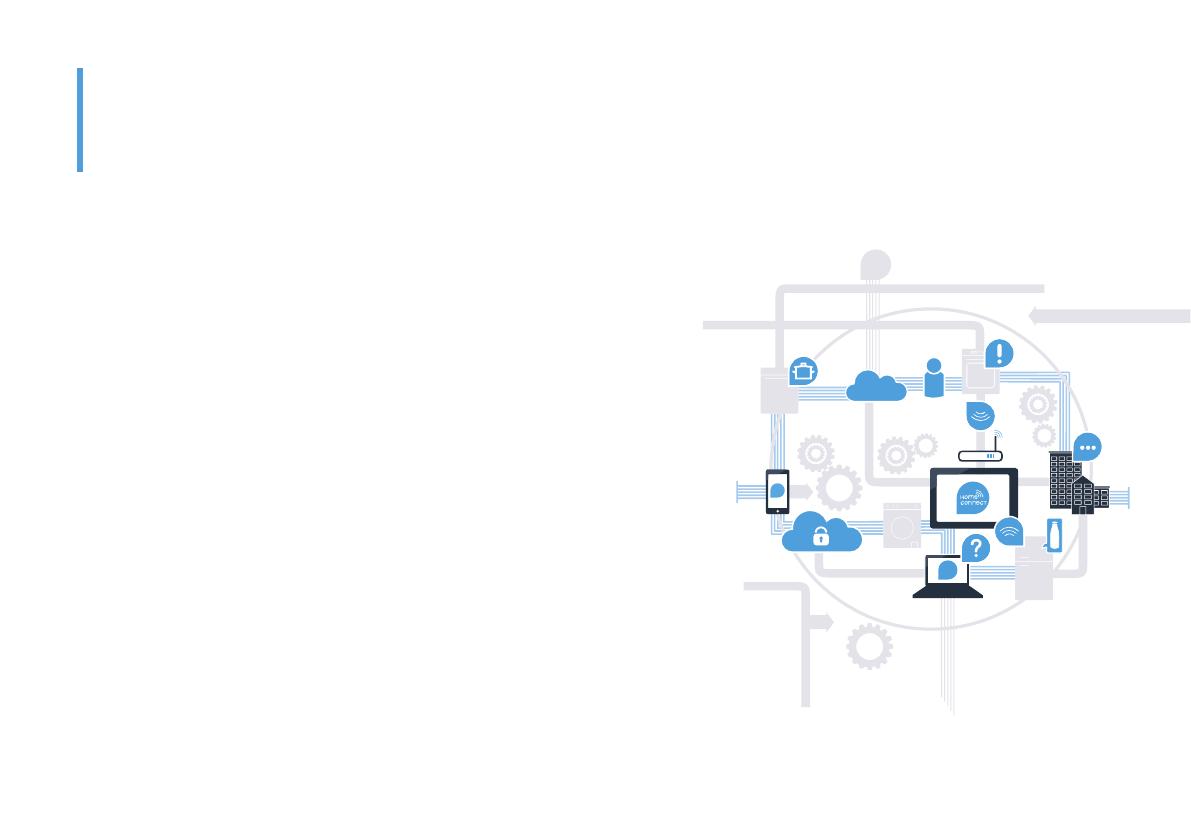
Bequemer.
Mit Home Connect steuern Sie Ihre Hausgeräte, wann Sie wollen, wo Sie
wollen. Ganz einfach und intuitiv über Smartphone oder Tablet. So sparen Sie
sich Umwege und Wartezeiten und Sie haben einfach mehr Zeit für die Dinge,
die Ihnen wirklich wichtig sind.
Leichter.
Nehmen Sie Bedieneinstellungen wie Signal töne oder individuelle Programme
einfach in der App am übersichtlichen Touchscreen vor. Das geht noch
leichter und genauer als am Gerät selbst, und Sie haben alle Daten, die

Vernetzter.
Lassen Sie sich inspirieren und entdecken Sie zahlreiche Zusatzangebote,
die genau auf Ihre Geräte zugeschnitten sind: Rezeptsammlungen, Tipps zur
Gerätenutzung und vieles mehr. Passendes Zubehör können Sie jederzeit mit
wenigen Klicks bestellen.
Die Zukunft beginnt ab jetzt in Ihrem Haushalt!
Schön, dass Sie Home Connect nutzen *
* Die Verfügbarkeit der Home Connect Funktion ist abhängig von der Verfügbarkeit der Home Connect-Dienste in Ihrem Land.
www.home-connect.com.
Weitere Sprachen dieser Installationsanleitung sind auf der Internetseite Ihrer
Hausgerätemarke verfügbar.
DE | 3
Ein Smartphone oder Tablet, ausgestattet mit der aktuellen Version des jeweiligen Betriebssystems.
Einen Heimnetzwerkempfang (WLAN) am Aufstellort des Hausgeräts.
Name und Passwort Ihres Heimnetzwerks (WLAN):
Netzwerkname (SSID):
Passwort (Key):
In drei Schritten zum vereinfachten Alltag:
Was brauchen Sie, um Ihr Hausgerät
mit Home Connect zu verbinden?
1. App einrichten 2. Hausgerät mit
WLAN verbinden
3. Hausgerät mit
App verbinden
www.home-connect.com
4 | DE
Schritt 1: Richten Sie die
Home Connect App ein

bzw. Google Play Store (Android-Geräte).
„Home Connect“ ein.
Wählen Sie die Home Connect App aus und installieren Sie diese auf Ihrem Smartphone oder Tablet.
Starten Sie die App und richten Sie Ihren Home Connect Zugang ein. Die App führt Sie dabei durch
den Anmeldeprozess. Notieren Sie sich im Anschluss Ihre E-Mail-Adresse und Ihr Passwort.
E-Mail: Passwort:
Home Connect Zugangsdaten:
Bitte überprüfen Sie die Verfügbarkeit auf www.home-connect.com
DE | 5
Schritt 2 (Erstinbetriebnahme): Verbinden Sie
Ihr Kühlgerät mit Ihrem Heimnetzwerk (WLAN)
Schließen Sie das Hausgerät an und schalten Sie es ein.
Prüfen Sie, ob Ihr Heimnetzwerk-Router über eine WPS-Funktion (Automatische Verbindung) verfügt.

Verfügt Ihr Router über eine WPS-Funktion (Automatische Verbindung)?
WPS
WPS
ja Dann weiter mit Schritt 2.1 –
Automatische Verbindung (WPS)
Dann weiter mit Schritt 2.2 –

nein
6 | DE
Schritt 2.1: Automatische Verbindung
Ihres Kühlgeräts mit Ihrem Heimnetzwerk (WLAN)
Drücken Sie die Taste „alarm of“.
Im Temperatur-Anzeigefeld des Kühlfachs erscheint „Cn“ (Connectivity = Home Connect Menü).
super
°
C
To uch Technology
super
super
° C
Touch Technology
super
super
super
°
C
To uch Technology
super
super
super
Drücken Sie die Taste „+“ im Kühlfach-Bedienfeld so oft, bis im Temperatur-Anzeigefeld des Kühlfachs
„AC“ (Automatische Verbindung) erscheint und im Temperatur-Anzeigefeld des Gefrierfachs „OF“.
Drücken Sie die Taste „+“ im Gefrierfach-Bedienfeld, um die automatische Verbindung zu starten. Die
Energiesparmodus-Anzeige beginnt zu blinken. Außerdem erscheint im Temperatur-Anzeigefeld des
Gefrierfachs nun für 2 Minuten eine Animation. Führen Sie in diesem Zeitraum die folgenden Schritte
durch.
Aktivieren Sie innerhalb der nächsten 2 Minuten die WPS-Funktion an Ihrem Heimnetzwerk-Router

Handbuch Ihres Routers.)
Bei erfolgreicher Verbindung erscheint „On“ im Temperatur-Anzeigefeld des Gefrierfachs.
Dann direkt weiter mit Schritt 3.
Wenn im Anzeigefeld „OF“ erscheint, konnte keine Verbindung innerhalb der 2 Minuten hergestellt
werden.
1. 
2. Beginnen Sie wieder mit Punkt A oder führen Sie die manuelle Verbindung (Schritt 2.2) durch.
WPS
Wenn das Gerät für längere Zeit nicht bedient wird, schließt sich das Menü automatisch.
Beginnen Sie wieder mit Punkt
!
DE | 7
Schritt 2.2: Manuelle Verbindung Ihres Kühlgeräts
mit Ihrem Heimnetzwerk (WLAN)
Die meisten WLAN Router haben eine WPS-Funktion. Wenn der vorhandene WLAN Router darüber nicht
verfügt bzw. dies nicht bekannt ist, können Sie das Kühlgerät auch manuell mit dem Heimnetzwerk verbinden.
Drücken Sie die Taste „alarm of“.
Im Temperatur-Anzeigefeld des Kühlfachs erscheint „Cn“ (Connectivity = Home Connect Menü).
super
°
C
To uch Technology
super
super
super
super
°
C
To uch Technology
super
super
super
Drücken Sie die Taste „+“ im Kühlfach-Bedienfeld so oft, bis im Temperatur-Anzeigefeld des Kühlfachs
„SA“ (Manuelle Verbindung) erscheint und im Temperatur-Anzeigefeld des Gefrierfachs „OF“.
Drücken Sie die Taste „+“ im Gefrierfach-Bedienfeld.
Das Gerät ist nun bereit für die manuelle Verbindung.
Die Energiesparmodus-Anzeige beginnt zu blinken. Außerdem erscheint im Temperatur-Anzeigefeld des
Gefrierfachs für 2 Minuten eine Animation. Führen Sie in diesem Zeitraum die folgenden Schritte aus.
Ihr Kühlgerät hat jetzt zur Datenübertragung ein eigenes WLAN Netzwerk mit dem
Netzwerknamen (SSID) „HomeConnect“ eingerichtet, auf das Sie mit Ihrem Smartphone oder Tablet
PC zugreifen können.
Wechseln Sie dafür in das allgemeine Einstellungsmenü Ihres Smartphones oder Tablet PCs und rufen
Sie die WLAN Einstellungen auf.
8 | DE
Schritt 2.2: Manuelle Verbindung Ihres Kühlgeräts
mit Ihrem Heimnetzwerk (WLAN)
Verbinden Sie Ihr Smartphone oder Ihren Tablet PC mit dem WLAN Netzwerk (SSID) „HomeConnect“
(das WLAN Passwort [Key] lautet „HomeConnect“). Der Verbindungsvorgang kann bis zu 60 Sekunden dauern!
WLAN

oder Tablet PC.
Die App sucht jetzt einige Sekunden nach Ihrem Kühlgerät. Wenn das Kühlgerät gefunden wurde,
geben Sie den Netzwerknamen (SSID) und das Passwort (Key) Ihres Heimnetzwerks (WLAN) in die

SSID
KEY
Drücken Sie anschließend auf „An Hausgeräte übertragen“.
Bei erfolgreicher Verbindung erscheint „On“ im Anzeigefeld.
Dann weiter mit Schritt 3.
super
super
super
super
Im Anzeigefeld erscheint „OF“. Es konnte keine Verbindung innerhalb der 5 Minuten hergestellt
werden. Kontrollieren Sie, ob sich das Kühlgerät innerhalb der Reichweite des Heimnetzwerks (WLAN)

!
DE | 9
Schritt 3: Verbinden Sie Ihr Kühlgerät
mit der Home Connect App
Verbindung fehlgeschlagen: Vergewissern Sie sich, dass sich Ihr Smartphone oder Tablet PC im Heimnetzwerk (WLAN)
„Er“
erscheinen, setzen Sie die Home Connect Einstellungen zurück. (Achtung: Dabei werden alle Home Connect Einstellungen

?
Stellen Sie sicher, dass die App auf Ihrem Mobilgerät aktiv ist!
super
°
C
To uch Technology
super
super
°
C
To uch Technology
super
super
°
C
To uch Technology
super
super
super
Drücken Sie die Taste „alarm of“.
Im Temperatur-Anzeigefeld des Kühlfachs erscheint „Cn“ (Connectivity = Home Connect Menü).
Drücken Sie die Taste „+“ im Kühlfach-Bedienfeld so oft, bis im Temperatur-Anzeigefeld des
Kühlfachs „PA“ erscheint und im Temperatur-Anzeigefeld des Gefrierfachs „OF“.
Drücken Sie die Taste „+“ im Gefrierfach-Bedienfeld, um das Gerät mit der App zu verbinden.
Die Energiesparmodus-Anzeige beginnt zu leuchten. Außerdem erscheint im Temperatur-
Anzeigefeld des Gefrierfachs eine Animation.
°
C
To uch Technology
super
super
super
super
Nehmen Sie Ihr Mobilgerät zur Hand. Folgen Sie den Anweisungen der App, um den
Vorgang abzuschließen.
Sollte das Kühlgerät nicht automatisch angezeigt werden, drücken Sie in der App auf
„Hausgeräte suchen“ und anschließend auf „Hausgerät verbinden“.
Bei erfolgreicher Verbindung erscheint „PA“ im Temperatur-Anzeigefeld des Kühlfachs und „On“
im Temperatur-Anzeigefeld des Gefrierfachs. Sie haben nun Ihr Kühlgerät erfolgreich mit Ihrer App
verbunden.
E
F
10 | DE
Kameras aktivieren
Hinweis: 
den Kühlgeräteinhalt abfragen, kommt es zu einem erhöhten Datentransfer.
!
Wenn Ihr Kühlgerät mit Ihrem Heimnetzwerk (WLAN) und mit der Home Connect App
verbunden ist, können Sie die Kameras aktivieren:
super
°
C
To uch Technology
super
super
°
C
Touch Technology
super
super
super
Drücken Sie die Taste „alarm of“.
Im Temperatur-Anzeigefeld des Kühlfachs erscheint „Cn“.
Drücken Sie die Taste „+“ im Kühlfach-Bedienfeld so oft, bis im Temperatur-Anzeigefeld
des Kühlfachs „CA“ erscheint und im Temperatur-Anzeigefeld des Gefrierfachs „OF“.
super
°
C
To uch Technology
super
Drücken Sie die Taste „+“ im Gefrierfach-Bedienfeld.
Im Temperatur-Anzeigefeld des Gefrierfachs erscheint „On“ und die Energiesparmodus-
Anzeige leuchtet. Die Kameras sind nun aktiviert.
DE | 11
Kameras deaktivieren
Drücken Sie die Taste „alarm of“.
Im Temperatur-Anzeigefeld des Kühlfachs erscheint „Cn“.
super
°
C
To uch Technology
super
super
°
C
To uch Technology
super
super
super
Drücken Sie die Taste „+“ im Kühlfach-Bedienfeld so oft, bis im Temperatur-Anzeigefeld des
Kühlfachs „CA“ erscheint und im Temperatur-Anzeigefeld des Gefrierfachs „On“.
Drücken Sie die Taste „+“ im Gefrierfach-Bedienfeld.
super
°
C
To uch Technology
super
Im Temperatur-Anzeigefeld des Gefrierfachs erscheint „OF“ und die Energiesparmodus-
Anzeige leuchtet. Die Kameras sind nun deaktiviert.
12 | EN
Congratulations on your refrigerator of tomorrow, which will make your everyday life easier and more agreeable.
More convenient.
Home Connect lets you control your household appliances whenever you want
and wherever you want. Simply and intuitively using a smartphone or tablet.
This saves you bother and waiting around, and you have more time for the
things that are truly important to you.
More straightforward.
Using the app's cleverly designed touchscreen, you can adjust operating
settings such as audible signals or even individual programmes. It's even
simpler and more straightforward than on the appliance itself, plus you have
direct access to a host of data, operating manuals and even numerous
instructional videos.
More connected.
Let yourself be inspired! Discover numerous extras that have been tailor-made
just for your appliances: recipe collections, tips on using your appliances and
much more. Compatible accessories can be ordered at any time with just a
few clicks.
The future begins now in your home!
We are glad you have chosen Home Connect *
* The availability of the Home Connect function depends on the availability of Home Connect services in your country.
www.home-connect.com.
These installation instructions are available in additional languages on the website for
your appliance brand.
EN | 13
A smartphone or tablet PC equipped with the latest version of the relevant operating system.


Network name (SSID):
Password (key):
Three steps to make your daily routine easier:
What do you need to connect your
appliance to Home Connect?
1. Setting up the app 2. Connecting the
household appliance to Wi-Fi
3. Connecting the
household appliance to the app
www.home-connect.com
14 | EN
Step 1: Installing the
Home Connect app
On your smartphone or tablet, go to the App Store (Apple devices)
or to the Google Play Store (Android devices).
Enter "Home Connect"
Select the Home Connect app and install it on your smartphone or tablet PC.
Start the app and create your Home Connect login details. The app will guide you through the registration
process. Don't forget to make a note of your e-mail address and password afterwards.
E-mail: Password:
Home Connect login details:
Please check availability at www.home-connect.com
EN | 15
 Connecting your
refrigerator to your home network (Wi-Fi)
Connect the appliance and switch it on.
Check whether your home network router has a WPS function (automatic connection).
Some routers have a WPS button, for example.

Does your router have a WPS function (automatic connection)?
WPS
WPS
Yes Now go on to Step 2.1 –
Automatically connecting (WPS)
Now go on to Step 2.2 –
Manually connecting
(professional mode)
No
16 | EN
Step 2.1: Automatically connecting
your refrigerator to your home network (Wi-Fi)
Press the „alarm of“ button. The temperature display panel of the refrigerator compartment shows
"Cn" (Connectivity = Home Connect menu).
super
°
C
To uch Technology
super
super
° C
Touch Technology
super
super
super
°
C
To uch Technology
super
super
super
Press the "+" button on the control panel of the refrigerator compartment until „AC“ (automatic
connection) appears on the temperature display panel of the refrigerator compartment, and the
temperature display panel of the freezer compartment shows „OF“.
Press the „+“ button on the control panel of the freezer compartment to start the automatic connection.

temperature display panel of the freezer compartment for 2 minutes. Perform the steps below during
this period.
Activate the WPS function on your home network router within the next 2 minutes (certain routers

router.)
If the connection is successful, „On“ appears on the temperature display panel of the freezer
compartment.
Now go on to Step 3.
If „OF“ appears on the display panel, it was not possible to establish a connection within 2 minutes.
1. Check whether your refrigerator is located within the range of your home network (Wi-Fi).
2. Start again with point A or connect manually (Step 2.2).
WPS
If the appliance is not operated for a prolonged period, the menu closes automatically.
Start again with point
!
EN | 17
Step 2.2: Manually connecting your refrigerator
to your home network (Wi-Fi)
Most Wi-Fi routers have a WPS function. If the Wi-Fi router present does not have a WPS function,
or if this is unknown, you can also manually connect the refrigerator to the home network.
Press the „alarm of“ button.
The temperature display panel of the refrigerator compartment shows „Cn“ (Connectivity = Home
Connect menu).
super
°
C
To uch Technology
super
super
super
super
°
C
To uch Technology
super
super
super
Press the „+“ button on the control panel of the refrigerator compartment until „SA“ (manual connection)
appears on the temperature display panel of the refrigerator compartment, and the temperature display
panel of the freezer compartment shows „OF“.
Press the „„+“„ button on the freezer compartment control panel.
The appliance is now ready for manual connection.

display panel of the freezer compartment for 2 minutes. Perform the steps below during this period.
Your refrigerator has now set up its own Wi-Fi network with the network name (SSID) „HomeConnect“
for data transfer, which you can access using your smartphone or tablet PC.

settings.
18 | EN
Step 2.2: Manually connecting your refrigerator
to your home network (Wi-Fi)
Connect your smartphone or tablet PC to the Wi-Fi network (SSID) „HomeConnect“
(Wi-Fi password [key] is „HomeConnect“). The connection process may take up to 60 seconds!
WLAN
Once successfully connected, open the Home Connect app on your smartphone
or tablet PC.
The app will now take a few seconds to search for your refrigerator. Once the refrigerator has been found,
enter the network name (SSID) and password (key) for your home network (Wi-Fi)

SSID
KEY
Then press "Transfer to household appliances".
If the connection is successful, „On“ appears on the display panel.
Now go on to Step 3.
super
super
super
super
„OF“ appears on the display panel. The connection could not be established within 5
minutes. Check whether the refrigerator is within range of the home network (Wi-Fi) and repeat the
process if necessary.
!
EN | 19
Step 3: Connecting your refrigerator
to the Home Connect app
Connection failed: Ensure that your smartphone or tablet PC is within your home network (Wi-Fi). If necessary, repeat the entire
process described in Step 3. If „Er“ appears on the temperature display panel of the freezer compartment, reset the Home
Connect settings. (Caution: this will reset all the Home Connect settings.) See the instruction manual for further details on resetting
and for more tips.
?
Ensure that the app on your mobile device is active!
super
°
C
To uch Technology
super
super
°
C
To uch Technology
super
super
°
C
To uch Technology
super
super
super
Press the „alarm of“ button. The temperature display panel of the refrigerator compartment
shows "Cn" (Connectivity = Home Connect menu).
Press the „+“ button on the control panel of the refrigerator compartment until „PA“ appears on
the temperature display panel of the refrigerator compartment, and the temperature display panel
of the freezer compartment shows „OF“.
Press the „+“ button on the control panel of the freezer compartment to connect the appliance
to the app. The energy saving mode display starts to light up. In addition, an animation appears
on the temperature display panel of the freezer compartment.
°
C
To uch Technology
super
super
super
super
Pick up your mobile device. Follow the instructions in the app to complete the
process.
If your refrigerator is not displayed automatically, press "Appliance search"
and then "Connect an appliance" in the app.
If the connection is successful, „PA“ appears on the temperature display panel of the refrigerator
compartment, and the freezer compartment temperature display panel shows „On“. You have
now successfully connected your refrigerator to your app.
E
F
20 | EN
Activating the cameras
Note: if the cameras are activated, and the refrigerator contents are
requested frequently via the app, this will result in increased data transfer.
!
If your refrigerator is connected to your home network (Wi-Fi) and to the Home Connect app,
you can activate the cameras:
super
°
C
To uch Technology
super
super
°
C
Touch Technology
super
super
super
Press the „alarm of“ button.
The temperature display panel of the refrigerator compartment shows „Cn“.
Press the „+“ button on the control panel of the refrigerator compartment until „CA“
appears on the temperature display panel of the refrigerator compartment, and the temperature display panel
of the freezer compartment shows „OF“.
super
°
C
To uch Technology
super
Press the „+“ button on the freezer compartment control panel.
„On“ appears on the temperature display panel of the freezer compartment, and the
energy saving mode display lights up. The cameras are now activated.
  • Page 1 1
  • Page 2 2
  • Page 3 3
  • Page 4 4
  • Page 5 5
  • Page 6 6
  • Page 7 7
  • Page 8 8
  • Page 9 9
  • Page 10 10
  • Page 11 11
  • Page 12 12
  • Page 13 13
  • Page 14 14
  • Page 15 15
  • Page 16 16
  • Page 17 17
  • Page 18 18
  • Page 19 19
  • Page 20 20
  • Page 21 21
  • Page 22 22
  • Page 23 23
  • Page 24 24
  • Page 25 25
  • Page 26 26
  • Page 27 27
  • Page 28 28
  • Page 29 29
  • Page 30 30
  • Page 31 31
  • Page 32 32
  • Page 33 33
  • Page 34 34
  • Page 35 35
  • Page 36 36
  • Page 37 37
  • Page 38 38
  • Page 39 39
  • Page 40 40
  • Page 41 41
  • Page 42 42
  • Page 43 43
  • Page 44 44
  • Page 45 45
  • Page 46 46
  • Page 47 47
  • Page 48 48
  • Page 49 49
  • Page 50 50
  • Page 51 51
  • Page 52 52

Bosch KGN36HI32 HC Home Connect leaflet

Tipo
HC Home Connect leaflet
Questo manuale è adatto anche per

in altre lingue