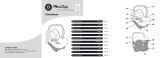
La pagina si sta caricando...

instructions
instrucciones
instruções
gebrauchsanleitung
gebruiksaanwijzing
istruzione
инструкции
pokyny
instrukcja obsługi
інструкція
használati utasítás
操作指南
תוארוה
تﺎﻣﯾﻠﻌﺗ
www.bebecar.com
i

Don´t use safety seat when airbag is active.
No use la sillita si el airbag se ha disparado.
Não utilize a cadeira se o airbag estiver activado.
Ne pas utiliser le siège auto lorsque l’airbag est activé.
Bei aktiviertem Airbag den Kindersitz nicht verwenden.
Zitje niet gebruiken met aktieve airbag.
Non utilizzare il passeggino con airbag attivo.
Используйте детское автокресло только в том случае,
если отключена подушка безопасности пассажира.
Fotelika dziecięcego nie wolno instalować na siedzeniach
wyposażonych w aktywną poduszkę powietrzną.
Nepouzivejte sedacku pokud airbag je aktivovan.
Не використовуйте сидіння
якщо подушка безпеки активона.
Ne használja a hordozót olyan
ülésben amely aktív légzsákkal felszerelt.
如安全气囊被激活,不要使用座椅
תוחיטבה בשומב שמתשהל ןיא
הליעפ ריוואה תירכ רשאכ
ﺎﻣدﻧﻋ نﺎﻣﻷا دﻋﺎﻘﻣ لﻣﻌﺗﺳﺗ ﻻ
ﺔطﺷﻧ ﺔﯾﺋاوﮭﻟا ةدﺎﺳوﻟا نوﻛﺗ


A
B
C

+
A
B
B
A
DO NOT USE the
extra padded reducer (cushion)
A
40- 60 cm
60-80 cm
158º
recline
The seat must be reclined
to the lie flat position when
baby is less than 60 cm.
100º
Seating
Position
extra padded
reducer
(cushion)
A

158º
recline
100º
Seated
bca

Rocking position
Posición de mecedora
Posição oscilante
Position balancement
Schaukelstand
Schommelpositie
Posizione a dondolo
Позиция колыбели
Pozycja kołysania
Poloha pro houpani
Позиція крісла-качалки
Hintázó funkció
摇摆位置
עונענ בצמ
زازھ ﻊﺿوﻣ
Extra safety position 1
Posición de seguridad extra 1
Posição ultra-segura 1
Position sécurité extra 1
Extra veiligheidsstand 1
Extra Sicherheitsstand 1
Posizione 1 di maggiore sicurezza
Позиция дополнительной безопасности 1
Pozycja z dodatkowym zabezpieczeniem 1
Poloha se zajistenim 1
Позиція додаткової безпеки 1
Extra biztonsági funkció 1
超安全位置1
ףסונ תוחיטב בצמ
1ﻲﻓﺎﺿإ ﺔﻣﻼﺳ ﻊﺿوﻣ
Carrying position
Posición de transporte
Posição de transporte
Position transport
Trageposition
Draagpositie
Posizione per il trasporto a mano
Переноска
Pozycja przenoszenia
Poloha pro prepravu
Позиція для транспортування
Hordozó funkció
手提位置
האישנ בצמ
لﻣﺣ ﻊﺿوﻣ
Extra safety position 2
Posición de seguridad extra 2
Posição ultra-segura 2
Position sécurité extra 2
Extra Sicherheitsstand 2
Extra veiligheidsstand 2
Posizione 2 di maggiore sicurezza
Позиция дополнительной безопасности 2
Pozycja z dodatkowym zabezpieczeniem 2
Poloha se zajistenim
Позиція додаткової безпеки 2
Extra biztonsági funkció 2
超安全的位置2
ףסונ תוחיטב בצמ
2 ﻲﻓﺎﺿإ ﺔﻣﻼﺳ ﻊﺿوﻣ
Car position
Posición en el coche
Posição para automóvel
Position voiture
Autoposition
Autopositie
Posizione per il trasporto in auto
Позиция для перевозки в автомобиле
Pozycja w samochodzie
Poloja pro pouzoti ve vozidle
Позиція для встановлення в автомобілі
Autós pozíció
汽车内置位置
תינוכמ בצמ
ةرﺎﯾﺳﻟا ﻊﺿوﻣ

Козирок від согця
Napfény tető
车篷
היישמש
Footmuff (optional)
Cubrepies (opcional)
Cobrepes (opção)
Nid d’ange (en option)
Engelnestje (optioneel)
Coprigambe (opzionale)
Fußsack (optional)
Муфта для ног (дополнительно)
Śpiworek (opcjonalnie)
Nanoznik (prislusenstvi)
Lábzsák (választható)
Чехол на ніжки (опціон, за
додатковим заказом)
婴儿车保暖脚套 (可选)
םיילגר יוסיכ
(ילאנויצפוא)
Sunshade
Sombrilla
Capota
Pare-soleil
Sonnendach
Zonnekap
Capottina parasole
Козырек от солнца
Osłona przeciwsłoneczna
Striska
errata • erreur dans l’imprimé • drukfout
errata corrige • oprava • перелік опечаток
a b
c d
e f


1
Carrying handle
Asa de transporte
Pega de transporte
Etrier de transport
Tragebügel
Draagbeugel
Maniglione per il trasporto a mano
Ручка для переноски
Rączka do przenoszenia
Rukojet pro prenos
Ручка для транспортування
Hordozó kar
手提把手
האישנ תידי
لﻣﺣﻠﻟ ضﺑﻘﻣ
2
Seat lining to reduce seat size
Revestimiento del asiento parareducir el tamaño del asiento
Redutor do assento
Réducteur de siège
Sitzverkleinerer
Stoelverkleiner
Riduttore del seggiolino
Подголовник
Wykładzina zmniejszająca wewnętrzne rozmiary fotelika
Vystelka sedacky
Оббивка для зменшення розміру сидіння
Belső szűkítő párna az ülés méretének változtatásához
内侧衬垫
בשומ לדוג תתחפהל בשומ תנטב
دﻌﻘﻣﻟا مﺟﺣ نﻣ دﺣﻠﻟ دﻌﻘﻣﻟا نﯾطﺑﺗ
3
Shoulder belt
Cinturón de hombros
Cinto de ombros
Ceinture d'épaule
Schultergurt
Schoudergordel
Cintura diagonale
Плечевой ремень
Pas barkowy
Ramenni pas
Плечовий ремінь
Váll pánt- biztonsági öv váll része
肩带
םייפתכ תרוגח
فﺗﻛﻟا مازﺣ
4
Central adjuster
Ajustador central
Dispositivo de regulação central
Réglage central
Zentralversteller
Centraalversteller
Regolazione centrale
Центральный регулятор
Regulator centralny
Centralni nastaveni
Центральний регулятор
K özponti öv állító
中央控制按钮
יזכרמ םאתמ
يزﻛرﻣﻟا فﯾﻛﻣﻟا
5
Lower belt
Cinturón inferior
Cinto inferior
Ceinture inférieure
Untergurt
Ondergordel
Cintura subaddominale
Нижний ремень
Pas dolny
Pas dolni
Нижній ремінь
Alsó biztonsági öv
底部安全带
הנותחת הרוגח
ﻰﻧدﻷا مازﺣﻟا
6
Push button
Pulsador
Botão de pressão
Bouton pression
Druckknopf
Drukknop
Pulsante a pressione
Кнопка регулирования
положения ручки
Przycisk
Tlacitko
Кнопка для регулювання ручки
Benyomó gomb
压力按钮
ןצחל
رزﻟا طﻐﺿا
7
Seat belt guide
Guía del cinturón de seguridad
Guia do cinto de segurança
Guide de ceinture
Gurtführung
Gordelgeleider
Guida della cintura
Направляющая ремня
Prowadnica pasa fotelika
Voditko pasu sedadla
Напрямна для ременя безпеки
Biztonsági öv vezető
安全带导向
בשומ תרוגח ליבומ
دﻌﻘﻣﻟا مازﺣ لﯾﻟد
8
Upholstery
Tapizado desmontable
Estofo amovível
Revêtement
Verkleidung
Bekleding
Rivestimento
Чехол сиденья
Tapicerka
Potah
Оббивка
Huzat
坐垫
דופיר
دﯾﺟﻧﺗﻟا داوﻣ
9
Stabilizer
Ajustador de posición
Estabilizador
Églage de position
Standversteller
Standversteller
Regolazione della posizione
Регулятор позиции
Regulator pozycji
Regulator polohy
Регулятор позиції
Stabilizáló
稳定器
בציימ
نزاوﻣ
10
Belt slit
Ranura para el cinturón
Ranhura para cinto
Fente de ceinture
Gurtschlitz
Gordelsleuf
Fessura di innesto della cintura
Прорезь для ремня
Uchwyt pasa
Voditko pasu
Прорізь для ременя безпеки
Biztonsági öv nyílás
安全带插口
הרוגח ץירח
مازﺣ ﺔﺣﺗﻓ
11
Storage compartment
Compartimento de
almacenamiento pequeño
Compartimento para arrumação
Bac de rangement
Aufbewahrungsfach
Opbergbakje
Vano portaoggetti
Отделение для мелких
предметов
Schowek
Schranka
відділення для дрібних
предметів
Tároló rész
储物箱
ןוסחא את
نﯾزﺧﺗﻟا ةرﺟﺣ


TO FIT AUTO SEAT: Place auto seat on chassis attachment devise “easylock”.
Lock will automatically engage.
Warning: Check that the auto seat attachment devices are correctly engaged
before use.
TO REMOVE AUTO SEAT: Push in button on back of seat unit and lift auto seat
away from chassis frame.
PARA ACOPLAR LA SILLA DE AUTO: Ponga los enganches de la silla de auto
sobre el sistema “Easylock” y se enganchará automáticamente.
Advertencia: Asegúrese que todos los enganches de la silla estén completamente
anclados antes de su uso.
PARA QUITAR LA SILLA DE AUTO: Pulse el botón en la parte trasera de la silla a
la vez que levanta la silla del chasis.
COLOCAR O ASSENTO AUTO: Coloque o assento auto sobre o sistema de
fixação “easylock” do chassis. O fecho bloqueará automaticamente.
Atenção: Verifique se os pontos de encaixe estão bem fixos antes de usar o
produto.
RETIRAR O ASSENTO AUTO: Para retirar o assento da estrutura do chassis,
basta pressionar o botão na parte traseira e levantar o mesmo.
FIXATION DE LE SIEGE AUTO SUR LE CHASSIS: Placez le siège auto sur le «
easylock » et il se fixera automatiquement.
Avertissement: Vérifier que les dispositifs de fixation soient correctement
enclenchés avant usage.
POUR ENLEVER LE SIEGE AUTO: Poussez sur le bouton à l’arrière et retirez le
siège en même temps.
OM HET AUTOZITJE TE BEVESTIGEN: Plaats het autozitje op de „easylock“
bevestiging en het autozitje zal automatisch vastklikken.
Opgelet: Vergewis U ervan dat de autozit goed is bevestigd alvorens hem te
gebruiken.
OM het AUTOZITJE TE VERWIJDEREN: Druk op de knop achteraan de autostoel
en neem de autostoel tegelijkertijd van de chassis.
PER SISTEMARE L'EASYMAXI: Collocare l'easy maxi sul dispositivo di fissaggio
“Easylock” del telaio, permettendo l'aggancio nei punti di incastro. La chiusura
viene fissata automaticamente.
Attenzione: accertarsi che l'easy maxi sia fissato correttamente in tutti i punti di
incastro.
PER RIMUOVERE L'EASYMAXI: Premere il bottone collocato nella parte
posteriore dell'easy maxi e sollevare.
FIXIEREN DER AUTO-BABYSCHALE: Platzieren Sie die Auto-Schale auf der
„Easylock“-Vorrichtung am Gestell. Die Sperre rastet wird automatisch ein.
Achtung: Prüfen Sie, dass die Babyschale korrekt befestigt wurde, bevor Sie den
Wagen in Gebrauch nehmen.
ENTFERNEN DER BABYSCHALE: Drücken Sie die Taste an der Rückseite der
Babyschale und heben diese vom Gestell.
ЧТОБЫ УСТАНОВИТЬ АВТОМОБИЛЬНОЕ СИДЕНЬЕ поместите
направляющие в пазы по обеим сторонам шасси.
Опустите сиденье, зажимы защелкнуться автоматически.
ЧТОБЫ СНЯТЬ АВТОМОБИЛЬНОЕ СИДЕНЬЕ нажмите на кнопку,
расположенную на спинке сиденья, одновременно поднимая его.
W CELU ZAŁOŻENIA FOTELIKA SAMOCHODOWEGO: Ustaw fotelik
samochodowy na elementach mocowania w podwoziu „easylock”. Blokada
zadziała automatycznie. Ostrzeżenie: Przed przystąpieniem do dalszego
użytkowania upewnij się, że elementy mocujące zostały prawidłowo zablokowane.
W CELU ZDJĘCIA FOTELIKA SAMOCHODOWEGO: Aby zdjąć fotelik
samochodowy ze stelaża wózka należy nacisnąć przycisk znajdujący
się z tyłu oparcia fotelika w jego górnej części, a następnie unieść fotelik ku górze.
UPEVNENI AUTOSEDACKY: Autosedacku vlozte na podvozek tak, aby uchyt
sedacky mohl zaklapnout do uchyceni podvozku. Nepouzivejte nasili, presvedcte
se o spravnem uchyceni pred pouzitim.
SEJMUTI SEDACKY: Stlacte tlacitko na zadni casti autosedacky a sedacku
vyjmete z podvozku.
ВСТАНОВЛЕННЯ АВТОКРІСЛА: вставте направляючі в пази з обох сторін
шасі. Опустіть автокрісло, затиски замкнуться автоматично.
ЗНЯТТЯ АВТОКРІСЛА: натисніть на кнопку, що знаходиться на задній частині
автокрісла, одночасно підіймаючи його.
A HORDOZÓ FELHELYEZÉSE A VÁZRA: Helyezze a hordozót a váz “easylock”
csatlakozó pontjához. A zár automatikusan záródik.
Figyelem: Használat előtt kérjük ellenőrizze, hogy a babakocsi vázára helyezett
hordozó helyesen csatlakozik-e.
A HORDOZÓ LEVÉTELE A VÁZRÓL: Nyomja be a hordozó hátulján található
gombot és emelje le a hordozót a vázról.
GBR
ESP
PRT
FRA
NLD
ITA
RUS
CZE
UKR
ISR
POL
HUN
CHN 安装自动座椅:将自动座椅固定在支架上方。安全锁自动锁定。
使用前,请检查各部件 是否安装到位、连接紧固。
座椅移除只需按住后方按钮直接取出即可。拆除自动座椅:
DEU

ENGLISH
General
• The Easymaxi is suitable for children with a stature between
40-80 cm.
• The Easymaxi is placed on the passenger’s seat or the back
seat of the car in the rear position (illustrations 1 and 2).
• Always fold out the position adjuster (illustrations 2 and 9)
when using the Easymaxi in the car.
• Only use the Easymaxi in the passenger’s seat if there is
no active airbag present.
• The Easymaxi is fastened in position using the 3-point seat belt
of the car that should have ECE approval no.16 or an approval of
equal quality. 2-Point belts are not to be used to fasten the
Easymaxi in a car.
• The carrying handle has 2 push buttons on each side. Press all
four buttons at the same time in order to adjust the carrying
handle (illustration 13).
Check that the buttons have clicked outwards after adjusting the
handle.
• The sunshade that is supplied with the Easymaxi can be
adjusted in various positions.
Placing your child in the child safety seat
• Press the button of the central adjuster and pull the belts of the
seat towards you until they have reached their maximum length
(illustration 3).
• Open the belts outward, place the child in the Easymaxi and
secure the child (illustrations 4 and 5). Place the locking parts of
the belts on top of one another (detail 5) and insert them together
in the safety lock until you clearly hear a ‘click’ (illustration 5).
• Now tighten the belt of the central adjuster by pulling it, so that
you child is securely seated (illustration 7). You can unfasten the
lock of the belt by pressing the red button (illustration 6).
• The handle should be put in the carrying position if you wish to
carry the Easymaxi (illustration 8).
Securing the child safety seat in the car
• Position the child’s seat in the passenger’s seat or on the back
seat in rearwardfacing position (illustrations 1and 2).
• Now place the carrying handle in the car position against the
back of the chair (illustration 9).
• The positions of the seat belt are indicated on the Easymaxi in
blue.
1 First, guide the seat belt along the back of the Easymaxi.
2 Guide the hip-belt through between the shell of the child safety
seat and the part below that (illustration 10).
3 Pull the hip-belt upwards in the belt guide (illustration 11), check
that the belts are not twisted and fasten the belt with a click
(illustration 11).
4 Tighten the shoulder belt and guide it through the belt slit at the
back of the child’s seat, making sure there is no slack (illustration
12).
5 The position adjuster is to be put in the car position.
This will tighten the seat to the car.
IMPORTANT! KEEP FOR FUTURE REFERENCE.

ENGLISH
Removing the child from the car
• You can easily remove your child from the car safety seat by
unfastening the belts of the Easymaxi. The Easymaxi itself
remains positioned in the car.
• The carrying handle is to be put in the carrying position before
removing the Easymaxi from the car (illustration 8). You can then
unfasten the 3-point car safety belt and remove the Easymaxi
from the car.
• When carrying your baby or moving the Easymaxi, always
ensure that your baby is secured in the seat by means of the belt
of the seat.
Adjusting possibilities
Handle
• By simultaneously pressing the knobs on the side of the seat,
you can adjust the handle in the following 5 positions: rocking
position, extra safety position 1, carrying position, extra safety
position 2 and the car position (illustrations 21 through 25).
Position adjuster
• The Easymaxi can furthermore be adjusted in 2 different
positions by folding the position adjuster in or out.
Folded in: rocking position (only to be used in the home)
(illustration 14).
Folded out: car position or standing position (illustration 15).
Enlarging the child safety seat
As your child grows, you are to adjust the child safety seat
according to the following steps:
1 Remove the extra padded cushion (B) from the seat (illust. 19).
NB: DO NOT USE the extra padded cushion (B) when baby
is more than 60 cm.
2 Switch the position of the belts by pulling handle situated
behind the seat and move it to the desired position.
(illustration 17 A; B; C).
Reclinable backrest (reclined position)
NB: The seat must be reclined to the lie flat position when baby
is less than 60 cm.
First, press the button of the central adjuster and pull the belts of
the seat towards you until they have reached their maximum
length.
To recline, pull the fabric cushion of the seat forwards until it locks
in position.
To return to the sitting position, pull fabric cushion of the seat
forwards (a) and slightly lift (b) then slide it back (c) to its original
position (illustration 20).
Removal and maintenance of the upholstery
• You can remove the upholstery as follows:
- First unfasten the material at the head of the child’s seat.
- Now unhook the upholstery at the height of the press buttons
(illustration 18).
- Pull the upholstery upward at the foot and unfasten the material
around the button of the central adjuster.
- Slide the belt cover off the safety belts.
• You can wash the upholstery by hand at a temperature of 30°C.
• The plastic parts can be cleaned using lukewarm water and
soap. Do not use any solvents to clean the car seat.

ENGLISH
WARNING!
• WARNING:Never leave the child unattended.
• WARNING: Do not use as a rocker in the home once your child can sit
unaided.
• WARNING: This reclined cradle is not intended for prolonged periods
of sleeping.
• WARNING: It is dangerous to use this reclined cradle on an elevated
surface, e.g. a table.
• WARNING: Always use the restraint system.
• Stop using this child restraint 7 years after date of manufacturing. Due
to ageing the quality of the material may change. Do not use second
hand products whose history is unknown.
The warranty only applies for the first owner and is not transferable.
• This car seat does not replace a cot or a bed. Should your child need to
sleep, then it should be placed in a suitable cot or bed.
• Do not use the car seat if any components are broken or missing.
• Do not use accessories or replacement parts other than those
approved by the manufacturer. It is dangerous to make any alterations or
additions to the device without the approval of the Type Approval
Authority, and is also dangerous not to follow closely the installation
instructions provided by BÉBÉCAR.
• The Easymaxi has a small storage compartment at the rear in which to
store a number of small items. You can also store the instructions for use
in this compartment (illustration 16).
• You can remove the child from the Easymaxi without removing the
child’s seat from the car.
• You must support the head of your newborn child with the
accompanying foam bottom that is used to reduce the size of the seat.
• Never hold your child on your lap in the car; always use the Easymaxi
(this also applies to short trips).
• The rigid items and plastic parts of an Enhanced child restraint shall be
so located and installed that they are not liable, during everyday use of
the vehicle, to become trapped by a movable seat or in a door of the
vehicle.
• Replace the Easymaxi when it has been subject to violent stresses in
an accident.
• The Easymaxi should always be fastened with the 3-point belt, even if
your child is not accompanying you on your trip.
• The non-upholstered, plastic parts of the child’s seat may become too
warm for contact with your child’s skin if the car has been standing in the
sun for too long.
• Make sure that the belts of the Easymaxi are not twisted and that they
fit snugly around the body of your child.
• Make sure that the 3-point belt, which you have used to secure the
Easymaxi in the car, is worn low down so that the pelvis is firmly engaged
and drawn tight.
• Never make any alterations or additions to the Easymaxi without the
approval of Bebecar. Follow closely the installation instructions
provided.
• Be sure to secure any baggage or other objects that may cause harm
during a car accident.
• Install your Easymaxi according to the instructions.
• Always use the belt to secure your child in the child’s seat.
• Only use the original upholstery, this in connection with the safety
regulations. The Enhanced Child Restraint System shall not be used
without the cover and shall never be replaced with any other than the
one recommended by the manufacturer, because the cover constitutes
an integral part of the restraint performance.
• The Easymaxi is completely recyclable.

ESPAÑOL
General
• El Easymaxi ha sido diseñado para niños con una estatura de
entre 40 y 80 cm.
• El Easymaxi se coloca en el asiento del pasajero o en el
asiento trasero del coche en la posición posterior (ilustraciones 1
y 2).
• Plegar siempre hacia fuera el ajustador de posición
(ilustraciones 2 y 9) cuando se usa el Easymaxi en el coche.
• Use sólo el Easymaxi en el asiento del pasajero si no hay
un airbag activo presente.
• El Easymaxi se fija en posición con el cinturón de seguridad de
3 puntos del coche que debe tener la aprobación ECE nº 16 o una
aprobación de la misma calidad. Los cinturones de 2 puntos no
se pueden utilizar para fijar el Easymaxi al coche.
• El asa de transporte tiene 2 pulsadores en cada lado. Presione
los cuatro botones al mismo tiempo para ajustar el asa de
transporte (ilustración 13). Compruebe que los botones hayan
hecho clic hacia fuera después de ajustar las asas.
• La sombrilla que se suministra con el Easymaxi se puede
ajustar en varias posiciones.
Colocación del niño en el asiento de seguridad infantil
• Pulse el botón del ajustador central y tire de los cinturones del
asiento hacia usted hasta que hayan alcanzado la longitud
máxima (ilustración 3).
• Abra los cinturones hacia fuera, coloque al niño en el Easymaxi
y asegúrelo (ilustraciones 4 y 5). Coloque las piezas de bloqueo
de los cinturones una encima de otra (detalle 5) e insértelas en el
cierre de seguridad hasta que oiga claramente un “clic”
(ilustración 5).
• Ahora tense el cinturón del ajustador central tirando de él, de
manera que el niño esté sentado de modo seguro (ilustración 7).
Puede desabrochar el cierre del cinturón pulsando el botón rojo
(ilustración 6).
• El asa se debe poner en posición de transporte si desea
transportar el Easymaxi (ilustración 8).
Asegurar el asiento de seguridad infantil en el coche
• Coloque la sillita Easymaxi en el asiento trasero, de espaldas a
la dirección de conducción (ilustraciones 1 y 2).
• A continuación, fi je la estructura de carga en la posición de
vehículo, contra el respaldo del asiento (ilustración 9).
• Las distintas posiciones del cinturón del coche están indicadas
en color azul en la sillita Easymaxi.
1 Coloque el cinturón del vehículo a la parte posterior de la
Easymaxi.
2 Haga pasar el cinturón de cadera entre el fondo de la sillita y la
pieza que tiene debajo (ilustración 10).
3 Tire del cinturón de la cadera hacia arriba al regulador del
cinturón (detalle 11), compruebe que el cinturón no haya
quedado girado y sujételos con un clic (ilustración 11).
4 Haga pasar el cinturón de hombro por la ranura que hay en la
parte trasera de la sillita y tire de él de tal modo que quede tenso
(ilustración 12).
5 A continuación coloque el dispositivo de fi jación en la posición
de vehículo. De este modo, la sillita queda aún más tirante
(ilustración 15).
¡IMPORTANTE!: CONSERVAR PARA FUTURAS REFERENCIAS

ESPAÑOL
Sacar al niño del coche
• Puede sacar fácilmente al niño del asiento de seguridad del
coche desabrochando los cinturones de seguridad del
Easymaxi. El Easymaxi mismo continúa colocado en el coche.
• El asa de transporte se debe poner en posición de transporte
antes de sacar el Easymaxi del coche (ilustración 8). Entonces
puede desabrochar el cinturón de seguridad de 3 puntos y sacar
el Easymaxi del coche.
• Cuando transporte al bebé o mueva el Easymaxi, asegúrese
siempre de que el bebé está seguro en el asiento mediante el
cinturón de seguridad del asiento.
Posibilidades de ajuste
Asa
• Al presionar simultáneamente los mandos en el lado del
asiento, puede ajustar el asa en las 5 posiciones siguientes:
posición de mecedora, posición de seguridad extra 1, posición
de transporte, posición de seguridad extra 2 y la posición del
coche (ilustraciones 21 a 25).
Ajustador de posición
• El Easymaxi se puede ajustar además en 2 posiciones
distintas al plegar hacia fuera o hacia dentro el ajustador de
osición.
Plegado hacia dentro: posición de mecedora (sólo se debe
usar en casa) (ilustración 14). Plegado hacia fuera: posición
del coche o posición de pie (ilustración 15).
Ampliación del asiento de seguridad para niños
A medida que su hijo crece, debe ajustar el asiento de seguridad
para niños de acuerdo con los siguientes pasos:
1) Retire el cojín extra acolchado (B) del asiento (ilustración 19).
NB: NO UTILICE el cojín extra acolchado (B) cuando el bebé
mide más de 60 cm.
2) Cambie la posición de los cinturones tirando de la empuñadura
situada detrás del asiento y muévala a la posición deseada.
(Ilustración 17 A; B; C).
Respaldo reclinable (posición reclinada)
NB: El asiento debe estar reclinado en posición horizontal
cuando el bebé mide menos de 60 cm.
Primero, presione el botón del ajustador central y tire de los
cinturones del asiento hacia Usted hasta que alcance su
longitud máxima.
Para reclinarlo, tire del cojín de tela del asiento hacia adelante
hasta que encaje en su posición.
Para volver a la posición sentada, tire del cojín de tela del asiento
hacia adelante (a) y levántelo ligeramente (b) y luego deslícelo
hacia atrás (c) a su posición original (ilustración 20).
Retirada y mantenimiento del tapizado
• Puede retirar el tapizado como se indica a continuación:
- Primero suelte el material en el cabezal del asiento infantil.
- Ahora desenganche el tapizado a la altura de los pulsadores
(ilustración 18).
- Tire del tapizado hacia arriba en la parte de los pies y suelte el
material alrededor del botón del ajustador central.
- Deslice la cubierta del cinturón fuera de los cinturones de
seguridad.
• Puede lavar el tapizado a mano a una temperatura de 30°C.
• Las piezas plásticas se pueden lavar con agua tibia y jabón.
No utilice disolventes para limpiar el asiento del coche.
1/43