Grundig Split Type Wall Mounted Air Conditioner Manuale utente
- Tipo
- Manuale utente

Split type wall mounted
air-conditioner
HomeWhiz Function
User Manual
EN - DE - IT - ES - PL - FR - RO - NL - TH - BS - HR -
MK - SL - SQ - SR - BG - PT - UA
01M-8504153200-4722-04

2 / EN Air-Conditioner / User Manual
CONTENTS
ENGLISH 3-7
DEUTSCH 8-12
ITALIANO 13-17
ESPAÑOL 18-22
POLSKI 23-27
FRANÇAIS 28-33
ROMÂNĂ 34-38
NEDERLANDS 39-43
ไทย 44-48
BOSANSKI 49-53
HRVATSKI 54-58
МАКЕДОНСКИ 59-63
SLOVENŠČINA 64-68
SHQIPTARE 69-73
СРПСКИ 74-78
БЪЛГАРСКИ 79-83
PORTUGUÊS 84-88
УКРАЇНСЬКОЮ 89-93

3 / EN
Air-Conditioner / User Manual
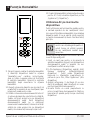
1 HomeWhz functon
HomeWhiz feature allows you to control your air
conditioner and monitor the room temperature
from your phone.
HomeWhz setup & user
account settngs
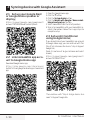
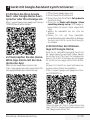
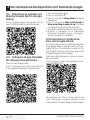
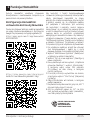
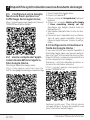
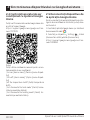
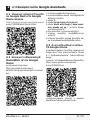
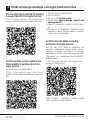
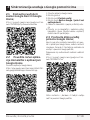
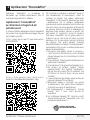
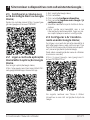
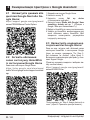
Please install HomeWhiz mobile application to
your mobile phone from AppStore or Google Play
via following QR cod.
https://apps.apple.com/tr/app/homewhiz/
id1234028528
https://play.google.com/store/apps/
details?id=com.homewhiz.global&hl=tr&gl
To use the wireless control (remote control)
feature of your air conditioner, you need to install
HomeWhiz from the application market for your
mobile device. To use the app, ensure your mobile
device is connected to the internet. If you have not
used the product before, you first need to sign
up within the app with your e-mail address. Once
registration is complete, you can use your account
with all HomeWhiz-enabled appliances in your
home. To see appliances paired with your account,
tap “Add/Remove Appliance” from the “Appliances”
tab on the app. Here, you can assign appliances to
users.
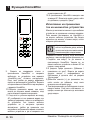
1. On your moble devce, go to wreless settngs
and connect to the your Home Network you
want to connect your ar condtoner.
2. Tap “Add/Remove Applance” on the HomeWhz
app.
3. Tap “Set up a new applance”.
4. On the screen that appears, choose “Heatng-
Coolng Devces” and choose “Ar Condtoner”,
then wrte your product’s SKU number(10-dgt)
nto bottom of page, then tap “contnue”.
5. Read the on-screen nstructons, then tap
“Start Setup”.
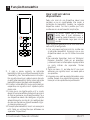
6. Dsconnect power supply of AC, then connect
the power supply of AC
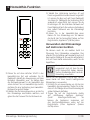
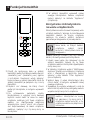
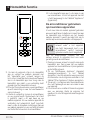
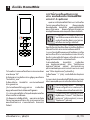
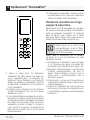
7. On the AC remote, press “LED” button 7 tmes
consecutvely n 10 seconds.
8. When unt dsplays “AP”, “HomeWhz_xxxx” wll
be dsplayed on the network lst to represent
the ar condtoner.
RECYCLED &
RECYCLABLE
PAPER

4 / EN Air-Conditioner / User Manual
1 HomeWhz functon
9. Go to the next step at the HomeWhz app and
connect your moble devce to “HomeWhz_
xxxx” network as per the nstructons. You
should then see the network password on the
HomeWhz app. Return to HomeWhz app after
connectng to HomeWhz network.
10. Choose the home network you want to
connect your ar condtoner, then enter the
password for the network.
11. Once your connecton between AC and your
selected home network s establshed, you wll
need to do the same on your moble devce. If
your moble devce has not set up the connecton
automatcally, you need to go to wreless
network settngs on your moble devce and
connect to the same network as the AC.
12. On the HomeWhz app, enter a name for your
AC. You can see the applance you added on the
“Applances” tab.
Usng the AC on multple
devces
You can use more than one mobile device to
control your air conditioner. This requires installing
HomeWhiz also on the second mobile device. You
will be prompted to sign in with your account when
you open the app.
C
If you are signed in with the same
account you added the appliance, you
can start using your air conditioner
right after signing in.
Follow the steps below to use a new account with
an already configured AC:
1. Create a new account to sgn n wth to
HomeWhz app. Make sure your moble devce
and your AC are on the same network.
2. On the Applances tab, tap “Add/Remove
Applance”. You can see the applances along
wth the owner nformaton at the bottom of
the “Other Applances” tab.
3. Tap the (+) con next to the AC you want to add,
then enter a name for your applance.
4. Ths sends an e-mal to the owner about your
request. Once the owner approves t, you can
start usng the applance together.
C
After installation is complete, your
mobile device and your air conditioner
do not need to be connected to the
same network. You can use your
appliance as long as your mobile
device has internet connection.
C
Too see appliances paired with
your account, tap “Add/Remove
Appliance” from the “Appliances”
tab on the app. Here, you can assign
appliances to users.

5 / EN
Air-Conditioner / User Manual
1 HomeWhz functon
Deletng HomeWhz settngs
HomeWhiz settings can be deleted from the app
by following the relevant in-app instructions.
Troubleshootng HomeWhz
If you are having trouble controlling or connecting
your product, follow the steps below. Proceed to
the next step if the action does not resolve your
issue.
1. Check whether your moble devce has nternet
connecton.
2. Close and re-launch the HomeWhz app on your
moble devce.
3. Restart your moble devce.
4. If you are stll havng ssues wth connecton,
repeat the ntal setup settngs from the
applance.
5. If the problem perssts, please reach out to an
authorzed servce provder.
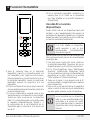
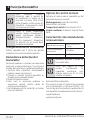
Manual Control Optons
HomeWhiz manual control options were shown as
below;
Operation Mode:
Auto, Cooling, Heating,
Dehumidification, Fan
Target Temperature:
In the range of 16-30 °C
Fan Speed:
Auto, Low, Medium, High
Wreless Network Module
Features
Frequency Band 2412 MHz-2472
MHz
Max. Transmsson
Power 17.9 dBm
Network Supported 2.4 G Wreless
C
HomeWhiz operates in the 2.4GHz
frequency band.
C
When wireless network module is
operating, it is recommended that
a minimum distance of 20 cm be
maintained between the user and
the device
Conformity declaration for CE
Arçelik A.Ş. hereby declares that this appliance
complies with Directive 2014/53/EU.
The complete text of the EU declaration of
conformity is available in the following internet
address:
support.beko.com
support.grundig.com

6 / EN Air-Conditioner / User Manual
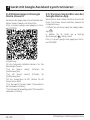
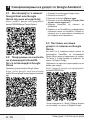
2 Syncng devce wth Google Assstant
2.1 Set up your Google Nest
or Google Home speaker or
dsplay;
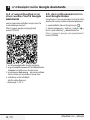
https://support.google.com/googlenest/
answer/7029485Manual Control Options
2.2 Lnk HomeWhz app acco-
unt to Google Home app
Download Google Home app;
https://play.google.com/store/apps/
details?id=com.google.android.apps.chromecast.
app
1. Open the Google Home app.
2. Clck the + button.
3. Clck the Set up devce button.
4. Clck the Works wth Google / Have somet-
hng already set up ? button.
5. Select HomeWhz from the lst of provders.
6. Sgn n to HomeWhz wth your HomeWhz ac-
count nformaton. Follow the n-app steps to
complete setup.
2.3 Set up Ar Condtoner
usng Google Home;
If you already linked your HomeWhiz app account
to Google Home app, you can continue with “For
Step 3: Set nicknames for devices” step in Support
Google link;
(Note: it is not a must to give nickname and select
a room)
https://support.google.com/googlenest/
answer/9159862?hl=en
Then continue with “Step 4: Assign devices to a
room” in Support Google link.

7 / EN
Air-Conditioner / User Manual
2 Syncng devce wth Google Assstant
2.4 Control Ar Condtoner
usng Google Home
You can check Google Home voice commands
from this Support Google link.
https://support.google.com/googlenest/an-
swer/7073578
In addition;
You can use the following commands to control
your air conditioner.
“Turn on [device name]”
“Turn off [device name]”
“Set the temperature to 28”
“Turn thermostat to heat mode”
“Turn thermostat to heating mode”
2.5 Dsconnect devces from
the Google Home app
If you no longer want to control your smart home
devices using your Assistant,you can disconnect
your account.
1. On your mobile, open the Google home app
2. Select your device Settings Unlink Unlink
https://support.google.com/googlenest/an-
swer/9159862

8 / DE Klimaanlage / Bedienungsanleitung
1 HomeWhz-Funkton
Mit der HomeWhiz-Funktion können Sie Ihre
Klimaanlage steuern und die Raumtemperatur von
Ihrem Telefon aus überwachen.
HomeWhiz-Setup und
Benutzerkontoeinstellungen
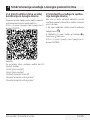
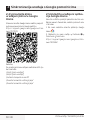
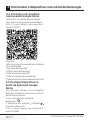
Bitte installieren Sie die mobile HomeWhiz-
Anwendung aus dem AppStore oder Google Play
auf Ihrem Mobiltelefon über den folgenden QR-
Code.
https://apps.apple.com/tr/app/homewhiz/
id1234028528
https://play.google.com/store/apps/
details?id=com.homewhiz.global&hl=tr&gl
Um die Funksteuerung (Fernbedienung) Ihrer
Klimaanlage nutzen zu können, müssen Sie vom
Anwendungsmarkt für Ihr Mobilgerät HomeWhiz
installieren. Stellen Sie zur Verwendung der
App sicher, dass Ihr Mobilgerät mit dem Internet
verbunden ist. Wenn Sie das Produkt noch nicht
verwendet haben, müssen Sie sich zunächst mit
Ihrer E-Mail-Adresse in der App anmelden. Sobald
die Registrierung abgeschlossen ist, können Sie
Ihr Konto mit allen HomeWhiz-fähigen Geräten in
Ihrem Haus verwenden. Um Geräte anzuzeigen,
die mit Ihrem Konto gekoppelt sind, tippen Sie
in der App auf der Registerkarte „Appliances“
(Geräte) auf „Add/Remove Appliance Appliance“
(Gerät hinzufügen/entfernen). Hier können Sie
Benutzern Geräte zuweisen.
1. Gehen Sie auf Ihrem Mobilgerät zu den WLAN-
Einstellungen und stellen Sie eine Verbindung
zu Ihrem Heimnetzwerk her, mit dem Sie Ihre
Klimaanlage verbinden möchten.
2. Tippen Sie in der HomeWhiz-App auf
„Add/Remove Appliance Appliance“ (Gerät
hinzufügen/entfernen).
3. Tippen Sie auf „Set up a new appliance“ (Neues
Gerät einrichten).
4. Wählen Sie auf dem angezeigten Bildschirm
“Heizungs-Kühlgeräte” und “Klimaanlage”,
schreiben Sie die SKU-Nummer Ihres Produkts
(10-stellig) unten auf der Seite und tippen Sie
dann auf “Weiter”.
5. Lesen Sie die Anweisungen auf dem Bildschirm
und tippen Sie anschließend auf „Start Setup“
(Setup starten).
6. Trennen Sie die Stromversorgung von AC und
schließen Sie dann die Stromversorgung von AC
an
7. Drücken Sie auf der AC-Fernbedienung
innerhalb von 10 Sekunden 7 Mal hintereinander
die „LED“-Taste.
8. Wenn das Gerät "AP" anzeigt, wird "HomeWhiz_
xxxx" in der Netzwerkliste angezeigt, um die
Klimaanlage darzustellen.
RECYCELTES UND
RECYCELBARES
PAPIER

9 / DE
Klimaanlage / Bedienungsanleitung
1 HomeWhz-Funkton
9. Fahren Sie mit dem nächsten Schritt in der
HomeWhiz-App fort und verbinden Sie Ihr
Mobilgerät gemäß den Anweisungen mit dem
Netzwerk „HomeWhiz_xxxx“. Sie sollten dann
das Netzwerkpasswort in der HomeWhiz-App
sehen. Kehren Sie zur HomeWhiz-App zurück,
nachdem Sie eine Verbindung zum HomeWhiz-
Netzwerk hergestellt haben.
10. Wählen Sie das Heimnetzwerk aus, an das Sie
Ihre Klimaanlage anschließen möchten, und
geben Sie das Passwort für das Netzwerk ein.
11. Sobald Ihre Verbindung zwischen AC und
Ihrem ausgewählten Heimnetzwerk hergestellt
ist, müssen Sie dies auch auf Ihrem Mobilgerät
tun. Wenn Ihr Mobilgerät die Verbindung nicht
automatisch eingerichtet hat, müssen Sie die
Einstellungen für das drahtlose Netzwerk auf
Ihrem Mobilgerät aufrufen und eine Verbindung
zum selben Netzwerk wie die Klimaanlage
herstellen.
12. Geben Sie in der HomeWhiz-App einen
Namen für Ihre Klimaanlage ein. Sie können
das Gerät, das Sie hinzugefügt haben, auf der
Registerkarte „Appliances“ (Geräte) sehen.
Verwenden der Klimaanlage
auf mehreren Geräten
Sie können mehr als ein mobiles Gerät zur
Steuerung Ihrer Klimaanlage verwenden. Dies
erfordert die Installation von HomeWhiz auch auf
dem zweiten Mobilgerät. Sie werden aufgefordert,
sich mit Ihrem Konto anzumelden, wenn Sie die
App öffnen.
C
Wenn Sie mit demselben Konto
angemeldet sind, mit dem Sie das
Gerät hinzugefügt haben, können
Sie Ihre Klimaanlage direkt nach der
Anmeldung verwenden.
Führen Sie die folgenden Schritte aus, um ein
neues Konto mit einer bereits konfigurierten
Klimaanlage zu verwenden:
1. Erstellen Sie ein neues Konto, um sich bei der
HomeWhiz-App anzumelden. Stellen Sie sicher,
dass sich Ihr Mobilgerät und Ihre Klimaanlage im
selben Netzwerk befinden.
2. Tippen Sie auf der Registerkarte Geräte
auf „Add/Remove Appliance Appliance“
(Gerät hinzufügen/entfernen). Sie
können die Appliances zusammen mit
den Besitzerinformationen unten auf der
Registerkarte „Other Appliances“ (Andere
Geräte) sehen.

10 / DE Klimaanlage / Bedienungsanleitung
1 HomeWhz-Funkton
3. Tippen Sie auf das Symbol (+) neben dem AC,
den Sie hinzufügen möchten, und geben Sie
einen Namen für Ihr Gerät ein.
4. Dies sendet eine E-Mail an den Eigentümer
über Ihre Anfrage. Sobald der Eigentümer
dies genehmigt hat, können Sie das Gerät
gemeinsam verwenden.
C
Nach Abschluss der Installation
müssen Ihr Mobilgerät und Ihre
Klimaanlage nicht mehr mit
demselben Netzwerk verbunden
sein. Sie können Ihr Gerät
verwenden, solange Ihr Mobilgerät
über eine Internetverbindung
verfügt.
C
Um Geräte anzuzeigen, die mit
Ihrem Konto gekoppelt sind, tippen
Sie in der App auf der Registerkarte
„Appliances“ (Geräte) auf „Add/
Remove Appliance Appliance“
(Gerät hinzufügen/entfernen).
Hier können Sie Benutzern Geräte
zuweisen.
HomeWhiz-Einstellungen
löschen
HomeWhiz-Einstellungen können aus der App
gelöscht werden, indem die entsprechenden In-
App-Anweisungen befolgt werden.
HomeWhiz Fehlerbehebung
Wenn Sie Probleme beim Steuern oder
Anschließen Ihres Produkts haben, führen Sie
die folgenden Schritte aus. Fahren Sie mit dem
nächsten Schritt fort, wenn die Aktion Ihr Problem
nicht behebt.
1. Überprüfen Sie, ob Ihr Mobilgerät über eine
Internetverbindung verfügt.
2. Schließen Sie die HomeWhiz-App und starten
Sie sie erneut auf Ihrem Mobilgerät.
3. Starten Sie Ihr Mobilgerät neu
4. Wenn Sie weiterhin Probleme mit der
Verbindung haben, wiederholen Sie die
Einstellungen für die Ersteinrichtung auf dem
Gerät.
5. Wenn das Problem weiterhin besteht, wenden
Sie sich an einen autorisierten Serviceanbieter.
Manuelle Steuerungsoptionen
Die manuellen Steuerungsoptionen von
HomeWhiz wurden wie folgt angezeigt.
Betriebsmodus:
Auto, Kühlung, Heizung,
Entfeuchtung, Lüfter
Zieltemperatur:
Im Bereich von 16-30 °C.
Lüftergeschwindigkeit:
Auto, Niedrig, Mittel,
Hoch
Funktionen des drahtlosen
Netzwerkmoduls
Frequenzberech 2412 MHz-2472 MHz
Max.
Übertragungslestung 17.9 dBm
Netzwerk unterstützt 2.4 G Wreless
C
HomeWhiz arbeitet im 2,4-GHz-
Frequenzband.
C
Wenn das drahtlose Netzwerkmodul
in Betrieb ist, wird empfohlen,
einen Mindestabstand von 20 cm
zwischen dem Benutzer und dem
Gerät einzuhalten
Konformitätserklärung für CE
Arçelik A.Ş. erklärt hiermit, dass dieses Gerät der
2014/53/EU Richtlinie entspricht. Der vollständige
Text der EU-Konformitätserklärung ist unter
folgender Internetadresse verfügbar:
support.beko.com
support.grundig.com

11 / DE
Klimaanlage / Bedienungsanleitung
2 Gerät mt Google Assstant synchronseren
2.1 Richten Sie Ihren Google
Nest- oder Google Home-Laut-
sprecher oder Ihre Anzeige ein.
https://support.google.com/googlenest/answer/
7029485Manual Control Options
2.2 Verknüpfen Sie das Home-
Whiz-App-Konto mit der Goo-
gle Home-App
Laden Sie die Google Home-App herunter.
https://play.google.com/store/apps/details?id=-
com.google.android.apps.chromecast.app
1. Öffnen Sie die Google Home-App.
2. Klicken Sie auf die Schaltfläche +.
3. Klicken Sie auf die Schaltfläche Set up device
(Gerät einrichten).
4. Klicken Sie auf Works with Google / Have
something already set up ? (Mit Google ar-
beiten/Haben Sie bereits etwas eingerichtet)
Taste.
5. Wählen Sie HomeWhiz aus der Liste der
Anbieter.
6. Melden Sie sich mit Ihren HomeWhiz-
Kontoinformationen bei HomeWhiz an. Befolgen
Sie die In-App-Schritte, um die Einrichtung ab-
zuschließen.
2.3 Einrichten der Klimaan-
lage mit Google Home;
Wenn Sie Ihr HomeWhiz-App-Konto bereits mit
der Google Home-App verknüpft haben, können
Sie mit dem Schritt "For Step 3: Set nicknames for
devices“ (Für Schritt 3: Festlegen von Spitznamen
für Geräte) im Link Google unterstützen fortfah-
ren;
(Hinweis: Es ist kein Muss, einen Spitznamen an-
zugeben und ein Zimmer auszuwählen.)
https://support.google.com/googlenest/ans-
wer/9159862?hl=en
Fahren Sie dann mit "Step 4: Assign devices to a
room“ (Schritt 4: Geräte einem Raum zuweisen) im
Link "Google unterstützen" fort.

12 / DE Klimaanlage / Bedienungsanleitung
2 Gerät mt Google Assstant synchronseren
2.4 Klimaanlage mit Google
Home steuern
Sie können die Google Home-Sprachbefehle über
diesen Support-Google-Link überprüfen.
https://support.google.com/googlenest/ans-
wer/7073578
In Ergänzung;
Mit den folgenden Befehlen können Sie Ihre
Klimaanlage steuern.
"Turn on [device name]” (Schalten Sie
[Gerätename] ein)
"Turn off [device name]” (Schalten Sie
[Gerätename] aus)
"Set the temperature to 28” (Stellen Sie die
Temperatur auf 28)
"Turn thermostat to heat mode” (Thermostat in
den Heizmodus schalten)
"Turn thermostat to heating mode” (Thermostat in
Heizmodus schalten)
2.5 Trennen Sie Geräte von der
Google Home-App
Wenn Sie Ihre Smart-Home-Geräte nicht mehr mit
Ihrem Assistenten steuern möchten, können Sie
Ihr Konto trennen.
1. Öffnen Sie auf Ihrem Handy die Google Home-
App
2. Wählen Sie Ihr Gerät aus Settings
(Einstellungen) Unlink Unlink
https://support.google.com/googlenest/ans-
wer/9159862

13 / IT
Condizionatore/Manuale utente
1 Funzone HomeWhz
La funzione HomeWhiz consente di controllare il
condizionatore e monitorare la stanza dal telefono.
Impostazioni HomeWhiz e
account utente
Si prega di installare l’applicazione mobile
HomeWhiz sul proprio telefono cellulare
dall’AppStore o da Google Play attraverso il
seguente codice QR.
https://apps.apple.com/tr/app/homewhiz/
id1234028528
https://play.google.com/store/apps/
details?id=com.homewhiz.global&hl=tr&gl
Per utilizzare la funzione di controllo wireless
(telecomando) del condizionatore, è necessario
installare HomeWhiz dal marketplace delle app per
il dispositivo mobile. Per utilizzare l'app, assicurarsi
che il dispositivo mobile sia connesso a internet.
Se non si è mai usato il prodotto in precedenza,
registrarsi prima all'interno dell'app con l‘indirizzo
e-mail. Una volta completata la registrazione,
è possibile utilizzare l’account con tutti gli
apparecchi abilitati per HomeWhiz a casa. Per
vedere gli elettrodomestici abbinati all’account,
toccare "Add/Remove Appliance” (Aggiungi/
Rimuovi apparecchio) dalla scheda "Appliances"
(Dispositivi) dell'app. Qui è possibile assegnare gli
elettrodomestici agli utenti.
1. Sul dispositivo mobile, andare alle impostazioni
wireless e connettersi alla rete domestica da
collegare al condizionatore.
2. Toccare "Add/Remove Appliance” (Aggiungi/
Rimuovi apparecchio) sull'app HomeWhiz.
3. Toccate "Set up a new appliance” (Configura un
nuovo apparecchio).
4. Nella schermata che appare, scegli “Dispositivi
di riscaldamento-raffreddamento” e scegli
“Condizionatore d’aria”, quindi scrivi il numero
di SKU del tuo prodotto (10 cifre) nella parte
inferiore della pagina, quindi tocca “continua”.
5. Leggere le istruzioni a schermo, quindi toccare
"Start Setup” (Avvio della configurazione).
6. Scollegare l'alimentazione del condizionatore,
quindi ricollegarla.
7. Sul telecomando del condizionatore, premere
il tasto "LED" 7 volte consecutive in 10 secondi.
8. Quando l'unità visualizza "AP", nell'elenco di
rete, si vedrà "HomeWhiz_xxxx" per indicare il
condizionatore.
CARTA RICICLATA E
RICICLABILE

14 / IT Condizionatore/Manuale utente
1 Funzone HomeWhz
9. Passare allo step successivo nell'app HomeWhiz
e collegare il dispositivo mobile alla rete
"HomeWhiz_xxxx" come da istruzioni. Si
dovrebbe poi vedere la password di rete sull'app
HomeWhiz. Tornare all'app HomeWhiz dopo
essersi collegati alla rete HomeWhiz.
10. Scegliere la rete domestica a cui si desidera
collegare il condizionatore d'aria, quindi inserire
la password di rete.
11. Una volta stabilita la connessione tra il
condizionatore e la rete domestica selezionata,
fare lo stesso sul dispositivo mobile. Se
il dispositivo mobile non ha impostato
automaticamente la connessione, andare alle
impostazioni della rete wireless sul dispositivo
mobile e collegarsi alla stessa rete del
condizionatore.
12. Nell'app HomeWhiz, inserire un nome per il
condizionatore. È possibile vedere l'apparecchio
che aggiunto nella scheda "Appliances”
(Dispositivi).
Utilizzo del condizionatore su
più dispositivi
È possibile utilizzare più di un dispositivo mobile
per controllare il condizionatore. Questo richiede
l'installazione di HomeWhiz anche sul secondo
dispositivo mobile. Verrà richiesto di accedere con
l’account quando si apre l'app.
C
Se è stato effettuato l'accesso con
lo stesso account con cui è stato
aggiunto l'apparecchio, è possibile
iniziare a utilizzare il condizionatore
subito dopo l'accesso.
Attenersi alla procedura seguente per utilizzare
un nuovo account con un condizionatore già
configurato:
1. Creare un nuovo account per accedere all'app
HomeWhiz. Assicurarsi che l’apparecchio mobile
e il condizionatore siano sulla stessa rete.
2. Nella scheda “Appliances” (Dispositivi), toccare
"Add/Remove Appliance” (Aggiungi/Rimuovi
dispositivo). È possibile vedere gli apparecchi
insieme alle informazioni sul proprietario in
fondo alla scheda "Other Appliances” (Altri
dispositivi).
3. Toccate l'icona (+) accanto al condizionatore
da aggiungere, quindi inserire un nome per il
dispositivo.
4. In questo modo si invia un'e-mail al proprietario
in merito alla richiesta. Una volta che il
proprietario l'ha approvata, si può iniziare a
usare l'apparecchio insieme.

15 / IT
Condizionatore/Manuale utente
1 Funzone HomeWhz
C
Una volta completata l'installazione,
non è necessario che il dispositivo
mobile e il condizionatore siano
collegati alla stessa rete. Si può
utilizzare il dispositivo, purché
l’apparecchio mobile sia dotato di
connessione a Internet.
C
Per vedere gli elettrodomestici
abbinati all’account, toccare "Add/
Remove Appliance” (Aggiungi/
Rimuovi apparecchio) dalla scheda
"Appliances" (Dispositivi) dell'app.
Qui è possibile assegnare gli
elettrodomestici agli utenti.
Cancellare le impostazioni di
HomeWhiz
Le impostazioni di HomeWhiz possono essere
cancellate dall'app seguendo le relative istruzioni
in-app.
Risoluzione dei problemi
HomeWhiz
Se si riscontrano problemi nel controllo o nel
collegamento del prodotto, seguire la seguente
procedura. Procedere alla fase successiva se
l'azione non risolve il problema.
1. Verificare se il dispositivo mobile ha una
connessione internet.
2. Chiudere e rilanciare l'app HomeWhiz sul
dispositivo mobile.
3. Riavviare il dispositivo mobile.
4. Se si riscontrano ancora problemi di
connessione, ripetere le impostazioni iniziali
dell'apparecchio.
5. Se il problema persiste, contattare un fornitore
di servizi autorizzato.
Opzioni di controllo manuale
Le opzioni di controllo manuale di HomeWhiz sono
state illustrate come segue;
Modalità di funzionamento:
Automatica, Raffreddamento, Riscaldamento,
Deumidificazione, Ventilatore
Temperatura target:
Nell'intervallo dei
16
-30 °C
Velocità del ventilatore:
Automatica, Bassa,
Media, Alta
Caratteristiche del modulo di
rete wireless
Banda d frequenza Da 2412 MHz a 2472 MHz
Potenza d trasmssone
massma 17.9 dBm
Rete supportata 2.4 G Wreless
C
HomeWhiz opera nella banda di
frequenza di 2,4GHz.
C
Quando il modulo di rete wireless
è in funzione, si raccomanda di
mantenere una distanza minima di
20 cm tra l'utente e il dispositivo.
Dichiarazione di conformità per la CE
Arçelik A.Ş. dichiara che questo apparecchio
è conforme alla direttiva 2014/53/UE. Il testo
completo della dichiarazione di conformità UE è
disponibile al seguente indirizzo internet:
support.beko.com
support.grundig.com

16 / IT Condizionatore/Manuale utente
2 Sncronzzazone del dspostvo con l’Assstente Google
2.1 Impostare lo speaker o l
dsplay Google Nest o Google
Home;
https://support.google.com/googlenest/an-
swer/7029485 Opzioni di controllo manuale
2.2 Collegare la app HomeW-
hz alla app Google Home
Scaricare la app Google Home;
https://play.google.com/store/apps/details?i-
d=com.google.android.apps.chromecast.app
1. Aprire la app Google Home.
2. Fare clic sul pulsante +.
3. Fare clic sul pulsante Set up device (Configura
dispositivo).
4. Fare clic sul pulsante Works with Google /
Have something already set up? (Funziona
con Google/Hai già configurato qualcosa?).
5. Selezionare HomeWhiz dall'elenco dei provider.
6. Accedere a HomeWhiz con le informazioni
dell’account HomeWhiz. Seguire i passaggi in-
app per completare l'installazione.
2.3 Impostare il condiziona-
tore con Google Home;
Se si ha già collegato l’account dell'app HomeWhiz
all'app Google Home, si può continuare con il pas-
saggio "For Step 3: Set nicknames for devices” (Per
il passaggio 3: impostare nome dispositivo) nel link
di Support Google (Guida di Google);
(Nota: non è obbligatorio dare un nome e selezio-
nare una stanza)
https://support.google.com/googlenest/an-
swer/9159862?hl=en
Poi continuare con “Step 4: Assign devices to a
room” (Passaggio 4: assegnare dispositivi a una
stanza) nel link fi Support Google (Guida di Google).

17 / IT
Condizionatore/Manuale utente
2 Sncronzzazone del dspostvo con l’Assstente Google
2.4 Controllare il condiziona-
tore con Google Home
È possibile verificare i comandi vocali di Google
Home da questo link.
https://support.google.com/googlenest/an-
swer/7073578
Inoltre;
È possibile utilizzare i seguenti comandi per con-
trollare il condizionatore.
“Turn on [device name]” (Accendi [nome disposi-
tivo])
“Turn off [device name]” (Spegni [nome dispositi-
vo])
“Set the temperature to 28” (Imposta la tempera-
tura a 28)
“Turn thermostat to heat mode” (Mettere il termo-
stato in modalità riscaldamento)
“Turn thermostat to heating mode” (Mettere il ter-
mostato in modalità riscaldamento)
2.5 Scollegare i dispositivi
dall'app Google Home
Se non si vuole più controllare i dispositivi di casa
utilizzando l’Assistente, è possibile scollegare l’ac-
count.
1. Sul cellulare, aprire l'app Google Home
2. Selezionare le impostazioni del dispositivo
Settings (Impostazioni) Unlink (scollegare)
Unlink (scollegare)
https://support.google.com/googlenest/an-
swer/9159862

18 / ES Aire acondicionado / Manual de usuario
1 Funcón HomeWhz
La función HomeWhiz le permite controlar el aire
acondicionado y controlar la temperatura de la
habitación desde su teléfono.
Configuración de HomeWhiz
y ajustes de la cuenta de
usuario
Instale la app HomeWhiz en su móvil,
descargándola desde la AppStore o Google Play
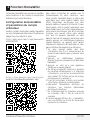
mediante el siguiente código QR.
https://apps.apple.com/tr/app/homewhiz/
id1234028528
https://play.google.com/store/apps/
details?id=com.homewhiz.global&hl=tr&gl
Para usar la función de control inalámbrico (control
remoto) de su aire acondicionado, necesita
instalar HomeWhiz desde la tienda de apps
para su dispositivo móvil. Para usar la aplicación,
asegúrese de que el dispositivo móvil esté
conectado a Internet. Si no ha usado el producto
antes, en primer lugar deberá registrarse dentro de
la aplicación con su dirección de correo electrónico.
Una vez que se haya completado el registro,
podrá usar su cuenta con todos los dispositivos
habilitados para HomeWhiz en su hogar. Para
ver los dispositivos emparejados con su cuenta,
toque en "Add/Remove Appliance’’ (Añadir/
quitar dispositivo) en la pestaña "Appliances’’
(Dispositivos) de la aplicación. Aquí podrá asignar
dispositivos a los usuarios.
1. En su dispositivo móvil, vaya a la configuración
inalámbrica y conéctese a la red doméstica a la
que desee conectar el aire acondicionado.
2. Toque en "Add/Remove Appliance’’ (Añadir/
quitar dispositivo) en la aplicación HomeWhiz.
3. Toque en “Set up a new appliance’’ (Configurar
un nuevo dispositivo).
4. En la pantalla que aparece, elija “Dispositivos
de calefacción-refrigeración” y elija “Aire
acondicionado”, luego escriba el número de SKU
de su producto (10 dígitos) en la parte inferior
de la página, luego toque “continuar.
5. Lea las instrucciones en pantalla y luego pulse
"Start Setup’’ (Iniciar configuración).
6. Desconecte la fuente de alimentación de CA,
luego conecte la fuente de alimentación de CA
7. En el control remoto de CA, presione el botón
"LED" 7 veces consecutivas en 10 segundos.
8. Cuando la unidad muestre "AP", "HomeWhiz_
xxxx" se mostrará en la lista de la red para
representar el aire acondicionado.
PAPEL
RECICLADO Y
RECIBLABLE

19 / ES
Aire acondicionado / Manual de usuario
1 Funcón HomeWhz
9. Vaya al siguiente paso en la aplicación
HomeWhiz y conecte su dispositivo móvil a la
red "HomeWhiz_xxxx" según las instrucciones.
Entonces debería ver la contraseña de la red en
la aplicación HomeWhiz. Vuelva a la aplicación
HomeWhiz después de conectarse a la red
HomeWhiz.
10. Elija la red doméstica a la que quiera conectar
el aire acondicionado; a continuación, introduzca
la contraseña de la red.
11. Una vez establecida la conexión entre el aire
acondicionado y la red doméstica seleccionada,
tendrá que hacer lo mismo en su dispositivo
móvil. Si su dispositivo móvil no ha configurado
la conexión automáticamente, deberá ir a
la configuración de la red inalámbrica de su
dispositivo móvil y conectarse a la misma red
que el AC.
12. En la aplicación HomeWhiz, introduzca un
nombre para su AC. Podrá ver el dispositivo
que haya añadido en la pestaña "Appliances’’
(Dispositivos).
Uso del AC en varios
dispositivos
Puede utilizar más de un dispositivo móvil para
controlar su aire acondicionado. Esto requiere la
instalación de HomeWhiz también en el segundo
dispositivo móvil. Se le pedirá que inicie sesión con
su cuenta cuando abra la aplicación.
C
Si ingresó con la misma cuenta
a la cual añadió el dispositivo,
podrá comenzar a usar su aire
acondicionado inmediatamente
después de ingresar.
Siga los pasos que se indican a continuación para
usar una nueva cuenta con un aire acondicionado
ya configurado:
1. Cree una nueva cuenta para iniciar sesión en
la aplicación HomeWhiz. Asegúrese de que su
dispositivo móvil y el AC estén en la misma red.
2. En la ficha Dispositivos, toque "Add/Remove
Appliance’’ (Añadir/quitar dispositivo). Podrá
ver los dispositivos junto con la información del
propietario en la parte inferior de la pestaña
"Other Appliances’’ (Otros dispositivos).
3. Toque en el icono (+) que aparece junto al AC
que desee añadir, y luego introduzca un nombre
para el dispositivo.
4. Esto envía un correo electrónico al propietario
sobre su solicitud. Una vez que el propietario lo
apruebe, podrá empezar a usar el dispositivo.
C
Una vez completada la instalación,
no es necesario que su dispositivo
móvil y su aire acondicionado estén
conectados a la misma red. Podrá
usar el aparato siempre y cuando su
dispositivo móvil tenga conexión a
Internet.

20 / ES Aire acondicionado / Manual de usuario
1 Funcón HomeWhz
C
Para ver los dispositivos
emparejados con su cuenta, toque
"Add/Remove Appliance’’ (Añadir/
quitar dispositivo) en la pestaña
"Appliances’’ (Dispositivos) de la
aplicación. Aquí podrá asignar
dispositivos a los usuarios.
Eliminación de la configuración
de HomeWhiz
La configuración de HomeWhiz puede ser
eliminada de la aplicación siguiendo las
instrucciones relevantes de la aplicación.
Solución de problemas de
HomeWhiz
Si tiene problemas para controlar o conectar su
producto, siga los siguientes pasos. Proceda al
siguiente paso si la acción no resuelve su problema.
1. Compruebe si su dispositivo móvil tiene
conexión a Internet.
2. Cierre y vuelva a iniciar la aplicación HomeWhiz
en su dispositivo móvil.
3. Reinicie su dispositivo móvil.
4. Si aún tiene problemas de conexión, repita la
configuración inicial del dispositivo.
5. Si el problema persiste, comuníquese con un
proveedor de servicios autorizado.
Opciones de control manual
Las opciones de control manual de HomeWhiz se
mostrarán como sigue;
Modos de funcionamiento:
Auto,
Refrigeración, Calefacción, Deshumidificación,
Ventilador
Temperatura objetivo:
En el rango de
16
-30
°C
Velocidad del ventilador:
Automático, Bajo,
Medio, Alto
Características del módulo de
red inalámbrica
Banda de frecuencas 2412 MHz-2472 MHz
Potenca de transmsón
máx. 17.9 dBm
Compatble con Red 2.4 G Wreless
C
HomeWhiz opera en la banda de
frecuencia de 2.4GHz.
C
Cuando el módulo de red inalámbrica
está funcionando, se recomienda
mantener una distancia mínima
de 20 cm entre el usuario y el
dispositivo
Declaración de conformidad CE
Arçelik A.Ş. declara por la presente que este
aparato cumple con la Directiva 2014/53/UE. El
texto completo de la declaración de conformidad
de la UE está disponible en la siguiente dirección
de Internet:
support.beko.com
support.grundig.com
La pagina si sta caricando...
La pagina si sta caricando...
La pagina si sta caricando...
La pagina si sta caricando...
La pagina si sta caricando...
La pagina si sta caricando...
La pagina si sta caricando...
La pagina si sta caricando...
La pagina si sta caricando...
La pagina si sta caricando...
La pagina si sta caricando...
La pagina si sta caricando...
La pagina si sta caricando...
La pagina si sta caricando...
La pagina si sta caricando...
La pagina si sta caricando...
La pagina si sta caricando...
La pagina si sta caricando...
La pagina si sta caricando...
La pagina si sta caricando...
La pagina si sta caricando...
La pagina si sta caricando...
La pagina si sta caricando...
La pagina si sta caricando...
La pagina si sta caricando...
La pagina si sta caricando...
La pagina si sta caricando...
La pagina si sta caricando...
La pagina si sta caricando...
La pagina si sta caricando...
La pagina si sta caricando...
La pagina si sta caricando...
La pagina si sta caricando...
La pagina si sta caricando...
La pagina si sta caricando...
La pagina si sta caricando...
La pagina si sta caricando...
La pagina si sta caricando...
La pagina si sta caricando...
La pagina si sta caricando...
La pagina si sta caricando...
La pagina si sta caricando...
La pagina si sta caricando...
La pagina si sta caricando...
La pagina si sta caricando...
La pagina si sta caricando...
La pagina si sta caricando...
La pagina si sta caricando...
La pagina si sta caricando...
La pagina si sta caricando...
La pagina si sta caricando...
La pagina si sta caricando...
La pagina si sta caricando...
La pagina si sta caricando...
La pagina si sta caricando...
La pagina si sta caricando...
La pagina si sta caricando...
La pagina si sta caricando...
La pagina si sta caricando...
La pagina si sta caricando...
La pagina si sta caricando...
La pagina si sta caricando...
La pagina si sta caricando...
La pagina si sta caricando...
La pagina si sta caricando...
La pagina si sta caricando...
La pagina si sta caricando...
La pagina si sta caricando...
La pagina si sta caricando...
La pagina si sta caricando...
La pagina si sta caricando...
La pagina si sta caricando...
La pagina si sta caricando...
La pagina si sta caricando...
-
 1
1
-
 2
2
-
 3
3
-
 4
4
-
 5
5
-
 6
6
-
 7
7
-
 8
8
-
 9
9
-
 10
10
-
 11
11
-
 12
12
-
 13
13
-
 14
14
-
 15
15
-
 16
16
-
 17
17
-
 18
18
-
 19
19
-
 20
20
-
 21
21
-
 22
22
-
 23
23
-
 24
24
-
 25
25
-
 26
26
-
 27
27
-
 28
28
-
 29
29
-
 30
30
-
 31
31
-
 32
32
-
 33
33
-
 34
34
-
 35
35
-
 36
36
-
 37
37
-
 38
38
-
 39
39
-
 40
40
-
 41
41
-
 42
42
-
 43
43
-
 44
44
-
 45
45
-
 46
46
-
 47
47
-
 48
48
-
 49
49
-
 50
50
-
 51
51
-
 52
52
-
 53
53
-
 54
54
-
 55
55
-
 56
56
-
 57
57
-
 58
58
-
 59
59
-
 60
60
-
 61
61
-
 62
62
-
 63
63
-
 64
64
-
 65
65
-
 66
66
-
 67
67
-
 68
68
-
 69
69
-
 70
70
-
 71
71
-
 72
72
-
 73
73
-
 74
74
-
 75
75
-
 76
76
-
 77
77
-
 78
78
-
 79
79
-
 80
80
-
 81
81
-
 82
82
-
 83
83
-
 84
84
-
 85
85
-
 86
86
-
 87
87
-
 88
88
-
 89
89
-
 90
90
-
 91
91
-
 92
92
-
 93
93
-
 94
94


Grundig Split Type Wall Mounted Air Conditioner Manuale utente
- Tipo
- Manuale utente
in altre lingue
Documenti correlati
Altri documenti
-
Beko BCNE400E40SN Manuale utente
-
Beko Lavatrice Washing Machine [WUX81436AI-IT] Manuale utente
-
Beko BCNE400E50SHN Manuale utente
-
Beko BCSE400E40SN Manuale utente
-
-
Beko GN1416231JX Manuale utente
-
-
Beko GN1406231XBN Manuale utente