Bluesound Pulse Quick Setup Manual
- Categoria
- Altoparlanti della soundbar
- Tipo
- Quick Setup Manual


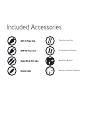
Two Kickstand Feet
Two Kickstand Extenders
Wall Mount Bracket
Wall Mount Bracket Template

All-In-One Wireless Streaming Audio System

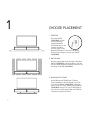
CHOOSE PLACEMENT
1
1 TABLETOP
Place the PULSE
SOUNDBAR on a flat
surface. Attach the
supplied Kickstand
Feet. Depending on the
speaker orientation,
you may need to add
Kickstand Extenders to ensure the Kickstand
Feet are long enough to support your PULSE
SOUNDBAR.
2 ON THE WALL
Use the supplied wall mount bracket to attachthe
PULSE SOUNDBAR to the wall. Refer to the wall
mount bracket template sheet with instructions for
mounting the PULSE SOUNDBAR.
3 BLUESOUND TV STAND
Use the Bluesound TS100 Panel TV Stand
(sold separately) to raise the height of your TV
if you find the PULSE SOUNDBAR covering a
portion of the TV screen. Attach both the PULSE
SOUNDBAR and your TV to the TS100. Refer to
the instruction sheet supplied with the TS100 for
complete assembly instructions.

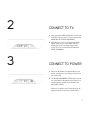
CONNECT TO TV
CONNECT TO POWER
2
3
A Using the supplied RCA to RCA cable, connect the
audio RCA output of your TV to the corresponding
AUDIO IN (L/R) of PULSE SOUNDBAR.
B Alternatively, if your TV is equipped with digital
optical output, use an optical audio cable (not
supplied) to connect the digital optical output
of your TV to the corresponding OPTICAL IN of
PULSE SOUNDBAR.
A Select the AC Power Cord appropriate for your
region and plug it into the Player, and then into
your wall outlet.
B The PULSE SOUNDBAR’s LED indicator should
turn Solid Green indicating that the Player is in
Hotspot Mode and ready to be added to your
home WiFi network.
Never force a power cord into a wall outlet. An
adaptor may be necessary in certain regions.

6_
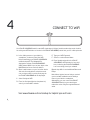
CONNECT TO WiFi
4
Your PULSE SOUNDBAR emits its own WiFi signal when in Hotspot mode to make setup easier. Look for
the solid green LED indicator on the front of the PULSE SOUNDBAR, which tells you it is in Hotspot mode.
Visit www.bluesound.com/setup for helpful tips and tricks
A. In the Settings menu of your tablet or
smartphone, locate and select the WiFi
Hotspot matching your PULSE SOUNDBAR’s
network unique ID. The Network ID is
displayed as follows: PULSESOUNDBAR-
XXXX, where XXXX is the last four digits of the
MAC (Machine Access Control) address.
B. Open a web browser on your controller device
and enter the web address setup.bluesound.
com, and press GO. A control panel page for
the PULSE SOUNDBAR will be displayed.
C. Select Configure WiFi.
D. From the Configure Wireless dropdown list,
select your home WiFi network.
E. Type your WiFi Password.
F. Select or create a Room Name.
G. Press Update and wait for the PULSE
SOUNDBAR’s LED indicator to turn solid
blue, indicating the PULSE SOUNDBAR
has successfully joined your network.
Repeat steps A-G for each additional Bluesound
Player.
Note: When finished, ensure that you reselect
your home WiFi network from the Settings
menu of your tablet or smartphone.
Alternatively, you can connect the PULSE
SOUNDBAR directly to your wired home
network or router using the supplied Ethernet
cable.

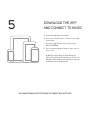
5
Visit www.bluesound.com/setup for helpful tips and tricks
DOWNLOAD THE APP
AND CONNECT TO MUSIC
A Download the BluOS Controller App.
B Ensure your controller device is connected to the proper
home network.
C Follow the in-App prompts to finish setting up your
PULSE SOUNDBAR.
D Use the left-hand Navigation Drawer to add or select a
music source.
All BluOS Controller Apps for Apple iOS devices
(iPhone, Pad, iPod), Android devices, Kindle Fire, and
Windows or Mac desktops are available for download
at www.bluesound.com/downloads.

1 SÉLECTION DE L’EMPLACEMENT
1 TABLE
Placez le PULSE SOUNDBAR sur une surface plane. Posez les pieds
de béquilles fournis Selon l’orientation de l’enceinte, il pourrait être
nécessaire d’ajouter les rallonges de béquilles afin de s’assurer que
les pieds de béquilles sont assez-longs pour supporter le PULSE
SOUNDBAR.
2 AU MUR
Utilisez le support mural fourni pour installer le PULSE SOUNDBAR sur
le mur. Reportez-vous à la feuille du gabarit pour les instructions sur
l’installation murale du PULSE SOUNDBAR.
3 SUPPORT DE TÉLÉVISEUR BLUESOUND
Utilisez le support de téléviseur plat Bluesound TS100 (vendu
séparément) pour soulever le téléviseur si le PULSE SOUNDBAR bloque
une partie de l’écran. Attachez le PULSE SOUNDBAR et le téléviseur au
TS100. Reportez-vous à la feuille d’instructions fournie avec le TS100
pour les instructions de montage complètes.
2 CONNEXION À UN TÉLÉVISEUR
A À l’aide du câble RCA à RCA fourni, brancher la sortie RCA audio
du téléviseur à l’entrée AUDIO IN (L/R) correspondante du PULSE
SOUNDBAR.
B Si votre téléviseur est équipé d’une sortie numérique optique, vous
pouvez également utiliser un câble audio optique (non fourni) pour
raccorder la sortie numérique optique du téléviseur à l’entrée OPTICAL
IN correspondante du PULSE SOUNDBAR.
3 BRANCHEMENT DE L’ALIMENTATION
A Sélectionnez le cordon d’alimentation CA correspondant à votre région
et branchez-le dans le lecteur et ensuite dans la prise murale.
B La DEL du PULSE SOUNDBAR doit s’allumer en vert pour indiquer que
le lecteur est en mode de point d’accès (Hotspot) et prêt à être ajouté
à votre réseau WiFi. Ne jamais forcer un cordon d’alimentation dans
une prise de courant. Un adaptateur peut être nécessaire dans certaines
régions.
4 CONNEXION AU WIFI
Votre PULSE SOUNDBAR émet son propre signal WiFi lorsqu’il est en
mode de point d’accès (Hotspot) afin de simplifier l’installation. La DEL
verte sur le devant du PULSE SOUNDBAR indique qu’il est en mode de
point d’accès.
A Dans le menu des paramètres de votre tablette ou téléphone intelligent,
trouvez et sélectionnez le point d’accès WiFi correspondant à l’ID réseau
unique de votre PULSE SOUNDBAR. L’ID réseau est affiché comme suit
: PULSESOUNDBAR-XXXX, où XXXX sont les quatre derniers chiffres de
l’adresse MAC (Machine Access Control).
B Ouvrez un navigateur Web sur votre appareil de commande et entrez
l’adresse Web setup.bluesound.com et puis appuyez sur GO. Une page
du panneau de commande du PULSE SOUNDBAR s’affiche.
C Sélectionnez Configure WiFi (Configurer WiFi).
D Dans le menu déroulant Configure Wireless (Configurer sans fil),
sélectionnez votre propre réseau WiFi.
E Tapez votre mot de passe WiFi.
F Sélectionnez ou créez un Room Name (Nom de pièce).
G Appuyez sur Update (Actualiser) et attentez que la DEL du PULSE
SOUNDBAR passe au bleu indiquant que le PULSE SOUNDBAR est
connecté à votre réseau.
Répétez les étapes A à G pour tous les autres lecteurs Bluesound.
Remarque : lorsque vous avez terminé, veillez à resélectionner votre
réseau WiFi de la maison dans le menu des paramètres de votre tablette
ou téléphone intelligent.
D’autre part, vous pouvez connecter le PULSE SOUNDBAR directement
à votre réseau maison câblé ou à un routeur à l’aide du câble Ethernet
fourni.
Visitez www.bluesound.com/setup pour des conseils et des astuces utiles.
5 TÉLÉCHARGEZ L’APPLI ET CONNECTEZ
LA MUSIQUE
A Téléchargez l’appli BluOS Controller.
B Assurez-vous que l’appareil de commande est connecté au bon réseau
maison.
C Suivez les invites de l’appli pour terminer la configuration de votre
PULSE SOUNDBAR.
D Utilisez le tiroir de navigation gauche pour ajouter ou sélectionner une
source musicale.
Toutes les applis BluOS Controller pour les appareils Apple iOS (iPhone, Pad,
iPod), Android, Kindle Fire et Windows ou Mac peuvent être téléchargées de
www.bluesound.com/downloads.
Visitez www.bluesound.com/setup pour des conseils et des astuces utiles.
Français

1 SELECCIÓN DE LA COLOCACIÓN
1 EN UNA MESA
Coloque la barra de sonido PULSE SOUNDBAR en una superficie
plana. Conecte las patas de soporte incluidas. Según la orientación del
altavoz, puede ser necesario que añada las extensiones de soporte para
asegurarse de que las patas tengan la longitud suficiente para soportar
la PULSE SOUNDBAR.
2 EN LA PARED
Use la ménsula que se incluye para instalar la PULSE SOUNDBAR en
la pared. Para ello, consulte las instrucciones en la hoja de la plantilla
para ménsula de montaje en la pared.
3 EN UN SOPORTE BLUESOUND PARA TELEVISOR
Use el soporte Bluesound TS100 de panel para televisor (se vende por
separado) para elevar la altura de su televisor si la PULSE SOUNDBAR
cubre parcialmente la pantalla de este. Conecte la PULSE SOUNDBAR y
el televisor al soporte TS100. En la hoja de instrucciones que se incluye
con el soporte TS100, consulte las recomendaciones completas para
montaje.
2 CONEXIÓN AL TELEVISOR
A Con el cable de RCA a RCA que se incluye, conecte la salida de audio
RCA de su televisor a la entrada AUDIO IN (L/R) correspondiente de la
PULSE SOUNDBAR.
B Otra alternativa es, si su televisor tiene una salida óptica digital, use un
cable óptico de audio (no incluido) para conectar esa salida a la entrada
OPTICAL IN correspondiente de la PULSE SOUNDBAR.
3 CONEXIÓN A LA FUENTE DE
ALIMENTACIÓN
A Seleccione el cable de alimentación de CA apropiado para su región,
conéctelo al reproductor y luego al tomacorriente de la pared.
B El indicador LED de la PULSE SOUNDBAR debe cambiar a verde
continuo, lo que significa que el reproductor está en el modo de
cobertura inalámbrica y listo para añadirlo a la red wifi de su hogar.
Nunca fuerce la entrada del cable de alimentación en el tomacorriente
de la pared. En ciertas regiones, puede ser necesario usar un
adaptador.
4 CONEXIÓN A LA RED WiFi
Para facilitar la configuración, su PULSE SOUNDBAR emite su propia señal
wifi cuando está en el modo de cobertura inalámbrica. Busque el indicador
LED color verde continuo al frente de la PULSE SOUNDBAR para saber si se
encuentra en el modo de cobertura inalámbrica.
A En el menú Settings (Configuración) de su tableta o teléfono inteligente,
busque y seleccione la zona wifi que corresponda a la identificación
particular de la red de su PULSE SOUNDBAR. La identificación de la red
se muestra así: PULSESOUNDBAR-XXXX, donde XXXX son los últimos
cuatro dígitos de la dirección MAC (Machine Access Control).
B Abra un explorador web en su dispositivo controlador, introduzca la
dirección web setup.bluesound.com y pulse GO (Ir a). Se muestra la
página del panel de control de la PULSE SOUNDBAR.
C Seleccione Configure WiFi (Configurar wifi).
D De la lista desplegable Configure Wireless (Configurar red inalámbrica),
seleccione la red wifi de su hogar.
E Escriba su contraseña de la red wifi.
F Seleccione o cree un Room Name (Número de habitación).
G Pulse Update (Actualizar) y espere a que la luz del indicador LED de
la PULSE SOUNDBAR cambie a azul continuo, lo que significa que se
logró conectar a su red.
Repita los pasos A a G para cada reproductor Bluesound.
Nota: Al terminar, asegúrese de volver a seleccionar la red wifi de su
hogar del menú Settings de su tableta o teléfono inteligente.
Como alternativa, puede conectar la PULSE SOUNDBAR directamente
a la red o el enrutador cableados de su hogar usando el cable ethernet
que se incluye.
En www.bluesound.com/setup, consulte otras sugerencias y
recomendaciones útiles.
5 DESCARGA DE LA APLICACIÓN Y
CONEXIÓN A LA MÚSICA
A Descargue la aplicación BluOS Controller.
B Revise que su dispositivo controlador esté conectado a la red apropiada
de su hogar.
C Siga las indicaciones de la aplicación para completar la configuración de
su PULSE SOUNDBAR.
D Use el cajón de navegación izquierdo para añadir o seleccionar una
fuente de música.
En www.bluesound.com/downloads, puede descargar todas las aplicaciones
BluOS Controller para dispositivos iOS de Apple (iPhone, iPad, iPod),
dispositivos Android, Kindle Fire y escritorios de Windows o de Mac.
En www.bluesound.com/setup, consulte otras sugerencias y
recomendaciones útiles.

1 SELEZIONARE LA POSIZIONE DI
MONTAGGIO
1 SU TAVOLO
Porre la PULSE SOUNDBAR su una superficie piatta orizzontale.
Montare i piedini a cavalletto in dotazione. A seconda dell’orientamento
dell’altoparlante, potrà essere necessario utilizzare anche gli estensori
per cavalletto al fine di assicurare che i piedini a cavalletto abbiano una
lunghezza sufficiente a sostenere la PULSE SOUNDBAR.
2 SULLA PARETE
Utilizzare la staffa a parete in dotazione per installare la PULSE
SOUNDBAR sulla parete. Fare riferimento al foglio che contiene la
maschera di montaggio e le istruzioni per il montaggio a parete della
PULSE SOUNDBAR.
3 BASE TV BLUESOUND
Usare la base per TV Bluesound TS100 (venduta separatamente) per
aumentare l’altezza del televisore se trovate che la PULSE SOUNDBAR
copre una porzione dello schermo del televisore. Montare sia la PULSE
SOUNDBAR sia il televisore alla base TS100. Fare riferimento al
foglio di istruzioni fornito con la base TS100 per istruzioni complete di
montaggio.
2 CONNETTERE AL TELEVISORE
A Utilizzando il cavo da RCA a RCA in dotazione, collegare l’uscita RCA
audio del televisore al corrispondente ingresso AUDIO IN (L/R) della
PULSE SOUNDBAR.
B In alternativa, se il televisore è dotato di uscita ottica digitale, utilizzare
un cavo audio ottico (non in dotazione) per collegare l’uscita ottica
digitale del televisore al corrispondente ingresso OPTICAL IN della
PULSE SOUNDBAR.
3 CONNETTERE ALL’ALIMENTAZIONE
A Selezionare il cavo di alimentazione appropriato per il proprio paese e
collegarlo al lettore, e quindi a una presa a muro.
B La spia a LED della PULSE SOUNDBAR si dovrebbe illuminare di luce
verde continua, il che indica che il lettore è in modalità hotspot, pronto
per essere aggiunto alla rete WiFi di casa.Non forzare mai la spina del
cavo di alimentazione nella presa. In certe zone, può essere necessario
utilizzare un adattatore.
4 CONNETTERE ALLA RETE WiFi
La PULSE SOUNDBAR emette un suo segnale WiFi in modalità hotspot
per rendere più facile l’installazione. Guardare la spia LED sulla parte
anteriore della PULSE SOUNDBAR, se è illuminato di luce verde
continua, ciò significa che il dispositivo è in modalità hotspot.
A Nel menu Impostazioni dello smartphone o tablet, individuare e
selezionare l’hotspot WiFi che corrisponde all’ID univoco di rete della
PULSE SOUNDBAR. L’ID di rete viene visualizzato come segue:
PULSESOUNDBAR-XXXX, dove XXXX sono le ultime quattro cifre
dell’indirizzo MAC (Machine Access Control).
B Aprire un browser Web sul controller, inserire l’indirizzo Web setup.
bluesound.com e premere GO (Vai). Verrà visualizzata una pagina del
pannello di controllo per la PULSE SOUNDBAR.
C Selezionare Configure WiFi (configura WiFi).
D Dall’elenco a discesa Configure Wireless (Configurazione rete wireless),
selezionare la rete WiFi domestica.
E Inserire la password per la propria rete WiFi.
F Selezionare o creare un Room Name (nome della stanza).
G Premere Update (Aggiorna) e attendere fino a quando la spia LED della
PULSE SOUNDBAR si illumina di luce blu continua, per indicare che la
PULSE SOUNDBAR si è connessa alla rete.
Ripetere le operazioni da A a G per ciascun lettore Bluesound
addizionale.
N.B.: Al termine dell’operazione, assicurarsi di selezionare di nuovo
la rete WiFi domestica dal menu Impostazioni dello smartphone o
tablet.
In alternativa, è possibile connettere la PULSE SOUNDBAR direttamente
alla rete domestica cablata o al router utilizzando il cavo Ethernet in
dotazione.
Visitare la pagina www.bluesound.com/setup per utili consigli
5 SCARICARE L’APP E CONNETTERSI ALLA
MUSICA
A Scaricare l’app BluOS Controller.
B Assicurarsi che il controller sia connesso alla rete domestica
corretta.
C Seguire le istruzioni visualizzate nell’app per completare l’impostazione
della PULSE SOUNDBAR.
D Usare il cassetto di navigazione di sinistra per aggiungere o selezionare
una sorgente musicale.
Tutte le app BluOS Controller per i dispositivi Apple iOS (iPhone, iPad, iPod),
i dispositivi Android, Kindle Fire, e Windows o Mac possono essere scaricate
da www.bluesound.com/downloads.
Visitare la pagina www.bluesound.com/setup per utili consigli

1 ESCOLHER A LOCALIZAÇÃO
1 SOBRE UMA MESA
Coloque o PULSE SOUNDBAR numa superfície plana. Monte os pés de
apoio fornecidos. Consoante a orientação da coluna de som, poderá ter
de adicionar extensores de pé de apoio, para garantir o comprimento
necessário para suportar o PULSE SOUNDBAR.
2 NA PAREDE
Utilize o suporte de parede para montar o PULSE SOUNDBAR na
parede. Consulte a folha do modelo de suporte de parede, para
instruções de montagem do PULSE SOUNDBAR.
3 SUPORTE DE TV DO BLUESOUND
Utilize o painel suporte de TV Bluesound TS100 (vendido em separado)
para aumentar a altura da TV, se o PULSE SOUNDBAR tapar parte do
ecrã da TV. Monte o PULSE SOUNDBAR e a sua TV no TS100. Consulte
a folha de instruções fornecida com o TS100, com as instruções para a
montagem de ambos.
2 LIGAÇÃO À TV
A Como cabo RCA-RCA fornecido, ligue a saída RCA da TV à entrada de
áudio (AUDIO IN (L/R)) do PULSE SOUNDBAR.
B Otra alternativa es, si su televisor tiene una salida óptica digital, use un
cable óptico de audio (no incluido) para conectar esa salida a la entrada
OPTICAL IN correspondiente de la PULSE SOUNDBAR.
3 CONEXIÓN A LA FUENTE DE
ALIMENTACIÓN
A Seleccione el cable de alimentación de CA apropiado para su región,
conéctelo al reproductor y luego al tomacorriente de la pared.
B Em alternativa, se a TV tiver uma saída ótica digital, utilize um cabo
ótico digital (não fornecido) para ligar a saída ótica digital da TV à
entrada ótica digital (OPTICAL IN) do PULSE SOUNDBAR.
4 LIGAÇÃO WiFi
O PULSE SOUNDBAR emite o seu próprio sinal WiFi quando se encontra
em Modo Hotspot, para facilitar a configuração. O LED de cor verde sólida
na parte frontal do PULSE SOUNDBAR indica se este se encontra no modo
Hotspot.
A No menu Definições do seu tablet ou smartphone, localize e selecione
o Hotspot WiFi que corresponde ao ID único de rede do PULSE
SOUNDBAR. O ID de rede é mostrado com a seguinte estrutura:
PULSESOUNDBAR-XXXX, onde XXXX representa os últimos quatro
dígitos do endereço MAC (Machine Access Control).
B Abra um navegador da Web no seu dispositivo controlador e introduza o
endereço setup.bluesound.com e prima OK. É apresentada uma página
de controlo para o PULSE SOUNDBAR.
C Selecione Configurar WiFi.
D Na lista pendente, selecione a sua rede WiFi doméstica.
E Introduza a sua palavra-passe.
F Selecione ou crie um nome de compartimento.
G Prima Atualizar e aguarde até que o LED do PULSE SOUNDBAR mude
para a cor azul sólida, indicando que a ligação do PULSE SOUNDBAR à
rede foi bem sucedida.
Repita os passos de A a G, para cada leitor Bluesound adicional.
Nota: quando terminar, certifique-se de que volta a selecionar a sua rede
WiFi doméstica nas definições do tablet ou smartphone.
Também pode ligar o PULSE SOUNDBAR diretamente à sua rede
doméstica ou a um router, utilizando o cabo Ethernet fornecido.
Visite www.bluesound.com/setup, para dicas e truques que podem ser úteis.
5 TRANSFERIR A APLICAÇÃO E LIGAR A
MÚSICA
A Transfira a aplicação BluOS Controller.
B Certifique-se de que o seu dispositivo controlador está ligado à rede
doméstica pretendida.
C Siga as instruções da aplicação para concluir a configuração do PULSE
SOUNDBAR.
D Utilize o navegador da esquerda para adicionar ou selecionar uma fonte
de música.
Todas as aplicações BluOS Controller para dispositivos Apple iOS (iPhone,
Pad, iPod) Android, Kindle Free, Windows ou Mac podem ser transferidas de
www.bluesound.com/downloads.
Visite www.bluesound.com/setup, para dicas e truques que podem ser úteis.

1 POSITIONSAUSWAHL
1 TISCHFLÄCHE
Positionieren Sie die PULSE SOUNDBAR auf einer ebenen
Fläche. Befestigen Sie die mitgelieferten Ständerfüße. Je
nach Lautsprecherorientierung müssen Sie möglicherweise
Ständerverlängerungen hinzufügen, um sicherzustellen, dass die
Ständerfüße lang genug sind, um Ihre PULSE SOUNDBAR zu
unterstützen.
2 WAND
Verwenden Sie die mitgelieferte Wandmontagehalterung,
um die PULSE SOUNDBAR an der Wand zu befestigen. Die
Wandmontagehalterungsschablone hat Anweisungen zum Montieren
der PULSE SOUNDBAR.
3 BLUESOUND-FERNSEHSTÄNDER
Verwenden Sie den Bluesound TS100 Panel-Fernsehständer (separat
erhältlich), um die Höhe Ihres Fernsehers zu verstellen, wenn die PULSE
SOUNDBAR einen Teil des Fernsehbildschirms abdeckt. Befestigen Sie
sowohl die PULSE SOUNDBAR als auch Ihren Fernseher am TS100.
Das Anweisungsblatt im Lieferumfang des TS100 enthält komplette
Montageanweisungen.
2 TV-ANSCHLUSS
A Schließen Sie den Audio-Cinch-Ausgang Ihres Fernsehers mit dem
mitgelieferten Cinch-Cinch-Kabel am entsprechenden Eingang AUDIO
IN (L/R) der PULSE SOUNDBAR an.
B Falls Ihr Fernseher über einen digitalen optischen Ausgang verfügt,
verwenden Sie alternativ ein optisches Audiokabel (nicht im
Lieferumfang enthalten), um den digitalen optischen Ausgang des
Fernsehers mit dem entsprechenden Eingang OPTICAL IN der PULSE
SOUNDBAR zu verbinden.
3 NETZANSCHLUSS
A Wählen Sie das für Ihre Region passende Netzkabel. Bringen Sie
das eine Ende am Player an und stecken Sie den Stecker in eine
Wandsteckdose.
B Die LED-Anzeige der PULSE SOUNDBAR sollte dauerhaft grün
leuchten. Dies weist darauf hin, dass der Player im Hotspot-Modus ist
und zu Ihrem WiFi-Heimnetzwerk hinzugefügt werden kann. Stecken Sie
den Netzstecker niemals mit Gewalt in eine Steckdose. In bestimmten
Regionen benötigen Sie unter Umständen einen Steckeradapter.
4 WiFi-ANSCHLUSS
Ihre PULSE SOUNDBAR sendet ihr eigenes WiFi-Signal im Hotspot-Modus
aus, um das Setup zu erleichtern. Eine dauerhafte grüne LED-Anzeige auf der
Vorderseite der PULSE SOUNDBAR zeigt den Hotspot-Modus an.
A Suchen Sie im Menü „Settings“ (Einstellungen) Ihres Tablets oder
Smartphones den WiFi-Hotspot, der der eindeutigen Netzwerk-ID Ihrer
PULSE SOUNDBAR entspricht und wählen Sie ihn aus. Die Netzwerk-
ID wird wie folgt angezeigt: PULSESOUNDBAR-XXXX, wobei XXXX
die letzten vier Ziffern der MAC (Machine Access Control)-Adresse
sind.
B Öffnen Sie einen Webbrowser auf dem Controller-Gerät und geben Sie
die Webadresse setup.bluesound.com ein. Drücken Sie dann auf GO
(Start). Eine Systemsteuerungsseite für die PULSE SOUNDBAR wird
angezeigt.
C Wählen Sie „Configure WiFi“ (WiFi konfigurieren).
D Wählen Sie Ihr WiFi-Netzwerk aus der Dropdown-Liste „Configure
Wireless“ (Wireless konfigurieren).
E Geben Sie Ihr WiFi-Kennwort ein.
F Wählen oder erstellen Sie einen Raumnamen.
G Drücken Sie auf „Update“ (Aktualisieren) und warten Sie darauf, dass
die LED-Anzeige der PULSE SOUNDBAR dauerhaft blau leuchtet. Dies
weist darauf hin, dass die PULSE SOUNDBAR erfolgreich zu Ihrem
Netzwerk hinzugefügt wurde.
Wiederholen Sie die Schritte A-G für jeden zusätzlichen Bluesound-
Player.
Hinweis: Wenn Sie fertig sind, stellen Sie sicher, dass Sie Ihr WiFi-
Heimnetzwerk erneut aus dem Menü „Settings“ (Einstellungen) Ihres
Tablets oder Smartphones auswählen.
Alternativ können Sie die PULSE SOUNDBAR mit dem mitgelieferten
Ethernet-Kabel auch direkt mit Ihrem Kabelheimnetzwerk oder Router
verbinden.
Besuchen Sie www.bluesound.com/setup, um nützliche Tipps und Tricks
zu lesen.
5 APP HERUNTERLADEN UND AN MUSIK
ANSCHLIESSEN
A Laden Sie die BluOS Controller-App herunter.
B Stellen Sie sicher, dass Ihr Controller-Gerät mit dem richtigen
Heimnetzwerk verbunden ist.
C Folgen Sie den Aufforderungen in der App, um das Setup Ihrer PULSE
SOUNDBAR abzuschließen.
D Verwenden Sie den linken Navigation Drawer, um eine Musikquelle
hinzuzufügen oder auszuwählen.
Alle BluOS Controller Apps für Apple iOS-Geräte (iPhone, iPad, iPod),
Android-Geräte, Kindle Fire und Windows- oder Mac-Desktops sind unter
www.bluesound.com/downloads zum Herunterladen verfügbar.
Besuchen Sie www.bluesound.com/setup, um nützliche Tipps und Tricks zu
lesen.

1 KEUZE MAKEN VOOR PLAATSING
1 OP TAFEL
Plaats de PULSE SOUNDBAR op een vlak oppervlak. Bevestig de
meegeleverde uitklapbare voeten. Afhankelijk van de richting waarin
de luidspreker is gericht zult u misschien de vergrote uitklapbare voeten
nodig hebben, zodat u zeker weet dat de uitklapbare voeten lang genoeg
zijn om de de PULSE SOUNDBAR te ondersteunen.
2 AAN DE WAND
Bevestig de PULSE SOUNDBAR aan de wand met behulp van de
meegeleverde wandbeugel. Raadpleeg de instructies op het blad
met het sjabloon voor het monteren van de beugel voor de PULSE
SOUNDBAR.
3 BLUESOUND TV-STANDAARD
U kunt met de Bluesound TS100 Panel TV-standaard (apart verkocht)
uw tv-toestel hoger plaatsen als de PULSE SOUNDBAR het tv-scherm
gedeeltelijk afdekt. Bevestig zowel de PULSE SOUNDBAR als uw
tv-toestel op de TS100. Op het instructieblad dat bij de TS100 wordt
geleverd, vindt u de volledige instructies voor montage.
2 AANSLUITEN OP HET TV-
TOESTEL
A Sluit met de meegeleverde RCA-naar-RCA-kabel de RCA-uitgang voor
audio van uw tv-toestel aan op de bijbehorende AUDIO IN (L/R) van de
PULSE SOUNDBAR.
B Als uw tv-toestel is voorzien van een digitale optische uitgang, breng
dan met een optische audiokabel (niet meegeleverd) de verbinding tot
stand tussen de digitale optische uitgang uw tv-toestel en de ingang
OPTICAL IN van de PULSE SOUNDBAR.
3 AANSLUITEN OP DE
STROOMVOORZIENING
A Kies het netsnoer dat geschikt is voor uw geografische locatie en steek
de stekker in de Player, en steek de stekker in het stopcontact.
B Het LED-indicatielampje van de PULSE SOUNDBAR moet
ononderbroken Groen gaan branden en dat betekent dat de Player
in Hotspot Mode staat en aan uw WiFi-netwerk thuis kan worden
toegevoegd. Ga altijd voorzichtig te werk wanneer u de stekker van het
netsnoer in het stopcontact steekt. Op bepaalde geografische locaties
zal misschien een adapter nodig zijn.
4 VERBINDING MAKEN MET WiFi
De PULSE SOUNDBAR zendt in Hotspot Mode zijn eigen WiFi-signaal uit en
dat maakt de installatie gemakkelijker. Kijk of het LED-indicatielampje op de
voorzijde van de PULSE SOUNDBAR ononderbroken groen brandt, u weet
dan dat het apparaat in Hotspot Mode staat.
A No menu Definições do seu tablet ou smartphone, localize e selecione
o Hotspot WiFi que corresponde ao ID único de rede do PULSE
SOUNDBAR. O ID de rede é mostrado com a seguinte estrutura:
PULSESOUNDBAR-XXXX, onde XXXX representa os últimos quatro
dígitos do endereço MAC (Machine Access Control).
B Open een webbrowser op uw controller-toestel, voer het web-adres
setup.bluesound.com in druk op GO. Er wordt dan een pagina met een
regelpaneel voor de PULSE SOUNDBAR weergegeven.
C Selecteer Configure WiFi.
D Selecteer in de snelkeuzelijst Configure Wireless uw WiFi-netwerk.
E Toets uw WiFi-wachtwoord in.
F Selecteer een Room Name of maak er een aan.
G Druk op Update en wacht tot het LED-indicatielampje van de PULSE
SOUNDBAR ononderbroken blauw gaat branden, wat betekent dat de
PULSE SOUNDBAR aan uw netwerk is toegevoegd.
Herhaal stappen A-G voor iedere Bluesound Player die u nog wilt
toevoegen.
Opmerking: Wanneer u hiermee klaar bent is het belangrijk dat u
opnieuw uw WiFi-netwerk thuis selecteert in het Instellingen-menu van
uw tablet of smartphone.
U kunt ook met de meegeleverde Ethernet-kabel de PULSE SOUNDBAR
direct op uw bedrade thuisnetwerk aansluiten.
Ga naar www.bluesound.com/setup voor nuttige tips en trucs
5 TRANSFERIR A APLICAÇÃO E LIGAR A
MÚSICA
A Download de BluOS Controller App.
B Controleer dat uw controller-toestel verbinding heeft met het juiste
thuisnetwerk.
C Volg de aanwijzingen in de App en voltooi de installatie van de PULSE
SOUNDBAR.
D Voeg met de linker Navigation Drawer een muziekbron toe of selecteer
er een.
Alle BluOS Controller Apps voor Apple iOS-toestellen (iPhone, iPad, iPod),
Android-toestellen, Kindle Fire en Windows- of Mac-bureaucomputers kunt u
downloaden van www.bluesound.com/downloads
Ga naar www.bluesound.com/setup voor nuttige tips en trucs

1 VÄLJ PLACERING
1 BORDSYTA
Placera PULSE SOUNDBAR på en plan yta. Fäst medföljande
fötter. Beroende på högtalarens riktning kan du behöva tillsätta
fotförlängningarna för att de ska vara tillräckligt långa för att ge
ordentligt stöd åt PULSE SOUNDBAR.
2 PÅ VÄGGEN
Använd medföljande väggmonteringsstativ för att fästa PULSE
SOUNDBAR på väggen. Se väggmonteringsstativets mall för
instruktioner om hur du monterar PULSE SOUNDBAR.
3 BLUESOUND TV-STATIV
Använd Bluesound TS100 Panel TV-stativet (säljs separat) för att
höja TV:n om PULSE SOUNDBAR täcker en del av TV-skärmen
Fäst både PULSE SOUNDBAR och TV:n på TS100. Fullständiga
installationsinstruktioner finns på det informationsblad som medföljer
varje TS100.
2 ANSLUT TILL TEVEN
A Koppla med hjälp av medföljande RCA till RCA-kabel audio RCA-uttaget
på teven till motsvarande AUDIO IN (L/R) på PULSE SOUNDBAR.
B Alternativt kan du använda en optisk ljudkabel (medföljer ej) om teven
har ett digitalt optiskt uttag för att koppla det digitala optiska uttaget på
teven till motsvarande OPTICAL IN på PULSE SOUNDBAR.
3 ANSLUT TILL NÄTSPÄNNING
A Välj lämplig nätkabel för din region och koppla in den i spelaren och
sedan i vägguttaget.
B PULSE SOUNDBARS LED-lampa ska lysa grönt för att ange att spelaren
är i hotspot-läge och redo att läggas till ditt trådlösa nätverket. Tvinga
aldrig in en nätkontakt i vägguttaget. En adapter kan krävas i vissa
regioner.
4 ANSLUT TILL ETT TRÅDLÖST
NÄTVERK
PULSE SOUNDBAR sänder egna WiFi-signaler i Hotspot-läge för att
göra inställningen enklare. Kontrollera att den gröna LED-lampan lyser
på PULSE SOUNDBARs framsida, vilket betyder att den är i Hotspot-
läge.
A I surfplattans eller smartphonens inställningar letar du upp den WiFi
hotspot som motsvarar PULSE SOUNDBAR-nätverkets unika ID.
Nätverksinformationen visas enligt följande: PULSESOUNDBAR-XXXX
där XXXX är de fyra sista siffrorna av MAC-adressen (Machine Access
Control).
B Öppna en webbläsare på kontrollenheten och ange webbadressen
setup.bluesound.com och tryck på GÅ. En PULSE SOUNDBAR-
kontrollpanelssida visas.
C Välj Configure WiFi (konfigurera trådlöst nätverk).
D Välj ditt trådlösa nätverk i rullgardinsmenyn Configure Wireless
(konfigurera trådlöst).
E Ange lösenordet för det trådlösa nätverket.
F Välj eller skapa ett namn för rummet.
G Tryck på Update (Uppdatera) och vänta tills PULSE SOUNDBARS LED-
lampa lyser blått, vilket anger att PULSE SOUNDBAR har anslutits till
nätverket.
Repetera steg A–G för varje Bluesound-spelare.
OBS! När du är klar ska du kontrollera att du markerar ditt eget trådlösa
nätverk i Inställningar på surfplattan eller mobilen.
Alternativt kan du ansluta PULSE SOUNDBAR direkt till ditt trådbundna
nätverk eller en router med den medföljande nätverkskabeln.
Gå till www.bluesound.com/setup för bra tips och knep
5 LADDA NER APPEN OCH ANSLUT TILL
DIN MUSIK
A Ladda ner BluOS Controller-appen.
B Säkerställ att kontrollenheten är kopplad till rätt hemnätverk.
C Följ anvisningarna i appen för att ställa in PULSE SOUNDBAR.
D Använd navigeringslådan på vänster sida för att lägga till eller välja en
musikkälla.
Alla BluOS Controller-appar för Apple iOS-enheter (iPhone, iPad, iPod),
Android-enheter, Kindle Fire och Windows eller Mac-skrivbord kan hämtas
från www.bluesound.com/downloads.
Gå till www.bluesound.com/setup för bra tips och knep

1 ESCOLHER A LOCALIZAÇÃO
1 SOBRE UMA MESA
Coloque o PULSE SOUNDBAR numa superfície plana. Monte os pés de
apoio fornecidos. Consoante a orientação da coluna de som, poderá ter
de adicionar extensores de pé de apoio, para garantir o comprimento
necessário para suportar o PULSE SOUNDBAR.
2 NA PAREDE
Utilize o suporte de parede para montar o PULSE SOUNDBAR na
parede. Consulte a folha do modelo de suporte de parede, para
instruções de montagem do PULSE SOUNDBAR.
3 SUPORTE DE TV DO BLUESOUND
Utilize o painel suporte de TV Bluesound TS100 (vendido em separado)
para aumentar a altura da TV, se o PULSE SOUNDBAR tapar parte do
ecrã da TV. Monte o PULSE SOUNDBAR e a sua TV no TS100. Consulte
a folha de instruções fornecida com o TS100, com as instruções para a
montagem de ambos.
2 LIGAÇÃO À TV
A Como cabo RCA-RCA fornecido, ligue a saída RCA da TV à entrada de
áudio (AUDIO IN (L/R)) do PULSE SOUNDBAR.
B Otra alternativa es, si su televisor tiene una salida óptica digital, use un
cable óptico de audio (no incluido) para conectar esa salida a la entrada
OPTICAL IN correspondiente de la PULSE SOUNDBAR.
3 CONEXIÓN A LA FUENTE DE
ALIMENTACIÓN
A Seleccione el cable de alimentación de CA apropiado para su región,
conéctelo al reproductor y luego al tomacorriente de la pared.
B Em alternativa, se a TV tiver uma saída ótica digital, utilize um cabo
ótico digital (não fornecido) para ligar a saída ótica digital da TV à
entrada ótica digital (OPTICAL IN) do PULSE SOUNDBAR.
4 LIGAÇÃO WiFi
O PULSE SOUNDBAR emite o seu próprio sinal WiFi quando se encontra
em Modo Hotspot, para facilitar a configuração. O LED de cor verde sólida
na parte frontal do PULSE SOUNDBAR indica se este se encontra no modo
Hotspot.
A No menu Definições do seu tablet ou smartphone, localize e selecione
o Hotspot WiFi que corresponde ao ID único de rede do PULSE
SOUNDBAR. O ID de rede é mostrado com a seguinte estrutura:
PULSESOUNDBAR-XXXX, onde XXXX representa os últimos quatro
dígitos do endereço MAC (Machine Access Control).
B Abra um navegador da Web no seu dispositivo controlador e introduza o
endereço setup.bluesound.com e prima OK. É apresentada uma página
de controlo para o PULSE SOUNDBAR.
C Selecione Configurar WiFi.
D Na lista pendente, selecione a sua rede WiFi doméstica.
E Introduza a sua palavra-passe.
F Selecione ou crie um nome de compartimento.
G Prima Atualizar e aguarde até que o LED do PULSE SOUNDBAR mude
para a cor azul sólida, indicando que a ligação do PULSE SOUNDBAR à
rede foi bem sucedida.
Repita os passos de A a G, para cada leitor Bluesound adicional.
Nota: quando terminar, certifique-se de que volta a selecionar a sua rede
WiFi doméstica nas definições do tablet ou smartphone.
Também pode ligar o PULSE SOUNDBAR diretamente à sua rede
doméstica ou a um router, utilizando o cabo Ethernet fornecido.
Visite www.bluesound.com/setup, para dicas e truques que podem ser úteis.
5 TRANSFERIR A APLICAÇÃO E LIGAR A
MÚSICA
A Transfira a aplicação BluOS Controller.
B Certifique-se de que o seu dispositivo controlador está ligado à rede
doméstica pretendida.
C Siga as instruções da aplicação para concluir a configuração do PULSE
SOUNDBAR.
D Utilize o navegador da esquerda para adicionar ou selecionar uma fonte
de música.
Todas as aplicações BluOS Controller para dispositivos Apple iOS (iPhone,
Pad, iPod) Android, Kindle Free, Windows ou Mac podem ser transferidas de
www.bluesound.com/downloads.
Visite www.bluesound.com/setup, para dicas e truques que podem ser úteis.

© Bluesound International. Bluesound, the stylized wordmark and “B” logotype, the phrase
“HiFi for a wireless generation”, PULSE SOUNDBAR and all other Bluesound product names
and taglines are trademarks or registered trademarks of Bluesound International, a division of
Lenbrook Industries Limited. All other logos and services are trademarks or service marks of their
respective owners.
-
 1
1
-
 2
2
-
 3
3
-
 4
4
-
 5
5
-
 6
6
-
 7
7
-
 8
8
-
 9
9
-
 10
10
-
 11
11
-
 12
12
-
 13
13
-
 14
14
-
 15
15
-
 16
16


Bluesound Pulse Quick Setup Manual
- Categoria
- Altoparlanti della soundbar
- Tipo
- Quick Setup Manual
in altre lingue
- English: Bluesound Pulse
- français: Bluesound Pulse
- español: Bluesound Pulse
- Deutsch: Bluesound Pulse
- Nederlands: Bluesound Pulse
- português: Bluesound Pulse
- svenska: Bluesound Pulse
Documenti correlati
-
Bluesound Vault 2i Manuale del proprietario
-
Bluesound Hub Guida utente
-
Bluesound Pulse Sub Manuale del proprietario
-
-
Bluesound Vault 2 Guida di installazione rapida
-
-
-
-
-
Bluesound NODE Wireless Streaming Music Player Quick Setup Manual