Philips AVENT SCD506 Avent Manuale utente
- Categoria
- Babyphone
- Tipo
- Manuale utente

SCD506

34
35
26
2
1
3
4
5
13
12
14
33
16
36
18
15
6
7
8
11
20
19
21
22
23
24
25
32
31
9
28
27
29
30
10
17
1

2
3
2
1
4
5
6
7
8
9
>
3.5ft/1m
10
11
12
13
14
15
16
17
18
19
20
21
22
23
24
25

26

English
Introduction
Congratulations on your purchase and welcome to Philips Avent! To fully benefit from the support
that Philips Avent offers, register your product at www.philips.com/welcome.
Philips Avent is dedicated to producing caring, reliable products that give parents the reassurance
they need. This Philips Avent baby monitor provides round-the-clock support by ensuring you can
always hear your baby clearly without any distracting noise. The DECT technology guarantees zero
interference and a crystal clear sound between the baby unit and the parent unit.
General description (Fig. 1)
1 Parent unit
2 'Talk' button
3 'Sensitivity' button
4 'Link' light
5 Speaker
6 Microphone
7 Sound level lights
8 ECO Max button with light
9 Battery status light
10 Volume + and - buttons
11 On/off button
12 Neck strap loop
13 Battery compartment
14 Socket for small plug
15 Lid of battery compartment
16 Rechargeable batteries
17 Adapter with small plug
18 Neck strap
19 Baby unit
20 Nightlight
21 Microphone
22 PAGE button
23 Power-on light
24 On/off button
25 Speaker
26 Battery status light
27 Volume + button
28 Volume - button
29 Lullaby play/stop button
30 Next lullaby button
31 Nightlight on/off button
32 Battery compartment
33 Socket for small plug
34 Lid of battery compartment
35 Non-rechargeable 1.5 V R6 AA batteries (not supplied)
36 Adapter with small plug
Important safety information
Read this important information carefully before you use the appliance and save it for future
reference.
6
English

IMPORTANT
This baby monitor is intended as an aid. It is not a substitute for responsible and proper adult
supervision and should not be used as such.
Never leave your baby alone in your home. Always make sure there is someone present to look after
the baby and take care of its needs.
Disclaimer
Please note that you use this baby monitor at your own risk. Koninklijke Philips N.V. and its subsidiary
companies are not responsible for the operation of this baby monitor or your use of it and therefore
do not accept any liability in connection with your use of this baby monitor.
Danger
-
Never immerse any part of the baby monitor in water or any other liquid. Do not place the
appliance where water or any other liquid can drip or splash onto it. Never use the baby monitor in
moist places or close to water.
-
Never put any object on top of the baby monitor and do not cover it. Do not block any ventilation
openings. Install according to the manufacturer’s instructions.
-
Cords present a potential strangulation hazard. Keep cords out of the reach of children (more than
1 meter/3.5 feet away). Never place the baby monitor inside the baby’s bed or playpen (Fig. 2).
-
There is a danger of explosion if disposable or rechargeable batteries are replaced incorrectly. Only
replace them with the same type.
Warning
-
Check if the voltage indicated on the adapter corresponds to the local mains voltage before you
connect the appliance.
-
Do not modify or cut off any part of the adapter and its cord, as this causes a hazardous situation.
-
Only use the adapter supplied (model S003PV0600050).
-
If the adapter is damaged, always have it replaced with one of the original type in order to avoid a
hazard.
-
This appliance can be used by children aged from 8 years and above and persons with reduced
physical, sensory or mental capabilities or lack of experience and knowledge if they have been
given supervision or instruction concerning use of the appliance in a safe way and understand the
hazards involved. Children shall not play with the appliance. Cleaning and user maintenance shall
not be made by children without supervision.
-
Protect the mains cord from being walked on or pinched particularly at plugs, convenience
receptacles, and the point where they exit from the appliance.
-
Make sure that you place the baby monitor in such a way that its cord does not obstruct a doorway
or passage. If you place the baby monitor on a table or low cabinet, do not let the mains cord hang
over the edge of the table or worktop. Make sure the cord does not lie on the floor where it
presents a tripping hazard.
-
Keep the packaging materials (plastic bags, cardboard buffers, etc.) out of the reach of children, as
they are not a toy.
-
To prevent electric shock, do not open the housing of the baby unit or parent unit except for the
battery compartments.
Caution
-
Use the appliance at a temperature between 0°C (32°F) and 40°C (104°F).
7
English

-
Do not install the appliance near any heat sources such as radiators, heat registers, stoves or other
apparatus (including amplifiers) that produce heat.
-
Make sure that your hands are dry when you handle adapters, plugs and mains cord and also
when you insert or replace disposable and rechargeable batteries.
-
All the required markings are located on the battery compartment of the parent unit and baby unit
and on the bottom enclosure of the charger (if any).
-
For the parent unit, only use the rechargeable battery supplied with the baby monitor.
-
Charge the rechargeable battery as described in the user manual.
-
The parent unit can only be recharged with the rechargeable battery supplied.
-
To prevent battery explosion or leakage, which can damage the baby monitor and cause burns and
skin or eye irritation:
-
Do not recharge non-rechargeable batteries in the parent unit.
-
Remove rechargeable and disposable batteries if you are not going to use the baby monitor for
more than 30 days.
-
Make sure the + and - poles of the batteries point in the right direction.
-
Keep the batteries away from excessive heat such as sunshine, fire or the like.
-
Do not leave empty batteries in the baby unit.
-
To prevent batteries from heating up or releasing toxic materials, hydrogen or oxygen, do not
overcharge, short-circuit, reverse charge or damage batteries.
-
To handle damaged or leaking batteries, wear protective gloves to protect your skin.
Compliance with standards
-
This product complies with the radio interference requirements of the European Community (Fig.
3).
-
Philips Consumer Lifestyle hereby declares that this baby monitor is in compliance with the
essential requirements and other relevant provisions of Directive 2014/53/EU (DECT: frequency
band 1880-1900 MHz, maximum radio-frequency power: 250 mW). A copy of the EC Declaration of
Conformity (DoC) is available online at www.philips.com/support.
Electromagnetic fields (EMF)
This Philips appliance complies with all applicable standards and regulations regarding exposure to
electromagnetic fields.
Preparing for use
Baby unit
We advise you to operate the baby unit from the mains. To guarantee automatic power backup in
case of mains failure, you can insert four 1.5V AA alkaline batteries (not included).
Do not use rechargeable batteries. The baby unit does not have a charging function and rechargeable
batteries discharge slowly when they are not in use.
1 Remove the lid of the battery compartment (Fig. 4).
2 Insert four non-rechargeable 1.5V R6 AA batteries. Make sure that the + and - poles point in the
right direction (Fig. 5).
3 Reattach the lid.
4 Put the small plug in the baby unit and put the adapter in the wall socket (Fig. 6).
8
English

Parent unit
The parent unit runs on two rechargeable 850mAh Ni-MH batteries that are supplied with the baby
monitor. Charge the parent unit before you use it for the first time and when the batteries are low.
1 Make sure that the parent unit is switched off and disconnected from the mains.
2 Remove the lid of the battery compartment (Fig. 7).
3 Insert the rechargeable batteries. Make sure that the + and - poles point in the right direction (Fig.
8).
4 Reattach the lid.
5 Put the power adapter in the parent unit and put the adapter in the wall socket (Fig. 9).
The battery status indicator flashes green to indicate that the appliance is charging.
Note: It takes 4 charge and discharge cycles before the rechargeable batteries reach their full capacity.
The normal charging time is 10 hours, and the normal operating time is 24 hours.
Rechargeable batteries:
Manufacturer
Model Rating
BYD H-AAA850A-MB20 1.2V Ni-MH AAA/R03 850mAh
GPI PH85AAAHC 1.2V Ni-MH AAA/R03 850mAh
Adapters:
UK model number
S003PB0600050
EU model number S003PV0600050
Using the baby monitor
Positioning the baby monitor
Keep the baby unit out of the reach of the baby. Never place the baby unit inside the baby’s bed or
playpen.
Because the cord of the baby unit presents a potential strangulation hazard, make sure that the baby
unit and its cord are at least 1 metre/3.5 feet away from your baby. (Fig. 10)
To prevent a high-pitched sound from one or both units, make sure the parent unit is at least 1.5
metres/5 feet away from the baby unit.
Note: When the parent unit is out of range of the baby unit, the parent unit beeps from time to time.
The link indicator on the parent unit flashes red.
Linking parent unit and baby unit
1 Press and hold the on/off button on the baby unit for two seconds (Fig. 11).
-
All lights on the baby unit light up briefly.
2 Press and hold the on/off button on the parent unit for two seconds (Fig. 12).
-
All lights on the parent unit light up briefly.
-
The 'link' light flashes red and the parent unit starts to search for the baby unit.
-
When the parent unit and baby unit are linked, the 'link' light turns solid green (Fig. 13).
9
English

-
If no connection is established, the 'link' light flashes red and the parent unit beeps from time to
time.
Note: It takes less than 15 seconds to establish the link between the parent unit and the baby unit.
What to do if no link is established
-
If the parent unit is out of range, place it closer to the baby unit, but not closer than 1 metre/3.5
feet.
-
If the baby or parent unit is too close to another DECT appliance (e.g. a cordless phone), switch off
this appliance or move the unit away from this appliance.
-
If the baby unit is switched off, switch it on.
Operating range
-
The operating range is 330 metres/1000 feet outdoors and up to 50 metres/150 feet indoors.
-
The operating range of the baby monitor varies depending on the surroundings and factors that
cause interference. Wet and moist materials cause so much interference that the range loss is up to
100%. For interference from dry materials, see the table below.
Dry materials
Material thickness Loss of range
Wood, plaster, cardboard,
glass (without metal, wires
or lead)
< 30cm (12in) 0-10%
Brick, plywood < 30cm (12in) 5-35%
Reinforced concrete < 30cm (12in) 30-100%
Metal grilles or bars < 1cm (0.4in) 90-100%
Metal or aluminium sheets < 1cm (0.4in) 100%
Functions and feedback on the baby unit
Nightlight
The nightlight produces a soft glow that comforts your baby.
1 Press the nightlight button on the back of the baby unit to switch on the nightlight (Fig. 14).
2 Press the nightlight button again to switch off the nightlight.
Lullaby function
1 Press the lullaby play/stop button on the baby unit to play the last selected lullaby (Fig. 15).
The selected lullaby repeats for 30 minutes.
2 Press the next lullaby button to select another lullaby from the list (Fig. 16).
3 To adjust the sound level of the lullaby, press the + or – button on the baby unit.
4 To stop lullaby playing, press the lullaby play/stop button on the baby unit.
10
English

Paging the parent unit
If you have lost the parent unit, you can use the PAGE button on your baby unit to locate the parent
unit. This function only works when the parent unit is switched on.
1 Press the PAGE button on the baby unit (Fig. 17). The parent unit produces a paging alert tone.
2 To stop the paging alert tone, press the PAGE button on the baby unit again or press any button
on the parent unit. The paging alert tone stops automatically after 2 minutes.
Battery status light
The battery status light is solid green when the baby unit is operating on battery power and the
batteries contain enough energy.
The battery status light flashes red quickly when the batteries run low while the baby unit is operating
on battery power (Fig. 18).
Note: The battery status light is off when the baby unit is powered by the adapter.
Replace the batteries when they run low.
Functions and feedback on the parent unit
Volume
There are five volume levels and a 'volume off' setting.
Setting the volume level
1 Press the + button or the - button once.
The sound level lights show the current volume (Fig. 19).
2 Press the + button to increase the volume or press the - button to decrease the volume.
3 If you do not press a button for more than 3 seconds, the sound level lights go out and the setting
is saved.
Volume off
Below the lowest volume setting, there is a 'volume off' setting.
1 Press the + button or the - button once.
The sound level lights show the current volume.
2 Press and hold the - button for more than 3 seconds to set the volume to off.
Note: The sound level lights always show that the baby produces sounds, even if the volume is set to
off.
Talk function
1 If you want to comfort your baby, press the TALK button on the parent unit and talk clearly into the
microphone on the front from a distance of 15-30cm (0.5-1ft) (Fig. 20).
The 'link' light starts flashing green.
Note: If you have set the volume for the lullaby higher on the baby unit, the sound will also be
louder when you use the talk function on the parent unit.
2 Release the TALK button when you have finished talking.
11
English

Battery status light
When the rechargeable batteries of the parent unit are low, the battery status light flashes red and the
parent unit beeps (Fig. 21). The remaining operating time is at least 30 minutes.
When the rechargeable battery of the parent unit is almost empty, the battery status light flashes red.
If you do not connect the parent unit to the mains to charge it when the battery status light flashes
red, the parent unit switches off.
The battery status light flashes green when the parent unit is charging (Fig. 21).
Microphone sensitivity
This option allows you to set the microphone sensitivity of the baby unit. The microphone sensitivity
determines what noise level the baby unit picks up, e.g. you will want to hear when your baby cries,
but you may be less interested in its babbling.
Note: The parent unit uses less power when it is set to a lower sensitivity level.
1 Press the 'sensitivity' button once (Fig. 22).
The sound level lights light up briefly and show the current sensitivity level (Fig. 19).
2 Press the 'sensitivity' button again within 3 seconds to increase the sensitivity level.
When the maximum sensitivity level has been reached, the lowest sensitivity level will be selected
again.
3 If you do not press a button for more than 3 seconds, the sound level lights go out and the setting
is saved.
ECO mode
Smart ECO is a standard feature on this baby monitor. It automatically reduces the DECT signal from
the baby unit to save energy. To save even more energy, activate the ECO Max mode. In this mode,
the DECT signal of the baby unit is switched off as long as the baby does not make a sound.
Caution: When the baby makes a sound, there may be a slight delay in response because the DECT
signal has to switch on again before the baby unit can send feedback to the parent unit.
Please note the following:
-
In ECO Max mode, you do not receive feedback when the baby unit is switched off or when the
parent unit is out of range of the baby unit. You can check the connection by pressing any button
on the parent unit.
Activating the ECO Max mode
Make sure that the parent unit is linked to the baby unit.
1 Press the ECO Max button (Fig. 23).
The ECO Max indicator lights up blue.The 'link' light starts flashing green slowly approx. 1 minute
after the baby has stopped making sounds (Fig. 24).
When the parent unit receives a DECT signal from the baby unit because the baby makes a sound,
the 'link' light turns solid green.
Deactivating ECO Max mode
1 Press the ECO Max button (Fig. 23).
The ECO Max indicator goes out.
12
English

Warranty and support
If you need information or support, please visit www.philips.com/support or read the international
warranty leaflet.
Recycling
-
This symbol means that this product shall not be disposed of with normal household waste
(2012/19/EU) (Fig. 25).
-
This symbol means that this product contains rechargeable and disposable batteries which shall
not be disposed of with normal household waste (2006/66/EC) (Fig. 26).
-
Follow your country's rules for the separate collection of electrical and electronic products, and
rechargeable and disposable batteries. Correct disposal helps prevent negative consequences for
the environment and human health.
Removing rechargeable and disposable batteries
To remove rechargeable and disposable batteries, see the instructions for placing and/or removing
batteries in the user manual.
Frequently asked questions
Question
Answer
Why don't the power-on light
of the baby unit and the 'link'
light of the parent unit light up
when I press the on/off
buttons of the units?
Perhaps the rechargeable battery of the parent unit is empty and
the parent unit is not plugged in. Put the small plug in the parent
unit and put the adapter in a wall socket. Then press the on/off
button to establish connection with the baby unit.
Perhaps the non-rechargeable batteries of the baby unit are empty
and the baby unit is not connected to the mains. Replace the non-
rechargeable batteries or connect the baby unit to the mains. Then
press the on/off button to establish connection with the parent unit.
Why doesn't the battery status
light on the parent unit light
up when I start recharging the
parent unit?
It takes a few minutes before the battery status lightlights up,
especially when the parent unit is charged for the first time or has
not been in use for a long period.
Is my baby monitor secure
from eavesdropping and
interference?
The DECT technology of this baby monitor guarantees no
interference from other equipment and no eavesdropping.
Why does the parent unit
beep?
If the parent unit beeps while the 'link' light fashes red, the
connection with the baby unit is lost. Move the parent unit closer to
the baby unit to re-establish the connection between the parent
unit and the baby unit.
If the parent unit beeps and the battery status light flashes red,
recharge the parent unit.
If the baby unit is switched off, switch on the baby unit.
13
English

Question Answer
Why does the parent unit
produce a high-pitched noise?
The units may be too close to each other. Make sure that the parent
unit and the baby unit are at least 1.5 metres/5 feet away from each
other. It takes a few seconds for the high-pitched noise to stop.
The volume of the parent unit may be too high. Decrease the
volume of the parent unit.
Why don't I hear a sound/ Why
can't I hear my baby cry?
The volume of the parent unit may be too low or may be switched
off. Increase the volume of the parent unit.
The microphone sensitivity level of the baby unit may be too low.
Increase the microphone sensitivity level on the parent unit.
The baby unit and the parent unit may be out of range of each
other. Reduce the distance between the units.
Why does the parent unit react
too quickly to other sounds?
The baby unit also picks up other sounds than those of your baby.
Move the sound sources away from the baby unit.
The microphone sensitivity level of the baby unit may be too high.
Decrease the microphone sensitivity level on the parent unit.
Why does the parent unit react
slowly to the baby's crying?
The microphone sensitivity level of the baby unit may be too low.
Increase the microphone sensitivity level on the parent unit.
The ECO Max mode is on and the baby unit only switches on the
DECT signal when the baby makes sounds. Switch off the ECO Max
mode to make the baby unit transmit DECT signals continuously
and to make the parent unit respond more quickly to your baby's
sounds.
Why do the non-rechargeable
batteries of the baby unit run
low quickly? How can I save
battery power?
The microphone sensitivity level of the baby unit may be too high,
which causes the baby unit to transmit more often. Decrease the
microphone sensitivity level in the menu of the parent unit.
The speaker volume on the baby unit may be too high, which
causes the baby unit to consume a lot of energy. Decrease the
speaker volume of the baby unit.
Perhaps you switched on the nightlight. If you want to use the
nightlight, we advise you to run the baby unit on mains power.
To save energy, activate the ECO Max mode.
The specific operating range of
the baby monitor is 330
metres/1000 feet. Why does
my baby monitor manage a
much smaller distance than
that?
The specified range is only valid outdoors in open air.
Why is the operating time of
my parent unit shorter than 24
hours?
When the parent unit is charged for the first 4 times, the operating
time is less than 24 hours. The rechargeable batteries only reach the
full capacity after you charge and discharge them at least 4 times.
14
English

Question Answer
The volume and microphone sensitivity of the parent unit may be
too high, which causes the parent unit to consume a lot of energy.
Decrease the volume and the microphone sensitivity of the parent
unit.
The parent unit may be switched on during charging. Switch off the
parent unit during charging.
What happens during a power
failure?
If the parent unit is sufficiently charged and there are batteries in
the baby unit, the baby monitor continues to operate during a
power failure.
The parent unit switched off
by itself and I can't I switch it
on again. What should I do?
Remove the batteries from the parent unit, reinsert them in the
parent unit, and the parent unit will switch on automatically. You
can also put the small plug in the parent unit and the adapter in the
wall socket, and then the parent unit will switch on automatically.
Why does it take up to 10
hours to charge the parent
unit, even if the batteries are
not completely discharged?
You have removed and then reinserted the batteries. This causes
the parent unit to charge the batteries fully up to 10 hours.
To maintain a long battery lifetime over the years, charging is
slowed down when the batteries are more than 50% charged.
15
English

Dansk
Introduktion
Tillykke med dit køb og velkommen til Philips Avent! For at få fuldt udbytte af den støtte, Philips Avent
tilbyder, skal du registrere dit produkt på www.philips.com/welcome.
Philips Avent sætter en ære i at producere pålidelige produkter, der kan give forældre den tryghed, de
har brug for. Denne Philips Avent-babyalarm hjælper dig døgnet rundt ved at sikre, at du altid kan
høre din baby klart og tydeligt uden forstyrrende støj. DECT-teknologien garanterer nul interferens og
en krystalklar lyd mellem babyenheden og forældreenheden.
Generel beskrivelse (fig. 1)
1 Forældreenhed
2 "Talk"-knap
3 "Sensitivity"-knap (Følsomhed)
4 "Link"-indikator
5 Højttaler
6 Mikrofon
7 Lys, som indikerer lydniveau
8 ECO Max-knap med lys
9 Batteristatusindikator
10 Lydstyrkeknapperne + og -
11 On/off-knap
12 Halsstrop med løkke
13 Batterirum
14 Lille strømstik
15 Låg til batterirum
16 Genopladelige batterier
17 Adapter med lille stik
18 Halsstrop
19 Babyenhed
20 Natlampe
21 Mikrofon
22 PAGE-knap (Søgning)
23 Strømindikator
24 On/off-knap
25 Højttaler
26 Batteristatusindikator
27 Lydstyrke + knap
28 Lydstyrke - knap
29 Vuggevise afspil/stop-knap
30 Næste vuggevise-knap
31 On/off-knap til natlampe
32 Batterirum
33 Lille strømstik
34 Låg til batterirum
35 Ikke-genopladelige 1,5 V R6 AA-batterier (medfølger ikke)
36 Adapter med lille stik
Vigtige sikkerhedsoplysninger
Læs disse vigtige oplysninger omhyggeligt igennem, inden apparatet tages i brug, og gem dem til
eventuel senere brug.
16
Dansk

VIGTIGT
Denne babyalarm er beregnet til at fungere som et hjælpemiddel. Den kan aldrig erstatte ansvarlig
og korrekt forældreopsyn og -overvågning og må ikke bruges sådan.
Lad aldrig det overvågede barn være alene i hjemmet. Sørg altid for, at der er nogen, der kan holde
øje med barnet og tage sig af dets behov.
Ansvarsfraskrivelse
Bemærk, at du bruger denne babyalarm på eget ansvar. Koninklijke Philips N.V. og dets
datterselskaber er ikke ansvarlig for betjeningen af denne babyalarm eller din brug af den og påtager
sig således intet ansvar i forbindelse med din brug af denne babyalarm.
Fare
-
Babyalarmen (eller dele af den) må aldrig kommes ned i vand eller andre væsker. Anbring ikke
apparatet, hvor vand eller anden væske kan dryppe eller sprøjte på det. Babyalarmen må ikke
bruges i fugtige omgivelser eller tæt ved vand.
-
Placer aldrig en genstand oven på babyalarmen, og dæk den ikke til. Ventilationsåbningerne må
ikke blokeres. Installer i overensstemmelse med producentens instruktioner.
-
Ledninger udgør en potentiel risiko for kvælning. Hold ledninger uden for børns rækkevidde (mere
end 1 m væk). Anbring ikke babyalarmen i barnets seng eller kravlegård (fig. 2).
-
Der er fare for eksplosion, hvis engangsbatterier eller genopladelige batterier udskiftes forkert.
Udskift dem kun med batterier af samme type.
Advarsel
-
Kontrollér, om den angivne netspænding på adapteren svarer til den lokale netspænding, før du
slutter strøm til opladeren.
-
Ingen dele af adapteren eller ledningen må ændres eller klippes af, da dette vil føre til farlige
situationer.
-
Brug kun den medfølgende adapter (S003PV0600050-model).
-
Hvis adapteren beskadiges, skal den altid udskiftes med en original adapter af samme type for at
undgå en farlig situation.
-
Dette apparat må bruges af børn fra 8 år og opefter og personer med reducerede fysiske,
sensoriske eller mentale evner eller manglende erfaring og viden, hvis de er blevet instrueret i
sikker brug af apparatet og forstår de medfølgende risici. Lad ikke børn lege med apparatet.
Rengøring og vedligeholdelse må ikke foretages af børn uden opsyn.
-
Sørg for, at lysnetledningen ikke trædes på eller klemmes, navnlig ved stikkene og
stikforbindelserne samt det sted, hvor ledningen føres ud af apparatet.
-
Sørg for at placere babyalarmen, så den tilsluttede ledning ikke spærrer en døråbning eller på
anden måde er i vejen. Hvis du placerer babyalarmen på et bord eller et lavt kabinet, må du aldrig
lade ledningen hænge ud over kanten af bordet eller pladen. Sørg for, at den tilsluttede ledning
ikke ligger på gulvet, hvor den udgør en fare for fald.
-
Hold emballagen (plastikposer, pap, karton osv.) uden for børns rækkevidde. Det er ikke legetøj.
-
For at undgå elektrisk stød må man ikke forsøge at åbne andet end batterirummene i
babyenheden eller i forældreenheden.
Forsigtig
-
Anvend apparatet ved en temperatur mellem 0 °C og 40 °C.
-
Installer ikke apparatet i nærheden af varmekilder, som f.eks. radiatorer, varmeapparater, ovne eller
andre apparater (inkl. forstærkere), der producerer varme.
17
Dansk

-
Sørg for, at dine hænder er tørre, når du håndterer adaptere, stik og lysnetledninger, og når du
udskifter batterier.
-
Alle de nødvendige afmærkninger er placeret på batterirummet i forældreenheden og
babyenheden og i bunden af opladeren (hvis der er nogen).
-
I forældreenheden må der kun benyttes det genopladelige batteri, der leveres sammen med
babyalarmen.
-
Oplad det genopladelige batteri som beskrevet i brugervejledningen.
-
Forældreenheden kan kun oplades ved hjælp af det medfølgende genopladelige batteri.
-
For at undgå batterieksplosion eller -lækage, som kan beskadige babyalarmen og forårsage
forbrændinger og hud- eller øjenirritation, skal du overholde følgende:
-
Ikke-genopladelige batterier må ikke oplades i forældreenheden.
-
Tag de genopladelige batterier og engangsbatterierne ud, hvis du ikke skal bruge babyalarmen i
mere end 30 dage.
-
Sørg for, at batteriernes poler (+ og -) vender den rigtige vej.
-
Hold batterierne væk fra stærk varme, som f.eks. solskin, ild eller lignende.
-
Undlad at lade opbrugte batterier blive siddende i babyenheden.
-
For at forhindre batterierne i at overophede eller afgive giftstoffer, hydrogen eller oxygen må de
ikke overoplades, kortsluttes, oplades omvendt eller beskadiges.
-
Bær beskyttelseshandsker for at beskytte huden, når du håndterer beskadigede eller utætte
batterier.
Overholdelse af standarder
-
Dette apparat overholder EU (fig. 3)'s krav om radiointerferens.
-
Philips Consumer Lifestyle erklærer hermed, at denne babyalarm overholder de væsentlige krav og
andre relevante bestemmelser i direktiv 2014/53/EU (DECT: frekvensbånd 1880-1900 MHz,
maksimal radiofrekvenseffekt: 250 mW). En kopi af EU-overensstemmelseserklæringen (DoC) er
tilgængelig online på www.philips.com/support.
Elektromagnetiske felter (EMF)
Dette Philips-apparat overholder alle branchens gældende standarder og regler angående
eksponering for elektromagnetiske felter.
Klargøring
Babyenhed
Vi anbefaler, at du slutter babyalarmen til lysnettet. For at sikre automatisk strømbackup i tilfælde af
strømsvigt kan du isætte fire 1,5 V AA alkaline-batterier (medfølger ikke).
Brug ikke genopladelige batterier. Babyenheden ikke har nogen ladefunktion, og genopladelige
batterier aflades langsomt, når de ikke benyttes.
1 Tag låget af batterirummet (fig. 4).
2 Isætfire ikke-genopladelige 1,5 V R6 AA-batterier. Sørg for, at + og - polerne vender rigtigt (fig. 5).
3 Sæt låget på igen.
4 Sæt det lille stik ibabyenheden, og sæt adapteren i en stikkontakt (fig. 6).
18
Dansk

Forældreenhed
Forældreenheden benytter to genopladelige 850 mAh Ni-MH-batterier, der leveres sammen med
babyalarmen. Oplad forældreenheden, før du tager den i brug første gang, og når batterierne er
ved at løbe tør.
1 Kontrollér, at forældreenheden er slukket, og at stikket er taget ud af stikkontakten.
2 Tag låget af batterirummet (fig. 7).
3 Sæt de genopladelige batterier i. Sørg for, at + og - polerne vender rigtigt (fig. 8).
4 Sæt låget på igen.
5 Sæt strømadapteren i forældreenheden, og sæt adapteren i en stikkontakt (fig. 9).
Batteristatusindikatoren blinker grønt for at indikere, at apparatet oplades.
Bemærk: Apparatet skal oplades og aflades fire gange, før de genopladelige batterier når først op på
deres fulde kapacitet.
Den normale opladningstid er 10 timer, og den normale brugstid er 24 timer.
Genopladelige batterier:
Producent
Model Klassificering
BYD H-AAA850A-MB20 1,2 V Ni-MH AAA/R03 850 mAh
GPI PH85AAAHC 1,2 V Ni-MH AAA/R03 850 mAh
Adaptere:
UK-modelnummer
S003PB0600050
EU-modelnummer S003PV0600050
Brug af babyalarmen
Placering af babyalarmen
Babyenheden placeres uden for barnets rækkevidde. Anbring ikke babyenheden i barnets seng eller
kravlegård.
Da ledningen til babyenheden udgør en potentiel risiko for kvælning, skal du sørge for, at
babyenheden og dens ledning er mindst 1 meter væk fra barnet. (fig. 10)
For at undgå en skinger tone lyd fra én eller begge enheder, skal du sørge for, at forældreenheden er
mindst 1,5 m væk fra babyenheden.
Bemærk: Hvis forældreenheden kommer uden for babyenhedens rækkevidde, vil forældreenheden
bippe med jævne mellemrum. Link-indikatoren på forældreenheden blinker rødt.
Oprettelse af forbindelse mellem forældre- og babyenhed
1 Tryk på on/off-knappen på babyenheden, og hold den nede i to sekunder (fig. 11).
-
Alle indikatorer på babyenheden lyser kortvarigt.
2 Tryk på on/off-knappen på forældreenheden, og hold den nede i to sekunder (fig. 12).
-
Alle indikatorer på forældreenheden lyser kortvarigt.
-
"Link"-indikatoren blinker rødt, og forældreenheden begynder at søge efter babyenheden.
19
Dansk

-
Når forældreenheden og babyenheden har forbindelse med hinanden, lyser "link"-indikatoren
konstant grønt (fig. 13).
-
Hvis der ikke er etableret forbindelse, blinker "link"-indikatoren rødt, og forældreenheden bipper
en gang imellem.
Bemærk: Det tager mindre end 15 sekunder at etablere forbindelsen mellem forældreenhed og
babyenhed.
Hvad gør man, hvis der ikke oprettes forbindelse
-
Hvis forældreenheden er uden for rækkevidde, skal du placere den tættere på babyenheden, men
ikke tættere end 1 meter.
-
Hvis baby- eller forældreenheden er for tæt på et andet DECT-apparat (f.eks. en trådløs telefon),
skal du slukke for dette eller flytte enheden væk fra apparatet.
-
Hvis babyenheden er slukket, skal du tænde den.
Senderækkevidde
-
Senderækkevidden er 330 meter udendørs og op til 50 meter indendørs.
-
Babyalarmens rækkevidde afhænger af omgivelserne og andre faktorer, der kan forårsage
interferens. Våde og fugtige materialer kan give op til 100 % tab i rækkevidden på grund af
interferens. Interferens forårsaget af tørre materialer fremgår af tabellen nedenfor.
Tørre materialer
Materialets tykkelse Tab af rækkevidde
Træ, gips, pap, glas (uden
metal, ledninger eller bly)
< 30 cm 0-10%
Mursten, krydsfiner < 30 cm 5-35%
Armeret beton < 30 cm 30-100%
Metalgitter eller -stænger < 1 cm 90-100%
Metal- eller
aluminiumsplader
< 1 cm 100%
Funktioner og feedback på babyenheden
Natlampe
Natlampen giver et blødt skær, der beroliger din baby.
1 Tryk på natlampeknappen bag på babyenheden for at tænde natlampen (fig. 14).
2 Tryk på natlampeknappen igen forat slukke natlampen.
Vuggevisefunktion
1 Tryk påvuggevise play/stop-knappen på babyenheden for at afspille den sidst valgte vuggevise
(fig. 15).
Den valgte vuggevise gentages i 30 minutter.
2 Tryk på den næste vuggevise for at vælge en anden vuggevise på listen (fig. 16).
3 Hvis du vil justere lydniveauet for vuggevisen, skal du trykke på + eller – knappen på babyenheden.
4 Vuggevisen kan stoppes ved attrykke på afspil/stop-knappen på babyenheden.
20
Dansk
La pagina si sta caricando...
La pagina si sta caricando...
La pagina si sta caricando...
La pagina si sta caricando...
La pagina si sta caricando...
La pagina si sta caricando...
La pagina si sta caricando...
La pagina si sta caricando...
La pagina si sta caricando...
La pagina si sta caricando...
La pagina si sta caricando...
La pagina si sta caricando...
La pagina si sta caricando...
La pagina si sta caricando...
La pagina si sta caricando...
La pagina si sta caricando...
La pagina si sta caricando...
La pagina si sta caricando...
La pagina si sta caricando...
La pagina si sta caricando...
La pagina si sta caricando...
La pagina si sta caricando...
La pagina si sta caricando...
La pagina si sta caricando...
La pagina si sta caricando...
La pagina si sta caricando...
La pagina si sta caricando...
La pagina si sta caricando...
La pagina si sta caricando...
La pagina si sta caricando...
La pagina si sta caricando...
La pagina si sta caricando...
La pagina si sta caricando...
La pagina si sta caricando...
La pagina si sta caricando...
La pagina si sta caricando...
La pagina si sta caricando...
La pagina si sta caricando...
La pagina si sta caricando...
La pagina si sta caricando...
La pagina si sta caricando...
La pagina si sta caricando...
La pagina si sta caricando...
La pagina si sta caricando...
La pagina si sta caricando...
La pagina si sta caricando...
La pagina si sta caricando...
La pagina si sta caricando...
La pagina si sta caricando...
La pagina si sta caricando...
La pagina si sta caricando...
La pagina si sta caricando...
La pagina si sta caricando...
La pagina si sta caricando...
La pagina si sta caricando...
La pagina si sta caricando...
La pagina si sta caricando...
La pagina si sta caricando...
La pagina si sta caricando...
La pagina si sta caricando...
La pagina si sta caricando...
La pagina si sta caricando...
La pagina si sta caricando...
La pagina si sta caricando...
La pagina si sta caricando...
La pagina si sta caricando...
La pagina si sta caricando...
La pagina si sta caricando...
La pagina si sta caricando...
La pagina si sta caricando...
La pagina si sta caricando...
La pagina si sta caricando...
La pagina si sta caricando...
La pagina si sta caricando...
La pagina si sta caricando...
La pagina si sta caricando...
La pagina si sta caricando...
La pagina si sta caricando...
La pagina si sta caricando...
La pagina si sta caricando...
La pagina si sta caricando...
La pagina si sta caricando...
La pagina si sta caricando...
La pagina si sta caricando...
La pagina si sta caricando...
La pagina si sta caricando...
La pagina si sta caricando...
La pagina si sta caricando...
La pagina si sta caricando...
La pagina si sta caricando...
La pagina si sta caricando...
La pagina si sta caricando...
La pagina si sta caricando...
La pagina si sta caricando...
La pagina si sta caricando...
La pagina si sta caricando...
La pagina si sta caricando...
La pagina si sta caricando...
La pagina si sta caricando...
La pagina si sta caricando...
La pagina si sta caricando...
La pagina si sta caricando...
La pagina si sta caricando...
La pagina si sta caricando...
La pagina si sta caricando...
La pagina si sta caricando...
La pagina si sta caricando...
La pagina si sta caricando...
La pagina si sta caricando...
La pagina si sta caricando...
La pagina si sta caricando...
La pagina si sta caricando...
La pagina si sta caricando...
La pagina si sta caricando...
La pagina si sta caricando...
La pagina si sta caricando...
La pagina si sta caricando...
La pagina si sta caricando...
La pagina si sta caricando...
La pagina si sta caricando...
La pagina si sta caricando...
La pagina si sta caricando...
La pagina si sta caricando...
La pagina si sta caricando...
La pagina si sta caricando...
La pagina si sta caricando...
La pagina si sta caricando...
La pagina si sta caricando...
La pagina si sta caricando...
La pagina si sta caricando...
La pagina si sta caricando...
La pagina si sta caricando...
La pagina si sta caricando...
La pagina si sta caricando...
-
 1
1
-
 2
2
-
 3
3
-
 4
4
-
 5
5
-
 6
6
-
 7
7
-
 8
8
-
 9
9
-
 10
10
-
 11
11
-
 12
12
-
 13
13
-
 14
14
-
 15
15
-
 16
16
-
 17
17
-
 18
18
-
 19
19
-
 20
20
-
 21
21
-
 22
22
-
 23
23
-
 24
24
-
 25
25
-
 26
26
-
 27
27
-
 28
28
-
 29
29
-
 30
30
-
 31
31
-
 32
32
-
 33
33
-
 34
34
-
 35
35
-
 36
36
-
 37
37
-
 38
38
-
 39
39
-
 40
40
-
 41
41
-
 42
42
-
 43
43
-
 44
44
-
 45
45
-
 46
46
-
 47
47
-
 48
48
-
 49
49
-
 50
50
-
 51
51
-
 52
52
-
 53
53
-
 54
54
-
 55
55
-
 56
56
-
 57
57
-
 58
58
-
 59
59
-
 60
60
-
 61
61
-
 62
62
-
 63
63
-
 64
64
-
 65
65
-
 66
66
-
 67
67
-
 68
68
-
 69
69
-
 70
70
-
 71
71
-
 72
72
-
 73
73
-
 74
74
-
 75
75
-
 76
76
-
 77
77
-
 78
78
-
 79
79
-
 80
80
-
 81
81
-
 82
82
-
 83
83
-
 84
84
-
 85
85
-
 86
86
-
 87
87
-
 88
88
-
 89
89
-
 90
90
-
 91
91
-
 92
92
-
 93
93
-
 94
94
-
 95
95
-
 96
96
-
 97
97
-
 98
98
-
 99
99
-
 100
100
-
 101
101
-
 102
102
-
 103
103
-
 104
104
-
 105
105
-
 106
106
-
 107
107
-
 108
108
-
 109
109
-
 110
110
-
 111
111
-
 112
112
-
 113
113
-
 114
114
-
 115
115
-
 116
116
-
 117
117
-
 118
118
-
 119
119
-
 120
120
-
 121
121
-
 122
122
-
 123
123
-
 124
124
-
 125
125
-
 126
126
-
 127
127
-
 128
128
-
 129
129
-
 130
130
-
 131
131
-
 132
132
-
 133
133
-
 134
134
-
 135
135
-
 136
136
-
 137
137
-
 138
138
-
 139
139
-
 140
140
-
 141
141
-
 142
142
-
 143
143
-
 144
144
-
 145
145
-
 146
146
-
 147
147
-
 148
148
-
 149
149
-
 150
150
-
 151
151
-
 152
152
-
 153
153
-
 154
154
Philips AVENT SCD506 Avent Manuale utente
- Categoria
- Babyphone
- Tipo
- Manuale utente
in altre lingue
- English: Philips AVENT SCD506 Avent User manual
- français: Philips AVENT SCD506 Avent Manuel utilisateur
- español: Philips AVENT SCD506 Avent Manual de usuario
- Deutsch: Philips AVENT SCD506 Avent Benutzerhandbuch
- Nederlands: Philips AVENT SCD506 Avent Handleiding
- português: Philips AVENT SCD506 Avent Manual do usuário
- dansk: Philips AVENT SCD506 Avent Brugermanual
- svenska: Philips AVENT SCD506 Avent Användarmanual
- Türkçe: Philips AVENT SCD506 Avent Kullanım kılavuzu
- suomi: Philips AVENT SCD506 Avent Ohjekirja
Documenti correlati
-
Philips-Avent SDC525/00 Manuale utente
-
Philips AVENT SCD505 Manuale utente
-
 Philips AVENT AVENT SCD505 Manuale utente
-
Philips AVENT ECOUTE BEBE SCD860/01 Manuale utente
-
 Philips AVENT SCD570/10 Manuale utente
-
Philips SCD535/00 Manuale utente
-
Philips AVENT scd520 00 dect babyfoon Manuale utente
-
 Philips AVENT SCD502/26 Manuale del proprietario
-
 Philips-Avent Philips Avent DECT baby monitor SCD502_26_AV5025 Manuale utente
-
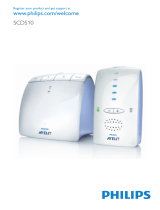 Philips AVENT SCD510/00 Manuale utente
Altri documenti
-
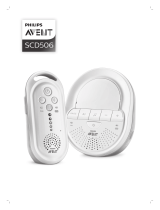 Avent SCD506/05 Manuale utente
-
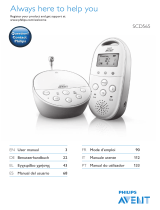 Avent SCD565/00 Manuale utente
-
Philips Two-Way Radio SCD520 Manuale utente
-
Philips SCD530 Manuale utente
-
Philips AVENT SCD503/00 Manuale utente
-
Philips SCD501/00 Manuale utente
-
Alcatel Baby Link 150 Manuale utente
-
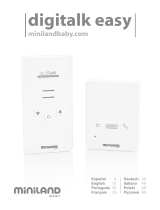 Miniland Baby digitalk easy 89171 Manuale utente
-
Philips BRR454/00 Manuale utente
-
 Miniland digitalk easy Manuale utente


