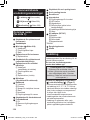
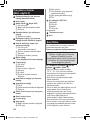
Panasonic ESED95 Istruzioni per l'uso
- Categoria
- Epilatori
- Tipo
- Istruzioni per l'uso

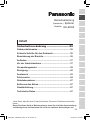
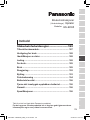
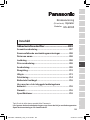
Operating Instructions
(Household)
Epilator
Model No.
ES‑ED95
PB015902 - ED95������_(00)_cover1.indd 1 2018/1/18 14:29:50

2
English �������������������������7
Deutsch ���������������������25
Français ���������������������49
Italiano ����������������������� 71
Nederlands ���������������� 93
Español�������������������� 115
Dansk �����������������������137
Português ����������������157
Norsk �����������������������179
Svenska ������������������� 199
Suomi �����������������������219
Polski ����������������������� 239
Česky ����������������������� 261
Slovensky ����������������281
Magyar ��������������������� 301
Română �������������������321
Türkçe ����������������������341
3
2
1
PB015902 - ED95������_(00)_cover2.indd 2 2018/1/18 14:29:34

3
A
B
C
D
E
F
H
J
G
I
P
M
Q
O
N
K
L
A B
C
1 2
PB015902 - ED95������_(00)_cover3,4.indd 3 2018/1/18 14:29:18

4
5
6
7
8
A B
9
10
11
12
13
3
4
PB015902 - ED95������_(00)_cover3,4.indd 4 2018/1/18 14:29:21

5
2
1
14 21
15 16 22
17 23
18 19 24
1
2
20
25
26
PB015902 - ED95������_(00)_cover5.indd 5 2018/1/18 14:28:56

6
2627
PB015902 - ED95������_(00)_cover6.indd 6 2018/1/18 14:28:37

7
GBDFINLEDKPNSFINPLCZSKHROTR
Thank you for purchasing this Panasonic product.
Before operating this unit, please read these instructions completely and save
them for future use.
Operating Instructions
(Household)
Epilator
Model No.
ES‑ED95
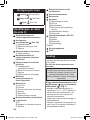
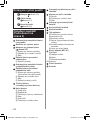
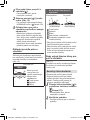
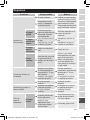
Contents
Safety precautions ...................................10
Intended use .................................................................. 14
Quick steps for using .................................................... 15
Parts identication ........................................................ 15
Charging ......................................................................... 15
Before use ...................................................................... 16
How to use ..................................................................... 16
Cleaning ......................................................................... 19
Replacing ....................................................................... 20
Troubleshooting ............................................................ 21
Battery life ...................................................................... 23
Removing the built‑in rechargeable battery ............... 23
Guarantee ....................................................................... 23
Specications ................................................................ 23
PB015902 - ED95������_(01GB)_01-18-18.indd 7 2018/1/18 13:37:25

8
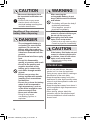
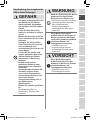
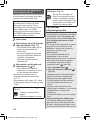
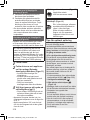
Warning
•This appliance can be used by
children aged from 8 years and
above and persons with reduced
physical, sensory or mental
capabilities or lack of experience and
knowledge if they have been given
supervision or instruction concerning
use of the appliance in a safe way
and understand the hazards
involved. Children shall not play with
the appliance. Cleaning and user
maintenance shall not be made by
children without supervision.
•The supply cord cannot be replaced.
If the cord is damaged, the AC
adaptor should be scrapped.
•Do not use anything other than the
supplied AC adaptor for any purpose.
Also, do not use any other product
with the supplied AC adaptor. (See
page 15.)
PB015902 - ED95������_(01GB)_01-18-18.indd 8 2018/1/18 13:37:25

9
GBDFINLEDKPNSFINPLCZSKHROTR
•The following symbol indicates that a
specicdetachablepowersupplyunit
is required for connecting the electrical
appliance to the supply mains. The
type reference of power supply unit is
marked near the symbol.
►Using the head of epilation/shaver
and the brush
•These heads can be used for wet.
The following symbol means
suitable for use in a bath or shower.
►Using the foot care head
•The foot care head is washable.
The following symbol means that
the foot care head can be cleaned
under the water.
•Detach the main body from the AC
adaptor before cleaning it in water.
PB015902 - ED95������_(01GB)_01-18-18.indd 9 2018/1/18 13:37:26

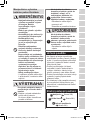
10
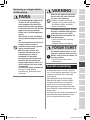
WARNING
Power supply
Do not damage or modify, or
forcefully bend, pull, or twist the
cord. Also, do not place anything
heavy on or pinch the cord.
Do not immerse the AC adaptor
in water or wash it with water.
Do not place the AC adaptor over
or near water lled sink or bathtub.
Never use the appliance if the
AC adaptor is damaged or if the
power plug ts loosely in a
household outlet.
‑
Doing so may cause electric
shockorreduetoashortcircuit.
Do not connect or disconnect
the adaptor to a household
outlet with a wet hand.
‑ Doing so may cause electric
shock or injury.
Do not use in a way exceeding
the rating of the household
outlet or the wiring.
‑ Exceeding the rating by
connecting too many plugs to one
householdoutletmaycausere
due to overheating.
Always ensure the appliance is
operated on an electric power
source matched to the rated
voltage indicated on the AC
adaptor.
Fully insert the adaptor or
appliance plug.
‑ Failuretodosomaycausere
or electric shock.
This product
This product has a built‑in
rechargeable battery. Do not throw
into ame or heat. Do not charge,
use, or leave in high temperatures.
‑
Doing so may cause overheating,
ignition, or explosion.
Do not modify or repair.
‑ Doingsomaycausere,electric
shock, or injury. Contact an
authorized service centre for
repair (battery change etc.).
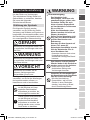
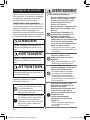
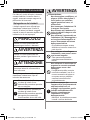
Safety precautions
To reduce the risk of injury, loss of life,
electricshock,re,anddamageto
property, always observe the following
safety precautions.
Explanation of symbols
The following symbols are used to
classify and describe the level of hazard,
injury, and property damage caused
when the denotation is disregarded and
improper use is performed.
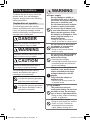
DANGER
Denotes a potential hazard that will
result in serious injury or death.
WARNING
Denotes a potential hazard that could
result in serious injury or death.
CAUTION
Denotes a hazard that could result in
minor injury or property damage.
The following symbols are used to
classify and describe the type of
instructions to be observed.
This symbol is used to alert users
toaspecicoperatingprocedure
that must not be performed.
This symbol is used to alert users
toaspecicoperatingprocedure
that must be followed in order to
operate the unit safely.
PB015902 - ED95������_(01GB)_01-18-18.indd 10 2018/1/18 13:37:26

11
GBDFINLEDKPNSFINPLCZSKHROTR
WARNING
Never disassemble except
when disposing of the product.
‑ Doingsomaycausere,electric
shock, or injury.
In case of an abnormality or
malfunction
Immediately stop using and
remove the adaptor if there is
an abnormality or malfunction.
‑ Failuretodosomaycausere,
electric shock, or injury.
<Abnormality or malfunction
cases>
•The main unit, adaptor or cord
is deformed or abnormally hot.
•The main unit, adaptor or cord
smells of burning.
•There is abnormal sound
during use or charging of the
main unit, adaptor or cord.
‑ Immediately request inspection
or repair at an authorized service
centre.
Preventing accidents
Do not place within reach of
children or infants. Do not let
them use it.
‑ Doing so may cause an accident
or injury due to accidental
ingestion of the inner blade,
brush, etc.
Cleaning
Always unplug the adaptor from a
household outlet when cleaning.
‑ Failure to do so may cause
electric shock or injury.
Regularly clean the power plug
and the appliance plug to
prevent dust from accumulating.
‑ Failuretodosomaycausere
due to insulation failure caused
by humidity.
Disconnect the adaptor and wipe
with a dry cloth.
CAUTION
To protect the skin
The following persons should
not use this appliance:
•Persons suffering from atopic
dermatitis or rashes and other
skin diseases
•Persons with allergic diathesis or
persons who are easily irritated by
cosmetics, clothing, metals, etc.
•Persons who are easily suppurated
•Persons suffering from varicose
veins, diabetes, hemophilia, etc.
•Persons who have trouble
stopping bleeding
‑ Use in such cases may cause the
skin to become sensitive or cause
inammation,bleeding,or
increased pain.
Do not use in the following cases:
•During menstruation, pregnancy, or
about one month after giving birth
•When you are not well or when
you feel an abnormality in your
skin or body
•After drinking alcohol or taking
medicine, or when you are very tired
‑ Use in such cases may cause the
skin to become sensitive or cause
inammation,bleeding,or
increased pain.
Do not use in the following
body area:
•Injury, rash, moles, bruises,
warts, pimples, etc.
•On suntanned skin
‑
Doing so may cause injury,
inammationoftheskin,orbleeding.
Do not use the epilation head
for legs/arms to epilate your
underarms and bikini‑line.
‑ Doing so may cause injury or
inammationoftheskin.
Do not press on the blade too
strongly when using the shaver
head.
‑ Doing so may cause damage
which results in injury to the skin.
PB015902 - ED95������_(01GB)_01-18-18.indd 11 2018/1/18 13:37:26

12
CAUTION
Do not touch the blade section
(metallic section) of the inner
blade when using the shaver head.
‑ Doing so may cause injury to
your hands.
Do not turn ON the switch
without the head attached.
‑ Doingsomaycausengerinjury
or cause hair or clothing
entanglement and damage.
Do not use with the frame
removed.
‑ Doingsomaycausengerinjury
or cause hair or clothing
entanglement and damage.
Do not use the soap with a scrub
or with peeling effect.
‑ Doing so may cause injury to the
skin, colour stains or other skin
trouble.
The skin protector and the outer
foil are fragile, so store with the
protection cap attached.
‑ Failure to do so may result in
deformation or damage to the
skin protector or outer foil, which
may cause injury to skin.
Before using, check that the skin
protector, disc, blade, frame and
brush are free from deformities,
cracks, and damage.
‑ Failure to do so may cause injury
to the skin.
Apply the skin protector and the
epilation discs at a 90° angle to
your skin with gentle force.
‑
Failure to do so may cause injury
to the skin or cause hair or clothing
entanglement and damage.
If skin problems continue for
2 days or longer after treatment,
stop using the unit and contact
a dermatologist.
‑ Failure to do so may cause
symptoms to worsen.
About using the epilation/
shaver head
Do not use in the following
body area:
•Face, genitals and genital area,
or thighs
•Inner side of the upper arms and
areas such as elbows or knees
which are prone to sagging
‑ Doing so may cause injury,
inammationoftheskin,or
bleeding.
The following persons should
not use this appliance:
•Persons who have suffered skin
problems (suppuration,
inammation,etc.)causedby
epilation (plucking, depilation,
waxing, etc.)
‑ Use in such cases may cause the
skin to become sensitive or cause
inammation,bleeding,or
increased pain.
Do not use epilation/shaver head
in the following ways:
•Using just before swimming or
sea bathing (use at least 2 days
before such activities)
•Using just before bathing
•Engaging in extreme sports or
exercise right after epilation
‑ Doing so may cause infection or
inammationresultingfrom
bacteria that enter the body
through the pores.
Do not apply strong pressure to
the skin, move repeatedly over
the same area or move back and
forth in one area. Also, do not
use with a jabbing motion.
‑ Doing so may cause injury or
inammationoftheskin,or
increased pain.
About using the foot care head
Do not use on blisters and corns.
‑ Doing so may cause injury,
inammationoftheskin,or
bleeding.
PB015902 - ED95������_(01GB)_01-18-18.indd 12 2018/1/18 13:37:26

13
GBDFINLEDKPNSFINPLCZSKHROTR
CAUTION
Do not use foot care head in the
following ways:
•Filing too deeply
•Lettingtheletouchsoftskin
•Using the foot care head in the bath
‑ Doing so may cause injury to the
skin,infection,inammation,
bleeding or other trouble, or
worsening of such symptoms.
•
People suffering from poor
circulation in the feet; or
swelling, itchiness, pain, or
excessive warmth in the feet
should consult their doctor
before using the foot care head.
•
If skin appears abnormal after
ling, stop using the foot care
head and consult a dermatologist.
•File the hardened skin little by
little over a few days.
•File only calluses or hardened
skin on your feet.
‑ Failure to follow the above
instruction may cause injury to
theskin,infection,inammation,
bleeding or other trouble, or
worsening of such symptoms.
When using the appliance for
ling, be careful of the direction
in which the main body moves.
‑ Rotationofthelemaycausethe
main body to move in an
unexpected direction and cause
injury to the skin.
Store the foot care head with the
protection cap attached.
‑ Failure to do so may cause
damage to surrounding items.
About using the sonic scrub
brush
Do not use in the following
body area:
•Face, throat, genitals and genital area
‑ Doing so may cause injury,
inammationoftheskin,or
bleeding.
Do not use sonic scrub brush
in the following ways:
•Apply with strong pressure to the
skin
•Use c
ontinuously for long periods
of time on the same area
‑ Doing so may cause injury to the
skin,infection,inammation,
bleeding, or other trouble, or
worsening of such symptoms.
Use to remove calluses on the
knees or elbows.
‑ Failure to do so may cause
injury,inammationoftheskin,
or bleeding.
Note the following precautions
Do not share with your family
or others.
‑ Doing so may cause infection or
inammation.
Do not allow metal objects or trash
to adhere to the power plug or the
appliance plug.
‑
Doing so may cause electric
shockorreduetoashortcircuit.
Do not continuously aim the light
directly into your eyes.
‑ Doing so may cause dizziness.
Do not drop or subject to shock.
‑ Doing so may cause injury.
Do not wrap the cord around
the adaptor or the appliance
when storing.
‑ Doing so may cause the wire in
the cord to break with the load,
andmaycausereduetoa
short circuit.
Disconnect the adaptor or the
appliance plug by holding onto
the adaptor or the appliance
plug instead of the cord.
‑ Disconnecting by holding onto
the cord may cause electric
shock or injury.
PB015902 - ED95������_(01GB)_01-18-18.indd 13 2018/1/18 13:37:26

14
CAUTION
Disconnect the adaptor from
the household outlet when not
charging.
‑ Failure to do so may cause
electricshockorredueto
electrical leakage resulting from
insulation deterioration.
Handling of the removed
battery when disposing
DANGER
• The rechargeable battery is
exclusively for use with this
appliance. Do not use the
battery with other products.
• Do not charge the battery after
it has been removed from the
product.
• Do not throw into re or apply
heat.
• Do not hit, disassemble,
modify, or puncture with a nail.
• Do not let the positive and
negative terminals of the
battery get in contact with
each other through metallic
objects.
• Do not carry or store the
battery together with metallic
jewellery such as necklaces
and hairpins.
• Do not use or leave the battery
where it will be exposed to
high temperatures, such as
under direct sunlight or near
other sources of heat.
• Never peel off the tube.
‑ Doing so may cause
overheating, ignition, or
explosion.
WARNING
After removing the
rechargeable battery, do not
keep it within reach of children
and infants.
‑ The battery will harm the body if
accidentally swallowed.
If this happens, consult a
physician immediately.
If the battery uid leaks out and
comes in contact with the eyes,
do not rub the eyes, and
thoroughly rinse with clean
water, such as tap water.
‑
Failure to do so may cause eye injury.
Consult a physician immediately.
CAUTION
If the battery uid leaks out and
comes in contact with the skin
or clothes, rinse off with clean
water, such as tap water.
‑ Failure to do so may cause
inammation.
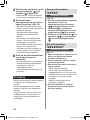
Intended use
•Do not use paint thinner, benzene,
alcohol, etc. to clean the appliance.
Doing so may cause failure, cracking or
discoloration of the main body.
•Keep the appliance away from sinks,
bathrooms or other high‑humidity areas
where it could be exposed to water and
moisture after use.
•Keep the appliance away from where it
will be exposed to high temperatures or
direct sunlight.
•When storing, always attach the
protection cap for the epilation head/
foot care head/sonic scrub brush/the
shaver head.
PB015902 - ED95������_(01GB)_01-18-18.indd 14 2018/1/18 13:37:26

15
GBDFINLEDKPNSFINPLCZSKHROTR
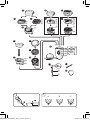
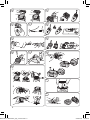
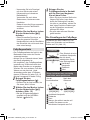
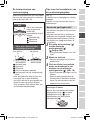
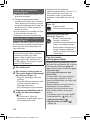
Parts identication
(See page 3)
A
Protection cap for epilation head
(legs/arms)
B
Fast cap
C
Gentle cap (
Page 17)
1 Skin protector
2 Cap release ribs
3 Frame
D
Epilation head for legs/arms
4 Epilation discs
E
Protection cap for
e
pilation head
(underarms/bikini‑line)
F
Epilation head for underarms/
bikini‑line
5 Skin protector
(metal part on the outside)
6 Frame release ribs
7 Frame
8 Epilation discs (inside)
G
Bikini comb
(Protection cap for shaver head)
H
Shaver head
9 Outer foil
0 Trimmer
Pop‑up trimmer switch
Frame
Inner blade
Frame release button
I
Protection cap for foot care head
J
Foot care head
File
Frame release buttons
Frame
K
Protection cap for sonic scrub brush
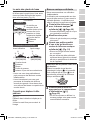
Quick steps for using
1 Charging ( This page)
2 Selecting the head (
Page 16)
3 How to use ( Page 16)
L
Sonic scrub brush
M
Brush head
N
Main body
Head release button
LED light
Mode lights
Power switch (power off/on/mode
selection)
Chargingindication/notication
light
Socket
O
AC adaptor (RE7‑87)
Adaptor
Power plug
Cord
s Appliance plug
Accessories
P
Cleaning brush
Q
Pouch
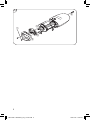
Charging
For best performance, fully charge the
appliance before use.
You cannot operate the appliance
while charging.
Charging time = Approx. 1 hour
The epilator can be used for
approximately 30 minutes (40 minutes
when using the gentle cap) after 1 hour
of charging. (This will differ depending
on the temperature.)
Plug the AC adaptor into the
epilator (
) and a household
outlet (
). (Fig. 1)
•
Recommended ambient temperature for
charging is 15 °C – 35 °C. The battery
may not charge properly or not at all if
outside the recommended temperature.
•The charging time may decrease
depending on the charging capacity.
•Charging the appliance every time it is
used will not affect the life of the
rechargeable battery.
PB015902 - ED95������_(01GB)_01-18-18.indd 15 2018/1/18 13:37:26

16
•When charging the appliance for the
rsttimeorwhenithasnotbeeninuse
for more than 6 months, the charging
time may change or the charging
indication/noticationlightmaynot
glow for a few minutes. It will eventually
glow if kept connected.
•If there is noise from the radio or other
sources while using or charging the
appliance, move to a different location
to use the appliance.
<About the Charging indication/
notication light>
(Fig. 2)
A. Red light appears while charging.
B. Red light goes off after charging is
completed.
C. Red light blinks twice every second
when abnormal charging.
<To check if charging is completed>
If you remove and reinsert the appliance
plug while charging, the charging
indication/noticationlightglowsand
turns off after approximately 5 seconds.
Before use
Selecting the head
(Fig. 3)
Remove the head while pushing
the head release button and push
the head until it clicks.
Using the bikini comb
(Fig. 4)
Place the bikini comb onto the
shaver head and slide trimmer up.
•When the bikini comb is in place, make
sure the comb is in close contact with
the skin.
Changing the sonic scrub brush
(Fig. 5)
Holding the brush by side, remove
from the brush head.
And align the marks as shown in
the diagram, and press rmly until
a click is heard.
<LED light> (Fig. 6)
The LED light comes on when the
power is turned on. The light will remain
on while the power is ON.
<Mode selecting function> (Fig. 7)
Operation will change in order from
“NORMAL” “SOFT” “OFF” each
time the power switch is pressed.
NORMAL
In NORMAL mode, epilation is
performed in a short time with fast disc
rotation speed.
•The orange lamp will light up.
SOFT
SOFT mode will control the rotation
speed of the discs, and minimize
irritation at the time of epilation.
•The green lamp will light up.
OFF
The power will be switched OFF.
<When the battery capacity is low>
•Thechargingindication/noticationlight
( ) blinks once every second. (Fig. 8)
•The operating time varies depending on
usage or temperature after the charging
indication/noticationlightblinks.
How to use
Epilation head
The epilation head for underarms/
bikini‑line is suitable for underarms/
bikini‑line and the epilation head for
legs/arms is suitable for legs/arms.
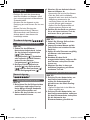
Areas suitable for epilation (Fig. 9)
A. Areas the epilation head for legs/arms
can be used.
B. Areas the epilation head for
underarms/bikini‑line can be used.
Before epilating the bikini‑line, be
sure to put on your swim wear or
underwear etc. and check the areas
you wish to epilate.
•Using the epilator on areas other than
those marked areas may cause pain or
skin trouble.
PB015902 - ED95������_(01GB)_01-18-18.indd 16 2018/1/18 13:37:26

17
GBDFINLEDKPNSFINPLCZSKHROTR
Areas not suitable for epilation (Fig. 10)
The epilator should not be used on the
inner side of the upper arms and areas
such as elbows or knees which are
prone to sagging.
WET epilation (epilating after wetting
the skin and epilator and then applying
foam) makes the skin softer so it is
gentler to your skin when epilating. For
DRY epilation, begin at step 3. Before
DRY epilation, wipe dry any moisture or
sweat from the skin.
1
1
Wet your skin.
2
2
Wet the discs and place a
small quantity of liquid
shower gel on the discs.
(Fig. 11)
•Always use shower gel when wet
epilating.
•Do not use a shower gel with a
scrub or with granular salt, this
may cause a malfunction.
•Rinse any shower gel out of your
hands.
3
3
Select the mode by pressing
the power switch [
N
].
•Foam is created. Foam makes the
epilator slide better, so you can
move it fast.
•The appliance may not operate in an
ambient temperature lower than
approximately 5 °C.
•Apply the epilator at 90° to your skin
and move it slowly so that it slides over
your skin.
<Epilating legs or arms> (Fig. 12)
Upwards from the bottom of
the leg.
Inwards from the outside of the
arm.
<Epilating underarms or bikini‑line>
(Fig. 13)
Move in several directions as
underarm/bikini line hair grows
in different directions.
Stretch the skin with your
ngers,andmoveslowlyfrom
inside to outside going against
theowofhair.
Tips for best epilation results
The hair removal is not permanent, so
from the second use, it is
recommended to epilate the underarms
about once a week, and the bikini‑line
about once every two weeks.
<For beginners/those with sensitive
skin>
Using the gentle cap that comes with
the skin guard is recommended for
peopleusingtheepilatorfortherst
time or for those with sensitive skin.
The gentle cap has a skin protector for
gentler epilation, to remove hair by
holding the skin down to reduce pain.
•We also recommend to use the SOFT
mode rotation. (
Page 16)
1. Remove the fast cap [
B
].
2. Attach the gentle cap [
C
]. (Fig. 14)
•Massaging with a body puff may help
to prevent ingrown hairs.
•Reddening might appear after use.
A cool towel will help if you feel pain or
there is a rash.
•If your skin gets dry after epilation, we
recommend applying a moisture lotion
two days after epilation.
•Make sure skin is clean before and
after use.
<Best hair length for epilation>
Trim your hair before epilating for the
rsttimeorifyouhavenotepilatedfor
a long time. Hair removal is easier and
less painful when the hair is short.
PB015902 - ED95������_(01GB)_01-18-18.indd 17 2018/1/18 13:37:27

18
Shaver head
WET Shaving with soap lather makes
the skin slippery for a closer shave. For
DRY shaving, step 3 is unnecessary.
Before DRY shaving, wipe dry any
moisture or sweat from the skin.
1
1
Attach the shaver head [
H
].
•Conrmthebikinicomb[
G
] is
detached.
2
2
Check that the outer foil is not
deformed or damaged.
3
3
Wet your skin and put shower
gel on your skin.
•Do not use a shower gel with a
scrub or with granular salt.
Also do not use shaving cream,
skin cream or skin lotion.
Doing so may clog the blade and
cause a malfunction.
4
4
Select the mode by pressing
the power switch [
N
].
•Press gently so that the whole
blade is in close contact with the
skin and the surface of the blade
does not move up and down.
Foot care head
•The foot care head cannot be used in a
bath or shower.
•Before use, be sure to fully charge the
appliance.
•We recommend using the product
within 30 minutes after bathing or
showering. With the feet clean, wipe off
any water on the skin. (Each use
should be approximately 10 minutes
(5 minutes on each foot, 10 minutes
total for both feet))
1
1
Attach the foot care head [
J
].
•Pushdownrmlyuntilyouheara
“click”.
2
2
Select the mode by pressing
the power switch [
N
].
(Fig. 15)
•NORMAL mode is recommended
for rotation speed. ( Page 16)
3
3
Bring the foot care head into
contact with the skin, and
begin ling.
•Filing a single location for a long
time can cause it to become hot
with friction. To avoid this, be sure
tomakesmallchangesintheling
positionwhileling.
•Filing should be performed about
once every two weeks.
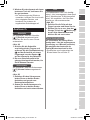
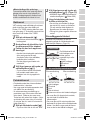
The basics of foot care
Donotusetheproductforlinganything
other than calluses and hardened skin
on the feet. (Fig. 16)
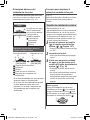
<Use on>
Callus
ף
ס
ע
A callus is a hardened
layer that forms
through repeated
pressure or abrasion.
Hardened layer
Epidermis
Derma
Things to be careful of when ling
Before use After use
ץ
ף
ע
ס
פ
Hardened layer
Epidermis
Derma
Portion to be removed
Leave some of the hardened layer
•Filing an area too deeply can cause it
tobecomesoreorinamed.
•Filing too large an area can result in
even larger calluses forming.
Therefore, be sure to leave some of the
hardened layer.
PB015902 - ED95������_(01GB)_01-18-18.indd 18 2018/1/18 13:37:28

19
GBDFINLEDKPNSFINPLCZSKHROTR
Tips for moving the foot care head
(Fig. 17)
Move in the direction indicated by the
arrows.
Useyourfreehandtosupportling.
Sonic scrub brush
•We recommend using about once per
week.
•We recommend using on areas for
epilation about 2 days before actual
epilation. Exfoliation may help to
prevent ingrown hairs.
1
1
Attach the brush head [
M
]
with sonic scrub brush [
L
].
(
Page 16)
•Pushdownrmlyuntilyouheara
“click”.
2
2
Wet your skin.
•Use shower gel to protect your
skin.
3
3
Pour a small quantity of water
and shower gel into the centre
of the sonic scrub brush [
L
].
(Fig. 18)
•Rinse any excess shower gel off
your hands.
•Do not use body scrub paste that
contains granular salt or abrasive
particles to avoid shortening the
lifetime of the appliance.
<Indication of the shower gel and
water amount>
Use shower gel in the amount indicated
by line (
) and water in the amount
indicated by line ( ) on the protection
cap for the sonic scrub brush [
K
].
4
4
Select the mode by pressing
the power switch [
N
].
(
Page 16)
•Foam is created. Foam protects
your skin from over exfoliation.
5
5
Put the sonic scrub brush
onto your skin and begin
exfoliation. (Fig. 19)
•We recommend using on legs,
arms (especially elbows and
knees) and neckline.
Do not use on sensitive areas of
skin or face.
•Do not continue to hold in one
place. Slide over skin in a circular
pattern.
•Apply to the same area of skin for
approximately 30 seconds each
time, check your skin and adjust
usage accordingly.
6
6
Press the power switch to
turn off the power.
•Moisturise by applying a
moisturiser that suits your skin on
the area where the sonic scrub
brush was used.
Cleaning
•Always clean the heads and caps after
use to keep them in a hygienic state.
•Switch off and unplug the appliance
before cleaning.
•Take care not to damage the skin
protector, the frame, the fast cap and
the gentle cap during cleaning.
Dry cleaning [
B
C
D
F
H
]
Epilation head/Shaver head
(Fig. 20)
1. Lift fast/gentle caps, the frame
upward while holding the cap
release ribs [
B C
2
]/the frame
release ribs [
F
6
] or remove the
frame by pushing the frame release
button [
H
].
2. Clean the gentle cap [
C
], the
epilation head [
D
F
] and the
shaver head [
H
] with the cleaning
brush [
P
].
PB015902 - ED95������_(01GB)_01-18-18.indd 19 2018/1/18 13:37:52

20
Wet cleaning
[
B
C
D
F
H
J
L
M
]
Epilation head/Shaver head
(Fig. 21)
1. Wet the discs and blades, and then
apply liquid hand soap.
2. Turn the switch on and then foam
is created.
3.
Wash the head with water to wash out hair.
•Do not use hot water.
•If soap is not completely washed
away, then a white deposit can
accumulate and prevent the discs and
the blades from moving smoothly.
•Rinse the shaver head with the
frame removed.
4. Turn the switch off, wipe the appliance
with a dry cloth and dry it well.
Foot care head
(Fig. 22)
1. Apply liquid hand soap to the
central part of the le.
2. Pour a small amount of water on
the le and turn the switch on.
3. Rinse any debris thoroughly with
water or lukewarm water.
4. After turning the switch off, remove
the frame and rinse inside.
5. Wipe with a dry cloth and dry in a
well‑ventilated location.
Sonic scrub brush and brush head
(Fig. 23)
1. Press the power switch to turn on
the power, and thoroughly rinse
debris from the sonic scrub brush.
•
Thoroughly rinse the hole in the centre
of the brush.
2. Press the power switch to turn off
the power, remove the brush head,
and thoroughly rinse the underside
of the brush head.
3. Wipe the appliance with a dry cloth
and dry it well.
•To protect of deformation of the brush,
dry it facing upward, and then store the
brush with the protection cap attached.
Replacing
Outer foil
We recommend replacing the outer foil
[
H
9
] every year and remove it only
when replacing it.
(Fig. 24)
1. While pushing the outer foil gently
with the ngers, use a ngernail to
release the plastic panel ( ) on the
blade from the hooks ( ) on the
inside of the frame.
2.
The new outer foil should be slightly
bent and pushed in until it is hooked
in the frame.
Inner blade
We recommend replacing the inner
blade[
H
\
] every two years.
(Fig. 25)
1. Remove the inner blade by holding
it at both ends and pulling straight
away from the shaver head.
2. Insert the inner blade by holding it
at both ends and press downward.
File
Thelelifetimeisapproximately1year
(assuming a single use every 2 weeks
with approximately 10 minutes per use).
Werecommendreplacingtheleabout
once a year.
(Fig. 26)
1. Press down with your nger and
release the le.
2. Align the shaped part with
the mark side and press down.
Sonic scrub brush
The scrub brush lifetime is approximately
1 year (assuming 3 minutes use per
week). We recommend replacing the
scrub brush about once a year.
•See page 16 for details regarding
replacement of the brush.
PB015902 - ED95������_(01GB)_01-18-18.indd 20 2018/1/18 13:37:52
La pagina si sta caricando...
La pagina si sta caricando...
La pagina si sta caricando...
La pagina si sta caricando...
La pagina si sta caricando...
La pagina si sta caricando...
La pagina si sta caricando...
La pagina si sta caricando...
La pagina si sta caricando...
La pagina si sta caricando...
La pagina si sta caricando...
La pagina si sta caricando...
La pagina si sta caricando...
La pagina si sta caricando...
La pagina si sta caricando...
La pagina si sta caricando...
La pagina si sta caricando...
La pagina si sta caricando...
La pagina si sta caricando...
La pagina si sta caricando...
La pagina si sta caricando...
La pagina si sta caricando...
La pagina si sta caricando...
La pagina si sta caricando...
La pagina si sta caricando...
La pagina si sta caricando...
La pagina si sta caricando...
La pagina si sta caricando...
La pagina si sta caricando...
La pagina si sta caricando...
La pagina si sta caricando...
La pagina si sta caricando...
La pagina si sta caricando...
La pagina si sta caricando...
La pagina si sta caricando...
La pagina si sta caricando...
La pagina si sta caricando...
La pagina si sta caricando...
La pagina si sta caricando...
La pagina si sta caricando...
La pagina si sta caricando...
La pagina si sta caricando...
La pagina si sta caricando...
La pagina si sta caricando...
La pagina si sta caricando...
La pagina si sta caricando...
La pagina si sta caricando...
La pagina si sta caricando...
La pagina si sta caricando...
La pagina si sta caricando...
La pagina si sta caricando...
La pagina si sta caricando...
La pagina si sta caricando...
La pagina si sta caricando...
La pagina si sta caricando...
La pagina si sta caricando...
La pagina si sta caricando...
La pagina si sta caricando...
La pagina si sta caricando...
La pagina si sta caricando...
La pagina si sta caricando...
La pagina si sta caricando...
La pagina si sta caricando...
La pagina si sta caricando...
La pagina si sta caricando...
La pagina si sta caricando...
La pagina si sta caricando...
La pagina si sta caricando...
La pagina si sta caricando...
La pagina si sta caricando...
La pagina si sta caricando...
La pagina si sta caricando...
La pagina si sta caricando...
La pagina si sta caricando...
La pagina si sta caricando...
La pagina si sta caricando...
La pagina si sta caricando...
La pagina si sta caricando...
La pagina si sta caricando...
La pagina si sta caricando...
La pagina si sta caricando...
La pagina si sta caricando...
La pagina si sta caricando...
La pagina si sta caricando...
La pagina si sta caricando...
La pagina si sta caricando...
La pagina si sta caricando...
La pagina si sta caricando...
La pagina si sta caricando...
La pagina si sta caricando...
La pagina si sta caricando...
La pagina si sta caricando...
La pagina si sta caricando...
La pagina si sta caricando...
La pagina si sta caricando...
La pagina si sta caricando...
La pagina si sta caricando...
La pagina si sta caricando...
La pagina si sta caricando...
La pagina si sta caricando...
La pagina si sta caricando...
La pagina si sta caricando...
La pagina si sta caricando...
La pagina si sta caricando...
La pagina si sta caricando...
La pagina si sta caricando...
La pagina si sta caricando...
La pagina si sta caricando...
La pagina si sta caricando...
La pagina si sta caricando...
La pagina si sta caricando...
La pagina si sta caricando...
La pagina si sta caricando...
La pagina si sta caricando...
La pagina si sta caricando...
La pagina si sta caricando...
La pagina si sta caricando...
La pagina si sta caricando...
La pagina si sta caricando...
La pagina si sta caricando...
La pagina si sta caricando...
La pagina si sta caricando...
La pagina si sta caricando...
La pagina si sta caricando...
La pagina si sta caricando...
La pagina si sta caricando...
La pagina si sta caricando...
La pagina si sta caricando...
La pagina si sta caricando...
La pagina si sta caricando...
La pagina si sta caricando...
La pagina si sta caricando...
La pagina si sta caricando...
La pagina si sta caricando...
La pagina si sta caricando...
La pagina si sta caricando...
La pagina si sta caricando...
La pagina si sta caricando...
La pagina si sta caricando...
La pagina si sta caricando...
La pagina si sta caricando...
La pagina si sta caricando...
La pagina si sta caricando...
La pagina si sta caricando...
La pagina si sta caricando...
La pagina si sta caricando...
La pagina si sta caricando...
La pagina si sta caricando...
La pagina si sta caricando...
La pagina si sta caricando...
La pagina si sta caricando...
La pagina si sta caricando...
La pagina si sta caricando...
La pagina si sta caricando...
La pagina si sta caricando...
La pagina si sta caricando...
La pagina si sta caricando...
La pagina si sta caricando...
La pagina si sta caricando...
La pagina si sta caricando...
La pagina si sta caricando...
La pagina si sta caricando...
La pagina si sta caricando...
La pagina si sta caricando...
La pagina si sta caricando...
La pagina si sta caricando...
La pagina si sta caricando...
La pagina si sta caricando...
La pagina si sta caricando...
La pagina si sta caricando...
La pagina si sta caricando...
La pagina si sta caricando...
La pagina si sta caricando...
La pagina si sta caricando...
La pagina si sta caricando...
La pagina si sta caricando...
La pagina si sta caricando...
La pagina si sta caricando...
La pagina si sta caricando...
La pagina si sta caricando...
La pagina si sta caricando...
La pagina si sta caricando...
La pagina si sta caricando...
La pagina si sta caricando...
La pagina si sta caricando...
La pagina si sta caricando...
La pagina si sta caricando...
La pagina si sta caricando...
La pagina si sta caricando...
La pagina si sta caricando...
La pagina si sta caricando...
La pagina si sta caricando...
La pagina si sta caricando...
La pagina si sta caricando...
La pagina si sta caricando...
La pagina si sta caricando...
La pagina si sta caricando...
La pagina si sta caricando...
La pagina si sta caricando...
La pagina si sta caricando...
La pagina si sta caricando...
La pagina si sta caricando...
La pagina si sta caricando...
La pagina si sta caricando...
La pagina si sta caricando...
La pagina si sta caricando...
La pagina si sta caricando...
La pagina si sta caricando...
La pagina si sta caricando...
La pagina si sta caricando...
La pagina si sta caricando...
La pagina si sta caricando...
La pagina si sta caricando...
La pagina si sta caricando...
La pagina si sta caricando...
La pagina si sta caricando...
La pagina si sta caricando...
La pagina si sta caricando...
La pagina si sta caricando...
La pagina si sta caricando...
La pagina si sta caricando...
La pagina si sta caricando...
La pagina si sta caricando...
La pagina si sta caricando...
La pagina si sta caricando...
La pagina si sta caricando...
La pagina si sta caricando...
La pagina si sta caricando...
La pagina si sta caricando...
La pagina si sta caricando...
La pagina si sta caricando...
La pagina si sta caricando...
La pagina si sta caricando...
La pagina si sta caricando...
La pagina si sta caricando...
La pagina si sta caricando...
La pagina si sta caricando...
La pagina si sta caricando...
La pagina si sta caricando...
La pagina si sta caricando...
La pagina si sta caricando...
La pagina si sta caricando...
La pagina si sta caricando...
La pagina si sta caricando...
La pagina si sta caricando...
La pagina si sta caricando...
La pagina si sta caricando...
La pagina si sta caricando...
La pagina si sta caricando...
La pagina si sta caricando...
La pagina si sta caricando...
La pagina si sta caricando...
La pagina si sta caricando...
La pagina si sta caricando...
La pagina si sta caricando...
La pagina si sta caricando...
La pagina si sta caricando...
La pagina si sta caricando...
La pagina si sta caricando...
La pagina si sta caricando...
La pagina si sta caricando...
La pagina si sta caricando...
La pagina si sta caricando...
La pagina si sta caricando...
La pagina si sta caricando...
La pagina si sta caricando...
La pagina si sta caricando...
La pagina si sta caricando...
La pagina si sta caricando...
La pagina si sta caricando...
La pagina si sta caricando...
La pagina si sta caricando...
La pagina si sta caricando...
La pagina si sta caricando...
La pagina si sta caricando...
La pagina si sta caricando...
La pagina si sta caricando...
La pagina si sta caricando...
La pagina si sta caricando...
La pagina si sta caricando...
La pagina si sta caricando...
La pagina si sta caricando...
La pagina si sta caricando...
La pagina si sta caricando...
La pagina si sta caricando...
La pagina si sta caricando...
La pagina si sta caricando...
La pagina si sta caricando...
La pagina si sta caricando...
La pagina si sta caricando...
La pagina si sta caricando...
La pagina si sta caricando...
La pagina si sta caricando...
La pagina si sta caricando...
La pagina si sta caricando...
La pagina si sta caricando...
La pagina si sta caricando...
La pagina si sta caricando...
La pagina si sta caricando...
La pagina si sta caricando...
La pagina si sta caricando...
La pagina si sta caricando...
La pagina si sta caricando...
La pagina si sta caricando...
La pagina si sta caricando...
La pagina si sta caricando...
La pagina si sta caricando...
La pagina si sta caricando...
La pagina si sta caricando...
La pagina si sta caricando...
La pagina si sta caricando...
La pagina si sta caricando...
La pagina si sta caricando...
La pagina si sta caricando...
La pagina si sta caricando...
La pagina si sta caricando...
La pagina si sta caricando...
La pagina si sta caricando...
La pagina si sta caricando...
La pagina si sta caricando...
La pagina si sta caricando...
La pagina si sta caricando...
La pagina si sta caricando...
La pagina si sta caricando...
La pagina si sta caricando...
La pagina si sta caricando...
La pagina si sta caricando...
La pagina si sta caricando...
La pagina si sta caricando...
La pagina si sta caricando...
La pagina si sta caricando...
La pagina si sta caricando...
La pagina si sta caricando...
La pagina si sta caricando...
La pagina si sta caricando...
La pagina si sta caricando...
La pagina si sta caricando...
La pagina si sta caricando...
La pagina si sta caricando...
La pagina si sta caricando...
-
 1
1
-
 2
2
-
 3
3
-
 4
4
-
 5
5
-
 6
6
-
 7
7
-
 8
8
-
 9
9
-
 10
10
-
 11
11
-
 12
12
-
 13
13
-
 14
14
-
 15
15
-
 16
16
-
 17
17
-
 18
18
-
 19
19
-
 20
20
-
 21
21
-
 22
22
-
 23
23
-
 24
24
-
 25
25
-
 26
26
-
 27
27
-
 28
28
-
 29
29
-
 30
30
-
 31
31
-
 32
32
-
 33
33
-
 34
34
-
 35
35
-
 36
36
-
 37
37
-
 38
38
-
 39
39
-
 40
40
-
 41
41
-
 42
42
-
 43
43
-
 44
44
-
 45
45
-
 46
46
-
 47
47
-
 48
48
-
 49
49
-
 50
50
-
 51
51
-
 52
52
-
 53
53
-
 54
54
-
 55
55
-
 56
56
-
 57
57
-
 58
58
-
 59
59
-
 60
60
-
 61
61
-
 62
62
-
 63
63
-
 64
64
-
 65
65
-
 66
66
-
 67
67
-
 68
68
-
 69
69
-
 70
70
-
 71
71
-
 72
72
-
 73
73
-
 74
74
-
 75
75
-
 76
76
-
 77
77
-
 78
78
-
 79
79
-
 80
80
-
 81
81
-
 82
82
-
 83
83
-
 84
84
-
 85
85
-
 86
86
-
 87
87
-
 88
88
-
 89
89
-
 90
90
-
 91
91
-
 92
92
-
 93
93
-
 94
94
-
 95
95
-
 96
96
-
 97
97
-
 98
98
-
 99
99
-
 100
100
-
 101
101
-
 102
102
-
 103
103
-
 104
104
-
 105
105
-
 106
106
-
 107
107
-
 108
108
-
 109
109
-
 110
110
-
 111
111
-
 112
112
-
 113
113
-
 114
114
-
 115
115
-
 116
116
-
 117
117
-
 118
118
-
 119
119
-
 120
120
-
 121
121
-
 122
122
-
 123
123
-
 124
124
-
 125
125
-
 126
126
-
 127
127
-
 128
128
-
 129
129
-
 130
130
-
 131
131
-
 132
132
-
 133
133
-
 134
134
-
 135
135
-
 136
136
-
 137
137
-
 138
138
-
 139
139
-
 140
140
-
 141
141
-
 142
142
-
 143
143
-
 144
144
-
 145
145
-
 146
146
-
 147
147
-
 148
148
-
 149
149
-
 150
150
-
 151
151
-
 152
152
-
 153
153
-
 154
154
-
 155
155
-
 156
156
-
 157
157
-
 158
158
-
 159
159
-
 160
160
-
 161
161
-
 162
162
-
 163
163
-
 164
164
-
 165
165
-
 166
166
-
 167
167
-
 168
168
-
 169
169
-
 170
170
-
 171
171
-
 172
172
-
 173
173
-
 174
174
-
 175
175
-
 176
176
-
 177
177
-
 178
178
-
 179
179
-
 180
180
-
 181
181
-
 182
182
-
 183
183
-
 184
184
-
 185
185
-
 186
186
-
 187
187
-
 188
188
-
 189
189
-
 190
190
-
 191
191
-
 192
192
-
 193
193
-
 194
194
-
 195
195
-
 196
196
-
 197
197
-
 198
198
-
 199
199
-
 200
200
-
 201
201
-
 202
202
-
 203
203
-
 204
204
-
 205
205
-
 206
206
-
 207
207
-
 208
208
-
 209
209
-
 210
210
-
 211
211
-
 212
212
-
 213
213
-
 214
214
-
 215
215
-
 216
216
-
 217
217
-
 218
218
-
 219
219
-
 220
220
-
 221
221
-
 222
222
-
 223
223
-
 224
224
-
 225
225
-
 226
226
-
 227
227
-
 228
228
-
 229
229
-
 230
230
-
 231
231
-
 232
232
-
 233
233
-
 234
234
-
 235
235
-
 236
236
-
 237
237
-
 238
238
-
 239
239
-
 240
240
-
 241
241
-
 242
242
-
 243
243
-
 244
244
-
 245
245
-
 246
246
-
 247
247
-
 248
248
-
 249
249
-
 250
250
-
 251
251
-
 252
252
-
 253
253
-
 254
254
-
 255
255
-
 256
256
-
 257
257
-
 258
258
-
 259
259
-
 260
260
-
 261
261
-
 262
262
-
 263
263
-
 264
264
-
 265
265
-
 266
266
-
 267
267
-
 268
268
-
 269
269
-
 270
270
-
 271
271
-
 272
272
-
 273
273
-
 274
274
-
 275
275
-
 276
276
-
 277
277
-
 278
278
-
 279
279
-
 280
280
-
 281
281
-
 282
282
-
 283
283
-
 284
284
-
 285
285
-
 286
286
-
 287
287
-
 288
288
-
 289
289
-
 290
290
-
 291
291
-
 292
292
-
 293
293
-
 294
294
-
 295
295
-
 296
296
-
 297
297
-
 298
298
-
 299
299
-
 300
300
-
 301
301
-
 302
302
-
 303
303
-
 304
304
-
 305
305
-
 306
306
-
 307
307
-
 308
308
-
 309
309
-
 310
310
-
 311
311
-
 312
312
-
 313
313
-
 314
314
-
 315
315
-
 316
316
-
 317
317
-
 318
318
-
 319
319
-
 320
320
-
 321
321
-
 322
322
-
 323
323
-
 324
324
-
 325
325
-
 326
326
-
 327
327
-
 328
328
-
 329
329
-
 330
330
-
 331
331
-
 332
332
-
 333
333
-
 334
334
-
 335
335
-
 336
336
-
 337
337
-
 338
338
-
 339
339
-
 340
340
-
 341
341
-
 342
342
-
 343
343
-
 344
344
-
 345
345
-
 346
346
-
 347
347
-
 348
348
-
 349
349
-
 350
350
-
 351
351
-
 352
352
-
 353
353
-
 354
354
-
 355
355
-
 356
356
-
 357
357
-
 358
358
-
 359
359
-
 360
360


Panasonic ESED95 Istruzioni per l'uso
- Categoria
- Epilatori
- Tipo
- Istruzioni per l'uso
in altre lingue
- English: Panasonic ESED95 Operating instructions
- français: Panasonic ESED95 Mode d'emploi
- Deutsch: Panasonic ESED95 Bedienungsanleitung
- Nederlands: Panasonic ESED95 Handleiding
- português: Panasonic ESED95 Instruções de operação
- dansk: Panasonic ESED95 Betjeningsvejledning
- čeština: Panasonic ESED95 Operativní instrukce
- polski: Panasonic ESED95 Instrukcja obsługi
- suomi: Panasonic ESED95 Käyttö ohjeet
Documenti correlati
-
Panasonic ESED96 Manuale del proprietario
-
Panasonic ES-ED90 Manuale del proprietario
-
Panasonic ESEL3A Manuale utente
-
-
-
-
-
Panasonic ESED94 Manuale del proprietario
-
Panasonic ESED92 Manuale del proprietario
-