
e3
uuip"=.= 7
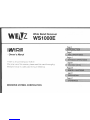
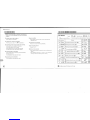
Owner's Manual
17
Thank you for purchasing our recetver
For proper use of this receiver, please read this manual thoroughly
Keep this manual in a safe place for fulure reference
Page 21
ffi-- 29
P,tt
47
INTRODUCTION
BASIC OPERATIONS
ADVANCED OPERATIONS
MEMORY FUNCTIONS
SEARCH/SCAN
REFERENCES
DIAMOND ANTENNA CORPORATION
Wide Band Receiver
WSlOOOE

. Do not attempt to disassemble or modify this
product in any way. This could lead to fire, electr¡c
shock or breakdown @
. lf this product is dropped or damaged in any way,
contact your dealer lf it is used in such a
condition, it could lead to fire, electric shock or
breakdown A
. ln the event that snìoke is emitted, a strange odor
or noise is generated, or similar abnormality
occurs, it could cause fire, electric shock or
breakdown Consult your dealer immediately for
the necessary instructions or repair needed Do
not attempt to repair the receiver your self. Doing
so may lead to ser¡ous damage or physical injury.
A
. Do not ¡nstall or rernove batteries while your hands
are wet This could cause electric shock A
¡ Do not place consumed batteries in a fire. They
could explode, causing fire or burns. A
o Do not use any batteries other than size AA
Alkaline or manganese batteries Using the
different batteries could cause fire, eleckic shock
or failure A
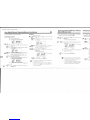
AWARNING
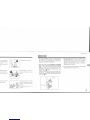
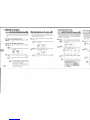
Before Operation
Cautions on Safety
lncluded are various illustrations and symbols in this
manual to assure that this product is used safely and
correctly, and to prevent injuries to you or to other
persons as well as damage to your possessions. The
meanings of these syrnbols are as shown below. Please
understand these symbols before reading this manual.
¡ Unauthorize
communicati
parties is prol
lndicates contents which, if disregarded and
AWAnNNC the product handled incorectly, could lead
:.S to a fatal accident or serious injury.
^ Indicates contents wh¡ch, if disregarded and
¿\CnUlON the product handled incorectly, could lead to
injury or physical damage to property
Examples of illustrat¡ons in symbols
This  symbol signals that the contents describe points
where caution is necessary or where there is danger
The illustration within the ^ at left indicates that there is
danger of electric shock.
^
@
o
This Q symbol signals that there is an action that is
prohibited. The illustration within the O on the left
indicates that disassembly is prohibited
This O symbolthatthere is an action to be performed by
the user The illustration on the left indicates that there is
a general instruction
. Do not place this product in locations with e)treme
temperature, high humidity or excessive dust. Do
not keep it in an automobile. lt could lead to fire,
electric shock or breakdown A
o When conducting routine maintenance, be sure to
disconnect the power for additional safety A
. Always be aware of antenna location to avoid
personal injury o
¡ Discontinue use of this product if it has a negative
influence on TV, electronic device, therapeutic
devices and or other equipment. ñ
. During extended trips or other times when th¡s
product is not in use for long periods, take the
batteries out Keep the batteries store in a safe
place and out of the reach of infants ana small
children o
¡ When not in use, keep it out of the reach of ínfants
and small children o
. Do not use this product for anything other than a
recerver. ñ
a CAUTTON

AWARNING
. Do not use any batteries other than size AA
Alkaline or manganese batteries Using the
different batteries could cause fire, electric shock
or failure. A
. Do not place consumed batteries in a fire They
could explode, causing fire or burns, A
. Do not install or remove batteries while your hands
are wet This could cause electric shock A
. ln the event that snìoke is emitted, a strange odor
or noise is generated, or similar abnormality
occurs, it could cause fire, electric shock or
breakdown Consult your dealer immediately for
the necessary instructions or repair needed. Do
not attempt to repair the receiver your self Doing
so may lead to serious damage or physical injury
A
. lf this product is dropped or damaged in any way,
contact your dealer lf it ¡s used in such a
condition, it could lead to fire, electric shock or
breakdown A
. Do not attempt to disassemble or modify this
product in any way This could lead to fire, electric
shock or breakdown @
symbols in this
sed safely and
/ou or to other
SSeSSions. The
r below. Please
'rg this manual.
NOTICE
. Unauthorized use of the contents of radic
communications or divulging its contents to other
parties is prohibited by law
a cAUroN
¡ Do not use this product for anything other than a
recetver ñ
¡ When not in use, keep it out of the reach of infants
and small children o
¡ During extended trips or other times when this
product is not in use for long periods, take the
batteries out. Keep the batteries store in a safe
place and out of the reach of infants ana small
children o
o Discontinue use of this product if it has a negative
influence on W, electronic device, therapeutic
devices and or other equipment ñ
. Always be aware of antenna location lo avoid
personal injury o
¡ When conducting routine maintenance, be sure to
disconnect the power for additional safety
^
. Do not place this product in locations with extreme
temperature, high humidity or excessive dust Do
not keep it in an autornobile lt could lead to fire,
electric shock or breakdown. A
disregarded and
rectly, could lead
s rnlury,
disregarded and
ctly, could lead to
o property
s describe points
there is danger.
)ates that there is
an action that is
le O on the left
j
be performed by
oates that there is
ols

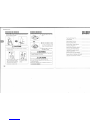
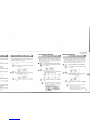
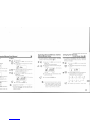
How to use this manual
Th s manua uses the fo ow ng symbo s.
Useful advice or suggestions.
Reference to another page.
Hold down the function key
Set mode uses hefollowing symbols.
Can be set in all modes.
Can be set in expanded mode.
f-,il
IG
Ð
E
w
w
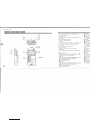
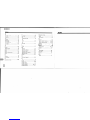
Table of Contens
After unpacking, make sure that the
following items are included.
Before Operation ADVANCED
Changing the Fr
Changing the R,
Matc
Changing Lamç
Turning the Bee
Using the Batter
Using the Auto f
How to use this manual I
ilt
Packing ltems
INTRODUCTION ....... 3
Precautions 4
5
6
6
Receiver Unit
Attaching the Antenna
lnstalling Batteries
BASIC OPERATIONS...
Turning the Power On
7
.8
8
.9
.9
10
10
11
11
12
EXPANDED
Switching to the
Setting the VFO
Changing the Fr
Slitching the I
Using the Selec
Controlling the S
Reducing Rece
Changing the Pr
of th
Changing the Fr
Changing the Fr
Preset Mode
Adjusting the Volume ......
Adjusting the Squelch
Recalling the Preset Memory .. .....
Changing Frequency
Selecting the Reception Mode
Changing the Preset Menìory
Lighting the Display's Lamp
Using the Key Lock 12
ResettingtheVFO(VFOReset) .. ... ...13
Resetting the All Settings (All Reset) 13
Operation and Funct¡ons of Parts 14

/mbols.
tions.
tge.
(ey
mbols.
mode.
Table of Contens
After unpacking, make sure that the
following items are included.
Before Operation .i
iii
iii
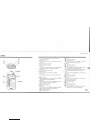
ADVANCED OPERATTONS ................... 1 7
Changing the Frequency Step (Auto Step) ... ........... . 18
Changing the Reception Mode to
Match the Frequency (Auto Mode) .............. 18
How to use this manual
Packing ltems
INTRODUCTION .....
Precautions.
Receiver Unit
4
5
6
6
Changing Lamp Operation
Turning the Beep On or Off 19
19
20
20
Attaching the Antenna Using the Battery Save
lnstalling Batteries Using the Auto Power Off
BASIC OPERATIONS.... 7
.8
.8
.9
.9
10
10
EXPANDED MODE ... 21
.22
.22
.23
.24
.24
25
.25
Turning the Power On . .... .. .. Switching tothe Expanded Mode
Preset Mode Setting the VFO tr4ode
Adjusting the Volume Chang¡ng the Frequency I2l ..............
Adjusting the Squelch Slitching the Set Mode Function Simply (My Key) ..... ..
Recalling the Preset Mernory Us¡ng the Selector in Key Lock
Changing Frequency Controlling the Squelch with RF Level (RF Squelch).. .. .
Reducing Receiving Sensitivity (Attenuator)
Changing the Proportion of Activation
Selecting the Reception Mode
Changing the Preset Memory of the Signal Meter in FM Mode .................... 26
Changing the Frequency to MHz Digit (Fast Step) ... ......26
Changing the Frequency in 100 MHz Steps .................. .27
Lighting the Display's Lamp ......
Using the Key Lock
Resetting the VFO (VFO Reset)
Resetting the All Settings (All Reset)
Owner's
recervef
Antenna
'l
Operation and Funct¡ons of Parts

MEMORY FUNCTIONS 29 Scan Specific Memory Frequencies
(Memory Scan Mernory) . . .....
Scanning a Block of Memory Address
(Block Memory Scan) ..
Changing the Halt Time in the Pause Type ..
t¡
The Memory Funct¡on
Calling the Memory [1]
30
31
31
32
æ
33
u
u
35
45
45
46
46
Calling the Memory [2] ....
Storing the Menìory Using Dual Watch .. Precautìons
Beceiver Unit.. .. ......
Attaching the Antenna
lnstalling Batteries .....,
Dual Watch during a Search/Scan ..
Erasing the Memory..
Preventing Changes to Memory (Memory Protec$..... . .REFERENCES .........
Troubleshooting
Listof the Set Mode Functions.. .. ..
Relationship Between FrequencY,
47
48
49
Erasing Memory One Block at a Time
Exchanging the Contents of Memory (Mernory Swap) .
Returning to the VFO Mode
with the Memory Frequency Unchanged . ..... .. Frequency Step and Recept¡on Mode . .50
50
51
52
Option
Specifications
Search and Scan Function 38
39
39
lndex
Search the Entire Bandwidth (All Search)
Using a One Touch Search
Rewriting Search Band Memory . .......... ....40
Eras¡ng the Search Band Memory
Searching a Specific Range (Program Search) ..... ........41
Skipping a Frequency during a Search [1]
(Search Pass Mernory)... . ...... ... .. 41
Skipping a Frequency during a Search [2]
(Search Pass Memory). ............... .42
Erasing the Search Pass Memory
Scanning All Frequencies in Memory
(All Mernory Scan) 43
2

29 Scan Specific Mernory Frequencies
(Memory Scan Mernory)
Scanning a Block of Memory Address
30
31
31
32
æ
33
u
34
(Block Memory Scan) ............
Changing the Halt Time in the Pause Type . .. . ..
45
45
46
46
Using Dual Watch
Dual Watch during a Search/Scan .. .. Precautions
Receiver Unit......... ..
Attaching the Antenna
lnstalling Batteries .....,
y Protect) REFERENCES
Troubleshooting ..
..47
emorySwap)...
hanged
List of the Set Mode Functions ...........
Relationship Between Frequency,
Frequency Step and Reception Mode
48
49
Option 50
50
51
52
Specifications
lndex
earch)
t11
rv)
'.21
rv)
3

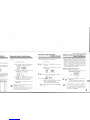
INTRODUCTION
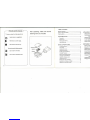
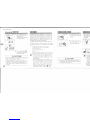
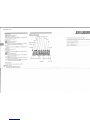
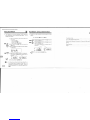
Precautions Receiver Unit
This receiver is water resistant.
Avoid wet or humid places lf
water is splashed on the
receiver, wipe the moisture off
with a dry cloth.
It.
It
¡t
I
Avoid extremely cold places
. This receiver (WS1000E) is capable of receiving AM, FM
Nanow Band (Amateur Radio bands, etc.)and FM Wde
Band (general radio broadcasts, etc ) broadcasts at
frequencies from 500 kHz to 1300 MHz .
..Exparìded_@
using the numer
used to find the
frequencies can
addition, a me
rationalize the us
o This receiver has two modes, Preset Mode and Exoanded
Mode. When purchased the receiver is set in the Preset
Mode ln this mode, ma.ior frequencies of popular FM
broadcasts and amateur radio broadcasts, etc. have
already been entered using the numeric keys and are
stored in memory. (Ð 10)
Frequencies called from rremory can be changed using
the selector. The changed frequencies can also be
entered in the desired memory location assigned to each
numeric key (Ð 11)
. ln this manual, thr
Mode are explait
Never disassemble the receiver.
Never touch the receiver's core.
It is adjusted for optimum
performance.
Avoid exposing the receiver to
excessive vibrations and dusty
places
Avoid hot places and locations
exposed to direct sunlight. Applicable batteries are either
AA-size manganese or alkaline
batteries Never use any other
batteries.
This receiver requie 2 2 to 3 5
volts DC
Selector
Numeric Keys
q
(tr:-
llt:-- . -
t
t
ad ùtt
4

r is water resistant.
)r humid places lf
;piashed on the
)e the moisture off
)th.
)emble the receiver.
the receiver's core.
ted for optimum
aces and locations
lirect sunlight.
iI: t
t
Avoid extremely cold places
Avoid exposing the receiver to
excessive vibrations and dusty
places
Applicable batteries are either
AA-size manganese or alkaline
batteries. Never use any other
batteries
This receiver require 2 2 to 3 5
volts DC
Receiver Unit
. This receiver (WS1000E) is capable of receiving AM, FM
Narrow Band (Amateur Radio bands, etc.)and FM Wide
Band (general radio broadcasts, etc ) broadcasts at
frequencies from 500 kHz to 13@ MHz .
. This receiver has two modes, Preset Mode and Exoanded
Mode. When purchased the receiver is set in the Preset
Mode. ln this mode, major frequencies of popular FM
broadcasts and amateur radio broadcasts, etc. have
already been entered using the numeric keys and are
stored in memory. (þ 10)
Frequencies called from rremory can be changed using
the selector. The changed frequencies can also be
entered in the desired memory location assigned to each
numeric key (þ 11)
Selector
Numeric Keys
INTRODUCTION
. Exoanded Mode, frequencies can be entered directly
using the numeric keys. Search and Scan can also be
used to find the frequency quickly. Up to 400 difierent
frequencies can be entered in memory in this rnode ln
addition, a memory swap function is included to
rationalize the use of memory,
. ln this manual, the functions used when in the Expanded
Mode are explained on pages 21 to 46.
/.1
5

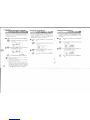
INTRODUCTION
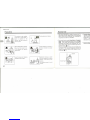
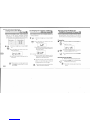
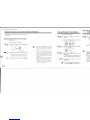
Attaching the Antenna lnstalling Batteries BAS'C
Hold the antenna base, set it on the receiver's antenna terminal
and turn clocla,vise to tighten. I Slide the battery cover off to
open
D&
Turning the Power On . . ........... . ,
Preset Mode
AdJUSting the Volume
Adjusting the Squelch
Recalling the Preset Memory
Changing Frequency
Selecting the Reception Mode ........,
Changing the Preset Memory ,...,....
Lighting the Display's Lamp ........,...
Using the Key Lock
Resetting the VFO (VFO Reset).......
Resetting the All Settings (All Reset)
Operation and Function of Parts .....
o
oa
o geo 2 lnsert two batteries, making
sure they are inserted with the
poles in the specified direction
3 S¡¡¿e the battery cover back
into pos¡tion to close.
. Do not place consumed batteries in a fire. They could
explode, causing fire or burns.
Awan¡¡lruc
. Turn the power off when replac¡ng batteries
. Be sure to ¡nsert batteries with the poles in the
specified direction
. Mixing new batteries with old batteries shortens the
life of the new batteries
acnurþNs
I
o The following actions may damage the receiver
¡
Ð
t
. Do not hold the top of the . Do not hold the receiver
antennaandattempttoinstall it by the antenna when
Also do not turn the antenna carrying
excessively when tightening
. Always be aware of antenna location to avoid
personal injury.
AcnurþNs
6

lnstalling Batteries BAS'C OPERATIONS
iver's antenna terminal I Sl¡de the baüery cover off to
open.
@
Turning the Power On ............ . ... .
Preset Mode
Ad¡usting the Volume
Adjusting the Squelch
Recalling the Preset Memory
Changing Frequency
Selecting the Reception Mode..... . ..
Changing the Preset Memory
Lighting the Display's Lamp....... ......
Using the Key Lock
Resetting the VFO (VFO Reset).........
Resetting the All Settings (All Reset).
Operation and Function of Parts .......
8
.8
9
o
10
10
11
1'1
12
t¿
13
13
14
2 lnsert two batteries, making
sure they are inserted wíth the
poles in the specified direction
3 Sl¡oe the battery cover back
into position to close.
Awnnru¡ruc
o Do not place consumed batter¡es in a fire. They could
explode, causing fire or burns.
S
)cation to avoid
the receiver
lot hold the receiver
the antenna when
yng.
AceuloNs
¡ Turn the power off when replacing batteries
o Be sure to insert batteries with the poles in the
specified direction
. Mixing new batteries with old batteries shortens the
life of the new batteries
7

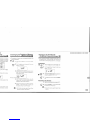
BASIC OPERATIONS
Power On Preset Mode Adjusting the Volume Adjusting tt
I Press the lÞõwERI key on the
front of the receiver for 1
second or longer
(A power up sound emits and
the display comes on )
. ln its initial state (when shipped from the factory), this
receiver is set in the Preset Mode. ln this mode, the
desired preset station frequencies can be called by
pressing the numeric key assigned to each station Also,
using the selector, etc., the preset frequencies can be
changed to any other desired frequencies
The receiving mode can be set in greater detail in the
receiver's Expanded N/ode (þ 22)
Knob I To increase the volume, turn
the VOL knob in the clockwise
direction
. When a signal is
The Squelch adl
the Squelch ke
temporarily
HELLÛ ! To decrease the volume, turn
the VOL knob in the
counterclockwise direction.
The following functions can be performed in the Preset
ModeChanging the frequencies using the se ector
Changìng the frequenc es using the M iFvEÑ¡ key
Changing the Set Mode
Changìng the Reception mode
Key Lock
Llghting the Dìsp ay
Recalling or entering the Preset rnemory using the numerlc keys
ME?sfrr
IHt
JF (2 To turn off, press the ÍFõWEFI
key on the front of the receiver
for 1 second or longer fa-l
IG . ln the Preset Mode, there are some Set Modes in
which setting cannot be done (Ð 49) All of these
Set Modes can be set by changing to the
Expanded Mode
. When changing from the Presel lvlode to the
Expanded Mode, Search and Scan operations
can be performed (E 38) The station you desire
to listen to can be found more quickly using
Search or Scan Also, the station you desire lo
listen to can be jumped to by entering the
frequency of that station to memory (D 32 40)
f-,Ft
IG . lf the SO
impossib
. lf the sigr
off, conti
possible
However
broadcar
. Squelch (
. Squelch (
the nois€
. Set the volume to an acceptable loudness level Be
sure decrease the volume level before switching
from speaker to earphones, etc
A cnulolv
ffi SQL
. When not in use, keep it in a place that is out of the
reach of infants and small children.
. During extended trips or other times when this
receiver is not in use for long periods of time, take the
batterles out Also, keep lhe batteries stored in a
place that is out of the reach of infants and small
children
AcnuloNs
I

BASIC OPERATIONS
Preset Mode Adjusting the Volume Adjusting the Squelch
e tPow-ERì key on the
the receíver for 1
cr longer.
rr up sound emits and
ay comes on )
o ln its initial state (when shipped from the factory), this
receiver is set in the Preset Mode ln this mode, the
desired preset station frequencies can be called by
pressing the numeric key assigned to each station Also,
using the selector, etc, the preset frequencies can be
changed to any other desired frequencies
The receiving mode can be set ¡n greater detail in the
receiver's Expanded li/ode (þ 22)
VOL Knob t To increase the volume, turn
the VOL knob in the clockwise
direction
r When a signal ls not being received, a noise is emitted
The Squelch adjustrnent eliminates lhis noise. Also press
the Squelch key to switch off the Squelch function
temporarily
SQL knob 1 Turn the SQL knob slowly in the
"+" direction
2 To decrease the volume, turn
the VOL knob in the
counterclockwise direction.
The following functions can be performed in the Preset
ModeChangìng the frequencles using the selector
Changìng the frequencies using the M /r;vÈrn ksy
Changing the Set Mode
Changing the Receptlon mode
Key Lock
Lighting the Dìsplay
Recallìng or entering the Preset memory using the numeric keys
2 Stop turning the knobwhen the
no¡se disappears
Íf, press the lFõwEFl
re front of the receiver
ond or longer.
g To turn Squelch off, press the
ßõl o-m key (This cause the
noise to be emitted again )
S
that ¡s out of the
times when this
s of time, take the
:eries stored in a
nfants and small
Tan
tÊ . ln the Preset Mode, there are some Set Modes in
which setting cannot be done (þ 49) All of these
Set Modes can be set by changing to the
Expanded Mode
. When changing from the Preset Mode to the
Expanded Mode, Search and Scan operations
can be performed (E 38) The station you desire
to listen to can be found more quickly using
Search or Scan Also, the station you desire to
listen to can be jumped to by entering the
frequency of that station to memory (D 32 40)
f-ãt
IG . lf the SOL knob is turned too far, it may become
impossible to receive weak signals
. lf the signal is weak and the received sound is cut
ofl, cont¡nue to press the ßõLõFFI key lt will be
possible to hear the received sound continuously
However, it may be necessary to listen to the
broadcast mixed noise
. Squelch Off: ln this state the noise is emitted
. Squelch On: Through the operation of Squelch,
A cnuloru
. Set the volume to an acceptable loudness level Be
sure decrease the volume level before switching
from speaker to earphones, etc,
MV-4
s@q
o ooo
O qo"e
9
the noise ¡s not heard in this state

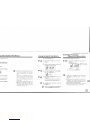
BASIC OPERATIONS
Recalling the Preset Memory Changing Frequency the Mode Changing tl
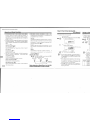
. When in the Preset Mode, the numeric keys function as
Preset Memory Keys. The frequencies stored in memory
can be easily called using these keys
o ln the Preset Mode, frequencies can be changed by the
following two methods. Change frequencies either by
using the Selector or by using the lE-Ãl /l¡VEñÎ key while
pressing the lFÛñCl key.
Using the Selector
o AM, Nanow FM mode (FM)and Wide FM mode (WFM)
can be selected corresponding to the reception mode
being received.
. Changing the Cc
u
t
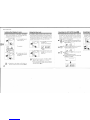
I Press the numeric key
corresponding to the desire
frequency.
I Hold down the tF¡ñõt key and
press the Þr,r-o-pE key.
1 Turning the Selector in the
clockwise direction increases
the frequency one step at a
time (þ 18).
2 Turning the Selector in the
counterclockwise direction
decreases the frequency one
step at a time.
2 Each time the Þ-ñro-õ-Êt key is
pressed, the display changes.
WFIV FIV AM
I trr t+l ¡r <+l Àt
IHþ l?flïfrï
AA
2 Confirm that the desired
frequency is displayed.
f-ãt
IG . This receiver uses a Quick Encoder System
Turning the Selector rapidly causes large
changes in f requencies.
WFM : Select to receive FM broadcasts and the
voice component only of W broadcasts.
FM : Select to receive amateur radio bands and
marine bands
AN/ : Select to receive AM broadcasts and air
bands, etc.
. lf the radio transmission system is not matched, it is not
possible to hear a broadcast even when it is being
received, or it will be distorted
. ln the initial state (when shipped frorn the factory), the
Auto Step function (þ 18) and the Auto Mode function
(Q18) are functioning. These functions are used to
change the frequency steps and reception mode
automatically to match the frequency setting These
functions can both be canceled
rn
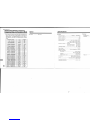
IG . ln the initial state, (when shipped from the
factory), the following frequencies
ton Using the lSTl /l¡VEñî key
E.@ f HolddownthelFúñõl keyand pressthe ß71 key
to increase the frequency one step at a t¡me. rn
LÊ
E.þ 2 Hold down thelFiiFdl key and press the l¡VEñil
key to decrease the frequency one step at a time
nn
le . Holding down these keys causes the frequencies to
change progressively faster.
Tan
t_G . This rec
Tu rning
changes
10
$::
oo
1
2
J
4
5
6
7
8
9
Numeric Kev 82500 MHz
128.800 MHz
145.000 MHz
156.800 MHz
221.7û MHz
904.0125 MHz
3.925 MHz
6.055 MHz
9.595 MHz
Freorrencv Receotion rnode
WFM
AM
Fil¡
FM
WFM
FÌM
AM
AM
AM

BASIC OPERATIONS
nory Changing Frequency Selecting the Reception Mode Changing the Preset Memory
ric keys function as
es stored in memory o ln the Preset Mode, frequencies can be changed by the
following two methods. Change frequencies either by
using the Selector or by using the l5'-Ãl /I¡VEñTì key while
pressing 1¡s l-FuNCl key.
. AM, Narrow FM mode (FM)and Wde FM mode (WFM)
can be selected conesponding to the reception rnode o Changing the Content of the Preset Mennry
bei received. 1 Chang¡rç fp desired frequercy
toreceptim nnde.
the numeric key
onding to the desire
cy
the Selector I Hold down the F¡fõt key and
press the Þr¡-ÕD-d key
I Turning the Selector in the
clockwise direction increases
the frequency one step at a
t¡me(E 18)
2 Turning the Selector in the
counterclockwise direction
decreases the frequency one
step at a time
Ei,lfr0
JF I
ì that the desired
ry is displayed. WFIV
2 Each time the Þ r\¡o-oE key is
pressed, the display changes
FIV AM
! Press the numeric key which is
to be changed for 2 seconds or
longer (a beep sound is
emitted and the memory
address is displayed The
f requency is entered in
mernory
Ir:, *[_1, *rlj,
Tat
IG o This receiver uses a Quick Encoder System
Turning the Selector rapidly causes large
changes in frequencies
WFM : Select to receive FM broadcasts and the
voice component only of TV broadcasts
FM : Select to receive amateur radio bands and
marine bands
AM : Select to receive AM broadcasts and air
bands, etc.
. lf the radio transmission system ¡s not matched, it is not
possible to hear a broadcast even when it is being
received, or it will be distorted
. ln the initial state (when shipped frorn the factory), the
Auto Step funct¡on (þ 18) and the Auto Mode funct¡on
(Q18) are functioning. These functions are used to
change the frequency steps and reception mode
automatically to match the frequency setting These
functions can both be canceled.
Oq
T3:"
en shipped from the
wing frequencies M8nlfr0
i!!t
to 9. Using the @/rvml key
E.@
E."Tò
I HolddownthelFÚNõl keyand presstheß-n key
to increase the frequency one step at a time
! Hold down thelFu¡rO key and press the f¡vE-ñil
key to decrease the frequency one step at a time
. Holding down these keys causes the frequencies to
change progressively faster.
o This receiver uses a Quick Encoder System
Turning the Selector rapidly causes large
ector
Receotion rrrrle
WFM
AM
FM
F|\¡
WFI\4
FM
AM
AM
AM 't 1
Tat
IG
T¡N
tÊ
Tat
tÊ changes in frequencies.

BASIC OPERATIONS
Lighting the Display's Lamp Using the Key Lock Resetting the VFO (VFO Reseflfl Resetting tl
. When using the receiver in a dark place, etc., the display's
lamp can be switched on Five seconds after keys
operations have ceased, the lamp goes off.
. lt is possible to disable the keys so they cannot be used.
This is to prevent the wrong keys from being pressed and
to prevent the operation from being changed by mistake.
This operation is called Key Lock. The Selector cannot be
operated during operation of the Key Lock function.
. The original state that the receiver was in when it is
purchased can be reset except for the contents of
mernory. This is called VFO Reset Use this function if a
mistake has been made in setting, or when you cannot
otherwise return to the original state.
. The original st¿
purchased car
cleared This is
I Hold down the lFúr.ra key and
oress the F-úM-FI kev E+ ,@
'@' I Fldd doivnhelFúñõl keyard pressü-temsËTl l€y.
2 f urn the selector and change the Set menu
display "OFF rES"
p@q
TBa"
1 Hold the Fuñd key and press
the ldREÍLl kev
(The Key mark is displayed.)
(The lamp lights.) E.r@- 3 Hold dor,vn the lFúñõl key and turn the selector to
change the display from "OFF to "on"
mark
00
E?HX 2 To cancel this function, hold
the i-FUNõl kev and oress the
f6-RÈifì kev.
POII/ER
E*o 4down the eúFõl key and press the
2 To switch the lamp off, hold
dovvn the tFúNÕì key and press
the ItTát'Fl key
lÞõ-w-Êñl key
(A high pitched beep is emitted).
5 Release the keys and confirm if the original state
rs in the
fa-l
tÊ . During Key Lock function, the lFuNõl , lFõwERl ,
lSdL-õFFl , F¡ñCl + lT LÃMFI keys can be used
o When in the Expanded Mode, use of the selector
can be activated even during Key Lock using the
Set Mode setting (E 24)
JF I
Ta-l
te . Depending on the setting of the Set Mode, the
lamp can be set to remain lit continuously. (Ð19) &
IH"I E?58ü
,F I
@
o
oo
s" rE5
frrt
af I
ar I
IH"t E?.5fr0 t=
''::::.:7
,,qn r|s
o
o
oo
T"
a
@q
1

BASIC OPERATIONS
mp Using the Key Lock Resetting the VFO (VFO Reset)fr1 Resetting the Attseftings (Att Reset)
e, etc., the display's
econds after keys
es off.
¡ lt is possible to disable the keys so they cannot be used,
This is to prevent the wrong keys from being pressed and
to prevent the operation frorn being changed by mistake.
Thisoperation iscalled Key Lock The Selectorcannot be
operated during operation of the Key Lock function.
. The original state that the receiver was in when it is
purchased can be reset except for the contents of
mernory, This is called VFO Reset. Use this function if a
mistake has been made in setting, or when you cannot
. The original state that the receiver was in when it was
purchased can be reset with the contents of memory
cleared This is called "All Reset "
vn the IFUNcì key and
r F-IÃñiU key return to the original state.
1 Hdd do^,îtelFúñõl l€yarìd presstel¡SEî key
2 f urn the selector and change the Set menu
display "OFF rES"
1 Press the lÞõw-ËRl key to turn
the power off
f Hold the fËuNdl key and press
the 16 KÈY.-¡ key.
(The Key mark is displayed )
r lights.) E.r@. 3 Hold down thel-púñcl key and turn the selector to
change the display from "OFF to "on"
2 Hold down the lF¡Nõl key and
ßo-Lo-m key and press the
lÞõwEã'l key.
(All the itens in the display are
displayed at once )
$ Releasethe keysand confirm if
the original state is displayed in
the display.
mark è
h the lamp off, hold
lFur.rõl key and press
E key
2 To cancel this function, hold
the lFoñõì key and press the
l6-x-Eifl kev. E*ö' 4 Hold down the t¡ú¡röl key and press the
fFõWEn-l kev.
(A high pitched beep is emitted).
5 Release the keys and confirm if the orig¡nal state
in the
o sPa.
flHfl Ml^Y Ít E
I
,ú
þ
. During Key Lock function, the fFùñ-cl , mwtrRl ,
mLõ+l , lFúñõl +h-tÃMÞì keys can be used
. When in the Expanded Mode, use of the selector
can be activated even during Key Lock using the
Set Mode setting. (E 24)
&
the Set Mode, the
:ontinuously. (þ19) &
ME?sfrfr
#!t
o
o
oo
T" rE5
lf.t
ME?5frfr
it, rE5
an
at I
o
o
oo
s"
lit
IHt
JF UE7sTD
1
ran
LE
ts

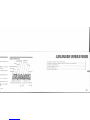
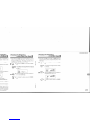
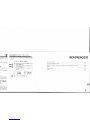
BASIC OPERATIONS
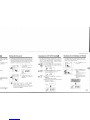
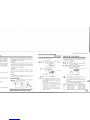
Operation and Functions of Parts O Antenna Connection Terminal (BNC fype)
To connect the Antenna
@ Speaker Cap
Ensure this cap is closed when the speaker terminal is not
being used.
@ External Speaker Terminal
Connect the optional speaker
@ Selector
Turn this knob to change the frequency The setting contents
change when adjusting the various types of settings.
@ vol Knob
Turn this knob to adjust the volume
@ sol- oFF Key
Squelch is turned off while this key is pressed
Ø ruruc rey
Various special functions can be set while pressing this key
3 SRH.D Key
Calls Mem(
lnputs of nr
fEl: Pressing t
initiates th
4 MYIV Key
@: Calls Mem<
lnputs of nL
Pressing thir
the Set Mor
DyH @: Pressing thir
between Sr
5AKey
Pressing this ke
frequency
fTl: Calls Memc
fEì: lnputs of nt
6 KEY.L Key
Pressing this ke
the Key Lock fu
@: Calls Memc
fEl: lnputs of nr
TVilV Key
fÞl: Calls Memc
@ Numeric Kevs
. @is indicateô when in the Preset Mode and @ is
indicated when in the Expanded Mode.
1 LAMP Key
Pressing this key while pressing the l-puudl key causes the
lamp in the display to light up for 5 seconds
@): Calls Memory Address 1.
@: lnputs of numeral "1"
2 MODE Key
Pressing this key while the lFúñdl key is pressed to change the
reception rnode from AM to FM or FM Wide (WFM).
@: Calls Memory Address 2
@l: lnputs of numeral "2"
@:
@: lnputs of nr
Pressing this
betvveen th
,| 4
o
wEEz
.þ iee
iee
;Q ^è
^â
\J"
iQ
ie
iee
gO
wl"a"Æ
wsræ0

ì of Parts
Di
äi(
ó
O Antenna Connection Terminal (BNC Type)
To connect the Antenna
@ Speaker Cap
Ensure this cap is closed when the speaker terminal is not
being used
@ External Speaker Terminal
Connect the optional speaker
@ Selector
Turn this knob to change the frequency. The setting contents
change when adjusting the various types of settings.
@ VoL Knob
Turn this knob to adjust the volume.
@ sol- oFF Key
Squelch is turned off while this key is pressed
O ruNc t<ey
Various special functions can be set whíle pressing this key
@ Numeric Kevs
. @is indicateâ when in the Preset Mode and @ is
indicated when in the Expanded Mode.
1 LAMP Key
Pressing this key while pressing the l-Ëú¡rdl key causes the
lamp in the display to light up for 5 seconds.
@): Calls Memory Address 1.
@l: lnputs of numeral "1"
2 MODE Key
Pressing this key while thq lFúNCl key is pressed to change the
reception mode from AM to FM or FM Wide (WFM).
@): Calls Memory Address 2
[Ð: lnputs of numeral "2".
BASIC OPERATIONS
3 SRH.D Key
E
ECalls Memory Address 3
lnputs of numeral "3"
@: Pressing this key while the l-F!trdì key is pressed
¡nitiates the Search Standby state
4MY/7 Key
@): Calls Memory Address 4
@: lnputs of numeral "4"
@: Pressing this key while the lFurudl key is pressed changes
the Set Mode function stored in the My Key
@: Pressing this key while the ]Fúruõl key is pressed switches
between Scan and Mernory Scan during scanning.
5ÂKey
Pressing lhis key while the ltruTõl key is pressed raises the
frequency
@): Calls Memory Address 5
fEl: lnputs of numeral "5"
6 KEY.L Key
Pressing this key while the lF¡Nõl key is pressed swilches
the Key Lock function On/Off
@J: Calls Memory Address 6.
@: lnputs of numeral "6"
7 VIM Key
@): Calls Memory Address 7
@:
@: lnputs of numeral "7"
Pressing this key while the lFuNdl key is pressed switches
between the VFO state and the Memory Mode
o
w¿il2
UUI"E...H
ws1@0
lo
tv
ie
'Vâ
.{J o
e
e
e
e
Q
e
Q
a
a
e
te
ie
1

BASIC OPERATIONS
ADVANCED
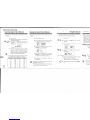
8 SCAN.D Key
þl: Calls Memory Address 8Display lndications
@:
E: lnputs of numeral "8"
Pressing this key while the lFuÑöl key is pressed starts
the scanning operation.
Auto Power
Memory Protect
Save
9 flfflPC Key
@: Calls Memory Address 9. Memory Mode Search
Changing the Frequency Step (Auto Step)........... ........
Changing the Reception Mode to Match the Frequency
Changing Lamp Operation........ . ..
Turning the Beep On or Off
Using the Battery Save .............
Using the Auto Power Off ..
B
Elnputs of numeral "9". '
Pressing this key while the Fiitrõl key is pressed
sw¡tches to the Search Pass enter state.
Scan
Memory Scan Memory
:0 SEì- Key
Pressing this key while the lFúFõl key is pressed calls the
Set Mode.
@): lnputs of numeral "0".
¡V EMKey
Pressing this key while the lFÛr.rdl key is pressed lowers the
frequency
Search
Dual watch
\
ö
Scen Type
@:
Eì: lnputs of decimal point ".".
Pressing this key sets the portion of the frequency
below the decimal point
CL MWTrrlC Key
@: Pressing this key cancels the contents which have
been ¡nput up to that point.
lEì: Pressing this key while the lFiiFdl key is pressed
sw¡tches to the Memory Write state.
Reception mode Lock MHz lndicalor
Frequency/Set Mode Setting llem Signal Meter Low
Signal Meter 100 Hz dig¡t
@ eowrn rey
Pressing this key switches the power On/Off
SQL Knob
Turning this knob adjusts the squelch.
La pagina si sta caricando...
La pagina si sta caricando...
La pagina si sta caricando...
La pagina si sta caricando...
La pagina si sta caricando...
La pagina si sta caricando...
La pagina si sta caricando...
La pagina si sta caricando...
La pagina si sta caricando...
La pagina si sta caricando...
La pagina si sta caricando...
La pagina si sta caricando...
La pagina si sta caricando...
La pagina si sta caricando...
La pagina si sta caricando...
La pagina si sta caricando...
La pagina si sta caricando...
La pagina si sta caricando...
La pagina si sta caricando...
La pagina si sta caricando...
La pagina si sta caricando...
La pagina si sta caricando...
La pagina si sta caricando...
La pagina si sta caricando...
La pagina si sta caricando...
La pagina si sta caricando...
La pagina si sta caricando...
La pagina si sta caricando...
La pagina si sta caricando...
La pagina si sta caricando...
La pagina si sta caricando...
La pagina si sta caricando...
La pagina si sta caricando...
La pagina si sta caricando...
La pagina si sta caricando...
La pagina si sta caricando...
La pagina si sta caricando...
La pagina si sta caricando...
La pagina si sta caricando...
La pagina si sta caricando...
-
 1
1
-
 2
2
-
 3
3
-
 4
4
-
 5
5
-
 6
6
-
 7
7
-
 8
8
-
 9
9
-
 10
10
-
 11
11
-
 12
12
-
 13
13
-
 14
14
-
 15
15
-
 16
16
-
 17
17
-
 18
18
-
 19
19
-
 20
20
-
 21
21
-
 22
22
-
 23
23
-
 24
24
-
 25
25
-
 26
26
-
 27
27
-
 28
28
-
 29
29
-
 30
30
-
 31
31
-
 32
32
-
 33
33
-
 34
34
-
 35
35
-
 36
36
-
 37
37
-
 38
38
-
 39
39
-
 40
40
-
 41
41
-
 42
42
-
 43
43
-
 44
44
-
 45
45
-
 46
46
-
 47
47
-
 48
48
-
 49
49
-
 50
50
-
 51
51
-
 52
52
-
 53
53
-
 54
54
-
 55
55
-
 56
56
-
 57
57
-
 58
58
-
 59
59
-
 60
60


in altre lingue
- English: WELZ WS1000E Owner's manual
- eesti: WELZ WS1000E Omaniku manuaal
Altri documenti
-
Kenwood TH-F6A Manuale utente
-
-
Kenwood TH-22E Manuale utente
-
-
-
Realistic PRO-2006 Manuale del proprietario
-
Kenwood TM-701A Manuale utente
-
-
Alinco DJ-X1 Manuale utente
-
Radio Shack 20-405 Manuale utente