Ryobi P620 Manuale utente

Categoria
Utensili elettrici
Tipo
Manuale utente
GB
18 VOLT SPEED SPRAYER
USER’S MANUAL 1
FR PISTOLET À PEINTURE 18 VOLT MANUEL D’UTILISATION 7
DE
18 VOLT HOCHGESCHWINDIGKEITS SPRÜHPISTOLE
BEDIENUNGSANLEITUNG 13
ES
PULVERIZADOR “SPEED SPRAYER” DE 18 VOLTIOS MANUAL DE UTILIZACIÓN 19
IT
SPRUZZATORE DA 18 VOLT MANUALE D’USO
25
NL
18 VOLT VERFSPUIT
GEBRUIKERSHANDLEIDING 31
PT PULVERIZADOR DE VELOCIDADE DE 18 VOLT MANUAL DE UTILIZAÇÃO 37
DK 18 V LYNMALERPRØJTE BRUGERVEJLEDNING 43
SE 18 VOLT SNABBFÄRGPISTOL INSTRUKTIONSBOK 49
FI 18 VOLTIN PIKASUMUTIN KÄYTTÄJÄN KÄSIKIRJA 55
NO 18 VOLT HURTIGSPRØYTE BRUKSANVISNING 61
RU СКОРОСТНОЙ РАСПЫЛИТЕЛЬ, 18 В êìäéÇéÑëíÇé èé ùäëèãìÄíÄñàà 67
PL PISTOLET NATRYSKOWY 18 V INSTRUKCJA OBSŁUGI 73
CZ 18 VOLTOVÁ ROZPRAŠOVACÍ PISTOLE NÁVOD K OBSLUZE 79
HU 18 VOLTOS FESTÉKSZÓRÓ HASZNÁLATI ÚTMUTA 85
RO PULVERIZATOR RAPID 18 VOLŢI MANUAL DE UTILIZARE 91
LV 18 V KRĀSU PISTOLE LIETOTĀJA ROKASGRĀMATA 97
LT 18 VOLTŲ PURKŠTUVAS NAUDOJIMO VADOVAS 103
EE KIIR-VÄRVIPRITS 18 VOLTI KASUTAJAJUHEND 109
HR RASPRŠIVAČ OD 18 V KORISNI»KI PRIRU»NIK 115
SI 18 VOLTNI HITRI RAZPRŠILNIK UPORABNIŠKI PRIROČNIK 121
SK 18 VOLTOVÝ RÝCHLY SPREJOV VOD NA POUŽITIE 127
GR ΨΕΚΑΣΤΗΡΑΣ ΤΑΧΥΤΗΤΑΣ 18 VOLT ΟΔΗΓΙΕΣ ΧΡΗΣΗΣ 133
TR 18 VOLT BOYA TABANCASI KULLANiM KILAVUZU 139
P620
GB ORIGINAL INSTRUCTIONS FR TRADUCTION DES INSTRUCTIONS ORIGINALES DE ÜBERSETZUNG DER ORIGINALANLEITUNG ES TRADUCCIÓN
DE LAS INSTRUCCIONES ORIGINALES IT TRADUZIONE DELLE ISTRUZIONI ORIGINALI NL VERTALING VAN DE ORIGINELE INSTRUCTIES PT TRADUÇÃO
DAS INSTRUÇÕES ORIGINAIS DK OVERSÆTTELSE AF DE ORIGINALE INSTRUKTIONER SE ÖVERSÄTTNING AV DE URSPRUNGLIGA INSTRUKTIONERNA
FI ALKUPERÄISTEN OHJEIDEN SUOMENNOS NO OVERSETTELSE AV DE ORIGINALE INSTRUKSJONENE RU ПЕРЕВОД ОРИГИНАЛЬНЫХ ИНСТРУКЦИЙ PL TŁUMACZENIE
INSTRUKCJI ORYGINALNEJ CZ PŘEKLAD ORIGINÁLNÍCH POKYNŮ HU AZ EREDETI ÚTMUTATÓ FORDÍTÁSA RO TRADUCEREA INSTRUCŢIUNILOR ORIGINALE LV TULKOTS NO
ORIĢINĀLĀS INSTRUKCIJAS LT ORIGINALIŲ INSTRUKCIJŲ VERTIMAS EE ORIGINAALJUHENDI TÕLGE HR PRIJEVOD ORIGINALNIH UPUTA SI PREVOD ORIGINALNIH NAVODIL SK
PREKLAD POKYNOV V ORIGINÁLI GR ΜΕΤΑΦΡΑΣΗ ΤΩΝ ΠΡΩΤΟΤΥΠΩΝ ΟΔΗΓΙΩΝ TR ORIJINAL TALIMATLARIN TERCÜMESI
Important!
It is essential that you read the instructions in this manual before operating this machine.
Attention !
Il est indispensable que vous lisiez les instructions contenues dans ce manuel avant la mise en service
de l’appareil.
Achtung!
Bitte lesen Sie unbedingt vor Inbetriebnahme die Hinweise dieser Bedienungsanleitung.
¡Atención!
Es imprescindible que lea las instrucciones de este manual antes de la puesta en servicio.
Attenzione!
Prima di procedere alla messa in funzione, è indispensabile leggere attentamente le istruzioni contenute
nel manuale.
Let op !
Het is van essentieel belang dat u de instructies in deze gebruiksaanwijzing leest vooraleer u dit toestel
in gebruik neemt.
Atenção!
É indispensável que leia as instruções deste manual antes de utilizar a máquina.
OBS!
Denne brugsanvisning skal læses igennem inden ibrugtagning.
Observera!
Det är nödvändigt att läsa instruktionerna i denna bruksanvisning innan användning.
Huomio!
On ehdottoman välttämätöntä lukea tässä käyttöohjeessa annetut ohjeet ennen käyttöönottoa.
Advarsel!
Det er meget viktig at du leser denne brukerveiledningen før du tar maskinen i bruk.
ÇÌËχÌËe! èee‰ Ò·ÓÍÓÈ Ë Á‡ÔÛÒÍÓÏ ËÌÒÚÛÏeÌÚ‡ ÌeÓ·ıÓ‰ËÏÓ ÔÓ˜eÒÚ¸ ËÌÒÚÛ͈ËË ËÁ ̇ÒÚÓfl˘e„Ó
ÛÍÓ‚Ó‰ÒÚ‚‡.
Uwaga!
Przed przystpieniem do uytkowania tego urzdzenia, naley koniecznie zapozna si z zaleceniami
zawartymi w niniejszym podrczniku.
Dležité upozornní!
Nepoužívejte tento pístroj díve, než si petete pokyny uvedené v tomto návodu.
Figyelem!
Feltétlenül fontos, hogy a jelen használati útmutatóban foglalt elírásokat az üzembe helyezés eltt
elolvassa!
Atenie!
Este esenial s citii instruciunile din acest manual înainte de operarea acestui aparat.
Uzmanību! Svarīgi, lai jūs pirms mašīnas darbināšanas izlasītu instrukcijas šajā rokasgrāmatā.
Dėmesio! Prieš pradėdami eksploatuoti šį prietaisą, svarbu, kad perskaitytumėte šiose instrukcijose pateiktus
nurodymus.
Tähtis! Enne trelli kasutama hakkamist tuleb käesolevas juhendis esitatud juhised kindlasti läbi lugeda.
Upozorenje! Neophodno je da proitate ove upute prije uporabe ovog ureaja.
Pomembno!
Pred uporabo tega stroja, obvezno preberite navodila iz tega prironika.
Dôležité! Pre prácou s týmto zariadením je dôležité, by ste si prečítali pokyny v tomto návode.
!
             
.
Dikkat!
Cihazn çaltrlmasndan önce bu klavuzda bulunan talimatlar okumanz zorunludur.
Subject to technical modifications / Sous réserve de modifications techniques /Technische Änderungen vorbehalten /
Sujeto a modificaciones técnicas / Con riserva di eventuali modifiche tecniche /Technische wijzigingen voorbehouden /
Com reserva de modificações técnicas / Med forbehold for tekniske ændringer / Med förbehåll för tekniska ändringar /
Tekniset muutokset varataan / Med forbehold om tekniske endringer / åÓ„ÛÚ ·˚Ú¸ ‚ÌeÒeÌ˚ ÚeıÌ˘eÒÍËe ËÁÏeÌeÌËfl /
Z zastrzeeniem modyfikacji technicznych / Zmny technických údaj vyhrazeny / A mszaki módosítás jogát fenntartjuk /
Sub rezerva modificaiilor tehnice / Paturam tiesības mainīt tehniskos raksturlielumus / Pasiliekant teisę daryti techninius pakeitimus /
Tehnilised muudatused võimalikud /Podloæno tehniËkim promjenama /Tehnine spremembe dopušene/
Technické zmeny vyhradené /     ! / Teknik deiiklik hakk sakldr
1
English
GB
FR DE ES IT NL PT DK SE FI NO RU PL CZ HU RO LV LT EE HR SI SK GR TR
SPECIAL SAFETY RULES
Q Wear ear protectors. Exposure to noise can cause
hearing loss.
Q Use auxiliary handle(s), if supplied with the tool.
Loss of control can cause personal injury.
Q Hold power tool by insulated gripping surfaces,
when performing an operation where the cutting
accessory may contact hidden wiring. Cutting
accessory contacting a «live» wire may make exposed
metal parts of the power tool «live» and could give the
operator an electric shock.
DESCRIPTION
1. 1 Liter quick-lock container
2. Round tip
3. Fan tip
4. Storage hook
5 . Lubricant bottle
6. Switch trigger
7. Cleaning brush
8. Battery pack (not included)
9. Replacement atomizer valve assembly
10. Depress latches to release battery pack
11. Lock
12. Unlock
13. Max fill line
14. Rotate spray tip 1/4 turn counterclockwise to loosen
15. Rotate adjusting arm 1/4 turn to change direction of
paint spray from horizontal to vertical
16. Horizontal spray direction
17. Vertical spray direction
18. Correct Spray Technique
19. Incorrect Spray Technique
20. Spray tip
21. Atomizer valve assembly
22. Locking nut
23. Pump housing assembly/container lid
24. Spring
25. Piston
26. Sprayer housing
27. Flexible suction tube and filter
28. Place Line Of Lubricant
29. Viscosity Cup
30. Measuring Cup
SPECIFICATIONS
Volage 18 V
Flow Rate 20.5 Liters/Hour
Container Size 1 Liter
Charger Input 230 V 60 Hz, AC only
Paint area per minute 4 m2
Paint area per liter 10 m2
3 x (1.8 m by 1.8 m)
fence panels
MODEL
BATTERY
PACK
(not included)
COMPATIBLE
CHARGER
(not included)
P620
BPL-1820
BPL-1815
BCL-1800
BCS618
BCL1418
BPP-1815
BPP-1815M
BPP-1817
BPP-1817M
BCA-180
BC-1815S
BC-1800
BCL-1800
BCS618
BCL1418
The paint sprayer can be used to apply the following
materials/applications:
1) Fencing
2) Furniture
3) Garden Furniture
4) Pesticides
5) Exterior Walls
6) Radiators
7) Garage Doors
8) Railings
9) Summer Houses
10) Stables
11) Outbuildings
12) Interior Walls
OPERATION
BATTERY PROTECTION FEATURES
This product will accept RYOBI One+ 18 V lithium-ion
battery packs and RYOBI One+ 18 V nickel-cadmium
battery packs.
RYOBI 18 V lithium-ion batteries are designed with
features that protect the lithium-ion cells and maximize
battery life. Under some operating conditions, these
built-in features may cause the battery and the tool it is
powering to act differently from nickel-cadmium batteries.
During some applications, the battery electronics may
signal the battery to shut down, and cause the tool to
stop running. To reset the battery and tool, release the
trigger and resume normal operation.
2
English
GB
FR DE ES IT NL PT DK SE FI NO RU PL CZ HU RO LV LT EE HR SI SK GR TR
OPERATION
NOTE: To prevent further shut down of the battery, avoid
forcing the tool.
If releasing the trigger does not reset the battery and
tool, the battery pack is depleted. If depleted, the battery
pack will begin charging when placed on the lithium-ion
charger.
TO INSTALL/REMOVE BATTERY PACK
See Figure 2.
WARNING
Always remove battery pack from your tool when
you are assembling parts, making adjustments,
cleaning, or when not in use. Removing battery
pack will prevent accidental starting that could
cause serious personal injury.
To install:
Q Place the battery pack in the tool. Align the raised rib
on the battery pack with groove in the battery port.
Q Make sure the latches on each side of the battery
pack snap in place and that the battery pack is
secured in the tool before beginning operation.
To remove:
Q Depress the latches on both sides of the battery pack
to release the battery pack and remove it from the
tool.
WARNING
Risk of fire or explosion. Spray area must be well-
ventilated and away from sparks or flames.
SELECTING PAINT
This is a highly versatile Spray System that can be used
with several different spray mediums including varnishes,
wood preservatives, enamels, as well as oil-based and
water-based paints. The viscosity of these mediums is
less than 135 DIN SEC. However some materials cannot
be sprayed so please check the recommendation of
the manufacturer before buying the paint. If a material
refers to brush application only then it usually cannot be
sprayed.
THIS UNIT CANNOT BE USED FOR TEXTURED
PAINTS. USE OF THESE MATERIALS WILL CAUSE
PREMATURE WEAR, WHICH WILL VOID THE
GUARANTEE.
TO OBTAIN THE BEST RESULTS FROM YOUR
SPRAY SYSTEM PLEASE READ THE INSTRUCTIONS
CAREFULLY BEFORE USE.
PREPARING FOR OPERATION
Preparation of the surface and thinning of the paint are
the two most important methods to be concerned with to
obtain the best results from your Spray System.
Preparing the Spray Surface
Ensure all surfaces are free from dust, dirt, rust and
grease. If necessary rub down with sandpaper, or similar.
Masking of areas is important to ensure you do not spray
those areas you wish to remain untouched.
THINNING OR DILUTING SPRAY MATERIAL
Your Spray System is supplied with a viscosity cup.
Viscosity is a technical term used to indicate if a product
is very thin or very thick. If thin, the viscosity is said to be
low, while if very thick the viscosity is said to be high.
Thinning is very important when spraying. Most paints are
supplied ready for brush application and may need to be
thinned (diluted) for spraying purposes.
Follow the manufacturers guide for thinning in
conjunction with a Sprayer. If in doubt please contact
the manufactures of the paint. The viscosity cup supplied
will help you determine the correct thickness of the paint.
Paint is “thinned” by adding the substance which the paint
is based upon. If a water based paint then water is added.
If oil based then white spirit.
IDEAL VISCOSITY
Water based paints and
emulsions 12 – 18 seconds
Oil based paints 12 – 18 seconds
Wood stains / Wood
preservatives No dilution
This Sprayer can be used with solutions that take
between 12 - 18 seconds to empty through the viscosity
cup. Dip the viscosity cup into the paint and fill up. Time
how long it takes for the viscosity cup to empty. See
Figure 10.
Using the above chart (or manufacture’s instructions) as a
guide, determine if the material requires further thinning,
if so then thin accordingly.
If the paint requires thinning, start with a 10% dilution of
the paint. For example:
Amount of spray
material (ml) 1000 2000 3000 4000
Paint thinner (ml) 100 200 300 400
3
English
GB
FR DE ES IT NL PT DK SE FI NO RU PL CZ HU RO LV LT EE HR SI SK GR TR
OPERATION
To do this, fill a 1 liter container with the required paint.
Then use the viscosity cup supplied to add 100 ml of
required thinner. Stir the contents thoroughly, measure
the viscosity using the viscosity chart above. If paint
requires further thinning then repeat the above step.
NOTE: Some paints are outside the ranges listed above.
Please contact our helpline for further information.
FILLING SPRAYER WITH PAINT/STAIN
See Figure 3-4.
Remove and discard any skin that has formed on top of
the paint or stain, then thoroughly mix the material in its
original container before beginning.
NOTE: Older containers of stain and paint may need to
be strained before use.
Q Remove the battery pack from the sprayer.
Q Remove the quick-lock container by twisting clockwise
so that the arrow on the container lines up with the
“unlock” symbol on the lid.
Q Fill the container with paint or stain as desired. Do not
fill above the max fill mark on the container.
Q Reinstall the container on the sprayer and twist
counterclockwise so that the arrow on the container
lines up with the “lock” symbol on the lid.
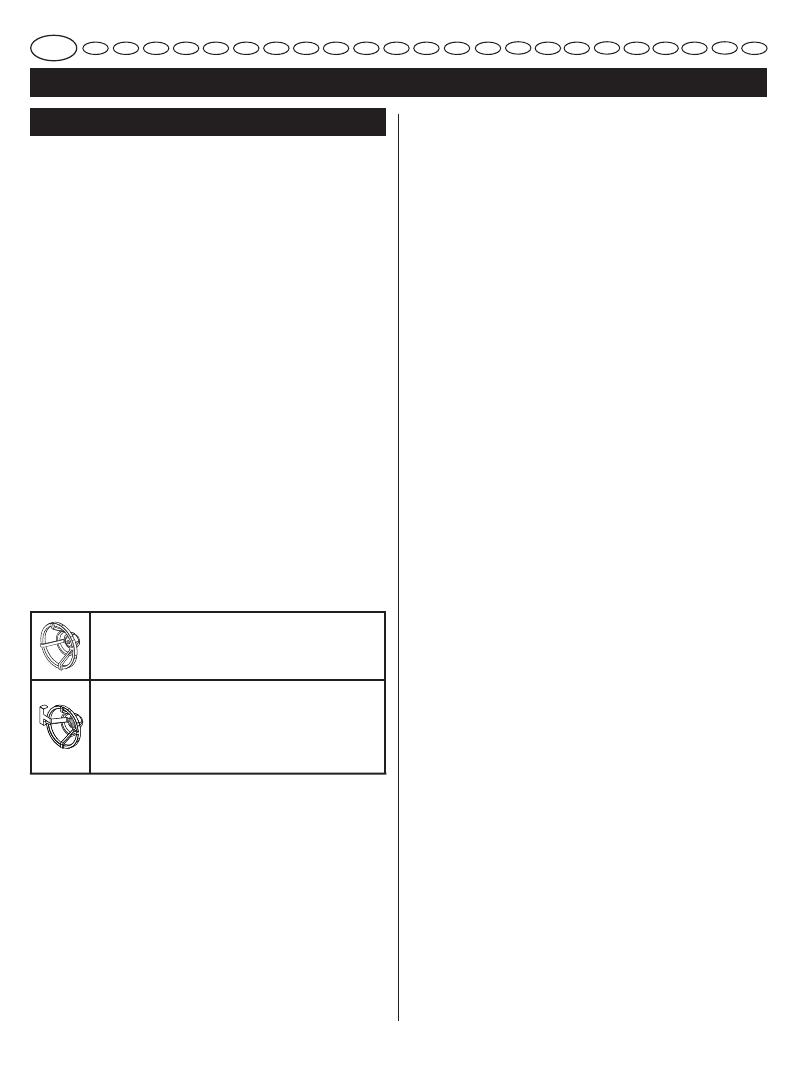
SELECTING THE PROPER SPRAY TIP
See Figure 5.
Use the Round Tip for thinner diluted paints
and stains. This tip sprays in a round pattern.
Ideal for outdoor fence spraying.
Use the Fan Tip for thicker or non diluted
paints. This tip sprays in a wide pattern,
giving a fine professional finish. It can be
adjusted from horizontal to vertical. Ideal for
indoor wall spraying.
To switch tips:
Q Remove the battery pack from the sprayer.
Q Remove the installed tip by turning it counter-
clockwise.
Q Install the desired tip and rotate clockwise to tighten
securely.
NOTE: The tip should be tightened securely by
hand. A too loose or overtightened tip may cause the
sprayer to leak or be damaged.
To change direction of fan tip from Horizontal to
Vertical:
Q Slightly loosen the fan tip by rotating counterclockwise
1/4 turn.
Q Rotate the adjusting arm 1/4 turn in the direction
needed to switch the direction of the tip spray.
Q While holding the adjusting arm in position, rotate the
fan tip clockwise until securely tightened.
OPERATING THE SPRAYER
See Figure 6-9.
Q Place a line of lubricant on the piston. To gain access
to the piston, follow the instructions in Cleaning the
Sprayer for Storage in the Maintenance section of
this manual.
Q Ensure surface to be painted is free of dust, dirt, and
grease.
Q Mask or cover any areas not intended to be painted
or stained. Be aware of wind that may cause your
paint or stain to spray into areas not desired. Always
use drop cloths or other cover to protect areas that
are not intended to be painted or stained.
Q Fill the quick-lock container with no more than 1 liter
of desired paint or stain.
NOTE: After every 4 refills of the quick-lock
container, add a line of lubricant to the piston. See
Cleaning the Sprayer for Storage for instructions
on disassembling the sprayer to gain access to the
piston.
Q Select the proper spray tip for desired spray pattern.
Q Install the battery pack in the sprayer.
Q Pull the switch trigger to spray paint. Release the
switch trigger to stop paint spray.
Q Practice spraying on a piece of scrap material to test
your spray pattern and to prime the pump before
beginning. If you cannot get a good spray pattern with
an even amount of paint or stain throughout, refer to
either the Dilution section or Troubleshooting section
later in this manual.
NOTE: The pump must be primed after every paint
change and at first use after storing. Spray paint at a
scrap surface for at least 20 seconds to prime.
Q To create an even coating over the entire surface:
• Move your arm at a steady rate of speed and make
sure to move your entire arm, not just your wrist.
• Keep the sprayer an even distance from the area
being sprayed, which should be between 20 to 25
cm from the tip of the sprayer to the surface being
sprayed.
• Depress the trigger to begin the spray off the
material you want to paint. Operate the sprayer in
straight horizontal or vertical strokes across the
surface being painted, then release the trigger off
the material to end the stroke.
NOTE: For spray quality consistency when using
thinner paints, it may be necessary to keep the
trigger depressed between strokes.
Q When finished, remove the battery pack, return any
unused paint or stain to its original container, and
thoroughly clean the sprayer.
4
English
GB
FR DE ES IT NL PT DK SE FI NO RU PL CZ HU RO LV LT EE HR SI SK GR TR
OPERATION
CAUTION
It is important to thoroughly clean the sprayer
after each use or when changing colors. Allowing
paint or stain to remain in an idle tool for an
extended period can cause its moving pieces to
seize up.
WARNING
Do not clean with any flammable liquids such
as paint stripper, paint remover, brush cleaner,
mineral spirits, lacquer thinner, turpentine,
acetone, gasoline, kerosene, etc.
WARNING
Do not use guns for spraying flammable
materials.
WARNING
Beware of any hazards presented by the material
being sprayed and consult the markings on
the container or the informatin supplied by the
manufacturer of the material to be sprayed,
including requirements for the use of personal
protective equipment.
WARNING
Do not spray any material where the hazard is
not known.
MAINTENANCE
WARNING
When servicing, use only identical replacement
parts. Use of any other parts may create a hazard
or cause product damage.
WARNING
Always wear eye protection with side shields.
Failure to do so could result in fluids entering
your eyes resulting in possible serious injury.
WARNING
Do not at any time let brake fluids, gasoline,
petroleumbased products, penetrating oils, etc.,
come in contact with plastic parts. Chemicals can
damage, weaken or destroy plastic which may
result in serious personal injury.
Do not abuse power tools. Abusive practices can damage
tool as well as workpiece.
WARNING
Do not attempt to modify this tool or create
accessories not recommended for use with this
tool. Any such alteration or modification is misuse
and could result in a hazardous condition leading
to possible serious personal injury.
CLEANING THE SPRAYER FOR STORAGE
See Figure 8-9.
When you’ve finished your project and are ready to
store the sprayer, a thorough cleaning and lubrication is
recommended.
Q Remove the battery pack from the sprayer.
Q Remove the paint container.
Q If you haven’t already done so, return any unused
paint or stain to its original container.
Q Fill the paint container with lukewarm water (following
the use of water based products) or Paint Thinner
(following the use of oil-based products).
Q Reinstall the paint container.
Q Install the battery pack in the sprayer.
Q Spray the solution onto a piece of cardboard or other
scrap material. Continue spraying until all the solution
is used.
Q Remove the battery pack from the sprayer.
Q Remove the paint container.
Q Remove the suction tube and filter.
Q Remove the installed spray tip by turning it
counterclockwise.
Q Remove the atomizer valve assembly.
Q Remove the locking nut by turning it counterclockwise.
Q Slide the pump housing assembly/container lid
forward off the sprayer
Q Pull the piston and spring off the pump housing.
Q Using the cleaning brush provided and the solution
determined by the last type of paint or stain sprayed,
clean all of the above parts thoroughly.
NOTE: Make sure to scrub thoroughly inside the
pump housing opening so that no paint or stain
material is left behind.
To reassemble:
Q Place a line of lubricant on the piston.
Q Slide the spring back onto the piston.
Q Insert the piston and spring assembly inside the back
of the pump housing.
Q Replace the pump housing assembly/container lid
into the sprayer.
Q Replace the locking nut on the motor housing by
pushing in while rotating clockwise to secure.
Q Insert the atomizer valve assembly into the pump
housing front opening.
5
English
GB
FR DE ES IT NL PT DK SE FI NO RU PL CZ HU RO LV LT EE HR SI SK GR TR
MAINTENANCE
Q Replace the spray tip and rotate clockwise to secure.
Q Reinstall the suction tube and filter.
Q Reinstall the paint container.
Q The sprayer is now ready to be stored.
REPLACING ATOMIZER VALVE ASSEMBLY
The atomizer valve causes the paint or stain material to
spin as it comes out of the sprayer. After 25 to 35 liters of
paint or stain, the atomizer valve may no longer produce
a good spray pattern and may need to be replaced.
To replace:
Q Remove the battery pack from the sprayer.
Q Rotate the spray tip counterclockwise and remove.
Q Remove the atomizer valve assembly and discard.
Q Install the new atomizer valve assembly.
Q Replace the spray tip and rotate clockwise to secure.
TROUBLESHOOTING
PROBLEM CAUSE POSSIBLE SOLUTION
Motor does not run. Battery is not charged. Charge battery.
Motor overheats.
Piston has seized up. Thoroughly clean the sprayer using long term storage
cleaning instructions in the Maintenance section of this
manual.
Continuous spray operation. Release trigger at the end of each pass to allow the
motor to cool.
Motor has a low hum but does
not spray. Piston has seized up.
Thoroughly clean the sprayer using long term storage
cleaning instructions in the Maintenance section of this
manual.
Motor seems to be running
properly but doesn’t spray.
Suction tube and fi lter are loose or
damaged. Reinstall or replace suction tube and fi lter as needed.
Atomizer valve is clogged or worn out. Clean or replace atomizer valve.
Material being sprayed is too thick. Follow material manufacturer’s directions and thin
material as needed.
Plugged spray tip or intake fi lter; worn
piston.
Thoroughly clean the sprayer and, if necessary, replace
piston, using storage cleaning instructions in the
Maintenance section of this manual.
Sprayed material is spitting or
globbing up.
Paint container volume is getting low. Refi ll paint container.
Material being sprayed is too thick. Follow material manufacturer’s directions to thin material
as needed.
Suction tube is loose. Reinstall suction tube securely.
Atomizer valve is clogged or worn out. Clean or replace atomizer valve.
Worn spray tip or piston. Clean or replace spray tip or piston.
Paint/stain spray overspray is
excessive.
Spray tip is too far from the surface
being sprayed.
Hold sprayer closer to the surface being
sprayed.
Paint/stain runs or sags on the
work surface.
Proper paint methods not being
observed. Refer to Operating the Sprayer earlier in this manual.
Paint/stain is leaking behind the
spray tip.
Spray tip is loose. Tighten spray tip.
Atomizer valve is worn or not positioned
properly. Replace or reposition atomizer valve as needed.
6
English
GB
FR DE ES IT NL PT DK SE FI NO RU PL CZ HU RO LV LT EE HR SI SK GR TR
ENVIRONMENTAL PROTECTION
Recycle raw materials instead of disposing
as waste. The machine, accessories
and packaging should be sorted for
environmental-friendly recycling.
SYMBOL
Safety Alert
V Volts
min-1 Revolutions or reciprocations per minute
Direct current
CE Conformity
Wear ear protection
Wear eye protection
Please read the instructions carefully before
starting the machine.
Recycle unwanted
Waste electrical products should not be
disposed of with household waste. Please
recycle where facilities exist. Check with your
Local Authority or retailer for recycling advice.
  • Page 1 1
  • Page 2 2
  • Page 3 3
  • Page 4 4
  • Page 5 5
  • Page 6 6
  • Page 7 7
  • Page 8 8
  • Page 9 9
  • Page 10 10

Ryobi P620 Manuale utente

Categoria
Utensili elettrici
Tipo
Manuale utente

in altre lingue

Documenti correlati