

2© MARMITEK

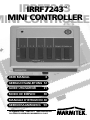
IRRF7243™ MINI CONTROLLER
SAFETY WARNINGS
• To prevent short circuits, this product should only be used inside and
only in dry spaces. Do not expose the components to rain or moisture.
Do not use the product close to a bath, swimming pool etc.
• Do not expose the components of your systems to extremely high
temperatures or bright light sources.
• Do not open the product: the device contains live parts. The product
should only be repaired or serviced by a qualified repairman.
• In case of improper usage or if you have opened, altered and repaired
the product yourself, all guarantees expire. Marmitek does not accept
responsibility in the case of improper usage of the product or when the
product is used for purposes other than specified. Marmitek does not
accept responsibility for additional damage other than covered by the
legal product responsibility.
• This product is not a toy. Keep out of reach of children.
• Only connect the adapter to the mains after checking whether the
mains voltage is the same as the values on the identification tags.
Never connect an adapter or power cord when it is damaged. In that
case, contact your supplier.
• Automatic switching devices provide comfort, but can also be
dangerous. They can surprise people or can ignite clothing hanging
over an electric heat source. Please be careful and take appropriate
measures to avoid accidents.
How does Marmitek X-10 work?
Marmitek X-10 components use the existing mains wiring to communicate
(using Marmitek X-10 signals). You can build a complete system using the
three different kind of components of the Marmitek X-10 System:
1. Modules: These components will receive Marmitek X-10 signals and
will switch or dim the attached lamp or appliance.
2. Controllers: These components will transmit Marmitek X-10 signals and
thus will control the Modules.
3IRRF7243
TM
ENGLISH

3. Transmitters: Wireless components like remotes. The signals of these
components will be received by a controller with transceiver
functionality (IRRF 7243, TM13 or console of a Marmitek
Security System).
The Transceiver will translate the signals into Marmitek X-10
signals on the power line.
Addresses
Up to a maximum of 256 different addresses can be preset. These are
subdivided into a so-called HouseCode (A to P incl.) and a UnitCode (1 to 16
incl.). The HouseCode can also be set on the controllers, so that the
controllers and modules become part of the same system. The address can be
set either using code dials or by pressing buttons, depending on the type of
module.
The Marmitek X-10 System uses standard commands, which control all units
with the same HouseCode at the same time (e.g. all lights on, all off, etc.).
Signal Range
Range of Marmitek X-10 signals over the Power Line and how to
increase the range.
The Marmitek X-10 System is based on power line communication. The
range of the Marmitek X-10 signals very much depends on the local
circumstances. On average the range is a cable length of 80 meters.
If you have difficulties with the range of your Marmitek X-10
signals, please pay attention to the following facts:
1. When more than one phase is used for your electrical system, it is
necessary to couple these phases for the Marmitek X-10 signals.
For coupling you can use FD10 Phase Couplers/Filters. You only need to
install a Phase Coupler/Filter when your wall outlets and light switches are
divided over more than one phase (more than one group is no problem).
For bigger buildings or longer distances we advice you to use an active
repeater instead of passive FD10’s.
2. It is possible that Marmitek X-10 signals are attenuated by devices and
lights which are connected to the power line. In a normal home situation
this effect is negligible (the Marmitek X-10 system is using active gain
control to eliminate the effects). However, it is possible that a particular
device in your house is attenuating the signals so much that the range of
Marmitek X-10 signals is decreased significantly. When you have range
problems, it is wise to try to locate the device which is attenuating the
4© MARMITEK

signals simply by unplugging devices from the power line, and testing the
differences in range for your Marmitek system. When e.g. your conclusion
is that e.g. your computer monitor is attenuating the signal, you can use a
FM10 Plug-in Filter between the power line and the monitor to eliminate
the effects.
Known devices which can cause attenuation are:
PC Monitors
PCs with heavy internal power supplies
Old Televisions
Copiers
Fluorescent Lights
Gas Discharge Lamps (Energy Saving Lamps)
3. Some (old) devices are able to disturb the signal by transmitting noise on
the power line. Because the Marmitek X-10 signals are transmitted on 120
kHz, only noise on or near this frequency will have influence on the range.
When you use a FM10 Filter to connect this device to the power line, the
noise will be filtered.
4. The Marmitek X-10 protocol has several mechanism to avoid modules to
be switched on or off by other sources than your Marmitek X-10 Controllers.
However, it is possible that the Marmitek X-10 signals are disturbed by e.g.
baby phones which are in TALK mode (continuous transmission). When
these kind of signals are present on the power line it is possible that the
Marmitek X-10 signals will not come through.
5. The mains do not stop at the front door of your home. Everything that is
attached to mains nearby your home can have influence on Marmitek X-10
signals (e.g. heavy machinery). If you think that your system is influenced by
devices out of your house, it is advisable to install FD10 Phase Coupler/Filter
on each phase entering the house. These filters will block signals coming
into or going out of your house, but will also match the impedance for the
mains. The FD10’s will not only filter but will also couple the phases (please
see 1).
5IRRF7243
TM
ENGLISH

USER MANUAL IRRF7243™ MINI CONTROLLER
TABLE OF CONTENTS
INTRODUCTION………………………………………………………………………….…… 6
1.PROPERTIES
…………………………………………………………………………….…… 6
2. INSTALLATION MINI CONTROLLER
………………………………………………... 7
3. SET UP OF REMOTE CONTROL
…………………………………………………….. 7
3.1 Operate via keyboard Mini Controller
…………………………………….. 7
3.2 Operating with the help of your infrared (IR) remote control
……. 7
3.3 Control with the help of your RF remote control
……….................... 9
4. FREQENTLY ASKED QUESTIONS
…………………………………………............... 9
5. TECHNICAL DATA
……………………………………………...................................... 11
INTRODUCTION
Congratulated on buying the Marmitek X-10 IRRF7243 Mini Controller.
With the Mini Controller you can operate your lighting and apparatus
remotely. You can place the Mini Controller anywhere in the house where
there is a plug. For instance in the living room or on your bedside table. You
can switch on and off lighting and apparatus with your universal infrared
(X-10 compatible) remote control, your X-10 RF (high frequent wall and
floor penetrating) remote control or the keys of your Mini Controller. So you
can switch off your children’s radio remotely or switch off your TV or night
lamp in your bedroom. You can also switch on lighting, pressing one
button, when you hear a suspected noise in the night or you can switch off
all apparatus.
1. PROPERTIES
Marmitek X–10 commands can be given in different ways:
1. Directly with the built-in key board (inclusive ‘dim’, ‘all lights on’, and ‘all
units off’ commands. You can operate max. 8 ‘X-10’ modules then. See
chapter 3.1.
2. With a universal infrared remote control which is X–10 compatible.
Depending on model: One for All, Philips Pronto, Thomson, Marmitek
etc. See chapter 3 and 3.2.
3. With any Marmitek X–10 IRRF remote control. In this case the Mini
Controller works as a Transceiver. See chapter 3 and 3.3.
6© MARMITEK

2. INSTALLATION MINI CONTROLLER
Installation of your Mini Controller is simple. Take the following steps:
1. You can choose one of the 16-letter-codes through the house code
screw wheel with the help of a small screw driver. Select the same letter
code as the ones on your modules and remote control (goes for RF
remote control and Philips Pronto).
2. Put the cable plug in a 230 VAC 50 Hz wall socket.
3. SET UP OF REMOTE CONTROL
To operate X–10 modules you have to set up the Home Automation IR code
on your X–10 remote control. This code can be found in the code book of
your remote control. (See the user’s manual of the remote control for
selecting a code for VCR, SAT etc.) Bear in mind that one of the modus
buttons of the remote control must be reserved for this Home Automation
code. For actual code lists of your Marmitek remote control, see
www.marmitek.com.
For others than X-10 remote control consult your user’s manual and the
code book of your remote control.
3.1 Operate via keyboard Mini Controller
1. Press the button corresponding to the Unicode of the module you want
to operate. Press ‘on’ to switch the module on; press ‘off’ to switch it
off. The choice switch decides which group of four unit codes will be
operated by the buttons of the keyboard ( 1-4 or 5-8 ).
2. To adjust ‘brightness’ press DIM/BRIGHT (this only functions when the
lamp is connected to a ‘lamp module’).
3. To switch on all lamps: press ‘all lights on’ button.
4. To switch off all modules: press ‘all units off’ button.
3.2 Operating with the help of your infrared (IR) remote control
To switch on/off a lamp or apparatus:
1. aim the remote control on the front of the Mini Controller.
2. press the mode button of your remote control reserved for Home
Automation.
3. select the number of the module via the numerical key board (1-9).
7IRRF7243
TM
ENGLISH

4. press Channel +/- to switch on/off the connected apparatus.
Dimming lamp:
1. aim the remote control on the front of the Mini Controller.
2. press the mode button of your remote control reserved for Home
Automation.
3. select the number of the module via the numerical key board (1-9).
4. press Volume +/- to dim the connected lighting.
Note: when using a Marmitek remote control use code 821 or 0821. To
operate modules with unit codes higher than 9, on most remote controls
the following buttons can be used:
1. ‘10’: press 0 button followed by on (Chan.+) off (Chan -) bright (Vol +)
or dim (Vol -).
2. ‘11’: press AV button followed by on (Chan.+) off (Chan -) bright (Vol +)
or dim (Vol -).
3. ‘12’: press (or record) button followed by on (Chan.+) off (Chan -)
bright (Vol +) or dim (Vol -).
4. ‘13’: press button followed by on (Chan.+) off (Chan -) bright (Vol +)
or dim (Vol -).
5. ‘14’: press button followed by on (Chan.+) off (Chan -) bright (Vol +)
or dim (Vol -).
6. ‘15’: press button followed by on (Chan.+) off (Chan -) bright (Vol +)
or dim (Vol -).
7. ‘16’: press ‘/- button followed by on (Chan.+) off (Chan -) bright (Vol +)
or dim (Vol -).
To switch on all lamps:
1. aim the remote control on the front of the Mini Controller.
2. press the mode button of your remote control reserved for Home
Automation.
3. press ‘power’ button of remote control.
To switch off all modules:
1. aim the remote control on the front of the Mini Controller.
2. press the mode button of your remote control reserved for Home
Automation.
8© MARMITEK

3. press Mute button of remote control.
Note: Using Philips Pronto
When ‘house code P’ is selected on the Mini Controller all commands of
the Pronto will be changed into an X-10 signal on the electric net. The
house code used is the same as the house code selected in the house code
screen of the Pronto. When pressing the buttons of the Mini Controller
‘house code P’ will be used.
3.3 Control with the help of your RF remote control
To dim lamps:
press the ‘on’ button with the number corresponding with the unit code of
the module (1 – 16) you want to dim followed by DIM or BRIGHT.
X-10 IRRF Universal remote control selected for RF use:
1. press the mode button of your remote control reserved for Home
Automation.
2. select the number of the module via the numbers key board (1 – 16).
3. press ‘volume’ +/- to dim.
Note: When on the Mini Controller ‘house code P’ is selected regardless of
the house code the commands of the remote control will be changed into a
X – 10 signal on the electric net. The house code used is the same as the
one selected on the remote control. When pressing the buttons of the Mini
Controller ‘house code P’ will be used.
4. FREQENTLY ASKED QUESTIONS
What is the reason for modules to switch on/off spontaneously?
It is possible that a Marmitek X-10 System is installed at one of your
neighbours using the same HouseCode. To solve this problem try to change
the HouseCode of your system, or have FD10 Phase Coupler/Filter installed
at your incoming mains.
9IRRF7243
TM
ENGLISH

My modules will not respond to my controller.
Make sure that the HouseCode on all Modules and Controllers are set to
the same HouseCode (A .. P).
My modules will not react to my remote / sensor.
When you use a remote or sensor, you should have at least one TM13
Transceiver or Marmitek Security Console installed in your house. These
components will translate the radio signals to the Marmitek X-10 signal on
the power line. Only one Transceiver should be installed for all remotes and
sensors set to the same House Code.
Am I able to increase the range of my remotes by using more
Transceivers?
Yes, you can use more than one TM13 Transceiver in your home when the
range of your remotes is not sufficient. The TM13 is using so called collision
detection to prevent signals to be disturbed when more than one TM13 is
transmitting. TM13’s will wait for a quite power line before transmitting
their data. To prevent your Marmitek X-10 System to become slow or to
prevent dimming from becoming less smooth, make sure that the TM13
units are placed as far away from each other as possible.
The IRRF7243 does not work with my remote control.
The house code of both the remote control and the rest of the components
must have the same letter code. Take care that your Marmitek remote
control is installed for use with the IRRF7243. The correct code is to find in
the code book of your remote control.
My IRRF7243 commands the wrong units.
Is the switch ( 1-4 5-8 ) in the wrong position?
Which remote controls can I use with the IRRF7243 ?
The following remote controls can be used with the IRRF7243:
Infrared remotes:
• Marmitek 4in1
• Marmitek 6in1
• Marmitek EasyControl4
10 © MARMITEK

• Marmitek EasyControl6
• Marmitek EasyTouch25
• Some Fox models
• Some One for All models
• Some Universal Remote models
• Some Logitech Harmony models
• Some Marantz RC models
• Philips Pronto (Marmitek X-10 IR codes for the Pronto can be found on
internet)
X-10 IRRF remotes:
• Marmitek 8in1 Silver
• Marmitek 8in1 Black
• Marmitek EasyControl8
• Marmitek EasyTouch35
• Marmitek PC Control
Do you still have questions? Please check out www.marmitek.com
for more information.
TECHNICAL DATA
Supply: 230 VAC/50Hz 2 Watt
Signal transmission: 2.5 Vpp at 120 kHz °æ 1 kHz
X-10 Key codes: All units off, all lights on, on, off, dim, bright
RF receiver Frequency: 433.92 MHz
Ambient temperature: - 10° C to + 50° C (operation)
- 20° C to + 70° C (storage)
Dimensions 115x95x30mm
11IRRF7243
TM
Environmental Information for Customers in the European Union
European Directive 2002/96/EC requires that the equipment bearing this symbol on
the product and/or its packaging must not be disposed of with unsorted municipal
waste. The symbol indicates that this product should be disposed of separately from
regular household waste streams. It is your responsibility to dispose of this and
other electric and electronic equipment via designated collection facilities appointed
by the government or local authorities. Correct disposal and recycling will help prevent potential
negative consequences to the environment and human health. For more detailed information
about the disposal of your old equipment, please contact your local authorities, waste
disposal service, or the shop where you purchased the product.
ENGLISH

IRRF7243 MINI CONTROLLER
SICHERHEITSHINWEISE
• Um Kurzschluss vorzubeugen, dieses Produkt bitte ausschließlich innerhalb des
Hauses und nur in trockenen Räumen nutzen. Setzen Sie die Komponenten
nicht Regen oder Feuchtigkeit aus. Nicht neben oder nahe eines Bades,
Schwimmbades usw. verwenden.
• Setzen Sie die Komponente Ihres Systems nicht extrem hohen Temperaturen
oder starken Lichtquellen aus.
• Das Produkt niemals öffnen: Das Gerät enthält Bestandteile mit
lebensgefährlicher Stromspannung. Überlassen Sie Reparaturen oder Wartung
nur Fachleuten.
• Bei einer zweckwidrigen Verwendung, selbst angebrachten Veränderungen
oder selbst ausgeführten Reparaturen verfallen alle Garantiebestimmungen.
Marmitek übernimmt bei einer falschen Verwendung des Produkts oder bei
einer anderen Verwendung des Produktes als für den vorgesehenen Zweck
keinerlei Produkthaftung. Marmitek übernimmt für Folgeschäden keine andere
Haftung als die gesetzliche Produkthaftung.
• Dieses Produkt ist kein Spielzeug. Außer Reichweite von Kindern halten.
• Schließen Sie den Netzadapter erst dann an das Stromnetz an, nachdem Sie
überprüft haben, ob die Netzspannung mit dem auf dem Typenschild
angegeben Wert übereinstimmt. Schließen Sie niemals einen Netzadapter oder
ein Netzkabel niemals an, wenn diese beschädigt sind. In diesem Fall nehmen
Sie Kontakt mit Ihrem Lieferanten auf.
• Automatisches Schalten ist nicht nur bequem, sondern kann auch Gefahr
bedeuten. So können Personen überrascht werden, oder kann Kleidung, die
über eine elektrische Wärmequelle hängt in Brand geraten. Passen Sie immer
auf und treffen Sie Maßnahmen um dies zu verhindern.
WIE FUNKTIONIERT MARMITEK X-10?
Die Komponenten aus dem Marmitek X-10 Sortiment kommunizieren mit
einander über das bestehende Lichtnetz (mittels Marmitek X-10 Signalen).
Das Sortiment besteht aus drei Teilen:
1. Module: Diese empfangen die Marmitek X-10 Signale und schalten
oder dimmen die angeschlossene Belastung.
12 © MARMITEK

2. Empfänger: Diese senden die Marmitek X-10 Signale und steuern somit
die Module.
3. Sender: Dies sind drahtlose Komponenten wie z.B.
Fernbedienungen. Die Signale der Sender werden von
einem Empfänger mit Transceiver-funktion (IRRF 7243,
TM13 oder die Zentrale eines Marmitek Alarmsystems)
empfangen.
Die Signale werden von dem Transceiver auf das Lichtnetz
gesetzt.
ADRESSIERUNG
Sie können maximal bis zu 256 verschiedene Adressen einstellen. Diese sind
aufgegliedert in einen so genannten HausCode (A bis einschl. P) und einen
UnitCode (1 bis einschl. 16). Der HausCode kann auch an den Reglern eingestellt
werden, sodass Regler und Module zum selben System gehören werden. Die
Adresse kann mithilfe von Kodierscheiben oder durch Tastenbedienung eingestellt
werden. Dies hängt vom Modultyp ab.
Das Marmitek X-10 System beinhaltet standardmäßige Befehle, wobei alle Units
innerhalb desselben HausCodes zugleich gesteuert werden (z.B. sämtliche Lampen
einschalten, alles ausschalten usw.).
REICHWEITE VON SIGNALEN
Reichweite von Marmitek X-10 Signalen über das Lichtnetz und diese
Reichweite vergrössern.
Das Marmitek X-10 System basiert auf der Kommunikation über das
bestehende Lichtnetz. Die Reichweite von Signalen über das Lichtnetz ist
sehr von der örtlichen Situation abhängig. Ein guter Durchschnitt der
Reichweite ist jedoch eine Kabellänge von 80 Metern.
Bei Problemen mit der Reichweite von Marmitek X-10 Signalen sind
folgende Faktoren wichtig:
1. Werden mehrere Phasen im Haus verwendet, kann es notwendig sein,
um diese Phasen für Marmitek X-10 Signale zu koppeln. Dieses Koppeln
kann geschehen, indem Sie einen FD10 Phasekoppler verwenden und wird
benötigt, wenn Steckdosen und Lampenanschlüsse tatsächlich über
mehrere Phasen verteilt sind (mehrere Gruppen sind kein Problem für die
Marmitek X-10 Signale). Für größere Gebäude advisieren wir die
Verwendung eines aktiven 3 Phasen Verstärkers statt eines Koppelfilters.
2. Marmitek X-10 Signale können durch Geräte und Lampen vermindert
werden, die auf das Lichtnetz angeschlossen sind. In normalen Hausanlagen
13IRRF7243
TM
DEUTSCH

ist dieser Effekt normalerweise zu verwahrlosen (das Marmitek X-10 System
verwendet u.a. eine aktive Verstärker um diesen Effekt zu eliminieren). Doch
kann es sein, dass ein einzelnes Gerät in Ihrer Wohnung stört. Wenn Sie
feststellen, dass Signale nicht immer gut durchkommen, dann können Sie
ein solches Gerät relativ einfach aufspüren, indem Sie die Stecker der
verdächtigen Geräte aus der Steckdose ziehen und erneut einen Test
durchführen. Stellen Sie fest, dass Ihr Problem gelöst ist, durch z.B. den
Stecker Ihres PC’s aus der Steckdose zu ziehen, dann können Sie das
Problem lösen, durch diesen PC-Monitor mit einem FM10 Steckerfilter zu
versehen. Dieser Steckerfilter sorgt dafür, dass die Signale nicht länger
durch das betreffende Gerät vermindert werden.
Wir empfehlen um folgende Geräte zu kontrollieren:
PC Monitore
PC’s mit relativ hoher Leistung
Alte TV-Geräte
Kopiermaschinen
Ein Raum mit vielen Neonlampen
3. Einige (alte) Geräte können Störsignale auf das Lichtnetz bringen,
wodurch die Marmitek X-10 Kommunikation gestört wird. Es handelt sich
dabei um Geräte, die auf einer Frequenz von 120 kHz stören. Diese 120
kHz werden vom Marmitek X-10 System als Sendefrequenz verwendet um
digitale Information über das Lichtnetz zu schicken. Geräte, die diese Art
Signale senden, können mit einem FM10 Steckerfilter versehen werden.
Hierdurch werden Störsignale das Lichtnetz nicht mehr erreichen.
4. Durch den Aufbau der Signale können andere (Stör)quellen die Module
des Marmitek X-10 Systems niemals aktivieren oder ausschalten. Wohl kann
das Signal durch z.B. Babyüberwachungsgeräte, die dauernd im
‘Sprechmodus’ stehen, gestört werden. Durch die Anwesendheit von diesen
Signalen ist es möglich, dass das Marmitek X-10 Signal nicht durchkommt.
5. Das Lichtnetz Ihrer Wohnung endet nicht bei der Haustüre. Alles was
außerhalb (in der Nähe) Ihrer Wohnung auf dem Lichtnetz angeschlossen
ist, kann die Marmitek X-10 Signale beeinflussen. Vor allem wenn Ihre
Wohnung an eine Fabrikhalle mit schweren Maschinen grenzt ist es
nützlich, um einkommende Phasen mit einem FD10 Phasenfilter zu
versehen. Diese Filter formen eine Blockade für alle Signale, die in Ihre
Wohnung wollen oder diese verlassen wollen, sorgen jedoch auch für eine
perfekte ‘Impedanzanpassung’ des Lichtnetzes Ihrer Wohnung. Sie bereiten
Ihre Wohnung auf Marmitek X-10 vor, indem Sie diese Module plazieren.
Hierdurch kuppeln Sie auch gleichzeitig die Phasen (siehe Punkt 1).
14 © MARMITEK

GEBRAUCHSANLEITUNG IRRF7243™
MINI CONTROLLER
INHALTSANGABE
EINFÜRUNG………………………………………………………………........………….…… 15
1. DATEN
……………………………………………………………..........…………..….…… 15
2. INSTALLIERUNG DES MINI CONTROLLERS
……………………………………... 16
3. EINSTELLEN IHRER FERNBEDIENUNG
…………………………..………..……….. 16
3.1 Anwendung der Tastatur des Mini Controllers
….....………………….. 16
3.2 Praktische Hinweise zu Ihrer Infrarot (IR) Fernbedienung
……......... 16
3.3 Praktische Hinweise zu Ihrer RF Fernbedienung
………....................... 18
4. HÄUFIG GESTELLTE FRAGEN
……......……………………………………............... 18
5. TECHNISCHE DATEN
……..…………………………………...................................... 20
EINFÜRUNG
Wir bedanken uns für Ihr Vertrauen in unsere Produkte mit dem Kauf von
den Marmitek X-10 IRRF7243 Mini Controller. Mit dem Mini Controller
können Sie Beleuchtung und Geräte in Entfernung steuern. Sie können
den Mini Controller überall ins Haus hinstellen wo eine Steckdose
vorhanden ist. Z.b. im Wohnzimmer oder oben auf ihrer Nachtkonsole. Sie
können Beleuchtung und Geräte ein- und ausschalten mit Ihrer universalen
Infrarot (X-10 kompatible) Fernbedienung, Ihren X-10 RF (Hochfrequenz
Radio Signal; sendet durch Boden und Mauern) Fernbedienung oder die
Tastatur von Ihren Mini Controller. So können Sie in Entfernung das
Radiogerät Ihrer Kinder ausschalten oder im Schlafzimmer Ihren Fernseher
oder eine Nachtlampe ausschalten. Auch ist mit nur einen Knopfdruck die
Beleuchtung ein zu schalten wenn Sie Nachts ein verdächtiges Geräusch
bemerken oder sind alle Geräte gleich ab zu schalten.
1. DATEN
Marmitek X-10 Kommandos können Sie unterschiedlich eingeben:
1. Direkt über die eingebaute Tastatur ( inklusive 'dim', 'all lights on' und
'all units off'' Kommandos ) und können Sie bis zu maximal 8 'X-10'
Modulen ansteuern. Siehe Kapitel 3.1.
2. Mit eine universale Infrarote Fernbedienung welche das 'X-10' Protokoll
unterstützt, abhängig vom Modell wie One for All, Philips Pronto, Thomson,
Marmitek usw. Siehe Kapitel 3 und 3.2.
3. Mit jeder Marmitek IRRF Fernbedienung. In diesem Fall arbeitet die Mini
Controller wie eine Sende- Empfänger. Siehe Kapitel 3 und 3.3.
15IRRF7243
TM
DEUTSCH

2. INSTALLIERUNG DES MINI CONTROLLERS
Installieren Ihres Mini Controllers ist einfach. Bitte folgen Sie diese Schritte:
1. Mit Hilfe eines kleinen Schraubenziehers können Sie mit das Haus Code
Stellrädchen einer der 16 Buchstabenkodierungen wählen. Wählen Sie
bitte den gleiche Buchstabenkodierung den Sie auch bei Ihren Modulen
und Fernbedienung gewählt haben (trifft zu auf RF Fernbedienungen
und den Philips Pronto).
2. Netzstecker an eine 230 Volt/50 Hz Steckdose anschließen.
3. EINSTELLEN IHRER FERNBEDIENUNG
Um 'X-10' fähige Modulen ansteuern zu können, müssen Sie den Mode
'Automation IR Code' bei Ihrer Fernbedienung aktivieren. Diese Code finden
Sie in das Codebuch für VCR,SAT usw. Bitte beachten Sie das Sie einer der
Modus tasten Ihrer Fernbedienung reservieren für diese Home Automation
Code. Für aktuelle Code Listen Ihrer Marmitek Fernbedienung besuchen Sie
uns bitte im Internet unter www.marmitek.com.
Für nicht taugliche 'X-10' Fernbedienungen sind die Gebrauchsanleitung
und Codelisten dieser Fernbedienungen zu beachten.
3.1 Anwendung der Tastatur des Mini Controllers
1. Drücken Sie die Taste mit der gleiche Nummer wie die UnitCode des
Moduls den Sie ansteuern wollen. Drücken Sie die 'ON' Taste um die
Module zu aktivieren und die 'OFF' Taste um diese Module wieder ab
zu schalten. Der Wahlschalter bestimmt welche Gruppe von 4 Unit
Codes angesteuert werden über die Tasten vom Tastenfeld (1 - 4 oder
5 - 8 ).
2. Um die Helligkeit zu regeln drücken Sie bitte die DIM/ BRIGHT Taste
( funktioniert nur wenn die Lampe angeschlossen ist an einen 'Lamp
Module'.
3. Um ALLE Lampen ein zu schalten: drücken Sie die 'ALL LIGHTS ON'
Taste.
4. Um ALLE Modulen aus zu schalten: drücken Sie die 'ALL UNITS OFF'
Taste.
3.2 Praktische Hinweise zu Ihrer Infrarot (IR) Fernbedienung
Um eine Lampe ein- oder aus zu schalten:
1. Positionieren Sie Ihren Fernbedienung so daß die Vorderseite der Mini
Controler angestrahlt wird.
2. Drücken Sie jetzt die 'Mode' Taste von Ihrem Fernbedienung die zuvor
16 © MARMITEK

die Home Automation Funktion zugewiesen bekommen hat.
3. Wählen Sie jetzt die Nummer des Moduls über die Tastatur ( 1 bis 9 ).
4. Drücken Sie die Channel + / - taste um die an den Module
angeschlossene Geräte ein- oder aus zu schalten.
Um eine Lampe dunkler oder heller zu schalten:
1. Positionieren Sie Ihren Fernbedienung so daßdie Vorderseite der Mini
Controler angestrahlt wird.
2. Drücken Sie die 'Mode' Taste Ihrer Fernbedienung welche Sie für Home
Automation autorisiert haben.
3. Wählen Sie jetzt die Nummer des Moduls über die Tastatur aus (1 bis 9 ).
4. Betätigen Sie die Volumen + / - Taste um die an die Module
angeschlossene beleuchtung dunkler oder heller zu schalten.
Bitte beachten ! Wenn Sie ein Marmitek Fernbedienung verwenden,
sollte Code 821 oder 0821 gewählt werden.
Um Modulen an zu steuern mit Unit Codes oberhalb 9, bitte verwenden Sie
folgender Tasten, die mann bei den meisten Fernbedienungen antrifft:
• '10' , drücken Sie die null (0) Taste und dann 'on' (Chan +), off (Chan -)
bright (Vol +) oder dim (Vol - ).
• '11' , drücken Sie die AV Taste und dann 'on' ( Chan +) , off ( Chan-),
bright ( Vol+) oder dim ( Vol-).
• '12' , drücken Sie die (oder ' record ') Taste und dann 'on' (Chan
+) ,off (Chan -), bright (Vol +) oder dim (Vol -).
• '13' , drücken Sie die Taste und dann 'on' ( Chan +) , off ( Chan-),
bright ( Vol+) oder dim ( Vol-).
• '14' , drücken Sie die Taste und dann 'on' ( Chan +) , off ( Chan-),
bright ( Vol+) oder dim ( Vol-).
• '15' , drücken Sie die Taste und dann 'on' ( Chan +) , off ( Chan-),
bright ( Vol+) oder dim ( Vol-).
• '16' , drücken Sie die ' /- Taste und dann 'on' ( Chan +) , off ( Chan-),
bright ( Vol+) oder dim ( Vol-).
Um alle Lampen ein zu schalten:
1. Positionieren Sie Ihren Fernbedienung so daßdie Vorderseite der Mini
Controler angestrahlt wird.
2. Drücken Sie die 'Mode' Taste Ihrer Fernbedienung welche Sie für Home
Automation autorisiert haben.
3. Drücken Sie die POWER Taste Ihrer Fernbedienung.
Um alle Modulen aus zu schalten:
1. Positionieren Sie Ihren Fernbedienung so daßdie Vorderseite der Mini
Controller angestrahlt wird.
2. Drücken Sie die 'Mode' Taste Ihrer Fernbedienung welche Sie für Home
17IRRF7243
TM
DEUTSCH

Automation autorisiert haben.
3. Drücken Sie die MUTE Taste Ihrer Fernbedienung.
BITTE BEACHTEN !
Falls der Philips Pronto vewendet wird: wenn der Mini Controller auf
Hauscode "P" eingerastet ist, werden alle Kommandos vom Pronto
umgewandelt in ein 'X-10' Signal ins Stromnetz. Die verwendete Hauscode
ist dann gleich an den Hauscode welche eingegeben wurde in das
Hauscode Bildschirm.
3.3 Praktische Hinweise zu Ihrer RF Fernbedienung
Um eine Lampe dunkler oder heller zu schalten:
Drücken Sie die EIN/ON Taste übereinstimmend mit der Unit Code der
Module ( 1 - 16) wovon die Beleuchtung dunkler/ heller werden soll.
Danach die Taste DIM oder BRIGHT betätigen.
Wenn X-10 IRRF Universal Fernbedienungen für RF genützt werden:
1. Drücken Sie die 'Mode' Taste Ihrer Fernbedienung welche Sie für Home
Automation autorisiert haben.
2. Wählen Sie die Nummer des Moduls über die Tastatur (1 - 16 ).
3. Drücken Sie die 'Volume' Taste +/ - um die angeschlossene Beleutung
dunkler oder heller zu bekommen.
BITTE BEACHTEN !
Wenn der Mini Controller auf "Hauscode P" gestellt worden ist, werden,
ungeachtet den Hauptcode, alle Kommandos der Fernbedienung
umgewandelt in ein 'X-10' Signal im Stromnetz. Die eingegebene Hauscode
ist in diesem Falle gleich an den Hauscode welche eingegeben worden ist
in die Fernbedienung. Wenn Sie die Tasten der Mini Controller drücken,
wird Hauscode "P" gesendet.
4. HÄUFIG GESTELLTE FRAGEN
Wie kommt es, dass einige Module spontan an- oder ausgehen?
Es kann sein, dass das installierte Marmitek X-10 System durch ein anderes
X-10 System in der Nachbarschaft beeinflusst wird. Da die Marmitek X-10
Signale über das Lichtnetz geschickt werden, ist es möglich, dass die Signale
ins Gebäude hineinkommen oder es verlassen. Diese Probleme können
gelöst werden, indem Sie einen anderen HausCode wählen (A bis P). Auch
können FD10 Phasenfilter plaziert werden, um ein- oder ausgehende
Signale zu blockieren.
18 © MARMITEK

Meine Module reagieren nicht auf meinen Sender.
Sorgen Sie dafür, dass alle verwendeten Module auf den gleichen
HausCode eingestellt sind (A bis P).
Meine Module reagieren nicht auf Fernbedienung oder Sensor.
Bei Verwendung von Fernbedienungen oder Sensoren müssen Sie ein TM13
Transceivermodul oder die Zentrale eine Marmitek Alarmanlage benutzen.
Diese setzen die Signale der Fernbedienungen oder Sensoren in das
Marmitek X-10 Lichtnetzprotokoll um. Auch bei mehreren Fernbedienungen
und Sensoren wird nur ein zentraler Empfänger benötigt.
Kann ich die Reichweite meiner Fernbedienung durch den Einsatz
von mehreren Transceivern vergrößern?
Ja. Sie können mehrere TM13 Transceiver in Ihrer Wohnung verwenden,
wenn die Reichweite Ihrer Fernbedienungen nicht ausreichend ist. Die TM13
sind mit sog. Kollisionserkennern ausgestattet, die verhindern, dass die
Signale gestört werden, wenn beide TM13 Module gleichzeitig auf dem
Lichtnetz senden. Um Ihr Marmitek X-10 System nicht unnötig zu verzögern
und um Schwankungen beim Dimmen zu verhindern müssen Sie dafür
sorgen, dass die TM13 Module so weit als möglich voneinander in der
Wohnung plaziert wurden.
Die IRRF7243 arbeitet nicht zusammen mit meiner Fernbedienung.
Die HausCode der Fernbedienung und die Rest der Componente sollten
denselben Ziffercode aufweisen. Bitte beachten Sie das Ihren Marmitek
Fernbedienung für gebrauch mit den IRRF7243 geschaltet ist. Die richtige
Code können Sie in das Codebuch Ihrer Fernbedienung finden.
Meine IRRF7243 schaltet falschen Modulen.
Steht der Wahlschalter ( 1 -4 / 5 - 8 ) richtig?
Welche Fernbedienungen arbeiten zusammen mit den IRRF7243?
Folgender Fernbedienungen können mit den IRRF7243 verwendet werden:
Infrarot (IR) Fernbedienung:
- Marmitek 4 in 1
- Marmitek 6 in 1
- Marmitek Easy Control4
- Marmitek Easy Control6
- Marmitek Easy Touch25
- Einige Fox Modelle
- Einige One for All Modelle
- Einige Universal Remote Modelle
- Einige Logitech Harmony Modelle
19IRRF7243
TM
DEUTSCH

- Einige Marantz RC Modelle
- Philips Pronto ( Marmitek X-10 IR Kodierungen für den Pronto finden Sie
im Internet )
X-10 IRRF Fernbedienung
- Marmitek 8 in 1 Silber
- Marmitek 8 in 1 Schwarz
- Marmitek Easy Control8
- Marmitek Easy Touch35
- Marmitek PC Control
Haben Sie noch immer Fragen? Besuchen Sie www.marmitek.com.
TECHNISCHE DATEN
Netzspannung: 230 VAC/ 50 Hz, 2 Watt
Signalübertragung: > 2,5Vpp bei 120 Khz +/- 1 Khz
RF Empfangfrequenz: 433.92 Mhz
Umgebungstemperatur: -10 bis +50 Grad (Betrieb)
-20 bis +70 Grad (Lagerung)
Abmessungen: 115x95x30 mm
20 © MARMITEK
Umweltinformation für Kunden innerhalb der Europäischen Union
Die Europäische Richtlinie 2002/96/EC verlangt, dass technische Ausrüstung, die
direkt am Gerät und/oder an der Verpackung mit diesem Symbol versehen ist nicht
zusammen mit unsortiertem Gemeindeabfall entsorgt werden darf. Das Symbol
weist darauf hin, dass das Produkt von regulärem Haushaltmüll getrennt entsorgt
werden sollte. Es liegt in Ihrer Verantwortung, dieses Gerät und andere elektrische
und elektronische Geräte über die dafür zuständigen und von der Regierung oder örtlichen
Behörden dazu bestimmten Sammelstellen zu entsorgen. Ordnungsgemäßes Entsorgen und
Recyceln trägt dazu bei, potentielle negative Folgen für Umwelt und die menschliche
Gesundheit zu vermeiden. Wenn Sie weitere Informationen zur Entsorgung Ihrer Altgeräte
benötigen, wenden Sie sich bitte an die örtlichen Behörden oder städtischen
Entsorgungsdienste oder an den Händler, bei dem Sie das Produkt erworben haben.
La pagina si sta caricando...
La pagina si sta caricando...
La pagina si sta caricando...
La pagina si sta caricando...
La pagina si sta caricando...
La pagina si sta caricando...
La pagina si sta caricando...
La pagina si sta caricando...
La pagina si sta caricando...
La pagina si sta caricando...
La pagina si sta caricando...
La pagina si sta caricando...
La pagina si sta caricando...
La pagina si sta caricando...
La pagina si sta caricando...
La pagina si sta caricando...
La pagina si sta caricando...
La pagina si sta caricando...
La pagina si sta caricando...
La pagina si sta caricando...
La pagina si sta caricando...
La pagina si sta caricando...
La pagina si sta caricando...
La pagina si sta caricando...
La pagina si sta caricando...
La pagina si sta caricando...
La pagina si sta caricando...
La pagina si sta caricando...
La pagina si sta caricando...
La pagina si sta caricando...
La pagina si sta caricando...
La pagina si sta caricando...
La pagina si sta caricando...
La pagina si sta caricando...
La pagina si sta caricando...
La pagina si sta caricando...
La pagina si sta caricando...
La pagina si sta caricando...
La pagina si sta caricando...
La pagina si sta caricando...
La pagina si sta caricando...
La pagina si sta caricando...
La pagina si sta caricando...
La pagina si sta caricando...
-
 1
1
-
 2
2
-
 3
3
-
 4
4
-
 5
5
-
 6
6
-
 7
7
-
 8
8
-
 9
9
-
 10
10
-
 11
11
-
 12
12
-
 13
13
-
 14
14
-
 15
15
-
 16
16
-
 17
17
-
 18
18
-
 19
19
-
 20
20
-
 21
21
-
 22
22
-
 23
23
-
 24
24
-
 25
25
-
 26
26
-
 27
27
-
 28
28
-
 29
29
-
 30
30
-
 31
31
-
 32
32
-
 33
33
-
 34
34
-
 35
35
-
 36
36
-
 37
37
-
 38
38
-
 39
39
-
 40
40
-
 41
41
-
 42
42
-
 43
43
-
 44
44
-
 45
45
-
 46
46
-
 47
47
-
 48
48
-
 49
49
-
 50
50
-
 51
51
-
 52
52
-
 53
53
-
 54
54
-
 55
55
-
 56
56
-
 57
57
-
 58
58
-
 59
59
-
 60
60
-
 61
61
-
 62
62
-
 63
63
-
 64
64


Marmitek IRRF7243 Manuale utente
- Tipo
- Manuale utente
- Questo manuale è adatto anche per
in altre lingue
- English: Marmitek IRRF7243 User manual
- français: Marmitek IRRF7243 Manuel utilisateur
- español: Marmitek IRRF7243 Manual de usuario
- Deutsch: Marmitek IRRF7243 Benutzerhandbuch
- Nederlands: Marmitek IRRF7243 Handleiding
Documenti correlati
-
Marmitek FM10 Manuale utente
-
-
Marmitek Marine Radio um7206 Manuale utente
-
Marmitek SS13 Manuale utente
-
-
Marmitek KR22 Manuale utente
-
-
-
-
Marmitek TM13 F Manuale utente