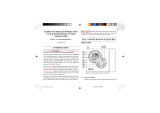
Oregon Scientific RRM968P Manuale utente
- Categoria
- Orologi da tavolo
- Tipo
- Manuale utente
Questo manuale è adatto anche per

1
GB
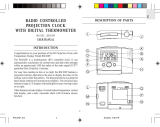
RADIO-CONTROLLED PROJECTION
CLOCK WITH DIGITAL TUNING
AM/FM RADIO
MODEL NO.: RRM968P/RRM968PU
USER MANUAL
INTRODUCTION
Congratulations on purchasing the radio-controlled projection clock
with digital tuning AM/FM radio RRM968P/RRM968PU.
The unit is a multi-functional radio-controlled clock. The RRM968P
- the Central Europe model - is designed to automatically synchronize
its current time and date when brought within an approximate
1500km radius of the radio signal generated from Frankfurt,
Germany (DCF77). The RRM968PU - the UK model - will do the
same when brought within range of the radio signal MSF-60
generated from Rugby, England.
This unit features a projection function that allows the user to display
either (1) the Current Time with Indoor Temperature or (2) the pre-
set Alarm time with Indoor Temperature on the ceiling, wall or any
other flat surface. In addition, the Alarm status will also be projected,
as indicated by the Alarm-on icon. The image projector is in a deep
red color which is easily seen in the dark.
This unit also comes with an digital tuning PLL (Phase Lock Loop)
AM/FM radio with 16 user-preset stations (8 for AM and 8 for FM
radio). A Radio Sleep-Timer (auto-off) function is also included.
Other features include EL back-light, indoor temperature display,
hourly-chime function, and user-selectable daily beep alarm with
8-minute snooze function or Wake-up-to-Radio Alarm.
KEY CONFIGURATION & FEATURES
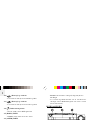
FRONT VIEW
A1. 3-Line LCD Display
- Displays the time, date, indoor temperature and radio function
RRM968PM_EN_R03 8/23/04, 10:39 AM1

2
GB
A2. [ ] Battery-low indicator
- Displays when clock battery is low
A3. [
] Battery-low indicator
- Displays when radio battery is low
A4. [
] Radio-reception icon
- Indicates reception strength of the clock radio signal
A5. [RADIO] BUTTON
- Press to turn the radio on or off
A6. [AM/FM] BUTTON
- Press to change between AM or FM radio band (when Radio
is On)
A7. [+ TUNING -] BUTTONS
- Press to increase / decrease the frequency setting
(when Radio is On)
- Press and hold for 2 seconds to trigger radio auto-search
function (when Radio is On)
A8. [STATION] BUTTON
- Press to toggle among the 8 preset stations in the respective
AM or FM radio band (when Radio is On)
- Press and hold for 2 seconds to enter the preset radio station
setting mode (when Radio is On)
A9. [VOL + & VOL -] BUTTONS
- Press to increase / decrease the volume
(when Radio is On)
- Press to increase / decrease the values in setting modes
- Press and hold for 2 seconds to activate / deactivate the auto-
reception of RF clock radio signal (When Radio is Off)
TOP VIEW
B1. [SLEEP] BUTTON
- Press to turn on the radio and activate the Sleep Timer function
- Press again to select the time period for the sleep-timer
(auto-off) feature: 15, 30, 60, 90 or 120 minutes
B2. [SNOOZE/ LIGHT] BUTTON
- Press to turn EL backlight and projection on for 5 seconds
- Press to change the projected image when projection is On
- Press to stop the alarm sound and activate the 8-minute
Snooze function (for Beep alarm only)
B3. [MODE] BUTTON
- Press to toggle among the calendar clock display modes
- Press and hold for 2 seconds to enter the clock setting mode
RRM968PM_EN_R03 8/23/04, 10:39 AM2

3
GB
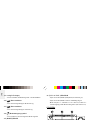
SIDE VIEW
C1. [ALARM ON/OFF] BUTTON
- Press to activate / deactivate the alarm
C2. [ALARM] BUTTON
- Press to enter alarm display
- Press and hold for 2 seconds to enter the alarm-time setting mode
C3. [PROJECTION ON
] BUTTON
- Slide to enable / disable continuous projection
(when Adapter is connected)
C4. HEADPHONE JACK
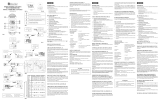
PROJECTION UNIT
D1. [180º ROTATION] BUTTON
- Press to flip the projected image horizontally
D2. [FOCUS] KNOB
- Rotate to adjust the focus of projection
D3. [IMAGE ROTATION] KNOB
- Rotate to turn the image 90º to the left or right
RRM968PM_EN_R03 8/23/04, 10:39 AM3

4
GB
BACK VIEW
E1. BATTERY COMPARTMENT
- Accommodates 4 x AA 1.5 V batteries
E2. EXTENDABLE ANTENNA
- External antenna for FM radio
E3. [RESET] BUTTON
- Press to return all settings to default values
E4. 4.5 V DC JACK WITH RUBBER COVER
- For AC power adapter installation
BATTERY INSTALLATION
This unit can be operated by batteries or AC power alone as well as
both together.
Using Battery
RRM968PM_EN_R03 8/23/04, 10:40 AM4

5
GB
Battery Installation:
1. Remove the battery compartment door by rotating it in the
direction of “ ” as shown
2. Insert 4 x AA 1.5V batteries in accordance to the polarities.
3. Press [RESET].
4. Replace the battery compartment door by rotating it back onto
the unit in the direction of “
”.
When the battery power level is low, the respective low battery
indicator [
] will light up. Replace the batteries or connect the
AC power adapter.
Please note if only the AC adapter is connected and no battery is
installed, the low battery indicator [
] for the clock will light
up.
Using AC Power
FEATURES
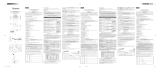
Section I — Radio-Controlled Calendar
Clock
ABOUT RADIO RECEPTION
After battery installation, the unit will automatically synchronize
its time and date with the radio signal when it is within reception
range.
When the unit is receiving a radio signal, the reception icon will
start to blink. The reception icon will show either strong or weak
reception depending on the strength of the radio signal. A complete
reception generally takes about 2 to 10 minutes.
When the reception is complete the reception icon will stop blinking. The
reception icon will show “
”for no reception or “ ” for successful
reception.
The antenna icon indicates the quality of reception.
STRONG
WEAK
NO RECEPTION
IN PROGRESS
RRM968PM_EN_R03 8/23/04, 10:40 AM5

6
GB
For best reception, place the unit away from other equipment that emit
radio frequency or microwave signals such as TVs, radios, PCs or
microwave ovens. Other causes for signal interference include electrical
power transmission tower and steel reinforced concrete construction.
HOW TO ENABLE OR DISABLE AUTO-
RECEPTION
To disable automatic radio signal reception, press and hold [VOL
-] for 2 seconds. The reception icon will disappear and the unit will
stop receiving radio signal.
To activate signal reception again, press and hold [VOL
+] for 2
seconds. The reception icon will start blinking
DISPLAY MODES SELECTION
Press [MODE] in the normal display mode to scroll through the
calendar clock display modes:
1. Clock with Seconds
---------------------------
Calendar/Indoor Temperature
2. Clock with Weekday
---------------------------------------------
Calendar/Indoor Temperature
3. Clock with Weekday
----------------------------------------------------------
-
Clock (2nd Zone-time)/Indoor Temperature
4. Clock with Weekday(2nd Zone-time)
----------------------------------------------------------
Calendar (2nd Zone-time)/Indoor Temperature
SETTING THE CLOCK AND
CALENDAR MANUALLY
When automatic radio reception is disabled, the main unit can be
set manually. Set the Clock and Calendar by following the
procedures below:
1. Press and hold [MODE] for 2 seconds. The 2nd Zone-time hour
offset will start flashing.
2. Enter the hour-offset by using [VOL +] or [VOL -]. Press
[MODE] to confirm the entry.
3. Follow the same procedure to set the 12/24-format, hour, minutes,
year, “mm:dd” or “dd:mm” calendar display format, month, day,
display languages and hourly chime on/off mode.
4. Press [MODE] to save the changes and exit the setting mode.
5. For the day-of-week you can select from 5 languages —English
(E), French (F), German (D), Italian (I) and Spanish (S).
RRM968PM_EN_R03 8/23/04, 10:40 AM6

7
GB
DISPLAYING AND SETTING THE
ALARM
This unit is equipped with a daily alarm. To view the preset alarm
time, press [ALARM].
To set alarm time:
1. Press and hold [ALARM] for 2 seconds in alarm display mode.
The hours will blink.
2. Enter the hour by using [VOL +] or [VOL -]. Press [ALARM]
to confirm.
3. The Minutes will then blink.
4. Enter the minutes by using [VOL +] or [VOL -]. Press
[ALARM] to confirm the entry.
5. The beep alarm [
] or radio alarm icon [ ] will blink.
6. Select the alarm-sounding mode by using [VOL +] or [VOL -].
Beep alarm is a 2-minute crescendo alarm. In Radio alarm mode,
the radio will activate and remain on for 2 hours unless manually
deactivated. Press [ALARM] to confirm.
7. If Radio alarm mode is chosen, the radio will automatically turn
on and the Radio Station Number will flash. Select the radio
station by using [STATION]. Please note that in this Radio
Alarm mode, manual tuning cannot be used to set the station.
Press [ALARM] to confirm.
8. The Volume will then flash. Again, select the radio volume by
using [VOL +] or [VOL -]. Press [ALARM] to confirm and
exit the setting mode. Press [RADIO] to turn the radio off.
Day-of-the-week Affichage du jour Wochentaganzeige
Giorno della settimana
Día de la semana Dia de Semana
Monday
Tuesday Wednesday Thursday
Friday
Saturday
Sunday
Lundi Mardi
Mercredi
Jeudi
Vendredi
Samedi
Dimanche
Montag
Dienstag Mittwoch
Donnerstag
Freitag
Samstag Sonntag
Lunedí
Martedí Mercoledí Glovedí Venerdí
Sabato
Domenica
Lunes Martes
Miércoles Jueves Viernes Sábado Domingo
Segunda Terça Quarta Quinta Sexta Sábado
Domingo
Language
Langues
Sprache
Lingue
Idiomas
Lingua
English
Anglais
Englisch
Inglese
Inglés
Inglês
French
Français
Französisch
Francese
Francés
Francês
German
Allemand
Deutsch
Tedesco
Alemán
Alemão
Italian
Italian
Italienisch
Italiano
Italiano
Italíano
Spanish
Espagnol
Spanisch
Spagnolo
Español
Espanhol
RRM968PM_EN_R03 8/23/04, 10:40 AM7

8
GB
BEEP ALARM
To activate / deactivate the alarm, press [ALARM ON/OFF ] when
the main unit is in Alarm display mode.
When Beep Alarm goes off the EL backlight and projection will
activate for 5 seconds. Press any key to silence the alarm.
When [SNOOZE/LIGHT] is pressed to stop the alarm sound (only
when Beep Alarm mode is selected), the alarm will go off again
after 8 minutes. To disable the snooze function, press [ALARM]
or [ALARM ON/OFF ] or press and hold [SNOOZE/LIGHT] for
3 seconds when alarm goes off.
Please note that the Radio, if active, will be temporarily interrupted
until the Beep Alarm is turned off.
RADIO ALARM
When the Radio Alarm is turned on, the Radio will be turned on for
2 hours. You can intervene by setting the time period for the Sleep
function by using [SLEEP] or simply turn off the radio at any time.
HOURLY CHIME FUNCTION
When the hourly chime function is on, “ ” will be displayed
and a beep will sound at the beginning of each hour. You can activate
or deactivate this function in the clock and calendar setting mode
(please refer to Section “SETTING THE CLOCK AND
CALENDAR MANUALLY”).
Section II - Digitally-tuned PLL AM/FM
Radio
HOW TO USE THE RADIO
All radio functions can only be operated when the Radio is on.
To turn on the radio press [RADIO]. The radio will return to the
last preset radio station and volume.
Press [AM/FM] to select the radio band. Use [+TUNING -] to locate
the desired radio frequency. Press once and the value will advance
by 1 step. Press and hold for 2 seconds to enter the Radio Channel
auto-search function.
Use [VOL +] or [VOL -] to increase or decrease the volume.There
are a total of 16 (0-15) - steps.
To toggle among the programmed stations, press [STATION].
To turn off the radio, press [ RADIO ].
AUTO-SEARCH FUNCTION
The unit is equipped with an Auto-Search function and can
automatically search for the next clear channel. To activate this
function, press and hold [+TUNING -] for 2 seconds. The value of
the frequency will keep increasing or decreasing until a clear channel
is found. Once Auto-Search is activated, you can release and stop
pressing the button.
RRM968PM_EN_R03 8/23/04, 10:40 AM8

9
GB
HOW TO PROGRAM A PRESET
STATION
This unit allows you to program up to 8 FM and 8 AM radio stations
in the memory. To do so:
1. First press [AM/FM] to select the AM or FM frequency.
2. Select a station number by pressing [STATION].
3. Locate the desired radio frequency by using [+TUNING -].
4. Press and hold [STATION] for 2 seconds to confirm and exit
the setting mode.
HOW TO USE THE SLEEP (AUTO-OFF)
FUNCTION
With this Sleep function, the radio will automatically switch off
after a pre-set period of time.
1. To set the sleep function, press [SLEEP]. “0 min” will be
displayed.
2. Press [SLEEP] again to select the period of time (120, 90, 60,
30 or 15 minutes)(when the function is activated the “Sleep”
icon will flash).
3. Wait for about 5 seconds and the sleep function will be activated
automatically.
Section III — Indoor Thermometer
DISPLAY OF INDOOR TEMPERATURE
Once batteries are installed into the main unit, it will start to detect
and display the indoor temperature. The temperature shown is in
degree Celsius (°C). The unit is capable of measuring temperatures
within the -5°C and +50°C range. If the temperature goes above or
below that, “HHH” or “LLL” will be displayed correspondingly.
Section IV — Projection
HOW TO USE THE PROJECTOR
The projector makes it easier for you to read the current time or
alarm time with alarm status and indoor temperature at night. To
use the feature,
1. Press [SNOOZE/LIGHT] to turn on the projector for 5 seconds.
The current time with alarm status and indoor temperature will
be projected onto the surface the lens is facing.
2. To view the preset alarm time instead of the current time, press
[SNOOZE/LIGHT] again.
RRM968PM_EN_R03 8/23/04, 10:40 AM9

10
GB
3. Adjust the projected image as below.
For continuous projection, you must connect the power adapter.
When the power adapter is connected to the unit, the projector
will be activated. To maintain projection, slide the [PROJECTION
ON ] switch to the “On” position.
To deactivate the feature, slide the switch back to the “Off” position.
it is recommended that to increase the life-time of the projection LED
you keep [ PROJECTION ON ] in the “off” position during
daytime.
Section V — Others
BACKLIGHT
To turn on the EL backlight of the LCD Display for 5 seconds press
[SNOOZE/LIGHT].
HOW TO RESET THE UNIT
Press [RESET] to reset the settings if the unit is malfunctioning
When [RESET] is pressed, all settings will return to the default
values and memory records will be erased.
PRECAUTIONS
This unit is engineered to give you years of satisfactory service if
you handle it carefully. Here are a few precautions.
1. Do not immerse the unit in water. If you spill liquid over it, dry
it immediately with a soft, lint-free cloth.
2. Do not clean the unit with any liquid containing alcohol,
detergent, abrasive or corrosive materials. They may scratch the
plastic parts and corrode the electronic circuit.
3. Do not subject the unit to excessive force, shock, dust,
temperature or humidity, which may result in malfunction,
shorter electronic life span, damaged battery and distorted parts.
Projector Features
Feature Effect Instructions
Adjustable
Projection
Flips an image to
maintain an upright
position
Rotates the
projection 180°
Tilt swivel projection
housing to alter the
direction of projection
FOCUS
Knob
Focuses
projection
Rotate Dial D2 to focus
projection
IMAGE
ROTATION
KNOB
Dial D3 rotates
projection
Rotation of projection
allows user to place
clock in a convenient
location
180
°
ROTATION
BUTTON
Button D1
horizontally flips
the projection
180°
RRM968PM_EN_R03 8/23/04, 10:40 AM10

11
GB
4. Do not tamper with the unit’s internal components. Doing so will
invalidate the warranty on the unit and may cause unnecessary damage.
The unit contains no user-serviceable parts.
5. Only use fresh batteries as specified in the user’s instructions.
Do not mix new and old batteries as the old ones may leak.
6. Always read the user’s instructions thoroughly before operating
the unit.
To maintain good performances, do not use the units in places which
are extremely hot, cold, dusty or humid. In particular, keep the
units away from:
- High Humidity areas (e.g., bathroom)
- Extreme hot areas (e.g., near a heater)
- Areas exposed to direct sunlight
Note on Listening with the headphones
A headphone jack is provided so that you can listen to the radio by
plugging a headphone into the jack. Remember to listen at a
moderate volume to avoid hearing damage.
SPECIFICATIONS
Radio-controlled Calendar Clock
Display format : 12- or 24-hour
Calendar : Month/Day/Second or Month/
Day/Day - of - Week
Day of Week in 5 languages:
English/ French/ German/ Italian
and Spanish
Alarm : Daily alarm in the following modes:
(i) Crescendo Beep Alarm with
8-minute Snooze function; or
(ii) Radio Alarm
Digital - tuning Radio
AM band Frequency : 531 – 1602 kHz
(Step frequency: 9KHz)
FM band Frequency : 87.5 – 108.0 MHz
(Step frequency: 0.05MHz)
Station : 16 station memories : 8 for
AM/ 8 for FM
Digital Volume : 16 - step (0-15)
Temperature Measurement
Main Unit
Indoor Temperature
Measuring Range : -5°C to +50°C (+23°F to +122°F)
Temperature Resolution : 0.1°C (0.2°F)
Power : - 4 x AA or 1.5 V batteries
- 4.5 V AC Adapter
(for continuous projection)
Weight : 379g (without battery)
Dimensions : 153 x 126 x 40mm ( L x W x H )
Note on Battery : Batteries included (if any) are for
demonstration purpose only. For
optimal daily-usage, application
of new alkaline batteries is
recommended.
RRM968PM_EN_R03 8/23/04, 10:40 AM11

12
GB
EC-DECLARATION OF CONFORMITY
This product complies with the essential requirements of Article 3
of the R&TTE 1999 / 5 / EC Directive, if used as intended and the
following standards have been applied:
Safety of information technology equipment
(Article 3.1.a of the R&TTE Directive)
Applied Standard EN 60950-1: 2001
Electromagnetic compatibility
(Article 3.1.b of the R&TTE Directive)
Applied Standards ETSI EN 301 489-1-3 (Ver.1.4.1) 2002-08
COUNTRIES RTTE APPROVAL COMPLIED
All EC countries, Switzerland
and Norway
CH
N
Efficient use of radio frequency spectrum
(Article 3.2 of the R&TTE Directive)
Applied Standards ETSI EN 300 220-3 (Ver.1.1.1) 2000-09
Additional information:
The product herewith complies with the requirements of the Low
Voltage Directive 73 / 23 / EC, the EMC Directive 89 / 336 / EC and
carries the CE marking accordingly.
Carmelo Cubito
Agrate Brianza (MI) / Italy January 2004
Manufacturer’s EU R&TTE Representative
ABOUT OREGON SCIENTIFIC
Visit our website (www.oregonscientific.com) to learn more about
Oregon Scientific products such as digital cameras; MP3 players;
children's electronic learning products and games; projection clocks;
health and fitness gear; weather stations; and digital and conference
phones. The website also includes contact information for our cus-
tomer care department in case you need to reach us, as well as fre-
quently asked questions and customer downloads.
We hope you will find all the information you need on our website,
however if you'd like to contact the Oregon Scientific Customer
Care department directly, please visit: www2.oregonscientific.com/
service/support OR Call 949-608-2848 in the US.
RRM968PM_EN_R03 8/23/04, 10:40 AM12

13
GB
TROUBLESHOOTING GUIDE - RRM968P/ RRM968PU
Trouble Possible Cause Remedy
Reception icon “Antenna” is not shown Auto-reception of clock radio signal has been
disabled
Enable this function by following the
instructions in the User’s Manual
Displayed Temperature data is different from other
measuring instruments
(1) The measurement method is different
(2) The area under evaluation is different or being
influenced by climate
(1) Use the same instruments with
consideration of the tolerance of readings
(1) Place the 2 instruments very closely for a
time period (no less then 30 minutes),
avoiding direct light and air movements
- Clock time is not correctly set; and/or
- Reception icon “Antenna” displays as “No
reception”
The clock radio signal is not received because:
- Electromagnetic interference exist, or the Main
Unit is located within reinforced concrete wall or
shadowed area location
- Orientation of placement is not at optimum
position for reception of clock radio signal
- Locate the Main Unit far from PC, mobile phone
etc and re-locate it near the window sill. Wait at
least 24 hours (note: during night-time signal is
less attenuate particularly after raining)
- The clock radio signal is searched at 1:00,
2:00, 3:00, 9:00, 15:00, 21:00 every day
automatically
- To force the signal reception please refer to
instructions in the User’s manual
The projection LED does not go on when AC/DC
adapter is installed
Projection-On button is slid to the Off-position Slide the Projection-On button to the On-
position
The unit is reset when SNOOZE button is pressed
Batteries are being discharged Replace with new batteries
Warning:
- For other cases not listed in the above, feel free to contact our help line
- Do not dissemble the unit. This will void the warranty
RRM968PM_EN_R03 8/23/04, 10:40 AM13

1
D
PROJEKTIONSFUNKUHR
MIT RADIO
MODELLNR.: RRM968P/RRM968PU
BEDIENUNGSANLEITUNG
EINFÜHRUNG
Herzlichen Glückwunsch zum Erwerb der Projektionsfunkuhr mit
AM/FM Radio RRM968P/RRM968PU.
Bei diesem Gerät handelt es sich um eine multifunktionelle
Uhr, welche die Zeit durch ein ausgestrahltes Funksignal
empfangen kann. Das RRM968P – das Modell für
Mitteleuropa – ist für die Synchronisation der aktuellen Uhrzeit
sowie des Datums ausgelegt, sobald die Uhr in den
Empfangsradius von ca. 1500 km des abgestrahlten Funksignals
aus Frankfurt, Deutschland (DCF77) gebracht wird. Das
RRM968PU - das UK Modell – verfügt über die gleiche Funktion,
wenn es in dem Empfangsbereich des MSF-60 Signals, das
von Rugby in England ausgestrahlt wird.
Dieses Gerät projiziert entweder (1) die aktuelle Uhrzeit mit
Innentemperatur oder (2) die eingestellte Alarmzeit mit
Innentemperatur an die Zimmerdecke oder an eine Wand. Darüber
hinaus wird der Alarmstatus, der durch das Alarmsymbol angezeigt
wird, ebenfalls projiziert. Die Projektion ist rot und kann im
Dunkeln gut gesehen werden.
Außerdem hat das Gerät ein digitales Tuning PLL („Phase Lock
Loop“) AM/FM Radio mit 16 Radiostationen, die vom Benutzer
eingespeichert werden können (8 für AM und 8 für FM Radio).
Ein Timer mit Radioschlummerfunktion (automatische
Abschaltung) ist ebenfalls eingebaut.
Weiterhin verfügt das Gerät über nützlichen Funktionen wie
Displaybeleuchtung, Innentemperaturanzeige, Stundensignal und
Alarmfunktion mit 8-minütiger Weckwiederholung oder
Aufwachen mit Radio.
HAUPTMERKMALE
ANSICHT VORNE
RRM968PM_D_R03 8/23/04, 10:41 AM1

2
D
A1. 3-zeiliges LCD Display
- Anzeige von Zeit, Datum, Innentemperatur und Radiofunktion
A2. [
] Batteriewechselanzeige
- Zeigt an, dass die Batterien der Uhr verbraucht sind
A3. [ ] Batteriewechselanzeige
- Zeigt an, dass die Batterien des Radios verbraucht sind
A4. [
] Funk-Empfangssymbol
- Zeigt die Stärke des empfangenden Funksignals an
A5. [RADIO] TASTE
- Taste drücken, um die Radiofunktion ein- oder auszuschalten
A6. [AM/FM] TASTE
- Taste drücken, um zwischen dem AM (MW) oder FM (UKW)
Frequenzband zu wählen (wenn das Radio eingeschaltet ist)
A7. [+ TUNING -] TASTEN
- Zur Einstellung der Frequenz nach oben oder unten (wenn
das Radio eingeschaltet ist)
- Taste für 2 Sekunden gedrückt halten, damit die automatische
Suchfunktion aktiviert wird (wenn das Radio eingeschaltet
ist)
A8. [STATION] TASTE
- Zum Wechseln zwischen den 8 einstellbaren Radiosendern
innerhalb der entsprechenden AM(MW) oder FM(UKW)
Frequenz (wenn das Radio eingeschaltet ist)
- Taste für 2 Sekunden gedrückt halten, um in den
Einstellmodus der Radiostationen zu gelangen (wenn das
Radio eingeschaltet ist)
A9. [VOL + & VOL -] TASTEN
- Zur Erhöhung/Senkung der Lautstärke (wenn das Radio
eingeschaltet ist)
- Zur Erhöhung/Senkung der Werte im Einstellmodus
- Taste für 2 Sekunden gedrückt halten, um den automatischen
Empfang des RF Funksignals zu aktivieren/deaktivieren
(wenn das Radio ausgeschaltet ist)
ANSICHT OBEN
B1. [SLEEP] TASTE
- Zum Einschalten des Radios und zur Aktivierung der
Schlummerfunktion
- Taste nochmals drücken, um die gewünschte Zeit für das Radio
zum Einschlafen mit Musik einzustellen (automatische
Abschaltung): 15, 30, 60, 90 oder 120 Minuten
B2. [SNOOZE/ LIGHT] TASTE
- Taste drücken, um die HiGlo Displaybeleuchtung
einzuschalten und die Projektion für 5 Sekunden zu aktivieren
RRM968PM_D_R03 8/23/04, 10:41 AM2

3
D
- Taste drücken, um das projizierte Bild während der Projektion
zu wechseln
- Taste drücken, um den Alarmton abzuschalten und die
8- minütige Weckwiederholung zu aktivieren (nur für Piep
Alarmton)
B3. [MODE] TASTE
- Um zwischen den Anzeigen des Kalenders zu wechseln
- Taste für 2 Sekunden gedrückt halten, um in den
Uhrzeiteinstellmodus zu gelangen
ANSICHT SEITE
C1. [ALARM ON/OFF] TASTE
- Um die Alarmfunktion ein- oder auszuschalten
C2. [ALARM] TASTE
- Zeigt die Alarmfunktion an
- Taste für 2 Sekunden gedrückt halten, um in den
Alarmeinstellmodus zu gelangen
C3. [PROJECTION ON
] TASTE
- Schiebeschalter, für die Dauerprojektion bzw. um die
Projektion auszuschalten (wenn der Adapter angeschlossen
ist)
C4. KOPFHÖRERBUCHSE
PROJEKTOR
D1. [180º ROTATION] TASTE
- Dreht das projizierte Bild horizontal
RRM968PM_D_R03 8/23/04, 10:41 AM3

4
D
D2. [FOCUS] DREHKNOPF
- Drehknopf betätigen, um das projizierte Bild zu fokussieren
D3. [IMAGE ROTATION] DREHKNOPF
- Rotation der Projektion um 90º nach links oder rechts
ANSICHT HINTEN
E1. BATTERIEFACH
- Fach für 4 UM-3 oder AA 1.5V Mignonbatterien (2 Stück für
Uhrfunktion und 2 Stück für Radiofunktion)
E2. AUSZIEHBARE ANTENNE
- Externe Antenne für FM Radio
E3. [RESET] TASTE
- Um alle Werte auf die Werkseinstellung zurückzusetzen
E4. 4.5 V DC BUCHSE MIT KUNSTSTOFFABDECKUNG
- Für das AC/DC Netzgerät
EINLEGEN DER BATTERIEN
Dieses Gerät kann mit Batterien oder nur durch den Anschluss an
einen AC Adapter bzw. beides zusammen betrieben werden.
Batteriebetrieb
RRM968PM_D_R03 8/23/04, 10:41 AM4

5
D
Batterieinstallation:
1. Batteriefachdeckel abnehmen und in Richtung der
Abbildung “ ” drehen
2. Vier UM-3 oder AA 1.5V Mignonbatterien unter Beachtung
der Polarität einlegen.
3. [RESET] Taste drücken.
4. Batteriefachdeckel wieder einsetzen und wieder zurück
in Richtung der Abbildung “
” drehen.
Wenn die Batterien verbraucht sind, erscheint die
Batteriewechselanzeige [
] auf. dem Display. In diesem Fall
bitte Batterien ersetzen oder Gerät an einen AC Adapter (Netzgerät)
anschließen.
Wenn der AC Adapter angeschlossen ist und keine Batterien
eingelegt sind, leuchtet die Batteriewechselanzeige [
]
für die Uhr ebenfalls auf.
Einsatz Netzgerät
FUNKTIONEN
Bereich I — Kalenderuhr mit
Funksignalübertragung
FUNKSIGNALEMPFANG
Nach dem Einlegen der Batterien, wird die Zeit und das Datum
automatisch mit dem ausgestrahlten Funksignal synchronisiert,
wenn sich das Gerät innerhalb des Empfangsbereichs des
Funksignals befindet.
Wenn das Gerät ein Funksignal empfängt, beginnt das
Empfangssymbol zu blinken. Das Empfangssymbol zeigt entweder
einen schwachen oder einen starken Empfang des Signals, je
nach Signalstärke, an. Der komplette Empfang dauert
normalerweise zwischen zwei und zehn Minuten.
Wenn der Empfang abgeschlossen ist, hört das Empfangssymbol
auf zu blinken.
Das Empfangssymbol zeigt “
”an, wenn kein Empfang möglich ist bzw.
“
” bei erfolgreichem Empfang des Signals.
Das Antennensymbol zeigt die Stärke des Signals an.
HINWEIS ZUM SCHUTZ UNSERER
UMWELT / BATTERIEENTSORGUNG
Batterien gehören nicht in den Hausmüll. Als Verbraucher sind Sie
gesetzlich verpflichtet, gebrauchte Batterien zurückzugeben. Sie
können Ihre alten Batterien bei den öffentlichen Sammelstellen in
Ihrer Gemeinde oder überall dort abgeben, wo Batterien der
betreffenden Art verkauft werden.
RRM968PM_D_R03 8/23/04, 10:41 AM5

6
D
Für einen optimalen Empfang, Gerät fern von anderen
Frequenzquellen wie Fernseher, Radio, PC oder Mikrowellengeräten
aufstellen. Weitere Störquellen sind elektrische Transformatoren
und/oder Stahlbetonbauten.
AKTIVIERUNG ODER
DEAKTIVIERUNG DES
FUNKEMPFANGS
Um den automatischen Empfang des Funksignals zu deaktivieren
[VOL -] Taste für 2 Sekunden gedrückt halten. Das Empfangssymbol
verschwindet und das Gerät beendet den Signalempfang.
Um den Signalempfang wieder zu aktivieren, [VOL
+] Taste für 2
Sekunden gedrückt halten. Das Empfangssymbol erscheint wieder
auf der Anzeige und beginnt zu blinken, d.h. der automatische
Empfang des Signals wurde aktiviert.
ANZEIGEMODI
[MODE] Taste im normalen Anzeigemodus drücken, um zwischen
den Anzeigemodi der Uhr zu wählen:
1. Uhrzeit mit Sekunden
---------------------------------------------------------
Kalender/Innentemperatur
2. Uhrzeit mit Wochentag
----------------------------------------------------------
Kalender/Innentemperatur
3. Uhrzeit mit Wochentag
----------------------------------------------------------
Uhrzeit (2. Zeitzone)/Innentemperatur
4. Uhrzeit mit Wochentag (2. Zeitzone)
----------------------------------------------------------
Kalender (2. Zeitzone)/Innentemperatur)
STARK
SCHWACH
KEIN EMPFANG
EMPFANG
RRM968PM_D_R03 8/23/04, 10:41 AM6

7
D
MANUELLE EINSTELLUNG VON
UHR UND KALENDER
Wenn der automatische Empfang des Funksignals deaktiviert ist,
kann die Uhrzeit und das Datum manuell eingestellt werden:
1. [MODE] Taste für 2 Sekunden gedrückt halten. Die Einstellung
für die zweite Zeitzone beginnt zu blinken.
2. Stundeneingabe mit den Tasten [VOL +] oder [VOL -].
vornehmen. Mit der [MODE] Taste die Eingabe bestätigen.
3. Zur Einstellung des Formats der 12/24 Stundenanzeige sowie zur
Eingabe der Stunden, Minuten, des Jahres, “MM:TT” oder “TT:MM”
Kalenderanzeige, Monat, Tag, Anzeigensprache und des
Stundensignals (ein/aus) im gleichen Schema verfahren.
4. Mit der [MODE] Taste die Änderungen speichern und den
Einstellmodus verlassen. Werden innerhalb der Minuteneingabe
Änderungen vorgenommen, beginnen die Sekundenwerte
von null.
5. Für die Anzeige des Wochentages kann zwischen 5 Sprachen
ausgewählt werden— Englisch (E), Französisch (F),
Deutsch (D), Italienisch (I) und Spanisch (S).
Day-of-the-week Affichage du jour Wochentaganzeige
Giorno della settimana
Día de la semana Dia de Semana
Monday
Tuesday Wednesday Thursday
Friday
Saturday
Sunday
Lundi Mardi
Mercredi
Jeudi
Vendredi
Samedi
Dimanche
Montag
Dienstag Mittwoch
Donnerstag
Freitag
Samstag Sonntag
Lunedí
Martedí Mercoledí Glovedí Venerdí
Sabato
Domenica
Lunes Martes
Miércoles Jueves Viernes Sábado Domingo
Segunda Terça Quarta Quinta Sexta Sábado
Domingo
Language
Langues
Sprache
Lingue
Idiomas
Lingua
English
Anglais
Englisch
Inglese
Inglés
Inglês
French
Français
Französisch
Francese
Francés
Francês
German
Allemand
Deutsch
Tedesco
Alemán
Alemão
Italian
Italian
Italienisch
Italiano
Italiano
Italíano
Spanish
Espagnol
Spanisch
Spagnolo
Español
Espanhol
RRM968PM_D_R03 8/23/04, 10:41 AM7
La pagina sta caricando ...
La pagina sta caricando ...
La pagina sta caricando ...
La pagina sta caricando ...
La pagina sta caricando ...
La pagina sta caricando ...
La pagina sta caricando ...
La pagina sta caricando ...
La pagina sta caricando ...
La pagina sta caricando ...
La pagina sta caricando ...
La pagina sta caricando ...
La pagina sta caricando ...
La pagina sta caricando ...
La pagina sta caricando ...
La pagina sta caricando ...
La pagina sta caricando ...
La pagina sta caricando ...
La pagina sta caricando ...
La pagina sta caricando ...
La pagina sta caricando ...
La pagina sta caricando ...
La pagina sta caricando ...
La pagina sta caricando ...
La pagina sta caricando ...
La pagina sta caricando ...
La pagina sta caricando ...
La pagina sta caricando ...
La pagina sta caricando ...
La pagina sta caricando ...
La pagina sta caricando ...
La pagina sta caricando ...
La pagina sta caricando ...
La pagina sta caricando ...
La pagina sta caricando ...
La pagina sta caricando ...
La pagina sta caricando ...
La pagina sta caricando ...
La pagina sta caricando ...
La pagina sta caricando ...
La pagina sta caricando ...
La pagina sta caricando ...
La pagina sta caricando ...
La pagina sta caricando ...
La pagina sta caricando ...
La pagina sta caricando ...
La pagina sta caricando ...
La pagina sta caricando ...
La pagina sta caricando ...
La pagina sta caricando ...
La pagina sta caricando ...
La pagina sta caricando ...
La pagina sta caricando ...
La pagina sta caricando ...
La pagina sta caricando ...
La pagina sta caricando ...
La pagina sta caricando ...
La pagina sta caricando ...
La pagina sta caricando ...
La pagina sta caricando ...
La pagina sta caricando ...
La pagina sta caricando ...
La pagina sta caricando ...
La pagina sta caricando ...
La pagina sta caricando ...
La pagina sta caricando ...
La pagina sta caricando ...
La pagina sta caricando ...
La pagina sta caricando ...
La pagina sta caricando ...
La pagina sta caricando ...
La pagina sta caricando ...
La pagina sta caricando ...
La pagina sta caricando ...
La pagina sta caricando ...
La pagina sta caricando ...
La pagina sta caricando ...
La pagina sta caricando ...
La pagina sta caricando ...
La pagina sta caricando ...
La pagina sta caricando ...
La pagina sta caricando ...
La pagina sta caricando ...
La pagina sta caricando ...
La pagina sta caricando ...
La pagina sta caricando ...
La pagina sta caricando ...
La pagina sta caricando ...
La pagina sta caricando ...
La pagina sta caricando ...
La pagina sta caricando ...
La pagina sta caricando ...
La pagina sta caricando ...
La pagina sta caricando ...
La pagina sta caricando ...
-
 1
1
-
 2
2
-
 3
3
-
 4
4
-
 5
5
-
 6
6
-
 7
7
-
 8
8
-
 9
9
-
 10
10
-
 11
11
-
 12
12
-
 13
13
-
 14
14
-
 15
15
-
 16
16
-
 17
17
-
 18
18
-
 19
19
-
 20
20
-
 21
21
-
 22
22
-
 23
23
-
 24
24
-
 25
25
-
 26
26
-
 27
27
-
 28
28
-
 29
29
-
 30
30
-
 31
31
-
 32
32
-
 33
33
-
 34
34
-
 35
35
-
 36
36
-
 37
37
-
 38
38
-
 39
39
-
 40
40
-
 41
41
-
 42
42
-
 43
43
-
 44
44
-
 45
45
-
 46
46
-
 47
47
-
 48
48
-
 49
49
-
 50
50
-
 51
51
-
 52
52
-
 53
53
-
 54
54
-
 55
55
-
 56
56
-
 57
57
-
 58
58
-
 59
59
-
 60
60
-
 61
61
-
 62
62
-
 63
63
-
 64
64
-
 65
65
-
 66
66
-
 67
67
-
 68
68
-
 69
69
-
 70
70
-
 71
71
-
 72
72
-
 73
73
-
 74
74
-
 75
75
-
 76
76
-
 77
77
-
 78
78
-
 79
79
-
 80
80
-
 81
81
-
 82
82
-
 83
83
-
 84
84
-
 85
85
-
 86
86
-
 87
87
-
 88
88
-
 89
89
-
 90
90
-
 91
91
-
 92
92
-
 93
93
-
 94
94
-
 95
95
-
 96
96
-
 97
97
-
 98
98
-
 99
99
-
 100
100
-
 101
101
-
 102
102
-
 103
103
-
 104
104
-
 105
105
-
 106
106
-
 107
107
-
 108
108
-
 109
109
-
 110
110
-
 111
111
-
 112
112
-
 113
113
-
 114
114
-
 115
115


Oregon Scientific RRM968P Manuale utente
- Categoria
- Orologi da tavolo
- Tipo
- Manuale utente
- Questo manuale è adatto anche per
in altre lingue
- français: Oregon Scientific RRM968P Manuel utilisateur
- español: Oregon Scientific RRM968P Manual de usuario
- Deutsch: Oregon Scientific RRM968P Benutzerhandbuch
- Nederlands: Oregon Scientific RRM968P Handleiding
- português: Oregon Scientific RRM968P Manual do usuário
Documenti correlati
-
 Oregon Scientific RRM968P/RRM968PU Manuale utente
-
Oregon RM313P Manuale del proprietario
-
Oregon Scientific RRM313P Manuale utente
-
 Oregon Scientific RM329P Manuale utente
-
 Oregon Scientific RM822 Manuale utente
-
 Oregon Scientific 983U Manuale utente
-
-
 Oregon Scientific JMR818WF Manuale utente
-
 Oregon Scientific RM822 Manuale utente
-
 Oregon Scientific NAW888T Manuale utente


