
CM15Pro
20219 / 20070827 • CM15PRO
TM
+ ACTIVEHOMEPRO
TM
ALL RIGHTS RESERVED MARMITEK ©
QUICK INSTALLATION GUIDE 3
KURZ INSTALLATIONSANLEITING 9
GUIDE D’INSTALLATION RAPIDE 15
BREVE MANUAL DE INSTRUCCIONES 21
GUIDA RAPIDA ALL’INSTALLAZIONE 27
KORTE INSTALLATIE HANDLEIDING 33
CM15Pro
™
Programmable Computer Interface
+ ActiveHomePro
™
Software
Visit
www.activehomepro.eu
for the latest
free software updates

2 © MARMITEK

CM15PRO™
Programmable Computer Interface+ ActiveHomePro™ Software
SAFETY WARNINGS
•
To prevent short circuits, this product should only be used inside and only in dry spaces. Do
not expose the components to rain or moisture. Do not use the product close to a bath,
swimming pool etc.
• Do not expose the components of your systems to extremely high temperatures or bright
light sources.
• In case of improper usage or if you have altered and repaired the product yourself, all guar-
antees expire. Marmitek does not accept responsibility in the case of improper usage of the
product or when the product is used for purposes other than specified. Marmitek does not
accept responsibility for additional damage other than covered by the legal product respon-
sibility.
• This product is not a toy. Keep out of reach of children.
• Do not open the product (battery panel excepted): the device may contain live parts. The
product should only be repaired or serviced by a qualified repairman.
• Keep batteries out of the reach of children. Dispose of batteries as chemical waste. Never
use old and new batteries or different types of batteries together. Remove the batteries when
you are not using the system for a longer period of time. Check the polarity (+/-) of the bat-
teries when inserting them in the product. Wrong positioning can cause an explosion.
• Only connect the adapter to the mains after checking whether the mains voltage is the same
as the values on the identification tags. Never connect an adapter or power cord when it is
damaged. In that case, contact your supplier.
• Automatic switching devices provide comfort, but can also be dangerous. They can surprise
people or can ignite clothing hanging over an electric heat source. Please be careful and take
appropriate measures to avoid accidents.
HOW DOES MARMITEK X-10 WORK?
Marmitek X-10 components use the existing mains wiring to communicate (using
Marmitek X-10 signals). You can build a complete system using the three different kind
of components of the Marmitek X-10 System:
1. Modules These components will receive Marmitek X-10 signals and will
switch or dim the attached lamp or appliance. Examples of these
modules are lamp modules and appliance modules. These are
available as build-in, micro, DIN rail and plug-in modules.
2. Controllers These components will transmit Marmitek X-10 signals and thus
will control the Modules.
3. Transmitters
Wireless components like remotes. The signals of these components will
be received by a controller with transceiver functionality (IRRF 7243,
3CM15Pro
™
+ ActiveHome Pro
™
ENGLISH

TM13 or CM15Pro). The Transceiver will translate the signals into
Marmitek X-10 signals on the power line.
ADRESSES
Up to a maximum of 256 different addresses can be preset. These are subdivided into a
so-called HouseCode (A to P incl.) and a UnitCode (1 to 16 incl.). The HouseCode can
also be set on the controllers, so that the controllers and modules become part of the
same system. The address can be set either using code dials or by pressing buttons,
depending on the type of module.
The Marmitek X-10 System uses standard commands, which control all units with the
same HouseCode at the same time (e.g. all lights on, all off, etc.).
SIGNAL RANGE
Range of Marmitek X-10 signals over the Power Line and how to increase
the range.
The Marmitek X-10 System is based on power line communication. The range of the
Marmitek X-10 signals very much depends on the local circumstances. On average the
range is a cable length of 80 meters.
If you have difficulties with the range of your Marmitek X-10 signals, please
pay attention to the following facts:
1. When more than one phase is used for your electrical system, it is necessary to cou-
ple these phases for the Marmitek X-10 signals. For coupling you can use FD10
Phase Couplers/Filters. You only need to install a Phase Coupler/Filter when your wall
outlets and light switches are divided over more than one phase (more than one
group is no problem). For bigger buildings or longer distances we advice you to use
an active repeater instead of passive FD10’s.
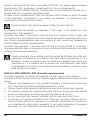
2. It is possible that Marmitek X-10 signals are attenuated by devices and lights which
are connected to the power line. In a normal home situation this effect is negligible
(the Marmitek X-10 system is using active gain control to eliminate the effects).
However, it is possible that a particular device in your house is attenuating the sig-
nals so much that the range of Marmitek X-10 signals is decreased significantly.
When you have range problems, it is wise to try to locate the device which is atten-
uating the signals simply by unplugging devices from the power line, and testing the
differences in range for your Marmitek system. When e.g. your conclusion is that
e.g. your computer monitor is attenuating the signal, you can use a FM10 Plug-in
Filter between the power line and the monitor to eliminate the effects.
Known devices which can cause attenuation are:
PC Monitors PCs with heavy internal power supplies
Old Televisions Copiers
Fluorescent Lights Gas Discharge Lamps (Energy Saving Lamps)
4 © MARMITEK

3. Some (old) devices are able to disturb the signal by transmitting noise on the power
line. Because the Marmitek X-10 signals are transmitted on 120 kHz, only noise on
or near this frequency will have influence on the range. When you use a FM10 Filter
to connect this device to the power line, the noise will be filtered.
4. The Marmitek X-10 protocol has several mechanism to avoid modules to be switched
on or off by other sources than your Marmitek X-10 Controllers. However, it is possi-
ble that the Marmitek X-10 signals are disturbed by e.g. baby phones which are in
TALK mode (continuous transmission). When these kind of signals are present on the
power line it is possible that the Marmitek X-10 signals will not come through.
5. The mains do not stop at the front door of your home. Everything that is attached
to mains nearby your home can have influence on Marmitek X-10 signals (e.g. heavy
machinery). If you think that your system is influenced by devices out of your house,
it is advisable to install FD10 Phase Coupler/Filter on each phase entering the house.
These filters will block signals coming into or going out of your house, but will also
match the impedance for the mains. Hereby make your house Marmitek X-10 com-
patible for these units. The FD10’s will not only filter but will also couple the phases
(please see 1).
USER MANUAL
Introduction
The Marmitek ActiveHomePro (AHP) software, in conjunction with the CM15Pro
Programmable Computer Interface, lets you control lights and appliances around your
home when used with Marmitek X-10 Modules.
The CM15Pro is a controller with Transceiver function: When it receives a command
from a wireless remote control (f.e. EasyControl8/EasyTouch35/KR21/SS13), it sends dig-
ital signals over your existing house wiring to Modules that receive the signals and exe-
cute the command.
You now have the power to control your whole home from your computer! With the
Marmitek AHP software and your X-10 Modules you can create schedules for your lights
and appliances, set up groups of commands for your daily life, and keep lights and appli-
ances off when they’re not in use. You can make AHP save the timer’s schedules and
Macro Events in the CM15Pro memory, so that they run even when your computer is
turned off! Use Marmitek AHP to make your home more comfortable, and more secure.
This Installation guide shows you how to install your CM15Pro and Marmitek AHP soft-
ware. Use this Installation guide as a guide to get you started, but be sure to read the
help information after installation.
5CM15Pro
™
+ ActiveHome Pro
™
ENGLISH

CONTENTS
1x CM15Pro Programmable Computer Interface
1x USB Cable
1x ActiveHomePro installation CD
1x Installation guide
1x 9 Volt 6LR61 alkaline block battery
1x Metal bracket
1x Antenna sleeve
SYSTEM REQUIREMENTS
Windows based Personal Computer
Available USB port
CD ROM or DVD player
Windows XP or Windows Vista operating system
HARDWARE SETUP AND SOFTWARE INSTALLATION
Please read through these installation steps completely before you start to
install your AHP software.
Please install the Marmitek AHP software before you plug in the CM15Pro!
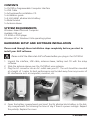
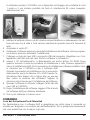
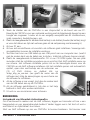
1. Unpack the interface, USB cable, antenna sleeve, battery and CD with the setup
software.
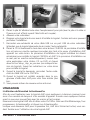
2. Slide the antenna sleeve over the CM15Pro’s wire antenna.
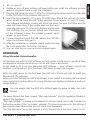
3. Plug the AC connector into an AC outlet near your PC. The unit should be mounted
at a height of 1 meter for best performance and located away from any sources of
RF interference such as computers, monitors, etc.
4. Open the battery compartment and insert the 9V alkaline block battery in the bat-
tery compartment (for retaining the time of day if there’s a power outage). Respect
the polarity. Replace the cover.
6 © MARMITEK

5. Turn on your PC.
6. Disable or turn off your antivirus software before you install the software as some
antivirus programs interfere with the installation.
7. Plug the USB cable into your PC (Wait for connecting the other end of the USB cable
to the CM15Pro till the software tells you to.)
8. Insert the ActiveHomePro CD in your CD-ROM drive. After a few seconds the instal-
lation should start and the AHP Setup windows should appear on your PC screen.
The software installation process will install the driver for your CM15Pro and the
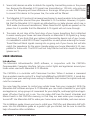
main AHP Application. If the installer does not start auto-
matically, open your CD drive using Explorer and double-
click on Setup_ahp_eu_xxx.exe. (where xxx is the version
of the software) Follow the installer prompts which
appear on your screen.
9. Connect the other end of the USB cable to the CM15Pro
when the software tells you to.
10. After the installation is complete, please review the Help
file in the application for further assistance.
11. You can now turn on your anti-virus program again.
OPERATION
Using Marmitek ActiveHomePro
To familiarize you with the AHP software, we will explain shortly how to operate a lamp
and appliance module and what you can do with macros and timers.
All you need to do is run your Marmitek AHP software — your software controls the
Interface. Use the entry in your Windows Start Menu to open the program.
When the AHP opens for the first time, the AHP Intro Wizard will start to make you
familiar with the software.
When you have finished the AHP Intro Wizard, it has loaded a standard profile and will
show a graphical representation of a Lamp Module and Appliance Module as well as 2
sample Macros.
You can always start the AHP Intro Wizard again by going to Help, Run Intro
Wizard….
The Lamp Module has been named "My Lamp Module" and the Appliance Module is
named "My Appliance."
"My Lamp Module" is already set to address A1 (HouseCode A, Unit Code 1 located on
the bottom center of the "on screen" module). This should correspond to the setting of
the physical Lamp Module that you will install (sold separately).
The "My Appliance" on screen module is set to HouseCode A and Unit Code 2 to cor-
7CM15Pro
™
+ ActiveHome Pro
™
ENGLISH

respond to the setting of the physical Appliance Module that you will install (sold sepa-
rately).
Make sure the Address Dials on the face of the Modules are set correctly. The
red dial should be set to A on both Modules. The black dial on the Lamp Module
should be set to 1 and the black dial on the Appliance Module should be set to
a 2. If they are not set correctly, you can reset the dials with a small screw-driv-
er (anything small enough to fit the slot in the dials).
LAMP MODULE LM12 (sold separately)
To control a lamp using AHP, follow these steps.
Please read through these installation steps completely before you start to install a Lamp
Module.
1. Select a nearby lamp, one that uses a standard light bulb, and make sure its on/off
switch is switched on.
2. Unplug the lamp from the wall outlet and plug it into the Lamp Module.
3. Plug the Lamp Module into a nearby AC outlet. If this outlet is controlled by a wall
switch, make sure the wall switch is turned on.
4. If you have not already done so, start your AHP software by double clicking on the
AHP icon.
5. Using your mouse, click the switch of "My Lamp Module" as shown on your com-
puter screen. There may be a delay of one or two seconds from the time you click
the "on screen" module switch and when the light actually turns on. You can also
dim the lamp by moving the slide switch up and down.
APPLIANCE MODULE AM12 (sold separately)
Controlling an appliance is just as easy!
Please read through these installation steps completely before you start to install an
Appliance Module.
1. Select a small appliance, such as an AC powered radio, and make sure its on/off
switch is switched on.
2. Unplug the appliance from the wall outlet and plug it into the Appliance Module.
3. Plug the Appliance Module into a nearby AC outlet. If this outlet is controlled by a
wall switch, make sure the wall switch is turned on.
4. If your AHP software is not running, start it by double clicking on the AHP icon.
5. Using your mouse, click the switch of "My Appliance" as shown on your computer
screen. There may be a delay of one or two seconds from the time you click the "on
screen" module switch and when the appliance actually turns on.
Timers
You can schedule each of your Modules to turn on or off any time by clicking on the
small clock at bottom left hand side of your "on screen" modules. If you have trouble
8 © MARMITEK

scheduling modules, check the on-line helps for details on how to schedule events (turn-
ing Modules on or off).
Macros
You can also define your own automated Macros for the lights and appliances in your
home!
Macros are a useful way to group commands for your X10 modules. If you have lights
and appliance that you frequently use in similar ways, you can easily turn them into a
macro. You can tell a macro only to be executed when specific conditions are true. F.e.:
the outdoor lamp should only turn on when motion is detected ánd it is dark outside.
Included with your AHP software are two sample macros: Sample Macro 1 and Sample
Macro 2. These 2 sample Macros show up as "on screen" modules also. Click on the
Edit button located on the "on screen" macro to get an idea of what you can do with
macro.
Sample Macro 1 with House Code/Unit Code of address of A3-On will be executed
when the command A3-On is received.
Sample Macro 2 with House Code/Unit Code of address A3-Off will be executed when
the command A3-Off is received.
Again, check the on-line helps for details on how setup macro.
Save changes in the CM15Pro
AHP will automatically ask you if you want to save your data to the CM15Pro when
you've made changes, before you close the program. If you want to save your changes
to the interface immediately, use the Tools menu and choose "Download Timers and
Macros." To save changes on the CM15Pro, you temporarily have to connect the
CM15Pro to your computer (with the USB cable supplied). When the download is com-
plete, you'll get a message telling you it's done.
When the download is complete, you can switch of your PC and disconnect the USB
cable. The adjustments, timers and macros will be saved in the CM15Pro.
FREQUENTLY ASKED QUESTIONS
Do I always have to leave my computer on to make the Timers and Macro’s
work?
No, you can make ActiveHomePro save the timer’s schedules and Macro Events in the
CM15Pro computer module memory, so that they run even when your computer is
turned off.
Do Marmitek ActiveHomePro and CM15Pro work with all my existing X-10
modules and witches?
Absolutely. ActiveHomePro and the CM15Pro are using the Marmitek X-10 protocol.
9CM15Pro
™
+ ActiveHome Pro
™
ENGLISH

Is there a Software Developers Kit (SDK) for Marmitek ActiveHomePro?
Yes there is. Use it to develop your own applications that work with Marmitek
ActiveHomePro. Go to www.activehomepro.eu for more information on the Marmitek
ActiveHomePro SDK.
Does Marmitek ActiveHomePro need a separate transceiver (TM13 or
IRRF7243)?
No. The CM15Pro has a built-in transceiver that constantly monitors all 256 X-10
addresses.
How many lights and appliances can I control using X-10?
X-10 can control up to 256 unique addresses (combination of 16 house codes and 16
units codes). However, each address can have an unlimited number of modules. This
means you could set three lamps, with lamp modules, in the living room to use the same
X-10 address and they will a respond to Marmitek ActiveHomePro at the same time. This
is particularly useful for holiday decorative lighting allowing you to control many differ-
ent electrical decorations using a single X-10 command.
What is the reason for modules to switch on/off spontaneously?
It is possible that a Marmitek X-10 System is installed at one of your neighbors using the
same House Code. To solve this problem try to change the House Code (A…P) of your
system, or have FD10 Phase Coupler/Filter installed at your incoming mains.
My modules will not respond to my controller.
Make sure that the HouseCode on all Modules and Controllers are set to the same
HouseCode (A .. P).
Am I able to increase the range of my remotes by using more Transceivers?
Yes, you can use more than one TM13 Transceiver in your home when the range of your
remotes is not sufficient. Both the TM13 and CM15Pro use so called collision detection
to prevent signals to be disturbed when more than one transceiver is transmitting. To
prevent your Marmitek X-10 System to become slow or to prevent dimming from
becoming less smooth, make sure that the TM13 units are placed as far away from each
other as possible.
Do you still have questions? Please check out www.marmitek.com for more
information.
10 © MARMITEK

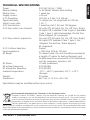
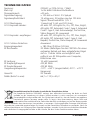
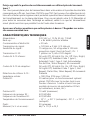
TECHNICAL SPECIFICATIONS
Power: 230 VAC 50 Hz, 7 Watt
Backup battery: 1x 9V 6LR61 alkaline block battery
Backup time: 1 week typ
Supply current : <30 mA
X-10 Powerline: 120 kHz ± 2 kHz / 2.5 Vpk-pk
Signal sensitivity: 15 mVpp min, 50 mVpp max at 120 kHz
Signal / noise ratio 1,35 : 1
X-10 transmission: 1 pulse burst at 0, 60 and 120 degrees.
X-10 Key codes it can transmit: All units Off, All Lights On, On, Off, Dim, Bright,
All Lights Off, Extended Code 1 type 0, Extended
Code 1 type 3, Hail Acknowledge, Pre-Set Dim,
Status Request, RF commands
X-10 Key codes to respond to: All units Off, All Lights On, On, Off, Dim, Bright,
All Lights Off, Extended Code 1 type 3, Hai
l Request, Pre-Set Dim, Status Request,
RF commands
X-10 Collision detection: Present
Input impedance: > 180 Ohm (P-N) at 120 kHz
RF Range: 30 meters (note: the unit should be mounted at
a height of 1metre for best performance and
located away from any sources of RF interference
such as computers, monitors, etc).
RF Power: 10 mW (maximum)
RF receiver frequency: 433,92 MHz
RF transmitter frequency: 433,92 MHz
Ambient temperature: -10°C - +50°C (operation) -20°C - +70°C
(storage)
Weight: 20 grams
Dimensions: 66.7 (w) x 113.5 (L) x 45.3 (H)
Specifications may be modified without prior notice.
Environmental Information for Customers in the European Union
European Directive 2002/96/EC requires that the equipment bearing this symbol on the product
and/or its packaging must not be disposed of with unsorted municipal waste. The symbol indicates
that this product should be disposed of separately from regular household waste streams. It is your
responsibility to dispose of this and other electric and electronic equipment via designated collection
facilities appointed by the government or local authorities. Correct disposal and recycling will help
prevent potential negative consequences to the environment and human health. For more detailed information
about the disposal of your old equipment, please contact your local authorities, waste disposal service, or the shop
where you purchased the product.
11CM15Pro
™
+ ActiveHome Pro
™
ENGLISH

12 © MARMITEK

13CM15Pro
™
+ ActiveHome Pro
™
DEUTSCH
CM15PRO™
Programmierbares Computer-Interface + ActiveHomePro™ Software
SICHERHEITSHINWEISE
• Um Kurzschluss vorzubeugen, dieses Produkt bitte ausschließlich innerhalb des Hauses
und nur in trockenen Räumen nutzen. Setzen Sie die Komponenten nicht Regen oder
Feuchtigkeit aus. Nicht neben oder nahe eines Bades, Schwimmbades usw. verwen-
den.
• Setzen Sie die Komponente Ihres Systems nicht extrem hohen Temperaturen oder star-
ken Lichtquellen aus.
• Bei einer zweckwidrigen Verwendung, selbst angebrachten Veränderungen oder
selbst ausgeführten Reparaturen verfallen alle Garantiebestimmungen. Marmitek
übernimmt bei einer falschen Verwendung des Produkts oder bei einer anderen
Verwendung des Produktes als für den vorgesehenen Zweck keinerlei Produkthaftung.
Marmitek übernimmt für Folgeschäden keine andere Haftung als die gesetzliche
Produkthaftung.
• Dieses Produkt ist kein Spielzeug. Außer Reichweite von Kindern halten.
• Das Produkt niemals öffnen (ausgen.des Batteriefachs): Das Gerät kann Teile enthal-
ten, worauf lebensgefährliche Stromspannung steht. Überlassen Sie Reparaturen oder
Wartung nur Fachleuten.
• Halten Sie die Batterien außerhalb der Reichweite von Kindern. Liefern Sie die
Batterien als chemischen Kleinabfall ein. Verwenden Sie niemals alte und neue oder
unterschiedliche Typen von Batterien durcheinander. Wenn Sie das System längere Zeit
nicht benutzen, entfernen Sie die Batterien. Achten Sie beim Einlegen der Batterien
auf die Polarität (+ / -): Ein falsches Einlegen kann zu Explosionsgefahr führen.
• Schließen Sie den Netzadapter erst dann an das Stromnetz an, nachdem Sie überprüft
haben, ob die Netzspannung mit dem auf dem Typenschild angegeben Wert überein-
stimmt. Schließen Sie niemals einen Netzadapter oder ein Netzkabel an, wenn diese
beschädigt sind. In diesem Fall nehmen Sie Kontakt mit Ihrem Lieferanten auf.
• Automatisches Schalten ist nicht nur bequem, sondern kann auch Gefahr bedeuten.
So können Personen überrascht werden, oder kann Kleidung, die über eine elektrische
Wärmequelle hängt in Brand geraten. Passen Sie immer auf und treffen Sie
Maßnahmen um dies zu verhindern.
WIE FUNKTIONIERT MARMITEK X-10?
Die Komponenten aus dem Marmitek X-10 Sortiment kommunizieren mit einander über das
bestehende Lichtnetz (mittels Marmitek X-10 Signalen). Das Sortiment besteht aus drei Teilen:
1. Module: Diese empfangen die Marmitek X-10 Signale und schalten oder dimmen
die angeschlossene Belastung. Modulbeispiele sind die Lampen- und Gerätemodule.
Diese sind in den Modellen Einbau, Mikro, Din-Rail und Steckanschluss erhältlich.
2. Empfänger:
Diese senden die Marmitek X-10 Signale und steuern somit die Module.
DEUTSCH

3. Sender: Dies sind drahtlose Komponenten wie z.B. Fernbedienungen. Die Signale
der Sender werden von einem Empfänger mit Transceiver-funktion (IRRF 7243, TM13
oder CM15Pro) empfangen. Die Signale werden von dem Transceiver auf das Lichtnetz
gesetzt.
ADRESSIERUNG
Sie können maximal bis zu 256 verschiedene Adressen einstellen. Diese sind aufgeglie-
dert in einen so genannten HausCode (A bis einschl. P) und einen UnitCode (1 bis
einschl. 16). Der HausCode kann auch an den Reglern eingestellt werden, sodass Regler
und Module zum selben System gehören werden. Die Adresse kann mithilfe von
Kodierscheiben oder durch Tastenbedienung eingestellt werden. Dies hängt vom
Modultyp ab.
Das Marmitek X-10 System beinhaltet standardmäßige Befehle, wobei alle Units inner-
halb desselben HausCodes zugleich gesteuert werden (z.B. sämtliche Lampen einschal-
ten, alles ausschalten usw.).
REICHWEITE VON SIGNALEN
Reichweite von Marmitek X-10 Signalen über das Lichtnetz und diese
Reichweite vergrössern.
Das Marmitek X-10 System basiert auf der Kommunikation über das bestehende
Lichtnetz. Die Reichweite von Signalen über das Lichtnetz ist sehr von der örtlichen
Situation abhängig. Ein guter Durchschnitt der Reichweite ist jedoch eine Kabellänge
von 80 Metern.
Bei Problemen mit der Reichweite von Marmitek X-10 Signalen sind folgende
Faktoren wichtig:
1. Werden mehrere Phasen im Haus verwendet, kann es notwendig sein, um diese
Phasen für Marmitek X-10 Signale zu koppeln. Dieses Koppeln kann geschehen,
indem Sie einen FD10 Phasekoppler verwenden und wird benötigt, wenn
Steckdosen und Lampenanschlüsse tatsächlich über mehrere Phasen verteilt sind
(mehrere Gruppen sind kein Problem für die Marmitek X-10 Signale). Für größere
Gebäude advisieren wir die Verwendung eines aktiven 3 Phasen Verstärkers statt
eines Koppelfilters.
2. Marmitek X-10 Signale können durch Geräte und Lampen vermindert werden, die
auf das Lichtnetz angeschlossen sind. In normalen Hausanlagen ist dieser Effekt nor-
malerweise zu verwahrlosen (das Marmitek X-10 System verwendet u.a. eine aktive
Verstärker um diesen Effekt zu eliminieren). Doch kann es sein, dass ein einzelnes
Gerät in Ihrer Wohnung stört. Wenn Sie feststellen, dass Signale nicht immer gut
durchkommen, dann können Sie ein solches Gerät relativ einfach aufspüren, indem
Sie die Stecker der verdächtigen Geräte aus der Steckdose ziehen und erneut einen
Test durchführen. Stellen Sie fest, dass Ihr Problem gelöst ist, durch z.B. den Stecker
14 © MARMITEK

Ihres PC’s aus der Steckdose zu ziehen, dann können Sie das Problem lösen, durch
diesen PC-Monitor mit einem FM10 Steckerfilter zu versehen. Dieser Steckerfilter
sorgt dafür, dass die Signale nicht länger durch das betreffende Gerät vermindert
werden.
Wir empfehlen um folgende Geräte zu kontrollieren:
PC Monitore
PC’s mit relativ hoher Leistung
Alte TV-Geräte
Kopiermaschinen
Ein Raum mit vielen Neonlampen
3. Einige (alte) Geräte können Störsignale auf das Lichtnetz bringen, wodurch die
Marmitek X-10 Kommunikation gestört wird. Es handelt sich dabei um Geräte, die
auf einer Frequenz von 120 kHz stören. Diese 120 kHz werden vom Marmitek X-10
System als Sendefrequenz verwendet um digitale Information über das Lichtnetz zu
schicken. Geräte, die diese Art Signale senden, können mit einem FM10 Steckerfilter
versehen werden. Hierdurch werden Störsignale das Lichtnetz nicht mehr erreichen.
4. Durch den Aufbau der Signale können andere (Stör)quellen die Module des
Marmitek X-10 Systems niemals aktivieren oder ausschalten. Wohl kann das Signal
durch z.B. Babyüberwachungsgeräte, die dauernd im ‘Sprechmodus’ stehen, gestört
werden. Durch die Anwesendheit von diesen Signalen ist es möglich, dass das
Marmitek X-10 Signal nicht durchkommt.
5. Das Lichtnetz Ihrer Wohnung endet nicht bei der Haustüre. Alles was außerhalb (in
der Nähe) Ihrer Wohnung auf dem Lichtnetz angeschlossen ist, kann die Marmitek
X-10 Signale beeinflussen. Vor allem wenn Ihre Wohnung an eine Fabrikhalle mit
schweren Maschinen grenzt ist es nützlich, um einkommende Phasen mit einem
FD10 Phasenfilter zu versehen. Diese Filter formen eine Blockade für alle Signale, die
in Ihre Wohnung wollen oder diese verlassen wollen, sorgen jedoch auch für eine
perfekte ‘Impedanzanpassung’ des Lichtnetzes Ihrer Wohnung. Sie bereiten Ihre
Wohnung auf Marmitek X-10 vor, indem Sie diese Module plazieren. Hierdurch kup-
peln Sie auch gleichzeitig die Phasen (siehe Punkt 1).
GEBRAUCHSANLEITUNG
EINFÜHRUNG
Mit der Marmitek ActiveHomePro (AHP) Software und dem CM15Pro
Programmierbaren Computerinterface (CM15Pro) können Sie Beleuchtung und
Geräte, die mittels Marmitek X-10 Modulen angeschlossen sind, im ganzen Haus
bedienen.
15CM15Pro
™
+ ActiveHome Pro
™
DEUTSCH

Das CM15Pro ist ein Controller mit einer Transceiver Funktion: Wenn es RF Befehle
von einer drahtlosen RF Fernbedienung erhält (z.B. der
EasyControl8/EasyTouch35/KR21/SS13) setzt es diese in X-10 (Lichtnetz)Signale um
und sendet diese an die Module weiter. Diese empfängt das Signal und führt den
Befehl durch.
Zudem haben Sie die Möglichkeit, alles im Haus mit Ihrem Computer zu bedienen!
Mit der Marmitek AHP Software können Sie Zeitpläne für Ihre Beleuchtung und
Geräte erstellen, Gruppenbefehle für den täglichen Gebrauch einrichten und Geräte
und Beleuchtung automatisch schalten lassen. Sie können überdies die Zeitplan- und
Makroereignisse im CM15Pro speichern, sodass diese auch funktionieren wenn Ihr
Computer ausgeschaltet ist!
Mit Marmitek AHP Software und der CM15Pro wandeln Sie Ihren PC in einen hoch-
wertigen Controller um, der all Ihre Home Control Wünsche erfüllt. Verwenden Sie
AHP zur Komfort- und Sicherheitserhöhung Ihres Hauses.
Diese Gebrauchsanleitung hilft Ihnen bei der Installation Ihrer AHP Software und
CM15Pro. Es ist ein Hilfsmittel, um Ihnen auf die Sprünge zu helfen. Vergessen Sie
aber nicht, nach der Installation die Hilfsdatei in der Software zu lesen.
VERPACKUNGSINHALT
1x CM15Pro programmierbares Computerinterface
1x USB Kabel
1x ActiveHomePro Installations- CD
1x Installationsanleitung
1x 9 Volt 6LR61 Alkaline Blockbatterie
1x Metall-Befestigungsplatte
1x Antennenschutzhülle
SYSTEMANFORDERUNGEN
Unter Windows betriebener PC
Verfügbarer USB Port
CD ROM oder DVD-Player
Windows XP oder Windows Vista Steuersystem
HARDWARE SETUP UND SOFTWARE INSTALLATION
Lesen Sie die Installationsschritte gut durch, bevor Sie die AHP Software wirk-
lich installieren.
Installieren Sie die Marmitek AHP Software, bevor Sie das CM15Pro anschließen!
16 © MARMITEK

17CM15Pro
™
+ ActiveHome Pro
™
DEUTSCH
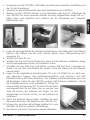
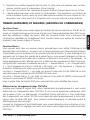
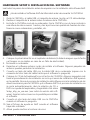
1. Entnehmen Sie das CM15Pro, USB Kabel, die Antennenschutzhülle, die Batterie und
die CD der Verpackung.
2. Schieben Sie die Antennenhülle über die Drahtantenne des CM15Pro.
3. Stecken Sie den CM15Pro Stecker in eine Steckdose nahe Ihres PC. Befestigen Sie
das CM15Pro für einen optimalen Betrieb mit dem mitgelieferten Bügel auf ca. 1
Meter Höhe und möglichst weit entfernt von RF Störquellen wie Computer,
Bildschirmen usw.
4. Legen Sie die mitgelieferte 9 V Alkaline Blockbatterie in das Batteriefach (die Batterie
bewirkt, dass Datum und Zeit nicht verloren gehen, wenn Netzspannung nicht
anwesend ist).
5. Schalten Sie Ihren PC ein.
6. Schalten Sie Ihre Anti-Virussoftware aus, bevor Sie die Software installieren. Einige
Anti-Virusprogramme können die Installation stören.
7. Schließen Sie eine Seite Ihres USB Kabels an einen USB Port Ihres Computers an.
(warten Sie mit dem Anschließen der anderen Seite des Kabels, bis die Software
hierum bittet).
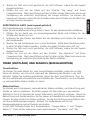
8. Legen Sie die mitgelieferte ActiveHomePro CD in Ihr CD ROM Fach ein. Nach eini-
gen Sekunden beginnt das Installationsverfahren und erscheint das AHP
Installationsmenü auf Ihrem Bildschirm. Der Software Installationsprozess wird nun
die benötigten Treiber für das CM15Pro und die AHP Software installieren. Startet
der Installationsprozess nicht automatisch, öffnen Sie
dann mithilfe des Explorers Ihr CD oder DVD Laufwerk
und doppelklicken Sie auf Setup_ahp_eu_xxx.exe. (xxx
zeigt die Version der Software an) Folgen Sie den
Anweisungen auf Ihrem Schirm, um die Software zu
installieren.
9. Wenn die Software darum bittet, schließen Sie dann
die andere Seite des USB Kabels an das CM15Pro an.
10. Schauen Sie, nachdem die Software installiert ist, in die
Hilfsdatei im AHP zur weiteren Hilfestellung.
11. Sie können nun Ihren Virusscanner wieder aktivieren.

BEDIENUNG
Die Anwendung der Marmitek ActiveHomePro
Um Sie mit der AHP Software vertraut zu machen, erklären wir nachstehend, wie Sie
ein Lampenmodul und ein Gerätemodul bedienen. Außerdem erläutern wir kurz die
Funktionalität von Makros und Zeitplänen.
Starten Sie Ihre AHP Software, um Ihr CM15Pro bedienen zu können. Dazu gehen Sie
zu Start/Starten, Alle Programme, ActiveHomePro und klicken Sie auf ActiveHomePro.
Wenn Sie AHP zum ersten Mal starten, beginnt der AHP Intro Wizard, der Sie mit der
Bedienung Ihrer AHP Software vertraut macht.
Haben Sie den AHP Intro Wizard ganz durchlaufen ist ein Standardprofil installiert wor-
den und wird ein Lampenmodul, ein Gerätemodul und zwei Beispiel Makros gezeigt.
Sie können den Intro Wizard nochmals starten, indem Sie zum Help, Run Intro
Wizard... gehen.
Die Bezeichnung des Lampenmoduls ist “My Lamp” und die des Gerätemoduls ist “My
Appliance” .
Das “My Lamp” Modul ist bereits eingestellt auf Hauscode A und Einheitscode 1
(Hauscode A, Einheitscode 1 finden Sie unten, mitten auf dem auf Ihrem Bildschirm
abgebildeten Modul). Diese Einstellung muss mit dem wirklichen Lampenmodul, das
Sie installieren wollen, übereinstimmen. (wird separat geliefert)
Das “My Appliance” Modul ist auf Hauscode A und Einheitscode 2 eingestellt, auch
diese Einstellung muss mit dem wirklichen Gerätemodul, das Sie installieren wollen,
übereinstimmen. (wird separat geliefert)
Vergewissern Sie sich, dass die Coderädchen von den entsprechenden
Modulen richtig eingestellt sind. Das rote Coderad muss an beiden Modulen
auf A stehen. Das schwarze Coderad für das Lampenmodul muss auf 1 und
das schwarze Coderad auf dem Gerätemodul muss auf 2 stehen. Sind diese
falsch eingestellt, so können Sie diese mithilfe eines Schraubenziehers richtig
einstellen.
LAMPENMODUL LM12 (wird separat geliefert)
Wenn Sie ein Lampenmodul mit AHP bedienen möchten, befolgen Sie dann nachfol-
gende Schritte.
Lesen Sie die Installationsschritte gut durch, bevor Sie das Lampenmodul installieren.
1. Wählen Sie eine Lampe mit einer normalen Glühbirne und schalten Sie den Schalter
der Lampe auf 'ein'.
2. Entfernen Sie den Stecker der Lampe aus der Steckdose und stecken Sie diesen in
das Lampenmodul.
3. Stecken Sie das Lampenmodul nun in eine Steckdose. Sollte diese Steckdose mith-
ilfe eines Schalters bedient werden, schalten Sie diesen Schalter dann auf ‘ein’.
18 © MARMITEK

4. Starten Sie, falls noch nicht geschehen, die AHP Software, indem Sie das Symbol
doppelt anklicken.
5. Klicken Sie nun mit der Maus auf den Schalter “My Lamp” auf Ihrem
Computerschirm. Nach dem Klicken auf den Schalter mit der Maus kann eine kurze
Verzögerung der wirklichen Einschaltung der Lampe auftreten. Sie können die
Lampe auch dimmen, indem Sie den Schieber neben dem Schalter mit der Maus hin-
auf oder hinunter bewegen.
GERÄTEMODUL AM12 (wird separat geliefert)
Die Gerätebedienung ist ebenso einfach!
Lesen Sie die Installationsschritte gut durch, bevor Sie das Lampenmodul installieren.
1. Wählen Sie ein Gerät wie ein stromnetzgespeistes Radio und schalten Sie den
Schalter des Geräts auf 'ein'.
2. Entfernen Sie den Stecker des Radios aus der Steckdose und stecken Sie diesen in
das Gerätemodul.
3. Stecken Sie das Gerätemodul nun in eine Steckdose. Sollte diese Steckdose mithil-
fe eines Schalters bedient werden, schalten Sie diesen Schalter dann auf ‘ein’.
4. Starten Sie, falls noch nicht geschehen, die AHP Software, indem Sie das Symbol
doppelt anklicken.
5. Klicken Sie nun mit der Maus auf den Schalter “My Appliance” auf Ihrem
Computerschirm. Nach dem Klicken auf den Schalter mit der Maus kann eine kurze
Verzögerung der wirklichen Einschaltung des Radios auftreten.
TIMER (ZEITPLÄNE) UND MAKROS (BEFEHLGRUPPEN)
Timerfunktion:
Sie können für jedes Modul Ein- oder Ausschaltzeiten einstellen, indem Sie auf die
kleine Uhr klicken, die sich rechts unten auf der Abbildung des Moduls in der AHP
befindet. Haben Sie Einstellungsprobleme, gehen Sie dann zum Hilfsmenü. Dort fin-
den Sie umfassende Informationen zum Einstellen der Timerfunktion, um Ihre Module
zu voreingestellten Zeiten schalten zu lassen.
Makrofunktion:
Sie können auch Ihre eigenen, automatisierten Makros erstellen, um Beleuchtung und
Geräte im Haus zu bedienen. Ein Makro eignet sich besonders gut, um mehrere
Befehle für Ihre X-10 Module mit einem Tastendruck durchführen zu lassen. Wenn Sie
Beleuchtung und Geräte besitzen, die Sie immer auf dieselbe Art und Weise bedienen,
können Sie dazu einfach ein Makro erstellen. An die Durchführung eines Makros kön-
nen Sie auf Bedingungen koppeln. Beispiel: Die Außenlampe soll nur bei
Bewegungsmeldung und im Dunkeln einschalten.
In Ihrer AHP Software finden Sie 2 Beispielmakros: “Sample Macro 1” und “Sample
Macro 2”. Diese stehen neben den zuvor beschriebenen “My Lamp” und “My
19CM15Pro
™
+ ActiveHome Pro
™
DEUTSCH

Appliance”. Klicken Sie auf die Edit-Taste des Makros, um zu sehen, welche
Möglichkeiten Sie nun haben.
Das “Sample Macro 1” Makro ist auf Haus/Einheitscode A3 ON eingestellt und wird
durchgeführt werden, wenn der Befehl A3 ON empfangen wird.
Das “Sample Macro 2” Makro ist auf Haus/Einheitscode A3 OFF eingestellt und wird
durchgeführt werden, wenn der Befehl A3 OFF empfangen wird.
Weitere Informationen hierüber finden Sie im AHP Software Hilfsmenü.
Änderungen im CM15Pro speichern
Wenn Sie die AHP Software schließen, wird diese automatisch fragen, ob Sie die
Änderungen im CM15Pro speichern wollen. Wenn Sie zwischenzeitlich Änderungen
speichern wollen, gehen Sie zum Tools Menü und klicken Sie auf “Download Timers
and Macros" Um Änderungen zu Ihrem CM15Pro zu downloaden, müssen Sie diese
kurze Zeit an Ihren Computer koppeln (mit dem mitgelieferten USB Kabel). Sie erhal-
ten automatisch eine Nachricht, wenn der Download vollendet ist.
Nach dem Download der Änderungen können Sie den PC abschalten und die USB
Verbindung abbrechen. Die programmierten Einstellungen, Timer und Makros bleiben
im CM15Pro gespeichert.
HÄUFIG GESTELLTE FRAGEN
Muss mein Computer immer eingeschaltet sein, um eingestellte Zeitpläne und
Makros nutzen zu können?
Nein, Sie können die Zeitplan- und Makroereignisse im CM15Pro speichern, sodass
diese auch funktionieren wenn Ihr Computer ausgeschaltet ist!
Arbeitet Marmitek ActiveHomePro und CM15Pro mit all meinen
bestehendenX-10 Modulen und Schaltern?
Gewiss. ActiveHomePro und CM15Pro verwenden das reguläre Marmitek X-10
Protokoll.
Gibt es ein Software Entwicklungspaket (SDK) für Marmitek ActiveHomePro?
Gewiss. Dieses können Sie zur Entwicklung eigener Programme, die mit Marmitek
AHP zusammenarbeiten, nutzen. Unter www.activehomepro.eu finden Sie weitere
Informationen über das Marmitek ActiveHomePro SDK.
Benötigt die Marmitek AHP Software einen separaten Transceiver (TM13 oder
IRRF7243)?
Nein. Das CM15Pro hat einen eingebauten Transceiver, der fortwährend alle X-10
Adressen empfangen kann.
Wie viele Lampen- und Schaltmodule kann ich mit X-10 bedienen?
X-10 besitzt 256 individuelle Adressen. Sie können jedoch auf jeder Adresse so viele
20 © MARMITEK
La pagina si sta caricando...
La pagina si sta caricando...
La pagina si sta caricando...
La pagina si sta caricando...
La pagina si sta caricando...
La pagina si sta caricando...
La pagina si sta caricando...
La pagina si sta caricando...
La pagina si sta caricando...
La pagina si sta caricando...
La pagina si sta caricando...
La pagina si sta caricando...
La pagina si sta caricando...
La pagina si sta caricando...
La pagina si sta caricando...
La pagina si sta caricando...
La pagina si sta caricando...
La pagina si sta caricando...
La pagina si sta caricando...
La pagina si sta caricando...
La pagina si sta caricando...
La pagina si sta caricando...
La pagina si sta caricando...
La pagina si sta caricando...
La pagina si sta caricando...
La pagina si sta caricando...
La pagina si sta caricando...
La pagina si sta caricando...
La pagina si sta caricando...
La pagina si sta caricando...
La pagina si sta caricando...
La pagina si sta caricando...
La pagina si sta caricando...
La pagina si sta caricando...
La pagina si sta caricando...
La pagina si sta caricando...
La pagina si sta caricando...
La pagina si sta caricando...
La pagina si sta caricando...
La pagina si sta caricando...
La pagina si sta caricando...
La pagina si sta caricando...
La pagina si sta caricando...
La pagina si sta caricando...
-
 1
1
-
 2
2
-
 3
3
-
 4
4
-
 5
5
-
 6
6
-
 7
7
-
 8
8
-
 9
9
-
 10
10
-
 11
11
-
 12
12
-
 13
13
-
 14
14
-
 15
15
-
 16
16
-
 17
17
-
 18
18
-
 19
19
-
 20
20
-
 21
21
-
 22
22
-
 23
23
-
 24
24
-
 25
25
-
 26
26
-
 27
27
-
 28
28
-
 29
29
-
 30
30
-
 31
31
-
 32
32
-
 33
33
-
 34
34
-
 35
35
-
 36
36
-
 37
37
-
 38
38
-
 39
39
-
 40
40
-
 41
41
-
 42
42
-
 43
43
-
 44
44
-
 45
45
-
 46
46
-
 47
47
-
 48
48
-
 49
49
-
 50
50
-
 51
51
-
 52
52
-
 53
53
-
 54
54
-
 55
55
-
 56
56
-
 57
57
-
 58
58
-
 59
59
-
 60
60
-
 61
61
-
 62
62
-
 63
63
-
 64
64


Marmitek Computer Hardware CM15PRO Manuale utente
- Tipo
- Manuale utente
- Questo manuale è adatto anche per
in altre lingue
- English: Marmitek Computer Hardware CM15PRO User manual
- français: Marmitek Computer Hardware CM15PRO Manuel utilisateur
- español: Marmitek Computer Hardware CM15PRO Manual de usuario
- Deutsch: Marmitek Computer Hardware CM15PRO Benutzerhandbuch
- Nederlands: Marmitek Computer Hardware CM15PRO Handleiding
Documenti correlati
-
Marmitek AM12 f Manuale utente
-
-
-
-
Marmitek easy icon 10rf Manuale utente
-
-
Marmitek SW12 Manuale utente
-
-
-
Marmitek SS13 Manuale utente
