
Vehicle Drive Recorder
DVR-1
HD
mini
User manual
Benutzerhandbuch
Guide de l’utilisateur
Manuale per l’utente
Gebruikershandleiding
Manual del usuario

Vehicle Drive Recorder
DVR-1
HD
mini
User manual

UK • 2
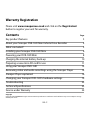
Warranty Registration
Please visit www.snooperneo.co.uk and click on the ‘Registration’
button to register your unit for warranty.
Contents Page
Key product features 3
About your Snooper DVR-1HD Mini Vehicle Drive Recorder 4
What’s included? 5
Installing your Snooper DVR-1HD Mini 6
Powering your DVR-1HD Mini 8
Charging the internal battery back-up 10
Preparing a new micro SD card for use 11
Using your Snooper DVR-1HD 12
Reviewing video and audio recordings using the Snooper Player 14
Snooper Player explained 16
Changing your Snooper DVR-1HD’s hardware settings 19
Troubleshooting 22
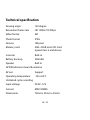
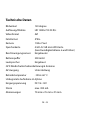
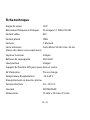
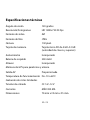
Technical Specifications 23
Service under Warranty 24
Copyright
Copyright @2014 SNOOPER. All rights reserved. Product specifications and features are for reference only and are subject to change
without prior notice.

UK • 3
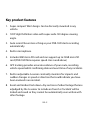
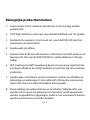
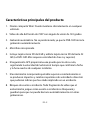
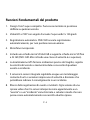
Key product features
1. Super compact ‘Mini’ design. Can be discreetly mounted in any
vehicle.
2. 720P High Definition video with super-wide 120 degree viewing
angle.
3. Auto record. Never miss a thing as your DVR-1HD starts recording
automatically.
4. Built-in microphone.
5. Includes 8GB micro SD card and can support up to 32GB micro SD
card (DVR-1HD Mini requires speed class 6 and above)
6. GPS tracking provides accurate evidence of your route, recording
vehicle speed whilst confirming date and exact time of any incidents.
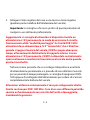
7. Built-in adjustable G-sensor constantly monitors for impacts and
sudden changes in speed or direction that could indicate you have
been involved in an incident.
8. Event and Incident lock down. Any sections of video footage that are
adjudged by the G-sensor to include an ‘Event’ or ‘Incident’ will be
locked and saved so they cannot be automatically over written with
other footage.

UK • 4
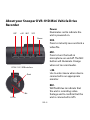
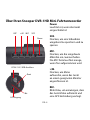
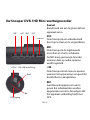
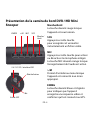
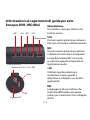
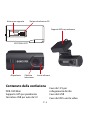
About your Snooper DVR-1HD Mini Vehicle Drive
Recorder
REC >/M MIC
DC5V~12V / USB interface
Reset
GPS In
Mic
Power.
Illuminates red to indicate the
unit is powered on.
SOS.
Press to instantly save and lock a
video file.
MIC.
Press to turn the built-in
microphone on and off. The MIC
button will illuminate Orange
when set to record audio.
>/M.
Use to enter menu when device
connected to an appropriate
monitor.
REC.
Will flash blue to indicate that
the unit is recording video
footage and to confirm that the
unit is connected to GPS.
SOS
Power

UK • 5
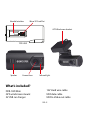
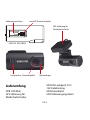
Speaker
Bracket Interface
TOP VIEW
Camera Lens
Micro SD Card Slot
Infrared light
GPS Windscreen bracket
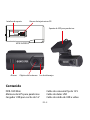
What’s included?
DVR-1HD Mini
GPS windscreen mount
5V USB car charger
12V Hard wire cable
USB data cable
USB to Video out cable

UK • 6
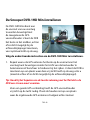
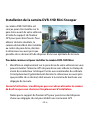
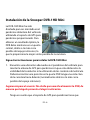
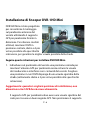
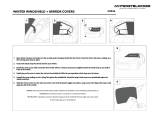
Installing your Snooper DVR-1HD Mini
DVR1HD Mini has been designed
to be mounted in the front
windscreen of your vehicle using
the GPS windscreen bracket
provided. For best results your
DVR should be mounted centrally,
behind or as near to the rear view
mirror as possible, giving it the
best view of the road ahead.
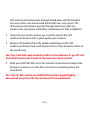
Follow these instructions to install your DVR1HD Mini.
1. Find a convenient location on your vehicle’s windscreen where you
can mount the GPS windscreen antenna without obscuring the
driver’s view or interfering with any of the vehicle’s controls. You need
to find a position where your DVR has a clear view of the road ahead
(normally behind or as close as possible to the rear view mirror).
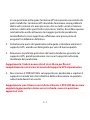
User tip: Don’t forget that you need to get power to your DVR so keep
this in mind when choosing your location.
Please note that the GPS windscreen bracket needs to have a clear
view of the sky to obtain a good GPS connection. Do not position
the bracket where the built-in GPS antenna is obscured by metal. The

UK • 7
GPS antenna should operate through tinted glass and the blacked
out areas often seen around and behind the rear view mirror. The
GPS antenna should also operate through most heat reflective
windscreens, but please test before completing the final installation.
2. Clean the area of glass where you intend to mount the GPS
windscreen bracket with a good quality glass cleaner.
3. Remove the backing from the double sided tape on the GPS
windscreen bracket and carefully position it in the desired location on
the windscreen.
User Tip: It will take approximately 24hrs for the adhesive to ‘go off’ and
for the GPS windscreen bracket to become securely mounted.
4. Slide your DVR1HD Mini on to the windscreen bracket and adjust the
bracket as necessary so that the camera lens is pointing down the
road ahead.
User Tip: For best results your DVR1HD should be angled slightly
downwards away from the sky and towards the road ahead.

UK • 8
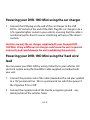
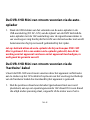
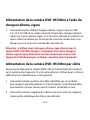
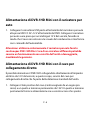
Powering your DVR-1HD Mini using the car charger
1. Connect the USB plug on the end of the car charger to the USB
DC5V~12V socket on the end of the DVR. Plug the car charger in to a
12V cigarette lighter socket in your vehicle, ensuring that the cable is
not obscuring the driver’s view or interfering with any of the driver’s
controls.
Caution: use only the car charger supplied with your Snooper DVR-
1HD Mini. Using a different car charger could cause the unit to operate
incorrectly and could damage the unit invalidating the warranty.
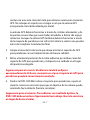
Powering your DVR-1HD Mini using the ‘hard wire’
lead
You can power your DVR-1HD by wiring it directly to your vehicles 12V
electrical system using the ‘Hard Wire’ cable supplied as standard with
your unit.
1. Connect the positive side of the cable (marked with a red plus symbol)
to a 12V permanent live. This is a permanent live which has power if
the if ignition if On or Off.
2. Connect the negative side of the lead to a negative ground - any
metal portion of the vehicles frame.

UK • 9
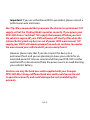
Important: If you are unfamiliar with this procedure, please consult a
professional auto electrician.
User Tip: We recommend that you power the device to a permanent 12V
supply so that the ‘Parking Mode’ operates correctly. If you power your
DVR-1HD from a ‘switched’ 12V supply that powers off when you turn
the vehicle’s engine off, your DVR will power off shortly after when the
internal battery back-up has run out of power. With a permanent 12V
supply your DVR1 will remain powered on and can continue to monitor
the area around your vehicle whilst you are away from it.
However please note that if you do connect the device to a
permanent feed, and you are planning to leave your vehicle for an
extended period of time we recommend that your DVR-1HD is either
switched off or disconnected from the power source to avoid draining
your vehicle’s battery.
Caution: use only the hard wire cable supplied with your Snooper
DVR-1HD Mini. Using a different hard wire cable could cause the unit
to operate incorrectly and could damage the unit invalidating the
warranty.

UK • 10
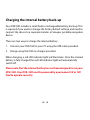
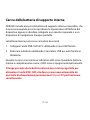
Charging the internal battery back-up
Your DVR1HD includes a small built-in rechargeable battery back-up. This
is required if you want to change the factory default settings and need to
connect the device to a separate monitor or Snooper portable navigation
device.
There are two ways to charge the internal battery.
1. Connect your DVR-1HD to your PC using the USB cable provided.
2. Charge using the USB car charger provided.
When charging, a red LED indicator light will illuminate. Once the internal
battery is fully charged the red LED indicator light will automatically
switch off.
Please note that the internal battery has not been designed to run your
DVR-1HD. Your DVR-1HD must be powered by a permanent 5V or 12V
feed to operate correctly.

UK • 11
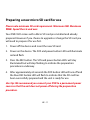
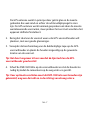
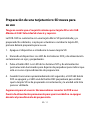
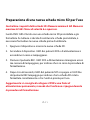
Preparing a new micro SD card for use
Please note minimum SD card requirement. Minimum 4GB. Maximum
GB. Speed Class 6 and over.
Your DVR-1HD comes with a Micro SD card pre-installed and already
prepared. However if you choose to upgrade or change the SD card you
will need to prepare it for use first.
1. Power off the device and insert the new SD card.
2. Power on the device. The SOS and power button LEDs will illuminate
red and flash.
3. Press the REC button. The SOS and power button LEDs will stay
illuminated but will stop flashing to indicate the preparation
procedure is underway.
4. After approximately 60 seconds the SOS button LED will turn off and
the blue REC button LED will flash to indicate that the SD card has
been successfully prepared and the unit is ready for use.
User tip: We recommend you connect your DVR to a permanent power
source so that the unit does not power off during the preparation
procedure.

UK • 12
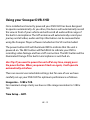
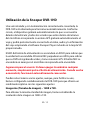
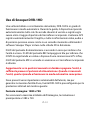
Using your Snooper DVR-1HD
Once installed and correctly powered your DVR-1HD has been designed
to operate automatically. As you drive, the device will automatically record
the view in front of your vehicle and will record all audio within range of
the built-in microphone. The GPS antenna will automatically record your
journey and all video, audio and trip information can be reviewed later
using the Snooper Player software included on the SD card included.
The power button LED will illuminate RED to indicate that the unit is
powered on. The REC button will flash BLUE to indicate your DVR is
recording video footage and has a GPS connection. The MIC button will be
illuminated Orange if the built-in microphone is switched on.
User Tip: If you want to power the unit off at any time, simply press
the power button. When you power it back on again, it will operate
automatically as before.
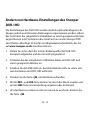
There are several user selectable settings, but for ease of use we have
carefully set-up your DVR-1HD for optimum performance as follows:-
Image size – 1280 x 720.
For maximum image clarity we have set the image resolution to 1280 x
720.
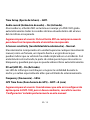
Time Setup – GMT.

UK • 13
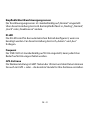
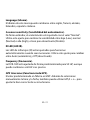
Audio record – On.
When powered on the MIC button will be illuminated orange and your
DVR-1HD will automatically record all audio within range of it’s built-in
microphone.
User Tip: Press the MIC button at any time to temporarily mute the built-
in microphone.
G-Sensor sensitivity – Normal.
The unit’s built-in G-Sensor monitors for any unusual movement such as
heavy breaking, hard impact or sharp turning which may indicate that
your vehicle has been involved in an incident. If the G-sensor is activated
the portion of video that includes this event will be locked and saved so
that it cannot be automatically overwritten.
IR Led – On.
The infrared LEDs help improve visibility at night, especially useful for
Parking Mode.
Frequency – 50 hz
GPS Time Zone – GMT: +0 (zero)
User Tip: We think these are the optimum settings for your DVR-1HD, but
if you wish to change them, please refer to the ‘settings’ section later in
this manual.

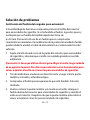
UK • 14
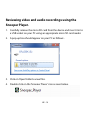
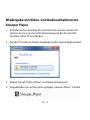
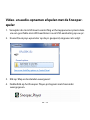
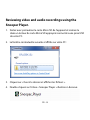
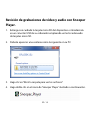
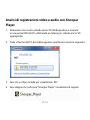
Reviewing video and audio recordings using the
Snooper Player.
1. Carefully remove the micro SD card from the device and insert it in to
a USB socket on your PC using an appropriate micro SD card reader.
2. A pop-up box should appear on your PC as follows:-
3. Click on ‘Open folder to view files.
4. Double click on the ‘Snooper Player’ icon as seen below.

UK • 15
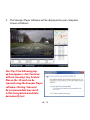
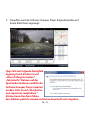
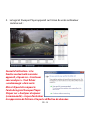
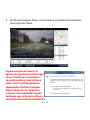
5. The Snooper Player software will be displayed on your computer
screen as follows:-
User Tip: if the following pop-
up box appears, click ‘Continue
without scanning’. Any ‘broken’
files on the SD card can be
repaired using the Snooper Player
software. Clicking ‘Scan and
fix (recommended) may result
in files being deleted and data
permanently lost.

UK • 16
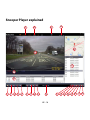
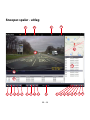
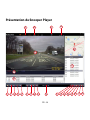
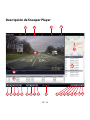
Snooper Player explained
21
24
25
26
27
1
16
2
17
3
18
4 5 6 7 8 9 10 11 12 13 14 15
19 20
22
23

UK • 17
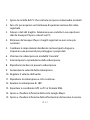
1. Open folder from your PC containing existing video/audio footage.
2. Click to take a snap shot from any section of video recorded.
3. Save route data. Select a folder to export it from the Snooper Player
and save it to your PC.
4. Delete routes recorded and no longer required, from the Snooper
Player.
5. Change settings such as Language and set up a password to protect
your data.
6. View video footage in ‘slow motion’
7. Stop video footage playing.
8. Play/pause video footage.
9. Increase speed of video footage.
10. Adjust volume of audio.
11. Run video footage on repeat.
12. Flip video footage 180 degrees
13. Export GPS coordinates to your PC in KML format.
14. Open and close Google Map view window.
15. Open and close G-sensor information window.

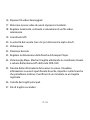
UK • 18
16. Repair broken video files.
17. Unlock ‘Incident/Event’ video footage.
18. Adjust Brightness, Contrast and Saturation of any video file selected.
19. GPS coordinates.
20. Your speed reading. Click to switch between mph and km/h.
21. Video footage.
22. Compass heading.
23. Adjust size of Snooper Player window.
24. Google Map view. Shows route track using coordinates collected and
saved by DVR-1HD GPS antenna.
25. G-sensor information window. Displays any event information such
as hard breaking, impacts or sharp turns that might indicate that an
incident has occurred on a recorded route.
26. Main route folders.
27. Sub route files.

UK • 19
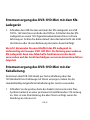
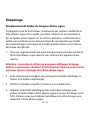
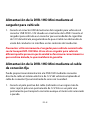
Changing your Snooper DVR-1HD’s hardware settings
The settings in your DVR-1HD have been set for optimum use but are
user selectable and can be changed by connecting the device to an
appropriate monitor using the video cable provided. You can also connect
the unit to any Snooper PND but may need to purchase an adaptor cable
separately from www.snooper.co.uk
1. Ensure that the DVR-1HD internal battery is fully charged and the SD
card is inserted.
2. Connect the USB to Video cable provided, between your DVR1HD and
a suitable monitor.
3. Power on the DVR1HD. You should see what the DVR1HD camera is
looking at on the monitor.
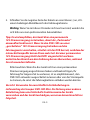
4. Press the >|M button to enter the Menu.
5. Scroll up and down through the menu using the MIC and SOS button
and use to the REC button to Enter or Confirm a setting.
6. To exit the menu or ‘go back’ press the >|M button.
La pagina si sta caricando...
La pagina si sta caricando...
La pagina si sta caricando...
La pagina si sta caricando...
La pagina si sta caricando...
La pagina si sta caricando...
La pagina si sta caricando...
La pagina si sta caricando...
La pagina si sta caricando...
La pagina si sta caricando...
La pagina si sta caricando...
La pagina si sta caricando...
La pagina si sta caricando...
La pagina si sta caricando...
La pagina si sta caricando...
La pagina si sta caricando...
La pagina si sta caricando...
La pagina si sta caricando...
La pagina si sta caricando...
La pagina si sta caricando...
La pagina si sta caricando...
La pagina si sta caricando...
La pagina si sta caricando...
La pagina si sta caricando...
La pagina si sta caricando...
La pagina si sta caricando...
La pagina si sta caricando...
La pagina si sta caricando...
La pagina si sta caricando...
La pagina si sta caricando...
La pagina si sta caricando...
La pagina si sta caricando...
La pagina si sta caricando...
La pagina si sta caricando...
La pagina si sta caricando...
La pagina si sta caricando...
La pagina si sta caricando...
La pagina si sta caricando...
La pagina si sta caricando...
La pagina si sta caricando...
La pagina si sta caricando...
La pagina si sta caricando...
La pagina si sta caricando...
La pagina si sta caricando...
La pagina si sta caricando...
La pagina si sta caricando...
La pagina si sta caricando...
La pagina si sta caricando...
La pagina si sta caricando...
La pagina si sta caricando...
La pagina si sta caricando...
La pagina si sta caricando...
La pagina si sta caricando...
La pagina si sta caricando...
La pagina si sta caricando...
La pagina si sta caricando...
La pagina si sta caricando...
La pagina si sta caricando...
La pagina si sta caricando...
La pagina si sta caricando...
La pagina si sta caricando...
La pagina si sta caricando...
La pagina si sta caricando...
La pagina si sta caricando...
La pagina si sta caricando...
La pagina si sta caricando...
La pagina si sta caricando...
La pagina si sta caricando...
La pagina si sta caricando...
La pagina si sta caricando...
La pagina si sta caricando...
La pagina si sta caricando...
La pagina si sta caricando...
La pagina si sta caricando...
La pagina si sta caricando...
La pagina si sta caricando...
La pagina si sta caricando...
La pagina si sta caricando...
La pagina si sta caricando...
La pagina si sta caricando...
La pagina si sta caricando...
La pagina si sta caricando...
La pagina si sta caricando...
La pagina si sta caricando...
La pagina si sta caricando...
La pagina si sta caricando...
La pagina si sta caricando...
La pagina si sta caricando...
La pagina si sta caricando...
La pagina si sta caricando...
La pagina si sta caricando...
La pagina si sta caricando...
La pagina si sta caricando...
La pagina si sta caricando...
La pagina si sta caricando...
La pagina si sta caricando...
La pagina si sta caricando...
La pagina si sta caricando...
La pagina si sta caricando...
La pagina si sta caricando...
La pagina si sta caricando...
La pagina si sta caricando...
La pagina si sta caricando...
La pagina si sta caricando...
La pagina si sta caricando...
La pagina si sta caricando...
La pagina si sta caricando...
La pagina si sta caricando...
La pagina si sta caricando...
La pagina si sta caricando...
La pagina si sta caricando...
La pagina si sta caricando...
La pagina si sta caricando...
La pagina si sta caricando...
La pagina si sta caricando...
La pagina si sta caricando...
La pagina si sta caricando...
La pagina si sta caricando...
La pagina si sta caricando...
La pagina si sta caricando...
La pagina si sta caricando...
La pagina si sta caricando...
La pagina si sta caricando...
La pagina si sta caricando...
La pagina si sta caricando...
-
 1
1
-
 2
2
-
 3
3
-
 4
4
-
 5
5
-
 6
6
-
 7
7
-
 8
8
-
 9
9
-
 10
10
-
 11
11
-
 12
12
-
 13
13
-
 14
14
-
 15
15
-
 16
16
-
 17
17
-
 18
18
-
 19
19
-
 20
20
-
 21
21
-
 22
22
-
 23
23
-
 24
24
-
 25
25
-
 26
26
-
 27
27
-
 28
28
-
 29
29
-
 30
30
-
 31
31
-
 32
32
-
 33
33
-
 34
34
-
 35
35
-
 36
36
-
 37
37
-
 38
38
-
 39
39
-
 40
40
-
 41
41
-
 42
42
-
 43
43
-
 44
44
-
 45
45
-
 46
46
-
 47
47
-
 48
48
-
 49
49
-
 50
50
-
 51
51
-
 52
52
-
 53
53
-
 54
54
-
 55
55
-
 56
56
-
 57
57
-
 58
58
-
 59
59
-
 60
60
-
 61
61
-
 62
62
-
 63
63
-
 64
64
-
 65
65
-
 66
66
-
 67
67
-
 68
68
-
 69
69
-
 70
70
-
 71
71
-
 72
72
-
 73
73
-
 74
74
-
 75
75
-
 76
76
-
 77
77
-
 78
78
-
 79
79
-
 80
80
-
 81
81
-
 82
82
-
 83
83
-
 84
84
-
 85
85
-
 86
86
-
 87
87
-
 88
88
-
 89
89
-
 90
90
-
 91
91
-
 92
92
-
 93
93
-
 94
94
-
 95
95
-
 96
96
-
 97
97
-
 98
98
-
 99
99
-
 100
100
-
 101
101
-
 102
102
-
 103
103
-
 104
104
-
 105
105
-
 106
106
-
 107
107
-
 108
108
-
 109
109
-
 110
110
-
 111
111
-
 112
112
-
 113
113
-
 114
114
-
 115
115
-
 116
116
-
 117
117
-
 118
118
-
 119
119
-
 120
120
-
 121
121
-
 122
122
-
 123
123
-
 124
124
-
 125
125
-
 126
126
-
 127
127
-
 128
128
-
 129
129
-
 130
130
-
 131
131
-
 132
132
-
 133
133
-
 134
134
-
 135
135
-
 136
136
-
 137
137
-
 138
138
-
 139
139
-
 140
140
-
 141
141
-
 142
142
-
 143
143
-
 144
144
-
 145
145


Snooper DVR-1HD Mini Manuale utente
- Tipo
- Manuale utente
- Questo manuale è adatto anche per
in altre lingue
- English: Snooper DVR-1HD Mini User manual
- français: Snooper DVR-1HD Mini Manuel utilisateur
- español: Snooper DVR-1HD Mini Manual de usuario
- Deutsch: Snooper DVR-1HD Mini Benutzerhandbuch
- Nederlands: Snooper DVR-1HD Mini Handleiding
Documenti correlati
Altri documenti
-
Caliber DVR225DUAL Manuale del proprietario
-
-
Roland V-1HD Manuale del proprietario
-
Mio MiVue 388 Manuale utente
-
Optimus JK-1MD Manuale utente
-
Valeo speed Manuale utente
-
 Delk 53036 Manuale del proprietario
-
-
-
Midland Street Guardian GPS+, Dashcam Kamera Manuale del proprietario
