Sunstech Tab 109 QC Manuale del proprietario
- Categoria
- Smartphone
- Tipo
- Manuale del proprietario

TAB109QC
TabletPC
Android 5.1.1
User Manual

Tablet of Contents
Specifications...............................................................................................................................1
Tablet Parts...................................................................................................................................2
GettingStarted..................................................................................3
How to use TF card....................................................................................................................7
How to connect with computer...........................................................................................8
Connection to Internet............................................................................................................8
Camera..........................................................................................................................................9
Trouble Shooting......................................................................................................................10

1
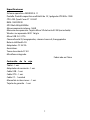
Specifications
Operatin
gSystem:ANDROID5.1.1
Display:10.1inchIPS800x1280Capacitivemulti-touchscreen
CPU:A33Quad-CoreA71.3GHZ
RAM:1GBDDRIII
GPUMali-400@450Mhz
InternalStorage:16GB
ExpansionMemory:MicroSDcardupto32GB(notsupplied)
Built-InWireless:802.11b/g/n
MicroUSB2.0/OTG
Frontcamera2.0Mpixels,backcamera5.0Mpixels.
Battery:6000mAhAC
Adapter:DC5V-2A
Outputheadphones.
DCinputjack5V.
Built-inmicrophone.
Made in China
What’s Inside The box
Tablet – 1pc
Power Adapter -1pc
USB Cable -1pc
OTG Cable -1pc
DC Cable -1pc
Instruction manual - 1pc
Warranty card - 1pc

2
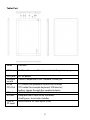
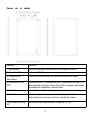
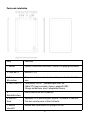
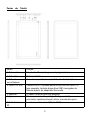
Tablet Part
Name function
1.Return Exit from the curren t function/return to theprevious page
2.DC jack DC 5V power
3.Earpho
ne jack
Connect earphone to this standard 3.5mm jack
4.USB
OTG Port
PC connection/peripheral connection through
OTG cable (for example keyboard, USB device)/
battery charge through the supplied adaptor
5.Reset Tablet will force to shutdown
6.Power Keep pressed to turn on/off the tablet;
shortly press to activate standby
7.Micro
SD input
Insert a micro SD card (up to 32GB)

3
Getting Started
Battery Charging
The tablet has a built-in rechargeable Li-polymer battery.
1. To charge connect the AC power adapter to the micro power jack onthe right
side of the tablet.
2. The battery icon shows the battery status and charging status
3. The tablet can b e used even if the battery is being charged.
the above ic ons indicate the different l evel of power left in the battery
4. Do not replace the battery without authorization, o r the ex plosion
hazard might happen.
5. Recharge it for at least half hour i f it has been idle for long tim e and fails
to start itself.
6. Regularly recharge it at least once a month
7. 40°—5° is the optimum temperature for the battery recharging or
the battery performanc e might deteriorate slightly
Disposal
the battery might contain the polluting material, please give it to the official

4
recycling-station before disposing the tablet pc, and don’t litter.
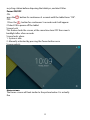
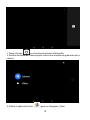
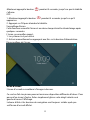
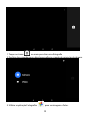
Power ON/OFF
ON:
press the
button for continuous 5 seconds until the tablet turns “O N”.
OFF:
1.Press the button for continuous 5 seconds and it will appear
2.Select OK to power off the tablet
Screen Lock
This feature locks the screen, at the same time turn OFF the screen’s
backlight after a few seconds.
Screen locks when:
1. System is idle.
2. Manually activated by pressing the Power button once.
Screen unlock :
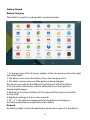
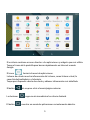
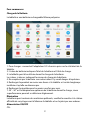
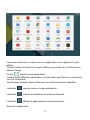
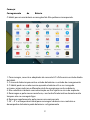
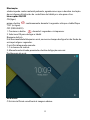
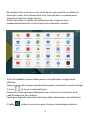
Home screen
The Home screen will look similar to the picture below. It is actually
five

5
screens, each of which can have a different layout of icons. To switch between
screens, simply slide your finger left or right across the display.
The status bar and navigation buttons are always visible, no matter which
Home screen you can currently viewing.
The Desktop contains shortcuts to your most-used applications and widgets
Touch the screen icon to quickly search the World Wide Web using Google.
The
icon will launch the A pplication menu.
The status bar displays system information, such as current time, wireless
connectivity and battery.
Touch to Expand the status bar for more detailed information.
The
button moves back one step to the previous menu/page.
The
buttons returns immediately to the Android desktop.
The
button display a menu of recently opened applications.

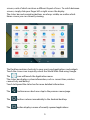
6
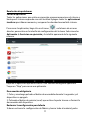
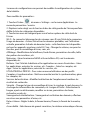
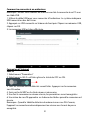
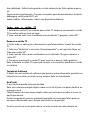
Settings Menu
The settings menu allows you to adjust Tablet system
configuration. To change settings:
1. Touch the "Settings"
menu icon on the Application menu. The
Settings menu will open.
2. Guide your finger up or down the left side of the screen to scroll through
the list of available categories.
3. Touch a category title to view further options on the right side of the
screen.
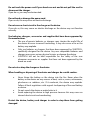
Wi-Fi - Connect to /disconnect from wireless networks, view connection
status Data usage - Enable / disable mobile data, view current usage, set
mobile data limit (note: this function is available only on devices supplied with
3G card) Sound - Change volume, to u c h sound, screen lock sound s etc
Display - Change brightness, wallpaper, sleep settings, font size etc
Storage - Manage NAND and M icro SD card, view available capacity etc
Battery - See battery status and powered-on time Apps - Manage applications,
running services etc Accounts - Manage accounts etc
Apps - Manage applications, running services etc
USERS& PROFILES- TO create a new user and profiles.
Accounts & sync - Switch synchronization on /off, manage accounts etc
Location services - Change approximatelocationdetection,improvesearch
results
Security - Change screen lock type, encryption, password, credential storage
etc Language & input Select language, add to the dictionary, edit onscreen
keyboard settings, vocal search, etc
Backup & reset - Backup & restore data, perform factory reset, etc
Date & time - Set date, time zo ne, time, clock format etc
Accessibility - Set u p large text, auto-rotate screen, speak password etc
Developer options - Advanced functions for Android developers - debugging,
HDCP check etc
About tablet - Information about your Android device

7
How to Use TF card
1. Insert the TF card into the TF card slot. Gently push TF card into slot until it
clicks into place.
2. A prompt will be seen on the screen saying “ Preparing SD card “
Removing TF card
1. Close all applicatio n s a nd documents which have been opened from the TF
card.
2. Select “Setting” and find “ Storage” then click “Unmount SD card”.
3. A prompt will be seen on the screen saying “ SD card safe to remove”
4. Gently press the TF card to remove and pull out the TF card.
Note: Insert the TF card in correct position, o therwise i t will damage the card
and the slot.
Software Key b o a rd
The tablet has a software keyboard which automatically show up when
you tap the place on screen where text or number are to be entered.
Touch Screen
The touch screen responds to finger touch.
Note: don’t place any object on the touch screen for it may damage or crush
the screen.
Single Click: single click one icon to choose the icon or option you want.
Long Press: press and hold one icon to make appear a menu related to the
executed function (if available).
Drag: drag on the screen and you can m ove between magic cube sides or
drag the application icons into the shortcut bar.

8
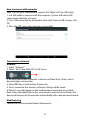
How to connect with computer
Note: Turn on your Tablet before connect the Tablet to PC by USB cable.
1. Use USB cable to connect with the computer. System w i l l notice USB
connected on bottom of screen.
2. Press USB connected on the top bar, then click Turn on USB storage, c l i c k
OK.
3. Then the USB connection has been successfully.
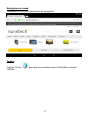
Connection to Internet
Wireless:
1. Select “ Settings”
2. Select “Wi-Fi” and slide OFF to ON status.
3. All detected wireless networks in the area will be listed, Click to select
desired wireless connection.
4. Enter WEP key or network key if necessary.
5. Once connected to a wireless network, settings will be saved
6. Wireless icon will appear on the taskbar when connected successfully.
Note: when the tablet detects the same wireless network in the future, the
device will connect to the network automatically with same password record.
Web Browsing
Connect to the internet and launch the browser.

9
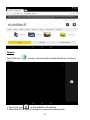
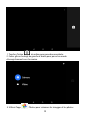
Camera
Touch the icon to enter camera mode and the interface is sho wn as
follows:
1. Touch the icon in the middle to take photo
2. Slide from left to right to change to camera recording mode.

10
3. Use the app Photos to see images and photos.
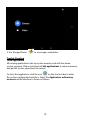
Trouble Shooting
Close Application
All running applications take up system memory and will slow down
system response. Please shut down all
idle applications
to release memory
and get the system speed back to normal.
To close the application, click the icon
on the shortcut bar to enter
the system configuration interface. Select the
Application
ė
Running
services
and the interface is shown as follows:

11
Tap the application you want to close. A pop-up window will be displayed.
Tap “Stop” to close that application.
Mandatory Power off
1. Press and hold the power button for 5 seconds and the devi ce wi l l be
powered off.
2. Press the reset button on the back and the device will be forced to be
powered off.
Restore Default Setting
If you want to reset the factory setting and erase all materials, please press
Settings
ė
Backup and Reset
ė
Factory d ata reset.
** Warning: Factory data reset setting will delete your data and
configuration of system and applications from downloading.
**Please use this function carefully.
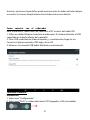
How to enter in recovery mode.
Please follow these steps.
1
-To enter in the recovery mode first you should power off the device,

12
2
-Then long-press the “
RETURN
”keyand“
ON-OFF”
key at the same time until the
Recovery mode has appeared.
3
-After a new menu will appear and then you must use the touch panel or
RETURN keys to select “
wipe data / factory reset
”thenpress“
Power
”andthen
select “
Yes dele te all u se r d ata
”.
Then press “
power
”again.The unit will thenbeginthe recovery mode.
(this process may last for a few minutes)
4
-Whenitfinishesselect“
reboot system now
”pressthe“
power button
”andthe
unit will re-start itself. (this process may last for a few minutes)

8"33"/5:$"3%
&6301&"/8"33"/5:
(FOFSBM
5IJT XBSSBOUZ JT HSBOUFE XJUIPVU QSFKVEJDF BOE JO BEEJUJPO UP UIF
SFDPHOJ[FE SJHIUT GPS UIF DPOTVNFS WJ
TËWJT UIF
TFMMFS
QSPWJEFE
JO
UIF
3PZBM
-FHJTMBUJWF %FDSFF PG /PWFNCFS BQQSPWJOH UIF SFTUBUFE UFYU PG
UIF (FOFSBM -BX GPS UIF 1SPUFDUJPO PG $POTVNFST BOE 6TFST BOE PUIFS
DPNQMFNFOUBSZ MFHJTMBUJPO 5IFSFGPSF UIF SFDPHOJ[FE MFHBM SJHIUT GPS UIF
DPOTVNFSBSFOPUMJNJUFEPSFYDMVEFEBDDPSEJOHUPUIFSFMFWBOU 3FHJPOBM
/BUJPOBMPS&VSPQFBOMFHJTMBUJPO
5IJTXBSSBOUZ
TIBMM
CF
WBMJE
JO
BMM
UIF&VSPQFBO6OJPO.FNCFS4UBUFTXJUI
UIF MJNJUBUJPOT UIBU MFHBMMZ DPSSFTQPOE JO UIF DPVOUSZ JO XIJDI UIFZ
BSF JOUFOEFE UP CF JNQMFNFOUFE JO BDDPSEBODF XJUI UIFJS
JNQMFNFOUJOHMFHJTMBUJPO
/PUXJUITUBOEJOH UIF GPSFHPJOH 46/45&$) TIBMM SFTQFDU UIF SJHIUT BOE
MJNJUBUJPOT SFMBUFE UP UIF QSPEVDU XBSSBOUZ
UIBU MFHBMMZ DPSSFTQPOE JO
FBDIPG UIF 4UBUFT MJTUFE JO UIF "UUBDINFOU JO BDDPSEBODF XJUI
UIFJS JNQMFNFOUJOH MFHJTMBUJPO GPS BOZ QSPEVDU QSPWJEFE UIBU JU JT
JOUFOEFE GPS UIF &6 NBSLFU BOE IBT CFFO QVSDIBTFE PS VTFE CZ UIF
DPOTVNFSPSVTFSXJUIJOUIF&&"
-FHBM8BSSBOUZ
5IJT46/45&$)QSPEVDUIBTBUXPZFBSXBSSBOUZDPVOUJOHGSPNUIFEBUF
PGEFMJWFSZBOEPSQVSDIBTF%VSJOHUIFBCPWFUJNFGSBNF46/45&$)TIBMM
CFIFMESFTQPOTJCMFGPSBOZMBDLPGDPOGPSNJUZPGUIFQSPEVDUJOSFMBUJPOUP
UIFDPOUSBDUJOBDDPSEBODFXJUIUIFQSPWJTJPOTPGUIF-BXGPSUIF1SPUFDUJPO
PG $POTVNFST BOE 6TFST UIBU TIBMM FOUJUMF UIF DPOTVNFS UP SFRVFTU UIF
SFQBJS PS SFQMBDFNFOU PG UIF QSPEVDU VOMFTT POF PG UIFTF PQUJPOT JT
PCKFDUJWFMZJNQPTTJCMFPSEJTQSPQPSUJPOBUF
"DDPSEJOHMZ UIF SFNFEZ JF UIF SFQBJS PS SFQMBDFNFOU TIBMM CF EFFNFE
UP CF EJTQSPQPSUJPOBUF JG JU JNQPTFT VOSFBTPOBCMF DPTUT PO UIF TFMMFS *O
PSEFS UP EFUFSNJOF UIJT UIF GPMMPXJOH TIBMM CF DPOTJEFSFE J UIF WBMVF PG
UIF QSPEVDU JG UIFSF XFSF OP MBDL PG DPOGPSNJUZ JJ UIF SFMFWBODF PG
UIF MBDL PG DPOGPSNJUZ BOE JJJ JG UIF PUIFS GPSN PG SFNFEZ DPVME CF
DBSSJFE PVU XJUIPVU NBKPS JODPOWFOJFODF UP UIF DPOTVNFS BOE VTFS5P
EFUFSNJOF

XIFUIFS UIF DPTUT BSF VOSFBTPOBCMF UIF DPTUT JODVSSFE CZ POF GPSN PG
SFNFEZ NVTU CF TJHOJGJDBOUMZ IJHIFS UIBO UIF DPTUT DPSSFTQPOEJOH UP UIF
PUIFS GPSN PG SFNFEZ
*O BEEJUJPO UIF DPOTVNFS NBZ DIPPTF CFUXFFO SFRVFTUJOH B SFEVDUJPO JO
UIF QSJDF PS UFSNJOBUJOH UIF DPOUSBDU JG IF JT OPU FOUJUMFE UP EFNBOE UIF
SFQBJS PS SFQMBDFNFOU PG UIF QSPEVDU BOE XIFOFWFS UIFTF BDUJPOT XPVME
OPU CF DPNQMFUFE XJUIJO B SFBTPOBCMF UJNFGSBNF BOE XPVME DBVTF NPSF
JODPOWFOJFODF UP UIF DPOTVNFS BOE VTFS )PXFWFS UIF UFSNJOBUJPO TIBMM
OPU UBLF QMBDF XIFSF UIF MBDL PG DPOGPSNJUZ JT NJOPS
#PUI UIF SFQBJS BOE UIF SFQMBDFNFOU PG UIF QSPEVDU BT SFTVMU PG UIF
QSPEVDUT MBDL PG DPOGPSNJUZ TIBMM CF GSFF PG DIBSHF GPS UIF DPOTVNFS BOE
VTFS JODMVEJOH MBCPVS BOE NBUFSJBMT
*O BOZ DBTF SFQBJST VOEFS XBSSBOUZ TIBMM CF DBSSJFE PVU CZ 46/45&$)T
0GGJDJBM 5FDIOJDBM "TTJTUBODF 4FSWJDF PS JUT BVUIPSJ[FE EJTUSJCVUPST
$POEJUJPOT GPS UIF XBSSBOUZ UP CF FYFSDJTFE
5P FYFSDJTF UIF MFHBM BOE DPNNFSDJBM XBSSBOUZ JU JT OFDFTTBSZ UP TVCNJU
EPDVNFOUBSZ FWJEFODF TIPXJOH UIF EFMJWFSZ BOEPS QVSDIBTF EBUF PG UIF
QSPEVDU XIFUIFS UIF JOWPJDF SFDFJQU EFMJWFSZ TMJQ PS TFBMFE BOE EBUFE
XBSSBOUZ DBSE %PDVNFOUT XIJDI IBWF CFFO UBNQFSFE XJUI PS GBMTJGJFE XJMM
OPU CF BDDFQUFE
5IF DPOTVNFS TIBMM DPOUBDU 46/45&$)T $VTUPNFS 4FSWJDF 5FBN VTJOH UIF
XFCTJUF VOEFS UIF TVQQPSU TFDUJPO BOE XJMM CF JOGPSNFE BCPVU XIBU
BDUJPO UP UBLF "U UIBU UJNF UIF DPOTVNFS TIBMM IBWF UP QSPWJEF B DMFBS
EFTDSJQUJPO PG UIF NBMGVODUJPO PS UIF MBDL PG DPOGPSNJUZ PG UIF QSPEVDU
XJUI UIF DPOUSBDU
*O BOZ DBTF SFQBJST VOEFS UIF XBSSBOUZ TIBMM CF DBSSJFE PVU CZ 46/45&$)T
0GGJDJBM 5FDIOJDBM "TTJTUBODF 4FSWJDFT PS JUT BVUIPSJ[FE EJTUSJCVUPST TP UIBU
46/45&$) DBO CF IFME SFTQPOTJCMF VOEFS UIF MFHBM BOEPS DPNNFSDJBM
XBSSBOUZ

&YDFQUJPOT
5IF XBSSBOUZ EPFT OPU GPSFTFF PS JODMVEF QFSJPEJD NBJOUFOBODF PS QSPEVDU
JOTUBMMBUJPO SFWJTJPOT
*O BEEJUJPO UIF QSPEVDU XJMM OPU CF DPOTJEFSFE BT MBDLJOH DPOGPSNJUZ JO
SFMBUJPO UP UIF DPOUSBDU BOE UIFSFGPSF JU XJMM OPU CF DPWFSFE CZ UIF MFHBM PS
DPNNFSDJBM XBSSBOUZ XIFO
x
5IF MBDL PG DPOGPSNJUZ DPSSFTQPOET UP B EJTDSFQBODZ XJUI UIF TBGFUZ
TUBOEBSET PS UIF MPDBM PS OBUJPOBM UFDIOJRVFT PG B EJGGFSFOU DPVOUSZ UP
UIF POF JU XBT PSJHJOBMMZ EFTJHOFE BOE QSPEVDFE JO
x
5IJT QSPEVDU PS BOZ PG JUT JEFOUJGJDBUJPO GFBUVSFT OVNCFS PG TFSJFT
FUD IBWF CFFO QBSUJBMMZ PS DPNQMFUFMZ PQFOFE BTTFNCMFE
VOBTTFNCMFE IBOEMFE BOEPS SFQBJSFE CZ B QFSTPO OPU QBSU PG
46/45&$)T 0GGJDJBM 5FDIOJDBM "TTJTUBODF 4FSWJDFT UFBN PS JUT
BVUIPSJ[FE EJTUSJCVUPST
x
5IF MBDL PG DPOGPSNJUZ JT B SFTVMU PG BO JODPSSFDU JOTUBMMBUJPO FYDFQU JG
UIF JOTUBMMBUJPO IBT CFFO DBSSJFE PVU CZ POF PG 46/45&$)T
BVUIPSJ[FE TFMMFST PS VOEFS JUT SFTQPOTJCJMJUZ PS CZ UIF DPOTVNFS
GPMMPXJOH 46/45&$)T JOTUBMMBUJPO JOTUSVDUJPOT PS BO BCVTJWF PS
JOBEFRVBUF VTF PG UIF QSPEVDU JODMVEJOH CVU OPU MJNJUFE UP B VTBHF
UIBU JT OPU JO BDDPSEBODF UP UIF OPSNBM QVSQPTF PG UIF QSPEVDU PS UIF
EJSFDUJPOT GPS VTF BOE NBJOUFOBODF BT EFGJOFE CZ 46/45&$)
x
5IF MBDL PG DPOGPSNJUZ IBT CFFO DBVTFE CZ B DPNQVUFS WJSVT BO
BDUJPO PS B NBOJQVMBUJPO PG QBTTXPSET TPGUXBSF JOTUBMMBUJPO
NBOJQVMBUJPO PS SFJOTUBMMBUJPO FUD
x
5IF MBDL PG DPOGPSNJUZ JT EVF UP UIF VTF PG BDDFTTPSJFT DIBSHFST PS
DPOTVNBCMFT UIBU BSF OPU 46/45&$) PSJHJOBMT BOE UIFSFGPSF BSF OPU
EFTJHOFE GPS UIBU QSPEVDU
x
5IF MBDL PG DPOGPSNJUZ JT EVF UP UIF VTF PG BOZ UIJSE QBSUZ TPGUXBSF PS
BQQMJDBUJPO UIBU NPEJGJFT DIBOHFT PS BEBQUT UIF TPGUXBSF UIBU XBT
BQQSPWFE BOEPS JODMVEFE CZ 46/45&$) JO UIF QSPEVDU

x
5IF MBDL PGDPOGPSNJUZ JT B SFTVMU PG EPXOMPBEJOH PS VTJOH UIJSE QBSUZ
NVMUJNFEJB TFSWJDFT BOEPS DPOUFOUT BWBJMBCMF PS BDDFTTJCMF UISPVHI
UIFQSPEVDU
x
%BNBHFT JO PS UISPVHI UIF CBUUFSZ XIJDI BSF EVF UP JU CFJOH
PWFSDIBSHFEBSFQSPEVDFE
x
"OZPGUIFCPYTFBMTPSCBUUFSZDFMMTIBWFCFFOEBNBHFEPSUIFSFJT
DMFBSFWJEFODFUIBUTIPXTUIFTFXFSFIBOEMFEBOEPS
x
5IF QSPEVDU EBNBHFT BSF DBVTFE CZ BOZ VOGPSFTFFBCMF PS GPSDF
NBKFVS DJSDVNTUBODFT FTQFDJBMMZ MJHIUOJOH XBUFS GJSF BQQMZJOH
JODPSSFDU WPMUBHF PS BOZ PUIFS DBVTF UIBU JT OPU EVF UP UIF QSPEVDU
NBOVGBDUVSJOHPSEFTJHO
6OEFS OP DJSDVNTUBODFT XJMM 46/45&$) CF IFME SFTQPOTJCMF GPS UIF MPTT PG BOZ EBUB
TUPSFE JO UIF QSPEVDU 5IF DPOTVNFS XJMM CF IFME SFTQPOTJCMF GPS BOZ CBDLVQ DPQJFT
BOE UIF QSPUFDUJPO PG BOZ EBUB GSPN MPTT EBNBHF PS EFTUSVDUJPO
/POF PG UIF XBSSBOUJFT JODMVEFE IFSF DPWFS UIF SFQMBDFNFOU PG QBSUT EVF UP XBSF PS
SVQUVSF PG NFDIBOJTNT SVCCFS CPYFT BOEPS QMBTUJD BT XFMM BT BOZ BFTUIFUJD EBNBHF
SFTVMUJOH GSPN UIF OPSNBM VTF PG UIF QSPEVDU GPS FYBNQMF JG UIF TDSFFO MPTFT JUT TIJOF
XJUI UIF VTF PG UIF QSPEVDU *O UIF TBNF XBZ UIF XBSSBOUJFT EP OPU DPWFS BOZ UZQF PG
EBNBHF QSPEVDFE EVSJOH UIF USBOTQPSUBUJPO PG UIF QSPEVDU JODMVEJOH CVU OPU
MJNJUFE UP BFTUIFUJD EBNBHF CMPXT MJOFT TDSBUDIFT TUBJOT EFOUT FUD JO XIJDI DBTF
UIF BQQMJDBCMF QSPWJTJPOT VOEFS 46/45&$)T HFOFSBM DPOUSBDU DPOEJUJPOT XJMM BQQMZ
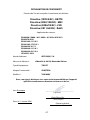
'PSGVSUIFSJOGPSNBUJPOHPUPXXXTVOTUFDIDPN
:PVDBOBMTPDPOUBDU
"'&946/44"
.FUBMM
.POUDBEBJ3FJYBD

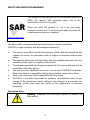
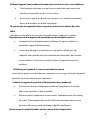
4"'&5: "/% 13&$"65*0/ 8"3/*/(4
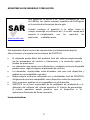
www.sar-tick.com
This product can be adjusted to the SAR national limits of 2
W/Kg. The specific SAR maximum values are in the
information section of this guide.
When you hold the product or use it on your body,
maintain a distance of 1.5 cm from your body to ensure the
radiofrequency exposure standards.
This device offers communication and entertainment services that follow
SUNSTECH’s high standards and technological experience.
x
The content may differ from the final product of the software provided by the
suppliers of services or transmitters and it is subject to alteration without prior
notice.
x
The elements that come with the device and any available accessory may vary
according to the region or supplier of the services.
x
The elements provided are designed uniquely for this device and may not be
compatible with other devices.
x
You may purchase additional accessories at your local SUNSTECH distributor.
Ensure that they are compatible with the device before you purchase them.
x
Other accessories may not be compatible with the device.
x
SUNSTECH is not held responsible for problems of insufficient return or any
change to the operating system’s software. Any attempt to personalize the
operating system may cause the device or the applications to function
incorrectly.
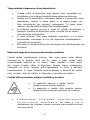
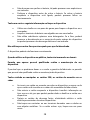
*OTUSVDUJPO JDPOT
8BSOJOH
:Situationsthatcancauseinjuriestoyourselfor
third parties.

1SFDBVUJPO
:Situationsthatcancausedamagestothedevice
or other equipment.
/PUF
Notes, recommendations of use or additional
information.
$PQZSJHIU
Copyright 2013 Afex suns, S. A.
This guide is protected by international copyright laws.
Reproduction, distribution, translation or transmission of any part of this guide is
not allowed under any circumstances or through any means, be it electronic or
mechanic. This includes photocopies, records or storage in any information
retrieval and storage systems, without previous written authorization from Afex
Suns, S. A.
4BGFUZ JOGPSNBUJPO
5IJT TFDUJPO DPOUBJOT TBGFUZ JOGPSNBUJPO GPS NPCJMF EFWJDFT 4PNF PG UIF
DPOUFOU NBZ OPU BQQMZ UP ZPVS EFWJDF *O PSEFS UP BWPJE JOKVSZ UP ZPVSTFMG PS
UIJSE QBSUJFT PS EBNBHF UP UIF EFWJDF SFBE UIF EFWJDFT TBGFUZ JOGPSNBUJPO
CFGPSF ZPV VTF JU
8BSOJOH
*G ZPV EP OPU DPNQMZ XJUI UIFTF TBGFUZ SFHVMBUJPOT BOE XBSOJOHT ZPV NBZ
TVGGFS TFSJPVT JOKVSZ PS FWFO EFBUI
%P OPU VTF EBNBHFE QPXFS DPSET PS DPOOFDUPST PS MPPTF TPDLFUT
Unsafe connections may cause an electric discharge or a fire.
La pagina si sta caricando...
La pagina si sta caricando...
La pagina si sta caricando...
La pagina si sta caricando...
La pagina si sta caricando...
La pagina si sta caricando...
La pagina si sta caricando...
La pagina si sta caricando...
La pagina si sta caricando...
La pagina si sta caricando...
La pagina si sta caricando...
La pagina si sta caricando...
La pagina si sta caricando...
La pagina si sta caricando...
La pagina si sta caricando...
La pagina si sta caricando...
La pagina si sta caricando...
La pagina si sta caricando...
La pagina si sta caricando...
La pagina si sta caricando...
La pagina si sta caricando...
La pagina si sta caricando...
La pagina si sta caricando...
La pagina si sta caricando...
La pagina si sta caricando...
La pagina si sta caricando...
La pagina si sta caricando...
La pagina si sta caricando...
La pagina si sta caricando...
La pagina si sta caricando...
La pagina si sta caricando...
La pagina si sta caricando...
La pagina si sta caricando...
La pagina si sta caricando...
La pagina si sta caricando...
La pagina si sta caricando...
La pagina si sta caricando...
La pagina si sta caricando...
La pagina si sta caricando...
La pagina si sta caricando...
La pagina si sta caricando...
La pagina si sta caricando...
La pagina si sta caricando...
La pagina si sta caricando...
La pagina si sta caricando...
La pagina si sta caricando...
La pagina si sta caricando...
La pagina si sta caricando...
La pagina si sta caricando...
La pagina si sta caricando...
La pagina si sta caricando...
La pagina si sta caricando...
La pagina si sta caricando...
La pagina si sta caricando...
La pagina si sta caricando...
La pagina si sta caricando...
La pagina si sta caricando...
La pagina si sta caricando...
La pagina si sta caricando...
La pagina si sta caricando...
La pagina si sta caricando...
La pagina si sta caricando...
La pagina si sta caricando...
La pagina si sta caricando...
La pagina si sta caricando...
La pagina si sta caricando...
La pagina si sta caricando...
La pagina si sta caricando...
La pagina si sta caricando...
La pagina si sta caricando...
La pagina si sta caricando...
La pagina si sta caricando...
La pagina si sta caricando...
La pagina si sta caricando...
La pagina si sta caricando...
La pagina si sta caricando...
La pagina si sta caricando...
La pagina si sta caricando...
La pagina si sta caricando...
La pagina si sta caricando...
La pagina si sta caricando...
La pagina si sta caricando...
La pagina si sta caricando...
La pagina si sta caricando...
La pagina si sta caricando...
La pagina si sta caricando...
La pagina si sta caricando...
La pagina si sta caricando...
La pagina si sta caricando...
La pagina si sta caricando...
La pagina si sta caricando...
La pagina si sta caricando...
La pagina si sta caricando...
La pagina si sta caricando...
La pagina si sta caricando...
La pagina si sta caricando...
La pagina si sta caricando...
La pagina si sta caricando...
La pagina si sta caricando...
La pagina si sta caricando...
La pagina si sta caricando...
La pagina si sta caricando...
La pagina si sta caricando...
La pagina si sta caricando...
La pagina si sta caricando...
La pagina si sta caricando...
La pagina si sta caricando...
La pagina si sta caricando...
La pagina si sta caricando...
La pagina si sta caricando...
La pagina si sta caricando...
La pagina si sta caricando...
La pagina si sta caricando...
La pagina si sta caricando...
La pagina si sta caricando...
La pagina si sta caricando...
La pagina si sta caricando...
La pagina si sta caricando...
La pagina si sta caricando...
La pagina si sta caricando...
La pagina si sta caricando...
La pagina si sta caricando...
La pagina si sta caricando...
La pagina si sta caricando...
La pagina si sta caricando...
La pagina si sta caricando...
La pagina si sta caricando...
La pagina si sta caricando...
La pagina si sta caricando...
La pagina si sta caricando...
La pagina si sta caricando...
-
 1
1
-
 2
2
-
 3
3
-
 4
4
-
 5
5
-
 6
6
-
 7
7
-
 8
8
-
 9
9
-
 10
10
-
 11
11
-
 12
12
-
 13
13
-
 14
14
-
 15
15
-
 16
16
-
 17
17
-
 18
18
-
 19
19
-
 20
20
-
 21
21
-
 22
22
-
 23
23
-
 24
24
-
 25
25
-
 26
26
-
 27
27
-
 28
28
-
 29
29
-
 30
30
-
 31
31
-
 32
32
-
 33
33
-
 34
34
-
 35
35
-
 36
36
-
 37
37
-
 38
38
-
 39
39
-
 40
40
-
 41
41
-
 42
42
-
 43
43
-
 44
44
-
 45
45
-
 46
46
-
 47
47
-
 48
48
-
 49
49
-
 50
50
-
 51
51
-
 52
52
-
 53
53
-
 54
54
-
 55
55
-
 56
56
-
 57
57
-
 58
58
-
 59
59
-
 60
60
-
 61
61
-
 62
62
-
 63
63
-
 64
64
-
 65
65
-
 66
66
-
 67
67
-
 68
68
-
 69
69
-
 70
70
-
 71
71
-
 72
72
-
 73
73
-
 74
74
-
 75
75
-
 76
76
-
 77
77
-
 78
78
-
 79
79
-
 80
80
-
 81
81
-
 82
82
-
 83
83
-
 84
84
-
 85
85
-
 86
86
-
 87
87
-
 88
88
-
 89
89
-
 90
90
-
 91
91
-
 92
92
-
 93
93
-
 94
94
-
 95
95
-
 96
96
-
 97
97
-
 98
98
-
 99
99
-
 100
100
-
 101
101
-
 102
102
-
 103
103
-
 104
104
-
 105
105
-
 106
106
-
 107
107
-
 108
108
-
 109
109
-
 110
110
-
 111
111
-
 112
112
-
 113
113
-
 114
114
-
 115
115
-
 116
116
-
 117
117
-
 118
118
-
 119
119
-
 120
120
-
 121
121
-
 122
122
-
 123
123
-
 124
124
-
 125
125
-
 126
126
-
 127
127
-
 128
128
-
 129
129
-
 130
130
-
 131
131
-
 132
132
-
 133
133
-
 134
134
-
 135
135
-
 136
136
-
 137
137
-
 138
138
-
 139
139
-
 140
140
-
 141
141
-
 142
142
-
 143
143
-
 144
144
-
 145
145
-
 146
146
-
 147
147
-
 148
148
-
 149
149
-
 150
150
-
 151
151


Sunstech Tab 109 QC Manuale del proprietario
- Categoria
- Smartphone
- Tipo
- Manuale del proprietario
in altre lingue
Documenti correlati
Altri documenti
-
Pantech Pursuit AT&T Manuale utente
-
Motorola T250 Manuale utente
-
Yamaha PC406 Manuale del proprietario
-
 Beninca JM3/JM4 Guida utente
-
Peavey XR 1212 Manuale utente
-
 Beninca DU350V Guida utente
-
 Budda 112 COMBO Manuale utente
-
ULTIMATE SPEED ULG 3.8 A1 BATTERY CHARGER Operation and Safety Notes
-
LG US995 US Cellular Guida utente
-
Thomson SB300B Manuale del proprietario


