La pagina si sta caricando...

DS70-700BL1
IT
EN
NL
DE
FR
ES
PT
DK
Monitor desk mount
Monitor bureausteun
Monitor Tischhalterung
Support moniteur de bureau
Supporto da scrivania per monitor
Soporte de escritorio para monitor
Suporte de mesa para monitor
Bordbeslag skærm
NO
SE
FI
PL
CS
SK
RO
Bordstativ til skjerm
Skrivbordsfäste för bildskärm
Näytön pöytäteline
Uchwyt nabiurkowy do monitora
Stolní držák monitoru
Držiak na monitor
Suport de birou pentru monitor
250mm
94mm
min160mm-max410mm
min10mm-max80mm
min225mm-max290mm 50mm
75mm
75mm
100mm
115mm
100mm
117mm
160mm
±90°
+90°
-45°
±180°
±180°
±180°
WWW.NEOMOUNTS.COM
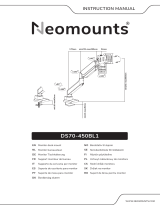
INSTRUCTION MANUAL

PARTS
DS70-700BL1
Assemble the base
Monteer de basis
Montieren Sie die Basis
Assemblez la base
Monti la base
Montar la base
Montar a base
Złóż podstawę
EN
NL
DE
FR
IT
ES
PT
PL
A. (x1)
B. (x1) C. (x1) D. (x1) E. M6x8
(x2)
F. 3mm
(x1)
G. 5mm
(x1)
M-A. M4x12
(x4)
M-B. M5x12
(x4)
M-C. D5
(x4)
STEP 1
75x75 -
100x100 mm
2-7 kg
15,2-40,2 cm
Tool
0-48 cm
G
B
E
C
G

Install the clamp to the desk - for desktop thickness
between 10-50 mm
Installeer de klem aan het bureau - voor bladdikte
10-50 mm
Installieren der Klemme an den Schreibtisch - für
Tischstärken zwischen 10-50 mm
Installez la pince sur le bureau (prévu pour un bureau
d'épaisseur entre 10-50 mm)
Installa il morsetto sulla scrivania - per spessore del
desktop tra 10-50 mm
Instale la abrazadera en el escritorio - para el grosor
del escritorio entre 10-50 mm
Instale a braçadeira na mesa - para espessura de mesa
entre 10-50 mm
Zainstaluj zacisk na biurku - dla grubości pulpitu od
10-50 mm
EN
NL
DE
FR
IT
ES
PT
PL
Install the clamp to the desk - for desktop thickness
between 40-80 mm
Installeer de klem aan het bureau - voor bladdikte
40-80 mm
Installieren der Klemme an den Schreibtisch - für
Tischstärken zwischen 40-80 mm
Installez la pince sur le bureau (prévu pour un bureau
d'épaisseur entre 40-80 mm)
Installa il morsetto sulla scrivania - per spessore del
desktop tra 40-80 mm
Instale la abrazadera en el escritorio - para el grosor
del escritorio entre 40-80 mm
Instale a braçadeira na mesa - para espessura de mesa
entre 40-80 mm
Zainstaluj zacisk na biurku - dla grubości pulpitu od
40-80 mm
EN
NL
DE
FR
IT
ES
PT
PL
STEP 2A
10-50mm
40-80mm
CAUTION:
Do not over-tighten the screws.
STEP 2B
D
G
CAUTION:
Do not over-tighten the screws.
G
G
G
G
D

Attention: the arm is compressed and packed under
tension. Make sure to firmly hold both sides of the arm
in position when cutting the cable tie
Let op: de steun is samengedrukt en verpakt onder
spanning. Zorg ervoor dat beide zijden van de steun
stevig op hun plek worden gehouden wanneer de
kabelbinder wordt doorgesneden
Hinweis: Der Halterung zusammengedrückt und unter
Spannung verpackt. Achten Sie darauf, beide Seiten
der Halterung festzuhalten, wenn Sie den Kabelbinder
abschneiden
Attention: le support est comprimé et emballé sous
tension. Assurez-vous que les deux côtés du support
sont fermement maintenus en place lorsque l'attache
sera coupée
Nota: il supporto è compresso e imballato in tensione.
Assicuri che entrambi i lati della staffa siano tenuti salda-
mente in posizione quando si taglia la fascetta
Nota: el brazo está comprimido y embalado bajo tensión.
Asegúrese de sostener firmemente ambos lados del
brazo cuando corte la cinta
Nota: o braço é comprimido e embalado sob tensão.
Certifique-se de agarrar firmemente ambos os lados
do braço ao cortar a abraçadeira
Uwaga: uchwyt jest ściśnięte i zapakowane pod
napięciem. Upewnij się, że oba ramiona uchwytu
wspornika są dobrze zabezpieczone podczas
przecinania opaski zaciskowej
EN
NL
DE
FR
IT
ES
PT
PL
STEP 3
A
1
A
2
F
* Not Included
WARNING
STORED ENERGY

Screw 2 bolts in the upper 2 VESA holes of the screen,
leaving 3 mm spacing
Draai 2 bouten in de bovenste 2 VESA-gaten van het
scherm en behoudt een tussenruimte van 3 mm
Setzen Sie 2 Schrauben in die oberen 2 VESA-Löcher
des Flachbildschirms ein und lassen Sie dabei einen
Abstand von 3 mm
Insérez 2 vis dans les 2 trous VESA supérieurs de l'écran
et gardez un espace de 3 mm.
Inserisca 2 bulloni nei 2 fori VESA superiori dello schermo
e mantenga uno spazio di 3 mm
Inserte 2 tornillos en los 2 orificios VESA superiores de
la pantalla plana, dejando un espacio de 3 mm
Insira 2 parafusos nos 2 orifícios VESA superiores do
monitor plano, mantendo um espaço de 3 mm
Włóż 2 śruby w 2 górne otwory VESA płaskiego ekranu
i zachowaj odstęp 3 mm
EN
NL
DE
FR
IT
ES
PT
PL
M-C
M-A
M-B
G
* Not Included
G
Too long Too Short
3mm
M-A M-B
M-C
Slide the bolts into the top holes of the VESA plate and
tighten the bolts. Attach the other 2 bolts in the lower
part of the VESA plate
Schuif de bouten in de bovenste gaten van de VESA-
plaat en draai de bouten vast. Bevestig de andere 2
bouten in het onderste deel van de VESA-plaat
Schieben Sie die Schrauben in die oberen Löcher der
VESA-Platte und ziehen Sie die Schrauben fest. Instal-
lieren Sie die anderen 2 Schrauben im unteren Teil der
VESA-Platte
Insérez les vis dans les trous supérieurs de la plaque
VESA et les serrer. Installez les 2 autres vis dans la
partie inférieure de la plaque VESA
Scorra i bulloni nei fori superiori della piastra VESA e
serrare i bulloni. Installare gli altri 2 bulloni nella parte
inferiore della piastra VESA
Deslice los tornillos en los orificios superiores de la placa
VESA y apriete los tornillos. Instale los otros 2 tornillos
en la parte inferior de la placa VESA
Deslize os parafusos nos orifícios superiores da placa
VESA e aperte os parafusos. Instale os outros 2 para-
fusos na parte inferior da placa VESA
Wsuń śruby w górne otwory płyty VESA i dokręć je.
Zainstaluj pozostałe 2 śruby w dolnej części płytki VESA
EN
NL
DE
FR
IT
ES
PT
PL
STEP 4
STEP 5

Adjust the gas spring
Stel de gasveer af
Gasfeder-Höhenverstellung einstellen
Ajuster le ressort à gaz
Regolare la forza della molla
Ajustar la fuerza de resorte a gas
Ajuste a força da mola a gás
Ustawić naprężenie sprężyny
EN
NL
DE
FR
IT
ES
PT
PL
Do not over-tighten the screws
G
Route the cable(s) through the cable clips
Geleid de kabel(s) door de kabelclips
Führen Sie das/die Kabel durch die Kabelklemmen
Faire passer le(s) câble(s) dans les attaches de câble
Far passare il/i cavo/i attraverso i fermacavi
Pase el cable o los cables por las abrazaderas
Guiar o(s) cabo(s) através dos clipes do cabo
Przełóż kabel (kable) przez uchwyty kablowe
EN
NL
DE
FR
IT
ES
PT
PL
STEP 6
STEP 7

Adjust the mount to the desired position
Stel de steun in op de gewenste positie
Positionieren die Halterung in die gewünschte Position
Ajustez le support à la position souhaitée
Regolare il supporto nella posizione desiderata
Ajuste el soporte a la posición deseada
Ajuste o suporte na posição desejada
Dostosuj pozycję uchwytu do twoich wymagań
EN
NL
DE
FR
IT
ES
PT
PL
STEP 8
G

1/8