
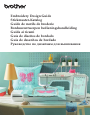
Embroidery Design Guide
Stickmuster-Katalog
Guide de motifs de broderie
Borduurontwerpen bedieningshandleiding
Guida ai ricami
Guía de diseños de bordado
Guia de desenhos de bordado
Руководство по дизайнам для вышивания

1
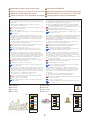
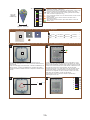
Note
Embroidery time and size of each design in this guide may dier from the information
on the machine display. Please use as a reference purpose only.
Hinweis
Die Stickzeit und die Größe jedes Designs in dieser Anleitung können von den
Informationen im Display abweichen. Bitte verwenden Sie die Angaben nur als
Referenz.
Remarque
La durée de broderie et la taille de chaque motif présenté dans ce guide peuvent
diérer des informations achées à l’écran de la machine. Merci de les utiliser à titre
de référence uniquement.
Opmerking
De informatie in deze handleiding over de borduurtijd en de afmeting van het
borduurpatroon kan afwijken van de weergave op het beeldscherm van de machine.
Gelieve de informatie alleen te gebruiken als richtlijn.
Nota
Il tempo di ricamo e le dimensioni di ciascun ricamo in questa guida possono dierire
dalle informazioni sul display della macchina. Si prega di utilizzare solo come
riferimento.
Nota
El tiempo de bordado y el tamaño de cada diseño en esta guía pueden diferir de la
información en la pantalla de la máquina. Por favor, use solo como referencia.
OBSERVAÇÃO
O tempo de bordado e o tamanho de cada desenho apresentados neste guia podem
diferir das informações mostradas na tela da máquina. Por favor, use-os apenas para o
propósito de referência
Примечание
Время вышивания и размер каждого дизайна в этом руководстве может
отличаться от информации на дисплее машины. Используйте эти данные только
для справки.

2
Contents
3 Character Patterns
4 Embroidery Pattern Color Change Table
34 Examples of Combinations
Inhalt
3 Buchstabenmuster
4 Stickmuster-Farbtabelle
34 Kombinationsbeispiele
Table des matières
3 Motifs de caractères
4 Tableau de changement de couleur des motifs de
broderie
34 Exemples de combinaisons
Inhoudsopgave
3 Letterpatronen
4 Kleurwijzigingstabel voor de borduurpatronen
34 Voorbeelden van combinaties
Sommario
3 Ricami con caratteri
4 Tabella dei cambi colore dei ricami
34 Esempi di combinazioni
Contenido
3 Patrones de caracteres
4 Tabla de cambio de color para patrones de bordado
34 Ejemplos de combinaciones
Содержание
3 Буквенные/символьныерисунки
4 Таблицыцветовнитейдлявышивания
34 Примерыкомбинирования
Índice
3 Padrões de caracteres
4 Tabela de alteração de cor do padrão de bordado
34 Exemplos de combinações

3
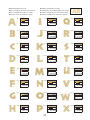
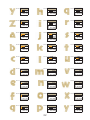
Character Patterns Buchstabenmuster
Motifs de caractères Letterpatronen
Ricami con caratteri Patrones de caracteres
Padrões de caracteres Буквенные/символьные рисунки
Tennessee ExtraBold
Brussels Light

4
La durée de broderie et la taille de chaque motif présenté dans ce guide
peuvent diérer des informations achées à l’écran de la machine. Merci
de les utiliser à titre de référence uniquement. Les numéros des couleurs
dans ce guide correspondent à la marque de fils de broderie Embroidery,
sauf indication contraire.
(●)Les motifs signalés par ● ont été pivotés. Vérifiez l’emplacement de
votre motif avant de commencer à broder.
1Reportez-vous au manuel d’instructions de la machine à broder pour
plus d’informations sur la broderie des appliqués.
2Référez-vous à la page 10 de ce guide.
En raison de la complexité de ce motif de broderie, nous vous
conseillons de le broder sans modifier sa taille définie par défaut.
De informatie in deze handleiding over de borduurtijd en de afmeting van
het borduurpatroon kan afwijken van de weergave op het beeldscherm van
de machine. Gelieve de informatie alleen te gebruiken als richtlijn.
De kleurnummers in deze handleiding verwijzen naar Brother Embroidery
borduurgaren, tenzij anders vermeld.
(●)Patronen die zijn gemarkeerd met ● zijn geroteerd. Controleer de
plaats van uw ontwerp voordat u gaat borduren.
1Raadpleeg de bedieningshandleiding bij de borduurmachine voor
gedetailleerde uitleg over het borduren van applicaties.
2Raadpleeg hiervoor pagina 10 in de handleiding.
Als gevolg van de complexiteit van dit borduurpatroon adviseren we
het patroon in het standaardformaat te borduren.
Il tempo di ricamo e le dimensioni di ciascun ricamo in questa guida
possono dierire dalle informazioni sul display della macchina. Si prega
di utilizzare solo come riferimento. Salvo diversa indicazione, i numeri dei
colori riportati in questa guida corrispondono alla marca del filo per ricamo.
(●)I ricami contrassegnati dal simbolo ● appaiono ruotati. Prima di
procedere a ricamare, verificare la posizione del ricamo.
1Consultare il manuale di istruzioni della macchina per ricamare per i
dettagli relativi al ricamo in appliqué.
2Fare riferimento a pagina 10 di questa guida.
Vista la complessità di questo ricamo, si consiglia di ricamarlo con le
dimensioni predefinite.
El tiempo de bordado y el tamaño de cada diseño en esta guía pueden
diferir de la información en la pantalla de la máquina. Por favor, use solo
como referencia. Los números de colores en esta guía se refieren a la marca
de hilos de Bordado, a menos que se indique lo contrario.
(●)Los patrones marcados con ● se han girado. Compruebe la colocación
del diseño antes de bordar.
1Consulte el manual de instrucciones de la máquina de bordar si desea
más información sobre cómo bordar apliques.
2Consulte la página 10 de esta guía.
Debido a la complejidad de este patrón de bordado, recomendamos
bordarlo a su tamaño predeterminado.
O tempo de bordado e o tamanho de cada desenho apresentados neste guia
podem diferir das informações mostradas na tela da máquina. Por favor, use-
os apenas para o propósito de referência. Os números de cores neste guia
são para marcas de linha de bordar, a menos que indicados de outra forma.
(●)Os padrões marcados com ● foram invertidos. Verifique o
posicionamento do seu desenho antes de bordar.
1Consulte o manual de operações da máquina de bordar para obter
detalhes sobre como bordar apliques.
2Consulte a página 10 deste manual.
Devido à complexidade deste padrão, recomendamos bordá-lo em seu
tamanho padrão.
Время вышивания и размер каждого дизайна в этом руководстве
может отличаться от информации на дисплее машины. Используйте
эти данные только для справки. Номера цветов, указанные в данном
руководстве, относятся к маркам нитей для вышивания, если не
указано иное.
(●)Дизайны, отмеченные знаком ●, повернуты. Проверьте
расположение дизайна перед началом вышивания.
1Инструкции по вышиванию аппликаций приведены в “Руководстве
пользователя”. машины.
2См. стр. 10 в этом руководстве.
Рекомендуется вышивать этот дизайн в первоначальном размере
из-за его сложности.
Embroidery time and size of each design in this guide may dier from the
information on the machine display. Please use as a reference purpose only.
The color numbers in this guide are for the Embroidery thread brand unless
otherwise noted.
(●)Patterns marked with ● have been rotated. Check your design
placement prior to embroidering.
1
Refer to the operation manual for the embroidery machine for details
on how to embroider appliqués.
2Refer to this guide page 10.
Due to the complexity of this pattern, we recommend embroidering it
at its default size.
Die Stickzeit und die Größe jedes Designs in dieser Anleitung können von
den Informationen im Display abweichen. Bitte verwenden Sie die Angaben
nur als Referenz. Die Farbnummern in dieser Anleitung beziehen sich auf
die Stickgarnmarke, sofern nicht anders angegeben.
(●)Muster, die mit ● gekennzeichnet sind, wurden gedreht. Überprüfen
Sie die Platzierung Ihres Designs, bevor Sie mit Sticken beginnen.
1Weitere Hinweise zum Sticken von Applikationen finden Sie in der
Bedienungsanleitung der Stickmaschine.
2Weitere Informationen finden Sie in dieser Anleitung auf Seite 10.
Da dieses Stickmuster recht komplex ist, empfehlen wir, es in der
Standardgröße zu sticken
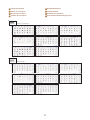
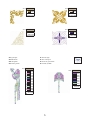
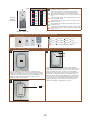
Embroidery Pattern Color Change Table Stickmuster-Farbtabelle
Tableau de changement de couleur des motifs de broderie
Kleurwijzigingstabel voor de borduurpatronen
Tabella dei cambi colore dei ricami
Tabla de cambio de color para patrones de bordado
Tabela de alteração de cor do padrão de bordado
Таблицы цветов нитей для вышивания
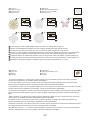
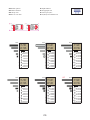
No.3 11 min
1(307)
2(348)
3(323)
4(843)
5(058)
6(001)
7(079)
56.2 mm
54.3 mm
● Line and Corner ● Linie und Ecke
● Ligne et Coin ● Lijn en hoek
● Linea e angolo ● Línea y esquina
● Linhas e cantos ● Линия и угол
No.1 13 min
1(502)
2(517)
3(307)
4(085)
5(019)
6(209)
7(206)
8(517)
102.0 mm
171.8 mm
No.2 9 min
1(542)
2(070)
3(124)
4(086)
5(804)
6(812)
43.8 mm
76.5 mm

5
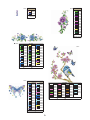
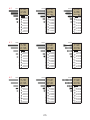
● Large Designs ● Große Designs
● Grands motifs ● Grote ontwerpen
● Ricami grandi ● Diseños de gran tamaño
● Desenhos grandes ● Большие дизайны
No.5 5 min
1(328)
124.5 mm
102.4 mm
No.6 27 min
1(214)
2(307)
125.8 mm
125.8 mm
No.7 9 min
1(612)
2(614)
126.2 mm
126.2 mm
No.2 19 min
1(307)
2(612)
3(542)
4(810)
5(612)
6(810)
7(070)
8(542)
192.5 mm
85.6 mm
No.4 20 min
1(214)
2(328)
125.4 mm
125.8 mm
No.1 36 min
1(612)
2(307)
3(810)
4(612)
5(542)
6(070)
7(307)
8(810)
9(070)
10
(612)
11
(542)
12
(348)
13
(810)
349.4 mm
91.6 mm

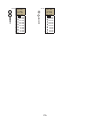
6
No.3 1 min
1(612)
2(307)
3(070)
44.1 mm
15.2 mm
No.5 21 min
1(420)
18
(810)
2(019)
19
(017)
3(812)
20
(607)
4(607)
21
(017)
5(810)
22
(810)
6(017)
23
(017)
7(607)
24
(810)
8(017)
25
(001)
9(810)
26
(019)
10
(017)
27
(420)
11
(810)
28
(001)
12
(001)
29
(017)
13
(019)
30
(019)
14
(420)
31
(420)
15
(019)
32
(812)
16
(812)
33
(810)
17
(607)
117.2 mm 152.8 mm
No.6 23 min
1(507)
2(513)
3(507)
4(513)
5(620)
6(513)
7(812)
8(810)
9(001)
10
(620)
11
(869)
12
(019)
13
(812)
14
(513)
15
(507)
217.2 mm
100.4 mm
No.7
151 min
1(001) 9(085)
17
(005)
25
(017)
2(005)
10
(843)
18
(206)
26
(812)
3(513)
11
(513)
19
(812)
27
(607)
4(810)
12
(085)
20
(323)
28
(017)
5(085)
13
(323)
21
(812)
29
(707)
6(513)
14
(348)
22
(323)
30
(017)
7(085)
15
(843)
23
(804)
8(348)
16
(323)
24
(019)
346.8 mm 233.5 mm
● No.4 33 min
1(507)
14
(812)
27
(019)
2(513)
15
(507)
28
(420)
3(507)
16
(513)
29
(001)
4(513)
17
(607)
30
(812)
5(810)
18
(810)
31
(507)
6(017)
19
(507)
32
(513)
7(001)
20
(513)
33
(001)
8(607)
21
(507)
34
(019)
9(019)
22
(513)
35
(812)
10
(420)
23
(810)
36
(607)
11
(001)
24
(017)
37
(810)
12
(019)
25
(001)
38
(812)
13
(420)
26
(607)
294.5 mm 85.9 mm

7
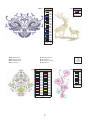
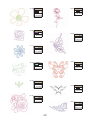
● Light Sketch Flowers ● Helle Blumenskizze
● Esquisse légère Fleurs ● Bloemenschets
● Fiori stilizzati leggeri ● Boceto ligero de flores
● Esboço de flores ● Эскиз цветов
No.9 22 min
1(330)
2(328)
267.0 mm
233.6 mm
● No.8 152 min
1(399)
2(005)
3(001)
4(707)
5(607)
6(406)
7(001)
8(406)
9(607)
10
(399)
11
(001)
12
(406)
13
(607)
14
(001)
15
(415)
16
(607)
17
(399)
18
(406)
19
(607)
351.9 mm
233.1 mm
No.1 55 min
1(027)
16
(202)
2(804)
17
(027)
3(017)
18
(085)
4(202)
19
(017)
5(017)
20
(804)
6(027)
21
(017)
7(124)
22
(027)
8(085)
23
(017)
9(202)
24
(027)
10
(027)
25
(017)
11
(124)
26
(804)
12
(017)
27
(017)
13
(085)
28
(202)
14
(027)
29
(017)
15
(124)
30
(704)
267.8 mm 234.0 mm
No.2 34 min
1(086)
2(502)
3(017)
4(810)
5(001)
6(086)
7(502)
8(017)
293.9 mm
145.2 mm

8
l Quilt 2 l Quilt 2
l Quilt 2 l Quilt 2
l Quilting 2 l Acolchado 2
l Quilting 2 l Квилтинг 2
l No.3 21 min
1(810)
2(070)
3(206)
4(337)
5(542)
250.0 mm
233.0 mm
No.1 4 min
1(214)
233.9 mm
233.4 mm
No.2 3 min
1(507)
228.2 mm
234.8 mm
No.3 4 min
1(019)
234.4 mm
235.2 mm
No.4 4 min
1(030)
234.8 mm
235.0 mm

9
No.5 5 min
1(330)
235.0 mm
234.3 mm
● No.6
3 min
1(517)
2(328)
295.2 mm
131.0 mm
● No.7
2 min
1(807)
295.0 mm
126.9 mm
No.8 2 min
1(614)
145.3 mm
147.0 mm
● No.9
2 min
1(534)
294.9 mm
130.7 mm
No.10 24 min
1(406)
2(534)
3(406)
4(534)
348.6 mm
175.7 mm

10
● Appliqué 2 ● Applikation 2
● Appliqué2 ● Applicatie 2
● Applicazione 2 ● Aplique 2
● Apliques 2 ● Аппликация 2
No.1+ 2125 min
1(086)
2(001)
3(812)
4(019)
5(812)
6(086)
7(328)
8(812)
9(214)
10
(214)
11
(214)
12
(214)
13
(542)
14
(542)
15
(542)
16
(542)
17
(509)
18
B
19
(812)
20
(812)
21
(812)
C
22
(812)
23
(812)
24
(086)
A
25
(086)
26
(086)
158.9 mm
213.2 mm
A
B
C
1
2
A,B,C,D
• Recommended: 2 mm-thick felt
• Empfohlen: 2 mm dicker Filz
• Recommandé : Feutrine d’une épaisseur de 2 mm
• Aanbevolem: 2 mm dik vilt
• Consigliato: feltro spesso 2 mm
• Recomendado: Fieltro de 2 mm de groso
• Recomendamos: feltro de 2 mm de espessura
• Peкoмeндyeтся: фeтp топщинoѝ 2 мм
Stitch this on the background fabric for placement purposes.
Dieser Stich dient der Positionierung. Sticken Sie ihn daher auf den
Hintergrundstoff.
Brodez cette étape sur le tissu de base pour le positionnement.
Borduur op de ondergrondstof - waardoor de plaatsing wordt
aangeduid.
Cucire i punti di posizionamento sul tessuto di fondo.
Cósalo en la tela de fondo con el fin de colocarlo.
Costure pontos-guia no forro para facilitar o posicionamento.
Вышейте этот контур на ткани фона для определения положения
аппликации.
Lay the appliqué fabric on top so that it overlaps the placement stitch.
Then sew next color.
Legen Sie den Applikationsstoff darüber, sodass er sich mit dem
Positionierungsstich überlappt. Sticken Sie anschließend die nächste
Farbe.
Posez le tissu d'appliqué par-dessus de façon à ce qu'il chevauche le
point de positionnement. Brodez ensuite la couleur suivante.
Leg de applicatiestof er op, zodat deze stof de plaatsingssteek overlapt.
Borduur vervolgens de volgende kleur.
Posarvi sopra il tessuto dell'applicazione in modo che si sovrapponga al
punto di posizionamento. Cucire poi il colore successivo.
Coloque la tela con aplique en la parte superior de manera que se
superponga a la puntada de colocación. Luego cosa el siguiente color.
Posicione o tecido do aplique por cima, de forma que ele se sobreponha
aos pontos-guia. Em seguida, costure a próxima cor.
Наложите поверх ткань аппликации, чтобы она полностью закрыла
вышитый контур. Затем вышейте следующий цвет.
Do not remove fabric from hoop. Remove hoop from the machine and
trim appliqué fabric close to stitching. Return hoop to machine and sew
the next color.
Lassen Sie den Stoff in den Rahmen eingespannt. Nehmen Sie
den Rahmen aus der Maschine und schneiden Sie überstehenden
Applikationsstoff entlang der Stickerei ab. Setzen Sie den Rahmen
wieder in die Maschine ein und sticken Sie die nächste Farbe.
Ne retirez pas le tissu du cercle. Retirez le cercle de la machine et
coupez le tissu de l'appliqué à côté de la couture. Remettez le cercle sur
la machine et cousez la couleur suivante.
Verwijder de stof niet uit het borduurraam. Schuif het borduurraam van
de machine en knip de applicatiestof dicht bij het stiksel af. Plaats het
borduurraam terug op de machine en borduur de volgende kleur.
Non togliere il tessuto dal telaio. Togliere il telaio dalla macchina e
tagliare il tessuto dell'applicazione vicino alla cucitura. Rimontare il
telaio sulla macchina e cucire il colore successivo.
No retire la tela del aro. Retire el aro de la máquina y recorte la tela con
aplique cerca de la costura. Vuelva a colocar el aro en la máquina y
cosa el siguiente color.
Não remova o tecido do bastidor. Remova o bastidor da máquina e corte
o tecido do aplique rente à costura. Reinstale o bastidor na máquina e
costure a próxima cor.
Не снимайте ткань с пялец. Снимите пяльцы с машины и обрежьте
ткань аппликации рядом со строчкой. Установите пяльцы обратно на
машину и вышейте следующий цвет.
stitch will secure appliqué fabric.
Mit dem Stich „ “ wird der Applikationsstoff sicher vernäht.
Le point permet de fixer le tissu d'appliqué.
De steek zet de applicatiestof vast.
Il punto fisserà il tessuto dell'applicazione.
La puntada asegurará la tela con aplique.
O ponto fixará o tecido do aplique.
Строчка прикрепляет ткань аппликации.
1

11
A
B
D C
5 min
1(513)
2(205)
3(800)
4(800)
*1
5(800)
6(800)
*1
7(800)
8(513)
*1
9(513)
10
(513)
11
(205)
12
(513)
161.5 mm
120.1 mm
A,B,C,D
Precautions/ Hinweise/ Précautions/
Voorzorgsmaatregelen/ Precauzioni/
Precauciones/ Precauções/ Меры
предосторожности
Gluing/ Kleben/ Collage/ Lijmen/ Incollare/ Encolado/
Colagem/ Склеивание
· Positioning/ Positionieren/ Positionnement/ Plaatsen/
Posizionamento/ Colocación/ Posicionamento/
Расположение
• Recommended: 2 mm-thick felt
• Empfohlen: 2 mm dicker Filz
• Recommandé : Feutrine d’une épaisseur de 2 mm
• Aanbevolem: 2 mm dik vilt
• Consigliato: feltro spesso 2 mm
• Recomendado: Fieltro de 2 mm de groso
• Recomendamos: feltro de 2 mm de espessura
• Peкoмeндyeтся: фeтp топщинoѝ 2 мм
A
A
A,B
C,D
*1
62 min
1(085) 8(812)
16
(001)
9(001)
2(085)
10
(812)
17
(001)
11
(542)
18
(399)
3(085)
19
(337)
4(001)
12
(812)
20
(323)
5(085)
21
(001)
6(812)
13
(542)
14
(542)
7(812)
15
(001)
289.1 mm 189.0 mm
● No.2
2
No.3
1

12
● Crochet Lace ● Häkelspitze
● Dentelle au crochet ● Haak- en kantborduurpatronen
● Pizzo all’uncinetto ● Cinta de encaje de ganchillo
● Renda de crochê ● Кружево кроше
● In The Hoop ● ITH-Stickerei
● Dans le cadre ● In The Hoop-borduurprojecten
● Nel telaio ● En el aro
● No bastidor ● В пяльцах
25 min
1(012)
91.1 mm
92.4 mm
34 min
1(000)
93.2 mm
93.2 mm
29 min
1(000)
73.1 mm
80.7 mm
33 min
1(000)
84.9 mm
84.8 mm
24 min
1(000)
2(152)
3(000)
60.8 mm
87.1 mm
Country Country
Country
Country Country
“In The Hoop Embroidery” is a technique to create a project using an embroidery frame. These patterns cannot be
resized. Recommended for use: stabilizer, Brother SA519/BM3.
„In-The-Hoop-Stickerei“ (ITH) ist eine Technik, mit der Projekte im Stickrahmen gefertigt werden. Die Größe dieser
Muster kann nicht angepasst werden. Empfohlene Produkte: Stickfolie, Brother SA519/BM3.
« Broderie dans le cadre » est une technique utilisée pour créer un projet avec un cadre à broder. Ces motifs ne peuvent
pas être redimensionnés. Utilisation recommandée : renfort de broderie, Brother SA519/BM3.
“In The Hoop-borduurprojecten” bestaan uit een techniek waarbij een project volledig in het borduurraam wordt gemaakt.
De grootte van deze borduurpatronen kan niet worden gewijzigd. Aanbevolen voor gebruik: steunstof, Brother SA519/
BM3.
“Ricamo nel telaio” è una tecnica per creare un progetto utilizzando un telaio per ricamo. Questi ricami non si possono
ridimensionare. Si consiglia di utilizzare: stabilizzatore, Brother SA519/BM3.
El “Bordado en el aro” es una técnica para crear un proyecto utilizando un bastidor de bordado. Estos patrones no
pueden redimensionarse. Uso recomendado: estabilizador, Brother SA519/BM3.
“O bordado no bastirdor” é uma técnica para criar um projeto usando um bastidor de bordar. Esses padrões não podem
ser redimensionados. Recomendamos o uso de: entretela Brother SA519/BM3.
“Вышивание в пяльцах” — это техника создания вышивки с помощью пялец. Размер этих рисунков невозможно
изменить. Рекомендуется для использования: стабилизатор Brother SA519/BM3.
No.1 No.3 No.5
No.2 No.4
Embroidering on water-soluble stabilizer without any fabric. For details, refer to page 39.
Sticken auf wasserlöslicher Stickfolie ohne Sto. Weitere Informationen nden Sie auf Seite 39.
A broder sur du renfort hydrosoluble sans tissu. Pour plus de détails, reportez-vous à la page 39.
Borduren op in water oplosbaar verstevigingsmateriaal zonder textiel te gebruiken. Raadpleeg pagina 39 voor meer bijzonderheden.
Ricamo su fogli di stabilizzatore idrosolubile senza alcun tessuto. Per i dettagli, fare riferimento a pagina 39.
Bordado en láminas de estabilizador soluble en agua sin ninguna tela. Para más detalles, consulte la página 39.
Bordado em folhas de entretela solúveis em água sem nenhum tecido. Para obter detalhes, consulte a página 39.
Вышивание на водорастворимом стабилизаторе без материала. Подробнее см. на стр. 39.

13
No.1 5 min
1(202)
2(808)
3(058)
4(202)
5(808)
6(202)
7(808)
9.5 cm
(approx.
3-3/4 inch)
6.0 cm
(approx.
2-3/8 inch)
Stabilizer / Stabilisator / Stabilisateur / Versteviging / stabilizzatore / estabilizador /
Entretela / стабилизатор
Fabric ( light-to-mid-weught ) / Stoff ( leicht bis mittelschwer ) / Tissu ( Léger et
souple ) / Stof (dunne of gemiddelde dikte) / Tessuto ( peso medio-leggero ) / Tela
( Peso ligero a medio ) / Tecido (gramatura leve a média) / Ткань ( легкий или
средний (по весу) )
Front / Vorderseite / Endroit / Voor / Lato dritto del tessuto / Frontal / Frente /
Лицевая сторона
Back / Rückseite / Envers / Achter / Rovescio / Por detrás / Verso / Изнаночная
сторона
Tape / Klebeband / Ruban adhésif / Tape / Nastro adesivo / Cinta / Fita adesiva /
Скотч
Cord or Ribbon / Band oder Schleife / Cordelette ou ruban / Koord/draad of lint /
Cordoncino o nastro / Cuerda o lazo / Cordão ou fita / Шнур или лента
Cotton / Baumwolle / Coton / Katoen / Cotone / Algodón / Algodão / Наполнитель
Material / Material / Matériel / Materiaal / Occorrente / Material / Material / Материалы
BA
..............................................................1
Appropriate amount of cotton stung
Angemessene Menge an Baumwoll-Füllung
A
12 cm × 12 cm
(approx. 4-3/4 inch × 4-3/4 inch) ..........1
Quantité adéquate de rembourrage coton
Voldoende katoenvulling
B
12 cm × 12 cm
(approx. 4-3/4 inch × 4-3/4 inch) ..........1
Giusta quantità di imbottitura in cotone
Cantidad adecuada de relleno de algodón
1 cm × 6 cm
(approx. 3/8 inch × 2-3/8 inch) .............1
Quantidade necessária de enchimento de algodão
Необходимое количество наполнителя
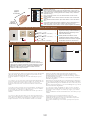
How to Make / Vorgehensweise / Comment procéder / Hoe te maken / Come fare / Cómo hacer / Como fazer / Выполнение проекта
1
● Hoop the stabilizer in the embroidery frame. ● Spannen Sie die
Stickfolie in den Stickrahmen ein. ● Cerclez le renfort de broderie dans
le cadre à broder. ● Span de versteviging in het borduurraam. ● Inserire
lo stabilizzatore nel telaio per ricamo. ● Coloque el estabilizador en el
bastidor de bordado. ● Prenda a entretela no bastidor de bordar.
● Закрепите стабилизатор в пяльцах.
2
1(202)
Colors #202 and #808 are stitches for placement only, not part of the finished
embroidery pattern. These thread color numbers are provisional. Use any
thread color you like that matches the fabric.
Prepare the stabilizer according to the size of the embroidery hoop to be
used.
I colori #202 e #808 sono punti solo per il posizionamento, non fanno parte
del ricamo finito. I numeri di questi colori dei fili sono provvisori. Utilizzare
il colore del filo che si preferisce e si abbina al tessuto.
Preparare lo stabilizzatore in base alle dimensioni del telaio per ricamo da
utilizzare.
Les couleurs nº202 et nº808 sont des points de placement uniquement, non
pas une partie du motif de broderie fini. Ces numéros de couleurs de fils sont
provisoires. Utilisez une couleur de fil de votre choix assortie au tissu.
Préparez le renfort de broderie en fonction de la taille du cadre à broder à
utiliser.
As cores #202 e #808 são apenas para os pontos-guia, não fazem parte do
padrão de bordado finalizado. Esses números de cor de linha são provisórios.
Use qualquer cor de linha de sua preferência que combine com o tecido.
Prepare a entretela de acordo com o tamanho do bastidor a ser utilizado.
Farben #202 und #808 sind Positionierungsstiche und dienen nur
der Positionierung. Sie sind nicht Teil des fertigen Stickmusters. Diese
Garnfarbennummern sind vorläufig. Sie können eine beliebige, zum Sto
passende Garnfarbe verwenden.
Bereiten Sie die Stickfolie vor, indem Sie sie an die Größe des verwendeten
Stickrahmens angleichen.
Los colores #202 y #808 son puntadas solo para colocación, no forman
parte del patrón de bordado acabado. Estos números del color del hilo son
provisionales. Utilice cualquier color del hilo que le guste y que combine
con la tela.
Prepare el estabilizador en función del tamaño del aro de bordado que vaya
a utilizar.
De kleuren #202 en #808 zijn alleen voor plaatsingssteken; ze maken geen
deel uit van het uiteindelijke borduurpatroon. Deze garenkleuren dienen als
voorbeeld. Gebruik elke gewenste draadkleur die u mooi vindt en bij de stof
past.
Bereid de steunstof/versteviging voor in overeenstemming met de grootte van
het borduurraam dat u wilt gebruiken.
Строчки цветов № 202 и 808 предназначены только для
позиционирования и не являются частью законченного рисунка
вышивания. Это временные номера цветов нитей. Используйте нити
любого цвета, который подходит к ткани.
Подготовьте стабилизатор в соответствии с размером используемых
пялец.

14
3
A
● Place fabric A right side up in the frame. Secure it with tape. ● Legen
Sie Stoff A mit der rechten Seite nach oben in den Rahmen ein. Sichern
Sie ihn mit dem Klebeband. ● Placez le tissu A dans le cadre avec le côté
endroit vers le haut. Sécurisez avec le ruban adhésif. ● Plaats de stof met
de goede kant naar boven in het borduurraam. Zet vast met tape.
● Posizionare il tessuto A con il lato diritto verso l’alto nel telaio. Fissarlo
con del nastro adesivo. ● Coloque la tela A con el lado derecho hacia
arriba en el bastidor. Asegúrela con cinta. ● Coloque o tecido A com o lado
direito para cima no bastidor. Prenda com fita adesiva. ● Расположите
деталь A в пяльцах лицевой стороной вверх. Зафиксируйте ее
скотчем.
42(808)
3(058)
5
4(202)
5(808)
● Place the cord or ribbon aligning its center to the mark. Secure it with
tape. ● Setzen Sie das Band oder die Schleife so auf, dass die Mitte an
der Markierung liegt. Sichern Sie es mit Klebeband. ● Placez la cordelette
ou le ruban en ajustant son centre sur la marque. Sécurisez avec le
ruban adhésif. ● Plaats de koord/draad of lint en lijn het midden uit op
de markering. Zet vast met tape. ● Posizionare il cordoncino o il nastro
allineandone il centro sul riferimento. Fissarlo con del nastro. ● Coloque
la cuerda o lazo alineando su centro con la marca. Asegúrelo con cinta.
● Coloque o cordão ou a fita, alinhando o centro com a marca. Prenda
com fita adesiva. ● Разместите шнур или ленту, выравнивая центр с
меткой. Зафиксируйте скотчем.
6
A
● After stitching is done, remove tape. ● Nehmen Sie nach dem Sticken
das Klebeband ab. ● Une fois la l’étape de broderie réalisée, retirez le
ruban adhésif. ● Verwijder de tape zodra het koord/lint is vastgezet.
● Completata la cucitura, togliere il nastro. ● Una vez realizada la costura,
retire la cinta. ● Depois de costurar, remova a fita. ● После выполнения
строчки удалите ленту.
7
B
6(202)
7(808)
● Place fabric B right side down in the hoop. Secure it with tape. ● Legen
Sie Stoff B mit der rechten Seite nach unten in den Rahmen ein. Sichern
Sie ihn mit dem Klebeband. ● Placez le tissu B dans le cadre avec le côté
endroit vers le bas. Sécurisez avec le ruban adhésif. ● Plaats stof B met
de goede kant omlaag in het borduurraam. Zet vast met tape.
● Posizionare il tessuto A con il lato diritto verso il basso nel telaio.
Fissarlo con del nastro adesivo. ● Coloque la tela B con el lado
derecho hacia abajo en el aro. Asegúrela con cinta. ● Coloque o
tecido B com o lado direito para baixo no bastidor. Prenda com fita
adesiva. ● Расположите деталь B в пяльцах лицевой стороной вниз.
Зафиксируйте ее скотчем.
8B A
● Remove tape. Remove the embroidery frame from the machine and trim
fabric close to stitching. ● Nehmen Sie das Klebeband ab. Nehmen Sie
den Stickrahmen aus der Maschine und schneiden Sie überstehenden
Stoff entlang der Stickerei ab. ● Retirez le ruban adhésif. Retirez le cadre
à broder de la machine et coupez le tissu à côté de la broderie.
● Verwijder de tape. Schuif het borduurraam van de machine en knip de
stof dicht bij het stiksel af. ● Togliere il nastro. Togliere il telaio per ricamo
dalla macchina e tagliare il tessuto vicino alla cucitura. ● Retire la cinta.
Retire el bastidor de bordado de la máquina y recorte la tela cerca de
la costura. ● Remova a fita. Remova o bastidor de bordar da máquina
e corte o tecido rente à costura. ● Удалите ленту. Снимите пяльцы с
машины и обрежьте ткань рядом со строчкой.

15
9
● Remove the stabilizer carefully. ● Entfernen Sie die Stabilisierung
vorsichtig. ● Retirez le renfort avec précaution. ● Verwijder voorzichtig de
steunstof/versteviging. ● Rimuovere con cura lo stabilizzatore ● Retire
con cuidado el estabilizador. ● Remova a entretela com cuidado.
● Осторожно удалите стабилизатор.
10
● Turn it right side out through the opening. Fill with cotton stuffing.
● Drehen Sie den Stoff über die Wendeöffnung auf rechts. Füllen Sie
das Projekt mit Baumwolle. ● Retournez-le sur l’endroit via l’ouverture.
Remplissez avec du rembourrage de coton. ● Keer de goede kant naar
buiten door de opening. Vul het project met een katoenen vulling. ● Girare
il lato diritto verso l’esterno attraverso l’apertura. Riempire con l’imbottitura
di cotone. ● Gire el derecho hacia afuera a través de la abertura. Rellene
con algodón. ● Vire para o lado direito, passando pela abertura. Encha
com enchimento de algodão. ● Выверните ее лицевой стороной наружу
через отверстие. Заполните ее ватным наполнителем.
11
● Stitch the opening closed to complete the project. ● Vernähen Sie die
Wendeöffnung, um das Projekt fertigzustellen. ● Cousez l’ouverture pour
la fermer et terminer le projet. ● Naai de opening dicht om het project af
te maken. ● Chiudere l’apertura cucendola per completare il progetto.
● Cosa la abertura para cerrarla y completar el proyecto. ● Costure a
abertura para concluir o projeto. ● Зашейте отверстие для завершения
изделия.

16
No.2 13 min
1(202)
2(808)
3(513)
4(206)
5(010)
6(612)
7(070)
8(206)
9(202)
10
(513)
13.5 cm
(approx.
5-3/8 inch)
Stabilizer / Stabilisator / Stabilisateur / Versteviging / stabilizzatore /
estabilizador / Entretela / стабилизатор
Fabric ( light-to-mid-weught ) / Stoff ( leicht bis mittelschwer ) / Tissu ( Léger
et souple ) / Stof (dunne tot gemiddelde dikte) / Tessuto ( peso medio-
leggero ) / Tela ( Peso ligero a medio ) / Tecido (gramatura leve a média) /
Ткань ( легкий или средний (по весу) )
Front / Vorderseite / Endroit / Voor / Lato dritto del tessuto / Frontal / Frente /
Лицевая сторона
Back / Rückseite / Envers / Achter / Rovescio / Por detrás / Verso /
Изнаночная сторона
Tape / Klebeband / Ruban adhésif / Tape / Nastro adesivo / Cinta / Fita
adesiva / Скотч
Material / Material / Matériel / Materiaal / Occorrente / Material / Material / Материалы
BA
..................................................................................................
1
A
21 cm× 17 cm (approx. 8-1/2 inch × 6-3/4 inch)........1
B
21 cm× 17 cm (approx. 8-1/2 inch × 6-3/4 inch)........1
..................................................................................................
1
How to Make / Vorgehensweise / Comment procéder / Hoe te maken / Come fare / Cómo hacer / Como fazer / Выполнение проекта
1
● Hoop the stabilizer in the embroidery frame. ● Spannen Sie die
Stickfolie in den Stickrahmen ein. ● Cerclez le renfort de broderie dans le
cadre à broder.
● Span de versteviging in het borduurraam. ● Inserire lo stabilizzatore nel
telaio per ricamo. ● Coloque el estabilizador en el bastidor de bordado.
● Prenda a entretela no bastidor de bordar. ● Закрепите стабилизатор в
пяльцах.
2
1(202)
3
A
● Place fabric A right side up in the hoop. Secure it with tape. ● Legen
Sie Stoff A mit der rechten Seite nach oben in den Rahmen ein. Sichern
Sie ihn mit dem Klebeband. ● Placez le tissu A dans le cadre avec le côté
endroit vers le haut. Sécurisez avec le ruban adhésif. ● Plaats stof A met
de goede kant naar boven in het borduurraam. Zet vast met tape.
● Posizionare il tessuto A con il lato diritto verso l’alto nel telaio. Fissarlo
con del nastro adesivo. ● Coloque la tela A con el lado derecho hacia
arriba en el aro. Asegúrela con cinta. ● Coloque o tecido A com o lado
direito para cima no bastidor. Prenda com fita adesiva.
● Расположите деталь A в пяльцах лицевой стороной вверх.
Зафиксируйте ее скотчем.
42(808)
3(513)
4(206)
5(010)
6(612)
7(070)
8(206)
7.5 cm
(approx. 3.0 inch)

17
5
B
● Remove the embroidery frame from the machine and place fabric B right
side up on the back of the frame. Secure it with tape. ● Nehmen Sie den
Stickrahmen aus der Maschine und legen Sie Stoff B mit der rechten Seite
nach oben auf die Rahmenrückseite. Sichern Sie ihn mit dem Klebeband.
● Retirez le cadre à broder de la machine et placez le tissu B avec le côté
endroit vers l’arrière du cadre. Sécurisez avec le ruban adhésif. ● Schuif
het borduurraam van de machine en plaats stof B met de goede kant naar
boven aan de achterzijde van het borduurraam. Zet vast met tape.
● Togliere il telaio per ricamo dalla macchina e posizionare il tessuto B con
il lato diritto verso l’alto sul retro del telaio. Fissarlo con del nastro adesivo.
● Retire el bastidor de bordado de la máquina y coloque la tela B con el
lado derecho hacia arriba en la parte posterior del bastidor. Asegúrela
con cinta. ● Remova o bastidor de bordar da máquina e coloque o tecido
B com o lado direito para cima na parte de trás do bastidor. Prenda com
fita adesiva. ● Снимите пяльцы с машины и расположите деталь B
лицевой стороной вверх на задней стороне пялец. Зафиксируйте ее
скотчем.
69(202)
7
● Remove the embroidery frame from the machine. Remove the
tapes, and cut only the fabric close to the stitching. ● Nehmen Sie den
Stickrahmen aus der Maschine. Nehmen Sie die Klebebander ab und
schneiden Sie uberstehenden Stoff entlang der Stickerei ab.● Retirez le
cadre a broder de la machine. Retirez les rubans adhesifs, et coupez
uniquement le tissu proche de la broderie.● Schuif het borduurraam van
de machine. Verwijder de tape en knip de stof dicht bij het stiksel af.
● Togliere il telaio per ricamo dalla macchina. Togliere i nastri e tagliare
solo il tessuto vicino alla cucitura.● Retire el bastidor de bordado de la
maquina. Retire las cintas y corte solo la tela cerca de la costura.● Retire
o bastidor de bordar da maquina. Remova as fitas e corte apenas o
tecido, rente a costura.● Снимите пяльцы с машины. Удалите ленты,
прорежьте только ткань рядом со строчкой.
8
10
(513)
9
● Remove the extra stabilizer. Open the buttonhole. Attach the button.
The project is complete. ● Entfernen Sie überstehende Stickfolie. Öffnen
Sie das Knopfloch. Bringen Sie den Knopf an. Das Projekt ist nun fertig.
● Enlevez l’excédent de renfort de broderie. Ouvrez la boutonnière.
Attachez le bouton. Le projet est terminé. ● Verwijder de extra steunstof.
Open het knoopsgat. Bevestig de knoop. Het project is klaar. ● Togliere
lo stabilizzatore in eccesso. Aprire l’asola. Applicare il bottone. Il progetto
è completato. ● Retire el estabilizador adicional. Abra el ojal. Coloque
el botón. El proyecto se ha completado. ● Remova o excesso de
entretela. Abra a casa do botão. Prenda o botão. Você concluiu o projeto.
● Удалите излишек стабилизатора. Прорежьте петлю. Пришейте
пуговицу. Теперь изделие готово.

18
33.0 cm
(approx.
13.0 inch)
12.0 cm
(approx. 4-3/4 inch)
13 min
1(202)
10
(086)
2(808)
11
(124)
3(086)
12
(704)
4(704)
13
(202)
5(420)
14
(808)
6(124)
15
(202)
7(420)
16
(808)
8(086)
17
(202)
9(420)
18
(808)
No.3
Stabilizer / Stabilisator / Stabilisateur / Versteviging / stabilizzatore /
estabilizador / Entretela / стабилизатор
Fabric ( light-to-mid-weught ) / Stoff ( leicht bis mittelschwer ) /
Tissu ( Léger et souple ) / Stof (dunne tot gemiddelde dikte) /
Tessuto ( peso medio-leggero ) / Tela ( Peso ligero a medio ) /
Tecido (gramatura leve a média) / Ткань ( легкий или средний (по
весу) )
Front / Vorderseite / Endroit / Voor / Lato dritto del tessuto / Frontal
/ Frente / Лицевая сторона
Back / Rückseite / Envers / Achter / Rovescio / Por detrás / Verso /
Изнаночная сторона
Tape / Klebeband / Ruban adhésif / Tape / Nastro adesivo / Cinta /
Fita adesiva / Скотч
Cord or Ribbon / Band oder Schleife / Cordelette ou ruban / Koord/
draad of lint / Cordoncino o nastro / Cuerda o lazo / Cordão ou fita /
Шнур или лента
Material / Material / Matériel / Materiaal / Occorrente / Material / Material / Материалы
B
C
A
....................................................................................................1
A
40 cm × 18 cm (approx. 16 inch × 7 inch)....................1
B
40 cm × 18 cm (approx. 16 inch × 7 inch)....................1
C
31 cm × 22 cm (approx. 12-1/4 inch × 8-3/4 inch)........1
1.5 cm × 10 cm (approx. 5/8 inch × 4 inch)..................1
How to Make / Vorgehensweise / Comment procéder / Hoe te maken / Come fare / Cómo hacer / Como fazer / Выполнение проекта
1
● Hoop the stabilizer in the embroidery frame. ● Spannen Sie die
Stickfolie in den Stickrahmen ein. ● Cerclez le renfort de broderie dans
le cadre à broder. ● Span de versteviging in het borduurraam. ● Inserire
lo stabilizzatore nel telaio per ricamo. ● Coloque el estabilizador en el
bastidor de bordado. ● Prenda a entretela no bastidor de bordar.
● Закрепите стабилизатор в пяльцах.
2
1(202)
3
A
● Place fabric A right side up inside the frame. Secure it with tape.
● Legen Sie Stoff A mit der rechten Seite nach oben in den Rahmen ein.
Sichern Sie ihn mit dem Klebeband. ● Placez le tissu A dans le cadre
avec le côté endroit vers le haut. Sécurisez avec le ruban adhésif.
● Plaats stof A met de goede kant naar boven in het borduurraam. Zet
vast met tape. ● Posizionare il tessuto A con il lato diritto verso l’alto
all’interno del telaio. Fissarlo con del nastro adesivo. ● Coloque la tela
A con el lado derecho en el interior del bastidor. Asegúrela con cinta.
● Coloque o tecido A com o lado direito para cima, dentro do bastidor.
Prenda com fita adesiva. ● Расположите деталь A внутри пялец
лицевой стороной вверх. Зафиксируйте ее скотчем.

19
42(808)
3(086)
4(704)
5(420)
6(124)
7(420)
8(086)
9(420)
10
(086)
11
(124)
12
(704)
5
13
(202)
6
● Place the cord or ribbon so that it is aligned with the mark. Secure it with
tape. ● Legen Sie die Kordel oder das Schleifenband entsprechend der
Markierung auf. Sichern Sie ihn mit dem Klebeband. ● Placez le cordon
ou le ruban de façon à l’aligner sur le repère. Sécurisez avec le ruban
adhésif. ● Plaats het koord of lint op dezelfde hoogte als de markering.
Zet vast met tape. ● Posizionare il cordoncino o la fettuccia in modo
che sia allineata al segno. Fissarlo con del nastro adesivo. ● Coloque el
cordón o la cinta de modo que quede alineado con la marca. Asegúrela
con cinta. ● Coloque o cordão ou a fita, de modo que fique alinhada com
a marca. Prenda com fita adesiva. ● Расположите шнур или ленту,
совместив его с отметкой. Зафиксируйте ее скотчем.
7
14
(808)
8
15
(202)
9
C
C
● Fold fabric C in half wrong-sides together. Place in frame with the fold
aligned with top placement stitches. Secure it with tape. ● Falten Sie
den Stoff C auf die Hälfte, wobei die Stoffrückseite innen liegen muss.
Legen Sie den Stoff in den Rahmen ein und richten Sie die Falte an den
oberen Positionierungsstichen aus. Sichern Sie ihn mit dem Klebeband.
● Pliez le tissu C en deux, envers sur envers. Placez-le dans le cadre
avec le pli aligné sur les points de placement supérieurs. Sécurisez avec
le ruban adhésif. ● Vouw stof C dubbel, met de goede kant naar buiten.
Plaats het in het borduurraam en zorg dat de vouw is uitgelijnd met
de plaatsingssteken. Zet vast met tape. ● Piegare il tessuto C a metà
rovescio contro rovescio. Posizionare nel telaio con la piega allineata ai
punti di posizionamento superiori. Fissarlo con del nastro adesivo. ● Doble
la tela C por la mitad con los reveses juntos. Colóquelo en el bastidor
con el pliegue alineado con las puntadas de colocación superiores.
Asegúrela con cinta. ● Dobre o tecido C ao meio com os lados avessos
juntos. Coloque no bastidor com a dobra alinhada com os pontos-guia
superiores. Prenda com fita adesiva. ● Сложите деталь C пополам
изнаночной стороной внутрь. Установите ее в пяльцах, совместив
складку с верхним простроченным контуром. Зафиксируйте ее
скотчем.
10
16
(808)
La pagina si sta caricando...
La pagina si sta caricando...
La pagina si sta caricando...
La pagina si sta caricando...
La pagina si sta caricando...
La pagina si sta caricando...
La pagina si sta caricando...
La pagina si sta caricando...
La pagina si sta caricando...
La pagina si sta caricando...
La pagina si sta caricando...
La pagina si sta caricando...
La pagina si sta caricando...
La pagina si sta caricando...
La pagina si sta caricando...
La pagina si sta caricando...
La pagina si sta caricando...
La pagina si sta caricando...
La pagina si sta caricando...
La pagina si sta caricando...
La pagina si sta caricando...
-
 1
1
-
 2
2
-
 3
3
-
 4
4
-
 5
5
-
 6
6
-
 7
7
-
 8
8
-
 9
9
-
 10
10
-
 11
11
-
 12
12
-
 13
13
-
 14
14
-
 15
15
-
 16
16
-
 17
17
-
 18
18
-
 19
19
-
 20
20
-
 21
21
-
 22
22
-
 23
23
-
 24
24
-
 25
25
-
 26
26
-
 27
27
-
 28
28
-
 29
29
-
 30
30
-
 31
31
-
 32
32
-
 33
33
-
 34
34
-
 35
35
-
 36
36
-
 37
37
-
 38
38
-
 39
39
-
 40
40
-
 41
41


Brother Innov-is XJ1 Guida utente
- Tipo
- Guida utente
- Questo manuale è adatto anche per
in altre lingue
- français: Brother Innov-is XJ1 Mode d'emploi
- español: Brother Innov-is XJ1 Guía del usuario
Documenti correlati
-
Brother Innov-is XP2 Guida utente
-
Brother Innov-is XJ1 Guida utente
-
-
-
-
-
-
-
Brother Innov-is VM6200D Guida di riferimento
-