Gastrodomus GA600DTV Manuale del proprietario
- Tipo
- Manuale del proprietario

1
INSTALLAZIONE – USO – MANUTENZIONE
INSTALLATION – USE – MAINTENANCE
ENTRETIEN AUFSTELLUNG – ANWENDUNG – WARTUNG
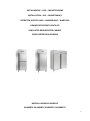
ARMADI REFRIGERATI VENTILATI
VENTILATED REFRIGERATED CABINET
VENTILIERTER KÜHLSCHRANK
MODELLI-MODELLS-MODELLE
GA600BTV-GA1200BTV-GA600DTV-GA1200DTV

2

3
INDICE
1. Introduzione
2. Diritti e responsabilità del costruttore
3. Movimentazione ed immagazzinaggio
4. Messa in servizio
5. Caratteristiche tecniche
6. Uso
7. Manutenzione
8. Comportamento in caso di guasto
9. Attività a cura del personale specializzato
10. Smaltimento
11. Figure e tabelle
12. Schemi elettrici
13. Dichiarazione di conformità CE

4
1. INTRODUZIONE
Questo apparecchio è stato realizzato negli interni, nell’estetica e nella componentistica secondo le esigenze
specifiche dei nostri clienti, è inoltre stato controllato funzionalmente ed esteticamente in ogni sua parte
prima dell’invio definitivo. Usate quindi l’apparecchio attendendovi a quanto qui sotto suggerito e rimarrà
per lungo tempo al vostro servizio.
2. DIRITTI E RESPONSABILITA’ DEL COSTRUTTORE
È vietata la riproduzione parziale o totale delle presenti istruzioni senza l’autorizzazione scritta della ditta. I
disegni riprodotti sono di carattere generale e possono essere difformi in alcuni particolari dall’apparecchio
consegnato. Il costruttore declina ogni responsabilità per danni causati a persone o cose dovuti a:
inosservanza di avvertenze ed istruzioni contenute nel presente testo; inosservanza dei limiti di impiego
dell’apparecchio; uso improprio, errato, irragionevole o da parte del personale inesperto; uso non conforme
alle normative locali; modifiche non autorizzate e/o riparazioni effettuate da personale non
qualificato/autorizzato; utilizzo di ricambi/accessori non originali; eventi eccezionali. Il costruttore si riserva
inoltre il diritto di apportare tutte le modifiche ritenute opportune senza alcun preavviso.
3. MOVIMENTAZIONE ED IMMAGAZZINAGGIO
L’apparecchio è contenuto in un imballo costituito da un pianale in legno, angolari rigidi, protezioni di
polistirolo e film plastico. Pesi ed ingombri sono indicati nella tabella CARATTERISTICHE TECNICHE del
capitolo 11. In attesa della collocazione definitiva immagazzinare in ambiente coperto a temperatura
compresa tra -25°/+55°C ed umidità relativa compresa tra 30/95%.
4. MESSA IN SERVIZIO
Leggere attentamente le etichette sull’apparecchio, non coprirle per nessuna ragione e sostituirle
immediatamente in caso venissero danneggiate. Non togliere le protezioni o pannellature che richiedono
l’uso di utensili per essere rimosse.
Posizionamento
Assicurarsi che, dal punto di vista degli ingombri (vedi tabella capitolo 11), lo spazio riservato all’apparecchio
ne permetta il corretto utilizzo e la facile manutenzione. Sistemare l’apparecchio in piano avvitando i piedini
livellatori e registrandoli, dopo averlo disimballato rimuovendo tutte le protezioni predisposte dall’azienda.
Per limitare il rischio di scarica elettrica statica dovuta alla rimozione della plastica protettiva, si consiglia di
rimuovere la plastica lentamente e in piccoli pezzi. Spostare l’apparecchio sollevandolo solo dal fondo
inferiore esterno, per evitare di danneggiare i piedini di appoggio e gli altri equipaggiamenti. Se l’apparecchio,
durante la movimentazione, è stato posizionato orizzontalmente, attendere due ore prima di procedere

5
all’accensione dell’apparecchio. L’apparecchio non deve essere installato in ambienti pericolosi, all’aria
aperta o esposto a pioggia, lontano da fonti di calore (termosifoni, faretti ecc..), al riparo dai raggi solari e da
correnti d’aria. L’aria deve circolare liberamente attraverso l’unità di condensa. Il mancato rispetto delle
condizioni riportati, porta ad una riduzione della prestazione dell’apparecchio.
Pulizia iniziale
Prima dell’allacciamento alla rete elettrica pulire adeguatamente l’apparecchio. Per le parti interne usare
detersivi antibatterici, per le parti in plastica è sufficiente utilizzare panni inumiditi. Asciugare con un panno
morbido e pulito. Non usare detersivi aggressivi, abrasivi né solventi.
Posizionamento componenti ed accessori
Tutti gli accessori sostitutivi delle griglie possono essere messi negli appositi supporti. Provvedere a sistemare
i supporti griglie all’interno della cella nella posizione più adatta all’uso.
Collegamento alla rete elettrica
Assicurarsi che l’impianto di alimentazione elettrico rispetti le leggi vigenti. Il cavo di alimentazione deve
essere ben steso (evitare arrotolamenti o sovrapposizioni) in posizione non esposta ad eventuali urti o
manomissioni, non deve essere in prossimità di liquidi od acqua e di fonti di calore. Nel caso si danneggiasse,
farlo sostituire immediatamente da personale qualificato. Evitare sempre l’uso di adattatori.
5. CARATTERISTICHE TECNICHE
Potenze assorbite ed ingombri
La potenza assorbita, gli ingombri esterni ed interni relativi ai vari modelli e nelle varie configurazioni sono
indicati nella tabella del capitolo 11.
Rumorosità e vibrazioni
Il livello sonoro degli apparecchi con unità condensatrice incorporate è inferiore ai 70 dB. In condizioni
normali l’apparecchio non genera vibrazioni dannose all’ambiente circostante.
6. USO
Azionamento
Questi armadi sono azionati tramite degli interruttori ed una centralina elettronica. Nei modelli combinati i
comandi sono doppi ed indipendenti. Le operazioni consentite all’utente sono
Accensione/spegnimento (fig. 1)

6
Premere l’interruttore n° 1: sul display apparirà la temperatura presente nell’armadio al momento e si
illumineranno il LED di funzionamento compressore ed il LED funzionamento ventilatore interno (in ritardo).
In caso di interruzioni nell’erogazione dell’energia elettrica il compressore si riavvierà con un certo ritardo.
Impostazione temperatura cella (fig. 1)
Premendo il tasto SET (a sx del display) si potrà leggere la temperatura impostata. Volendo variare detta
temperatura: tenere premuto il tasto SET (lampeggia il LED 1) premere entro 15 secondi il tasto ▲(UP) o il
tasto ▼ (DOWN) per far rispettivamente aumentare o diminuire la temperatura inizialmente impostata fino
a raggiungere la nuova temperatura. Confermare il nuovo valore impostato premendo il tasto SET entro 10
secondi dal completamento dell’operazione precedente. Lampeggio per 2 secondi del nuovo valore
impostato conferma l’accettazione e memorizzazione del nuovo dato.
Visualizzazione codici allarme
La centralina segnala eventuali malfunzionamenti facendo lampeggiare sul display i codici di allarme elencati
di seguito:PF1, PF2, HLA, LLA, HtA, LtA. Nel caso di visualizzazione di uno o più codici in sequenza prenderne
nota, spegnere la centralina e riaccenderla dopo alcuni secondi. Se uno o più codici dovessero manifestarsi
nuovamente, riprenderne nota e chiamare l’assistenza tecnica segnalando i codici annotati.
Stoccaggio degli alimenti
Allo scopo di ottenere le migliori prestazioni dell’armadio è necessario rispettare le seguenti indicazioni:
introdurre la merce nell’apparecchio dopo che esso avrà raggiunto la temperatura desiderata leggibile sulla
centralina; non introdurre al suo interno cibi caldi o liquidi scoperti; confezionare e proteggere gli alimenti;
non limitare la circolazione dell’aria all’interno con ostacoli; evitare frequenti e prolungate aperture delle
porte; attendere alcuni istanti prima di riaprire la porta appena chiusa.
Sbrinamento
Temporizzazione sbrinamento (fig.1)
La centralina avvia automaticamente 4 cicli di sbrinamento nelle 24 ore. Il timer rileverà il tempo a partire
dal momento della prima accensione. Per effettuare un ciclo di sbrinamento manuale è sufficiente premere
per 3 secondi il tasto sbrinamento (SBR), avverrà un immediato sbrinamento automatico per le prossime 6
ore. Durante tale fase sul display si accenderà la spia di sbrinamento. L’eliminazione acqua di sbrinamento è
automatica in tutti i modelli.

7
7. MANUTENZIONE
Pulizia periodica della cella e del condensatore
Prima di iniziare la pulizia spegnere l’apparecchio e scollegare la spina dalla presa. Pulire almeno una volta
alla settimana il vano interno seguendo le indicazioni (vedi Pulizia iniziale). Pulire il condensatore posto sopra
l’armadio, dietro il pannello di comando, almeno una volta alla settimana. Prima di iniziare la pulizia, chiudere
e proteggere l’armadio, poi asportare con una spazzola e con un’aspirapolvere la polvere depositata sulla
superficie frontale del condensatore.
Inattività dell’apparecchio
Nei periodi di inattività scollegare la spina dalla presa, pulire accuratamente come per una pulizia periodica
e lasciare circolare l’aria nella cella coprendo l’armadio con un telo di stoffa.
8. COMPORTAMENTO IN CASO DI GUASTO
Se l’apparecchio non funziona controllare che:
• la spina sia correttamente inserita nella presa;
• il cavo di alimentazione non sia danneggiato.
Se la temperatura prestabilita non viene raggiunta controllare che:
• l’interruttore di comando sia acceso;
• la centralina sia ben regolata (vedi impostazione temperatura cella);
• l’apparecchio non sia in fase di sbrinamento o in fase di recupero post-sbrinamento;
• l’evaporatore non sia ricoperto di ghiaccio (vedi sbrinamento);
• il condensatore non sia intasato dalla polvere;
• l’apparecchio non si trovi in prossimità di fonti di calore o la sua unità condensatrice sia poco aerata;
• gli alimenti stoccati o altri oggetti non impediscano la corretta chiusura dell’armadio;
• l’apparecchio non lavori in condizioni anomale (inserimento di alimenti caldi, in eccesso e/o
maldisposti).
Se l’apparecchio perde acqua controllare che:
• il dispositivo di eliminazione acqua non sia danneggiato, che lo scarico sia stato ben canalizzato e che
non sia ostruito;
• l’apparecchio sia stato messo in piano.
Se l’apparecchio è rumoroso controllare che:
• non ci siano viti o bulloni svitati;

8
• l’apparecchio sia ben livellato e che i piedini appoggino stabilmente sul pavimento.
Se dopo tutti questi controlli il malfunzionamento dovesse permanere è opportuno rivolgersi all’assistenza
tecnica, indicando la sigla del modello ed il numero di matricola (ambedue rilevabili dalla targhetta dati
tecnici) e gli eventuali codici di allarme comparsi sul display della centralina.
9. ATTIVITA’ A CURA DI PERSONALE SPECIALIZZATO
Sostituzione di componenti
Prima di qualsiasi operazione di manutenzione scollegare la spina dalla rete elettrica.
10. SMALTIMENTO
Lo smaltimento dell’apparecchio deve essere affidato a ditte specializzate di settore secondo quanto previsto
da leggi ed enti locali.
L’apparecchio è costituito da:
struttura in lamiera d’acciaio;
componenti e cablaggio elettrici;
compressore elettrico;
materiali plastici;
fluido frigorigeno da non disperdere nell’ambiente.
TUTTE LE RESPONSABILITA’ PER IL MANCATO RISPETTO DELLE VIGENTI LEGGI LOCALI
RICADRANNO SUL PROPRIETARIO.

9
INDEX
1. Introduction
2. Rights and responsibilities of the manufacturer
3. Handling and storage
4. Commissioning
5. Technical characteristics
6. Use
7. Maintenance
8. Behaviour in case of failure
9. Activities carried out by specialized personnel
10. Disposal
11. Figures and tables
12. Wiring diagrams
13. EC Declaration of Conformity

10
1. INTRODUCTION
This appliance has been realized in the interiors, aesthetics and components according to the specific needs
of our customers, it has also been checked functionally and aesthetically in every part before the final
shipment. Therefore, please use the appliance according to what is suggested below and it will remain at
your service for a long time.
2. RIGHTS AND RESPONSIBILITIES OF THE MANUFACTURER
No part or all of these instructions may be reproduced without the written permission of the company. The
drawings reproduced are of a general nature and may differ in some details from the equipment delivered.
The manufacturer declines all responsibility for damage caused to persons or things due to: non-observance
of the warnings and instructions contained in this text; non-observance of the limits of use of the appliance;
improper, incorrect, unreasonable use or by inexperienced personnel; use that does not comply with local
regulations; unauthorised modifications and/or repairs carried out by unqualified/authorised personnel; use
of non-original spare parts/accessories; exceptional events. The manufacturer also reserves the right to make
any changes deemed appropriate without prior notice.
3. HANDLING AND STORAGE
The appliance is contained in a packaging consisting of a wooden platform, rigid corners, polystyrene
protections and plastic film. Weights and overall dimensions are indicated in the table TECHNICAL FEATURES
in chapter 11. Pending final placement, store in a covered area at a temperature between -25°/+55°C and
relative humidity between 30/95%.
4. COMMISSIONING
Read the labels on the unit carefully, do not cover them under any circumstances and replace them
immediately if they are damaged. Do not remove guards or panelling that require tools to be removed.
Positioning
Make sure that, from the point of view of overall dimensions (see table chapter 11), the space reserved for
the appliance allows for its correct use and easy maintenance. Place the appliance on the flat by screwing in
the levelling feet and adjusting them, after unpacking it by removing all the protections provided by the
company. To limit the risk of static electrical discharge due to the removal of the protective plastic, it is
advisable to remove the plastic slowly and in small pieces. Move the appliance by lifting it only from the
lower external bottom, to avoid damaging the support feet and other equipment. If the appliance has been
positioned horizontally during handling, wait two hours before switching it on. The appliance must not be
installed in dangerous environments, in the open air or exposed to rain, away from heat sources (radiators,

11
spotlights, etc.), protected from sunlight and drafts. The air must circulate freely through the condensation
unit. Failure to comply with the above conditions leads to a reduction in the performance of the unit.
Initial cleaning
Clean the appliance properly before connecting it to the power supply. For internal parts use antibacterial
detergents, for plastic parts it is sufficient to use damp cloths. Dry with a soft, clean cloth. Do not use
aggressive detergents, abrasives or solvents.
Positioning components and accessories
All accessories replacing the grilles can be placed in the appropriate brackets. Arrange the grid supports inside
the cell in the most suitable position for use.
Connection to the power grid
Ensure that the power supply system complies with the applicable laws. The power supply cable must be well
extended (avoid coiling or overlapping) in a position not exposed to possible impacts or tampering, it must
not be near liquids or water and heat sources. If damaged, have it replaced immediately by qualified
personnel. Always avoid the use of adapters.
5. TECHNICAL CHARACTERISTICS
Absorbed powers and overall dimensions
The power consumption, external and internal dimensions of the various models and in the various
configurations are indicated in the table in Chapter 11.
Noise and vibrations
The sound level of devices with built-in condensing units is less than 70 dB. Under normal conditions the unit
does not generate vibrations harmful to the surrounding environment.
6. USE
Activation
These cabinets are operated by means of switches and an electronic control unit. In the combined models
the controls are double and independent. The operations allowed to the user are
Switch on/off (Fig. 1)
Press switch no. 1: the display will show the temperature in the cabinet at the moment and the compressor
operation LED and the fun LED will light up.

12
Room temperature setting (fig. 1)
Press the SET button (left of the display) to read the set temperature. If you want to change this temperature:
keep the SET button pressed (LED 1 flashes) press the ▲(UP) or the ▼(DOWN) button within 15 seconds to
increase or decrease the temperature initially set until the new temperature is reached. Confirm the new set
value by pressing the SET button within 10 seconds of completing the previous operation. Flashing for 2
seconds of the new set value confirms the acceptance and storage of the new data.
Alarm codes display
The control unit signals any malfunctions by flashing the following alarm codes on the display: PF1, PF2, HLA,
LLA, HtA, LtA. If one or more codes are displayed in sequence, take note of them, turn the control unit off
and then on again after a few seconds. If one or more codes reappear, take note of them and call technical
assistance indicating the codes noted.
Food storage
In order to obtain the best performance of the cabinet it is necessary to comply with the following
instructions: introduce the goods into the appliance after it has reached the desired temperature readable
on the control unit; do not introduce hot food or uncovered liquids into the appliance; pack and protect the
food; do not limit the air circulation inside with obstacles; avoid frequent and prolonged door openings; wait
a few moments before reopening the door just closed.
Defrosting
Defrosting timing (fig.1)
The control unit automatically starts 4 defrost cycles within 24 hours. The timer will detect the time starting
from the moment of the first start-up. To carry out a manual defrost cycle simply press the defrost button
(SBR) for 3 seconds, an immediate automatic defrost will take place for the next 6 hours. During this phase,
the defrost indicator light will light up on the display. The defrost water elimination is automatic in all models.
7. MAINTENANCE
Periodic cell and capacitor cleaning
Before starting cleaning, switch off the appliance and unplug it from the socket. Clean the internal
compartment at least once a week following the instructions (see Initial cleaning). Clean the condenser
located above the cabinet, behind the control panel, at least once a week. Before starting the cleaning, close
and protect the cabinet, then remove the dust deposited on the front surface of the condenser with a brush
and a vacuum cleaner.

13
Inactivity of the device
During periods of inactivity, unplug the plug from the socket, clean thoroughly as for a periodic cleaning and
let the air circulate in the cell by covering the cabinet with a cloth cloth.
8. BEHAVIOUR IN CASE OF FAILURE
If the unit does not work check that:
• the plug is correctly inserted into the socket;
• the power cord is not damaged.
If the set temperature is not reached, check that:
• the plug is correctly inserted in the socket;
• the power cord is not damaged:
• the control switch is on;
• the control unit is well regulated (see room temperature setting);
• the appliance is not in defrosting or post-defrost recovery phase;
• the evaporator is not covered with ice (see defrosting);
• the condenser is not clogged by dust;
• the unit is not near heat sources or its condensing unit is poorly ventilated;
• the stored food or other objects do not prevent the correct closing of the cabinet;
• the unit does not work in abnormal conditions (insertion of hot, excess and/or misplaced food).
If the appliance loses water, check that it is not leaking:
• the water elimination device is not damaged, that the drain has been well channeled and that it is
not obstructed;
• the appliance is level.
If the appliance is noisy, check that:
• there are no unscrewed screws or bolts;
• the appliance is level and the feet are firmly on the floor.
If, after all these checks, the malfunction continues, it is advisable to contact technical assistance, indicating
the model code and serial number (both can be found on the technical data plate) and any alarm codes that
may appear on the display of the control unit.

14
9. ACTIVITIES CARRIED OUT BY SPECIALISED PERSONNEL
Replacement of components
Disconnect the plug from the mains before any maintenance work.
10. DISPOSAL
The disposal of the device must be entrusted to specialist firms in accordance with local laws and authorities.
The device consists of
sheet steel structure;
electrical components and wiring;
electric compressor;
plastic materials;
refrigerant fluid not to be dispersed in the environment.
ALL RESPONSIBILITIES FOR THE NON-OBSERVANCE OF THE LOCAL LAWS IN FORCE WILL FALL ON
THE OWNER.

15
INDEX
1. Einführung
2. Rechte und Pflichten des Herstellers
3. Handhabung und Lagerung
4. Inbetriebnahme
5. Technische Merkmale
6. Verwenden Sie
7. Wartung
8. Verhalten im Fehlerfall
9. Von Fachpersonal durchgeführte Aktivitäten
10. Entsorgung
11. Abbildungen und Tabellen
12. Schaltpläne
13. EG-Konformitätserklärung

16
1. EINLEITUNG
Dieses Gerät wurde in den Innenräumen, in der Ästhetik und in den Komponenten nach den spezifischen
Bedürfnissen unserer Kunden realisiert und vor der endgültigen Auslieferung in jedem Teil funktionell und
ästhetisch überprüft. Benutzen Sie das Gerät daher bitte entsprechend den unten aufgeführten Vorschlägen
und es wird Ihnen lange Zeit zur Verfügung stehen.
2. RECHTE UND PFLICHTEN DES HERSTELLERS
Kein Teil oder die Gesamtheit dieser Anweisungen darf ohne die schriftliche Genehmigung des
Unternehmens reproduziert werden. Die reproduzierten Zeichnungen sind allgemeiner Natur und können in
einigen Details von der gelieferten Ausrüstung abweichen. Der Hersteller lehnt jede Verantwortung für
Schäden an Personen oder Sachen ab, die verursacht werden durch: Nichtbeachtung der in diesem Text
enthaltenen Warnhinweise und Anweisungen; Nichtbeachtung der Nutzungsgrenzen des Geräts;
unsachgemäße, falsche, unangemessene Nutzung oder durch unerfahrenes Personal; Nutzung, die nicht den
örtlichen Vorschriften entspricht; nicht autorisierte Änderungen und/oder Reparaturen, die von nicht
qualifiziertem/autorisiertem Personal durchgeführt wurden; Verwendung von nicht originalen
Ersatzteilen/Zubehör; außergewöhnliche Ereignisse. Der Hersteller behält sich außerdem das Recht vor, ohne
vorherige Ankündigung Änderungen vorzunehmen, die als angemessen erachtet werden.
3. HANDHABUNG UND LAGERUNG
Das Gerät befindet sich in einer Verpackung, die aus einer Holzplattform, starren Ecken, Polystyrolschutz und
Plastikfolie besteht. Gewichte und Gesamtabmessungen sind in der Tabelle TECHNISCHE MERKMALE in
Kapitel 11 angegeben. Bis zur endgültigen Platzierung in einem überdachten Bereich bei einer Temperatur
zwischen -25°/+55°C und einer relativen Luftfeuchtigkeit zwischen 30/95% lagern.
4. KOMMISSIONIEREN
Lesen Sie die Aufkleber auf dem Gerät sorgfältig durch, decken Sie sie auf keinen Fall ab und ersetzen Sie sie
sofort, wenn sie beschädigt sind. Entfernen Sie keine Schutzvorrichtungen oder Verkleidungen, bei denen
Werkzeuge entfernt werden müssen.
Positionierung
Vergewissern Sie sich, dass der für das Gerät reservierte Platz unter dem Gesichtspunkt der
Gesamtabmessungen (siehe Tabelle Kapitel 11) einen korrekten Gebrauch und eine einfache Wartung
ermöglicht. Stellen Sie das Gerät auf die ebene Fläche, indem Sie die Nivellierfüße einschrauben und
justieren, nach dem Auspacken, indem Sie alle von der Firma vorgesehenen Schutzvorrichtungen entfernen.
Um das Risiko einer statischen elektrischen Entladung durch das Entfernen des Schutzkunststoffs zu

17
begrenzen, ist es ratsam, den Kunststoff langsam und in kleinen Stücken zu entfernen. Bewegen Sie das
Gerät, indem Sie es nur vom unteren äußeren Boden anheben, um eine Beschädigung der Stützfüße und
anderer Geräte zu vermeiden. Wenn das Gerät während der Handhabung horizontal aufgestellt wurde,
warten Sie zwei Stunden, bevor Sie es einschalten. Das Gerät darf nicht in gefährlichen Umgebungen, im
Freien oder bei Regen, entfernt von Wärmequellen (Heizkörper, Scheinwerfer usw.), geschützt vor
Sonnenlicht und Zugluft, aufgestellt werden. Die Luft muss frei durch die Kondensationseinheit zirkulieren
können. Die Nichteinhaltung der oben genannten Bedingungen führt zu einer Verringerung der Leistung der
Einheit.
Erstmalige Reinigung
Reinigen Sie das Gerät ordnungsgemäß, bevor Sie es an die Stromversorgung anschließen. Verwenden Sie für
Innenteile antibakterielle Reinigungsmittel, für Kunststoffteile genügt es, feuchte Tücher zu verwenden. Mit
einem weichen, sauberen Tuch abtrocknen. Verwenden Sie keine aggressiven Reinigungsmittel,
Scheuermittel oder Lösungsmittel.
Positionierungskomponenten und Zubehör
Alle Zubehörteile, die die Gitter ersetzen, können in die entsprechenden Halterungen eingesetzt werden.
Ordnen Sie die Gitterstützen innerhalb der Zelle in der für die Verwendung am besten geeigneten Position
an.
Anschluss an das Stromnetz
Stellen Sie sicher, dass das Stromversorgungssystem den geltenden Gesetzen entspricht. Das
Stromversorgungskabel muss gut verlängert sein (Wicklung oder Überlappung vermeiden), an einer Stelle,
die nicht möglichen Stößen oder Manipulationen ausgesetzt ist, und es darf sich nicht in der Nähe von
Flüssigkeiten oder Wasser- und Wärmequellen befinden. Falls beschädigt, lassen Sie es sofort von
qualifiziertem Personal ersetzen. Vermeiden Sie stets die Verwendung von Adaptern.
5. TECHNISCHE MERKMALE
Aufgenommene Kräfte und Gesamtabmessungen
Der Stromverbrauch, die Außen- und Innenabmessungen der verschiedenen Modelle und in den
verschiedenen Konfigurationen sind in der Tabelle in Kapitel 11 angegeben.
Lärm und Vibrationen
Der Schallpegel von Geräten mit eingebauten Verflüssigungssätzen beträgt weniger als 70 dB. Unter
normalen Bedingungen erzeugt das Gerät keine für die Umgebung schädlichen Vibrationen.

18
6. VERWENDUNG
Antrieb
Diese Schränke werden mit Hilfe von Schaltern und einer elektronischen Steuereinheit bedient. In den
kombinierten Modellen sind die Kontrollen doppelt und unabhängig. Die dem Benutzer erlaubten
Operationen sind
Ein-/Ausschalten (Abb. 1)
Schalter Nr. 1 drücken: Auf dem Display wird die momentan im Schrank herrschende Temperatur angezeigt,
und die Betriebs-LED des Kompressors und die Betriebs-LED des internen Lüfters (verzögert) leuchten auf.
Im Falle einer Unterbrechung der Stromversorgung startet der Kompressor mit einer gewissen Verzögerung
wieder.
Einstellung der Raumtemperatur (Abb. 1)
Drücken Sie die SET-Taste (links von der Anzeige), um die eingestellte Temperatur abzulesen. Wenn Sie diese
Temperatur ändern möchten: Halten Sie die SET-Taste gedrückt (LED 1 blinkt) und drücken Sie innerhalb von
15 Sekunden die Taste ▲(UP) oder ▼(DOWN), um die ursprünglich eingestellte Temperatur zu erhöhen oder
zu verringern, bis die neue Temperatur erreicht ist. Bestätigen Sie den neuen eingestellten Wert durch
Drücken der SET-Taste innerhalb von 10 Sekunden nach Abschluss des vorherigen Vorgangs. Das Blinken des
neuen Sollwerts für 2 Sekunden bestätigt die Annahme und Speicherung der neuen Daten.
Anzeige von Alarmcodes
Die Steuereinheit signalisiert eventuelle Fehlfunktionen durch Blinken der folgenden Alarmcodes auf dem
Display: PF1, PF2, HLA, LLA, HtA, LtA. Wenn ein oder mehrere Codes nacheinander angezeigt werden,
notieren Sie diese, schalten Sie die Steuereinheit aus und nach einigen Sekunden wieder ein. Wenn ein oder
mehrere Codes wieder auftauchen, notieren Sie sie und rufen Sie unter Angabe der notierten Codes die
technische Hilfe an.
Lagerung von Lebensmitteln
Um die beste Leistung des Schrankes zu erzielen, ist es notwendig, folgende Anweisungen zu befolgen: die
Ware in das Gerät einführen, nachdem sie die gewünschte, an der Steuereinheit ablesbare Temperatur
erreicht hat; keine heißen Lebensmittel oder nicht abgedeckten Flüssigkeiten in das Gerät einführen; die
Lebensmittel verpacken und schützen; die Luftzirkulation im Inneren nicht durch Hindernisse einschränken;
häufiges und längeres Öffnen der Tür vermeiden; einige Augenblicke warten, bevor die gerade geschlossene
Tür wieder geöffnet wird.

19
Auftauen
Zeitpunkt des Auftauens (Abb.1)
Das Steuergerät startet automatisch 4 Abtauzyklen innerhalb von 24 Stunden. Der Timer erkennt die Zeit ab
dem Moment des ersten Starts. Um einen manuellen Abtauzyklus durchzuführen, drücken Sie einfach die
Abtautaste (SBR) für 3 Sekunden, eine sofortige automatische Abtauung findet für die nächsten 6 Stunden
statt. Während dieser Phase leuchtet die Abtau-Kontrollleuchte auf dem Display auf. Die
Abtauwasserbeseitigung erfolgt bei allen Modellen automatisch.
7. WARTUNG
Periodische Zellen- und Kondensatorreinigung
Schalten Sie das Gerät vor Beginn der Reinigung aus und ziehen Sie den Stecker aus der Steckdose. Reinigen
Sie das Innenfach mindestens einmal pro Woche gemäß den Anweisungen (siehe Erstreinigung). Reinigen Sie
den Kondensator, der sich über dem Schrank hinter der Schalttafel befindet, mindestens einmal pro Woche.
Bevor Sie mit der Reinigung beginnen, schließen und schützen Sie das Gehäuse und entfernen Sie dann den
auf der Vorderseite des Kondensators abgelagerten Staub mit einer Bürste und einem Staubsauger.
Inaktivität der Einheit
Ziehen Sie bei Inaktivität den Stecker aus der Steckdose, reinigen Sie gründlich wie bei einer periodischen
Reinigung und lassen Sie die Luft in der Zelle zirkulieren, indem Sie das Gehäuse mit einem Tuch abdecken.
8. VERHALTEN IM FALLE DES VERSAGENS
Wenn das Gerät nicht funktioniert, überprüfen Sie dies:
• der Stecker korrekt in die Steckdose eingesteckt ist;
• das Netzkabel nicht beschädigt ist.
Wenn die eingestellte Temperatur nicht erreicht wird, überprüfen Sie, ob:
• der Stecker korrekt in die Steckdose eingesteckt ist;
• das Netzkabel nicht beschädigt ist;
• der Steuerschalter eingeschaltet ist;
• die Steuereinheit gut geregelt ist (siehe Einstellung der Raumtemperatur);
• sich das Gerät nicht in der Auftau- oder Wiederherstellungsphase nach dem Auftauen befindet;
• der Verdampfer nicht mit Eis bedeckt ist (siehe Abtauen);
• der Kondensator nicht durch Staub verstopft ist;

20
• sich das Gerät nicht in der Nähe von Wärmequellen befindet oder seine Verflüssigereinheit schlecht
belüftet ist;
• die eingelagerten Lebensmittel oder andere Gegenstände das korrekte Schließen des Schrankes nicht
verhindern;
• das Gerät nicht unter anormalen Bedingungen arbeitet (Einlegen von heißem, überschüssigem
und/oder fehlplatziertem Essen).
Wenn das Gerät Wasser verliert, prüfen Sie, ob es nicht undicht ist:
• die Wasserbeseitigungsvorrichtung nicht beschädigt ist, dass der Abfluss gut kanalisiert und nicht
verstopft ist;
• das Gerät eben ist.
Wenn das Gerät Geräusche macht, überprüfen Sie dies:
• es gibt keine abgeschraubten Schrauben oder Bolzen;
• das Gerät eben ist und die Füße fest auf dem Boden stehen.
Wenn nach all diesen Kontrollen die Fehlfunktion weiterhin besteht, ist es ratsam, sich unter Angabe des
Modellcodes und der Seriennummer (beide sind auf dem technischen Datenschild zu finden) sowie
eventueller Alarmcodes, die auf dem Display des Steuergeräts erscheinen können, an den technischen
Kundendienst zu wenden.
9. TÄTIGKEITEN, DIE VON FACHPERSONAL AUSGEFÜHRT WERDEN
Ersetzen von Komponenten
Ziehen Sie vor Wartungsarbeiten den Stecker aus der Steckdose.
10. ENTSORGUNG
Die Entsorgung des Geräts muss entsprechend den örtlichen Gesetzen und Behörden an spezialisierte Firmen
übertragen werden.
Das Gerät besteht aus
Stahlblechkonstruktion;
elektrische Komponenten und Verkabelung;
elektrischer Kompressor;
Kunststoffmaterialien;
La pagina si sta caricando...
La pagina si sta caricando...
-
 1
1
-
 2
2
-
 3
3
-
 4
4
-
 5
5
-
 6
6
-
 7
7
-
 8
8
-
 9
9
-
 10
10
-
 11
11
-
 12
12
-
 13
13
-
 14
14
-
 15
15
-
 16
16
-
 17
17
-
 18
18
-
 19
19
-
 20
20
-
 21
21
-
 22
22


Gastrodomus GA600DTV Manuale del proprietario
- Tipo
- Manuale del proprietario
in altre lingue
- English: Gastrodomus GA600DTV Owner's manual
- Deutsch: Gastrodomus GA600DTV Bedienungsanleitung