
GRIGNOTEUSE SANS FIL 20 V
Traduction des instructions d’origine
AKKU-KNABBER 20 V
Originalbetriebsanleitung
CORDLESS NIBBLER 20V
Translation of the original instructions
AKU PROSTŘIHOVAČ
PLECHU 20 V
Překlad originálního provozního návodu
ACCU-KNABBELSCHAAR 20 V
Vertaling van de originele gebruiksaanwijzing
AKU REZAČKA PLECHU 20 V
Preklad originálneho návodu na obsluhu
AKUMULATOROWE NOŻYCE
DO CIĘCIA BLACHY 20 V
Tłumaczenie oryginalnej instrukcji obsługi
PUNZONADORA RECARGABLE 20 V
Traducción del manual de instrucciones original
BATTERIDREVEN PLADENIPLER 20 V
Oversættelse af den originale driftsvejledning
RODITRICE RICARICABILE 20 V
Traduzione delle istruzioni d’uso originali
AKKUS LEMEZVÁGÓ 20 V
Az originál használati utasítás fordítása AKUMULATORSKI STROJ
ZA REZANJE 20 V
Prevod originalnega navodila za uporabo
CORDLESS NIBBLER 20V / AKKU-KNABBER 20 V /
GRIGNOTEUSE SANS FIL 20 V PMKA 20-Li A1
IAN 359201_2110

GB / IE Translation of the original instructions Page 1
DE / AT / CH Originalbetriebsanleitung Seite 15
FR / BE Traduction des instructions d’origine Page 29
NL / BE Vertaling van de originele gebruiksaanwijzing Pagina 45
CZ Překlad originálního provozního návodu Strana 59
PL Tłumaczenie oryginalnej instrukcji obsługi Strona 71
SK Preklad originálneho návodu na obsluhu Strana 85
ES Traducción del manual de instrucciones original Página 99
DK Oversættelse af den originale driftsvejledning Side 113
IT Traduzione delle istruzioni d’uso originali Pagina 125
HU Az originál használati utasítás fordítása Oldal 139
SI Prevod originalnega navodila za uporabo Stran 153
Before reading, unfold the page containing the illustrations and familiarise yourself with all functions of
the device.
Klappen Sie vor dem Lesen die Seite mit den Abbildungen aus und machen Sie sich anschließend mit allen
Funktionen des Gerätes vertraut.
Avant de lire le mode d‘emploi, ouvrez la page contenant les illustrations et familiarisez-vous ensuite avec
toutes les fonctions de l‘appareil.
Vouw vóór het lezen de pagina met de afbeeldingen open en maak u vertrouwd met alle functies van het
apparaat.
Před čtením si otevřete stranu s obrázky a potom se seznamte se všemi funkcemi přístroje.
Przed przeczytaniem proszę rozłożyć stronę z ilustracjami, a następnie proszę zapoznać się z wszystkimi
funkcjami urządzenia.
Pred čítaním si odklopte stranu s obrázkami a potom sa oboznámte so všetkými funkciami prístroja.
Antes de empezar a leer abra la página que contiene las imágenes y, en seguida, familiarícese con todas
las funciones del dispositivo.
Før du læser, vend siden med billeder frem og bliv bekendt med alle apparatets funktioner.
Prima di leggere aprire la pagina con le immagini e prendere confidenza con le diverse funzioni
dell‘apparecchio.
Olvasás előtt kattintson az ábrát tartalmazó oldalra és végezetül ismerje meg a készülék mindegyik funkcióját.
Pred branjem odprite stran s slikami in se nato seznanite z vsemi funkcijami naprave.

A C
D
B

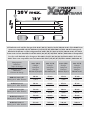
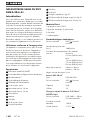
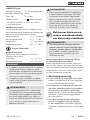
All Parkside tools and the chargers PLG 20 A1/A4/C1/A2/C2/A3/C3/PDSLG 20 A1 of the X20V Team
series are compatible with the PAP 20 A1/A2/A3/B1/B3/PAPS 204 A1/PAPS 208 A1 battery pack.
Alle Parkside Geräte und die Ladegeräte PLG 20 A1/A4/C1/A2/C2/A3/C3/PDSLG 20 A1 der X20V
Team Serie sind mit dem Akku-Pack PAP 20 A1/A2/A3/B1/B3/PAPS 204 A1/PAPS 208 A1 kompatibel.
Tous les outils Parkside et les chargeurs PLG 20 A1/A4/C1/A2/C2/A3/C3/PDSLG 20 A1 de la série
X20V Team sont compatibles avec la batterie PAP 20 A1/A2/A3/B1/B3/PAPS 204 A1/PAPS 208 A1.
Charging times
Ladezeiten
Temps de charge
Charging currents
Ladeströme
Courants de charge
max. 2,4 A
Charger
Ladegerät
Chargeur
PLG 20 A1/A4/C1
max. 3,5 A
Charger
Ladegerät
Chargeur
PLG 20 A2/C2
max. 4,5 A
Charger
Ladegerät
Chargeur
PLG 20 A3/C3
max. 4,5 A
Charger
Ladegerät
Chargeur
PDSLG 20 A1
2 Ah PAP 20 A1/B1
Battery pack · Akku · Batterie
60 min
2,4 A
45 min
3,5 A
35 min
3,8 A
35 min
3,8 A
3 Ah PAP 20 A2
Battery pack · Akku · Batterie
90 min
2,4 A
60 min
3,5 A
45 min
4,5 A
45 min
4,5 A
4 Ah PAP 20 A3/B3
Battery pack · Akku · Batterie
120 min
2,4 A
80 min
3,5 A
60 min
4,5 A
60 min
4,5 A
4 Ah PAPS 204 A1
Battery pack · Akku · Batterie
120 min
2,4 A
80 min
3,5 A
50 min
4,5 A
50 min
4,5 A
8 Ah PAPS 208 A1
Battery pack · Akku · Batterie
210 min
2,4 A
165 min
3,5 A
120 min
4,5 A
120 min
4,5 A

PMKA 20-Li A1 GB│IE │ 1 ■
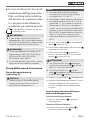
Contents
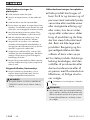
Introduction ............................................................2
Intended use ........................................................................2
Features ...........................................................................2
Package contents ....................................................................2
Technical specifications ...............................................................2
General power tool safety warnings .......................................3
1. Work area safety ..................................................................3
2. Electrical safety ...................................................................4
3. Personal safety ....................................................................4
4. Power tool use and care ............................................................4
5. Use and handling of the cordless electrical power tool .....................................5
6. Service ..........................................................................6
Safety instructions for nibblers ..........................................................6
Original accessories/attachments .......................................................6
Safety guidelines for battery chargers ....................................................7
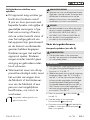
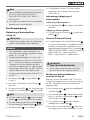
Before use .............................................................7
Charging the battery pack (seefig.D) ....................................................7
Inserting/removing the battery pack .....................................................8
Checking the battery charge level .......................................................8
Changing the die holder position (seefig. A) ..............................................8
Permissible material thickness ...........................................................8
Fitting and removing the grooved pin and the die holder (see figs. B + C) ........................8
Using the appliance .....................................................9
Switching on/off .....................................................................9
Lubrication .........................................................................9
Cutting process ......................................................................9
Cut-outs ............................................................................9
Maintenance and cleaning ................................................ 9
Kompernass Handels GmbH warranty .....................................9
Service ............................................................... 11
Importer .............................................................11
Disposal ..............................................................11
Original declaration of conformity ........................................12
Ordering replacement batteries ..........................................13
Telephone ordering .................................................................13

PMKA 20-Li A1
■ 2 │ GB│IE
CORDLESS NIBBLER 20V
PMKA 20-Li A1
Introduction
Congratulations on the purchase of your new
appliance. You have selected a high-quality product.
The operating instructions are part of this product.
They contain important information about safety,
usage and disposal. Before using the product, please
familiarise yourself with all operating and safety
instructions. Use the product only as described and
for the specified range of applications. Please also
pass these operating instructions on to any future
owner.
Intended use
This appliance is suitable for cutting steel sheet and
aluminium sheet. This appliance is exclusively in-
tended for private use in dry indoor spaces. Any
other usage or modification of the appliance is
deemed to be improper and carries a significant
risk of accidents. The manufacturer accepts no
responsibility for damage attributable to misuse.
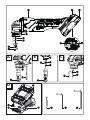
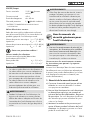
Features
ON/OFF switch
Release button for the battery pack
Battery pack*
Battery charge level button
Battery display LED
Hex screw
Measuring groove 1.6 mm
Measuring groove 1.2 mm
Die holder
Die
Hex key
Hex screw
Grooved pin
Hex key
Tool holder
High-speed charger (see fig. D)*
Red charge control LED (see fig. D)
Green charge control LED (see fig. D)
Package contents
1 cordless nibbler 20V
2 grooved pins (1 pre-fitted)
2 hex keys
1 set of operating instructions
Technical specifications
Rated voltage 20 V (DC)
Idling stroke rate 1400 strokes/min
Cutting performance/material thickness max. in
Aluminium
2.5 mm (200 N/mm²)
Steel
1.6 mm (400 N/mm²),
1.2 mm (600 N/mm²),
0.8 mm (800 N/mm²)
Min. cutting radius inside = 40 mm
outside = 50 mm
Cutting track width 5 mm
Battery PAP 20 A3*
Type LITHIUM ION
Rated voltage 20 V (DC)
Capacity 4 Ah
Cells 10
High-speed charger PLG 20 A3*
INPUT
Rated voltage 230–240 V ∼ 50 Hz
(AC)
Rated power
consumption 120 W
Fuse (internal) 3.15 A T3.15A

PMKA 20-Li A1 GB│IE │ 3 ■
OUTPUT
Rated voltage 21.5 V (DC)
Rated current 4.5 A
Charging time approx. 60 min
Protection class II / (double insulation)
* BATTERY AND CHARGER ARE NOT SUPPLIED
Noise emission value
Noise measurement value determined in
accordance with EN62841. The A-rated
noise level of the tool is typically
Sound pressure level LpA = 71.2 dB (A)
Uncertainty KpA = 3 dB
Sound power level LWA = 82.2 dB (A)
Uncertainty KWA = 3 dB
Wear ear muffs!
Total vibration value
(vector total of three directions) determined in
accordance with EN 62841:
Cutting of sheet metal ah = 3.8 m/s2
Uncertainty K = 1.5 m/s2
NOTE
► The vibration emission values and the noise
emission values given in these instructions
have been measured in accordance with a
standardised test procedure and can be used
for comparison of the power tool with another
tool.
► The specified total vibration values and the
noise emission values can also be used to
make a provisional load estimate.
WARNING!
► Depending on the manner in which the power
tool is being used and, in particular, the kind
of workpiece being worked, the vibration and
noise emission values can deviate from the
values given in these instructions during
actual use of the power tool.
WARNING!
► It is necessary to establish safety measures to
protect the operator based on an estimation
of the vibration load during actual use (all
states of operation must be included, e.g. times
when the power tool is switched off and times
where the power tool is switched on but
running without load).
General power
tool safety warnings
WARNING!
►Read all safety warnings, instructions,
illustrations and specifications provided
with this power tool. Failure to follow all
instructions listed below may result in electric
shock, fire and/or serious injury.
Save all warnings and instructions for future
reference.
The term "power tool" in the warnings refers to your
mains-operated (corded) power tool or battery-
operated (cordless) power tool.
1. Work area safety
a) Keep work area clean and well lit.
Cluttered or dark areas invite accidents.
b) Do not operate power tools in explosive atmos-
pheres, such as in the presence of flammable
liquids, gases or dust. Power tools create sparks
which may ignite the dust or fumes.
c) Keep children and bystanders away while
operating a power tool. Distractions can
cause you to lose control.

PMKA 20-Li A1
■ 4 │ GB│IE
2. Electrical safety
a) Power tool plugs must match the outlet. Never
modify the plug in any way. Do not use any
adapter plugs with earthed (grounded) power
tools. Unmodified plugs and matching outlets
will reduce risk of electric shock.
b) Avoid body contact with earthed or grounded
surfaces, such as pipes, radiators, ranges and
refrigerators. There is an increased risk of electric
shock if your body is earthed or grounded.
c) Do not expose power tools to rain or wet
conditions. Water entering a power tool will
increase the risk of electric shock.
d) Do not abuse the cord. Never use the cord
for carrying, pulling or unplugging the power
tool. Keep cord away from heat, oil, sharp
edges or moving parts. Damaged or entangled
cords increase the risk of electric shock.
e) When working outdoors with an electrical
power tool always use extension cords that
are also suitable for use outdoors. Use of a
cord suitable for outdoor use reduces the risk
of electric shock.
f) If operating a power tool in a damp location
is unavoidable, use a residual current device
(RCD) protected supply. Use of an RCD re-
duces the risk of electric shock.
3. Personal safety
a) Stay alert, watch what you are doing and use
common sense when operating a power tool.
Do not use a power tool while you are tired
or under the influence of drugs, alcohol or
medication. A moment of inattention while
operating power tools may result in serious
personal injury.
b) Use
personal protective equipment. Always
wear eye protection. Protective equipment such
as a dust mask, non-skid safety shoes, hard hat
or hearing protection used for appropriate
conditions will reduce personal injuries.
c) Prevent unintentional starting. Ensure the
switch is in the off-position before connecting
to power source and/or battery pack, picking
up or carrying the tool. Carrying power tools
with your finger on the switch or energising
power tools that have the switch on invites
accidents.
d) Remove any adjusting key or wrench before
turning the power tool on. A wrench or a key
left attached to a rotating part of the power tool
may result in personal injury.
e) Do not overreach. Keep proper footing and
balance at all times. This enables better control
of the power tool in unexpected situations.
f) Dress properly. Do not wear loose clothing or
jewellery. Keep your hair and clothing away
from moving parts. Loose clothes, jewellery or
long hair can be caught in moving parts.
g) If devices are provided for the connection of
dust extraction and collection facilities, ensure
these are connected and properly used. Use
of dust collection can reduce dust-related
hazards.
h) Do not allow yourself to get lulled into a false
sense of security and do not ignore the safety
rules for power tools, even if you are familiar
with the power tool after repeated use.
A careless action can cause severe injury within
a fraction of a second.
4. Power tool use and care
a) Do not force the power tool. Use the correct
power tool for your application. The correct
power tool will do the job better and safer at
the rate for which it was designed.
b) Do not use the power tool if the switch does
not turn it on and off. Any power tool that
cannot be controlled with the switch is
dangerous and must be repaired.

PMKA 20-Li A1 GB│IE │ 5 ■
c) Disconnect the plug from the power source
and/or remove the battery pack, if detacha-
ble, from the power tool before making any
adjustments, changing accessories, or storing
power tools. Such preventive safety measures
reduce the risk of starting the power tool acci-
dentally.
d) Store idle power tools out of the reach of
children. and do not allow persons unfamiliar
with the power tool or these instructions to
operate the power tool. Power tools are
dangerous in the hands of untrained users.
e) Maintain power tools and accessories. Check
for misalignment or binding of moving parts,
breakage of parts and any other condition
that may affect the power tool’s operation.
If damaged, have the power tool repaired
before use. Many accidents are caused by
poorly maintained power tools.
f) Keep cutting tools sharp and clean. Properly
maintained cutting tools with sharp cutting edges
are less likely to bind and are easier to control.
g) Use the power tool, accessories and accessory
tools, etc. in accordance with these instructions,
taking into account the working conditions and
the work to be performed. Use of the power
tool for operations different from those intended
could result in a hazardous situation.
h) Keep handles and grasping surfaces dry,
clean and free from oil and grease. Slippery
handles and grasping surfaces do not allow for
safe handling and control of the tool in unex-
pected situations.
5. Use and handling of the cordless
electrical power tool
a) Charge a rechargeable battery using only the
charger recommended by the manufacturer.
Chargers are often designed for a particular
type of rechargeable battery unit. There is a risk
of fire if other types of rechargeable battery
units are used.
b) Only the rechargeable battery units supplied
are to be used with an electrical power tool.
The use of other rechargeable battery units may
lead to the danger of injury or fire.
c) When they are not being used, store re-
chargeable battery units away from paper-
clips, coins, keys, nails, screws or other small
metal objects that could cause the contacts to
be bridged. Short-circuiting the contacts of a
rechargeable battery unit may result in heat
damage or fire.
d) Fluids may leak out of rechargeable battery
units if they are misused. If this happens,
avoid contact with the fluid. If contact occurs,
flush the affected area with water. Seek addi-
tional medical help if any of the fluid gets into
your eyes. Escaping battery fluid may cause
skin irritation or burns.
e) Do not use a damaged or modified battery.
Damaged or modified batteries may behave
unexpectedly and cause fires, explosions or
pose a risk of injury.
f) Do not expose a battery to fire or excessively
high temperatures. Fire or temperatures in excess
of 130°C (265°F) can cause an explosion.
g) Follow all instructions regarding charging
and never charge the battery or the cordless
tool outside of the temperature range given in
the operating instructions. Incorrect charging
or charging outside of the permissible tempera-
ture range can destroy the battery and increase
the risk of fire.

PMKA 20-Li A1
■ 6 │ GB│IE
CAUTION! RISK OF EXPLOSION!
Never charge non-rechargeable
batteries.
Protect the rechargea-
ble battery from heat (for example, from
continuous exposure to sunlight), fire, water
and moisture. There is a risk of explosion.
6. Service
a) Have your power tool serviced by a qualified
repair person using only identical replace-
ment parts. This will ensure that the safety of
the power tool is maintained.
b) Never try to repair damaged batteries.
Batteries should only be maintained by the
manufacturer or an approved customer service
centre.
Safety instructions for nibblers
■ Hold the tool with a firm grip.
■ Secure the workpiece properly.
■ Keep hands away from rotating parts.
■ The edges and chips from the workpiece are
sharp. Wear gloves. To prevent injuries, it is
also advisable to wear shoes with thick soles.
■ Do not place the tool onto the chips from the
workpiece. Otherwise the tool may be
damaged and malfunction.
■ Do not leave the tool running unattended.
Use the tool only when held in your hands.
■ Always ensure that you have a firm footing.
When you are working in an elevated position,
ensure that no-one is standing beneath you.
■ Avoid touching the grooved pin, the die or the
workpiece immediately after machining, be-
cause the parts will still be very hot and can
cause skin burns.
■ Avoid cutting electrical cables. This can lead
to serious accidents due to electric shock.
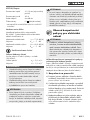
Original accessories/attachments
■ Use only the accessories and additional equip-
ment that are specified in the operating instruc-
tions and are compatible with the appliance.
WARNING!
■ Do not use any accessories that are not
recommended by PARKSIDE. This can lead
to electric shock and fire.

PMKA 20-Li A1 GB│IE │ 7 ■
Safety guidelines for battery
chargers
■ This appliance may be used
by children aged 8 years and
above and by persons with lim-
ited physical, sensory or men-
tal capabilities or lack of expe-
rience and knowledge,
provided that they are under
supervision or have been told
how to use the appliance safe-
ly and are aware of the poten-
tial risks. Do not allow children
to use the appliance as a toy.
Cleaning and user mainte-
nance tasks may not be car-
ried out by children unless they
are supervised.
■ To avoid potential risks, dam-
aged mains cables should be
replaced by the manufacturer,
their customer service depart-
ment or a similarly qualified
person.
The charger is suitable for indoor use
only.
WARNING!
■ To avoid potential risks, damaged mains
cables should be replaced by the manufac-
turer, their customer service department or
a similarly qualified person.
CAUTION!
♦ This charger can only charge the following
batteries: PAP20A1/PAP20A2/PAP20A3/
PAP20B1/PAP20B3/ PAPS204A1/
PAPS208A1.
♦ A current list of battery compatibility can
be found at www.Lidl.de/Akku.
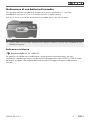
Before use
Charging the battery pack
(seefig.D)
CAUTION!
► Always unplug the appliance before you
remove the battery pack from or connect
the battery pack to the charger.
NOTE
► The recommended ambient temperature
range for using tools and batteries is between
-5°C and 50°C.
► Never charge the battery pack at an ambient
temperature of below 10°C or above 40°C.
If a lithium-ion battery is to be stored for an
extended period, the charge level should be
checked regularly. The optimum charge level
is between 50% and 80%. The storage climate
should be cool and dry and the ambient
temperature should be between 0°C and
50°C.
♦ Connect the battery pack to the high-speed
charger (see fig. D).
♦ Insert the mains plug into the mains socket.
The control LED lights up red.
♦ The green control LED indicates that the
charging process is complete and the battery
pack is ready for use.

PMKA 20-Li A1
■ 8 │ GB│IE
CAUTION!
♦ If the red control LED flashes, this means
that the battery pack has overheated and
cannot be charged.
♦ If the red and green control LEDs both
flash, this means that the battery pack is
defective.
♦ Push the battery pack into the appliance.
♦ Switch off the charger for at least 15 minutes
between successive charging sessions. Also
disconnect the power plug from the mains
power socket.
Inserting/removing the battery pack
Inserting the battery pack
♦ Push the battery pack into the handle until it
clicks into place.
Removing the battery pack
♦ Press the release button and remove the
battery pack .
Checking the battery charge level
♦ Press the battery charge level button to
check the status of the battery (see also main
diagram). The status/remaining charge will be
shown on the battery display LED as follows:
RED/ORANGE/GREEN = maximum charge
RED/ORANGE = medium charge
RED = low charge – charge the battery
WARNING! RISK OF INJURY!
► Before doing any work on the device, switch
it off and remove the battery.
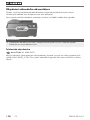
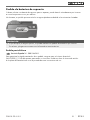
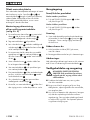
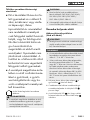
Changing the die holder position
(seefig. A)
The die position can be adjusted by 360°. Four
working positions offset by 90° are specified.
The working positions can be set as follows:
♦ Undo the hex screw using the hex key
supplied.
♦ Turn the die holder into the desired working
position so that the respective hole in the die
holder faces towards the hex screw .
♦ Retighten the hex screw using the supplied
hex key .
♦ Rotate the die holder slightly to check
whether it is fixed in the correct position.
Permissible material thickness
The maximum cutting capacity depends on the
material quality and strength. The measuring
grooves and on the die holder serve as
a thickness gauge for the permissible cutting thick-
ness. Never cut material thicknesses greater than
those specified in the technical data.
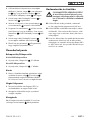
Fitting and removing the grooved pin
and the die holder (see figs. B + C)
♦ To remove the grooved pin and the die
holder , undo the hex screw using the
supplied hex key .
♦ Pull the die holder from the appliance.
♦ Undo the hex screw using the supplied hex
key so you can remove the grooved pin
from the tool holder .
♦ Insert the new supplied grooved pin into the
tool holder so that the hole in the grooved
pin is facing towards the hex screw .
♦ Tighten the hex screw , to fasten the grooved
pin in place.
♦ Guide and replace the die holder above
the tool holder in the appliance.
♦ Turn the die holder into the desired working
position so that the respective hole in the die
holder faces towards the hex screw .
♦ Retighten the hex screw using the supplied
hex key .
♦ Rotate the die holder slightly to check
whether it is fixed in the correct position.

PMKA 20-Li A1 GB│IE │ 9 ■
Using the appliance
Switching on/off
Switching on the appliance
♦ Move the ON/OFF switch to position "0".
Switching off the appliance
♦ Move the ON/OFF switch to position "I".
Lubrication
♦ Apply standard machine oil to the cutting line
to extend the service life of the grooved pin
and the die . This is particularly important
when cutting aluminium.
Cutting process
♦ Hold the appliance at a right angle (90°) to
the workpiece during the machining process.
♦ Move the appliance in the cutting direction
with gentle pressure.
Cut-outs
For internal cut-outs, a hole larger than 22 mm
is needed to insert the die holder .
Maintenance and cleaning
WARNING! RISK OF INJURY! Switch
the appliance off and remove the
power plug before starting any work
on the appliance.
■ The appliance must always be kept clean, dry
and free from oil or grease.
■ Use a soft, dry cloth to clean the housing.
Never use petrol, solvents or cleansers which
can damage plastic.
■ If a lithium-ion battery is to be stored for an
extended period, the charge level should be
checked regularly. The optimum charge level is
between 50% and 80%. The optimum storage
environment is cool and dry.
Kompernass Handels GmbH
warranty
Dear Customer,
This appliance has a 3-year warranty valid from
the date of purchase. If this product has any faults,
you, the buyer, have certain statutory rights. Your
statutory rights are not restricted in any way by the
warranty described below.
Warranty conditions
The warranty period starts on the date of purchase.
Please keep your receipt in a safe place. This will
be required as proof of purchase.
If any material or manufacturing fault occurs within
three years of the date of purchase of the product,
we will either repair or replace the product for you
or refund the purchase price (at our discretion).
This warranty service requires that you present the
defective appliance and the proof of purchase (re-
ceipt) within the three-year warranty period, along
with a brief written description of the fault and of
when it occurred.
If the defect is covered by the warranty, your
product will either be repaired or replaced by us.
The repair or replacement of a product does not
signify the beginning of a new warranty period.
X 12 V and X 20 V Team Series battery packs
come with a 3-year warranty valid from the date
of purchase.
Warranty period and statutory claims
for defects
The warranty period is not prolonged by repairs
effected under the warranty. This also applies to
replaced and repaired components. Any damage
and defects present at the time of purchase must
be reported immediately after unpacking. Repairs
carried out after expiry of the warranty period shall
be subject to a fee.

PMKA 20-Li A1
■ 10 │ GB│IE
Scope of the warranty
This appliance has been manufactured in accord-
ance with strict quality guidelines and inspected
meticulously prior to delivery.
The warranty covers material faults or production
faults. The warranty does not extend to product
parts subject to normal wear and tear or to fragile
parts which could be considered as consumable
parts such as switches or parts made of glass.
The warranty does not apply if the product has
been damaged, improperly used or improperly
maintained. The directions in the operating instruc-
tions for the product regarding proper use of the
product are to be strictly followed. Uses and
actions that are discouraged in the operating
instructions or which are warned against must be
avoided.
This product is intended solely for private use and
not for commercial purposes. The warranty shall
be deemed void in cases of misuse or improper
handling, use of force and modifications / repairs
which have not been carried out by one of our
authorised Service centres.
The warranty period does not apply to
■ Normal reduction of the battery capacity
over time
■ Commercial use of the product
■ Damage to or alteration of the product by the
customer
■ Non-compliance with safety and maintenance
instructions, operating errors
■ Damage caused by natural hazards
Warranty claim procedure
To ensure quick processing of your case, please
observe the following instructions:
■ Please have the till receipt and the item number
(IAN) 359201_2110 available as proof of
purchase.
■ You will find the item number on the type plate
on the product, an engraving on the product,
on the front page of the operating instructions
(below left) or on the sticker on the rear or bot-
tom of the product.
■ If functional or other defects occur, please
contact the service department listed either by
telephone or by e-mail.
■ You can return a defective product to us free of
charge to the service address that will be pro-
vided to you. Ensure that you enclose the proof
of purchase (till receipt) and information about
what the defect is and when it occurred.
You can download these instructions
along with many other manuals,
product videos and installation soft-
ware at www.lidl-service.com.
This QR code will take you directly to the Lidl
service page (www.lidl-service.com) where you
can open your operating instructions by entering
the item number (IAN) 359201_2110.
WARNING!
■Have your appliances repaired by the
service centre or a qualified electrician
and only using genuine replacement parts.
This will ensure that the safety of the appli-
ance is maintained.
■Always ensure that the power plug or the
mains cable is replaced only by the manu-
facturer of the appliance or by an approved
customer service provider. This will ensure
that the safety of the appliance is maintained.

PMKA 20-Li A1 GB│IE │ 11 ■
Service
Service Great Britain
Tel.: 0800 404 7657
E-Mail: [email protected]
Service Ireland
Tel.: 1800 101010
E-Mail: [email protected]
IAN 359201_2110
Importer
Please note that the following address is not the
service address. Please use the service address
provided in the operating instructions.
KOMPERNASS HANDELS GMBH
BURGSTRASSE 21
44867 BOCHUM
GERMANY
www.kompernass.com
Disposal
The packaging is made from environ-
mentally friendly material and can be
disposed of at your local recycling
plant.
Do not dispose of power tools
in the normal domestic waste!
According to European Directive
2012/19/EU, used power tools
must be collected separately and recycled in
an environmentally sound manner.
Do not dispose of batteries in
your normal household waste!
Remove the batteries from the appli-
ance before disposal. Defective or
worn-out rechargeable batteries must
be recycled according to Directive 2006/66/EC.
Take the battery pack and/or the appliance to a
nearby collection facility.
Please contact your local authority or town council
for information about disposal options for used
power tools/battery packs.
Dispose of the packaging in an envi-
ronmentally friendly manner. Observe
the labels on the different packaging
materials and separate them as need-
ed. The packaging material is labelled with abbre-
viations (a) and numbers (b) with the following
meanings: 1–7: plastics, 20–22: paper and
cardboard, 80–98: composites.
Your local community or municipal
authorities can provide information
on how to dispose of the worn-out
product.
The product is recyclable, is subject
to extended producer responsibility
and is collected separately.

PMKA 20-Li A1
■ 12 │ GB│IE
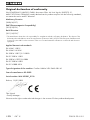
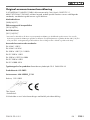
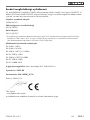
Original declaration of conformity
We, KOMPERNASS HANDELS GMBH, document officer: Mr Semi Uguzlu, BURGSTR. 21,
44867 BOCHUM, GERMANY, hereby declare that this product complies with the following standards,
normative documents and EC directives:
Machinery Directive
(2006/42/EC)
EMC (Electromagnetic Compatibility)
(2014/30/EU)
RoHS Directive
(2011/65/EU)*
* The manufacturer bears the sole responsibility for compliance with this conformity declaration. The subject of the
declaration described above meets the requirements of Directive 2011/65/EU of the European Parliament and
Council of 8 June 2011 on the restriction of the use of certain hazardous substances in electrical and electronic
equipment.
Applied harmonised standards
EN 62841-1:2015
EN 62841-2-8:2016
EN 55014-1:2017/A11:2020
EN IEC 55014-1:2021
EN 55014-2:1997/A2:2008
EN IEC 55014-2:2021
EN IEC 63000:2018
Type designation of the machine: Cordless Nibbler 20V PMKA 20-Li A1
Year of manufacture: 02–2022
Serial number: IAN 359201_2110
Bochum, 12/01/2022
Semi Uguzlu
- Quality Manager -
We reserve the right to make technical changes in the context of further product development.

PMKA 20-Li A1 GB│IE │ 13 ■
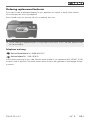
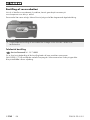
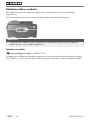
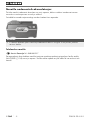
Ordering replacement batteries
If you want to order a replacement battery for your appliance, you can do so easily via the Internet
on www.kompernass.com or by telephone.
Due to limited stocks, this item may sell out in a relatively short time.
NOTE
► Online ordering of replacement parts is not possible in all countries. If this is the case, please contact
the Service Hotline.
Telephone ordering
Service Great Britain Tel.: 0800 404 7657
Service Ireland Tel.: 1800 101010
To ensure fast processing of your order, have the article number of your appliance (IAN359201_2110)
to hand in case of questions. The article number can be found on the type plate or the title page of these
instructions.

PMKA 20-Li A1
■ 14 │ GB│IE

PMKA 20-Li A1 DE│AT│CH │ 15 ■
Inhaltsverzeichnis
Einleitung .............................................................16
Bestimmungsgemäßer Gebrauch .......................................................16
Ausstattung ........................................................................16
Lieferumfang .......................................................................16
Technische Daten ...................................................................16
Allgemeine Sicherheitshinweise für Elektrowerkzeuge .......................17
1. Arbeitsplatzsicherheit ..............................................................17
2. Elektrische Sicherheit ..............................................................18
3. Sicherheit von Personen ............................................................18
4. Verwendung und Behandlung desElektrowerkzeugs .....................................19
5. Verwendung und Behandlung desAkkuwerkzeugs .......................................19
6. Service .........................................................................20
Sicherheitshinweise für Knabber ........................................................20
Originalzubehör/-zusatzgeräte ........................................................20
Sicherheitshinweise für Ladegeräte .....................................................21
Vor der Inbetriebnahme ................................................21
Akku-Pack laden (siehe Abb. D) ........................................................21
Akku-Pack ins Gerät einsetzen/entnehmen ...............................................22
Akkuzustand prüfen .................................................................22
Änderung der Matrizenhalterposition (siehe Abb. A) .......................................22
Zulässige Materialstärke .............................................................22
Montage und Demontage von Kerbstift und Matrizenhalter (sieheAbb. B + C) ...................23
Inbetriebnahme .......................................................23
Einschalten/Ausschalten ..............................................................23
Schmierung ........................................................................23
Scheidvorgang .....................................................................23
Ausschnitte ........................................................................23
Wartung und Reinigung .................................................24
Garantie der Kompernaß Handels GmbH ..................................24
Service ............................................................... 26
Importeur ............................................................26
Entsorgung ...........................................................26
Original-Konformitätserklärung ..........................................27
Ersatz-Akku-Bestellung .................................................28
Telefonische Bestellung ...............................................................28

PMKA 20-Li A1
■ 16 │ DE│AT│CH
AKKU-KNABBER 20 V
PMKA 20-Li A1
Einleitung
Wir beglückwünschen Sie zum Kauf Ihres neuen
Gerätes. Sie haben sich damit für ein hochwertiges
Produkt entschieden. Die Bedienungsanleitung ist
Teil dieses Produkts. Sie enthält wichtige Hinweise
für Sicherheit, Gebrauch und Entsorgung. Machen
Sie sich vor der Benutzung des Produkts mit allen
Bedien- und Sicherheitshinweisen vertraut. Benut-
zen Sie das Produkt nur wie beschrieben und für
die angegebenen Einsatzbereiche. Händigen Sie
alle Unterlagen bei Weitergabe des Produkts an
Dritte mit aus.
Bestimmungsgemäßer Gebrauch
Das Gerät ist zum Schneiden von Stahlblech und
Aluminiumblech geeignet. Das Gerät ist aus-
schließlich für den privaten Gebrauch in trockenen
Räumen zugelassen. Jede andere Verwendung
oder Veränderung des Gerätes gilt als nicht be-
stimmungsgemäß und birgt erhebliche Unfallge-
fahren. Für aus bestimmungswidriger Verwendung
entstandene Schäden übernimmt der Hersteller
keine Haftung.
Ausstattung
EIN-/AUS-Schalter
Taste zur Entriegelung des Akku-Packs
Akku-Pack*
Taste Akkuzustand
Akku-Display-LED
Innensechskantschraube
Meßnut 1,6 mm
Meßnut 1,2 mm
Matrizenhalter
Matrize
Sechskantschlüssel
Innensechskantschraube
Kerbstift
Sechskantschlüssel
Werkzeughalter
Schnell-Ladegerät (siehe Abb. D)*
Rote Ladekontroll-LED (siehe Abb. D)
Grüne Ladekontroll-LED (siehe Abb. D)
Lieferumfang
1 Akku-Knabber 20 V
2 Kerbstifte (1 vormontiert)
2 Sechskantschlüssel
1 Bedienungsanleitung
Technische Daten
Bemessungsspannung 20 V (Gleichstrom)
Leerlaufhubzahl (min-1) 1400 p/min
Schnittleistung/Materialstärke max. in
Aluminium
2,5 mm (200 N/mm²)
Stahl
1,6 mm (400 N/mm²),
1,2 mm (600 N/mm²),
0,8 mm (800 N/mm²)
Min. Schnittradius Innen = 40 mm
Außen = 50 mm
Schneidspurbreite 5 mm
Akku PAP 20 A3*
Typ LITHIUM-IONEN
Bemessungsspannung 20 V (Gleichstrom)
Kapazität 4 Ah
Zellen 10
Akku-Schnellladegerät PLG 20 A3*
EINGANG/Input
Bemessungsspannung 230–240 V ∼ 50 Hz
(Wechselstrom)
Bemessungsaufnahme 120 W
Sicherung (innen) 3,15 A T3.15A
La pagina si sta caricando...
La pagina si sta caricando...
La pagina si sta caricando...
La pagina si sta caricando...
La pagina si sta caricando...
La pagina si sta caricando...
La pagina si sta caricando...
La pagina si sta caricando...
La pagina si sta caricando...
La pagina si sta caricando...
La pagina si sta caricando...
La pagina si sta caricando...
La pagina si sta caricando...
La pagina si sta caricando...
La pagina si sta caricando...
La pagina si sta caricando...
La pagina si sta caricando...
La pagina si sta caricando...
La pagina si sta caricando...
La pagina si sta caricando...
La pagina si sta caricando...
La pagina si sta caricando...
La pagina si sta caricando...
La pagina si sta caricando...
La pagina si sta caricando...
La pagina si sta caricando...
La pagina si sta caricando...
La pagina si sta caricando...
La pagina si sta caricando...
La pagina si sta caricando...
La pagina si sta caricando...
La pagina si sta caricando...
La pagina si sta caricando...
La pagina si sta caricando...
La pagina si sta caricando...
La pagina si sta caricando...
La pagina si sta caricando...
La pagina si sta caricando...
La pagina si sta caricando...
La pagina si sta caricando...
La pagina si sta caricando...
La pagina si sta caricando...
La pagina si sta caricando...
La pagina si sta caricando...
La pagina si sta caricando...
La pagina si sta caricando...
La pagina si sta caricando...
La pagina si sta caricando...
La pagina si sta caricando...
La pagina si sta caricando...
La pagina si sta caricando...
La pagina si sta caricando...
La pagina si sta caricando...
La pagina si sta caricando...
La pagina si sta caricando...
La pagina si sta caricando...
La pagina si sta caricando...
La pagina si sta caricando...
La pagina si sta caricando...
La pagina si sta caricando...
La pagina si sta caricando...
La pagina si sta caricando...
La pagina si sta caricando...
La pagina si sta caricando...
La pagina si sta caricando...
La pagina si sta caricando...
La pagina si sta caricando...
La pagina si sta caricando...
La pagina si sta caricando...
La pagina si sta caricando...
La pagina si sta caricando...
La pagina si sta caricando...
La pagina si sta caricando...
La pagina si sta caricando...
La pagina si sta caricando...
La pagina si sta caricando...
La pagina si sta caricando...
La pagina si sta caricando...
La pagina si sta caricando...
La pagina si sta caricando...
La pagina si sta caricando...
La pagina si sta caricando...
La pagina si sta caricando...
La pagina si sta caricando...
La pagina si sta caricando...
La pagina si sta caricando...
La pagina si sta caricando...
La pagina si sta caricando...
La pagina si sta caricando...
La pagina si sta caricando...
La pagina si sta caricando...
La pagina si sta caricando...
La pagina si sta caricando...
La pagina si sta caricando...
La pagina si sta caricando...
La pagina si sta caricando...
La pagina si sta caricando...
La pagina si sta caricando...
La pagina si sta caricando...
La pagina si sta caricando...
La pagina si sta caricando...
La pagina si sta caricando...
La pagina si sta caricando...
La pagina si sta caricando...
La pagina si sta caricando...
La pagina si sta caricando...
La pagina si sta caricando...
La pagina si sta caricando...
La pagina si sta caricando...
La pagina si sta caricando...
La pagina si sta caricando...
La pagina si sta caricando...
La pagina si sta caricando...
La pagina si sta caricando...
La pagina si sta caricando...
La pagina si sta caricando...
La pagina si sta caricando...
La pagina si sta caricando...
La pagina si sta caricando...
La pagina si sta caricando...
La pagina si sta caricando...
La pagina si sta caricando...
La pagina si sta caricando...
La pagina si sta caricando...
La pagina si sta caricando...
La pagina si sta caricando...
La pagina si sta caricando...
La pagina si sta caricando...
La pagina si sta caricando...
La pagina si sta caricando...
La pagina si sta caricando...
La pagina si sta caricando...
La pagina si sta caricando...
La pagina si sta caricando...
La pagina si sta caricando...
La pagina si sta caricando...
La pagina si sta caricando...
La pagina si sta caricando...
La pagina si sta caricando...
La pagina si sta caricando...
La pagina si sta caricando...
La pagina si sta caricando...
La pagina si sta caricando...
La pagina si sta caricando...
La pagina si sta caricando...
La pagina si sta caricando...
La pagina si sta caricando...
La pagina si sta caricando...
La pagina si sta caricando...
-
 1
1
-
 2
2
-
 3
3
-
 4
4
-
 5
5
-
 6
6
-
 7
7
-
 8
8
-
 9
9
-
 10
10
-
 11
11
-
 12
12
-
 13
13
-
 14
14
-
 15
15
-
 16
16
-
 17
17
-
 18
18
-
 19
19
-
 20
20
-
 21
21
-
 22
22
-
 23
23
-
 24
24
-
 25
25
-
 26
26
-
 27
27
-
 28
28
-
 29
29
-
 30
30
-
 31
31
-
 32
32
-
 33
33
-
 34
34
-
 35
35
-
 36
36
-
 37
37
-
 38
38
-
 39
39
-
 40
40
-
 41
41
-
 42
42
-
 43
43
-
 44
44
-
 45
45
-
 46
46
-
 47
47
-
 48
48
-
 49
49
-
 50
50
-
 51
51
-
 52
52
-
 53
53
-
 54
54
-
 55
55
-
 56
56
-
 57
57
-
 58
58
-
 59
59
-
 60
60
-
 61
61
-
 62
62
-
 63
63
-
 64
64
-
 65
65
-
 66
66
-
 67
67
-
 68
68
-
 69
69
-
 70
70
-
 71
71
-
 72
72
-
 73
73
-
 74
74
-
 75
75
-
 76
76
-
 77
77
-
 78
78
-
 79
79
-
 80
80
-
 81
81
-
 82
82
-
 83
83
-
 84
84
-
 85
85
-
 86
86
-
 87
87
-
 88
88
-
 89
89
-
 90
90
-
 91
91
-
 92
92
-
 93
93
-
 94
94
-
 95
95
-
 96
96
-
 97
97
-
 98
98
-
 99
99
-
 100
100
-
 101
101
-
 102
102
-
 103
103
-
 104
104
-
 105
105
-
 106
106
-
 107
107
-
 108
108
-
 109
109
-
 110
110
-
 111
111
-
 112
112
-
 113
113
-
 114
114
-
 115
115
-
 116
116
-
 117
117
-
 118
118
-
 119
119
-
 120
120
-
 121
121
-
 122
122
-
 123
123
-
 124
124
-
 125
125
-
 126
126
-
 127
127
-
 128
128
-
 129
129
-
 130
130
-
 131
131
-
 132
132
-
 133
133
-
 134
134
-
 135
135
-
 136
136
-
 137
137
-
 138
138
-
 139
139
-
 140
140
-
 141
141
-
 142
142
-
 143
143
-
 144
144
-
 145
145
-
 146
146
-
 147
147
-
 148
148
-
 149
149
-
 150
150
-
 151
151
-
 152
152
-
 153
153
-
 154
154
-
 155
155
-
 156
156
-
 157
157
-
 158
158
-
 159
159
-
 160
160
-
 161
161
-
 162
162
-
 163
163
-
 164
164
-
 165
165
-
 166
166
-
 167
167
-
 168
168
-
 169
169


in altre lingue
- français: Parkside PMKA 20-Li A1 Manuel utilisateur
- español: Parkside PMKA 20-Li A1 Manual de usuario
- Deutsch: Parkside PMKA 20-Li A1 Benutzerhandbuch
- Nederlands: Parkside PMKA 20-Li A1 Handleiding
- slovenčina: Parkside PMKA 20-Li A1 Používateľská príručka
- dansk: Parkside PMKA 20-Li A1 Brugermanual
- polski: Parkside PMKA 20-Li A1 Instrukcja obsługi
Documenti correlati
-
Parkside IAN 391008_2201 Manuale utente
-
Parkside PDSSA 20-Li A1 Manuale utente
-
Parkside PAAS 20-Li Manuale utente
-
-
Parkside PAMFW 20-LI A1 Translation Of The Original Instructions
-
Parkside PABH 20-Li B2 Translation Of The Original Instructions
-
-
Parkside IAN 404419_2110 Manuale utente
-
Parkside 331789 1907 Operating Instructions Manual
-