
Nota: utilizzare 4 x 1.5V / batterie AA (opzionali, Batterie
non incluse nella confezione) per il telefono e una
batteria 12V MN27 per il trasmettitore SOS ( necessaria,
Batteria inclusa )
ISTRUZIONI DI SICUREZZA
Quando si utilizza il telefono, seguire sempre le seguenti pre-
cauzioni di sicurezza, per ridurre il rischio di incendio, scossa
elettrica o infortunio.
• Leggere con attenzione le seguenti avvertenze e istruzioni.
• Scollegare il prodotto dalla presa elettrica prima di pulirlo.
Non utilizzare detergenti liquidi o spray. Per la pulizia, utilizzare
un panno morbido leggermente umido
• Non installare il prodotto su superfici instabili. Potrebbe
cadere e subire gravi danni.
• Non sovraccaricare la presa elettrica o la prolunga, altrimenti
esiste il rischio di incendio o scossa elettrica.
• Non inserire oggetti di nessun tipo attraverso le aperture
del prodotto, altrimenti si potrebbero toccare punti sotto
tensione o causare corto circuiti, con conseguente rischio di
incendio o scossa elettrica. Non rovesciare liquidi di alcun tipo
sul prodotto.
• Non spostare o scollegare l’unità durante i temporali perché
esiste il rischio, benché remoto, di scossa elettrica dovuta ai
tuoni e ai fulmini.
• IMPORTANTE – L’unità base deve essere utilizzata con l’adat-
tatore elettrico fornito con il prodotto.
• L’uso di altri adattatori potrebbe pregiudicare la sicurezza
dell’apparecchio.
• In caso di problemi, l’apparecchio deve essere aperto solo
da un tecnico specializzato o deve essere portato a un centro
di assistenza.
Contenuto della confezione:
Base telefono SOS
Dispositivo SOS con collana
Staa
Cavo microtelefono
Alimentatore da parete
Guida utente in 5 lingue
TELEFONO A FILO
GUIDA UTENTE
EASYHOME300SOS
ITA
TELEPHONE WIRE
USER GUIDE
EASYHOME300SOS
EN
FIL DE TÉLÉPHONE
GUIDE De L’UTILISATEUR
EASYHOME300SOS
FR
INTRODUZIONE
Grazie per avere acquistato questo Telefono Nordmende. Que-
sto manuale consentirà di acquisire familiarità con il telefono.
Si prega di leggere attentamente il presente manuale in modo
da utilizzare il vostro telefono nella maniera migliore, e di con-
servarlo per utilizzi futuri. il menu del telefono potrebbe essere
leggermente diverso da quanto descritto in questa guida. la
guida è disponibile sul sito
http://www.nordmende-phones.it/
Informazioni importanti : il modello EASYHOME300SOS e l’u-
nità di allarme cordless sono progettati e costruiti per orire un
buon livello di sicurezza per molto tempo. EASYHOME300SOS
è studiato per rendere la sua installazione e il suo utilizzo il
più semplice possibile. Non sono normalmente consentite
chiamate automatiche alla polizia, ai pompieri, ecc. Pertanto,
tali numeri non dovrebbero essere memorizzati nei numeri da
chiamare automaticamente in situazioni di emergenza. Alcune
agenzie di sicurezza private accettano chiamate automatiche
dai propri clienti. Contattare sempre l’agenzia di sicurezza
prima di programmare i relativi numeri. La portata dell’unità
di allarme cordless varia a seconda di vari fattori presenti
nell’ambiente circostante. Le onde radio che trasportano il
segnale incontrano molti ostacoli lungo il percorso tra l’unità di
allarme e il telefono, che riflettono o assorbono parzialmente le
onde radio e il segnale ne risulta pertanto smorzato. La portata
è limitata da pavimenti, soitti, strutture in metallo e cemento
armato. È pertanto opportuno controllare che l’unità di allarme
sia eettivamente entro la portata del telefono attivando
l’allarme da punti diversi della casa.
INSTALLAZIONE DELLA BATTERIA:
1. Rimuovere il copribatteria del telefono presente sul lato
posteriore in basso
2. verificare il verso dell’inserimento delle batterie facendolo
combaciare come indicato sul telefono vicino ai contatti stessi
3.Inserire le batterie facendola scivolare nell’apposito
compartimento.
4. Installare Iil copribatteria del telefono.
INTRODUCTION
Thank you for purchasing our newest model, the manual is
designed to familiarize you with this phone. Please read this
manual carefully in order to use your phone as well as possible,
and keep it for future use.Note: Due to the soware and net-
work systems of dierent operators, the phone’s menu may be
slightly dierent from those described in this guide.
NOTE: This user manual can be downloaded from the site
http://www.nordmende-phones.it/
Important Information: The EASYHOME300SOS model and
cordless alarm units are designed and built to provide a good
level of safety for a long time. EASYHOME300SOS is designed
to make its installation and its use as simple as possible. They
are not normally allowed automatic calls to the police, fire
brigade, etc. Therefore, these numbers should not be stored
in numbers by automatically call in emergency situations.
Some private security agencies accept automatic calls from
their clients. Always contact the security company before
programming the appropriate numbers. The scope of cordless
alarm unit varies depending on various factors present in the
environment. The radio waves carrying the signal encounter
many obstacles along the path between the alarm unit and the
phone, which reflect or partially absorb the radio waves and
the signal it is therefore damped. The scope is limited to floors,
ceilings, metal and reinforced concrete structures. It is there-
fore appropriate to check that the alarm unit is actually within
range of your phone by activating the alarm from dierent
points of the house.
BATTERY INSTALLATION:
1. Remove the battery cover on the phone rear side
2. check the batteries insertion into making him fit as shown on
the phone next to the contacts
3.Insert the batteries by sliding it into the comparment.
4.Install the battery cover of the phone.
Note: Use 4 x 1.5V AA batteries (optional batte-
ries not included) for the phone and a MN27 12V
battery for the transmitter SOS (mandatory, battery
included)
SAFETY INSTRUCTION
When using your telephone equipment, the following ba-
sic safety precautions should always be followed to reduce
the risk of fire, electric shock and injury to persons:
• Read, understand and follow all warnings and in-
structions
• Unplug the product from the wall outlet before cleaning.
Do not use liquid cleaners or aerosol cleaners. Use a so
damp cloth for cleaning.
• Do not place this product on unstable surfaces. The pro-
duct may drop, causing serious damage to the product.
• Do not overload wall outlets and extension cords as this
can result in fire or electric shock.
• Never push foreign objects of any kind into this product
through cabinet slots as they may aect dangerous
voltage points or short circuit parts that could result in
fire or electric shock. Never spill liquid of any kind on the
product.
• Avoid moving or disconnecting this unit during a heavy
storm, as there may be a remote risk of electric shock from
lightning and thunder.
• IMPORTANT – The base unit must be used with the
mains adapter supplied with the unit.
• Using any other adapter will may invalidate any appro-
val given to this apparatus.
• Unprofessional person cannot open the telephone even
meets troubles, please send to service center.
What’s in the Box :
SOS Telephone Base
Necklace Pedant
Bracket
Handset cord & Cable
Power adapter
User guide
INTRODUCTION
Merci d'avoir choisi notre nouveau modèle;
ce mode d'emploi vous permettra de vous familiariser
avec ce téléphone. Veuillez lire attentivement ce manuel
de façon à utiliser votre téléphone correctement et le
ranger pour le consulter par la suite. Le menu du télé-
phone pourrait être légèrement diérent de celui décrit
dans ce guide.NOTE: La version du manuel d’utilisation
peut être téléchargé à partir du site http://www.nord-
mende-phones.it/
INSTALLATION DES PILES:
1. Retirez le couvercle de la batterie sur le côté arrière
du téléphone vers le bas
2. vérifier l’insertion de la batterie en lui faisant
ajustement comme indiqué sur le téléphone à côté
des contacts
3.Insérez la batterie en le faisant glisser dans le
compartiment.
4.Installez le couvercle de la batterie du téléphone.
REMARQUE: Utiliser 4 x 1.5V AA batteries (piles
non incluses) pour le téléphone et une batterie
MN27 12V pour les SOS de l’émetteur (piles
incluses)
Qu’y a-t-il dans la boite :
SOS Téléphone Base
Pendentif Collier
Support
Cordon et câble du combiné
Adaptateur secteur
Mode d’emploi
INSTRUCTIONS DE SECURITE
Lorsque vous utilisez votre téléphone, prenez toujours
ces précautions de sécurité de base afin de réduire le
risque de provoquer un incendie, d’électrocuter ou de
blesser des personnes.
• Veuillez lire, comprendre et suivre tous
les avertissements et toutes les instructions
Débranchez l'appareil de la prise murale avant de le
nettoyer. N'utilisez pas de nettoyants liquides ou en
bombes. Pour le nettoyage, servez-vous d'un chion
doux et humide
• Ne posez pas cet appareil sur une surface
instable. L'appareil pourrait tomber et être sérieusem-
ent endommagé.
• Ne surchargez pas les prises murales ni
les rallonges afin d'éviter le risque d'électrocution.
• N'introduisez jamais de corps étranger
dans l'appareil à travers les fentes du boîtier afin de ne
pas toucher des points sous tension dangereux ou de
court-circuiter des parties susceptibles de provoquer
un incendie ou une électrocution. Ne renversez jamais
de liquide sur l'appareil.
• Evitez de déplacer ou de débrancher cet
appareil pendant un gros orage, car il existe un certain
risque d'électrocution à distance causé par un éclair
ou le tonnerre.
• IMPORTANT – La base doit être utilisée
avec l'adaptateur de secteur fourni avec cet appareil.
• Le recours à un autre adaptateur peut
annuler les homologations de cet appareil.
• Les personnes non qualifiées ne doivent
pas ouvrir le téléphone; en cas de problèmes adres-
sez-vous à un service de dépannage
INFORMAZIONI AGLI UTENTI DI APPARECCHIA-
TURE DOMESTICHE
i sensi del Decreto Legislativo N° 49 del
14 Marzo 2014 “Attuazione della Direttiva
2012/19/UE sui rifiuti di apparecchiature
elettriche ed elettroniche (RAEE)”.
Il simbolo del cassonetto barrato riportato
sull’apparecchiatura indica che il prodotto
alla fine della propria vita utile deve essere
raccolto separatamente dagli altri rifiuti.
L’utente dovrà, pertanto, conferire l’appa¬recchiatura integra
dei componenti essenziali giunta a fine vita agli idonei centri
di raccolta dierenziata dei rifiuti elettronici ed elettrotecnici,
oppure riconsegnarla al rivenditore al momento dell’acquis-
to di nuova apparecchiatura di tipo equivalente, in ragione di
uno a uno, oppure 1 a zero per le apparecchiature aventi lato
maggiore inferiore a 25 CM. L’adeguata raccolta dierenziata
per l’avvio successivo dell’apparecchiatura dimessa al riciclag-
gio, al trattamento e allo smaltimento ambientale compatibile
contribuisce ad evitare possibili eetti negativi sull’ambiente e
sulla salute e favorisce il riciclo dei materiali di cui è compos-
ta l’apparecchiatura. Lo smaltimento abusivo del prodotto
da parte dell’utente comporta l’applicazione delle sanzioni
amministrative di cui al D.Lgs n. Decre-
to Legislativo N° 49 del 14 Marzo 2014.
Il prodotto funziona con batterie che ri-
entrano nella direttiva europea 2013/56/
EU e che non possono essere smal-
tite con i normali rifiuti domestici.
Informarsi sulle direttive locali relative alla
raccolta dierenziata delle batterie: un corretto smaltimento per-
mette di evitare conseguenze negative per l’ambiente e la salute.
AVVERTENZE
WARNINGS
INFORMATION ON DISPOSAL OF UNITS
This product bears the selective sorting symbol
for waste electrical and
electronic equipment (WEEE).
This means that this product must be
handled to the local collecting points or
given back to retailer when you buy a new
product, in a ratio of one to one (or one to
zero if the external dimension is less than
25 cm) pursuant to European Directive
2012/19/EC in order to be recycled or
dismantled to minimize its impact on the environment.
For further information, please contact
your local or regional authorities.
Electronic products not included in the selective sorting
process are potentially dangerous for the environment and
human health due to the presence of hazardous substances.
The unlawful disposal of the product carries a
fine according to the legislation currently in force.
This product contains batteries
covered by the European Directive
2013/56/EU, which must not
be put in the household waste.
Please be informed about lo-
cal regulations regarding the
collection of batteries, as their
correct disposal helps to prevent negative conse-
quences for the environment and human health.
To avoid damage to your hearing, please
do not listen at high volume for a long
time
MISE EN GARDE
INFORMATIONS POUR LES UTILISATEURS D’APPAREILS DOMES-
TIQUES
au sens du Décret législatif n°49 du 14 mars 2014 “Application
de la Directive 2012/19/UE sur les déchets
d’équipements électriques et électroniques
(DEEE)”Le symbole de la poubelle barrée
que porte l’appareil indique que le produit
en fin de vie utile doit être collecté séparé-
ment des autres déchets.
L’utilisateur devra donc confier l’appareil
en fin de vie avec tous ces composants es-
sentiels à un centre de collecte sélective des
déchets électroniques et électrotechniques
ou le retourner au vendeur lors de l’achat d’un nouvel appareil
de type équivalent, avec un rapport de un à un ou de 1 à 0 pour
les appareils ayant la plus grande dimension inférieure à 25 cm.
La collecte sélective en vue de diriger l’appareil en fin
de vie vers le recyclage, le traitement et l’élimination en-
vironnementale compatible contribue à éviter le ris-
que des eets négatifs sur l’environnement et la santé
et favorise le recyclage des matériaux dont est formé
l’appareil. L’élimination illégale du produit par l’utilisateur
comporte l’application des sanctions administratives visées par
le Décret législatif n°49 du 14 mars 2014.
Le produit fonctionne avec des batter-
ies visées par la directive européenne
2013/56C/UE et qui ne peuvent pas être élim-
inées avec les déchets ménagers ordinaires.
Informez-vous sur les règlements locaux
portant sur la collecte sélective des batter-
ies: une élimination correcte permet d’éviter
des conséquences négatives pour l’environnement et la santé.
Pour éviter d’endommager votre ouïe limitez le temps
d’écoute à des volumes élevés.
Vista generale
1. LED luminoso indicatore chiamata entrante
2. Microtelefono
3. LED indicatore apparato in uso
4. Tasti su/Giù
5. Tasto Cancella (DEL)
6. Tasto OK/seleziona
7. Tasto Rubrica/Esc
8. Tasto menu
9. Tasto viva voce
10. Tasto chiamata rapida M1
11. Tasto chiamata rapida M2
12. Tasto chiamta di emergenza SOS
13. Tasto Richiama/pausa
14. Tasto Flash
Caratteristiche
- Il telefono SOS può essere programmato per chiamare
automaticamente fino a 10 numeri di emergenza
- Supporta fino a 5 dispositivi wireless
- Attivazione delle chiamate di emergenza fino a 30,48
metri dalla base!
- Può riprodurre un messaggio pre-registrato durante la
chiamata ai numeri di emergenza
Idoneo per non udenti - Volume del microtelefono
amplificabile fino a +40 dB (interruttore: HI), suonerie ad
alto volume (90+ dB)
- Spia lampeggiante di chiamata in arrivo sulla cornetta
- Attivazione/disattivazione annuncio ID chiamante . Una
voce annuncia le chiamate in arrivo (numeri di telefono) e
le opzioni di menu
- Display e annunci vocali in 6 lingue (inglese, spagnolo,
francese, italiano, olandese e tedesco)
- Display LCD grande e facile da leggere, con 5 livelli di
luminosità e retroilluminazione blu (richiede batterie –
non incluse)
- Grandi pulsanti/tasti di selezione
- La rubrica può contenere fino a 50 numeri telefonici
(nomi e numeri di telefono fino a 16 cifre)
- Le funzioni del telecomando includono:
(1) Pressione del pulsante sui dispositivi per rispondere
alle chiamate
(2) Selezione dei numeri di emergenza SOS
(3) Due pulsanti di emergenza sull'unità base, un (1)
pulsante di emergenza sui dispositivi wireless
- Può memorizzare fino a 20 chiamate in uscita (nomi e
numeri di telefono fino a 16 cifre)
- Conserva tutte le chiamate telefoniche e le imposta-
zioni anche in caso di interruzione di corrente (memoria
non volatile)
Compatibile con i sistemi FSK/DTMF Dual Caller ID
Collegamento della staa al telefono
Collegamento dell'adattatore elettrico
IMPORTANTE: se non si collega l'adattatore elettrico o
le batterie, sarà comunque possibile eettuare e ricevere
chiamate, tuttavia il display LCD e i dispositivi SOS non
funzioneranno. Inoltre, poiché il telefono SOS è dotato di
memoria non volatile, tutti i numeri di telefono memoriz-
zati nella rubrica o negli elenchi delle chiamate in uscita o
in arrivo verranno conservati.
Attenzione: l'uso di un adattatore errato può causare
un'esplosione. Può anche causare danni al telefono SOS.
Installazione delle batterie (opzionali non inclu-
se, richiede (4) batterie AA)
SUGGERIMENTO: le batterie sono opzionali ma viva-
mente consigliate, per poter utilizzare l'apparecchio
anche in caso di interruzione di corrente.
Attenzione: i dispositivi wireless di emergenza posso-
no essere utilizzati solo se il telefono SOS è alimentato
(tramite adattatore o batterie).
Collegamento alla linea telefonica e alla segre-
teria telefonica (opzionale)
Familiarità con il telefono SOS
Indicatore visivo di chiamata in
arrivo del microtelefono
Microtelefono( cornetta) Rego-
lazione volume
LO = udito normale
HI: = volume molto alto+40 dB
Regolazione del volume
della suoneria
Sono disponibili tre (3) livelli
di volume della suoneria:
basso, medio, alto
Funzionamento
Menu
Quando il telefono è agganciato, premere il
pulsante MENU per accedere alla modalità di
impostazione.
La voce LDC CONTRAST lampeggia sul display LCD.
Premere i pulsanti SU o GIÙ per scorrere/selezio-
nare le impostazioni. Le impostazioni includono:
LDC CONTRAST, LOCAL AREA CODE , ENTER TIME/
DATE, LCD LANGUAGE, VOICE, SET FLASH TIME,
PAIR NEW PEDANT, EMERGENCY CALL)
Premere il pulsante OK/DIAL per selezionare la
voce mentre lampeggia.
Premere il pulsante RUBRICA/ESC o attendere 15
secondi per uscire automaticamente dalla modali-
tà di impostazione.
Impostazione del contrasto del display LCD
Dopo avere premuto il pulsante MENU, mentre sul
display LCD l’opzione LCD CONTRAST lampeggia,
premere il pulsante OK/DIAL. Sul display appare
la luminosità corrente del display LCD (il valore
predefinito è 3). Utilizzare i pulsanti Su o Giù per
impostare il valore da 1 a 5. Al termine, premere
OK per passare all’impostazione successiva.
Impostazione della data e dell’ora
Si noti che il mese, il giorno, l’ora e i minuti vengo-
no automaticamente aggiornati sul telefono SOS
in base alle informazioni delle chiamate in arrivo
(ID chiamante).
Solo l’anno deve essere impostato manualmente.
( continua)
Per impostare l'anno premere il pulsante MENU,
quindi premere il pulsante SU per 3 volte. Quando
ENTER TIME/DATE inizia a lampeggiare, premere
il pulsante OK/DIAL per confermare. Sul display
verrà visualizzato l'anno con le ultime 2 cifre lam-
peggianti (es. 20"13"). Premere il pulsante Su o Giù
per impostare l'anno corrente. Al termine, premere
il pulsante OK per confermare, quindi utilizzare
lo stesso metodo per impostare il mese, il giorno,
l'ora e i minuti.
Impostazione della lingua
Quando sul display LCD appare l’opzione LCD LAN-
GUAGE, premere il pulsante OK/DIAL per accedere
all’impostazione della lingua di interfaccia. La
lingua predefinita è l’inglese’. Premere il pulsante
SU o GIÙ per passare a un’altra lingua. Le lingue
disponibili sono: inglese, francese, spagnolo, italia-
no, olandese e tedesco. Una volta scelta la lingua,
premere il pulsante OK per confermare e passare
all’impostazione successiva.
Impostazione degli annunci vocali
Quando sul display LCD appare l’opzione VOICE,
premere il pulsante OK/DIAL per accedere all’im-
postazione corrispondente. Sul display LCD verrà
visualizzato lo stato corrente: VOICE ON. Premere il
pulsante SU o GIÙ per selezionare ON/OFF, quindi
premere il pulsante OK/DIAL per confermare.
( continua)
Selezionare ON per attivare l’annuncio dei numeri
delle chiamate in arrivo, delle voci del menu e dei
numeri pre-selezionati.
Accoppiamento dei dispositivi SOS
Seguire questa procedura per accoppiare un
dispositivo wireless (uno alla volta) con la base.
(1) Premere il pulsante MENU.
(2) Premere il pulsante SU per 5 volte finché sul
display LCD l'opzione PAIR NEW PENDANT inizia a
lampeggiare.
(3) Premere il pulsante OK/DIAL per completare la
selezione. La parola PAIRING inizierà a lampeggiare
sul display LCD.
(4) Premere nuovamente il pulsante OK/DIAL.
Sul display LCD verrà visualizzato l'indicatore
PAIRING...
(5) Premere una volta il pulsante rosso su un
dispositivo wireless. Se l'accoppiamento viene
completato correttamente, sul display LCD verrà
visualizzato l'indicatore DONE per 5 secondi. In
modalità di accoppiamento, il dispositivo deve
essere accoppiato con la base entro 2 minuti.
È possibile accoppiare con la base un massimo
di cinque (5) dispositivi wireless (o telecomandi)
simultaneamente. Se si tenta di accoppiare più
di 5 dispositivi, sul display LCD verrà visualizzato
l'indicatore FULL, al passaggio (4) descritto in pre-
cedenza. ( continua)
In questo caso, non sarà possibile accoppiare un
nuovo dispositivo, a meno che non si eliminino
tramite il comando DELETE tutti i dispositivi
wireless accoppiati.
Per eliminare i dispositivi accoppiati e ripetere la
procedura, seguire i passaggi (1) – (4) descritti in
precedenza, quindi:
(5) Premere il pulsante SU. Sul display LCD verrà
visualizzato DELETE.
(6) Premere di nuovo il pulsante OK/DIAL. Sul
display LCD verrà visualizzato DELETE DEVICE
per circa 5 secondi, quindi l'indicatore PAIR NEW
PENDANT inizierà a lampeggiare. Ritornare al pas-
saggio (1) descritto in precedenza per accoppiare il
primo dispositivo.
Impostazione delle chiamate di emergenza
(OBBLIGATORIO)
(1) Premere il pulsante MENU
(2) Premere per 7 volte il pulsante SU (oppure 1
volta il pulsante GIÙ) finché sul display LCD l’opzio-
ne EMERGENCY CALL inizia a lampeggiare.
(3) Premere il pulsante OK/DIAL per accedere
all’impostazione delle chiamate di emergenza.
Sono disponibili 3 voci. Premere il pulsante SU
per selezionarle e premere il pulsante OK/DIAL per
accedere alle impostazioni corrispondenti, come
indicato in seguito .
( continua)
Registrazione del messaggio vocale per le
chiamate di emergenza
(4) Dopo avere eseguito i passaggi da (1) a (3)
descritti in precedenza, quando sul display LCD
appare l'indicatore RECORD MESSAGE, premere il
pulsante OK/DIAL.
(5) La registrazione audio inizia quando sul
display LCD l'icona VOICE comincia a lampeggiare.
Durante la registrazione, sul display LCD viene
visualizzato un conto alla rovescia di 20 secondi.
Per registrare il messaggio si hanno a disposizione
20 secondi.
Messaggio di esempio: "QUESTA È UNA CHIAMATA
DI EMERGENZA, PER ACCETTARE QUESTA CHIAMA-
TA TENERE PREMUTO LO ZERO". Si noti che ogni
registrazione deve finire con "PER ACCETTARE
QUESTA CHIAMATA TENERE PREMUTO LO ZERO".
(6) Premere il pulsante OK/DIAL per terminare
la registrazione, la quale terminerà comunque
automaticamente dopo 20 secondi. Il messaggio
verrà riprodotto automaticamente al termine della
registrazione.
Nota: durante la registrazione si potrebbero udire
dei rumori statici in sottofondo. Ciò è assoluta-
mente normale. La registrazione è possibile solo
tramite il microfono sulla base. Non tentare di
utilizzare il microtelefono durante la registrazione
del messaggio di emergenza.
(Continua)
Controllo del messaggio vocale per le chiamate
di emergenza
Per registrare il messaggio, seguire i passaggi da
(1) a (3) descritti in precedenza, quindi:
(4) Premere di nuovo il pulsante SU. Sul display
LCD verrà visualizzato CHECK MESSAGE.
(5) Premere il pulsante OK/DIAL per riprodurre il
messaggio registrato. È possibile premere il pul-
sante UP per visualizzare l'opzione DELETE, quindi
il pulsante OK/DIAL per eliminare il messaggio
corrente.
Impostazione dei numeri di emergenza
Il telefono SOS supporta la selezione automatica
di un massimo di dieci (10) numeri telefonici di
contatto/emergenza, compreso il 112. Seguire
i passaggi da (1) a (3) descritti in precedenza,
quindi:
(4) Premere 2 volte il pulsante SU. Sul display
LCD verrà visualizzato l’indicatore EMERGENCY
NUMBER.
(5) Premere per 2 volte il pulsante OK/DIAL per
accedere alla modalità di immissione (sulla parte
destra del display verrà visualizzato un cursore
lampeggiante).
(6) Utilizzare la tastiera sulla base per digitare il
numero. Premere OK/DIAL per salvare.
(7) Premere il pulsante GIÙ per aggiungere un altro
numero di emergenza.
(Continua)
(8) Premere il pulsante OK/DIAL per accedere alla
modalità di immissione (sulla parte inferiore destra del
display verrà visualizzato un cursore lampeggiante).
(9) Utilizzare la tastiera sulla base per digitare il nume-
ro, quindi premere il pulsante OK/DIAL per salvarlo.
Ripetere i passaggi (7) – (9) per aggiungere fino a 10
numeri di emergenza.
MODIFICA DEI NUMERI: Premere i pulsanti SU/GIÙ per
visualizzare i numeri memorizzati. Quindi premere il
pulsante OK/DIAL per modificare il numero memoriz-
zato oppure premere il pulsante DEL per eliminarlo.
SUGGERIMENTI:
(1) Ogni numero memorizzato viene visualizzato come
CLIP 1, 2, 3, ,,, 10. Assicurarsi di utilizzare CLIP 1, poi
2, poi 3 e così via per memorizzare i numeri nella
sequenza corretta.
(2) Si raccomanda di memorizzare tutti i numeri di
emergenza PRIMA di registrare il messaggio di emer-
genza, dato che il dispositivo tenterà di ri-registrare
un messaggio ogni volta che si accede all’opzione
EMERGENCY CALL.
BOOK/ESC (impostazione della rubrica)
Creazione di una nuova voce nella rubrica
(1) Premere il pulsante BOOK/ESC.
(2) Premere il pulsante MENU. Sul display LCD verrà
visualizzato STORE NUMBER.
(3) Premere il pulsante OK/DIAL, quindi inserire il
numero 0-9, *, #, P. Premere OK/DIAL per salvarlo.
Inserire quindi il nume utilizzando la tastiera (2-9) per
selezionare le lettere da A a Z. Al termine premere OK/
DIAL per salvare.
(Continua)
SUGGERIMENTO: quando si utilizza la tastiera per
inserire i nomi, cercare le lettere sotto ogni numero
(da 2 a 9). Per visualizzare la lettera desiderata, sarà
necessario premere il tasto 2 o 3 volte. Ad esempio,
per visualizzare la "C", il tasto "2" va premuto 2 volte.
Modifica di una voce della rubrica
Premere RUBRICA, quindi premere i pulsanti SU e GIÙ
per trovare la voce da modificare. Tenere premuto il
pulsante MENU per 3 secondi. Sul display LCD verrà vi-
sualizzato il messaggio “EDIT?”. Premere di nuovo OK/
DIAL per accedere alla modalità di modifica e premere
OK/DIAL per confermare.
Eliminazione di una o di TUTTE le voci della rubrica
Premere il pulsante BOOK/ESC, quindi utilizzare i
pulsanti SU o GIÙ per trovare la voce della rubrica da
eliminare. Premere il pulsante DEL. Sul display LCD
verrà visualizzato il messaggio “DELETE?”. Premere il
pulsante OK/DIAL per confermare.
Se si tiene premuto il pulsante DEL per 3 secondi, sul
display LCD verrà visualizzato il messaggio “DELETE
ALL?”. Premere il pulsante OK/DIAL per eliminare tutte
le voci. Sul display appare l’indicatore EMPTY.
Rubrica , ricerca contatti Premere ‘BOOK / ESC’
per entrare nella rubrica, quindi premere i tasti
‘UP’ o ‘DOWN’ ( tasti su e giù) per sfogliare i contat-
ti presenti ; o inserire direttamente la prima lettera
del nome richiesto. Il display LCD mostra tutti i
contatti della rubrica che iniziano con tale lettera.
Quindi premere i tasti ‘UP’ o ‘DOWN’ ( tasti su e giù)
per la selezione prescelta .
(Continua)
pulsante DEL( CANCELLA)
Una funzione o il numero evidenziato verranno elimi-
nati se il tasto “DEL” viene premuto se evidenziata una
funzione o un numero di chiamata
Pulsante vivavoce (arancione)
Utilizzare questo pulsante in qualsiasi momento
per attivare l'altoparlante e accedere alla modalità
vivavoce del telefono SOS. Sarà quindi possibi-
le utilizzare la tastiera per comporre i numeri.
Premere i pulsanti M1, M2 o SOS per passare alla
selezione rapida. È possibile utilizzare questo
pulsante mentre si scorrono le chiamate in arrivo/
uscita per selezionare il numero visualizzato.
Pulsanti di selezione rapida (MEM1, MEM2)
Programmazione dei pulsanti di selezione rapida:
Con il telefono agganciato, tenere premuto il pul-
sante M1 o M2 per 3 secondi. Sul display LCD verrà
visualizzato il numero memorizzato in origine (se
presente). Premere il pulsante DEL per eliminare il
numero originale, quindi inserire il nuovo numero.
Se non c’è alcun numero memorizzato, inserire
direttamente il numero.
Selezione rapida dei numeri: Premere il pulsante
M1 o M2 quando il telefono è agganciato per
comporre il numero memorizzato.
Pulsante di emergenza (SOS)
Il pulsante di emergenza SOS sulla base consente
di attivare la procedura di emergenza.
(Continua)
Quindi viene riprodotto il messaggio di emergenza
pre-registrato e viene selezionato il primo numero
memorizzato
B: Il telefono SOS rileva se l’interlocutore ha premuto
lo “0” per rispondere alla chiamata durante i primi 60
secondi. In caso contrario, la chiamata viene chiusa
automaticamente e il telefono chiama il successivo
numero di emergenza memorizzato.
Nota:
per segnalare che la chiamata è stata ricevuta, la
persona chiamata deve tenere premuto il tasto "0".
C: Se la persona chiamata risponde alla chiamata e
preme il tasto "0", il messaggio di emergenza si inter-
rompe e nei successivi due (2) minuti il telefono passa
in modalità vivavoce.
D: Durante i primi 2 minuti di chiamata, la chiamata di
emergenza si interrompe se la persona chiamata non
preme il pulsante "*". In questo caso, verrà chiamato
il successivo numero di emergenza memorizzato.
Dieci (10) secondi prima dello scadere dei 2 minuti, il
telefono emette un segnale acustico.
E: Se l'altra persona preme il pulsante "*" durante i
primi 2 minuti, la conversazione può proseguire per
altri 2 minuti. Dieci (10) secondi prima dello scadere di
ogni intervallo di 2 minuti, il telefono emette un segna-
le acustico. Per terminare la chiamata di emergenza al
termine della conversazione, è suiciente riagganciare
l'apparecchio.
F: Entrambe le persone possono interrompere in qual-
siasi momento la chiamata di emergenza premendo
il tasto “#”.
(Continua)
Innanzitutto,
un segnale acustico si attiverà per 15 secondi,
per avvisare l’utente che la funzione SOS sta per
essere attivata.
Quindi, il messaggio di emergenza pre-registrato
verrà riprodotto secondo la sequenza
memorizzata (CLIP da 1 a 10).
Esecuzione/interruzione delle chiamate di
emergenza
Per interrompere la sequenza delle chiamate di
emergenza, premere il pulsante arancione (alto-
parlante) oppure tenere premuto il pulsante SOS
sulla base per 3 secondi mentre il telefono è ag-
ganciato. Per interrompere la sequenza, è anche
possibile tenere premuto per 3 secondi il pulsante
rosso SOS sul dispositivo wireless. Un segnale
acustico si attiverà per 15 secondi, per avvisare l'u-
tente che la funzione SOS sta per essere attivata.
Se si preme il pulsante SOS (o il pulsante rosso su
uno dei dispositivi wireless) entro 15 secondi, la
chiamata di emergenza si interrompe.
Funzioni delle chiamate di emergenza/SOS
A: Chiamate di emergenza/SOS: Premere il pulsan-
te rosso SOS su un dispositivo wireless accoppiato
per avviare una chiamata di emergenza.
Quando si preme il pulsante rosso SOS, la base
del telefono SOS emette un segnale acustico per
15 secondi, per avvisare l'utente che la funzione
SOS sta per essere attivata. (Continua)
Dopo che la chiamata SOS è iniziata, la chiamata di
emergenza si interrompe se il telefono viene sgancia-
to, se si preme il pulsante vivavoce (arancione) o se si
tiene premuto per tre secondi il pulsante SOS su un
dispositivo wireless.
Se non è stato memorizzato alcun numero di emer-
genza, quando si preme il pulsante SOS il telefono
emetterà un segnale acustico per 15 secondi.
Uso dei dispositivi wireless (telecomandi)
I dispositivi wireless hanno 2 diversi utilizzi, come
spiegato di seguito:
1Risposta/chiusura delle chiamate in arrivo
Quando c’è una chiamata in arrivo, è suiciente tenere
premuto il pulsante rosso SOS sul dispositivo wireless
per rispondere alla chiamata in modalità vivavoce. Al
termine della chiamata, premere di nuovo il pulsante
rosso SOS sul dispositivo wireless per riagganciare.
2Attivazione delle chiamate di emergenza
Quando il telefono è agganciato, tenere premuto per
3 secondi il pulsante SOS sul dispositivo wireless per
chiamare automaticamente i numeri di emergenza
memorizzati.
-------------------------------------------------------------------------
AVVERTENZE:
Informazioni sulla certificazione SAR (Specific
Absorption Rate, tasso specifico di assorbimento)
Il dispositivo è conforme agli standard dell’Unione Europea
(UE) che limitano l’esposizione umana alle radiofrequenze
(RF) emesse da dispositivi di telecomunicazione e radio.
Questi standard impediscono la vendita di dispositivi
mobili che eccedano un livello di esposizione massimo
(denominato anche SAR) pari a 2,0 W/kg.
Se non c’è nessun numero memorizzato in rubrica
, il display LCD mostrerà “EMPTY”. Il menu rubri-
ca sarà disattivato dopo 30 secondi di inattività.
Composizione di un numero dalla rubrica
Premere il tasto ‘BOOK / ESC’ per accedere alla
rubrica. Utilizzare i tasti ‘UP’ o ‘DOWN’ ( tasti Sù e Giù
) per trovare il numero desiderato, quindi premere il
pulsante ‘OK / DIAL’ per comporre questo numero.
Copiare / salvare una chiamata in arrivo in rubrica
Premere il tasto ‘MENU’ per 3 secondi, durante la
ricezione di una chiamata in arrivo. Il display LCD
visualizzerà “COPIA IN MEMORIA”, quindi premere il
pulsante ‘OK / DIAL’. Il display LCD mostra “salvati”,
quindi questo numero sarà stato copiato all’interno
dei contatti della rubrica con successo.Per copiare
un contatto della rubrica alla chiamata SOS numero
di emergenza, premere il tasto SOS per 3 secondi
durante la ricerca contatti nella rubrica. Il display LCD
visualizzerà “COPY TO SOS”, quindi premere il pulsante
‘OK / DIAL’. Il display LCD mostra “salvati”, quindi que-
sto numero verrà copiato come numero di emergenza
SOS con successo.
Tasti Richiama/ Pausa (RD /PA)
A telefono attivo senza chiamate in corso , con cor-
netta agganciata quindi, premere il tasto ‘RD / PA’ per
ricomporre l’ultimo numero composto.
In modalità attiva con cornetta sollevata , dopo la
ricomposizione di un numero, premendo lo stesso
tasto esso funzionerà come Pausa, con un tempo di
pausa di 3,6 secondi.
In modalità attiva con cornetta sollevata , funzionerà
come “Pausa” quando un numero viene immesso.
(Continua)
Tasto FLASH
la funzione FLASH viene utilizzato per attivare la linea
teleofnica libera mentre siete su chiamata attiva
(Of-hook). E ‘anche usato per scambiare la chiamata
se l’avviso di chiamata è disponibile.
pulsante OK / DIAL
Nel MENU, questo pulsante viene usato per conferma-
re l’inserimento o la selezione.È possibile comporre
il numero pre-selezionato premendo questo tasto. È
anche possibile chiamare il numero se premuto nel
momento in cui verificate le chiamate in entrata/usci-
ta o all’interno della rubrica
TASTO UP( tasto Sù)
Con la cornetta sollevata, premere TASTO SU per acce-
dere alla modalità di navigazione elenco delle chiama-
te in entrata, quindi utilizzare i tasti ‘UP’ o ‘DOWN’ (
Tasti Sù e Giù) per sfogliare la lista delle chiamate in
arrivo.Premere il pulsante ‘DEL’ ( CANCELLA ) una volta
durante lo scorrimento della lista delle chiamate in
arrivo. La chiamata evidenziata sarà quindi cancellata
dalla lista . Premere il pulsante ‘DEL’ per 3 secondi per
cancellare tutte le chiamate in lista
TASTO DOWN( tasto Giù)
Con la cornetta agganciata , premere il tasto ‘DOWN’(
tasto Giù) per entrare nella modalità di navigazione
lista delle chiamate in uscita, quindi utilizzarei tasti
‘UP’ o ‘DOWN’ ( Tasti Sù e Giù) per sfogliare la lista
delle chiamate in uscita.Premere il pulsante ‘DEL’ (
CANCELLA) una volta durante lo scorrimento della lista
delle chiamate in uscita per eliminare la registrazione
evidenziata. Premere il pulsante ‘DEL’ per 3 secondi
per cancellare tutti i numeri in lista .
(Continua)
3
1
4
5
6
7
8
9
14
13
121110
2
General view
1. LED incoming call indicator light
2. handset
3. LED indicator apparatus in use
4. Up / Down
5. Delete key (DEL)
6. OK button / select
7. Contacts key / Escape
8. menu button
9. Handsfree key
10. speed-dial button M1
11. speed-dial button M2
12. Ext emergency SOS button
13. Key Redial / pause
14. Flash button
vue d’ensemble
1. Appel entrant voyant LED
2. combiné
3. Appareil indicateur LED en cours d’utilisation
4. Up / Down
5. Suppr (DEL)
6. Bouton OK / sélectionnez
7. Contacts clés / évasion
8. bouton de menu
9. Touche mains libres
10. numérotation rapide bouton M1
11. numérotation rapide bouton M2
12. bouton SOS d’urgence Ext
13. Touche Recomposition / pause
14. bouton Flash
Attaching the bracket to the phone
Connecting to the power Adapter
IMPORTANT: If you do not connect the power adapter or
the batteries, you can still make and receive calls, however
the LCD display nor the SOS pedants will work. Also, since
the SOS phone has non-volatile memory, all the phone
numbers stored in the Phonebook or in the incoming and
outgoing lists will remain.
Warning: Using incorrect adapter may result in an explo-
sion. It may also cause damage to the SOS phone.
Installing the Batteries (optional, requires four (4)
AA batteries)not included
TIP:
Batteries are optional but highly recommended in
case you lose power.
Warning: You cannot use the emergency wireless
pedants unless your SOS phone has power (via power
adapter or batteries).
Connecting to the telephone line and answe-
ring machine (optional)
Familiarizing with your SOS Phone
Handset Incoming Call Visual
Indicator
Handset,Volume,Adjustment
LO = Normal hearing,
HI= Add +40bB
Ringer volume adjustment
There are three (3) levels of
ringer volume:
Low,Medium,High
Fixer le support sur le téléphone
Branchement sur l’adaptateur électrique
IMPORTANT: Même sans brancher l’adaptateur électrique
ou les batteries, vous pouvez passer et recevoir des
appels, mais l’aicheur LCD et les pendentifs SOS ne
fonctionneront pas. En outre, le téléphone SOS ayant une
mémoire non-volatile, tous les numéros de téléphone
mémorisés dans le répertoire ou dans les listes des appels
entrants et sortants restent,
Avertissement: Si vous n’utilisez pas un adaptateur
approprié vous risquez de provoquer une explosion. Vous
risquez aussi d’endommager le téléphone SOS.
Installation des batteries (facultatives, il faut
quatre (4) batteries AA)
UNE ASTUCE : Les batteries sont facultatives mais
fortement recommandées en cas de perte de courant.
Avertissement: Vous ne pouvez pas utiliser les pen-
dentifs d’urgence sans-fil si votre téléphone n’est pas
alimenté (à travers un adaptateur électrique ou des
batteries).
Connexion sur la ligne téléphonique et un
répondeur (facultatif)
Vous familiariser avec votre téléphone SOS
Indicateur visuel d’appel en-
trant du combiné
Combiné,Volume,Réglage
LO = Audition normale
HI = Ajouter +40bB
Réglage du volume de la
sonnerie
Il y a trois (3) niveaux de volu-
me de la sonnerie :
Bas, Moyen, Haut
Features
- SOS phone can be programmed to automatically
call up to 10 emergency phone numbers
- Supports up to 5 Wireless Pedants
- Trigger emergency calls up to 100 feet away from
the base!
- It can play a pre-recorded message when calling
emergency numbers
- Hearing Aid Friendly - Handset volume can be
amplified by +40 dB (switch: HI), extra loud rings rated
90+ dB
- Visual incoming call flashing light alert on handset
- ON/OFF Talking Caller ID – Voice announces inco-
ming calls (phone numbers) and menu options
- Supports 6 languages on display and voice promp-
ts (English, Spanish, French, Italian, Netherlands &
German)
- Large, easy to read LCD display with 5 levels of
brightness and blue backlighting (requires batteries
– not included)
- Large dialpad buttons/keys for easy dialing
- Phonebook stores up to 50 telephone records (16
digit names & phone numbers)
- Remote control functions include:
(1) Press button on pedants to answer calls,
(2) dial out pre-programmed SOS emerg.numbers.
(3) Two 1-touch emergency push buttons on base
unit, one (1) 1-touch emergency on wireless pedants
- Stores up to 20 outgoing phone records (16 digit
names & phone numbers)
- Retains all phone records and settings even if
power is lost (Uses non-volatile memory)
- Compatible with FSK/DTMF Dual Caller ID Systems
Operation
Menu
While On-hook state, press the MENU button to
enter the setting mode.
The LCD display will flash “LDC CONTRAST” setting
item, press ‘UP or DOWN’ buttons to browse/
select the setting items. Setting items include: LDC
CONTRAST, LOCAL AREA CODE , ENTER TIME/DATE ,
LCD LANGUAGE, VOICE, SET FLASH TIME, PAIR NEW
PEDANT, EMERGENCY CALL)
Press OK/DIAL button to select the setting item
while flashing.
Press BOOK/ESC button to or wait 15 seconds to
exit automatically the setting mode.
LCD CONTRAST Setting
Aer pressing the MENU button, while the LCD
display flashes "LCD CONTRAST", press the ‘OK/
DIAL’ button. The screen will display the current
LCD brightness (3 as default). Use the ‘Up or Down’
buttons to change setting from 1 to 5. Press ‘OK’’
aer setting finished and proceed to the next one.
ENTER TIME/DATE Setting
Please note that the month, day, hour and minute
data is automatically updated on your SOS phone
with the caller id information from incoming calls
that you receive. Only the year will require manual
setting. ( Next)
To set it up, press the ‘MENU’ button, then the
‘UP’button 3 times to flash ‘ENTER TIME/DATE’,
then Press “OK/DIAL” button to confirm. The di-
splay will flash the last 2 digits on the 20“13”, then
Press “UP” or “Down” button to modify the current
year. When finished, Press ‘OK’ button to confirm,
and then use the same method to set the month,
day, hour & minute.
LANGUAGE Setting
When the LCD shows “LCD LANGUAGE’’, Press
the “OK/DIAL” button to enter into the language
interface option, and the default language is “En-
glish’’. Press the ‘UP’ or “Down’’ to change to other
language. The available languages are: English,
French, Spanish, Italian, Netherland, and German.
Aer the language is chosen, Press the “OK’’ button
to confirm and enter into next step
Prompt VOICE Setting
When the LCD shows “VOICE”, press the ‘OK/DIAL’
button to enter the prompt VOICE option. The
LCD display will show the current state: “VOICE
ON”. Press the ‘UP’ or ‘DOWN’ button to select
“ON/OFF”, then press ‘OK/DIAL’ button to confirm.
Select “ON” to get announcements on incoming
phone numbers, menu operation steps, and the
pre-dialed numbers.
( Next)
PAIR NEW PEDANT Setting (REQUIRED)
Please follow the steps below to pair a pedant
(one at a time) with the base.
(1) Press the ‘MENU’ button
(2) Press the ‘UP’ button 5 times until the LCD
flashes "PAIR NEW PENDANT"
(3) Press the ‘OK/DIAL’ button to select. The word
“PAIRING” will flash on the LCD Display.
(4) Press the ‘OK/DIAL’ button again, the LCD
display will show "PAIRING........".
(5) Press the “Red” button on a wireless pedant
once. If pairing is successful, the LCD display will
show “DONE” for 5 seconds. You have up to 2
minutes to pair your pedant with the base while in
pairing mode.
A maximum of five (5) wireless pedants (or remote
controllers) can be paired with a base at the same
time. If you try pairing more than 5 pedants, the
LCD display will show "FULL" on step (4) above.
At this time, you cannot pair a new pedant unless
you DELETE all the paired wireless pedants.
To DELETE the paired pedants and start all over
again, follow steps (1) – (4) above, then:
(5) Press the ‘UP’ button, the LCD display will show
“DELETE”.
(6) Press ‘OK/DIAL’ button again, the LCD display
will show “DELETE DEVICE” for about 5 seconds,
the "PAIR NEW PENDANT" will flash on the LCD di-
splay. Now go back to step (1) above to pair your
first pedant. ( Next)
EMERGENCY CALL Setting (REQUIRED)
(1) Press the ‘MENU’ button
(2) Press the ‘UP’ button 7 times (or the ‘DOWN’
button 1 time) until the LCD flashes "EMERGENCY
CALL"
(3) Press ‘OK/DIAL’ button to enter into the emer-
gency call setting. There are 3 items, press ‘UP’
button to select and press the ‘OK/DIAL’ button to
enter the appropriate settings, as shown below.
Emergency call voice information recording
(4) Aer following steps (1) to (3) above, when the
LCD display shows "RECORD MESSAGE", press
‘OK/DIAL’ button,
(5) When the LCD display shows "VOICE" icon
flashing, voice recording begins. While recor-
ding, the LCD display will show a 20-second
countdown. You have 20 seconds to record your
message.
Sample message: "THIS IS AN EMERGENCY CALL,
TO ACCEPT THIS CALL, KEEP PRESSING ZERO",
note the any recording should be ended with "TO
ACCEPT THIS CALL KEEP PRESSING ZERO".
(6) Press the ‘OK/DIAL’ button to end recording, or
it will end automatically aer 20 seconds. It will
play automatically aer recording is finished.
Note: If you hear some static noise in the back-
ground while recording, this is normal. Recording
is only available via the microphone on the base.
Please do not attempt to use the handset when
recording your emergency message. ( Next)
Emergency call telephone information
checking
To set it up, follow steps (1) to (3) above, then:
(4) Press ‘UP’ button again, the LCD display shows
"CHECK MESSAGE"
(5) Press ‘OK/DIAL’ button, it will play the recorded
voice message. You can press the ‘UP’ button
to show “DELETE” and then ‘OK/DIAL’ button to
remove the current message.
Emergency call number(s) setting
The SOS Phone supports auto dialing of up to ten
(10) emergency/contact telephone numbers, inclu-
ding 112. Follow steps (1) to (3) above, then:
(4) Press ‘UP’ button 2 times, the LCD display
shows “EMERGENCY NUMBER”
(5) Press ‘OK/DIAL’ button 2 times to enter into
entry mode (display will show a flashing cursor on
the right)
(6) Use keypad on the base to type the number.
Press ‘OK/DIAL’ to save it.
(7) Press the ‘DOWN’ button to add another emer-
gency number.
(8) Press the ‘OK/DIAL’ button to enter into entry
mode (display will show a flashing cursor on the
lower right)
(9) Use keypad on the base to type the number,
then press ‘OK/DIAL’ button to save it.
Repeat steps (7) – (9) to add up to 10 emergency
numbers. (Next)
DOWN Button
In On-hook status, press the ‘DOWN’ button to
enter the outgoing call list browsing mode, then
use the ‘UP’ or ‘DOWN’ buttons to browse the
outgoing call records.
Press the ‘DEL’ button once when scrolling the
outgoing call records to delete the record showing.
Press the ‘DEL’ button for 3 Seconds to delete all
records.
DEL Button
The appropriate function or number will be
deleted if the “DEL” button is pressed while in
operation and dialing out.
Hands-free (Orange) Button
Use this button any time to turn the speaker ON
and start hand-free mode on your SOS phone.
You can then use the keypad to dial numbers.
Press the M1, M1 or SOS buttons to speed dial.
You can also press this button while browsing the
incoming/outgoing call records to dial the number
showing
SPEED DIAL (MEM1, MEM2) Buttons
Speed dial number storage programming: In
On-hook status, press the ‘M1’ or ‘M2’ buttons for
3 seconds.
(Next)
The LCD display will show the original stored num-
ber (if any). Press the ‘DEL’ button to delete the
original number, and input the new one. If there is
no number stored, input the number directly.
Speed dial operation: Press ‘M1’ or ‘M2’ button
once while in On-hook status to dial out the stored
number.
SOS (Emergency) Button
The SOS button Emergency on the base will trigger
the emergency dialing sequence. First it will
emit “BEEP” sounds for 15 seconds to alert the
user that the SOS function is about to start, then
it will start playing the pre-recorded EMERGENCY
MESSAGE and start the dialing sequence
(stored numbers in CLIP 1 to 10).
Make/Stop Emergency Calls
To stop an Emergency call sequence, while in
On-hook status, press the orange button (Speaker-
phone) once or the ‘SOS’ button on the base for 3
seconds.
You can also press the ‘SOS’ red button on the
wireless remote control for 3 seconds to stop. The
phone continuously issues “Beep” sound for 15
seconds to alert the user that the SOS function
is about to start. If you press the ‘SOS’ button (or
the Red buttons on any of the pedants) within 15
seconds, the emergency call will be stopped
(Next)
SOS / Emergency Calls Functions
A: SOS/Emergency calls: Press the SOS “RED” but-
ton on a paired pedant to start an emergency call.
When the SOS “RED” button is pressed, the SOS
phone base will emit a beeping sound for 15
seconds to alert the user that the SOS function is
about to start. Then it will start playing the stored
EMERGENCY RECORDING.
The SOS function will start dialing out the first
stored number (CLIP 01).
B: The SOS phone will detect whether the other
side has pressed “0” to answer during the first 60
seconds, if not the SOS phone will hang up auto-
matically, and continue to dial out the next stored
emergency number. Note: The person at the other
end will need to keep pressing zero in order for the
SOS phone to acknowledge it.
C: If the other side answers the phone and presses
“0”, the EMERGENCY MESSAGE will stop playing,
and will enter into the first two (2) minutes hands-
free state for conversation between the 2 parties.
D: In the first 2 minutes call, the emergency call
will be stopped if the other side doesn’t press “*”
button, then hang up automatically to dial the next
stored emergency number. Ten (1) seconds prior to
ending the 2 minutes, the phone will emit a “BEEP”
sound.
(Next)
Aer the phone call is completed, you can press
“SOS” red button on the wireless pedant again to
hang up the phone/call.
Trigger EMERGENCY sequence calls
In On-hook status, press the “SOS” button on the
wireless pedant for 3 seconds to start the dialing
out of stored emergency number(s) automatically.
--------------------------------------------------------------------
WARNINGS:
SAR Certification information (Specific Absorption
Rate)
The device is compliant to European Union (EU) standards
that limit human exposure to radio frequency (RF) energy
emitted by radio and telecommunications equipment.
These standards prohibit the sale of mobile devices that
exceed a maximum exposure level (known as SAR) of 2.0
W/kg.
E: During the 2 minutes, if the other side presses
the star button “*” button on the keypad then the
conversation will be extended for an additional 2
minutes. Ten (10) seconds prior to ending each
2-minute interval, the SOS phone will emit a
“Beep” sound.
When you finish the call, simply hang up to termi-
nate the emergency call.
F: At any time, the emergency call can be termina-
ted by either side by pressing the “#” key.
Aer the SOS calling has began, the emergency
call will stop if the SOS phone goes O-hook, the
hands-free (orange) button is pressed, or the ‘SOS’
button is pressed on any pedant for 3 seconds.
If there is no emergency call number stored, when
press the ‘SOS’ button is pressed, the SOS phone
will only emit the “BEEP” sound for 15 seconds.
Using the Wireless Pedants (Remote control-
lers)
The wireless pedants have 2 uses as described
below:
Answering / Hanging-up Incoming calls
When there is an incoming call, simply press the
“SOS” red button on the wireless pedant for 3
seconds to answer the phone call in “hands-free”
mode e.g. speakerphone.
(Next)
MODIFY NUMBERS: You can press the ‘UP/DOWN’
buttons to view stored number(s). Then Press ‘OK/
DIAL’ button to modify the stored number or press
‘DEL’ button to delete the stored number.
re-record a message every time you go into the
EMERGENCY CALL setup.
TIPS:
(1) Each stored number will show as CLIP 1, 2, 3,
,,, 10. Please make sure that you are using CLIP 1,
then 2, then 3 and so on to store the numbers in
the correct sequence.
(2) We recommend that you store all the emergen-
cy numbers BEFORE recording your EMERGENCY
MESSAGE because this device will attempt to
re-record a message every time you go into the
EMERGENCY CALL setup.
BOOK/ESC (Phonebook Setting)
Creating a new entry in the phonebook
(1) Press the ‘BOOK/ESC’ button,
(2) Press the ‘MENU’ button, the LCD display shows
“STORE NUMBER”
(3) Press ‘OK/DIAL’ button, then input the number
0-9, *, #, P, then press ‘OK/DIAL’ button to save,
and then input the name using the keypad (2-9) to
select letters A thru Z, then press ‘OK/DIAL’ to save.
TIP: When using the keypad to enter names, look
for the letters below each number (2 thru 9) in the
keypad. You will need to press the key 2 or 3 times
in order to display the desired letter. For example,
to show ‘C”, you will need to press the ‘2’ key 2
times. (Next)
Editing a phonebook record
Press BOOK and then the ‘UP’ or ‘DOWN’ buttons
to find the phone record that needs to be edited,
then press ‘MENU’ button for 3 seconds. The LCD
display shows “EDIT?”, press ‘OK/DIAL’ again, then
enter into the number edition, aer that then
press ‘OK/DIAL’ to confirm.
Deleting a phonebook record or ALL records
Press ‘BOOK/ESC’ button, and then use the ‘UP’ or
‘DOWN’ buttons to find the phonebook record you
want to delete, press the ‘DEL’ button once. The
LCD display shows “DELETE?”, then press the ‘OK/
DIAL’ button to confirm.
If you press the ‘DEL’ button for 3 seconds, the LCD
display will show “DELETE ALL?”, then press ‘OK/
DIAL’ button to delete all records. The LCD display
will show “EMPTY”.
Browsing the records on the Phonebook
Press ‘BOOK/ESC’ button to enter into the Phone-
book query status then press the ‘UP’ or ‘DOWN’
buttons to browse the records; or directly input
the first letter of the queried name. The LCD di-
splay will show all the phonebook beginning with
such letter. Then press the ‘DOWN’ or ‘UP’ button
to check one by one. .
(Next)
Caractéristiques
- Le téléphone SOS peut être programmé pour appeler
automatiquement jusqu'à 10 numéros d'urgence
- Prise en charge d'un maximum de 5 pendentifs sans-fils
(2 compris) - Déclenchement des appels d'urgence jusqu'à
une distance maximum de 100 pieds de la base!
- Il peut lire un message préenregistré lors de l'appel des
numéros d'urgence.
- Adapté aux prothèses auditives - Le volume du
haut-parleur peut être augmenté de +40dB (commuter
sur:HI), sonnerie ultra haute réglée sur 90+ dB
- Alarme visuelle d’appel entrant avec lumière clignotan-
te sur le combiné
- ID appelant en conversation ON/OFF - Une voix
annonce les appels entrants (numéros de téléphone) et les
options de menu
- Il prend en charge 6 langues sur l'aicheur et les
annonces vocales (anglais, espagnol, français, italien,
néerlandais et allemand)
- Grand aicheur LCD facile à lire avec 5 niveaux de
luminosité et un rétro-éclairage bleu (batteries nécessaires
pas comprises).
- Clavier avec grands boutons/touches pour composer
facilement
- Le répertoire mémorise jusqu'à 50 contacts (noms et
numéros de téléphone à 16 caractères)
- La fonction de commande à distance comprend:
(1) Touche sur les pendentifs pour répondre aux appels
(2) composition de numéros SOS préprogrammés
(3) Deux boutons d'urgence sur la base, un bouton, (1)
bouton d'urgence sur les pendentifs sans-fil.
- Il mémorise jusqu'à 20 contacts sortants - Il conserve
tous les contacts et les réglages même en cas de panne de
courant (exploite une mémoire non volatile)
- Compatible avec les Systèmes ID Appelant Double FSK/
DTMF
Fonctionnement
Menu
Avec le téléphone décroché, appuyez sur le
bouton MENU pour accéder au mode réglage.Sur
l'aicheur LCD l'élément CONTRASTE LCD cligno-
tera, appuyez sur le bouton HAUT ou BAS pour
faire défiler/sélectionner les éléments du réglage.
Les éléments du réglage comprennent: CONTRA-
STE LCD, CODE ZONE LOCALE, SAISIR HEURE/
DATE, LANGUE LCD, VOIX, CONFIGURER TEMPS
CLIGNOTEMENT, COUPLER NOUVEAU PENDENTIF,
APPEL D'URGENCE)
Appuyez sur REPERTOIRE/ECHAP ou attendez 15
secondes pour sortir automatiquement du mode
réglage.
Réglage CONTRASTE LCD
Après avoir appuyé sur le bouton MENU, quand
CONTRASTE LCD clignote sur l'aicheur LCD,
appuyez sur le bouton OK/COMPOSER. L'écran af-
fiche la luminosité actuelle du LCD (3 par défaut).
Avec le bouton Haut ou Bas modifiez éventuellem-
ent le réglage entre 1 et 6. Appuyez ensuite sur OK
et procédez au réglage suivant.
Réglage SAISIE HEURE/DATE
Remarquez que le mois, le jour, l’heure et les
minutes se mettent à jour automatiquement sur
votre téléphone SOS avec les informations sur l’ID
de l’appelant à partir des appels entrants que vous
recevez. Seule l’année doit être réglée manuelle-
ment. (suivant)
Réglage COUPLER NOUVEAU PENDENTIF
Suivez les étapes ci-après pour coupler un pen-
dentif (un à la fois) avec la base.
(1) Appuyez sur le bouton MENU (suivant)
(2) Appuyez 5 fois sur le bouton HAUT jusqu’à ce
que COUPLER NOUVEAU PENDENTIF clignote sur
le LCD
(3) Appuyez sur le bouton OK/COMPOSER pour
sélectionner. Le mot COUPLAGE clignote sur
l’aicheur LCD.
(4) Appuyez encore une fois sur le bouton OK/
COMPOSER et l’aicheur CD montre “COUPLAGE....”
(5) Appuyez une fois sur le bouton Rouge
d’un pendentif sans-fil. Si le couplage est réussi le
LCD aiche FAIT pendant 5 secondes. Vous avez 2
minutes pour coupler votre pendentif avec la base
en mode couplage.
Vous pouvez coupler un maximum de (5) cinq
pendentifs sans-fil à la fois (ou contrôleurs à
distance) avec une base. Si vous essayez de
coupler plus de 5 pendentifs, le LCD aiche PLEIN
à l’étape (4) ci-dessus. Par la suite vous ne pouvez
plus coupler de nouveaux pendentifs à moins de
SUPPRIMER tous les pendentifs couplés.
Pour SUPPRIMER les pendentifs couplés et
recommencer le couplage, suivez les étapes de
(1) à (4) puis:
(5) Appuyez sur le bouton HAUT et l’aicheur LCD
montre SUPPRIMER
(suivant)
(6) Appuyez à nouveau sur le bouton OK/COM-
POSER et le LCD aiche SUPPRIMER DISPOSITIF
pendant environ 5 secondes, COUPLER NOUVEAU
PENDENTIF clignote sur l'aicheur LCD. Retournez
à l'étape (1) ci-dessus pour coupler votre premier
pendentif.
Réglage APPEL D’URGENCE (NECESSAIRE)
(1) Appuyez sur le bouton MENU
(2) Appuyez 7 fois sur le bouton HAUT (ou BAS 1
fois) jusqu’à ce que APPEL D’URGENCE clignote
sur le LCD
(3) Appuyez sur le bouton OK/COMPOSER pour
accéder au réglage de l’appel d’urgence. Il y a
3 éléments, appuyez sur le bouton HAUT pour
sélectionner et appuyez sur le bouton OK/COMPO-
SER pour saisir le bon réglage, de la façon illustrée
ci-dessous.
Enregistrement vocal des informations de
l’appel d’urgence
(4) Après avoir suivi les étapes de (1) à (3), quand le
LCD aiche ENREGISTRER MESSAGE, appuyez sur
OK/COMPOSER
(5)) Quand le LCD aiche l’icône VOIX qui clignote,
l’enregistrement vocal commence. Pendant
l’enregistrement, le LCD aiche un décompte de
20 secondes. Vous disposez de 20 secondes pour
enregistre votre message.
(suivant)
Réglage du/des numéro/s d’appel d’urgence
Le téléphone SOS prend en charge la composition
automatique d’un maximum de dix (10) numéros
de téléphone de contact/urgence. Suivez les étap-
es de (1) à (3) ci-dessus, puis:
(4) Appuyez 2 fois sur le bouton HAUT, le LCD
aiche NUMERO URGENCE
(5) Appuyez 2 fois sur OK/COMPOSER pour accéd-
er au mode saisie (l’aicheur montre un curseur
clignotant sur la droite)
(6) Avec le clavier de la base tapez le numéro.
Appuyez sur OK/COMPOSER pour le sauvegarder.
(7) Appuyez sur le bouton BAS pour ajouter un
autre numéro d’urgence.
(8) Appuyez sur OK/COMPOSER pour accéder au
mode saisie (l’aicheur montre un curseur cligno-
tant en bas et à droite)
(9) Avec le clavier de la base tapez le numéro, puis
appuyez sur OK/COMPOSER pour le sauvegarder.
Répétez les étapes de (7) à (9) pour ajouter un
maximum de 10 numéros d’urgence.
MODIFIER NUMEROS : Vous pouvez appuyer sur
les boutons HAUT/BAS pour voir le/s numéro/s
mémorisé/s. Appuyez ensuite sur OK/COMPOSER
pour modifier le numéro mémorisé ou sur SUPPR
pour supprimer le numéro mémorisé.
QUELQUES ASTUCES:
(1) Tous les numéros mémorisés s’aichent com-
me CLIP 1, 2, 3....10.
(suivant)
Assurez-vous d’utiliser le CLIP 1 puis 2, 3 et ainsi
de suite, pour mémoriser les numéros dans la
séquence correcte.
(2) Nous vous recommandons de mémoriser tous
les numéros d'urgence AVANT d'enregistrer votre
MESSAGE D'URGENCE car ce dispositif tente de
réenregistrer un message chaque fois que vous
accédez à la configuration APPEL D'URGENCE
REPERTOIRE/ECHAP (réglage du répertoire)
Créer un nouveau contact dans le répertoire
(1) Appuyez sur le bouton REPERTOIRE/ECHAP
(2) Appuyez sur MENU, le LCD aiche MEMORISER
NUMERO
(3) Appuyez sur OK/COMPOSER, puis saisissez
le numéro 0-9, *, #, P, appuyez ensuite sur OK/
COMPOSER pour le sauvegarder et saisissez le nom
avec le clavier (2-9) pour sélectionner les lettres
de A à Z, appuyez ensuite sur OK/COMPOSER pour
sauvegarder.
UNE ASTUCE : Lorsque vous utilisez le clavier
pour saisir les noms, cherchez les lettres sous les
numéros (de 2 à 9) du clavier. Vous devez appuyer
2 ou 3 fois sur la touche pour aicher la lettre
voulue. Par exemple, pour aicher C vous devez
appuyer 2 fois sur la touche 2.
Modifier un contact dans le répertoire
Appuyez sur REPERTOIRE et ensuite sur le bouton
HAUT ou BAS pour trouver le contact que vous
voulez modifier, appuyez ensuite sur le bouton
MENU pendant 3 secondes. (suivant)
Puis elle commence à lire le MESSAGE D’URGENCE
enregistré. La fonction SOS commence ensuite à com-
poser le premier numéro mémorisé (CLIP 01)
B: Le téléphone SOS détecte si le correspondant a
appuyé sur 0 pour répondre pendant les 60 premières
secondes; si ce n’est pas le cas le téléphone SOS
raccroche automatiquement et se met à composer le
numéro d’urgence mémorisé suivant. Remarque : La
personne au bout du fil doit continuer à appuyer sur
zéro pour que le téléphone SOS le reconnaisse.
C: Si le correspondant répond au téléphone
et appuie sur 0, le MESSAGE D’URGENCE ces-
se d’être lu et le téléphone se met pendant les
deux (2) premières minutes de l’état mains-libres
pour établir la conversation entre les 2 parties.
(suivant)
D: Dans les 2 premières minutes de l'appel, l'appel
d'urgence est arrêté si le correspondant n'appuie pas
sur le bouton *; le téléphone raccroche automatique-
ment et compose le numéro d'urgence suivant. Dix
(10) secondes avant la fin des 2 minutes, le téléphone
émet un Bip.
E: Pendant les 2 minutes, si le correspondant appuie
sur le bouton * du clavier, la conversation est prolon-
gée pendant 2 autres minutes.
Dix (10) secondes avant la fin de chaque intervalle de
2 minutes, le téléphone émet un Bip. Lorsque l’appel
est fini, raccrochez tout simplement pour terminer
l’appel d’urgence.
F: A tout moment l’appel d’urgence peut être terminé
par l’une des deux personnes en appuyant sur la
touche #.
(suivant)
Appuyez une fois sur la touche ‘DEL’ lorsque vous
faites défiler les enregistrements des appels sortants
pour eacer l’enregistrement. Appuyez sur le bouton
‘DEL’ pendant 3 secondes pour supprimer tous les
enregistrements.
DEL Button
La fonction ou le numéro approprié sera eacé si
vous appuyez sur la touche “DEL” pendant le fon-
ctionnement et la composition.
Bouton (orange) mains-libres
Utilisez ce bouton pour allumer le haut-parleur et
mettre votre téléphone SOS en mode mains-libres.
Vous pouvez utiliser le clavier pour composer les
numéros. Appuyez sur les boutons M1, M2 ou SOS
pour la composition rapide. Vous pouvez aussi
appuyer sur ce bouton lorsque vous faites défiler
les contacts d’appels entrants/sortants pour com-
poser le numéro aiché.
Boutons COMPOSITION RAPIDE (MEM1,MEM2)
Programmation mémorisation composition rapide
numéro: En mode Raccroché, appuyez pendant 3
secondes sur les boutons M1 ou M2. Le LCD aiche
le numéro déjà mémorisé (s’il y en a un).Appuyez
sur SUPPR pour supprimer le numéro déjà mémor-
isé et saisir le nouveau.
S'il n'y a pas de numéro mémorisé, saisissez
directement le numéro.
(suivant)
Composition rapide: Appuyez une fois sur le bouton
M1 ou M2 en état Raccroché pour composer le
numéro mémorisé.
Bouton (Urgence) SOS
Le bouton Urgence SOS de la base déclenche la séq-
uence de composition d’urgence. Tout d’abord:
il émet un BIP pendant 15 secondes pour signaler
(suivant)
à l’utilisateur que la fonction SOS va commencer, puis
il commence à lire le MESSAGE D’’URGENCE préenr-
egistré et il commence la séquence de composition
(numéros mémorisés sur CLIP 1 à 10)
Passer/interrompre des appels d’urgence
Pour interrompre la séquence d’appel d’urgence,
dans l’état Raccroché, appuyez une fois sur le bouton
orange (haut-parleur) ou sur le bouton SOS de la base
pendant 3 secondes. Vous pouvez aussi appuyer
sur le bouton rouge SOS de la commande à distance
sans-fil pendant 3 secondes pour l’arrêter.
Le téléphone émet un BIP continu pendant 15 secon-
des pour signaler à l’utilisateur que la fonction SOS va
commencer. Si vous appuyez sur le bouton
SOS (ou le bouton rouge de l'un des pendentifs) dans
les 15 secondes, l'appel d'urgence est arrêté.
Fonctions des appels d'urgence/SOS
A: Appels d'urgence/SOS Appuyez sur le bouton SOS
ROUGE du pendentif couplé pour commencer un
appel d'urgence.
Si vous appuyez sur le bouton SOS ROUGE, la base
du téléphone SOS émet un Bip pendant 15 secondes
pour avertir l’utilisateur que la fonction SOS va
démarrer.
(suivant)
Lorsque l’appel SOS a commencé, l’appel d’urgence
s’arrête si le téléphone SOS est décroché, si le bouton
(orange) mains-libres est enfoncé ou si le bouton SOS
est enfoncé sur un pendentif pendant 3 secondes.
S’il n’y a aucun numéro d’urgence mémorisé, si vous
appuyez sur le bouton SOS le téléphone SOS émet
seulement un Bip pendant 15 secondes. Utiliser les
pendentifs sans-fil (contrôleurs à distance)
Les pendentifs sans-fils peuvent être utilisés des 2
façons suivantes:
Répondre/Raccrocher aux appels entrants
En cas d'appel entrant, appuyez sur le bouton rouge
SOS du pendentif sans-fil pendant 3 secondes pour
répondre à l'appel en mode mains-libres, c'est-à-
dire haut-parleur. Au terme de l'appel, vous pouvez
appuyer à nouveau sur le bouton rouge SOS du pen-
dentif sans-fil pour raccrocher le téléphone/appel.
Déclencher des appels d'URGENCE en séquence
Dans l'état Raccroché, appuyez sur le bouton SOS du
pendentif sans-fil pendant 3 secondes pour démarrer
automatiquement la composition du/des numéro/s
d'urgence mémorisé/s.
-------------------------------------------------------------------------
Informations sur la certification SAR (Specific
Absorption Rate, taux spécifique d’absorption).
Informations sur la certification SAR (Specific Absorption
Rate, taux spécifique d’absorption).
Le dispositif est conforme aux normes de l’Union
européenne (UE) qui limitent l’exposition humaine
aux radiofréquences (RF) émises par des dispositifs de
télécommunication et radio. Ces normes interdisent la
vente de dispositifs mobiles qui dépassent un niveau
d’exposition humaine maximum (appelé SAR) de 2,0 W/kg.
Exemple de message: CECI EST UN APPEL D'UR-
GENCE, POUR ACCEPTER CET APPEL APPPUYEZ
SANS LACHER SUR ZERO, remarquez que tous
les enregistrements doivent s'achever par POUR
ACCEPTER CET APPEL APPUYEZ SANS LACHER SUR
ZERO.
(6) Appuyez sur OK/COMPOSER pour terminer
l’enregistrement ou il s’achève automatiquement
après 20 secondes.
Il sera lu automatiquement lorsque l’enregistre-
ment est terminé.
Remarque : Si vous entendez un bruit de fond
statique, cela est normal. Vous ne pouvez enre-
gistrer qu’avec le micro de la base. N’essayez pas
d’utiliser le combiné pendant l’enregistrement de
votre message d’urgence.
Vérification des informations téléphoniques de
l’appel d’urgence
Pour le configurer, suivez les étapes de (1) à (3)
ci-dessus, puis:
(4) Appuyez à nouveau sur le bouton HAUT, le LCD
aiche VERIFIER MESSAGE
(5) Appuyez sur OK/COMPOSER, le message en-
registré est lu Vous pouvez appuyer sur le bouton
HAUT pour aicher SUPPRIMER et ensuite sur OK/
COMPOSER pour éliminer le message actuel.
(suivant)
Pour la régler, appuyez sur MENU puis 3 fois sur le
bouton HAUT pour faire clignoter SAISIE HEURE/
DATE et appuyez ensuite sur OK/COMPOSER pour
confirmer.
Les 2 derniers chires de 20”13” clignotent sur l’af-
ficheur, appuyez alors sur le bouton HAUT OU BAS
pour modifier l’année en cours. Quand vous avez
fini, appuyez sur OK pour confirmer et utilisez la
même méthode pour régler le mois, le jour, l’heure
et les minutes.
Réglage LANGUE
Lorsque le LCD aiche LANGUE LCD, appuyez sur
OK/COMPOSER pour accéder à l’option langue
d’interface, la langue par défaut est l’anglais.
Appuyez sur HAUT ou BAS pour passer à une
autre langue. Les langues disponibles sont:
anglais, français, espagnol, italien, néerlandais et
allemand.
Après avoir choisi la langue, appuyez sur OK pour
confirmer et accéder à la prochaine étape
Réglage VOIX des annonces
Lorsque le LCD aiche VOIX appuyez sur OK/COM-
POSER pour accéder à l’option VOIX. L’aicheur
LCD montre l’état en cours: VOIX ON. Appuyez sur
le bouton HAUT ou BAS pour sélectionner ON/
OFF, puis sur OK/COMPOSER pour confirmer. Sél-
ectionnez ON pour avoir l’annonce des numéros
de téléphone des appels entrants, des étapes du
menu et des numéros pré-composés.
(suivant)
If there is no number stored, the LCD display will
show “EMPTY”. If within 30 seconds there is no
further operation, then it will exit the phonebook
query status
Dialing a number from the Phonebook
Press ‘BOOK/ESC’ button to go into the Phone-
book. Use the ‘UP’ or ‘DOWN’ buttons to find the
desired number, then press the ‘OK/DIAL’ button
to dial out this number.
Copying/ saving an incoming call to the pho-
nebook
Press the ‘MENU’ button for 3 seconds while re-
viewing the incoming call records. The LCD display
will show "COPY TO MEMORY", then press the ‘OK/
DIAL’ button. The LCD display will show "SAVED",
which means that this number has been copied to
the phonebook successfully.
To copy a phonebook to SOS emergency number,
press the SOS button for 3 seconds while browsing
the phonebook records. The LCD display will show
"COPY TO SOS", then press the ‘OK/DIAL’ button.
The LCD display will show "SAVED", which means
that this number has been copied to the SOS
emergency number successfully.
(Next)
Redial / Pause (RD /PA) Button
In O-hook and no dial state, press the ‘RD/PA’ but-
ton to redial the last number that was dialed.
In O-hook, aer redialing a number, it will fun-
ction as Pause, with a pause time of 3.6 seconds.
In On-hook status, it will function as a “Pause”
when a number is input.
FLASH button
The Flash is used to get dialtone while on call
(Of-hook). It’s also used to switch between calls if
call waiting is available.
OK/DIAL Button
In the MENU, this button is used to confirm the
entry or selection.
You can dial out the pre-dialed number by pres-
sing this button.
You can also dial out the number if pressed when
reviewing the incoming/outgoing call or phonebo-
ok records
UP Button
In On-hook status, press UP to enter incoming call
list browsing mode, then use the ‘UP’ or ‘DOWN’
buttons to browse the incoming call records.
Press the ‘DEL’ button once when scrolling the
incoming call records. It will delete the record
showing. Press the ‘DEL’ button for 3 Seconds to
delete all records.
(Next)
Le LCD aiche MODIFIER?, appuyez à nouveau sur
OK/COMPOSER puis accédez à la modification du
numéro, appuyez ensuite sur OK/COMPOSER pour
confirmer.
Supprimer un contact du répertoire ou TOUS
les contacts
Appuyez sur REPERTOIR/ECHAP et avec les bou-
tons HAUT et BAS cherchez le contact du répert-
oire que vous voulez supprimer, appuyez une fois
sur la touche SUPPR. Le LCD aiche SUPPRIMER?,
appuyez alors sur OK/COMPOSER pour confirmer.
Si vous appuyez sur SUPPR pendant 3 secondes, le
LCD aiche SUPPRIMER TOUS?, appuyez alors sur
OK/COMPOSER pour supprimer tous les contacts.
Le LCD aiche VIDE. (suivant)
Parcourir les enregistrements sur le répertoire
Appuyez sur le bouton ‘BOOK / ESC’ pour entrer
dans le statut de requête du répertoire, puis
appuyez sur les boutons ‘UP’ ou ‘DOWN’ pour
parcourir les enregistrements; Ou saisir directe-
ment la première lettre du nom interrogé. L’écran
LCD aichera tout le répertoire commençant par
une telle lettre. Appuyez ensuite sur le bouton
«BAS» ou «HAUT» pour vérifier un par un. Si aucun
numéro n’est mémorisé, l’écran LCD aiche “VIDE”.
Si dans les 30 secondes il n’y a plus d’opération, il
quittera l’état de la requête du répertoire.
Composer un numéro à partir du répertoire
Appuyez sur le bouton «BOOK / ESC» pour accéder
au répertoire. (suivant)
Utilisez les boutons 'UP' ou 'DOWN' pour trouver
le numéro désiré, puis appuyez sur le bouton 'OK /
DIAL' pour composer ce numéro.
Copier / enregistrer un appel entrant dans le
répertoire
Appuyez sur le bouton 'MENU' pendant 3 secondes
pendant que vous révisez les enregistrements des
appels entrants. L'écran LCD aiche "COPY TO ME-
MORY", puis appuyez sur le bouton 'OK / DIAL'. L'écran
LCD aichera "SAVED", ce qui signifie que ce numéro
a été copié avec succès dans le répertoire.
Pour copier un répertoire vers le numéro d'urgence
SOS, appuyez sur la touche SOS pendant 3 secondes
pendant que vous parcourez les enregistrements du
répertoire. L'écran LCD aiche "COPY TO SOS", puis
appuyez sur le bouton 'OK / DIAL'.
Parcourir les enregistrements sur le répertoire
L’écran LCD aiche “SAVED”, ce qui signifie que
ce numéro a été copié avec succès sur le numéro
d’urgence SOS.
Bouton Recomposition / Pause (RD / PA)
En mode Décroché et sans numéro, appuyez sur la
touche ‘RD / PA’ pour recomposer le dernier numéro
composé.
En mode Décroché, après avoir recomposé un nu-
méro, il fonctionnera en mode Pause, avec un temps
de pause de 3,6 secondes.
Dans l’état Décroché, il fonctionnera comme une
«pause» lorsqu’un numéro est entré.
Bouton FLASH
Le flash est utilisé pour obtenir la sonnerie pendant
l’appel (Of-hook). (suivant)
Il est également utilisé pour basculer entre les appels
si l’appel en attente est disponible.
Bouton OK / DIAL
Dans le MENU, ce bouton sert à confirmer l'entrée ou
la sélection.
Vous pouvez composer le numéro pré-composé en
appuyant sur ce bouton.
Vous pouvez également composer le numéro si vous
appuyez sur cette touche pour revoir les appels en-
trants / sortants ou les enregistrements du répertoire
Bouton HAUT
Dans l'état Décroché, appuyez sur UP pour entrer
dans le mode de navigation de la liste d'appels en-
trants, puis utilisez les boutons 'UP' ou 'DOWN' pour
parcourir les enregistrements d'appels entrants.
Appuyez une fois sur la touche DEL' pour faire défiler
les enregistrements d'appels entrants. Il suppri-
mera l'aichage du dossier. Appuyez sur le bouton
'DEL' pendant 3 secondes pour supprimer tous les
enregistrements.
Bouton DOWN
Dans l'état Décroché, appuyez sur le bouton «BAS»
pour entrer dans le mode de navigation de la liste
des appels sortants, puis utilisez les boutons «UP»
ou «DOWN» pour parcourir les enregistrements des
appels sortants.
(suivant)
Per evitare possibili danni all’udito
limitare il tempo di ascolto a
volumi elevati.
3
1
4
5
6
7
8
9
14
13
121110
2
3
1
4
5
6
7
8
9
14
13
121110
2

TELEFON WIRE
BENUTZERHANDBUCH
EASYHOME300SOS
DE
ALAMBRE DE TELÉFONO
GUÍA DE USUARIO
EASYHOME300SOS
ES
GARANZIA LEGALE E GARANZIA CONVENZIONALE
AGGIUNTIVA SUI PRODOTTI COMMERCIALIZZATI DA
NORDMENDE IN ITALIA
La garanzia legale
I prodotti commercializzati da ALDINET Spa sono cop-
erti dalla garanzia di legge gratuita prevista a favore dei
consumatori , ossia degli acquirenti non professionali ,
agli articoli dal 128 al 134 Codice del Consumo ( Decreto
legislativo 06/09/2005 n. 206 ) .
La garanzia di legge ha una durata di n. 24 mesi a partire
dalla data di consegna al consumatore come sopra inteso
ed è fornita dal venditore, ossia dal soggetto che gli ha
fornito il prodotto , a cui il consumatore dovrà rivolgersi .
In virtù della garanzia di legge , il consumatore può
chiedere al venditore , a sua scelta , (1) di riparare il bene
o (2) di sostituirlo, senza spese in entrambi i casi , salvo
che il rimedio richiesto sia oggettivamente impossibile
o eccessivamente oneroso rispetto all'altro, così come
regolamentato dall’Art. 130 comma 4 .
In alternativa , ove ricorra una delle seguenti situazioni , il
consumatore può richiedere, a sua scelta, (3) una congrua
riduzione del prezzo o (4) la risoluzione del contratto :
a) la riparazione e la sostituzione sono impossibili o ecces-
sivamente onerose;
b) il venditore non ha provveduto alla riparazione o alla
sostituzione del bene entro un termine congruo ;
c) la sostituzione o la riparazione precedentemente eettu-
ata ha arrecato notevoli inconvenienti al consumatore.
Nel determinare l'importo della riduzione o la somma
da restituire si tiene conto dell'uso del bene . Al seguente
indirizzo WEB è consultabile e scaricabile il testo degli
articoli dal 128 al 134 del Codice del Consumo concernenti
la Garanzia legale www.nordmende-phones.it/
GARANZIA
Garanzia Convenzionale aggiuntiva fornita in Italia da
ALDINET Spa
In aggiunta alla garanzia legale in capo al venditore
prevista a favore dei consumatori, ossia degli acquirenti
non professionali, agli articoli dal 128 al 134 Codice del
Consumo ( Decreto legislativo 06/09/2005 n. 206 ) , i cui
diritti riconosciuti ai consumatori rimangono comunque
fermi ed impregiudicati , ALDINET Spa , con sede in Viale
C. Colombo 8 - 20090 TREZZANO SUL NAVIGLIO (MI) ( d’
ora in poi ALDINET ) fornisce al consumatore
, sui telefoni da essa commercializzati in Italia , Repub-
blica di San Marino e Città del Vaticano , una propria
garanzia convenzionale come di seguito definita:
Oggetto e durata della garanzia convenzionale :
La garanzia convenzionale riguarda
“ Tutti i modelli di telefoni commercializzati da ALDINET ,
incluse le correlative batterie ed accessori “
La garanzia convenzionale consiste nella riparazione e/o
sostituzione gratuita - a scelta di ALDINET - dei telefoni
e correlative batterie ed accessori venduti assieme ai
telefoni risultanti non conformi nella fabbricazione o nei
materiali durante i seguenti periodi di tempo :
- per un periodo di 24 ( ventiquattro ) mesi decorrenti
dalla data di acquisto ( farà fede scontrino o fattura ) ,
quanto ai telefoni ;
- per un periodo di 6 ( sei ) mesi decorrenti dalla data di
acquisto, come sopra determinata , quanto a batterie ed
accessori venduti assieme al telefono .
Esclusione dalla garanzia convenzionale :
La garanzia NON copre i difetti derivanti da :
1) Mancato rispetto delle istruzioni per l’uso corretto del
dispositivo
2) Collegamento a dispositivi non in dotazione e/o utiliz-
zo di batterie e/o accessori non originali .
3) Modifiche o riparazioni eettuata da persone non
autorizzate dal produttore.
4) Modifica, regolazione o alterazione di soware o
hardware eettuata da persone non autorizzate dal
produttore.
5) Danni al telefono derivanti da maltempo (quali per
esempio fulmini), incendi, umidità, infiltrazione di liquidi
o alimenti, prodotti chimici, download di file, eventi acci-
dentali, ad alta tensione, corrosione, ossidazione.
Inoltre , come si è già detto , la garanzia convenzionale
non copre i telefoni e relative batterie / accessori che
non siano immessi nel mercato italiano, nella Repubblica
di San Marino o Città del Vaticano da ALDINET .
A chi rivolgersi per l’ erogazione del servizio di Garan-
zia Convenzionale
Il Consumatore dovrà rivolgersi direttamente al servizio
di assistenza incaricato da ALDINET i cui riferimenti sono
reperibili al seguente indirizzo : http://www.nord-
mende-phones.it. In alternativa, il Consumatore potrà
contattare il servizio di assistenza tramite il rivenditore
presso il quale ha acquistato il telefono .
Disponibilità delle presenti condizioni di Garanzia
Convenzionale
Le presenti condizioni di Garanzia Convenzionale sono
pubblicate sul sito WEB al seguente indirizzo http://
www.nordmende-phones.it/ accedendo all’area ASSIS-
TENZA PRIVATI e sono dal medesimo scaricabili.
LIMITED WARRANTY AND CONVENTIONAL WARRANTY
IN ADDITIONAL FOR PRODUCTS SOLD BY NORDMENDE
IN ITALY
The legal guarantee
The products marketed by Aldinet Spa are covered by
free legal guarantee provided in favor of consumers, ie
non-professional buyers, Articles 128-134 of the Consumer
Code (Legislative Decree 06/09/2005 n. 206).
The statutory warranty has a duration of no. 24 months
from the date of delivery to the consumer as above is
understood and is mentioned by the seller, or by the per-
son who supplied him with the product, that consumers
should seek your own.
By virtue of the legal warranty, the consumer may require
the seller, at its option, (1) to repair the goods or (2) to
replace it at no charge in both cases, unless the remedy
requested is impossible or excessively costly relative to
each other, as well as regulated by Art. 130 paragraph 4.
Alternatively, where one of the following situations, the
consumer may, at its option, (3) an appropriate reduction
of the price or (4) have the contract rescinded:
a) repair and replacement are impossible or prohibitively
expensive;
b) the seller has failed to repair or replace the goods within
a reasonable period;
c) the replacement or repair previously carried out has
caused significant inconvenience to the consumer.
In determining the amount of the reduction or the amount
to be repaid is considers the use of the asset.
At the following web address is viewed and downloaded
the text of Articles 128 to 134 of the Consumer Code
relating to the legal warranty described above
www.nordmende-phones.it/
WARRANTY
The additional conventional warranty provided in
Italy by ALDINET Spa
In addition to the legal guarantee in the hands of the
seller intended for consumers, or non-professional buyers,
Articles 128-134 of the Consumer Code (Legislative Decree
06/09/2005 n. 206), whose recognized rights to consumers
remain still firm and prejudice, Aldinet Spa, located in
Viale C. Colombo 8-20090 TREZZANO SUL NAVIGLIO (MI)
(d 'now on Aldinet) provide the consumer, on the phones
it distributes in Italy, Republic of San Marino and City
Vatican, its own standard warranty as defined below:
Scope and duration of the standard warranty:
The standard warranty covers
"All phone models marketed by Aldinet, including correla-
tive batteries and accessories"
The standard warranty covers repair and / or replacement
free of charge - a choice of Aldinet - phones and correlative
batteries and accessories sold together with the resulting
non-compliant phones in the manufacturing or material
during the following time periods:
- For a period of twenty four (24) months from the date
of purchase (receipt or invoice shall prevail), how to
telephones;
- For a period of 6 (six) months from the date of purchase,
so calculated as to batteries and accessories sold with
the phone.
Exclusion from the standard warranty:
The warranty does NOT cover defects resulting from:
1) Failure to comply with the instructions for proper use
of the device
2) Connection to any equipment not supplied and / or use
of batteries and / or non-original accessories.
3) Modification or repair performed by individuals not
authorized by the manufacturer.
4) Modification, adjustment or alteration of soware or
hardware performed by individuals not authorized by the
manufacturer.
5) Damage to the phone caused by bad weather (such as
eg lightning), fire, humidity, infiltration of liquids or foods,
chemical products, download of files, accidental events,
high voltage, corrosion, oxidation.
In addition, as already mentioned, the standard warranty
does not cover the phones and their batteries / acces-
sories that are not placed in the Italian market, in the
Republic of San Marino and the Vatican City from Aldinet.
Who to contact for the 'provision of the Conventional
Warranty Service
The consumer will have to apply directly for assistance
commissioned by ALDINETwhose references can be found
at the following address:
http://www.nordmende-phones.it. Alternatively, the
consumer can contact the service via the dealer where you
purchased the phone.
Availability of the present Conventional Warranty
conditions
The present conventional warranty conditions are publi-
shed on the web site at the following address http://www.
nordmende-phones.it/ accessing the ASSISTENZA PRIVATI.
GARANTIE LEGALE ET GARANTIE CONVENTIONNELLE
SUPPLEMENTAIRE SUR LES PRODUITS COMMERCIALISES
PAR NORDMENDE ITALIA
La garantie légale
Les produits commercialisés par ALDINET Spa sont
couverts par la garantie légale gratuite prévue en faveur
des consommateurs, c’est-à-dire des acheteurs non
professionnels, par les articles 128 et 134 du code de la
consommation (Décret législatif 06/09/2005 n°206).
La garantie légale a une durée de 24 mois à compter de
la date de livraison au consommateur, au sens indiqué
plus haut, et elle est fournie gratuitement par le vendeur
, c’est-à-dire par le sujet qui lui a fourni le produit, auquel
le consommateur devra s’adresser. En vertu de la garantie
légale, le consommateur peut demander au vendeur, à
son gré, (1) de réparer l’article ou (2) de le remplacer, sans
frais dans les deux cas, moins que le remède demandé
soit objectivement impossible ou trop onéreux par rapport
à l’autre, comme le prescrit l’article 130 alinéa 4.
Ou alors , si l’une des situations suivantes se présente, le
consommateur peut demander, à son gré, (3) une réduc-
tion congrue du prix ou (4) la résiliation du contrat:
a) la réparation et le remplacement sont impossibles ou
trop onéreux;
b) le revendeur n’a ni réparé ni remplacé le bien dans un
délai raisonnable;
c) le remplacement ou la réparation accompli/e
précédemment a causé beaucoup d’inconvénients au
consommateur.
Pour établir le montant de la réduction ou la somme à
restituer on tient compte de l’utilisation du bien. A l’adres-
se Internet suivante vous pouvez consulter le texte des
articles de 128 à 134 du Code de la consommation portant
sur la Garantie légale www.nordmende-phones.it/
GARANTIE
Garantie conventionnelle supplémentaire fournie en
Italie par ALDINET Spa
Outre la garantie légale assumée par le revendeur prévue
en faveur des consommateurs, c’est-à-dire les acheteurs
non professionnels, par les article de 128 à 134 Code de la
consommation (Décret législatif 06/09/2005 n°206 ) , dont
les droits reconnus aux consommateurs restent inchangés
et non aectés, ALDINET Spa , sise Viale C. Colombo 8 -
20090 TREZZANO SUL NAVIGLIO
(MI) (par la suite ALDINET )
fournit au consommateur,
sur les téléphones commercialisés en Italie, République de
Saint Marin et Cité du Vatican, sa propre garantie conven-
tionnelle définie de la sorte:
Objet et durée de la garantie conventionnelle:
La garantie conventionnelle concerne
“Tous les modèles de téléphones commercialisés par
ALDINET, y compris leurs batteries et accessoires”
La garantie conventionnelle consiste à réparer et/ou
remplacer gratuitement - au gréé d’ALDINET - des télé-
phones et leurs batteries et accessoires vendus avec les
téléphones résultant non conformes dans la fabrication
ou les matériaux pendant les périodes suivantes:
- pendant une période de 24 (vingt-quatre) mois à compt-
er de la date d’achat (le ticket de caisse ou la facture fera
foi), pour les téléphones:
- pendant une période de 6 (six) mois à compter de la date
d’achat, telle que définie plus haut, pour les batteries et
accessoires vendus avec le téléphone.
Exclusion de la garantie conventionnelle:
La garantie NE couvre PAS les défauts dérivant de:
1) Non respect des instructions d’utilisation correcte du
dispositif
2) Connexion sur des dispositifs non fournis et/ou utilisa-
tion de batteries et/ou accessoires non originaux
3) Modifications ou réparations faites par des personnes
non autorisées par le fabricant
4) Modification, réglage ou altération de logiciel ou appar-
eil faites par des personnes non autorisées par le fabricant
5) Dommages au téléphone causés par le mauvais temps
(par ex. la foudre), des incendies, l’humidité, l’infiltra-
tion de liquides ou d’aliments, produits chimiques,
télédéchargement de fichiers, évènements accidentels,
haute tension, corrosion, oxydation.
En outre, comme nous l’avons dit, la garantie conven-
tionnelle ne couvre pas les téléphones et leurs batteries/
accessoires non mis en vente sur le marché italien, dans
la République de Saint Marin ou a Cité du Vatican par
ALDINET.
A qui vous adresser pour recevoir le service de Garan-
tie conventionnelle.
Le consommateur devra s’adresser directement au
Service d’assistance chargé par ALDINET dont les coor-
données se trouvent à l’adresse suivante : http://www.
nordmende-phones.it. Ou bien le consommateur pourra
contacter le Service d’assistance à travers le revendeur
auquel il a acheté le téléphone.
Disponibilité de ces conditions de Garantie
Conventionnelle. Ces conditions de Garantie conven-
tionnelle sont publiées sur le site Internet à l’adresse
suivante http://www.nordmende-phones.it/ en accédant
à l’aire ASSISTANCE PARTICULIERS et peuvent en être
télédéchargées.
GESETZLICHE GARANTIE UND ZUSÄTZLICHE VERTRAGLI-
CHE GARANTIE AUF DIE VON NORDMENDE IN ITALIEN
VERTRIEBENEN PRODUKTE
Gesetzliche Garantie
Die von ALDINET Spa vertriebenen Produkte sind durch eine
kostenlose gesetzliche Garantie gedeckt, die zu Gunsten
der Verbraucher beziehungsweise der nichtprofessionellen
Käufer in den Artikeln 128 bis 134 des ital. Verbraucherge-
setzes (Gesetzesvertretendes Dekret Nr. 206 vom 06/09/2005)
vorgesehen ist.
Die gesetzliche Garantie hat eine Laufzeit von 24 Monaten,
die ab der Lieferung an den Verbraucher zu laufen beginnt,
wie oben ausgelegt, und die vom Verkäufer beziehungsweise
von der Person, die ihm das Produkt geliefert hat und an die
sich der Verbraucher wenden muss, beigestellt wird. Aufgrund
der gesetzlichen Garantie kann der Verbraucher nach seiner
Wahl vom Verkäufer Folgendes zu verlangen: (1) Das Produkt
zu reparieren oder (2) auszutauschen, in beiden Fällen ohne
Kosten, außer wenn die geforderte Abhilfe im Vergleich zum
anderen objektiv unmöglich oder zu teuer ist, wie durch Art.
130 Absatz 4 geregelt.
Der Verbraucher kann alternativ dazu, falls eine der folgenden
Situationen auritt, nach seiner Wahl: (3) Eine angemessene
Preisminderung oder (4) die Vertragsauflösung fordern, wenn:
a) Die Reparatur und der Austausch unmöglich oder zu teuer
ist;
b) Der Verkäufer nicht innerhalb einer angemessenen Frist
für die Reparatur oder den Austausch des Produktes Sorge
getragen hat;
c) der zuvor durchgeführte Austausch oder die Reparatur er-
hebliche Unannehmlichkeiten für den Verbraucher verursacht
hat.
Bei der Festlegung des Betrages des Nachlasses oder des
rückzuerstattenden Betrages wird die Verwendung des Produk-
tes berücksichtigt. Unter der folgenden Internetadresse kann
der Text der Artikel 128 bis 134 des ital. Verbrauchergesetzes in
Bezug auf die gesetzliche Garantie eingesehen werden: www.
nordmende-phones.it/
GARANTIE
Zusätzliche vertragliche Garantie, die in Italien von
ALDINET Spa beigestellt wird
Zusätzlich zu der zu Gunsten der Verbraucher beziehu-
ngsweise der nichtprofessionellen Käufer in den Artikeln
128 bis 134 des ital. Verbrauchergesetzes (Gesetzesver-
tretendes Dekret Nr. 206 vom 06/09/2005) vorgeseh-
enen gesetzlichen Garantie, dessen den Verbrauchern
zuerkannten Rechte auf jeden Fall unverändert und
unberührt bleiben, gewährt das Unternehmen ALDINET
Spa mit Niederlassung in Viale C. Colombo 8 - 20090
TREZZANO SUL NAVIGLIO (MI) (von nun an ALDINET
genannt) dem Verbraucher auf die vom Unternehmen in
Italien, der Republik von San Marino und der Vatikanstadt
vertriebenen Telefone
eine eigene vertragliche Garantie, die wie folgt festgelegt
wird:
Gegenstand und Dauer der vertraglichen Garantie:
Die vertraglichen Garantie betrit
„Alle Telefonmodelle, die von ALDINET vertrieben werden,
inklusive die entsprechenden Batterien und das Zubehör“
Die vertragliche Garantie besteht aus der kostenlosen
Reparatur bzw. aus dem Austausch – nach Wahl von ALDI-
NET - der Telefone und der entsprechenden Batterien und
des Zubehörs, die gemeinsam mit den Telefonen verkau
wurden, die innerhalb der folgenden Fristen als nicht kon-
form in der Herstellung oder den Materialien hervorgehen,
und zwar innerhalb der folgenden Zeiten:
- Für einen Zeitraum von 24 (vierundzwanzig) Monaten ab
dem Kaufdatum (als Beweis gilt der Kassenbon oder die
Rechnung), hinsichtlich der Telefone;
- Für einen Zeitraum von 6 (sechs) Monaten ab dem
Kaufdatum, wie oben festgelegt, hinsichtlich der mit dem
Telefon Zubehörs. zusammen verkauen Akkus und des
Zubehörs.
Ausschluss von der vertraglichen Garantie:
Die Garantie deckt KEINE Mängel, die durch Folgendes
entstehen:
1) Nichteinhaltung der Anleitungen zur korrekten Verwendung
des Gerätes
2) Anschluss an Geräte, die nicht im Lieferumfang enthalten
sind beziehungsweise Verwendung von nicht originalen Batter-
ien und/oder Zubehörteilen.
3) Von Personen, die nicht durch den Hersteller dazu befugt
sind, durchgeführte Änderungen oder Reparaturen.
4) Von Personen, die nicht durch den Hersteller dazu befugt
sind, durchgeführte Änderungen, Einstellungen oder Verfäl-
schung der Soware oder Hardware.
5) Schäden am Telefon aufgrund von Unwetter (wie zum
Beispiel Blitzschlag), Feuer, Feuchtigkeit, Infiltration von Flüs-
sigkeiten oder Nahrungsmittel, chemische Produkte, Download
von Files, zufällige Ereignisse, Hochspannung, Korrosion,
Oxidation.
Darüber hinaus deckt die vertragliche Garantie, wie bereits
erwähnt, die Telefone und die entsprechenden Batterien/
Zubehörteile, die von ALDINET nicht auf den italienischen
Markt, auf den Markt der Republik San Marino oder der Vatikan-
stadt gebracht wurden nicht ab.
An wen man sich zur Erbringung der gesetzlichen Garantie-
leistung zu wenden hat
Der Verbraucher muss sich direkt an den von ALDINET beauf-
tragten Kundenservice wenden, auf den unter der folgenden
Adresse verwiesen wird: http://www.nordmende-phones.
it. Alternativ dazu kann der Verbraucher den Kundenservice
über den Verkäufer, bei dem er das Telefon erworben hat,
kontaktieren.
Verfügbarkeit der gegenständlichen vertraglichen Garan-
tiebedingungen
Die gegenständlichen vertraglichen Garantiebedingungen sind
auf der WEBSITE unter der folgenden Adresse http://www.nord-
mende phones.it/, wenn man zum Abschnitt KUNDENSERVICE
PRIVATKUNDEN Zutritt erlangt, veröentlicht und können eben-
falls auf dieser Website heruntergeladen werden.
GARANTÍA LEGAL Y GARANTÍA CONVENCIONAL ADI-
CIONAL SOBRE PRODUCTOS COMERCIALIZADOS POR
NORDMENDE EN ITALIA
Garantía legal
Los productos comercializados por ALDINET Spa están
cubiertos por la garantía legal gratuita prevista a favor de los
consumidores, es decir, de los compradores no profesionales,
en los artículos 128 a 134 del Código de Consumo (Decreto
legislativo nº 206 del 06/09/2005).
La garantía que establece la ley tiene una duración de 24
meses a partir de la fecha de entrega al consumidor, como fue
definido con anterioridad, y es prestada por el vendedor, es
decir, por el sujeto que ha suministrado el producto, al cual
deberá dirigirse el consumidor. En virtud de la garantía legal,
el consumidor puede solicitar al vendedor, a su elección, (1)
reparar el bien o (2) sustituirlo, sin gastos en ninguno de los
casos, salvo que la solución solicitada sea objetivamente
imposible o excesivamente onerosa respecto a la otra, tal como
está reglamentado por el art. 130 inciso 4. Como alternativa, en
caso de que se presentara alguna de las siguientes situaciones,
el consumidor puede solicitar, a su elección, (3) una reducción
razonable del precio o (4) la resolución del contrato:
a) la reparación y la sustitución son imposibles o excesiva-
mente onerosas;
b) el vendedor no ha realizado la reparación o sustitución del
bien dentro de un plazo razonable;
c) la sustitución o la reparación previamente efectuada ha
provocado importantes inconvenientes al consumidor.
Al determinar el importe de la reducción o la suma a restituir, se
tendrá en cuenta el uso del bien. En la siguiente dirección web
se puede consultar y descargar el texto de los artículos 128 a
134 del Código de Consumo, concernientes a la Garantía legal
www.nordmende-phones.it/
GARANTÍA
Garantía Convencional adicional provista en Italia por
ALDINET Spa.
Adicionalmente a la garantía legal que recae sobre el
vendedor, prevista a favor de los consumidores, es decir,
de los compradores no profesionales, en los artículos 128
a 134 del Código de Consumo (Decreto legislativo nº 206
del 06/09/2005), derechos reconocidos a los consum-
idores que permanecen, de todos modos, firmes y sin
perjuicio, ALDINET Spa, con domicilio en Viale C. Colombo
n.º 8 - 20090 - TREZZANO SUL NAVIGLIO (MI) (en adelante,
ALDINET), otorga al consumidor,
para los teléfonos que la misma comercializa en Italia,
República de San Marino y Ciudad del Vaticano, una
garantía propia convencional, definida a continuación:
Objeto y duración de la garantía convencional:
La garantía convencional se refiere a
“Todos los modelos de teléfonos comercializados por
ALDINET, incluidos las baterías y los accesorios correspon-
dientes”.
La garantía convencional consiste en la reparación y/o
sustitución gratuita - a elección de ALDINET - de los telé-
fonos y correspondientes baterías y accesorios vendidos
junto con los teléfonos que resultaren no adecuados en
su fabricación o en los materiales, durante los siguientes
períodos de tiempo:
- por un período de 24 (veinticuatro) meses a contar a
partir de la fecha de compra (certificada por el ticket o
factura), respecto de los teléfonos;
- por un período de 6 (seis) meses a contar a partir de la
fecha de compra, como fue determinada antes, respecto
de las baterías y los accesorios vendidos junto con el
teléfono.
Exclusión de la garantía convencional:
La garantía NO cubre defectos derivados de:
1) Inobservancia de las instrucciones para el uso correcto del
dispositivo.
2) Conexión a dispositivos no suministrados y/o utilización de
baterías y/o de accesorios no originales.
3) Modificaciones o reparaciones efectuadas por personas no
autorizadas por el fabricante.
4) Modificación, regulación o alteración del soware o hard-
ware por parte de personas no autorizadas por el fabricante.
5) Daños al teléfono provocados por fenómenos clima-
tológicos (como por ejemplo, rayos), incendios, humedad,
infiltración de líquidos o alimentos, productos químicos,
descarga de ficheros, eventos accidentales, alta tensión,
corrosión, oxidación.
Además, como fue dicho antes, la garantía convencional no
cubre los teléfonos y correspondientes baterías/accesorios
que no hayan sido introducidos en el mercado italiano, en
la República de San Marino o en la Ciudad del Vaticano por
ALDINET.
A quién dirigirse para la prestación del servicio de Garantía
Convencional
El Consumidor deberá dirigirse directamente al servicio de
asistencia encargado por ALDINET cuyas referencias pueden
encontrarse en la siguiente dirección: http://www.nord-
mende-phones.it. Como alternativa, el Consumidor podrá
contactar con el servicio de asistencia a través del revendedor
donde adquirió el teléfono.
Disponibilidad de las presentes condiciones de Garantía
Convencional
Las presentes condiciones de Garantía Convencional están
publicadas en el sitio web en la siguiente dirección: http://
www.nordmende-phones.it/ en el área ASISTENCIA PRIVADOS
y pueden ser descargadas de la misma.
EINLEITUNG
Vielen Dank für den Kauf des neuen Modells. Mithilfe
dieser Bedienungsanleitung können Sie sich mit dem
Telefon vertraut machen. Bitte lesen Sie die gesamte
Anleitung
sorgfältig durch, damit Sie Ihr Telefon optimal nutzen
können. Bewahren Sie diese für einen eventuellen späteren
Gebrauch auf. Das Menü des Telefons kann etwas von den
Beschreibungen in dieser Anleitung abweichen.
HINWEIS: Die Vollversion der Bedienungsanleitung kann
von der Website heruntergeladen werden http://www.
nordmende-phones.it/
BATTERY INSTALLATION:
1. Nehmen Sie die Batterieabdeckung auf der Rücks-
eite des Telefons nach unten
2. Überprüfen Sie die Batterie Einsetzen in ihn am
Telefon zu den Kontakten nächsten gezeigt fit machen
3.Insert die Batterie, indem sie in das Fach gleiten
4.Installieren die Batterieabdeckung des Telefons.
HINWEIS: Verwenden Sie 4 x 1,5V AA Batterien
(Batterien nicht inklusiv) für das Telefon und eine
MN27 12V-Batterie für den Sender SOS(Batterien
inklusiv)
Was ist in der Box :
SOS Telefon-Unterseite
Halskette Anhänger
Halterung
Handset Schnur u. Kabel
Netzteil
Benutzerhandbuch
SICHERHEITSHINWEISE
Wenn Sie Ihr Telefon verwenden, müssen stets grundle-
gende Vorsichtsmaßnahmen beachtet werden, um das
Risiko eines Brandes, Stromschlags oder von Körperverl-
etzungen zu verringern:
• Alle Warn- und Sicherheitshinweise in dieser
Betriebsanleitung müssen gelesen, verstanden und befol-
gt werden.
• Trennen Sie das Gerät vor dem Reinigen vom
Stromnetz. Verwenden Sie keine flüssigen Reiniger oder
Reiniger in Sprühdosen, sondern einen weichen und leicht
feuchten Tuch.
• Stellen Sie dieses Produkt nicht auf wackeli-
ge oder instabile Flächen. Das Produkt kann herunterfallen
und dadurch ernstha beschädigt werden.
• Überlasten Sie keine Wandsteckdosen und
Verlängerungskabel, da dies zu Feuer oder elektrischem
Schlag führen kann.
• Stecken Sie auf keinen Fall Gegenstände in
die Gehäuseschlitze, da Sie so Teile mit hoher Spannung
berühren oder Teile kurzschließen können, was zu Feuer
oder einem elektrischen Schlag führen kann. Verschütten
Sie niemals Flüssigkeiten jeglicher Art auf dieses Gerät.
• Vermeiden Sie es, das Gerät während eines
Gewitters zu trennen oder zu bewegen, da ein geringes
Risiko eines Stromschlags aufgrund von Blitzeinschlag
bestehen kann.
• WICHTIG – Die Basisstation muss mit dem
mitgelieferten Netzadapter verwendet werden.
• Die Verwendung eines anderen Adapters
lässt die für das Gerät geltende Zulassung erlöschen und
kann gefährliche Folgen haben.
• Ausschließlich Fachleute dürfen das Telefon
önen, wenn Störungen aureten. Kontaktieren Sie daher
das Kundendienstzentrum.
INTRODUCCIÓN
Gracias por adquirir nuestro más reciente modelo .
El manual ha sido diseñado para se familiarice con
este teléfono.
Le rogamos leer atentamente este manual para poder
utilizar su teléfono de la mejor manera, y conservarlo
para futuras consultas. El menú del teléfono podría ser
levemente diferente de lo que se describe en esta guía.
NOTA: La versión completa del manual de usuario se
puede descargar desde el sitio http://www.nordmende-
phones.it/
INSTALACIÓN DE LA BATERÍA:
1. Retire la tapa de la batería en la parte posterior del
teléfono hacia abajo
2. comprobar la inserción de la batería en la fabricación
de él en forma como se muestra en el teléfono junto a
los contactos
3.Inserte la batería deslizándola en el compartimiento.
4.Instale la tapa de la batería del teléfono.
NOTA: Utilice las baterías recargables 4 x 1.5V AA
(Batería no incluse) para el teléfono y una batería
de 12 V para los MN27 SOS transmisor (Batería
incluse)
Qué hay en la caja :
Base Telefónica SOS
Collar Colgante
Soporte
Cable del auricular y cable
Adaptador de corriente
Guía del usuario
INSTRUCCIONES DE SEGURIDAD
Cuando utilice el teléfono, siempre se deben respetar
las siguientes precauciones básicas de seguridad para
reducir los riesgos de incendio, electrochoque y lesiones
a personas:
• Lea, comprenda y respete todas las adver-
tencias e instrucciones
• Desconecte el producto del tomacorriente
de pared antes de limpiarlo. No utilice limpiadores
líquidos o en aerosol. Utilice un paño húmedo suave
para la limpieza.
• No coloque este producto sobre superficies
inestables. El producto podría caerse y resultar seria-
mente dañado.
• No sobrecargue los tomacorrientes de pared y cables
de prolongación dado que esto puede provocar incen-
dios o electrochoques.
• Nunca introduzca objetos extraños de
ningún tipo dentro de este producto por las ranuras de
la carcasa ya que podrían afectar puntos de tensión pe-
ligrosos o partes en cortocircuito que podrían provocar
incendios o electrochoques. Nunca derrame líquidos de
ningún tipo sobre el producto.
• Evite mover o desconectar esta unidad
durante una tormenta fuerte, dado que puede existir
un riesgo remoto de electrochoque debido a rayos y
truenos.
• IMPORTANTE – La base se debe utilizar con
el adaptador de corriente suministrado con la unidad.
• El uso de cualquier otro adaptador invali-
dará toda aprobación dada a este aparato.
• Ninguna persona no profesional puede
abrir el teléfono. Si tiene problemas, envíe el equipo al
centro de servicio.
HINWEISE
HINWEISE
INFORMATIONEN FÜR DIE BENUTZER VON HAUSHALTS-
GERÄTEN
gemäß dem gesetzesvertretenden Dekret Nr. 49 vom 14. März
2014 „Umsetzung der Richtlinie 2012/19/EU
betreend Elektro- und Elektronik-Abfälle
(RAEE)”.Das Symbol der durchgestrichenen
Mülltonne auf dem Gerät oder seiner Ver-
packung weist darauf hin, dass das Produkt
am Ende seiner Nutzungsdauer
getrennt von den anderen Abfällen
entsorgt werden muss. Nach Beendi-
gung der Nutzungsdauer muss der Be-
nutzer dafür sorgen, das Produkt einer
geeigneten Müllentsorgungsstelle für elektronische Ab-
fälle zuzuführen oder es dem Händler beim Ankauf neu-
er Geräte gleichwertiger Art, im Verhältnis von eins
zu eins oder eins zu null für Geräte mit einer größer-
en Seitenlänge von 25 cm oder weniger zu übergeben.
Die getrennte Sammlung der stillgelegten Anla-
gen zur Verwertung, Aufbereitung und umweltgere-
chten Entsorgung trägt zur Vermeidung möglicher
negativer Auswirkungen auf die Umwelt und die menschli-
che Gesundheit bei und fördert das Recycling von Materi-
alien aus denen sie bestehen. Unsachgemäße Entsorgung
des Produkts durch den Anwender bringt die Verhän-
gung von Verwaltungsstrafen entsprechend dem gesetz-
esvertretendem Dekret Nr. 49 vom 14. März 2014 mit sich.
IDas Gerät funktioniert mit Akkus, die von der europäis-
chen Richtlinie 2013/56/EU erfasst
werden und die nicht mit dem normalen
Haushaltsabfall entsorgtwerden können.
Informieren Sie sich über die Richt-
linien vor Ort in Bezug auf die get-
rennte Sammlung von Akkus: Eine ko-
rrekte Entsorgung vermeidet mögliche
negative Auswirkungen auf die Umwelt und die Gesundheit.
ADVERTENCIAS
ADVERTENCIAS
INFORMACIÓN PARA LOS USUARIOS DE APARATOS DOMÉSTICOS
conforme a lo que establece el De-
creto Legislativo nº 49 del 14 de mar-
zo de 2014, “Aplicación de la Direc-
tiva 2012/19/UE sobre residuos de
aparatos eléctricos y electrónicos (RAEE)”.
El símbolo del contenedor de residuos
tachado sobre el aparato indica que el
producto, al final de su vida útil, debe
eliminarse separadamente de los demás
residuos. Por lo tanto, el usuario deberá entregar aquel aparato
que haya alcanzado el final de su vida útil, con todos sus com-
ponentes esenciales, a los centros de recogida diferenciada
de residuos eléctricos y electrónicos idóneos, o devolverlo al
vendedor en el momento de la adquisición de un nuevo aparato
de tipo equivalente, en razón de uno por uno, o bien, de uno por
cero para los aparatos que tengan el lado mayor inferior a 25 cm.
La recogida diferenciada adecuada para la posterior desti-
nación del aparato desechado al reciclaje, al tratamiento y a la
eliminación ambiental compatible, contribuye a evitar posibles
efectos negativos para el medio ambiente y la salud y favorece
el reciclaje de los materiales que componen el aparato. La
eliminación abusiva del producto por parte del usuario con-
lleva la aplicación de las sanciones administrativas a las que
se refiere el Decreto Legislativo nº 49 del 14 de marzo de 2014.
El producto funciona con baterías
que quedan comprendidas dentro
de la directiva europea 2013/56/EU
y que no pueden ser eliminadas con
los residuos domésticos comunes.
Informarse acerca de las directivas locales
referidas a la recogida diferencia de las
baterías: la correcta eliminación de las mismas permite evitar
consecuencias negativas para el medio ambiente y la salud.
Con la presente Aldinet S.p.A dichiara che questo modello
EASYHOME300SOS, marchio NordMende è conforme
ai requisiti essenziali ed alle altre disposizioni pertinenti
stabilite dalla Direttiva R&TTE 1999/5/CE.
La Dichiarazione di Conformità completa è disponibile
presso:
Aldinet S.p.A.
Viale Colombo, 8 - 20090 Trezzano S/N (MI) Italy
e disponibile all’indirizzo www.nordmende-phones.it
MADE IN CHINA BY
Aldinet S.p.A.
Viale Colombo, 8 - 20090 Trezzano S/N (MI) Italy
NORDMENDE è un marchio di Technicolor o dei suoi ail-
iati, utilizzato su licenza da Aldinet S.p.A.
TELEFONO A FILO
EASYHOME300SOS
Hereby, Aldinet S.p.A, declares that this type of
EASYHOME300SOS Brand Nordmende is in
compliance with the essential requirements and other
relevant provisions of Directive R&TTE 1999/5/EC.
The Declaration of Conformity is available at:
Aldinet S.p.A.
Viale Colombo, 8 - 20090 Trezzano S/N (MI) Italy
and available at www.nordmende-phones.it
MADE IN CHINA BY
Aldinet S.p.A.
Viale Colombo, 8 - 20090 Trezzano S/N (MI) Italy
NORDMENDE is a trademark of Technicolor or its ailiates
used under license to ALDINET S.p.A.
TELEPHONE WIRE
EASYHOME300SOS
FIL DE TÉLÉPHONE
Aldinet S.p.A. déclare ici que ce modèle
EASYHOME300SOS de marque NordMende, est
conforme aux exigences essentielles et aux autres
dispositions pertinentes établies par la Directive R&TTE
1999/5/CE.
La Déclaration de conformité complète est disponible
chez:
Aldinet S.p.A.
Viale Colombo, 8 - 20090 Trezzano S/N (MI) Italie
ainsi qu'à l'adresse Internet www.nordmende-phones.it
FABRIQUE EN CHINE PAR
Aldinet S.p.A.
Viale Colombo, 8 - 20090 Trezzano S/N (MI) Italie
NORDMENDE est une marque de Technicolor ou de ses
filiales, utilisée sur licence par Aldinet S.p.A.
Hiermit erklärt Aldinet S.p.A, dass das Modell
EASYHOME300SOS Marke NordMende den wichtig-
sten Anforderungen und anderen maßgeblichen Bestim-
mungen der R&TTE-Richtlinie 1999/5/EG entspricht.
Die vollständige Konformitätserklärung ist unter der
folgenden Adresse erhältlich:
Aldinet S.p.A.
Viale Colombo, 8 - 20090 Trezzano S/N (MI) Italien
Die Konformitätserklärung ist auch unter der folgenden
Internetadresse erhältlich: www.nordmende-phones.it
MADE IN CHINA BY
Aldinet S.p.A.
Viale Colombo, 8 - 20090 Trezzano S/N (MI) Italien
NORDMENDE ist eine Marke von Technicolor oder deren
Tochterfirmen und wird in Lizenz von Aldinet S.p.A.
verwendet.
TELEFON WIRE
Mediante la presente Aldinet S.p.A. declara que este
modelo EASYHOME300SOS marca NordMende,
es conforme a los requisitos esenciales y a las demás
disposiciones pertinentes establecidas por la Directiva
R&TTE 1999/5/CE.
La Declaración de Conformidad completa está dispo-
nible en:
Aldinet S.p.A.
Viale Colombo n.º 8 - C. P. 20090 Trezzano S/N (MI) Italia
y disponible en la dirección www.nordmende-phones.it
MADE IN CHINA BY
Aldinet S.p.A.
Viale Colombo, 8 - 20090 Trezzano S/N (MI) Italia
NORDMENDE es una marca de Technicolor o de sus
asociados, utilizada bajo licencia por Aldinet S.p.A.
Alambre de teléfono
EASYHOME300SOS
EASYHOME300SOS
EASYHOME300SOS
Überblick
1. LED-Anzeige für eingehende Anrufe Licht
2. Hörer
3. LED-Anzeigevorrichtung in Gebrauch
4. Up / Down
5. Löschtaste (DEL)
6. OK-Taste / wählen
7. Kontakte key / Flucht
8. Menü-Taste
9. Freisprech -Taste
10. Kurzwahltaste M1
11. Kurzwahltaste M2
12. Extern Notruaste
13. Key Ww / Pause
14. Flash-Taste
visión de conjunto
1. Luz indicadora de llamada entrante LED
2. auricular
3. Aparato indicador LED en uso
4. Arriba / Abajo
5. Tecla de borrado (DEL)
6. Botón Aceptar / select
7. Contactos clave / escape
8. botón de menú
9. tecla de manos libres
10. botón de marcación rápida M1
11. botón de marcación rápida M2
12. Botón de emergencia SOS ext
13. Tecla de rellamada / pausa
14. botón del flash
Anbringung des Bügels am Telefon
Anschluss des Spannungsadapters
WICHTIG: Wenn Sie den Spannungsadapter oder die
Batterien nicht anschließen, ist es noch möglich, Anrufe zu
tätigen und entgegenzunehmen, das LCD-Display und die
SOS-Geräte funktionieren jedoch nicht. Da das SOS-Tele-
fon über einen nichtflüchtigen Speicher verfügt, bleiben
alle im Telefonbuch oder in den Listen für abgehende und
ankommende Anrufe gespeicherten Telefonnummern
erhalten.
Wichtiger Hinweis: Die Benutzung eines falschen
Adapters kann zu Explosionen führen und das SOS-Telefon
beschädigen.
Installieren der Batterien (optional, vier (4) AA
Batterien erforderlich)
TIPP: Batterien sind ein Sonderzubehör, das jedoch im
Fall von Stromausfällen dringend zu empfehlen ist.
Wichtiger Hinweis: Sie können die Notfall-Schnurlo-
sgeräte nur verwenden, wenn Ihr SOS-Telefon an den
Strom angeschlossen ist (über den Spannungsadapter
oder Batterien).
Anschluss an die Telefonleitung und Anrufbe-
antworter (optional)
Präsentation des SOS-Telefons
Optische Hörer-Anzeige für ein-
gehende Anrufe
Hörer, Lautstärke, Anpassung
LO = Normales Gehör
HI= Fügt zusätzlich +40bB
Einstellung der Klingelton-
lautstärke
Es gibt drei (3) Klingeltonlau-
tstärken:
Niedrig, Mittel, Hoch
Cómo sujetar el soporte al teléfono
Conexión al adaptador de corriente
IMPORTANTE: Si no conecta el adaptador de corriente o
las pilas, podrá hacer y recibir llamadas pero la pantalla
LCD y los colgantes de emergencia no funcionarán.
Además, como el teléfono SOS tiene una memoria no
volátil, todos los números telefónicos almacenados en el
directorio o en la lista de llamadas entrantes y salientes
quedarán allí.
Advertencia: Puede producirse una explosión si no usa
el adaptador correcto. También puede dañar el teléfono
SOS.
Cómo instalar las pilas (opcional, necesita cuatro
(4) pilas AA)
CONSEJO: Las pilas son opcionales pero se recomien-
da tenerlas en caso de corte eléctrico.
Advertencia: No puede usar los colgantes inalámb-
ricos de emergencia a menos que su teléfono tenga
corriente (por medio del adaptador o de las pilas).
Cómo hacer la conexión a la línea telefónica y
al contestador automático (opcional)
Familiarización con su teléfono SOS
Indicador visual de llamada
entrante del auricular
Auricular, Volumen, Ajuste
LO = volumen normal
HI= Añade +40 dB
Ajuste del volumen del
timbre
Hay tres (3) niveles dispo-
nibles para el volumen del
timbre:
Bajo, medio y alto
Funktionalitäten
- Das SOS-Telefon kann programmiert werden, um auto-
matisch bis zu 10 Notrufnummern anrufen zu können
- Eignet sich für bis zu 5 Schnurlosgeräte (2 inbegrien)
– Aktiviert in einer Entfernung von 30 Metern von der
Basisstation Notrufe!
- Kann eine voreingestellte Mitteilung abspielen, wenn
Notrufnummern angerufen werden
- Hörgerätefreundlich – Hörerlautstärke kann um +40 dB
erhöht werden (Taste: HI), extra laut: Klingelton mit +90 dB
- Optisches Blinksignal für eingehenden Anruf auf dem
Hörer
- Aktivierung/Deaktivierung der Ansage der Anrufer-ID –
eine Stimme sagt die ankommenden Anrufe (Telefonnum-
mern) und die Menüoptionen an
- Unterstützt 6 Sprachen auf dem Display sowie
Sprachanweisungen (Englisch, Spanisch, Französisch,
Italienisch, Niederländisch & Deutsch)
- Großes, leicht lesbares LCD-Display mit 5 unterschiedli-
chen Helligkeiten und blauer Hinterleuchtung (Batterien
erforderlich – nicht im Lieferumfang enthalten)
- Große Wähltastatur/Tasten zum einfachen Wählen
- Telefonbuch speichert bis zu 50 Telefoneinträge (16-stel-
lige Namen & Telefonnummern)
- Die Fernsteuerungsfunktionen umfassen Folgendes:
(1) Taste auf den Geräten drücken, um Anrufe entgegen-
zunehmen.
(2) Vorprogrammierte SOS-Notrufnummern wählen.
(3) Zwei One Touch-Nottaster auf der Basisstation, ein (1)
One-Touch-Nottaster auf den Schurlosgeräten
- Speichert bis zu 20 ausgehende Anrufe (16-stellige
Namen & Telefonnummern)
- Behält alle Telefonanrufe und Einstellungen, auch bei
einem Stromausfall (Verwendung eines nichtflüchtigen
Speichers)
- Kompatibel mit FSK/DTMF Dual Caller -ID Systemen
Menu
Drücken Sie bei aufgelegtem Hörer die Taste MENU,
um in den Einstellungsmodus zu gelangen.
Das LCD-Display zeigt blinkend die Einstellungsop-
tion LDC CONTRAST an. Drücken Sie die Tasten AUF
oder AB, um die Einstellungsoption zu durchsuchen/
auszuwählen. Die Einstellungsoptionen umfassen
Folgendes: LDC CONTRAST, LOCAL AREA CODE , ENTER
TIME/DATE , LCD LANGUAGE, VOICE, SET FLASH TIME,
PAIR NEW PEDANT, EMERGENCY CALL)
Drücken Sie die Taste OK/DIAL, um die Einstellungsop-
tion auszuwählen, während sie blinkt.
Drücken Sie die Taste BOOK/ESC oder warten Sie 15
Sekunden, um den Einstellungsmodus automatisch
zu verlassen.
Einstellung DES KONTRASTES DES LCD-DISPLAYS
Drücken Sie nach dem Drücken der Taste MENU,
während auf dem LCD-Display blinkend LCD CON-
TRAST angezeigt wird, die Taste OK/DIAL. Auf dem
Display wird die aktuelle Helligkeit des LCD-Displays
angezeigt (3 voreingestellt). Verwenden Sie die
Tasten Auf oder Ab, um die Einstellung von 1 bis 5
vorzunehmen. Drücken Sie nach der vorgenommenen
Einstellung die Taste OK und gehen Sie zur nächsten
Einstellung über.
EINSTELLUNG VON DATUM UND UHRZEIT
Bitte beachten Sie, dass Monat, Tag, Stunden und
Minuten mit der Anrufer-Information der eingehen-
den Anrufe, die Sie erhalten, auf Ihrem SOS-Telefon
automatisch aktualisiert werden. Nur das Jahr muss
manuell eingestellt werden.
(weiter)
Verbindung der Schnurlosgeräte (ERFORDERLICH)
Bitte befolgen Sie die unten angeführten Schritte, um
ein Schnurlosgerät (eines nach dem anderen) mit der
Basisstation zu verbinden.
(1) Drücken Sie die Taste MENU
(2) Drücken Sie die Taste AUF 5 Mal, bis auf dem
LCD-Display blinkend PAIR NEW PENDANT angezeigt
wird.
(3) Drücken Sie die Taste OK/DIAL, um auszuwählen.
Das Wort PAIRING blinkt auf dem LCD-Display .
(4) Drücken Sie die Taste he OK/DIAL noch einmal und
das LCD-Display zeigt PAIRING an
(5) Drücken Sie einmal die rote Taste auf einem
Schnurlosgerät.
Wurde die Paarung erfolgreich abgeschlossen, wird
auf dem LCD-Display 5 Sekunden lang DONE angezei-
gt. Sie haben 2 Minuten Zeit, um Ihr Schnurlosgerät
mit der Basisstation zu verbinden, wenn es sich im
Verbindungsmodus befindet.
Maximal (5) Schnurlosgeräte (oder Fernbedienungen)
können gleichzeitig mit einer Basisstation verbunden
werden. Wenn Sie versuchen, mehr als 5 Schnurlo-
sgeräte zu verbinden, wird beim oben genannten
Schritt (4) auf dem LCD-Display FULL angezeigt. In
diesem Fall können Sie kein neues Schnurlosgerät
verbinden, sofern Sie nicht alle gepaarten Schnurlo-
sgeräte über die Option DELETE löschen.
Um die verbunden Schnurlosgeräte zu löschen und
das Verfahren zu wiederholen, folgen Sie bitte den
oben angeführten Schritten (1) – (4) und:
(5) Wenn Sie die Taste AUF und auf dem LCD-Display
drücken, wird DELETE angezeigt
zu verbinden. (weiter)
(6) Drücken Sie die Taste OK/DIAL noch einmal. Auf
dem LCD-Display wird 5 Sekunden lang DELETE DEVI-
CE angezeigt. Die Anzeige PAIR NEW PENDANT blinkt
auf dem LCD-Display. Gehen Sie nun zurück zu dem
oben aufgeführten Schritt (1), um Ihr erstes Gerät
Einstellung der Notrufe (ERFORDERLICH)
(1) Drücken Sie die Taste MENU
(2) Drücken Sie die Taste AUF 7 Mal (oder die Taste AB
1 Mal), bis auf dem LCD-Display blinkend EMERGENCY
CALL angezeigt wird.
(3) Drücken Sie die Taste OK/DIAL, um zur Einstellung
der Notrufe zu gelangen. Es gibt 3 Menüpunkte.
Drücken Sie die Taste AUF, um eine Auswahl zu treen
und drücken Sie dann die Taste OK/DIAL, um die
entsprechenden Einstellungen einzugeben, wie in der
folgenden Abbildung gezeigt.
Aufzeichnung der Sprachnachricht für die Notrufe
(4) Drücken Sie nach dem Befolgen der oben ange-
gebenen Schritte (1) bis (3), wenn das LCD-Display
RECORD MESSAGE anzeigt, die Taste OK/DIAL,
(5) Wenn auf dem LCD-Display blinkend das Symbol
VOICE angezeigt wird, beginnt die Sprachaufzei-
chnung. Während der Aufzeichnung, wird auf dem
LCD-Display ein Countdown von 20-Sekunden ange-
zeigt. Sie haben 20 Sekunden Zeit für Ihre Nachricht.
Beispielmitteilung: „DIES IST EIN NOTRUF. HALTEN
SIE BITTE DIE NULL GEDRÜCKT, UM DIESEN ANRUF
ENTGEGENZUNEHMEN”, beachten Sie bitte,
(weiter)
BOOK/ESC (Telefonbucheinstellung)
Einen neuen Eintrag im Telefonbuch erstellen
(1) Drücken Sie die Taste BOOK/ESC.
(2) Drücken Sie die Taste MENU. Auf dem LCD-Display
wird STORE NUMBER angezeigt.
(3) Drücken Sie die Taste OK/DIAL. Geben Sie die
Nummer 0-9, *, #, P ein und drücken Sie dann die
Taste OK/DIAL, um sie zu speichern. Geben Sie dann
mithilfe der kleinen Tastatur (2-9) den Namen ein, um
die Buchstaben von A bis Z auszuwählen. Drücken Sie
dann OK/DIAL um zu speichern.
TIPP: Schauen Sie, wenn Sie die kleine Tastatur zum
Eingeben der Namen benutzen, auf die Buchstaben
unter jeder Zahl (2 bis 9) auf der kleinen Tastatur.
Sie müssen die Taste 2 oder 3 Mal drücken, um den
gewünschten Buchstaben anzuzeigen. Um zum
Beispiel „C” anzuzeigen, müssen Sie die Taste ‚2’ zwei
Mal drücken.
Einen Telefonbucheintrag bearbeiten
Drücken Sie die Taste BOOK und dann die Taste AUF
oder AB, um den Telefonbucheintrag zu finden, der
bearbeitet werden soll. Drücken Sie dann 3 Sekunden
lang die Taste MENU. Auf dem LCD-Display wird EDIT?
angezeigt. Drücken Sie erneut die Taste OK/DIAL,
greifen Sie dann auf die Bearbeitung der Nummern zu.
Drücken Sie dann die Taste OK/DIAL, um zu bestätigen.
Einen Telefonbucheintrag oder ALLE Telefonbu-
cheinträge löschen
Drücken Sie die Taste BOOK/ESC. Verwenden Sie dann
die Tasten AUF oder AB, um den Telefonbucheintrag,
den Sie gerne löschen möchten, zu suchen. (weiter)
Drücken Sie die Taste DEL einmal. Auf dem LCD-Di-
splay wird DELETE? angezeigt. Drücken Sie dann die
Taste OK/DIAL, um zu bestätigen.
Wenn Sie die Taste DEL 3 Sekunden lang gedrückt
halten, wird auf dem LCD-Display DELETE ALL? ange-
zeigt. Drücken Sie dann die Taste OK/DIAL, um alle
Einträge zu löschen. Auf dem LCD-Display wird EMPTY
angezeigt.
Durchsuchen der Einträge im Telefonbuch
Drücken Sie ‘BOOK / ESC’, um in den Telefonbu-
ch-Abfrage-Status zu gelangen, und drücken Sie
dann die ‘UP’ oder ‘DOWN’ Taste, um die Datensätze
zu durchsuchen; Oder geben Sie direkt den ersten
Buchstaben des abgefragten Namens ein. In der
LCD-Anzeige erscheint das gesamte Telefonbuch mit
einem solchen Buchstaben. Drücken Sie dann die
Taste ‘DOWN’ oder ‘UP’, um einzuchecken. Wenn keine
Nummer gespeichert ist, zeigt das LCD-Display “EMP-
TY” an. Wenn innerhalb von 30 Sekunden kein weiterer
Vorgang stattfindet, wird der Telefonbuchabfragesta-
tus beendet.
Wählen einer Rufnummer aus dem Telefonbuch
Drücken Sie ‘BOOK / ESC’, um in das Telefonbuch zu
gelangen. Verwenden Sie die ‘UP’ oder ‘DOWN’ Tasten,
um die gewünschte Nummer zu finden, und drücken
Sie dann die ‘OK / DIAL’ Taste, um diese Nummer zu
wählen.
Einen eingehenden Anruf in das Telefonbuch
kopieren / speichern
Drücken Sie die MENU-Taste 3 Sekunden lang,
während Sie die eingehenden Anrufdatensätze überp-
rüfen. (weiter)
DEL-Taste
Die entsprechende Funktion oder Nummer wird
gelöscht, wenn die Taste “DEL” gedrückt wird,
während sie in Betrieb ist.
Freihand-Taste (Orange)
Verwenden Sie diese Taste, um den Lautsprecher
zu aktivieren und beginnen Sie mit dem Freispre-
chmodus auf Ihrem SOS-Telefon. Sie können dann
die kleine Tastatur verwenden, um die Nummern
zu wählen. Drücken Sie die Taste M1, M2 oder die
SOS-Tasten für die Kurzwahl. Sie können diese
Taste auch drücken, während Sie die Ruflisten der
eingehenden/ausgehenden Anrufe durchsehen,
um die angezeigte Nummer zu wählen.
Kurzwahl-Tasten (MEM1, MEM2)
Programmieren der Tasten für die Kurzwahl-
nummer: Drücken Sie bei aufgelegtem Hörer 3
Sekunden lang die Taste M1 oder M2.
Auf dem LCD-Display wird die ursprünglich ge-
speicherte Nummer angezeigt (wenn vorhanden).
Drücken Sie die Taste DEL, um die ursprüngliche
Nummer zu löschen und die neue einzugeben.
Ist keine Nummer gespeichert, können Sie die
Nummer direkt eingeben.
Bedienung der Kurzwahl: Drücken Sie bei aufgele-
gtem Hörer die Taste M1 oder M2 einmal, um die
gespeicherte Nummer zu wählen.
(weiter)
OK / DIAL-Taste
Im MENU dient diese Taste zur Bestätigung der Einga-
be oder Auswahl.
Sie können die vorgewählte Nummer durch Drücken
dieser Taste wählen.
Sie können die Nummer auch wählen, wenn Sie die
eingehenden / ausgehenden Anrufe oder Telefonbu-
cheinträge überprüfen
UP-Taste
Im Aufnahmestatus betätigen Sie die UP-Taste, um
den eingehenden Anruflisten-Suchmodus aufzurufen.
Verwenden Sie dann die Tasten ‘UP’ oder ‘DOWN’, um
die eingehenden Anrufdatensätze zu durchsuchen.
Drücken Sie die “DEL” -Taste einmal, wenn Sie die ein-
gehenden Anrufdatensätze scrollen. Der Eintrag wird
gelöscht. Drücken Sie die ‘DEL’ Taste für 3 Sekunden,
um alle Datensätze zu löschen.
DOWN-Taste drücken
Im Aufnahmestatus betätigen Sie die ‘DOWN’ -Taste,
um den Modus für die Ansageliste für ausgehende An-
rufe aufzurufen, und verwenden Sie dann die Tasten
‘UP’ oder ‘DOWN’, um die ausgehenden Anrufdaten-
sätze zu durchsuchen.
Drücken Sie die “DEL” -Taste einmal, wenn Sie die
ausgehenden Gespräche aufzeichnen, um den ange-
zeigten Datensatz zu löschen. Drücken Sie die ‘DEL’
Taste für 3 Sekunden, um alle Datensätze zu löschen.
(weiter)
Notfall-Taste (SOS)
Die SOS-Notfalltaste auf der Basisstation löst die
Notruf-Wahlfolge aus. Zuerst ertönt 15 Sekunden
lang ein akustisches Signal, um den Benutzer zu
warnen, dass die SOS-Funktion anläu. Dann wird die
voreingestellte Notfallmitteilung abgespielt und die
Wahlfolge gestartet (die in CLIP 1 bis 10 gespeicherten
Nummern).
Notruf durchführen/anhalten
Drücken Sie bei aufgelegtem Hörer die orange Taste
(Freisprecheinrichtung) einmal oder drei Sekunden
lang die SOS-Taste auf der Basisstation, um eine
Notruf-Wahlfolge anzuhalten. Sie können auch drei
Sekunden lang die rote SOS-Taste auf der drahtlosen
Fernbedienung drücken, um die Wahlfolge anzuhal-
ten. Das Telefon emittiert 15 Sekunden lang ohne
Unterbrecheng akustische Signale um den Benutzer
zu warnen,
dass die SOS-Funktion anläu. Wenn Sie innerhalb
von 15 Sekunden die SOS-Taste drücken (oder die rote
Taste auf einem der Schnurlosgeräte), wird der Notruf
gestoppt.
SOS-/Notruf-Funktionen
A: SOS-/Notrufe: Drücken Sie die rote SOS-Taste auf
einem verbundenen Schnurlosgerät, um einen Notruf
durchzuführen. Wird die rote SOS-Taste gedrückt,
emittiert das SOS-Telefon der Basisstation für 15
Sekunden ein akustisches Signal, um den Benutzer zu
warnen, dass die SOS-Funktion anläu. Dann wird die
voreingestellte NOTFALLMITTEILUNG abgespielt.
Die SOS-Funktion beginnt, die erste gespeicherte
Nummer zu wählen (CLIP 01).
(weiter)
B: Das SOS-Telefon erfasst, ob der Gesprächspart-
ner am anderen Ende der Leitung innerhalb von 60
Sekunden „0” gedrückt hat, um zu antworten. Wurde
der Anruf nicht beantwortet, beendet das SOS-Telefon
den Anruf automatisch und beginnt mit der Wahl der
nächsten gespeicherten Notrufnummer. Hinweis:
Der Gesprächspartner am anderen Ende der Leitung
muss Null gedrückt halten, damit das SOS-Telefon
dies erfasst.
C: Meldet sich der Gesprächspartner am anderen
Ende der Leitung und drückt „0”, wird das Abspielen
der NOTFALLMITTEILUNG angehalten und das Telefon
tritt innerhalb der ersten zwei (2) Minuten in den
Freihand-Modus für das Gespräch zwischen den 2
Gesprächspartnern zu ermöglichen. D: innerhalb der
ersten 2 Anrufminuten wird der Notruf angehalten,
wenn die Person am anderen Ende der Leitung nicht
die Taste ‚*” drückt. Es wird automatisch aufgelegt, um
die nächste gespeicherte Notfallnummer zu wählen.
Zehn (10) Sekunden vor dem Ablauf der 2 Minuten,
emittiert das Telefon ein akustisches Geräusch.
E: Drückt der Gesprächspartner am anderen Ende der
Leitung innerhalb dieser 2 Minuten die Stern-Taste „*”
auf der kleinen Tastatur, wird das Gespräch für weitere
2 Minuten weitergeführt. Zehn (10) Sekunden vor dem
jeweiligen Ablauf von 2 Minuten, emittiert das SOS-Te-
lefon ein akustisches Geräusch. Legen Sie einfach auf,
wenn Sie den Notruf beenden möchten.
F: Der Notruf kann durch beide Gesprächspartner
jederzeit durch Drücken der Taste „#” beendet werden.
(weiter)
Wurde der SOS-Anruf begonnen, wird der Notruf
beendet, wenn das SOS-Telefon abgehoben wird, die
Freihand-Taste (orange) gedrückt oder die SOS-Taste 3
Sekunden lang auf irgendeinem Gerät gedrückt wird.
Ist keine Notrufnummer gespeichert, emittiert das
SOS-Telefon nur 15 Sekunden lang ein akustisches
Geräusch
Verwendung der Schnurlosgeräte (Fernbedienung)
Die Schnurlosgeräte haben 2 Verwendungszwecke,
wie hier unten beschrieben:
Eingehende Anrufe entgegennehmen/auflegen
Drücken Sie einfach 3 Sekunden lang die rote SOS-Ta-
ste auf dem Schnurlosgerät, um einen eingehenden
Anruf im „Freihand“-Modus, d.h. mit der Freisprechein-
richtung entgegenzunehmen. Ist der Anruf beendet,
können Sie die rote SOS-Taste auf dem Schnurlosgerät
noch einmal drücken, um das Telefon aufzulegen und
den Anruf zu beenden.
Auslösen der NOTRUF-Wahlfolge
Drücken Sie bei aufgelegtem Hörer 3 Sekunden lang
die SOS-Taste auf dem Schnurlosgerät, um den Anruf
der gespeicherten Notrufnummer(n) automatisch zu
starten.
-------------------------------------------------------------------------
Informationen über die SAR-Zertifizierung (Specific
Absorption Rate, spezifische Absorptionsrate)
Das Gerät entspricht den Standards der Europäischen
Union (EU) die die Exposition des Menschen gegenüber
Radiofrequenzen (RF) beschränken, die von Funkanlagen
und Telekommunikationsendeinrichtungen ausgestrahlt
werden. Diese Standards verhindern den Verkauf von
Geräten, die den Expositionsgrenzwert (auch SAR genannt)
von 2,0 W/kg übersteigen.
dass alle Aufzeichnungen mit „HALTEN SIE BITTE DIE
NULL GEDRÜCKT, UM DIESEN ANRUF ENTGEGENZU-
NEHMEN” beendet werden sollten.
(6) Drücken Sie die Taste OK/DIAL, um die Auf-
zeichnung zu beenden. Die Aufzeichnung endet
automatisch nach 20 Sekunden. Die Mitteilung wird
nach der Beendigung der Aufzeichnung automatisch
abgespielt.
Anmerkung: Wenn Sie statische Geräusche während
der Aufzeichnung im Hintergrund hören, ist das nor-
mal. Die Aufzeichnung kann nur über das Mikrofon auf
der Basisstation erfolgen. Versuchen Sie bitte nicht,
den Hörer zu verwenden, während Sie Ihre Notfallmit-
teilung aufzeichnen.
Notruf-Telefon Überprüfung von Informationen
Zur Einstellung sind die oben genannten Schritte (1)
bis (3) zu befolgen:
(4) Drücken Sie die Taste AUF noch einmal. Auf dem
LCD-Display wird CHECK MESSAGE angezeigt
(5) Drücken Sie die Taste OK/DIAL. Die aufgezeichnete
Sprachmitteilung wird abgespielt. Sie können die
Taste AUF drücken, um die Option DELETE anzuzeigen
und dann die Taste OK/DIAL, um die jeweilige Mittei-
lung zu löschen.
Einstellung der Notrufnummer(n)
Das SOS-Telefon unterstützt die automatische Wahl
von bis zu zehn (10) Notrufnummern/Kontakt-Telefon-
nummern, einschließlich 112. Befolgen Sie die oben
genannten Schritte (1) bis (3) und führen Sie dann
Folgendes aus:
(4) Drücken Sie die Taste AUF 2 Mal. Auf dem LCD-Di-
splay wird EMERGENCY NUMBER angezeigt
(weiter)
Drücken Sie zur Einstellung die Taste MENU, dann 3
Mal die Taste AUF, bis die Anzeige ENTER TIME/DATE
blinkt. Drücken Sie dann die Taste OK/DIAL, um zu be-
stätigen. Auf dem Display blinken die 2 letzten Ziern
der Jahreszahl 20„13”. Drücken Sie die Taste AUF oder
AB um das laufende Jahr zu ändern. Drücken Sie nach
der vorgenommenen Einstellung die Taste OK, um zu
bestätigen und verwenden Sie die gleiche Methode,
um Monat, Tag, Stunden & Minuten einzustellen.
EINSTELLUNG DER SPRACHE
Wenn das LCD-Display LCD LANGUAGE’ anzeigt,
drücken Sie die Taste OK/DIAL, um zur Option zur Ein-
stellung der Sprache zu gelangen. Die voreingestellte
Sprache ist Englisch. Drücken Sie die Taste AUF oder
AB, um eine andere Sprache einzustellen. Folgende
Sprachen sind verfügbar: Englisch, Französisch, Spani-
sch, Italienisch, Niederländisch und Deutsch. Drücken
Sie die Taste OK, wenn die Sprache ausgewählt
wurde, um zu bestätigen und gehen Sie zur nächsten
Einstellung über.
EINSTELLUNG DER SPRACHANSAGEN
Wenn das LCD-Display die Option VOICE anzeigt,
drücken Sie die Taste OK/DIAL, um auf die Option
VOICE zuzugreifen. Das LCD-Display zeigt den
aktuellen Status an: VOICE ON. Drücken Sie die Taste
AUF oder AB, um ON/OFF auszuwählen. Drücken Sie
dann die Taste OK/DIAL, um zu bestätigen. Wählen
Sie die Option ON, um Ansagen über die eingehende
Rufnummern, Menüpunkte und die vorgewählten
Rufnummern zu erhalten.
(weiter)
(5) Drücken Sie die Taste OK/DIAL 2 Mal, um in den
Eingabemodus zu gelangen (auf dem Display wird auf
der rechten Seite ein blinkender Cursor angezeigt).
(6) Verwenden Sie die kleine Tastatur auf der Basissta-
tion, um die Nummer einzugeben. Drücken Sie dann
die Taste OK/DIAL, um sie zu speichern.
(7) Drücken Sie die Taste AB, um eine weitere Notruf-
nummer hinzuzufügen.
(8) Drücken Sie die Taste OK/DIAL, um in den Einga-
bemodus zu gelangen (auf dem Display wird auf der
rechten Seite ein blinkender Cursor angezeigt).
(9) Verwenden Sie die kleine Tastatur auf der Basissta-
tion, um die Nummer einzugeben. Drücken Sie dann
die Taste OK/DIAL, um sie zu speichern.Wiederholen
Sie Schritt (7) – (9), um bis zu 10 Notrufnummern
einzugeben.
NUMMERN ÄNDERN: Sie können die Tasten AUF/AB
drücken, um die gespeicherte(n) Nummer(n) anzu-
zeigen. Drücken Sie dann die Taste OK/DIAL, um die
gespeicherte Nummer zu ändern oder drücken Sie die
Taste DEL, um die gespeicherte Nummer zu löschen.
TIPPS:
(1) Jede gespeicherte Nummer wird als CLIP 1, 2, 3,
... 10 angezeigt. Achten Sie bitte darauf, dass Sie CLIP
1, dann 2, dann 3 und so weiter verwenden, um die
Nummern in der korrekten Reihenfolge zu speichern.
(2) Es ist empfehlenswert, die Notrufnummer zu
speichern, BEVOR Sie Ihre NOTFALLMITTEILUNG auf-
zeichnen, da dieses Gerät jedes Mal, wenn Sie auf die
Einstellung des NOTRUFS zugreifen eine Neuaufnah-
me der Mitteilung versucht.
(weiter)
Características
- El teléfono SOS puede programarse para llamar au-
tomáticamente hasta 10 números de emergencia
- Compatible con hasta 5 colgantes inalámbricos (2
incluidos) - Hace llamadas de emergencia, ¡hasta 30
metros de la base!
- Puede reproducir un mensaje previamente grabado al
llamar números de emergencia
- Adaptado a audífonos - El volumen del auricular puede
amplificarse hasta +40 dB (interruptor: HI), timbre fuerte
estimado en 90+ dB
- Alerta de luz intermitente para llamada entrante visual
en el auricular
- Identificador de llamadas parlante ACTIVADO/DESACTI-
VADO – la voz anuncia las llamadas entrantes (números
telefónicos) y las opciones del menú
- Compatible con 6 idiomas en la pantalla e indicaciones
vocales (inglés, español, francés, italiano, holandés alemán)
- Pantalla LCD grande y fácil de leer con 5 niveles de brillo
y luz de fondo azul (funciona con pilas, no incluidas)
- Botones/teclas del teclado de marcación de gran
tamaño para facilitar el marcado
- El directorio puede almacenar hasta 50 registros telefón-
icos (nombres de 16 caracteres y números telefónicos)
- Funciones del control remoto:
(1) Presione el botón en el colgante para atender las llamadas,
(2) Marque números de emergencia previamente programados
(3) Dos botones de emergencia a 1 toque en la unidad base,
un (1) botón de emergencia a 1 toque en los colgantes
inalámbricos
- Puede almacenar hasta 20 registros telefónicos salientes
(nombres de 16 caracteres y números telefónicos)
- Conserva todos los registros telefónicos y parámetros en
caso de corte eléctrico (usa una memoria no volátil)
- Compatible con los sistemas identificadores de llama-
das dobles FSK/DTMF
Menú
Con el teléfono colgado, presione el botón MENÚ para
ingresar al modo de configuración.
La pantalla LCD mostrará el parámetro "CONTRASTE
DE LA PANTALLA LCD"; use los botones ARRIBA/ABAJO
para navegar/seleccionar los parámetros. Parámetros
disponibles: CONTRASTE DE LA PANTALLA LCD, CÓD-
IGO DE ÁREA LOCAL, INGRESAR HORA/FECHA, IDIOMA
EN LA PANTALLA LCD, VOZ, ESTABLECER HORA DE
DESTELLO, EMPAREJAR COLGANTE NUEVO, LLAMADA
DE EMERGENCIA)
Presione el botón OK/MARCAR para seleccionar el
parámetro mientras destella.
Presione el botón DIRECTORIO/ESC o espere 15
segundos para salir automáticamente del modo de
configuración.
Parámetro CONTRASTE DE LA PANTALLA LCD
Después de presionar el botón MENÚ, mientras la pan-
talla LCD muestra "CONTRASTE DE LA PANTALLA LCD",
presione el botón "OK/MARCAR". La pantalla mostrará
el brillo actual de la pantalla LCD (el valor por defecto
es 3). Use los botones "Arriba" o "Abajo" para cambiar
el ajuste de 1 a 5. Presione "OK" una vez que terminó
la configuración y pase a la configuración siguiente.
Parámetro INGRESAR HORA/FECHA
Tenga en cuenta que los datos relativos al mes, día,
hora y minuto se actualizan automáticamente en su
teléfono SOS con la información del identificador de
llamadas de las llamadas entrantes que recibe.
(continúa)
Parámetro EMPAREJAR COLGANTE NUEVO (OBLI-
GATORIO)
Siga los pasos siguientes para emparejar un colgante
(uno por vez) con la base.
(1) Presione el botón “MENÚ”
(2) Presione el botón “ARRIBA” 5 veces hasta que la
pantalla LCD indique “EMPAREJAR COLGANTE NUEVO”
(3) Presione el botón “OK/MARCAR” para seleccionar.
La palabra “EMPAREJAMIENTO” aparecerá en la
pantalla LCD.
(4) Presione de nuevo el botón “OK/MARCAR” y la
pantalla LCD indicará “EMPAREJAMIENTO........”.
(5) Presione una vez el botón “Rojo” de un colgante
inalámbrico. Si el emparejamiento tuvo éxito, la pa-
labra “TERMINADO” aparecerá en la pantalla LCD por
5 segundos. Tiene hasta 2 minutos para emparejar
su colgante con la base mientras permanezca en el
modo de emparejamiento.
Se puede emparejar un máximo de cinco (5) colgantes
inalámbricos (o controles remotos) a una base al mi-
smo tiempo. Si intenta emparejar más de 5 colgantes,
la palabra “COMPLETO” aparecerá en la pantalla LCD
en el paso (4) anterior.
En tal caso, no podrá emparejar un nuevo colgante a
menos que ELIMINE todos los colgantes inalámbricos
emparejados.
Para ELIMINAR los colgantes emparejados y empezar
de nuevo todo el proceso, siga los pasos (1) a (4)
anteriores y luego:
(5) Presione el botón “ARRIBA” y la pantalla LCD
indicará “ELIMINAR”.
(continúa)
El año es el único parámetro que debe ingresarse
manualmente. Para configurarlo, presione el botón
"MENÚ", luego tres veces el botón "ARRIBA" para
que aparezca "INGRESAR HORA/FECHA" y presione
finalmente el botón "OK/MARCAR" para confirmar. La
pantalla mostrará los últimos dos números de 20"13";
presione luego el botón "ARRIBA" o "ABAJO" para
modificar el año actual. Cuando termine, presione el
botón "OK" para confirmar y use el mismo método
para configurar el mes, el día, la hora y los minutos.
Parámetro IDIOMA
Cuando el mensaje "IDIOMA DE LA PANTALLA LCD"
aparezca en la pantalla LCD, presione el botón "OK/
MARCAR" para ingresar a la opción de la interfaz del
idioma; el idioma por defecto es "Inglés". Presione
"Arriba" o "Abajo" para cambiar de idioma. Los idio-
mas disponibles son: inglés, francés, español, italiano,
holandés y alemán. Una vez que seleccionó el idioma,
presione el botón "OK" para confirmar y siga con el
paso siguiente.
Parámetro INDICACIONES VOCALES
Cuando el mensaje “VOZ” aparezca en la pantalla
LCD, presione el botón “OK/MARCAR” para ingresar a
la opción INDICACIONES VOCALES. La pantalla LCD
indicará el estado actual: “VOZ ACTIVADA”. Presione el
botón “ARRIBA” o “ABAJO” para seleccionar “ACTIVAR/
DESACTIVAR” y luego el botón “OK/MARCAR” para
confirmar. Seleccione “ACTIVAR” para recibir anuncios
de los números telefónicos entrantes, los pasos opera-
tivos del menú y los números previamente marcados.
(continúa)
(6) Presione de nuevo el botón "OK/MARCAR", la
pantalla LCD indicará "ELIMINAR DISPOSITIVO" por 5
segundos y el mensaje "EMPAREJAR COLGANTE NUE-
VO" aparecerá en la pantalla LCD. Vuelva ahora al paso
(1) más arriba para emparejar su primer colgante.
Parámetro LLAMADA DE EMERGENCIA (OBLIGATORIO)
(1) Presione el botón “MENÚ”
(2) Presione el botón “ARRIBA” 7 veces (o el botón
“ABAJO” 1 vez) hasta que la pantalla LCD indique
“LLAMADA DE EMERGENCIA”
(3) Presione el botón “OK/MARCAR” para ingresar al
parámetro llamada de emergencia. Hay 3 elementos;
presione el botón “ARRIBA” para seleccionar y presione
el botón “OK/MARCAR” para ingresar los parámetros
relevantes, tal como se muestra abajo.
Grabación de la información vocal de la llamada de
emergencia
(4) Una vez que completó los pasos (1) a (3) anteriores,
cuando la pantalla LCD muestre “GRABAR MENSAJE”,
presione el botón “OK/MARCAR”,
(5) Cuando la pantalla LCD muestre el icono parpade-
ante “VOZ”, la grabación de la voz empieza. Al grabar,
una cuenta regresiva de 20 segundos aparecerá en
la pantalla LCD. Tiene 20 segundos para grabar su
mensaje.
Mensaje de muestra: “ESTA ES UNA LLAMADA DE EMER-
GENCIA, PARA ACEPTAR LA LLAMADA, SIGA APRETANDO
CERO”. Note que es necesario terminar siempre la
grabación con “PARA ACEPTAR LA LLAMADA, SIGA
APRETANDO CERO”
(continúa)
(6) Presione el botón “OK/MARCAR” para terminar la
grabación o terminará automáticamente después de
20 segundos. Se reproducirá automáticamente una
vez que termine la grabación.
Nota: Si escucha ruido de interferencias de fondo
mientras graba, es totalmente normal. La grabación
está disponible únicamente por medio del micrófono
en la base. No trate de usar el auricular al grabar su
mensaje de emergencia.
Verificación de la información telefónica de la
llamada de emergencia
Para configurar, siga los pasos (1) a (3) anteriores y
luego:
(4) Presione de nuevo el botón “ARRIBA”; la pantalla
LCD indicará “VERIFICAR MENSAJE”
(5) Presione el botón “OK/MARCAR” y se reproducirá
el mensaje vocal grabado. Puede presionar el botón
“ARRIBA” para mostrar “ELIMINAR” y luego “OK/MAR-
CAR” para eliminar el mensaje actual.
Parámetro Número(s) de la llamada de emergencia
El teléfono SOS permite el marcado automático de
hasta diez (10) números telefónicos de emergencia/
contactos, con el 112 incluido.
Siga los pasos (1) a (3) anteriores y luego:
(4) Presione el botón “ARRIBA” dos veces y la pantalla
LCD indicará “NÚMERO DE EMERGENCIA”
(5) Presione el botón “OK/MARCAR” 2 veces para
acceder al modo de ingreso (un cursor parpadeante
aparecerá a la derecha de la pantalla)
(6) Use el teclado de la base para ingresar el número.
Presione “OK/MARCAR” para guardarlo.
(continúa)
(7) Presione el botón “ABAJO” para añadir otro núm-
ero de emergencia.
(8) Presione el botón “OK/MARCAR” para acceder al
modo de ingreso (un cursor parpadeante aparecerá en
la parte inferior derecha de la pantalla)
(9) Use el teclado de la base para ingresar el número y
presione luego el botón “OK/MARCAR” para guardarlo.
Repita los pasos (7) a (9) para añadir hasta 10 números
de emergencia.
MODIFICAR NÚMEROS: Puede usar los botones “ARRI-
BA/ABAJO” para visualizar el/los número(s) almace-
nado(s). Luego, presione el botón “OK/MARCAR” para
modificar el número almacenado o presione el botón
“DEL” para eliminar el número almacenado.
CONSEJOS:
(1) Cada número almacenado aparecerá como FRAG-
MENTO 1, 2, 3, , , , 10. Asegúrese de usar FRAGMENTO
1, luego el 2, luego el 3 y así sucesivamente para
almacenar los números en la secuencia correcta.
(2) Recomendamos que almacene todos los números
de emergencia ANTES de grabar su MENSAJE DE
EMERGENCIA porque este dispositivo tratará de volver
a grabar un mensaje cada vez que acceda al parámet-
ro LLAMADA DE EMERGENCIA.
DIRECTORIO/ESC (Parámetro Directorio telefónico)
Cómo crear una nueva entrada en el directorio
telefónico
(1) Presione el botón “DIRECTORIO/ESC”,
(2) Presione el botón “MENÚ”; la pantalla LCD indicará
“ALMACENAR NÚMERO”
(continúa)
(3) Presione el botón “OK/MARCAR” e ingrese el núm-
ero 0-9, *, #, P y presione luego el botón “OK/MARCAR”
para guardar. Ingrese luego el nombre con el teclado
(del 2 al 9) para seleccionar las letras A a Z y presione
finalmente el botón “OK/MARCAR” para guardar.
CONSEJO: Al usar el teclado para ingresar nombres,
busque las letras debajo de cada número (del 2 al 9)
en el teclado.
Deberá presionar la tecla 2 o 3 veces para que
aparezca la letra deseada. Por ejemplo, para que
aparezca la “C”, debe presionar dos veces la tecla “2”.
Cómo modificar un registro del directorio telefónico
Presione DIRECTORIO y use los botones “ARRIBA” y
“ABAJO” para encontrar el registro telefónico que
desea modificar y presione luego el botón “MENÚ” por
3 segundos. La pantalla LCD indicará “¿MODIFICAR?”.
Presione “OK/MARCAR” de nuevo e ingrese a la modi-
ficación del número. Una vez que terminó, presione
“OK/MARCAR” para confirmar.
Cómo eliminar un registro del directorio telefónico
o TODOS los registros
Presione el botón “DIRECTORIO/ESC” y use los boto-
nes “ARRIBA” o “ABAJO” para encontrar el registro del
directorio telefónico que desea eliminar y presione
una vez el botón “DEL”. La pantalla LCD indicará
“¿ELIMINAR?”. Presione el botón “OK/MARCAR” para
confirmar.
Si mantiene apretado el botón “DEL” por 3 segundos,
la pantalla LCD indicará “¿ELIMINAR TODO?”. Presione
luego el botón “OK/MARCAR” para eliminar todos los
registros. La palabra “VACÍO” aparecerá en la pantalla
LCD. (continúa)
Visualización de los registros de la agenda
telefónica
Pulse el botón ‘BOOK / ESC’ para entrar en el estado
de consulta de la agenda telefónica y luego pulse los
botones ‘ARRIBA’ o ‘ABAJO’ para navegar por los regi-
stros; O introduzca directamente la primera letra del
nombre consultado. La pantalla LCD mostrará toda
la agenda comenzando con esa letra. A continuación,
pulse el botón ‘ABAJO’ o ‘ARRIBA’ para comprobar
uno por uno. Si no hay ningún número almacenado,
la pantalla LCD mostrará “VACÍO”. Si dentro de 30
segundos no hay más operación, entonces saldrá del
estado de consulta de la agenda.
Marcación de un número desde la agenda telefón-
ica
Presione el botón ‘BOOK / ESC’ para entrar en la agen-
da telefónica. Utilice los botones ‘ARRIBA’ o ‘ABAJO’
para encontrar el número deseado, luego presione el
botón ‘OK / DIAL’ para marcar este número.
Copiar / guardar una llamada entrante en la
agenda
Pulse el botón ‘MENU’ durante 3 segundos mientras
revisa los registros de llamadas entrantes. La pantalla
LCD mostrará “COPY TO MEMORY”, luego presione el
botón ‘OK / DIAL’. La pantalla LCD mostrará “SAVED”, lo
que significa que este número se ha copiado correcta-
mente en la agenda.
Para copiar una agenda al número de emergencia
SOS, pulse el botón SOS durante 3 segundos mientras
navega por los registros de la agenda.
(continúa)
Botón de arriba
En el estado de Descolgado, presione ARRIBA para
ingresar al modo de navegación de lista de llama-
das entrantes, luego utilice los botones ‘ARRIBA’ o
‘ABAJO’ para examinar los registros de llamadas
entrantes.
Presione el botón ‘DEL’ una vez al desplazar los
registros de llamadas entrantes. Se eliminará la vi-
sualización del registro. Pulse el botón ‘DEL’ durante
3 segundos para borrar todos los registros.
Botón ABAJO
En el estado de Descolgado, presione el botón
‘ABAJO’ para ingresar al modo de navegación de la
lista de llamadas salientes, luego utilice los botones
‘ARRIBA’ o ‘ABAJO’ para examinar los registros de
llamadas salientes.
Presione el botón ‘DEL’ una vez al desplazar los
registros de llamadas salientes para borrar el regi-
stro que se muestra. Pulse el botón ‘DEL’ durante 3
segundos para borrar todos los registros.
Botón DEL
La función o número apropiado se eliminará si se
pulsa el botón “DEL” mientras está en funciona-
miento y se marca.
(continúa)
Botón manos libres (naranja)
Use este botón en cualquier momento para
ACTIVAR el altavoz e iniciar el modo manos libres
en su teléfono SOS. Podrá entonces usar el teclado
para marcar números. Presione los botones M1,
M2 o SOS para el marcado rápido. También puede
presionar este botón mientras recorre los registros
de llamadas entrantes/salientes para marcar el
número que aparece.
Botones de MARCADO RÁPIDO (MEM1,MEM2)
Programación del almacenamiento de los números
de marcado rápido: Con el teléfono colgado,
presione por 3 segundos los botones “M1” o “M2”.
La pantalla LCD mostrará el número almacenado
original (de haber uno).
Presione el botón “DEL” para eliminar el número
original e ingrese el número nuevo.
Si no hay ningún número almacenado, ingrese
directamente el número.
Marcado rápido: Presione una vez el botón “M1” o
“M2” con el teléfono colgado para marcar el número
almacenado.
(continúa)
Botón SOS (emergencia)
El botón SOS de emergencia en la base disparará la
secuencia del marcado de emergencia.
Emitirá primero un “pitido” por 15 segundos para
avisarle al usuario que la función SOS está a punto de
empezar.
Luego, empezará a reproducir el MENSAJE DE
EMERGENCIA pregrabado y a ejecutar la secuencia de
marcado (números almacenados en los FRAGMENTOS
1 a 10).
Cómo hacer/detener las llamadas de emergencia
Para detener una secuencia de llamadas de emergen-
cia con el teléfono colgado, presione una vez el botón
naranja (altavoz) o el botón “SOS” de la base por 3 se-
gundos. También puede presionar el botón rojo “SOS”
del control remoto inalámbrico durante 3 segundos
para detener la secuencia. El teléfono seguirá emitien-
do un “pitido” por 15 segundos para avisarle al usuario
que la función SOS está a punto de empezar.
Si presiona el botón "SOS" (o los botones rojos de uno
de los colgantes) antes de trascurridos los 15 segun-
dos, se detendrá la llamada de emergencia.
Funciones de la llamadas SOS/de emergencia
A: Llamadas SOS/de emergencia: Presione el botón
SOS “ROJO” de un colgante emparejado para hacer
una llamada de emergencia.
Al presionar el botón SOS “ROJO”, la base del teléfono
SOS emitirá un pitido por 15 segundos para avisarle al
usuario que la función SOS está por empezar.
(continúa)
Una vez que empezó la llamada SOS, se detendrá la
llamada de emergencia si se descuelga el teléfono
SOS, si se presiona el botón manos libres (naranja) o
si se presiona el botón “SOS” de un colgante durante 3
segundos.Si no se almacenó ningún número de emer-
gencia, cuando se presiona el botón “SOS”, el teléfono
SOS emitirá el “pitido” por 15 segundos.
Cómo usar los colgantes inalámbricos (controles
remotos)
Los colgantes inalámbricos tienen 2 usos descritos a
continuación:
Contestar/cortar llamadas entrantes
Al recibir una llamada entrante, presione simplemente
el botón rojo “SOS” en el colgante inalámbrico por
3 segundos para contestar la llamada telefónica en
modo “manos libres” (con el altavoz encendido, por
ejemplo). Una vez que terminó la llamada telefónica,
puede presionar el botón rojo “SOS” en el colgante
inalámbrico para cortar la llamada telefónica.
Disparar una secuencia de llamadas de emergencia
Con el teléfono colgado, presione el botón “SOS” del
colgante inalámbrico por 3 segundos para iniciar
automáticamente el marcado del / de los número(s)
de emergencia almacenado(s).
----------------------------------------------------------------
Información sobre la certificación SAR (Specific Ab-
sorption Rate, índice de absorción específico).
El dispositivo cumple los estándares de la Unión Europea
(UE) que limitan la exposición humana a la radiofrecuencia
(RF) emitida por dispositivos de telecomunicación y radio.
Estos estándares impiden la venta de dispositivos móviles
que excedan un nivel de exposición máximo (denominado
también SAR) igual a 2,0 W/kg.
Luego, empezará a ejecutar la GRABACIÓN DE EMER-
GENCIA almacenada. La función SOS comenzará a
marcar el primer número almacenado (FRAGMENTO
01).
B: El teléfono SOS detectará si el destinatario apretó
“0” para contestar en los primeros 60 segundos; de
no ser el caso, el teléfono SOS cortará automáticam-
ente la llamada y marcará el siguiente número de
emergencia almacenado. Nota: La persona que recibe
la llamada deberá seguir apretando cero para que el
teléfono SOS la reconozca.
C: Si la persona que recibe la llamada contesta el
teléfono y presiona “0”, se detendrá la reproducción
del MENSAJE DE EMERGENCIA y se dará inicio
al primer estado manos libres de dos (2) minutos para
que ambas partes conversen.
D: En la primer llamada de 2 minutos, se detendrá
la llamada de emergencia si la persona que recibe
la llamada no presiona el botón “*”. En tal caso, se
cortará automáticamente la llamada para marcar el
siguiente número de emergencia almacenado. Diez
(10) segundos antes de que se terminen los 2 minutos,
el teléfono emitirá un “pitido”.
E: Durante esos 2 minutos, si la persona que recibe la
llamada presiona el botón asterisco “*” del teclado, se
extenderá la conversación por 2 minutos adicionales.
Diez (10) segundos antes de que se termine cada tiem-
po de 2 minutos, el teléfono SOS emitirá un “pitido”.
Cuando termine la llamada, basta simplemente con
cortar para finalizar la llamada de emergencia.
F: Cualquiera de las dos partes puede finalizar la
llamada de emergencia presionando la tecla “#”.
(continúa)
Auf dem LCD-Display erscheint "COPY TO MEMORY",
dann drücken Sie die Taste "OK / DIAL". Auf dem
LCD-Display erscheint "SAVED", was bedeutet,
dass diese Nummer erfolgreich in das Telefonbuch
kopiert wurde.
Um ein Telefonbuch in die SOS-Notrufnummer zu
kopieren, drücken Sie die SOS-Taste 3 Sekunden
lang, während Sie die Telefonbucheinträge durch-
suchen. Auf dem LCD-Display erscheint "COPY TO
SOS", dann drücken Sie die Taste "OK / DIAL". Auf
dem LCD-Display erscheint "SAVED", was bedeutet,
dass diese Nummer erfolgreich in die SOS-Notruf-
nummer kopiert wurde.
Wahlwiederholung / Pause (RD / PA) -Taste
Im Abheben- und Keinwahlzustand drücken Sie die
Taste “RD / PA”, um die zuletzt gewählte Nummer
erneut zu wählen.
Im O-Hook, nach Wahlwiederholung, wird es
als Pause mit einer Pausenzeit von 3,6 Sekunden
fungieren.
Im On-Hook-Status fungiert er als “Pause”, wenn
eine Zahl eingegeben wird.
FLASH-Taste
Der Blitz wird verwendet, um Dialton während des
Anrufs (Of-Hook) zu erhalten. Es wird auch verwen-
det, um zwischen Anrufen zu wechseln, wenn
Anklopfen verfügbar ist.
(weiter)
La pantalla LCD mostrará "COPY TO SOS", luego
presione el botón 'OK / DIAL'. La pantalla LCD mostrará
"SAVED", lo que significa que este número se ha copia-
do correctamente en el número de emergencia SOS.
Botón de remarcación / pausa (RD / PA)
En el modo Descolgado y sin marcar, presione el
botón 'RD / PA' para volver a marcar el último número
marcado.
En Descolgado, después de volver a marcar un núm-
ero, funcionará como Pausa, con un tiempo de pausa
de 3,6 segundos.
En el estado de Descolgado, funcionará como una
"Pausa" cuando se ingrese un número.
Botón FLASH
El Flash se utiliza para obtener el tono de llamada
mientras está en la llamada (Of-hook). También se uti-
liza para conmutar entre llamadas si está disponible la
llamada en espera.
Botón OK / DIAL
En el MENÚ, este botón se utiliza para confirmar la
entrada o la selección.
Puede marcar el número pre-marcado pulsando este
botón.
También puede marcar el número si lo pulsa al revisar
la llamada entrante / saliente o los registros de la
agenda
(continúa)
3
1
4
5
6
7
8
9
14
13
121110
2
3
1
4
5
6
7
8
9
14
13
121110
2
-
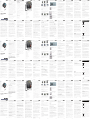 1
1
-
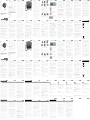 2
2


in altre lingue
Documenti correlati
Altri documenti
-
Telefunken TF591 Manuale del proprietario
-
SWITEL TF560 Manuale utente
-
SwissVoice MP03 Manuale utente
-
SWITEL M820 Manuale del proprietario
-
AEG Voxtel M320 Manuale del proprietario
-
SwissVoice MP-03 Manuale utente
-
Amplicomms BIGTEL 50 ALARM Guida utente
-
SWITEL M228 Manuale utente
-
SWITEL M215 Manuale del proprietario
-
SWITEL M222 Manuale utente