BorMann BTW3130 Istruzioni per l'uso

Tipo
Istruzioni per l'uso
WWW.NIKOLAOUTOOLS.GR 2
v2.2
037798

026136 026150 026112

049685 026129 037804026143
026525
EN EL
FR IT
BG SL
RO
2
WWW.NIKOLAOUTOOLS.GR
BTW3330 BTW3130
BTW3150 BTW3110
BTW3400 BTW3120
BTW3140 BTW3340 BTW3260
3WWW.NIKOLAOUTOOLS.GR
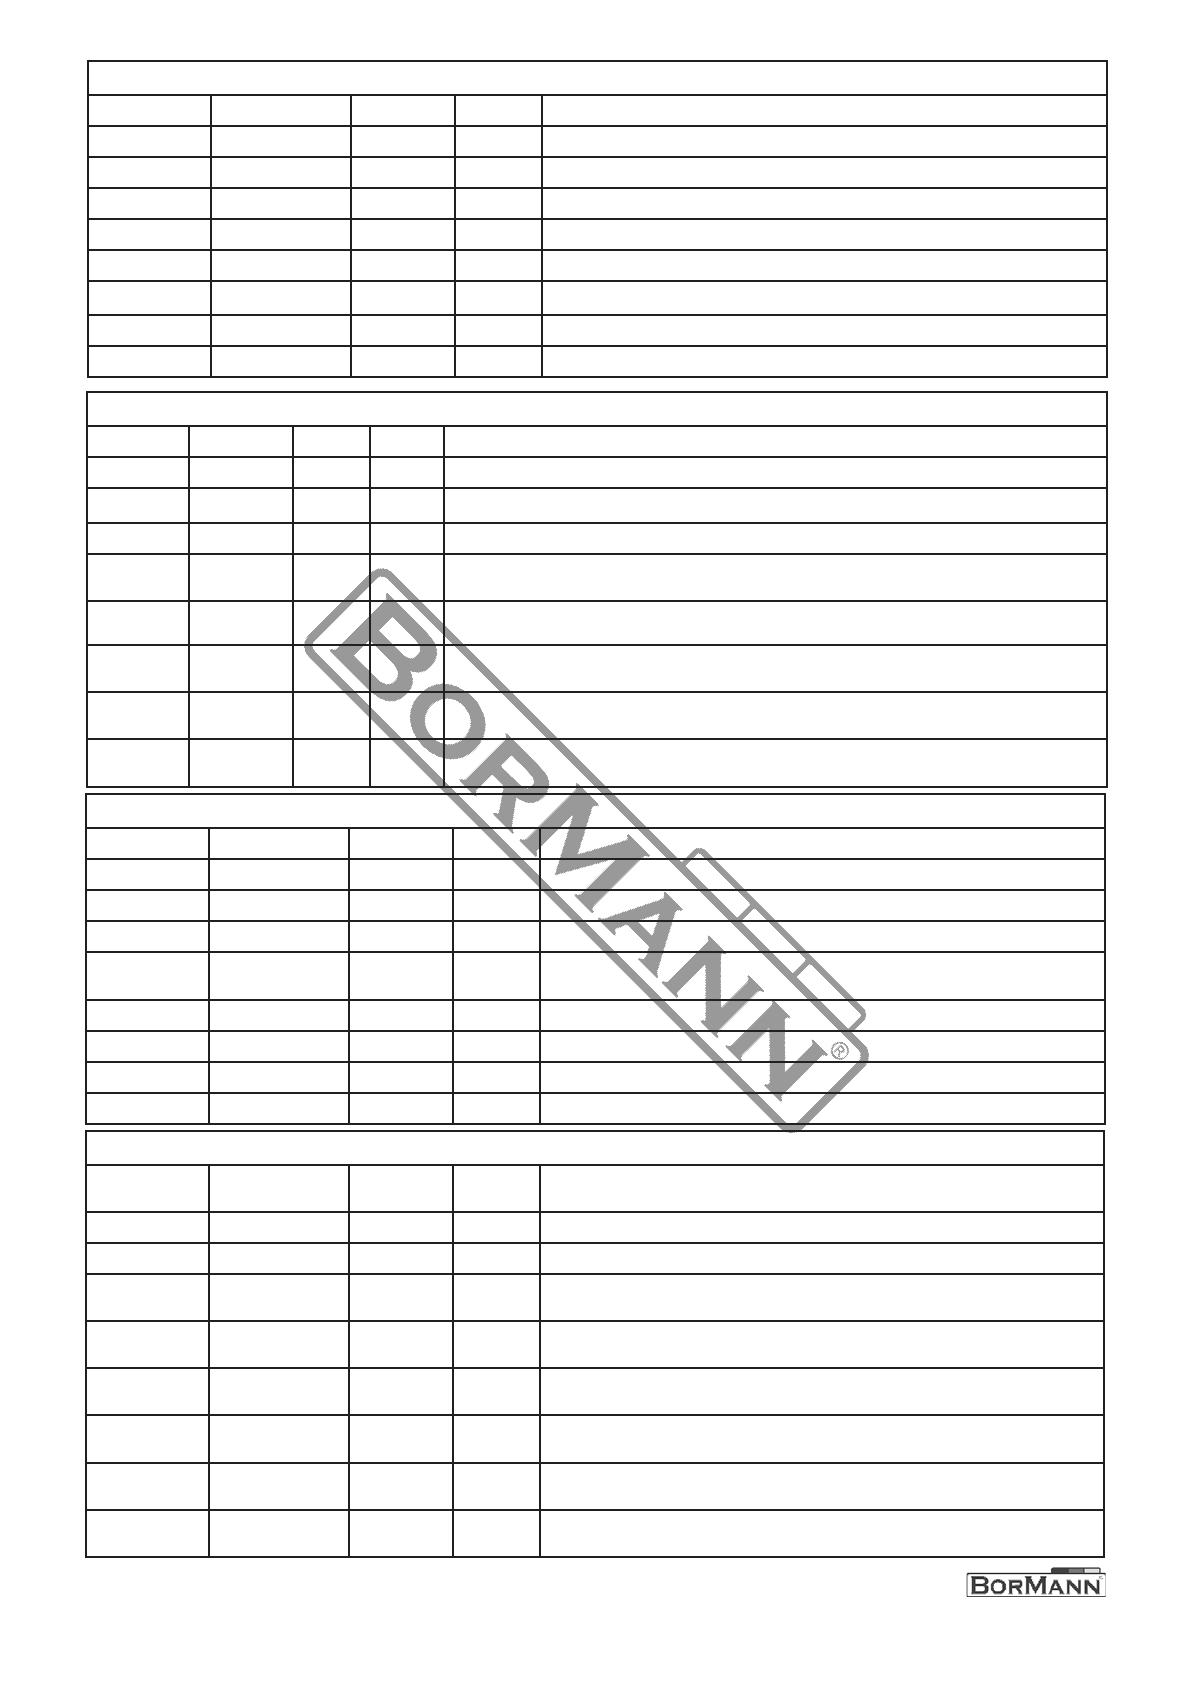
ΕN ΜΙΧΙΝG KITCHEN FAUCETS
ΕLIS BTW3330 35 mm 1720 g body: brass, handle: zinc, 40 cm stainless steel fl exible hose
ZEBRA BTW3130 35 mm 620 g body: brass, handle: zinc, stainless steel spout
SILVER BTW3150 --
body: brass, handle: zinc, stainless steel spout
SUPREME BTW3110 35 mm 520 g body: brass, handle: zinc, stainless steel fl exible hose
SERENA BTW3400 --
body: brass, handle: zinc, 40 cm stainless steel fl exible hose, pull out hand spray
STAR BTW3120 35 mm 450 g body: brass
JULIA BTW3140 40 mm 800 g body: brass
NADIA BTW3340 40 mm 1100 g body: brass
LIDA BTW3260 40 mm 1150 g body: brass, stainless steel fl exible hose
FR ROBINETS MÉLANGEURS POUR LA CUISINE
ELIS BTW3330 35 mm 1720 g corps : laiton, poignée : zinc, 40 cm de tuyau fl exible en acier inoxydable
ZEBRA BTW3130 35 mm 620 g corps : laiton, poignée : zinc, bec en acier inoxydable
SILVER BTW3150 - - corps : laiton, poignée : zinc, bec en acier inoxydable
SUPREME BTW3110 35 mm 520 g corps : laiton, poignée : zinc, tuyau fl exible en acier inoxydable
SERENA BTW3400 --
corps : laiton, poignée : zinc, tuyau fl exible en acier inoxydable de 40 cm, jet manuel
STAR BTW3120 35 mm 450 g corps: laiton
JULIA BTW3140 40 mm 800 g corps: laiton
NADIA BTW3340 40 mm 1100 g corps: laiton
LIDA BTW3260 40 mm 1150 g corps : laiton, tuyau fl exible en acier inoxydable
IT RUBINETTI MISCELATORI PER LA CUCINA
ELIS BTW3330 35 mm 1720 g corpo: o one, maniglia: zinco, tubo fl essibile in acciaio inox da 40 cm
ZEBRA BTW3130 35 mm 620 g corpo: o one, maniglia: zinco, beccuccio in acciaio inox
SILVER BTW3150 --
corpo: o one, maniglia: zinco, beccuccio in acciaio inox
SUPREME BTW3110 35 mm 520 g corpo: o one, impugnatura: zinco, tubo fl essibile in acciaio inox
SERENA BTW3400 --
corpo: o one, maniglia: zinco, tubo fl essibile in acciaio inox da 40 cm, spray manu-
ale estraibile
STAR BTW3120 35 mm 450 g corpo: o one
JULIA BTW3140 40 mm 800 g corpo: o one
NADIA BTW3340 40 mm 1100 g corpo: o one
LIDA BTW3260 40mm 1150 g corpo: o one, tubo fl essibile in acciaio inox
ΕL ΑΝΑΜΕΙΚΤΙΚΕΣ MΠΑΤΑΡΙΕΣ KOYZINAΣ
AVRA BTW3330 35 mm 1720 g σώμα: ορείχαλκος, λαβή: ψευδάργυρος, εύκαμπτος σωλήνας από ανοξείδωτο
ατσάλι, 40 cm
SIERRA BTW3130 35 mm 620 g σώμα: ορείχαλκος, λαβή: ψευδάργυρος, στόμιο από ανοξείδωτο ατσάλι
SILVER BTW3150 --
σώμα: ορείχαλκος, λαβή: ψευδάργυρος, στόμιο από ανοξείδωτο ατσάλι
SPRING BTW3110 35 mm 520 g σώμα: ορείχαλκος, λαβή: ψευδάργυρος, εύκαμπτος σωλήνας από ανοξείδωτο
ατσάλι
VIOLET BTW3400 --
σώμα: ορείχαλκος, λαβή: ψευδάργυρος, 40 cm εύκαμπτος σωλήνας από ανοξείδωτο
ατσάλι, χειροκίνητο σπρέι
STAR BTW3120 35 mm 450 g σώμα: ορείχαλκος
JULIA BTW3140 40 mm 800 g σώμα: ορείχαλκος
NADIA BTW3340 40 mm 1100 g σώμα: ορείχαλκος
LIDA BTW3260 40 mm 1150 g σώμα: ορείχαλκος, εύκαμπτος σωλήνας από ανοξείδωτο χάλυβα
4
WWW.NIKOLAOUTOOLS.GR
BG КУХНЕНСКИ СМЕСИТЕЛИ
ΕLIS BTW3330 35 mm 1720 g корпус: месинг, дръжка: цинк, гъвкав маркуч от неръждаема стомана с
дължина 40 cm
ZEBRA BTW3130 35 mm 620 g корпус: месинг, дръжка: цинк, чучур от неръждаема стомана
SILVER BTW3150 --
корпус: месинг, дръжка: цинк, чучур от неръждаема стомана
SUPREME BTW3110 35 mm 520 g корпус: месинг, дръжка: цинк, гъвкав маркуч от неръждаема стомана
SERENA BTW3400 --
корпус: месинг, дръжка: цинк, гъвкав маркуч от неръждаема стомана с
дължина 40 cm, издърпваща се ръчна пръскачка
STAR BTW3120 35 mm 450 g тяло: месинг
JULIA BTW3140 40 mm 800 g тяло: месинг
NADIA BTW3340 40 mm 1100 g тяло: месинг
LIDA BTW3260 40 mm 1150 g тяло: месинг, гъвкав маркуч от неръждаема стомана
SL MEŠANJE KUHINJSKIH PIP
ΕLIS BTW3330 35 mm 1720 g ohišje: medenina, ročaj: cink, 40 cm gibljive cevi iz nerjavečega jekla
ZEBRA BTW3130 35 mm 620 g ohišje: medenina, ročaj: cink, izliv iz nerjavečega jekla
SILVER BTW3150 --
ohišje: medenina, ročaj: cink, izliv iz nerjavečega jekla
SUPREME BTW3110 35 mm 520 g ohišje: medenina, ročaj: cink, gibljiva cev iz nerjavečega jekla
SERENA BTW3400 --
ohišje: medenina, ročaj: cink, 40 cm gibljiva cev iz nerjavečega jekla, izvlečni ročni
pršilnik
STAR BTW3120 35 mm 450 g ohišje: medenina
JULIA BTW3140 40 mm 800 g ohišje: medenina
NADIA BTW3340 40 mm 1100 g ohišje: medenina
LIDA BTW3260 40 mm 1150 g ohišje: medenina, gibljiva cev iz nerjavečega jekla
RO ROBINETE DE BUCĂTĂRIE
ΕLIS BTW3330 35 mm 1720 g corp: alamă, mâner: zinc, 40 cm furtun fl exibil din oțel inoxidabil
ZEBRA BTW3130 35 mm 620 g corp: alamă, mâner: zinc, gura de scurgere din oțel inoxidabil
SILVER BTW3150 --
corp: alamă, mâner: zinc, gura de scurgere din oțel inoxidabil
SUPREME BTW3110 35 mm 520 g corp: alamă, mâner: zinc, furtun fl exibil din oțel inoxidabil
SERENA BTW3400 --
corp: alamă, mâner: zinc, furtun fl exibil din oțel inoxidabil de 40 cm, pulverizator
manual detașabil
STAR BTW3120 35 mm 450 g corp: alamă
JULIA BTW3140 40 mm 800 g corp: alamă
NADIA BTW3340 40 mm 1100 g corp: alamă
5WWW.NIKOLAOUTOOLS.GR

Installa on
• Install the faucet with the assistance of a qualifi ed, licenced technician. These services are provided at extra cost.
• Make sure that the pressure control valve and the an -calciferous fi lter are mounted in the system of water supply.
• Otherwise, mount the required components on the water supply system, before you con nue to install the mixing faucet.
• Regulate the valve for the reduc on of pressure.
• Carefully wash the junc ons.
• Put the rubber packing on the bo om of the mixer tap.
• Posi on the mixing faucet, place the rubber sec on the on the mixing faucet body. Screw the threading rod, then mount the
washer. A er that, fasten the mixing faucet with a screw.
• Screw the fl exible hose in the recep on part of the mixing faucet, to ensure air  ghtness.
• With the help of the nut, connect the faucet to the connec on of the hot and cold water supply system
Service and Maintenance Instruc ons
In order to proceed to maintenance for long and comfortable opera on of the acquired item we recommend that you should:
1. install/maintain the faucet with the assistance of a qualifi ed, licenced technician. These services are provided at extra cost.
2. follow the instruc ons while installing.
3. use the fi lter of water purifi ca on with purifi ca on effi ciency no more than 315 micron.
4. periodically wipe the faucet with a cloth we ed in soapsuds and then clean it with a dry so fabric. It is expressly forbidden
to use acidiferous, chlorine - containing and abrasive cleaning fl uids.
5. Remove salt regularly by removing the components and placing them in a water-vinegar solu on for one hour. Then rinse
them with water and replace them.
* The manufacturer reserves the right to make minor changes to product design and technical specifi ca ons without prior no ce unless these chang-
es signifi cantly aff ect the performance and safety of the products. The parts described / illustrated in the pages of the manual that you hold in your
hands may also concern other models of the manufacturer's product line with similar features and may not be included in the product you just acquired.
* To ensure the safety and reliability of the product and the warranty validity, all repair, inspec on, repair or replacement work, includ-
ing maintenance and special adjustments, must only be carried out by technicians of the authorized service department of the manufacturer.
* Always use the product with the supplied equipment. Opera on of the product with non-provided equipment may cause malfunc ons or even serious
injury or death. The manufacturer and the importer shall not be liable for injuries and damages resul ng from the use of non-conforming equipment.
6WWW.NIKOLAOUTOOLS.GR

Installa on
- Installez le robinet avec l'aide d'un technicien qualifi é et agréé. Ces services sont fournis moyennant un coût supplémen-
taire.
- Assurez-vous que la vanne de régula on de pression et le fi ltre an -calcaire sont montés dans le système d'alimenta on en
eau.
- Sinon, montez les composants requis sur le système d'alimenta on en eau, avant de poursuivre l'installa on du robinet
mélangeur.
- Réglez la vanne de réduc on de la pression.
- Lavez soigneusement les jonc ons.
- Placez la garniture en caoutchouc sur le fond du robinet mélangeur.
- Posi onnez le robinet mélangeur, placez la sec on en caoutchouc sur le corps du robinet mélangeur. Vissez la ge fi letée,
puis montez la rondelle. Ensuite, fi xez le robinet mélangeur avec une vis.
- Vissez le tuyau fl exible dans la par e récep on du robinet mélangeur, pour assurer l'étanchéité.
- À l'aide de l'écrou, raccordez le robinet au raccordement du système d'alimenta on en eau chaude et froide.
Entre en
Afi n de procéder à l'entre en pour un fonc onnement durable et confortable de l'objet acquis, nous vous recommandons de
:
1. d'installer/entretenir le robinet avec l'assistance d'un technicien qualifi é et agréé. Ces services sont fournis moyennant un
coût supplémentaire.
2. de suivre les instruc ons lors de l'installa on.
3. u liser le fi ltre de purifi ca on d'eau dont l'effi cacité de purifi ca on ne dépasse pas 315 microns.
4. essuyez périodiquement le robinet avec un chiff on imbibé de savon et ne oyez-le ensuite avec un  ssu doux et sec. Il est
expressément interdit d'u liser des liquides de ne oyage acidifi ants, contenant du chlore et abrasifs.
5. Re rez régulièrement le sel en enlevant les composants et en les plaçant dans une solu on eau-vinaigre pendant une heu-
re. Rincez-les ensuite à l'eau et reme ez-les en place.
* Le fabricant se réserve le droit d'apporter des modifi ca ons mineures à la concep on et aux spécifi ca ons techniques des produits sans préavis, à moins
que ces modifi ca ons n'aff ectent de manière signifi ca ve les performances et la sécurité des produits. Les pièces décrites / illustrées dans les pages du ma-
nuel que vous tenez entre vos mains peuvent également concerner d'autres modèles de la gamme de produits du fabricant présentant des caractéris ques
similaires et peuvent ne pas être incluses dans le produit que vous venez d'acquérir.
* Pour garan r la sécurité et la fi abilité du produit et la validité de la garan e, tous les travaux de répara on, d'inspec on, de répara on ou de remplace-
ment, y compris l'entre en et les réglages spéciaux, doivent être eff ectués uniquement par des techniciens du service après-vente agréé du fabricant.
* U lisez toujours le produit avec l'équipement fourni. L'u lisa on du produit avec un équipement non fourni peut entraîner des dysfonc onnements, voire
des blessures graves ou la mort. Le fabricant et l'importateur ne sont pas responsables des blessures et des dommages résultant de l'u lisa on d'un équipe-
ment non conforme.
7WWW.NIKOLAOUTOOLS.GR

Installazione
- Installi il rubine o con l'assistenza di un tecnico qualifi cato e abilitato. Ques servizi sono forni a un costo aggiun vo.
- Si assicuri che la valvola di controllo della pressione e il fi ltro an -calcare siano monta nel sistema di alimentazione idrica.
- Altrimen , mon i componen necessari sulla rete idrica, prima di con nuare a installare il rubine o miscelatore.
- Regoli la valvola per la riduzione della pressione.
- Lavare accuratamente le giunzioni.
- Me a la guarnizione di gomma sul fondo del miscelatore.
- Posizionare il rubine o miscelatore, collocare la sezione in gomma sul corpo del rubine o miscelatore. Avvi l'asta di fi le at-
ura, quindi mon la rondella. Dopodiché, fi ssi il rubine o miscelatore con una vite.
- Avvi il tubo fl essibile nella parte di ricezione del rubine o miscelatore, per garan re la tenuta d'aria.
- Con l'aiuto del dado, colleghi il rubine o alla connessione del sistema di alimentazione dell'acqua calda e fredda.
Manutenzione
Al fi ne di procedere alla manutenzione per un funzionamento lungo e confortevole dell'ar colo acquistato, le consigliamo di:
1. installare/manutenere il rubine o con l'assistenza di un tecnico qualifi cato e abilitato. Ques servizi sono forni a un costo
aggiun vo.
2. seguire le istruzioni durante l'installazione.
3. u lizzare il fi ltro di purifi cazione dell'acqua con un'e cienza di purifi cazione non superiore a 315 micron.
4. pulisca periodicamente il rubine o con un panno bagnato di sapone e poi lo pulisca con un tessuto morbido e asciu o. È
espressamente vietato l'uso di detergen acidi, contenen cloro e abrasivi.
5. Rimuova regolarmente il sale rimuovendo i componen e me endoli in una soluzione di acqua e aceto per un'ora. Poi li sci-
acqui con acqua e li rime a.
* Il produ ore si riserva il diri o di apportare piccole modifi che al design del prodo o e alle specifi che tecniche senza preavviso, a meno che tali modifi che
non infl uiscano signifi ca vamente sulle prestazioni e sulla sicurezza dei prodo . Le par descri e/illustrate nelle pagine del manuale che  ene tra le mani
possono riguardare anche altri modelli della linea di prodo del produ ore con cara eris che simili e potrebbero non essere incluse nel prodo o appena
acquistato.
* Per garan re la sicurezza e l'a dabilità del prodo o e la validità della garanzia, tu i lavori di riparazione, ispezione, riparazione o sos tuzione, compresa
la manutenzione e le regolazioni speciali, devono essere esegui esclusivamente da tecnici del servizio di assistenza autorizzato del produ ore.
* U lizzare sempre il prodo o con l'apparecchiatura fornita. L'u lizzo del prodo o con apparecchiature non fornite può causare malfunzionamen o addirit-
tura lesioni gravi o morte. Il produ ore e l'importatore non sono responsabili per le lesioni e i danni derivan dall'uso di apparecchiature non conformi.
8WWW.NIKOLAOUTOOLS.GR

*Ο κατασκευαστής διατηρεί το δικαίωμα να πραγματοποιήσει δευτερεύουσες αλλαγές στο σχεδιασμό του προϊόντος και στα τεχνικά χαρακτηριστικά χωρίς
προηγούμενη ειδοποίηση, εκτός εάν οι αλλαγές αυτές επηρεάζουν σημαντικά την απόδοση και λειτουργία ασφάλειας των προϊόντων. Τα εξαρτήματα που
περιγράφονται / απεικονίζονται στις σελίδες του εγχειριδίου που κρατάτε στα χέρια σας ενδέχεται να αφορούν και σε άλλα μοντέλα της σειράς προϊόντων
του κατασκευαστή, με παρόμοια χαρακτηριστικά, και ενδέχεται να μην περιλαμβάνονται στο προϊόν που μόλις αποκτήσατε.
* Για να διασφαλιστεί η ασφάλεια και η αξιοπιστία του προϊόντος καθώς και η ισχύς της εγγύησης όλες οι εργασίες επιδιόρθωσης, ελέγχου, επισκευής ή
αντικατάστασης συμπεριλαμβανομένης της συντήρησης και των ειδικών ρυθμίσεων, πρέπει να εκτελούνται μόνο από τεχνικούς του εξουσιοδοτημένου
τμήματος Service του κατασκευαστή.
* Χρησιμοποιείτε πάντα το προϊόν με τον παρεχόμενο εξοπλισμό. Η λειτουργία του προϊόντος με μη-προβλεπόμενο εξοπλισμό ενδέχεται να προκαλέσει βλάβη
ή ακόμα και σοβαρό τραυματισμό ή θάνατο. Ο κατασκευαστής και ο εισαγωγέας ουδεμία ευθύνη φέρει για τραυματισμούς και βλάβες που προκύπτουν από
την χρήση μη προβλεπόμενου εξοπλισμού.
Εγκατάσταση/Τοποθέτηση
Η εγκατάσταση της αναμεικτικής μπαταρίας κουζίνας πρέπει να πραγματοποιηθεί μόνο από έναν εξειδικευμένο επαγγελματία,
ο οποίος κατέχει και την ανάλογη άδεια άσκησης επαγγέλματος.
• Βεβαιωθείτε ότι η βαλβίδα ελέγχου πίεσης και το φίλτρο κατά των αλάτων είναι τοποθετημένα στο σύστημα εισαγωγής
νερού. Διαφορετικά, τοποθετήστε τα απαραίτητα εξαρτήματα στο σύστημα παροχής νερού προτού συνεχίσετε με την
τοποθέτηση της βρύσης.
• Ρυθμίστε τη βαλβίδα για τη μείωση της πίεσης.
• Πλύνετε προσεκτικά τους συνδέσμους.
• Τοποθετήστε το λάστιχο στο κάτω μέρος της βρύσης.
Τοποθετήστε τη βρύση, τοποθετήστε το λάστιχο στον κορμό της βρύσης. Βιδώστε το τμήμα με το σπείρωμα, στη συνέχεια
τοποθετήστε τη ροδέλα. Στη συνέχεια, σταθεροποιήστε τη βρύση χρησιμοποιώντας μια βίδα.
• Βιδώστε καλά τον εύκαμπτο σωλήνα στην υποδοχή της βρύσης, για να εξασφαλίσετε στεγανότητα.
• Με τη βοήθεια του παξιμαδιού του σωλήνα συνδέστε τη βρύση με την υποδοχή του συστήματος παροχής νερού ζεστού
και κρύου νερού.
Οδηγίες Συντήρησης
Για την επίτευξη της βέλτιστης απόδοσης και της μέγιστης διάρκειας χρόνου ζωής παρακαλούμε να ακολουθήστε τις
παρακάτω οδηγίες:
1. Η εγκατάσταση/τοποθέτηση των προϊόντων πρέπει να πραγματοποιηθεί μόνο από έναν εξειδικευμένο επαγγελματία,
ο οποίος κατέχει την ανάλογη άδεια άσκησης επαγγέλματος, όπως ήδη αναφέρθηκε. Η εγκατάσταση / τοποθέτηση των
προϊόντων φέρουν επιπλέον κόστος.
2. Ακολουθήστε τις οδηγίες για την συντήρηση των αναμεικτικών μπαταριών.
3. Χρησιμοποιήστε ένα φίλτρο καθαρισμού νερού από υπολείμματα με ακρίβεια διήθησης 315 micron.
4. Για να διατηρήσετε το φινίρισμα και την λάμψη στα εξαρτήματα, συνιστάται περιοδικά να τα σκουπίζετε με ύφασμα
βρεγμένο με σαπούνι και στη συνέχεια να τα καθαρίζετε με ένα στεγνό και μαλακό ύφασμα. Είναι ρητά απαγορευμένη η
χρήση υγρών καθαρισμού που περιέχουν όξινα, χλωριούχα και διαβρωτικά καθαριστικά.
5. Αφαιρείτε τα άλατα τακτικά αφαιρώντας τα εξαρτήματα και τοποθετώντας τα σε ένα διάλυμα νερού - ξυδιού για μία ώρα.
Έπειτα ξεπλύνετε τα με νερό και επανατοποθετήστε τα.
9WWW.NIKOLAOUTOOLS.GR
Installa on
• Install the faucet with the assistance of a qualifi ed, licenced technician. These services are provided at extra cost.
• Make sure that the pressure control valve and the an -calciferous fi lter are mounted in the system of water supply.
• Otherwise, mount the required components on the water supply system, before you con nue to install the mixing faucet.
• Regulate the valve for the reduc on of pressure.
• Carefully wash the junc ons.
• Put the rubber packing on the bo om of the mixer tap.
• Posi on the mixing faucet, place the rubber sec on the on the mixing faucet body. Screw the threading rod, then mount the
washer. A er that, fasten the mixing faucet with a screw.
• Screw the fl exible hose in the recep on part of the mixing faucet, to ensure air  ghtness.
• With the help of the nut, connect the faucet to the connec on of the hot and cold water supply system
Service and Maintenance Instruc ons
In order to proceed to maintenance for long and comfortable opera on of the acquired item we recommend that you should:
1. install/maintain the faucet with the assistance of a qualifi ed, licenced technician. These services are provided at extra cost.
2. follow the instruc ons while installing.
3. use the fi lter of water purifi ca on with purifi ca on effi ciency no more than 315 micron.
4. periodically wipe the faucet with a cloth we ed in soapsuds and then clean it with a dry so fabric. It is expressly forbidden
to use acidiferous, chlorine - containing and abrasive cleaning fl uids.
5. Remove salt regularly by removing the components and placing them in a water-vinegar solu on for one hour. Then rinse
them with water and replace them.
* The manufacturer reserves the right to make minor changes to product design and technical specifi ca ons without prior no ce unless these chang-
es signifi cantly aff ect the performance and safety of the products. The parts described / illustrated in the pages of the manual that you hold in your
hands may also concern other models of the manufacturer's product line with similar features and may not be included in the product you just acquired.
* To ensure the safety and reliability of the product and the warranty validity, all repair, inspec on, repair or replacement work, includ-
ing maintenance and special adjustments, must only be carried out by technicians of the authorized service department of the manufacturer.
* Always use the product with the supplied equipment. Opera on of the product with non-provided equipment may cause malfunc ons or even serious
injury or death. The manufacturer and the importer shall not be liable for injuries and damages resul ng from the use of non-conforming equipment.
10 WWW.NIKOLAOUTOOLS.GR
Installa on
• Install the faucet with the assistance of a qualifi ed, licenced technician. These services are provided at extra cost.
• Make sure that the pressure control valve and the an -calciferous fi lter are mounted in the system of water supply.
• Otherwise, mount the required components on the water supply system, before you con nue to install the mixing faucet.
• Regulate the valve for the reduc on of pressure.
• Carefully wash the junc ons.
• Put the rubber packing on the bo om of the mixer tap.
• Posi on the mixing faucet, place the rubber sec on the on the mixing faucet body. Screw the threading rod, then mount the
washer. A er that, fasten the mixing faucet with a screw.
• Screw the fl exible hose in the recep on part of the mixing faucet, to ensure air  ghtness.
• With the help of the nut, connect the faucet to the connec on of the hot and cold water supply system
Service and Maintenance Instruc ons
In order to proceed to maintenance for long and comfortable opera on of the acquired item we recommend that you should:
1. install/maintain the faucet with the assistance of a qualifi ed, licenced technician. These services are provided at extra cost.
2. follow the instruc ons while installing.
3. use the fi lter of water purifi ca on with purifi ca on effi ciency no more than 315 micron.
4. periodically wipe the faucet with a cloth we ed in soapsuds and then clean it with a dry so fabric. It is expressly forbidden
to use acidiferous, chlorine - containing and abrasive cleaning fl uids.
5. Remove salt regularly by removing the components and placing them in a water-vinegar solu on for one hour. Then rinse
them with water and replace them.
* The manufacturer reserves the right to make minor changes to product design and technical specifi ca ons without prior no ce unless these chang-
es signifi cantly aff ect the performance and safety of the products. The parts described / illustrated in the pages of the manual that you hold in your
hands may also concern other models of the manufacturer's product line with similar features and may not be included in the product you just acquired.
* To ensure the safety and reliability of the product and the warranty validity, all repair, inspec on, repair or replacement work, includ-
ing maintenance and special adjustments, must only be carried out by technicians of the authorized service department of the manufacturer.
* Always use the product with the supplied equipment. Opera on of the product with non-provided equipment may cause malfunc ons or even serious
injury or death. The manufacturer and the importer shall not be liable for injuries and damages resul ng from the use of non-conforming equipment.
11 WWW.NIKOLAOUTOOLS.GR
Installa on
• Install the faucet with the assistance of a qualifi ed, licenced technician. These services are provided at extra cost.
• Make sure that the pressure control valve and the an -calciferous fi lter are mounted in the system of water supply.
• Otherwise, mount the required components on the water supply system, before you con nue to install the mixing faucet.
• Regulate the valve for the reduc on of pressure.
• Carefully wash the junc ons.
• Put the rubber packing on the bo om of the mixer tap.
• Posi on the mixing faucet, place the rubber sec on the on the mixing faucet body. Screw the threading rod, then mount the
washer. A er that, fasten the mixing faucet with a screw.
• Screw the fl exible hose in the recep on part of the mixing faucet, to ensure air  ghtness.
• With the help of the nut, connect the faucet to the connec on of the hot and cold water supply system
Service and Maintenance Instruc ons
In order to proceed to maintenance for long and comfortable opera on of the acquired item we recommend that you should:
1. install/maintain the faucet with the assistance of a qualifi ed, licenced technician. These services are provided at extra cost.
2. follow the instruc ons while installing.
3. use the fi lter of water purifi ca on with purifi ca on effi ciency no more than 315 micron.
4. periodically wipe the faucet with a cloth we ed in soapsuds and then clean it with a dry so fabric. It is expressly forbidden
to use acidiferous, chlorine - containing and abrasive cleaning fl uids.
5. Remove salt regularly by removing the components and placing them in a water-vinegar solu on for one hour. Then rinse
them with water and replace them.
* The manufacturer reserves the right to make minor changes to product design and technical specifi ca ons without prior no ce unless these chang-
es signifi cantly aff ect the performance and safety of the products. The parts described / illustrated in the pages of the manual that you hold in your
hands may also concern other models of the manufacturer's product line with similar features and may not be included in the product you just acquired.
* To ensure the safety and reliability of the product and the warranty validity, all repair, inspec on, repair or replacement work, includ-
ing maintenance and special adjustments, must only be carried out by technicians of the authorized service department of the manufacturer.
* Always use the product with the supplied equipment. Opera on of the product with non-provided equipment may cause malfunc ons or even serious
injury or death. The manufacturer and the importer shall not be liable for injuries and damages resul ng from the use of non-conforming equipment.
  • Page 1 1
  • Page 2 2
  • Page 3 3
  • Page 4 4
  • Page 5 5
  • Page 6 6
  • Page 7 7
  • Page 8 8
  • Page 9 9
  • Page 10 10
  • Page 11 11
  • Page 12 12

BorMann BTW3130 Istruzioni per l'uso

Tipo
Istruzioni per l'uso