Aastra OpenPhone 28 Manuale utente
- Categoria
- Telefoni
- Tipo
- Manuale utente

OpenPhone 28
DECT Telephone
User Guide
Communications systems
Aastra 800
OpenCom X320
OpenCom 130/131/150
OpenCom 510

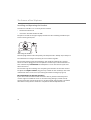
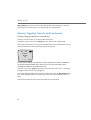
Welcome to Aastra
Thank you for choosing this Aastra product. Our product meets the strictest
requirements with regard to quality and design.
The following operating instructions will assist you in using your OpenPhone 28 and
answer most of the questions that may arise.
If you require further technical support or information about other Aastra products,
please refer to our website at http://www.aastra.de or http://www.aastra.com.
It provides additional notes and tips on the product.
We hope you enjoy using “OpenPhone”.
Aastra 800 and OpenCom 100
This user guide applies to the Aastra 800 and OpenCom 100 communications
systems. The OpenCom 100 product family comprises the OpenCom 130,
OpenCom 131, OpenCom 150, OpenCom 510 and OpenCom X320 communications
systems.
If individual features differ on the systems, a reference is made in this user guide.

1
Contents
OpenPhone 28. . . . . . . . . . . . . . . . . . . . . . . . . . . . . . . . . . . . . . . . . . . . . . . . . . . . . . . . . . . . . . . . 5
General Information . . . . . . . . . . . . . . . . . . . . . . . . . . . . . . . . . . . . . . . . . . . . . . . . . . . . . . 5
Authorisation is Required . . . . . . . . . . . . . . . . . . . . . . . . . . . . . . . . . . . . . . . . . . . . . . . . . . . 5
The Glossary . . . . . . . . . . . . . . . . . . . . . . . . . . . . . . . . . . . . . . . . . . . . . . . . . . . . . . . . . . . . . . . 5
Further Documentation . . . . . . . . . . . . . . . . . . . . . . . . . . . . . . . . . . . . . . . . . . . . . . . . . . . . 6
Safety Precautions. . . . . . . . . . . . . . . . . . . . . . . . . . . . . . . . . . . . . . . . . . . . . . . . . . . . . . . . . . 6
The Features of Your Telephone. . . . . . . . . . . . . . . . . . . . . . . . . . . . . . . . . . . . . . . . . . . 8
Using Your Telephone . . . . . . . . . . . . . . . . . . . . . . . . . . . . . . . . . . . . . . . . . . . . . . . . . . . . . 8
General Information . . . . . . . . . . . . . . . . . . . . . . . . . . . . . . . . . . . . . . . . . . . . . . . . . . . . . . . . 8
Power Supply / Power Failure / Batteries. . . . . . . . . . . . . . . . . . . . . . . . . . . . . . . . . . . . . 8
Usage. . . . . . . . . . . . . . . . . . . . . . . . . . . . . . . . . . . . . . . . . . . . . . . . . . . . . . . . . . . . . . . . . . . . . . 8
DECT and GAP . . . . . . . . . . . . . . . . . . . . . . . . . . . . . . . . . . . . . . . . . . . . . . . . . . . . . . . . . . . . . 9
Additional Notes . . . . . . . . . . . . . . . . . . . . . . . . . . . . . . . . . . . . . . . . . . . . . . . . . . . . . . . . . . . 9
Installation . . . . . . . . . . . . . . . . . . . . . . . . . . . . . . . . . . . . . . . . . . . . . . . . . . . . . . . . . . . . . . . 10
Scope of Delivery. . . . . . . . . . . . . . . . . . . . . . . . . . . . . . . . . . . . . . . . . . . . . . . . . . . . . . . . . . 10
If Your Handset has not been Assembled . . . . . . . . . . . . . . . . . . . . . . . . . . . . . . . . . . . 10
If your Handset has been Completely Assembled . . . . . . . . . . . . . . . . . . . . . . . . . . . 10
MEM Card. . . . . . . . . . . . . . . . . . . . . . . . . . . . . . . . . . . . . . . . . . . . . . . . . . . . . . . . . . . . . . . . . 10
Inserting the MEM Card. . . . . . . . . . . . . . . . . . . . . . . . . . . . . . . . . . . . . . . . . . . . . . . . . . . . 11
Removing the MEM Card . . . . . . . . . . . . . . . . . . . . . . . . . . . . . . . . . . . . . . . . . . . . . . . . . . 11
Inserting the Battery. . . . . . . . . . . . . . . . . . . . . . . . . . . . . . . . . . . . . . . . . . . . . . . . . . . . . . . 12
Removing the Battery . . . . . . . . . . . . . . . . . . . . . . . . . . . . . . . . . . . . . . . . . . . . . . . . . . . . . 12
Installing the Charger. . . . . . . . . . . . . . . . . . . . . . . . . . . . . . . . . . . . . . . . . . . . . . . . . . . . . .12
Charging the Handset . . . . . . . . . . . . . . . . . . . . . . . . . . . . . . . . . . . . . . . . . . . . . . . . . . . . . 13
Charging the Replacement Battery. . . . . . . . . . . . . . . . . . . . . . . . . . . . . . . . . . . . . . . . . 14
Recommendations for Battery Usage. . . . . . . . . . . . . . . . . . . . . . . . . . . . . . . . . . . . . . . 14
Installing and Operating the Headset . . . . . . . . . . . . . . . . . . . . . . . . . . . . . . . . . . . . . . 16
Belt Clip. . . . . . . . . . . . . . . . . . . . . . . . . . . . . . . . . . . . . . . . . . . . . . . . . . . . . . . . . . . . . . . . . . . 17
Commissioning . . . . . . . . . . . . . . . . . . . . . . . . . . . . . . . . . . . . . . . . . . . . . . . . . . . . . . . . . . 17
Handset Subscription (Checking In) . . . . . . . . . . . . . . . . . . . . . . . . . . . . . . . . . . . . . . . . 17
Background Information. . . . . . . . . . . . . . . . . . . . . . . . . . . . . . . . . . . . . . . . . . . . . . . . . . . 18

2
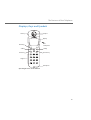
Displays, Keys and Symbols . . . . . . . . . . . . . . . . . . . . . . . . . . . . . . . . . . . . . . . . . . . . . . 19
Displays. . . . . . . . . . . . . . . . . . . . . . . . . . . . . . . . . . . . . . . . . . . . . . . . . . . . . . . . . . . . . . . . . . . 20
Symbols in the Display. . . . . . . . . . . . . . . . . . . . . . . . . . . . . . . . . . . . . . . . . . . . . . . . . . . . . 21
Information Line/Text Lines . . . . . . . . . . . . . . . . . . . . . . . . . . . . . . . . . . . . . . . . . . . . . . . . 21
Softkey Line. . . . . . . . . . . . . . . . . . . . . . . . . . . . . . . . . . . . . . . . . . . . . . . . . . . . . . . . . . . . . . . 22
Illumination . . . . . . . . . . . . . . . . . . . . . . . . . . . . . . . . . . . . . . . . . . . . . . . . . . . . . . . . . . . . . . . 22
Softkeys and Other Keys . . . . . . . . . . . . . . . . . . . . . . . . . . . . . . . . . . . . . . . . . . . . . . . . . 22
Softkey: Left Key. . . . . . . . . . . . . . . . . . . . . . . . . . . . . . . . . . . . . . . . . . . . . . . . . . . . . . . . . . . 22
Softkey: Right Key . . . . . . . . . . . . . . . . . . . . . . . . . . . . . . . . . . . . . . . . . . . . . . . . . . . . . . . . . 23
Softkey: Arrow Keys . . . . . . . . . . . . . . . . . . . . . . . . . . . . . . . . . . . . . . . . . . . . . . . . . . . . . . .23
Softkey: OK. . . . . . . . . . . . . . . . . . . . . . . . . . . . . . . . . . . . . . . . . . . . . . . . . . . . . . . . . . . . . . . . 23
Softkey: Esc . . . . . . . . . . . . . . . . . . . . . . . . . . . . . . . . . . . . . . . . . . . . . . . . . . . . . . . . . . . . . . . 24
Softkey: Redial . . . . . . . . . . . . . . . . . . . . . . . . . . . . . . . . . . . . . . . . . . . . . . . . . . . . . . . . . . . . 24
Softkey: Menu. . . . . . . . . . . . . . . . . . . . . . . . . . . . . . . . . . . . . . . . . . . . . . . . . . . . . . . . . . . . . 24
Automatic Hiding of Menus. . . . . . . . . . . . . . . . . . . . . . . . . . . . . . . . . . . . . . . . . . . . . . . . 24
Receiver Key . . . . . . . . . . . . . . . . . . . . . . . . . . . . . . . . . . . . . . . . . . . . . . . . . . . . . . . . . . . . . . 25
Cancel Key . . . . . . . . . . . . . . . . . . . . . . . . . . . . . . . . . . . . . . . . . . . . . . . . . . . . . . . . . . . . . . . . 25
R Key / Hash Key. . . . . . . . . . . . . . . . . . . . . . . . . . . . . . . . . . . . . . . . . . . . . . . . . . . . . . . . . . . 26
Star Key . . . . . . . . . . . . . . . . . . . . . . . . . . . . . . . . . . . . . . . . . . . . . . . . . . . . . . . . . . . . . . . . . . . 26
SOS Key . . . . . . . . . . . . . . . . . . . . . . . . . . . . . . . . . . . . . . . . . . . . . . . . . . . . . . . . . . . . . . . . . . . 27
Number Keys. . . . . . . . . . . . . . . . . . . . . . . . . . . . . . . . . . . . . . . . . . . . . . . . . . . . . . . . . . . . . . 27
Making Calls . . . . . . . . . . . . . . . . . . . . . . . . . . . . . . . . . . . . . . . . . . . . . . . . . . . . . . . . . . . . . . . . . 29
General Information . . . . . . . . . . . . . . . . . . . . . . . . . . . . . . . . . . . . . . . . . . . . . . . . . . . . . 29
Description of Operating Steps . . . . . . . . . . . . . . . . . . . . . . . . . . . . . . . . . . . . . . . . . . . . 29
Switching the Device Off/On. . . . . . . . . . . . . . . . . . . . . . . . . . . . . . . . . . . . . . . . . . . . . . . 29
Open Listening / Hands-Free Usage . . . . . . . . . . . . . . . . . . . . . . . . . . . . . . . . . . . . . . . . 29
Muting. . . . . . . . . . . . . . . . . . . . . . . . . . . . . . . . . . . . . . . . . . . . . . . . . . . . . . . . . . . . . . . . . . . . 30
Visual Call Indicator. . . . . . . . . . . . . . . . . . . . . . . . . . . . . . . . . . . . . . . . . . . . . . . . . . . . . . . . 30
Time / Alarm . . . . . . . . . . . . . . . . . . . . . . . . . . . . . . . . . . . . . . . . . . . . . . . . . . . . . . . . . . . . . . 30
Internal and External Call Numbers . . . . . . . . . . . . . . . . . . . . . . . . . . . . . . . . . . . . . . . . 30
Multiple Trunk Keys. . . . . . . . . . . . . . . . . . . . . . . . . . . . . . . . . . . . . . . . . . . . . . . . . . . . . . . . 30
Multiple Connections. . . . . . . . . . . . . . . . . . . . . . . . . . . . . . . . . . . . . . . . . . . . . . . . . . . . . . 31
DTMF Postdial/VF Signalling . . . . . . . . . . . . . . . . . . . . . . . . . . . . . . . . . . . . . . . . . . . . . . . 31
Call-charge Display . . . . . . . . . . . . . . . . . . . . . . . . . . . . . . . . . . . . . . . . . . . . . . . . . . . . . . . . 31
Redialling . . . . . . . . . . . . . . . . . . . . . . . . . . . . . . . . . . . . . . . . . . . . . . . . . . . . . . . . . . . . . . . . . 31
Telephone Lock . . . . . . . . . . . . . . . . . . . . . . . . . . . . . . . . . . . . . . . . . . . . . . . . . . . . . . . . . . . 31
Blocked/Unblocked Call Numbers. . . . . . . . . . . . . . . . . . . . . . . . . . . . . . . . . . . . . . . . . . 31
Keypad Dialling . . . . . . . . . . . . . . . . . . . . . . . . . . . . . . . . . . . . . . . . . . . . . . . . . . . . . . . . . . . 32

3
Least Cost Routing (LCR) . . . . . . . . . . . . . . . . . . . . . . . . . . . . . . . . . . . . . . . . . . . . . . . . . . . 32
Transmission of Call Numbers. . . . . . . . . . . . . . . . . . . . . . . . . . . . . . . . . . . . . . . . . . . . . . 33
Calls in the Call-waiting Queue. . . . . . . . . . . . . . . . . . . . . . . . . . . . . . . . . . . . . . . . . . . . . 34
Forwarding Calls . . . . . . . . . . . . . . . . . . . . . . . . . . . . . . . . . . . . . . . . . . . . . . . . . . . . . . . . . . 34
Menu Before and During a Connection. . . . . . . . . . . . . . . . . . . . . . . . . . . . . . . . . . . . . 36
“Selection” Menu in the Idle State . . . . . . . . . . . . . . . . . . . . . . . . . . . . . . . . . . . . . . . . . . 37
Making External/Internal Calls . . . . . . . . . . . . . . . . . . . . . . . . . . . . . . . . . . . . . . . . . . . 39
External Line Seizure (Manually / Automatically) and Entering Call Numbers. 39
Making a Call. . . . . . . . . . . . . . . . . . . . . . . . . . . . . . . . . . . . . . . . . . . . . . . . . . . . . . . . . . . . . . 40
Making a Call from the Redial List . . . . . . . . . . . . . . . . . . . . . . . . . . . . . . . . . . . . . . . . . . 41
Making a Call from the Telephone Book . . . . . . . . . . . . . . . . . . . . . . . . . . . . . . . . . . . . 42
Making a Call from the Call List. . . . . . . . . . . . . . . . . . . . . . . . . . . . . . . . . . . . . . . . . . . . . 43
Call Waiting with an Internal Subscriber . . . . . . . . . . . . . . . . . . . . . . . . . . . . . . . . . . . . 44
Voicebox Queries. . . . . . . . . . . . . . . . . . . . . . . . . . . . . . . . . . . . . . . . . . . . . . . . . . . . . . . . . . 44
Ending a Call . . . . . . . . . . . . . . . . . . . . . . . . . . . . . . . . . . . . . . . . . . . . . . . . . . . . . . . . . . . . . . 44
Using Routes to Make Calls . . . . . . . . . . . . . . . . . . . . . . . . . . . . . . . . . . . . . . . . . . . . . . . . 45
“Calling …” Menu. . . . . . . . . . . . . . . . . . . . . . . . . . . . . . . . . . . . . . . . . . . . . . . . . . . . . . . . . . 45
“Busy” Menu . . . . . . . . . . . . . . . . . . . . . . . . . . . . . . . . . . . . . . . . . . . . . . . . . . . . . . . . . . . . . . 47
Menu During a Call . . . . . . . . . . . . . . . . . . . . . . . . . . . . . . . . . . . . . . . . . . . . . . . . . . . . . . . .48
Accepting Calls . . . . . . . . . . . . . . . . . . . . . . . . . . . . . . . . . . . . . . . . . . . . . . . . . . . . . . . . . . . 49
Normal Call . . . . . . . . . . . . . . . . . . . . . . . . . . . . . . . . . . . . . . . . . . . . . . . . . . . . . . . . . . . . . . . 49
VIP Calls. . . . . . . . . . . . . . . . . . . . . . . . . . . . . . . . . . . . . . . . . . . . . . . . . . . . . . . . . . . . . . . . . . . 50
Calls During a Conversation. . . . . . . . . . . . . . . . . . . . . . . . . . . . . . . . . . . . . . . . . . . . . . . . 50
“Call” Menu . . . . . . . . . . . . . . . . . . . . . . . . . . . . . . . . . . . . . . . . . . . . . . . . . . . . . . . . . . . . . . . 51
“Call-Waiting” Menu . . . . . . . . . . . . . . . . . . . . . . . . . . . . . . . . . . . . . . . . . . . . . . . . . . . . . . .51
Enquiry, Toggling, Transfer and Conference . . . . . . . . . . . . . . . . . . . . . . . . . . . . . 52
Enquiry/Toggling by Means of the R-Key . . . . . . . . . . . . . . . . . . . . . . . . . . . . . . . . . . . 52
Transferring an Internal/External Call to an Internal Subscriber . . . . . . . . . . . . . . 53
Transferring an External Call to an External Subscriber . . . . . . . . . . . . . . . . . . . . . . 54
“Subscriber on Hold” Menu . . . . . . . . . . . . . . . . . . . . . . . . . . . . . . . . . . . . . . . . . . . . . . . . 54
Internal/External 3-Party Conference. . . . . . . . . . . . . . . . . . . . . . . . . . . . . . . . . . . . . . . 55
“Conference” Menu. . . . . . . . . . . . . . . . . . . . . . . . . . . . . . . . . . . . . . . . . . . . . . . . . . . . . . . .56
Special Calls/Conversations . . . . . . . . . . . . . . . . . . . . . . . . . . . . . . . . . . . . . . . . . . . . . . 57
Manual Emergency Call (SOS Call). . . . . . . . . . . . . . . . . . . . . . . . . . . . . . . . . . . . . . . . . . 57
Automatic Emergency Call (Mandown Call). . . . . . . . . . . . . . . . . . . . . . . . . . . . . . . . . 57
Accepting an Appointment Call. . . . . . . . . . . . . . . . . . . . . . . . . . . . . . . . . . . . . . . . . . . . 58
Baby Call. . . . . . . . . . . . . . . . . . . . . . . . . . . . . . . . . . . . . . . . . . . . . . . . . . . . . . . . . . . . . . . . . . 58
Doorbell, Door Opener . . . . . . . . . . . . . . . . . . . . . . . . . . . . . . . . . . . . . . . . . . . . . . . . . . . . 58
Entrance Intercom Calls. . . . . . . . . . . . . . . . . . . . . . . . . . . . . . . . . . . . . . . . . . . . . . . . . . . . 59

4
Announcements (with and without Intercom) . . . . . . . . . . . . . . . . . . . . . . . . . . . . . . 60
Answering a Callback. . . . . . . . . . . . . . . . . . . . . . . . . . . . . . . . . . . . . . . . . . . . . . . . . . . . . . 61
Making Calls from the Telephone Book . . . . . . . . . . . . . . . . . . . . . . . . . . . . . . . . . . 62
The OpenCom 100 / Aastra 800 Telephone Book. . . . . . . . . . . . . . . . . . . . . . . . . . . . 62
“Phone book” Menu . . . . . . . . . . . . . . . . . . . . . . . . . . . . . . . . . . . . . . . . . . . . . . . . . . . . . . . 62
Speed-Dialling . . . . . . . . . . . . . . . . . . . . . . . . . . . . . . . . . . . . . . . . . . . . . . . . . . . . . . . . . . . . 64
Add Call Numbers to Phone Book from Lists or During a Call . . . . . . . . . . . . . . . . 64
The Local Phone Book of Your OpenPhone 28 . . . . . . . . . . . . . . . . . . . . . . . . . . . . . . 66
Features and Menus . . . . . . . . . . . . . . . . . . . . . . . . . . . . . . . . . . . . . . . . . . . . . . . . . . . . . . . . 67
How to Set Features . . . . . . . . . . . . . . . . . . . . . . . . . . . . . . . . . . . . . . . . . . . . . . . . . . . . . . 67
Using Menus . . . . . . . . . . . . . . . . . . . . . . . . . . . . . . . . . . . . . . . . . . . . . . . . . . . . . . . . . . . . . . 67
Using the Star and Hash Keys . . . . . . . . . . . . . . . . . . . . . . . . . . . . . . . . . . . . . . . . . . . . . . 67
The Menus . . . . . . . . . . . . . . . . . . . . . . . . . . . . . . . . . . . . . . . . . . . . . . . . . . . . . . . . . . . . . . . 68
“Main” Menu . . . . . . . . . . . . . . . . . . . . . . . . . . . . . . . . . . . . . . . . . . . . . . . . . . . . . . . . . . . . . . 68
“Calls” Menu . . . . . . . . . . . . . . . . . . . . . . . . . . . . . . . . . . . . . . . . . . . . . . . . . . . . . . . . . . . . . . 69
“Call forwarding” Menu . . . . . . . . . . . . . . . . . . . . . . . . . . . . . . . . . . . . . . . . . . . . . . . . . . . . 71
“Messages” Menu . . . . . . . . . . . . . . . . . . . . . . . . . . . . . . . . . . . . . . . . . . . . . . . . . . . . . . . . .73
“Phone settings” Menu . . . . . . . . . . . . . . . . . . . . . . . . . . . . . . . . . . . . . . . . . . . . . . . . . . . . 75
“Protection” Menu. . . . . . . . . . . . . . . . . . . . . . . . . . . . . . . . . . . . . . . . . . . . . . . . . . . . . . . . . 80
“Connections” Menu. . . . . . . . . . . . . . . . . . . . . . . . . . . . . . . . . . . . . . . . . . . . . . . . . . . . . . . 82
“Phone book” Menu . . . . . . . . . . . . . . . . . . . . . . . . . . . . . . . . . . . . . . . . . . . . . . . . . . . . . . . 84
“Applications” Menu. . . . . . . . . . . . . . . . . . . . . . . . . . . . . . . . . . . . . . . . . . . . . . . . . . . . . . .86
“Central settings” Menu. . . . . . . . . . . . . . . . . . . . . . . . . . . . . . . . . . . . . . . . . . . . . . . . . . . . 86
Appendix . . . . . . . . . . . . . . . . . . . . . . . . . . . . . . . . . . . . . . . . . . . . . . . . . . . . . . . . . . . . . . . . . . . . . 88
Care and Maintenance . . . . . . . . . . . . . . . . . . . . . . . . . . . . . . . . . . . . . . . . . . . . . . . . . . . 88
Technical Data. . . . . . . . . . . . . . . . . . . . . . . . . . . . . . . . . . . . . . . . . . . . . . . . . . . . . . . . . . . . 89
CE Symbol. . . . . . . . . . . . . . . . . . . . . . . . . . . . . . . . . . . . . . . . . . . . . . . . . . . . . . . . . . . . . . . . 90
Declaration of Conformity . . . . . . . . . . . . . . . . . . . . . . . . . . . . . . . . . . . . . . . . . . . . . . . 90
Notes on Disposal . . . . . . . . . . . . . . . . . . . . . . . . . . . . . . . . . . . . . . . . . . . . . . . . . . . . . . . . 91
Main Menu . . . . . . . . . . . . . . . . . . . . . . . . . . . . . . . . . . . . . . . . . . . . . . . . . . . . . . . . . . . . . . . 92
Index. . . . . . . . . . . . . . . . . . . . . . . . . . . . . . . . . . . . . . . . . . . . . . . . . . . . . . . . . . . . . . . . . . . . . . . . . . . 93

OpenPhone 28
5
OpenPhone 28
General Information
The OpenPhone 28 is a cordless system terminal for use in conjunction with the
OpenCom 100 / Aastra 800 communications system. The newly designed menus
allow you to easily use and quickly access your system's many functions and features.
You can activate the features and programme functions on the handset itself, or
equally conveniently, use the Configurator of the OpenCom 100 / Aastra 800.
The OpenPhone 28 is suitable for use in office, in outdoor or in dusty environments.
The handset offers the following special features:
• SOS key for one touch emergency call
• Mandown switch: Position sensor triggers emergency call automatically
• The memory card inserted in your handset (MEM card) saves your personal set-
tings and telephone book. If you should change your handset, you will be able to
telephone immediately by inserting this MEM card in the new device.
• The device complies with industrial standard IP54 (splash- and dust proof)
Get to know your telephone equipment. You will discover many new functions that
simplify communication and organisation considerably.
Authorisation is Required
Most of the features mentioned in this user guide are only available to you if you have
the appropriate user authorisation. This will be set up by your system administrator
when configuring the communications system.
If you have any questions concerning a particular feature or are unable to use a par-
ticular feature, consult your system administrator.
The Glossary
This operating instruction describe all the basic functions of your handset. Should you
require further information on the communications system's features, please refer to
the glossary provided with your communications system.

OpenPhone 28
6
Further Documentation
Refer also to the other documentation supplied with the components of your com-
munications system. This documentation is available on the OpenCom 100 product
CD (on the USB stick that comes with an Aastra 800).
Safety Precautions
Only use this product in countries where the relevant authorities have authorised its
operation.
This product complies with protection class IP54 according to IEC 529 / EN 60 529
(dust-proof and splash-proof).
Please observe the following notes on safety when setting up, connecting and
using the handset:
• Do not place the handset in areas subject to danger of explosion.
• Do not place the handset, the charging station or accessories near:
– water, moisture or damp areas (e.g. bathroom)
– heat sources, direct sunlight or inadequately ventilated areas
– devices that produce strong magnetic fields, electrical devices, fluorescent
lamps, computers, radios and television sets
– areas where the equipment may be covered, where its ventilation is impaired or
where it may be penetrated by fluids. Do not leave the handset lying, for example,
uncovered outside in the rain.
– areas subject to vibration, shock or extreme temperature fluctuations.
Please observe the following notes on safety when setting up, connecting and using
the handset:
• Connect only approved accessories.
• Only use the supplied AC adapter with the no. 4999045014 (no. 4999051605 for
the UK) or the AC adapter plus (no. 4999070859, no. 4999070860 for the UK).
• Do not use AC adapters which are visibly damaged (cracked or broken casing).
• Research has shown that in certain cases mobile telephones (DECT) that are
switched on can affect medical equipment. If you are using mobile telephones
within a medical establishment, then please observe its regulations.

OpenPhone 28
7
• Generally, other electronic equipment is protected from interference by radio-
based equipment. Electronic equipment that is inadequately shielded may be
subject to malfunction.
• Do not throw the battery pack into a fire, as there is risk of explosion. To prevent
injuries or fire damage, do not connect the contact points of the batteries with
other electroconductive components or short-circuit them.
Please note: Please check before telephoning to make sure that there are no
small, loose pieces of metal in the earpiece or loudspeaker (re-
verse side) areas that could potentially stick to the built-in mag-
nets in the casing (risk of injury).
WARNING! Never
– open the telephone yourself!
– touch the plug contacts with pointed metallic objects!
• Only wipe your telephone clean with a slightly damp cloth.
• Place and/or store the handset and accessories out of the reach of small children.

The Features of Your Telephone
8
The Features of Your Telephone
Using Your Telephone
General Information
The OpenPhone 28 is a cordless telephone designed for operation in the
OpenCom 100 / Aastra 800 communications system. In addition to convenient
softkey control of system features, this telephone also offers a variety of features that
allow you to make calls more easily. You can also operate your handset in other com-
munications systems, which means you can use the same handset in different places.
Furthermore, it is possible to operate the handset in communications systems made
by other manufacturers, as long as they meet the GAP standard.
Power Supply / Power Failure / Batteries
This product requires a 230 V alternating current power supply. This product can only
be switched off by removing the adapter plug from the mains socket.
The mains supply voltage in some countries is 110 V. The corresponding adapter plug
can be obtained as accessory. Please consult with customer service of your supplier
for this.
In the case of power failure, all memory storage (program and user data) are pre-
served without alteration.
Important tips regarding the use of the batteries can be found on page 14.
Usage
This handset, like any cordless telephone, operates using radio signals, which do not
always guarantee a connection being established under all circumstances. For this
reason, you should never rely solely upon any cordless telephone for essential com-
munication (e.g. medical emergencies).

The Features of Your Telephone
9
DECT and GAP
Your handset uses a digital radio connection in accordance with the DECT (Digital
Enhanced Cordless Telephone) standard for the connection to the base station. The
digital channel guarantees superior voice quality without static or background noise.
For signalling between the communications system and the handset, the
OpenPhone 28 uses the Generic Access Profile (GAP).
The Generic Access Profile (GAP) and the DECT standard define procedures used by
digital cordless telephones to establish connections. The GAP standard is not manu-
facturer-specific so it is possible to combine the communication systems and
handsets of different vendors. The basic functions (making and receiving calls) are
always possible with in these combinations, but other functions provided by your
OpenCom 100 / Aastra 800 communications system together with your handset
(e.g. display of call numbers or call charges) may not be available when communica-
tions systems produced by other manufacturers are used.
Additional Notes
Depending on the digital transmission in the frequency range used and also on the
technical environment within the range of coverage, silent zones may occur. In this
case, transmission quality can be diminished by multiple, short transmission gaps.
Slight movement out of the silent zone will restore typical transmission quality. The
connection will be lost if the handset is moved out of range.
In order to avoid radio coupling into other electronic equipment, we recommend the
maximum possible distance (min. 1m) between the handset and other devices (e.g.
radios, loudspeakers etc.).
Before using the handset, people with hearing aids should note that radio signals can
couple into hearing aids and if strong enough can cause an unpleasant buzzing
sound.

The Features of Your Telephone
10
Installation
Scope of Delivery
Please check the contents upon receiving your OpenPhone 28:
• Handset OpenPhone 28 with belt clip and MEM card
• Replacement battery
• Charging station
• AC Adapter (no. 4999045014, no. 4999051605 for the UK) 230 V with connection
cable
If Your Handset has not been Assembled
If your handset has been delivered unassembled, you must:
• insert the MEM card (see page 11),
• insert the battery (see page 12) and
• if necessary, remove the protective film from the display.
• Your system administrator must subscribe the handset to your communication
system.
Your OpenPhone 28 is then ready to operate.
Now install the charging station (see page 12).
If your Handset has been Completely Assembled
If your handset has been delivered completely assembled and it is subscribed to your
communications system, then you only need to install the charging station (see
page 12).
MEM Card
It is only possible to make a telephone call with your handset when the MEM card has
been inserted (condition upon delivery). It saves important data of your handset, such
as your personal telephone book. If you should change your handset at some point,
you will be able to telephone immediately using this MEM card.

The Features of Your Telephone
11
The MEM card manager can be obtained as an accessory and can be used to edit the
data stored on the MEM card. If you wish to purchase this product, please consult with
customer service of your supplier.
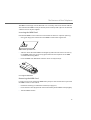
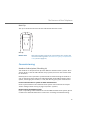
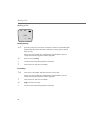
Inserting the MEM Card
Provided the MEM card has not been inserted into the device or requires replacing:
• Using your finger, first remove the small MEM card from the larger frame.
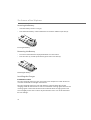
MEM card in OpenPhone 28
• Slide the short side of the MEM card diagonally under the two small crescents (a)
in the MEM card panel (1). The shiny gold-coloured contact points on the MEM
card should be facing down!
• Press the MEM card downwards until the small catch (b) locks (2).
Inserting the MEM card
Removing the MEM Card
It is only necessary to remove the MEM card if you pass on the handset or if you need
the MEM card for a new handset.
• Remove the battery pack from the handset (see page 12).
• Press the little catch (b) upwards and simultaneously lift the MEM card up slightly.
• Take the MEM card out.
2
1
a
b

The Features of Your Telephone
12
Inserting the Battery
• Slide the battery into the casing (1).
• Press down the battery at the end with the latch until it audible snaps shut (2).
Inserting the battery
Removing the Battery
• Place the handset with the display downwards on a flat surface.
• Press the latch (1) and lift up the battery pack at the same time (2).
Removing the battery
Installing the Charger
Installation location
Place the charging station on a flat, even surface, for example on a table. Choose an
area that is free of direct sunlight and moisture.
Place the charging station on a non slip underlay, especially when placing the
charging station on furniture that is new or treated with cleaning agents. Varnish and
cleaning agents can dissolve the feet on the underside of the charging station and
leave unsightly marks on the surface of your furniture. Aastra can not be held liable
for such damage.
2
1
2

The Features of Your Telephone
13
Recommendations for AC adapter plug
The adapter plug components for the standard charging station and the charging
station plus differ in respect to the low voltage pin assignments and the rating. Use
only the standard adapter plug (named Adapter Plug No. 4999045014, no.
4999051605 for the UK) for the standard charging station (here named Charging
Station) and only the adapter plug plus (named Adapter Plug Plus No. 4999070859,
no. 4999070860 for the UK) for the charging station plus.
• Plug the small end of the connecting cord into the back of the charging station.
• Plug the adapter plug into a power socket.
The charging station is now ready to operate.
Charging the Handset
Simply place the handset in the charging station. You will hear an acoustic confir-
mation signal. The display illumination will illuminate briefly. Your handset will
remain switched on or off.
The battery symbol in the symbol line is animated until the battery is completely
charged. The batteries will turn slightly warm during charging. This is normal.
Charging Station (Standard)
Charging Station Plus

The Features of Your Telephone
14
Charging the Replacement Battery
If you have a Charging Station Plus (accessory part) you can use it to charge a
replacement battery pack. The replacement battery pack can be charged simultane-
ously with the handset.
• Fold open the charging station plus (1).
• Place the replacement battery correctly in the designated compartment (2).
• The LED at the base of the charging station changes from green to red and indi-
cates that the replacement battery pack has been inserted correctly and that it is
charging.
• When the replacement battery has been completely charged, the charging pro-
cedure stops. The LED turns back to green.
Charging Station Plus: Charging the replacement battery
Recommendations for Battery Usage
Do not throw the battery into a fire, as there is risk of explosion.
To prevent injury or fire damage, do not connect the contact points of the batteries
with other electroconductive components or short-circuit them.
When a new battery is inserted, the charging level is initially unknown to the handset.
The battery symbol is first displayed in the handset after the first complete charging
cycle! Place the handset in the charging compartment for at least 14 hours after
inserting a new battery in order to completely charge it.
You can leave the handset permanently in the charging station. The battery pack can
not be overcharged.
1
2

The Features of Your Telephone
15
You can remove the battery pack from the handset if you are not going to use the tel-
ephone for an extended period of time, for example when you go on holiday. You will
see that the battery pack will only have discharged minimally when you re-install it at
a later date.
Do not leave the battery pack in direct sunlight. You will be rewarded with a long
battery life.
Charging and operating times
Charging time: (fully discharged battery) approximately 5 hours to be fully charged.
Talk time: up to 8 hours (when fully charged).
Stand-by time: up to 75 hours (when fully charged).
Note
Batteries with an unknown charging status are fully charged in approximately
14 hours.
Charge display
The charging status of the battery is shown in the display as follows:
Charge warning
When the battery capacity is nearly exhausted, the battery symbol will flash in the
display.
If you are making a call at the time, you still have up to three minutes of talk time
before the handset switches itself off. If you are not making a call and the handset is
not in the charging station, “Battery empty” appears in the display. Now you can no
longer make a telephone call.
80 - 100 % charged
60 - 80 % charged
40 - 60 % charged
20 - 40 % charged
0 - 20 % charged
(Frame flashes) Battery nearly discharged

The Features of Your Telephone
16
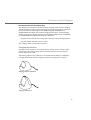
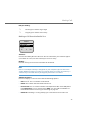
Installing and Operating the Headset
A headset is available as an accessory for the handset:
• Headset Standard T171
• alternative: Headset Comfort TC 500
The port is located on the upper right part of the handset. Carefully pull off the pro-
tective covering of the port.
Connecting the headset
Push the plug of the headset completely into the port until it audibly snaps into place.
For information on using the headset, please read the user guide.
The headset enables hands-free telephony. Your handset automatically registers
when a headset is plugged in. The microphone and the earpiece of the handset are
then automatically switched off. The loudspeaker can be switched on if you want
others to listen in.
The handset rings for incoming calls. Everything else functions in the usual manner.
To adjust the earpiece volume, long press up or down on the arrow keys until a low
confirmation tone can be heard. (see Setting the volume starting on page 29).
Recommendation for headset operation
If you connect the headset to other electronic devices, potential extremely loud
acoustic signals or feed back noise can lead to hearing damage (acoustic shock).
Hearing protection against loud noises is not guaranteed if the headset is used with
other devices. Only use this headset in conjunction with the OpenPhone 28.

The Features of Your Telephone
17
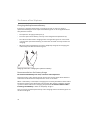
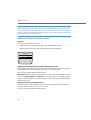
Belt Clip
The clip is attached on the back of the handset with two small screws.
Belt clip
Please note: Attach the handset vertically on your clothing; this ensures the
correct functioning of the “Automatic Emergency Call (Mandown
Call)” (see also page 57).
Commissioning
Handset Subscription (Checking In)
Your handset can be operated in up to ten different communications systems. To be
able to do this, it must be subscribed to every system, this means: the handset must
be checked in.
Normally the check-in operation is performed when commissioning the handset. If
you are operating your handset in the OpenCom 100 / Aastra 800 communications
system, checking in your handset, as a rule, will done by your system administrator.
For the communications systems of other manufacturers:
Check-in your handset in the communications system as described in the chapter
“Phone settings” Menu starting on page 75 (section “System”).
Note for the System Administrator
If you are operating a DECT network on an Aastra 800 communications system, please
read the more detailed information as well in the “Installing and Commissioning”

The Features of Your Telephone
18
guide and in the online help on the topics DECT networks and DECT areas. This is
where you will find details on configuring DECT base stations and on checking in
DECT terminals in DECT areas.
Background Information
Checking in
The OpenCom 100 / Aastra 800 check-in operation for handsets is initiated via the
Web console, either by the system administrator or by a user with administrator
rights. You will need the following information if you wish to subsequently subscribe
a handset yourself.
There are two check-in procedures. Depending on which procedure is used, there are
different time limits for the completion of the check in and you may also have to enter
an authentication code.
• Simplified procedure: The handset must be checked in to the communications
system within three minutes. This convenient procedure enables you to check in
any DECT telephone within this short period of time (“the next handset is being
checked in”). This means: all menu items in the “Subscription” menu must be con-
firmed with
OK
.
• Secured procedure: The handset must be checked in within one hour. You will
need to know the IPEI of your handset and you may also have to enter an authen-
tication code (AC) for this check-in procedure. The IPEI can be read from the
handset's “System” menu (see page 77); the AC can be obtained from your system
administrator or read from the DECT Phones menu in the Configurator of the
OpenCom 100 / Aastra 800 (Web console).
Subscription
The handset will store a subscription record for each communications system it has
been checked into. Each subscription record includes, among other information, a
name; whenever the handset enters the range of a base station, this name will be
appear in the handset’s display.
Registration
Once the handset has been subscribed to one or more communications systems you
can make and receive calls. If you have activated the Auto Search feature (see
page 76), the handset (in the idle state) will automatically register with the nearest
base station within range. If you do not want to use the auto search feature, you can
manually register the handset with a base station using the subscription record
stored in the handset.
La pagina si sta caricando...
La pagina si sta caricando...
La pagina si sta caricando...
La pagina si sta caricando...
La pagina si sta caricando...
La pagina si sta caricando...
La pagina si sta caricando...
La pagina si sta caricando...
La pagina si sta caricando...
La pagina si sta caricando...
La pagina si sta caricando...
La pagina si sta caricando...
La pagina si sta caricando...
La pagina si sta caricando...
La pagina si sta caricando...
La pagina si sta caricando...
La pagina si sta caricando...
La pagina si sta caricando...
La pagina si sta caricando...
La pagina si sta caricando...
La pagina si sta caricando...
La pagina si sta caricando...
La pagina si sta caricando...
La pagina si sta caricando...
La pagina si sta caricando...
La pagina si sta caricando...
La pagina si sta caricando...
La pagina si sta caricando...
La pagina si sta caricando...
La pagina si sta caricando...
La pagina si sta caricando...
La pagina si sta caricando...
La pagina si sta caricando...
La pagina si sta caricando...
La pagina si sta caricando...
La pagina si sta caricando...
La pagina si sta caricando...
La pagina si sta caricando...
La pagina si sta caricando...
La pagina si sta caricando...
La pagina si sta caricando...
La pagina si sta caricando...
La pagina si sta caricando...
La pagina si sta caricando...
La pagina si sta caricando...
La pagina si sta caricando...
La pagina si sta caricando...
La pagina si sta caricando...
La pagina si sta caricando...
La pagina si sta caricando...
La pagina si sta caricando...
La pagina si sta caricando...
La pagina si sta caricando...
La pagina si sta caricando...
La pagina si sta caricando...
La pagina si sta caricando...
La pagina si sta caricando...
La pagina si sta caricando...
La pagina si sta caricando...
La pagina si sta caricando...
La pagina si sta caricando...
La pagina si sta caricando...
La pagina si sta caricando...
La pagina si sta caricando...
La pagina si sta caricando...
La pagina si sta caricando...
La pagina si sta caricando...
La pagina si sta caricando...
La pagina si sta caricando...
La pagina si sta caricando...
La pagina si sta caricando...
La pagina si sta caricando...
La pagina si sta caricando...
La pagina si sta caricando...
La pagina si sta caricando...
La pagina si sta caricando...
La pagina si sta caricando...
La pagina si sta caricando...
La pagina si sta caricando...
La pagina si sta caricando...
La pagina si sta caricando...
La pagina si sta caricando...
La pagina si sta caricando...
La pagina si sta caricando...
-
 1
1
-
 2
2
-
 3
3
-
 4
4
-
 5
5
-
 6
6
-
 7
7
-
 8
8
-
 9
9
-
 10
10
-
 11
11
-
 12
12
-
 13
13
-
 14
14
-
 15
15
-
 16
16
-
 17
17
-
 18
18
-
 19
19
-
 20
20
-
 21
21
-
 22
22
-
 23
23
-
 24
24
-
 25
25
-
 26
26
-
 27
27
-
 28
28
-
 29
29
-
 30
30
-
 31
31
-
 32
32
-
 33
33
-
 34
34
-
 35
35
-
 36
36
-
 37
37
-
 38
38
-
 39
39
-
 40
40
-
 41
41
-
 42
42
-
 43
43
-
 44
44
-
 45
45
-
 46
46
-
 47
47
-
 48
48
-
 49
49
-
 50
50
-
 51
51
-
 52
52
-
 53
53
-
 54
54
-
 55
55
-
 56
56
-
 57
57
-
 58
58
-
 59
59
-
 60
60
-
 61
61
-
 62
62
-
 63
63
-
 64
64
-
 65
65
-
 66
66
-
 67
67
-
 68
68
-
 69
69
-
 70
70
-
 71
71
-
 72
72
-
 73
73
-
 74
74
-
 75
75
-
 76
76
-
 77
77
-
 78
78
-
 79
79
-
 80
80
-
 81
81
-
 82
82
-
 83
83
-
 84
84
-
 85
85
-
 86
86
-
 87
87
-
 88
88
-
 89
89
-
 90
90
-
 91
91
-
 92
92
-
 93
93
-
 94
94
-
 95
95
-
 96
96
-
 97
97
-
 98
98
-
 99
99
-
 100
100
-
 101
101
-
 102
102
-
 103
103
-
 104
104


Aastra OpenPhone 28 Manuale utente
- Categoria
- Telefoni
- Tipo
- Manuale utente
in altre lingue
- English: Aastra OpenPhone 28 User manual
Documenti correlati
-
Aastra OpenPhone 26 Manuale utente
-
Aastra 7433ip Quick Reference Manual
-
Aastra IntelliGate 630d Quick User Manual
-
Aastra Aastra 610d Quick User Manual
-
-
-
-
-
-
Altri documenti
-
DETEWE OpenPhone 26 Manuale utente
-
Tristar Butler 901 Combo Manuale del proprietario
-
Topcom Sologic B901 Combo Guida utente
-
-
Ericsson 230i Manuale utente
-
Olympia Joy II Manuale del proprietario
-
Siemens Cordless Telephone Hicom cordless EM Convenience mobile unit 2000C pocket Manuale utente
-
NEC DT710 Manuale utente
-
-
Marmitek DoorPhone 124 Manuale utente