La pagina si sta caricando...

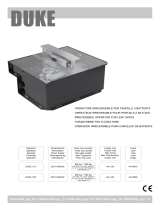
P508 - CONTENITORE DI SICUREZZA CON DISPOSITIVO DI SLOCCO E PULSANTE PER
ALZASERRANDE
ISTRUZIONI DI MONTAGGIO
NB. Per il corretto montaggio del contenitore di sicurezza, seguire attentamente le istruzioni.
1. Eseguire un foro sulla parete a 130 cm. dal pavimento di diametro min. 8. Eseguire un ulteriore foro per un tubo flessibile se si in-
tende montare anche il pulsante di apertura/chiusura.
2. Posizionare il contenitore con il foro per il passaggio cavetto in asse con il foro appena eseguito. Forare per un fissaggio a pare-
te o eseguire uno scasso adeguato per eventuale muratura del contenitore
3. Prima di fissare o murare il contenitore alla parete, infilare il capo guaina (5), fare passare nel foro praticato nella parete ed infi-
lare il cavetto nella parte posteriore del contenitore, come da fig. 3
4. Se si intende utilizzare il pulsante, montare nel contenitore la placchetta per pulsante con le relative viti autofilettanti, inserire il
pulsante stesso ed eseguire i collegamenti. Collegare la messa a terra nell’apposita sede contrassegnata con la relativa vite
autofilettante.
5. Infilare il cavetto nella leva (4) e di seguito il morsetto (3), senza bloccare, come da fig. 2
6. Posizionare il contenitore in battuta sul muro o nello scasso predisposto, come in fig. 3. Quindi mettere in tensione il cavetto, po-
sizionando contemporaneamente la leva (4) in sede, come in fig. 5. Serrare il morsetto (3) ed azionare la leva per controllare lo
sblocco del freno, come in fig. 5. Per regolazione agire sul tirante (1), come in fig. 1.
7. Inserire nella parte posteriore del contenitore il particolare plastico per la guida dei perni.
8. Fissare o murare a parete il contenitore.
9. Montare la serratura sullo sportello. La leva di bloccaggio, a chiave disinserita, deve essere posizionata come in fig. 4.
10. Inserire nello sportello le molle (7) e i perni (8) in sede (a), come in fig. 4. Tenere premuto con le dita i perni all’interno del coper-
chio. Far scivolare il coperchio all’interno del contenitore (9) sino a scatto avvenuto dei perni in posizione (b).
ATTENZIONE: Utilizzare i pulsanti solo per comandi in bassa tensione.
P508 - SAFETY CONTAINER WITH RELEASE DEVICE AND SHUTTER LIFTING BUTTON
ASSEMBLY INSTRUCTIONS
NOTE: To ensure that the safety container is properly assembled, carefully follow the instructions listed below.
1. Drill a hole, with a min. diameter of 8, on the wall, 130 cm from the floor. Drill another hole for a flexible tube if the opening/
closing button will also be installed.
2. Position the container with the hole for passing the wire so that it is in line with the hole that was just drilled. Drill holes for a wall
mounting or make a recess suitable to house the container, if it will be walled in.
3. Before attaching the container to the wall or walling in, insert the end of the sheath (5), pass it through the hole drilled in the wall
and insert the wire into the rear of the container, as shown in fig. 3.
4. If the button will be used, mount the plate for the button in the container using the relative self-threading screws, insert the
button and complete the connections. Complete the earth connection in the specially marked area using the relative self-
threading screw.
5. Insert the wire into the lever (4) and then the clamp (3), without tightening it, as shown in fig. 2.
6. Position the container up against the wall or in the recess, as shown in fig. 3. Then, put the wire under tension, while positioning
the lever (4) at the same time in its seat, as shown in fig. 5. Tighten the terminal (3) and activate the lever to control the brake
release, as shown in fig. 5. To adjust, use the tie-rod (1), as shown in fig. 1.
7. Insert the plastic item to guide the pins into the rear of the container.
8. Attach the container to the wall or wall it in.
9. Mount the lock on the door. With the key not inserted, the locking lever must be positioned as shown in fig. 4.
10. Insert the springs (7) and the pins (8) in the seat (a) in the door, as shown in fig. 4. Use the fingers to continue pressing the
pins inside the cover. Make the cover slide inside the container (9) until the pins snap into position (b).
CAUTION: Switches are to be used for low voltage impulses only.
P508
/