JUA354
JUA360
( 2K HDMI™+2K VGA )
( 4K HDMI™ )
English Español Français Deutsch
USB™ Multi-Monitor Adapter
JCA365 / JUA354 / JUA360 / JUA365
E
N
: Quick Installation Guide
ES : Guía De Instalación Rápida
D
E : Kurzanleitung Für Installation
CZ : Rychlý Průvodce Instalací
FR : Guide D'installation Rapide
HU : Gyors Telepítési Útmutató
JP : イック イン ストー ル ガ イド
TC : 快速安裝手冊
RU : Руководство по быстрой установке
Requisitos del Sistema
● Microsoft® Windows® 10 / 8.1 / 7
● macOS® v10.8 o superior
● Puerto USB™ 3.1 / 3.0 / 2.0
● Aplicaciones de Office / Web
CPU: 2,8 GHz Intel® Core™ i3 de doble núcleo / RAM: 2 GB de memoria o más alto
● Una 2K (2048 x 1152 @ 60 Hz) la reproducción de vídeo a pantalla completa
CPU: Intel® Core™ i5 Quad Core / RAM: 4 GB de memoria o más alto
●
Una 4K Ultra HD o dos 2K (2048 x 1152 @ 60 Hz) de pantalla completa Reproducción de vídeo
CPU: Intel® Core™ i7 Quad Core / RAM: memoria de 8 GB o superior
Tarjeta gráfica: Intel® HD 4000 / ATI™ HD 7xxx / NVIDIA® 5XXM o superior
Instalación del controlador Mac®
Instalación del controlador de Windows® Treiberinstallation unter Windows®
Mac® Treiberinstallation
Schritt 1.
Wenn Sie Zugang zum Internet haben, ist es sehr empfehlenswert, dass Sie den
neuesten Treiber von www.j5create.com unter Support&Service herunterladen,
scrollen Sie nach unten zu dem Produkt Treiber und installieren Sie den neuesten
Treiber für Ihr Betriebssytem (Hinweis: Wenn Sie Probleme haben, den Treiber
herunterzuladen, müssen Ihre Sicherheitseinstellungen angepasst werden und den
"Download von überall" erlauben )
Schritt 2.
Wählen Sie das richtige Betriebssystem für Ihr System und folgen Sie den
Anweisungen, um den Treiber zu installieren. (Sie müssen möglicherweise auf Finder>
Downloads und j5UsbDisplayAdapter klicken, um die Installation zu beginnen).
Für Benutzer v10.12: Klicken Sie auf "OK", wenn Sie das Popup-Fenster sehen. Gehen
Sie zu Sicherheit und Datenschutz> Allgemeines und klicken Sie dann auf "Trotzdem
öffnen ", um den Treiber zu installieren.
Schritt 3.
Ist die Installation abgeschlossen, klicken Sie auf Neustart, um die Softwareinstalla-
tion abzuschließen. Nach dem Neustart des Computers, schließen Sie den j5create
USB Display Adapter an ihren Bildschirm und dann an Ihren Computer. Jetzt sind Sie
bereit, Ihr j5create USB Display Adapter zu verwenden!
Schritt 4. Bildschirmeinstellungen
Gehen Sie auf ( ) und dann auf Systemeinstellungen , wählen Sie die Anzeige oder
Bearbeitung Registerkarte zum anpassen .
System Anforderungen
● Microsoft® Windows® 10 / 8.1 / 7
● macOS® X 10.8 oder höher
● USB™ 3.1 / 3.0 / 2.0 Anschluss
● Büroanwendung / Web
CPU: Intel® Core™ i3 Dual-Core-Prozessor mit 2.8 GHz / RAM: 2 GB Speicher oder mehr
● Ein Vollbildschirm 2K (2048 x 1152 @ 60 Hz) für Videowiedergabe
CPU: Intel® Core™ i5 Quad-Core / RAM: 4 GB Speicher oder mehr
● Ein Bildschirm 4K ultra oder zwei 2k (2480 x 1152 @ 60 Hz) für Videowiedergabe
CPU: Intel® Core™ i7 Quad-Core / RAM: 8 GB Speicher oder mehr
Grafikkarte: Intel® HD Graphics 4000 / ATI™ HD 7xxx / NVIDIA® 5XXM oder höher
Schritt 1.
Wenn Sie Zugang zum Internet haben, ist es sehr empfehlenswert, dass Sie den neuesten Treiber von
www.j5create.com unter Support & Services herunterladen - scrollen Sie nach unten zu dem Produkt Treiber
und installieren Sie den neuesten Treiber für Ihr Betriebssytem (Hinweis: Wenn möglich als Administrator
laufen )
Schritt 2.
Folgen Sie den Anweisungen, um den Treiber zu installieren. (Möglicherweise haben Sie auf dem lokalen
Computer> Downloads zu klicken und j5UsbDisplayAdapter zu wählen, um Installation zu beginnen).
Schritt 3.
Sobald der Treiber installiert wurde, wählen Sie Ja und Fertig stellen, um den Computer neu zu starten und
die Installation zu vervollständigen . Sobald Ihr Computer neu gestartet wurde, schließen Sie das j5create
USB Display Adapter an Ihren Display und dann an Ihren Computer. Jetzt sind Sie bereit, Ihr j5create USB
Display Adapter zu verwenden!
Schritt 4. Display Settings
Windows® 7 / 8.1: Rechtsklick auf das Symbol J5 auf der unteren rechten Seite der Leiste, um die
Display Einstellung zu öffnen. Wenn der Treiber automatisch installiert wurde, werden Sie ein anderes Symbol
sehen .
Étape 1.
Téléchargement du logiciel est disponible à www.j5create.com dans la rubrique
"Support & Services". (Remarque: Si vous avez des difficultés à télécharger ce logiciel
vos paramètres de sécurité peuvent avoir besoin d'être ajustées pour permettre "le
téléchargement de n'importe où")
Étape 2.
Choisissez le système d'opération correspondant à votre système et suivez les
instructions pour installer le logiciel. (Vous devrez peut-être cliquer sur Finder
téléchargements et choisissez j5UsbDisplayAdapter pour commencer l'installation)
Pour les utilisateurs de la version 10.12: Cliquez sur "OK" lorsque vous voyez la
fenêtre pop-up. Allez à Sécurité et confidentialité> Généralités, puis cliquez sur
"Ouvrir de toute façon" pour installer le pilote.
Étape 3.
Une fois le téléchargement du logiciel terminé, cliquez sur Terminer pour Redémarrer.
Après le redémarrage de votre ordinateur, connectez le dispositif d'affichage externe
(moniteur / projecteur) au connecteur de l’adaptateur graphique USB. Connectez
l'adaptateur graphique USB dans le port disponible d'un PC ou ordinateur portable.
Étape 4. Réglage de l’affichage
Allez sur ( ), puis Préférences Système. Choisissez l'onglet Affichage ou
Arrangement pour ajuster.
Environnement requis
● Microsoft® Windows® 10 / 8.1 / 7
● macOS® v10.8 ou plus
● Port USB™ 3.1 / 3.0 / 2.0 Disponible
● Application de bureau / Web
CPU: Intel® Core™ i3 Dual Core 2.8 GHz / RAM: 2 GB de mémoire ou plus
● Un écran 2K (2048 x 1152 @ 60 Hz) pour la lecture vidéo
CPU: Intel® Core™ i5 Quad Core / RAM: 4 GB de mémoire ou plus
● Un écran 4K Ultra ou deux 2K (2048 x 1152 @ 60 Hz) pour la lecture vidéo
CPU: Intel® Core™ i7 Quad Core / RAM: 8 GB de mémoire ou plus
Carte graphique: Intel® HD Graphics 4000 / ATI™ HD 7xxx / NVIDIA® 5XXM ou plus
Installation Windows
Installation Mac®
Windows® Driver Installation
Mac® Driver Installation
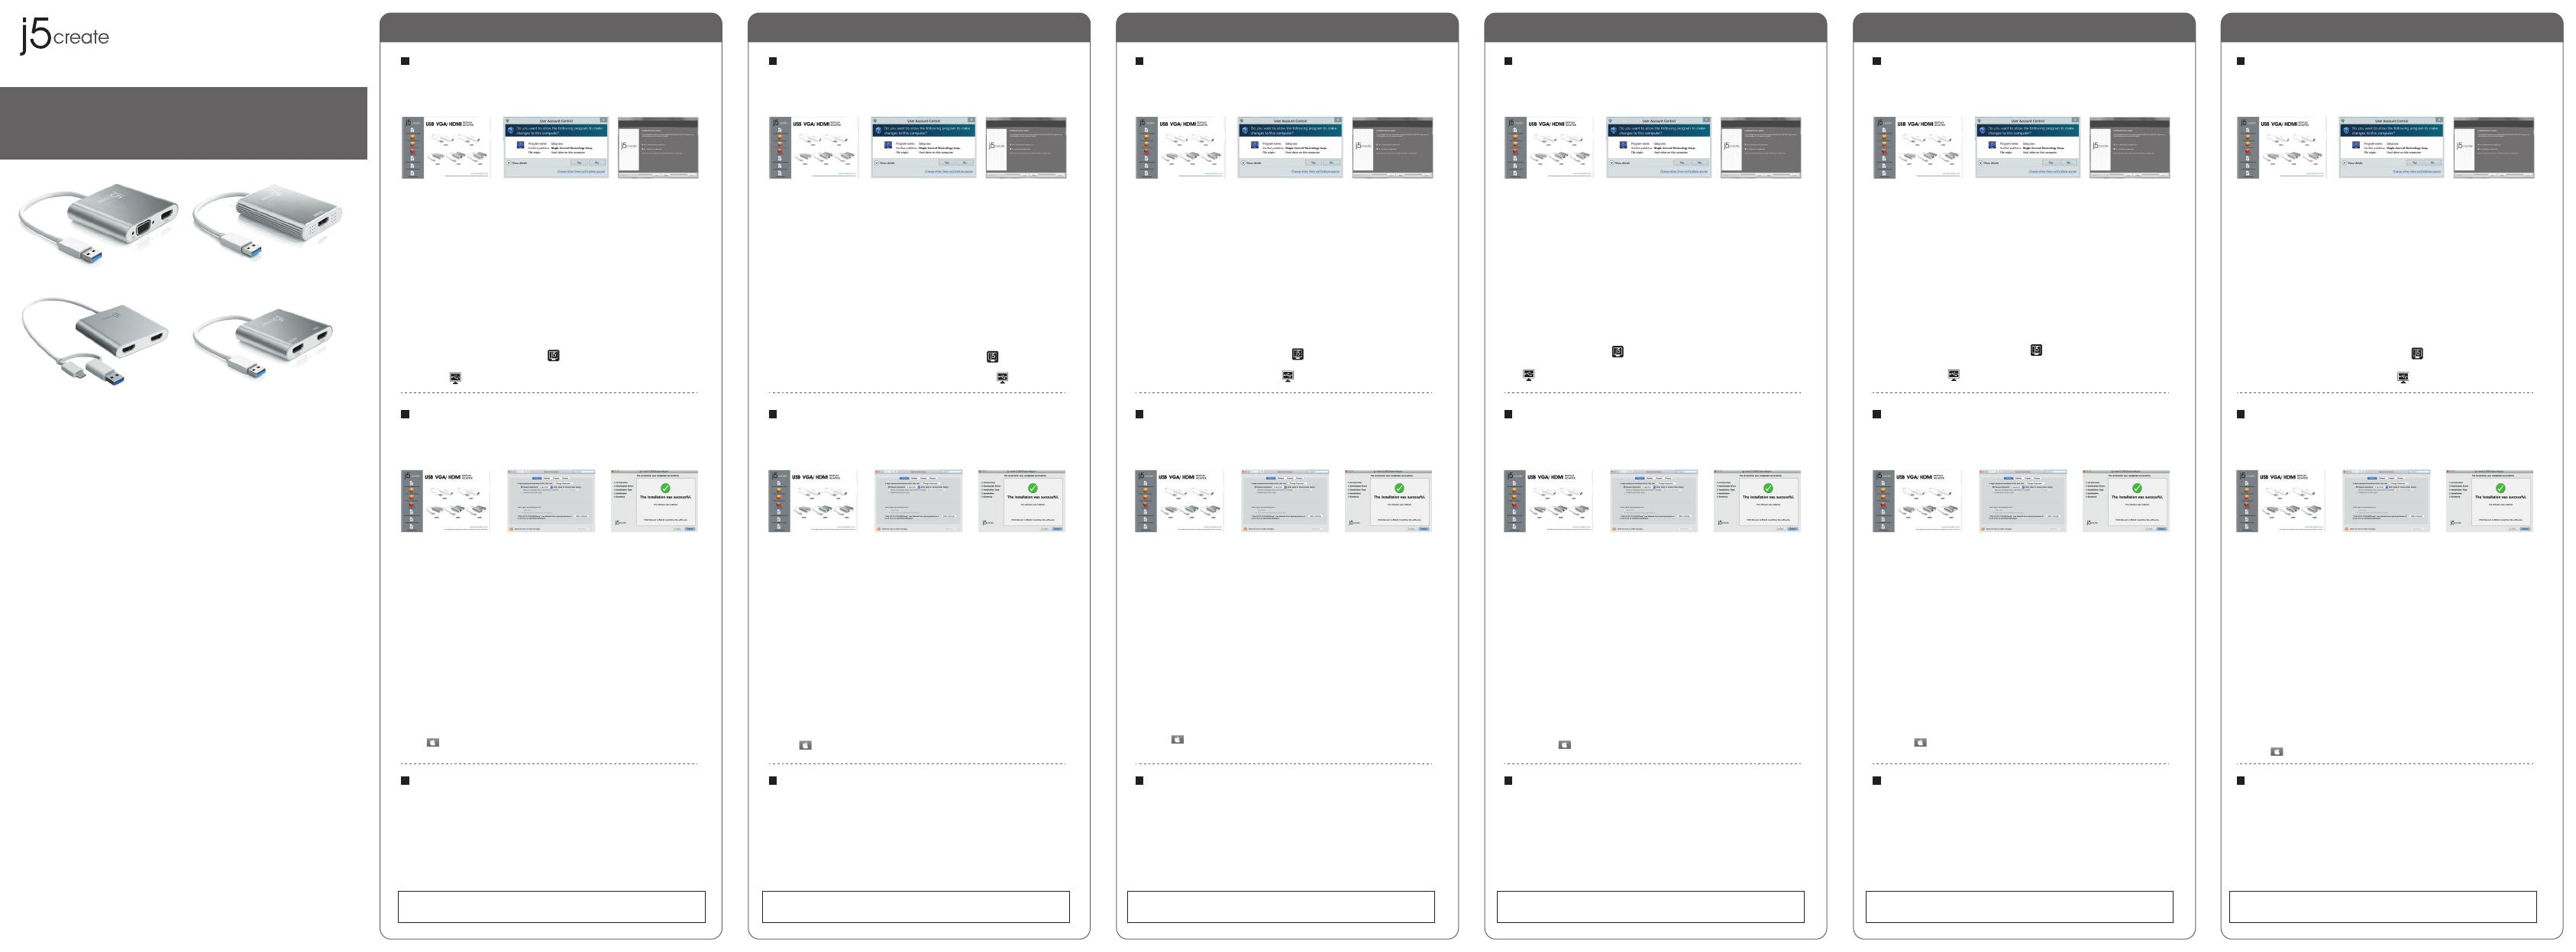
Step 1. Step 3.Step 2.
Step 1.
If you have internet access it is highly recommended that you download the latest
driver from www.j5create.com under Support & Services –scroll down to the
product’s driver you are installing and download the latest driver for your operating
system. (Note: If possible run as an administrator)
Step 2.
Follow the prompts to install the driver. (You may have to click on My Computer >
downloads and choose j5UsbDisplayAdapter to begin installation).
Step 3.
Once the driver has been installed choose "Yes" and click "Finish" to restart your
computer and complete driver installation. Once your computer has restarted, connect
the j5create USB Display Adapter to your display first and then to your computer. Now
you are ready to use your j5create USB Display Adapter!
Step 1. Step 3.Step 2.
Step 1.
If you have internet access it is highly recommended that you download the latest
driver from www.j5create.com under Support & Services –scroll down to the
product’s driver you are installing and download the latest driver for your operating
system. (Note: If you have trouble downloading this driver your security settings may
need to be adjusted to allow for “downloading from anywhere”)
Step 2.
Choose the correct operating system for your system and follow the prompts to
install the driver. (You may have to click on Finder > downloads and choose
j5UsbDisplayAdapter to begin installation).
For v10.12 users: When the pop-up window appears click "Ok". Then go to Security
and Privacy > General and click on "Open Anyway" to install the driver.
Step 3.
Once initial installation has completed, click "Restart" to finish installing the software.
After your computer has restarted, connect the j5create USB Display Adapter to your
display first and then to your computer. Now you are ready to use your j5create USB
Display Adapter!
Step 4. Display Settings
Go to ( ) and then System Preferences, choose the Display or Arrangement tab to
adjust.
System Requirements
● Microsoft® Windows® 10 / 8.1 / 7
● macOS® X 10.8 or later
● Available USB™ 3.1 / 3.0 / 2.0 port
● Office applications / Web
CPU: Intel® Core™ i3 Dual Core 2.8 GHz / RAM: 2 GB memory or higher
● One 2K (2048 x 1152 @ 60 Hz) full-screen video playback
CPU: Intel® Core™ i5 Quad Core / RAM: 4 GB memory or higher
● One 4K Ultra HD or two 2K (2048 x 1152 @ 60 Hz) Full-screen video playback
CPU: Intel® Core™ i7 Quad Core / RAM: 8 GB memory or higher
Graphics card: Intel® HD Graphics 4000/ ATI™ HD 7xxx/ NVIDIA® 5XXM or higher
Step 4. Display Settings
Windows® 7 / 8.1: Right click on the icon on the lower right-hand side of the
toolbar to open display settings. If your driver automatically installed, you will see a
different icon
Paso 1. Paso 3. Paso 2.
Paso 1.
Si tiene acceso a Internet, le recomendamos que descargue el último controlador
desde www.j5create.com en Soporte y Servicios - desplácese hasta el controlador del
producto que está instalando y descargue el último controlador para su sistema
operativo. (Nota: si es posible, ejecute como administrador)
Paso 2.
Siga las instrucciones para instalar el controlador. (Es posible que tenga que hacer
clic en Mi PC> Descargas y seleccione j5UsbDisplayAdapter para comenzar la
instalación)
Paso 3.
Una vez que haya instalado el controlador, seleccione "Sí" y haga clic en "Finalizar"
para reiniciar su computadora y completar la instalación del controlador. Una vez que
su computadora se haya reiniciado, conecte el adaptador de pantalla USB j5create
primero a su pantalla y luego a su computadora. ¡Ahora está listo para usar su
adaptador de pantalla USB j5create!
Paso 4. Configuración de Pantalla
Windows® 7 / 8.1: haga clic con el botón derecho en el icono en la parte inferior
derecha de la barra de herramientas para abrir la configuración de pantalla. Si su
controlador se instala automáticamente, verá un icono diferente
Étape 1.
Si vous avez accès à l'Internet, il est fortement recommandé que vous téléchargez le
dernier logiciel www.j5create.com sous Support & Services Faites défiler vers le bas pour le
logiciel du produit que vous installez et téléchargez le dernier logiciel pour votre système
d'exploitation. (Remarque: Si possible exécuter en tant qu'administrateur)
Étape 2.
Suivez les instructions pour installer le logiciel. (Vous devrez peut-être cliquer sur "Poste de
Travail" téléchargements et choisissez j5UsbDisplayAdapter pour commencer l'installation)
Étape 3.
Une fois le téléchargement du logiciel terminé, cliquez sur Terminer pour Redémarrer. Après
le redémarrage de votre ordinateur, connectez le dispositif d'affichage externe (moniteur /
projecteur) au connecteur de l’adaptateur graphique USB. Connectez l'adaptateur graphique
USB dans le port disponible d'un PC ou ordinateur portable.
Étape 4. Réglage de l’affichage
Windows® 7 / 8.1: Faites un clic droit sur l'icon ,trouvé au bas de la barre d'outils, à
droite, ce qui ouvra la rubrique des reglements d'affichages. Si le logiciel s'est installé
automatiquement, vous verez l'icon différent .
Étape 1. Étape 3.Étape 2. Schritt 1. Schritt 3.Schritt 2.
( For v10.12 ) Paso 1. Paso 3.Paso 2.
Paso 1.
Si tiene acceso a Internet, le recomendamos que descargue el último controlador de
www.j5create.com en Soporte y Servicios - desplácese hasta el controlador del
producto que está instalando y descargue el último controlador para su sistema
operativo. (Nota: si tiene problemas para descargar este controlador, es posible que
deba ajustar su configuración de seguridad para permitir la "descarga desde
cualquier lugar")
Paso 2.
Elija el sistema operativo correcto para su sistema y siga las instrucciones para
instalar el controlador. (Puede que tenga que hacer clic en Finder> descargas y elegir
j5UsbDisplayAdapter para comenzar la instalación). Para usuarios de v10.12: cuando
aparezca la ventana emergente, haga clic en "Aceptar". Luego vaya a Seguridad y
privacidad> General y haga clic en "Abrir de todos modos" para instalar el
controlador
Paso 3.
Una vez que la instalación inicial se haya completado, haga clic en "Reiniciar" para
finalizar la instalación del software. Después de que su computadora se haya
reiniciado, conecte el adaptador de pantalla USB j5create primero a su pantalla y
luego a su computadora. ¡Ahora está listo para usar su adaptador de pantalla USB
j5create!
Paso 4. Configuración de Pantalla
Vaya a ( ) y luego a Preferencias del sistema, elija la pestaña Pantalla o Arreglo
para ajustar.
( For v10.12 ) Étape 1. Étape 3.Étape 2. ( For v10.12 ) Schritt 1. Schritt 3.Schritt 2. ( For v10.12 )
●
Driver will automatically install on Windows® 10 / 8.1 / 7 (Plug & Play requires Internet
access)
●
Los usuarios de Windows: Controlador automáticamente instalar en Windows® 10 / 8.1 / 7
( Plug & Play requiere acceso a Internet )
● Le logiciel s’instalera automatiquement sur Win 10 / 8.1 / 7
(Plug & Play nécessite un accès Internet) ● Treiber wird automatisch installiert auf Windows® 10 / 8.1 / 7
(Plug & Play erfordert Internetzugang )
●
Do NOT plug the j5create USB Multi-Monitor Adapter into the computer until the
driver is completely installed.
●
No enchufe el j5create USB multi-monitor Adaptador en el equipo hasta que el
conductor esté completamente instalado.
●
Ne branchez pas l'adaptateur d'affichage j5create USB dans l’ordinateur avant que le
logiciel soit complètement installé.
●
Schließen Sie den j5create USB Display Adapter nicht an den Computer, bis der Driver
vollständig installiert ist.
●
Before you upgrade your operating system, update your j5create product driver
first to avoid compatibility issues.
●
Antes de actualizar su sistema operativo, actualice primero su controlador de
producto j5create para evitar problemas de compatibilidad.
●
Avant de faire la mise à jour de votre système d'opération, mettez à jour les logiciels
de produits j5create pour éviter des problèmes de compatibilité.
●
Bevor Sie Ihr Betriebssystem aktualisieren, aktualisieren Sie zunächst Ihre j5create
Produkt Treiber um Kompatibilitätsprobleme zu vermeiden.
JUA365
( 4K HDMI™+2K HDMI™ )
Italian
Installazione del driver di Windows®
Mac® - Installazione del driver
Passo 1.
Se si dispone di accesso Internet, si consiglia vivamente di scaricare il driver
più recente dal sito www.j5create.com in Supporto e servizi – scorrere verso il
basso sul driver del prodotto che si sta installando e scaricare il driver più
recente per il sistema operativo. (Nota: In caso di problemi di download del
driver, è necessario regolare le impostazioni di protezione per consentire il
"download da ovunque")
Passo 2.
Scegliere il sistema operativo corretto per il proprio sistema e seguire le
istruzioni per installare il driver. (Potrebbe essere necessario fare clic su Finder
> Download e selezionare j5UsbDisplayAdapter per avviare l'installazione)
Per utenti v10.12: Fare clic su "OK" quando appare la finestra popup. Andare
su Sicurezza e Privacy > Generali, quindi fare clic su "Apri comunque" per
installare il driver.
Passo 3.
Una volta completata l'installazione, fare clic su "Riavvia" per terminare
l'installazione del software. Una volta riavviato il computer, collegare la scheda
video USB 3.0 j5create prima al display e poi al computer. Quindi, si è pronti
per utilizzare la scheda video USB 3.0 j5create!
Passo 4. Bildschirmeinstellungen
Andare su ( ), quindi su Preferenze di Sistema. Selezionare la scheda
Monitor o Disposizione per regolare.
Requisiti di sistema
● Microsoft® Windows® 10 / 8.1 / 7
● macOS® X 10.8 o successivo
● Porta USB™ 3.1 / 3.0 / 2.0 disponibile
● Applicazioni d'ufficio / Web
CPU: Intel® Core™ i3 Dual Core 2.8 GHz / RAM: 2 GB di memoria o superiore
● One 2K (2048 x 1152 @ 60 Hz) Riproduzione video a schermo intero
CPU: Intel® Core™ i5 Quad Core / RAM: memoria da 4 GB o superiore
● Un 4K Ultra HD o due 2K (2048 x 1152 @ 60 Hz) Riproduzione video a schermo intero
CPU: Intel® Core™ i7 Quad Core / RAM: memoria da 8 GB o superiore
Scheda grafica: Intel® HD Graphics 4000 / ATI™ HD 7xxx / NVIDIA® 5XXM o superiore
Passo 1.
Se si dispone di accesso Internet, si consiglia vivamente di scaricare il driver più recente dal sito
www.j5create.com in Supporto e servizi – scorrere verso il basso sul driver del prodotto che si
sta installando e scaricare il driver più recente per il sistema operativo (Nota: Se possibile,
eseguire come amministratore).
Passo 2.
Seguire le istruzioni per installare il driver (Potrebbe essere necessario fare clic su Computer >
Download e selezionare j5USB Display Adapter per avviare l'installazione).
Passo 3.
Una volta installato il driver, selezionare Sì e fare clic su Fine per riavviare il computer e
completare l'installazione del driver. Una volta riavviato il computer, collegare la scheda video
USB j5create prima al display e poi al computer. Quindi, si è pronti per utilizzare la scheda video
USB j5create!
Passo 4. Impostazioni di visualizzazione
Windows® 7 / 8.1: Fare clic con il tasto destro sull'icona in basso a destra della barra degli
strumenti per aprire le impostazioni di visualizzazione. Se il driver viene installato automaticamente,
viene visualizzata un'icona differente.
Passo 1. Passo 3.Passo 2.
Passo 1. Passo 3.Passo 2. ( For v10.12 )
● Il driver viene installato automaticamente su Windows® 10 / 8.1 / 7
(si richiede accesso Internet)
●
NON inserire la scheda video USB j5create nel computer fino all'installazone
completa del driver
●
Prima di aggiornare il sistema operativo, aggiornare il driver del prodotto
j5create per evitare problemi di compatibilità.
Windows®-stuurprogramma installeren
Stuurprogramma Mac® installeren
Stap 1.
Als u toegang tot internet hebt, raden we aan om het nieuwste stuurprogramma
te downloaden van www.j5create.com onder Support & Services –
blader omlaag naar het stuurpgoramma van het product dat u installeert en
download het nieuwste stuurprogramma voor uw besturingssysteem.
(Opmerking: Als u problemen ondervindt bij het downloaden van het
stuurprogramma moeten mogelijk uw beveiligingsinstellingen worden
aangepast om "Downloaden overal vandaan" toe te staan.)
Stap 2.
Kies het juiste besturingssysteem voor uw systeem en volg de aanwijzingen om
het stuurprogramma te installeren. (Mogelijk moet u op Finder > downloads
klikken en j5UsbDisplayAdapter kiezen om de installatie te starten)
Voor gebruikers van v10.12: Klik op "OK" als u het popupvenster ziet. Ga naar
Beveiliging en privacy > Algemeen en klik op "Toch openen" om het stuurprogramma
te installeren.
Stap 3.
Klik na afloop van de installatie op "Opnieuw starten" om de installatie van de
software af te ronden. Sluit na het herstarten van de computer eerst de j5create
USB 3.0 Display Adapter aan op uw scherm en daarna op de computer. Nu bent
u klaar om uw j5create USB 3.0 Display Adapter te gebruiken!
Stap 4. Display Settings
Ga naar ( ) en daarna naar Systeemvoorkeuren. Selecteer het tabblad
Scherm of Indeling om in te stellen.
Systeemvereisten
● Microsoft® Windows® 10 / 8.1 / 7
● macOS® X 10.8 of later
● Beschikbaar USB™ 3.1 / 3.0 / 2.0 poort
● Kantoortoepassingen / Web
CPU: Intel® Core™ i3 Dual Core 2.8 GHz / RAM: 2 GB geheugen of meer
● Eén 2K (2048 x 1152 @ 60 Hz) Video afspelen op volledig scherm
CPU: Intel® Core™ i5 Quad Core / RAM: 4 GB geheugen of meer
● Eén 4K Ultra HD of twee 2K (2048 x 1152 @ 60 Hz) Video afspelen op volledig scherm
CPU: Intel® Core™ i7 Quad Core / RAM: 8 GB geheugen of meer
Grafische kaart: Intel® HD Graphics 4000 / ATI™ HD 7xxx / NVIDIA® 5XXM of hoger
Stap 1.
Als u toegang tot internet hebt, raden we aan om het nieuwste stuurprogramma te
downloaden van www.j5create.com onder Support & Services – blader omlaag naar
het stuurpgoramma van het product dat u installeert en download het nieuwste
stuurprogramma voor uw besturingssysteem (Opmerking: voer dit indien mogelijk
uit als Administrator).
Stap 2.
Volg de instructies om het stuurprogramma te installeren (Mogelijk moet u op Mijn
computer > downloads klikken en j5USB Display Adapter kiezen om de installatie
te starten)
Stap 3.
Klik na installatie van het stuurprogramma op Ja en klik op Voltooien om de
computer te herstarten en de installatie van het stuurprogramma te voltooien. Sluit
na het herstarten van de computer eerst de j5create USB Display Adapter aan op
uw scherm en daarna op de computer. Nu bent u klaar om uw j5create USB Display
Adapter te gebruiken!
Stap 4. Weergave-instellingen
“Windows® 7 / 8.1: Rechtsklik op het pictogram rechtsonder op de werkbalk om
de weergave-instellingen te openen. Als het stuurprogramma automatisch is
geïnstalleert, verschijnt een ander pictogram .
Dutch
Stap 1. Stap 3.Stap 2.
Stap 1. Stap 3.Stap 2. ( For v10.12 )
● Het stuurprogramma wordt automatisch geïnstalleerd onder
Windows® 10 / 8.1 / 7 (vereist internettoegang)
●
Verbind de j5create USB display adapter NIET met de computer tot het
stuurprogramma volledig is geïnstalleerd
●
Antes de atualizar o seu sistema operativo, atualize previamente o controlador
do seu produto j5create para evitar problemas de compatibilidade.
JCA365
( 4K HDMI™+2K HDMI™ )


