Ryobi RCS36X3550HI Manuale del proprietario
- Categoria
- Motoseghe
- Tipo
- Manuale del proprietario
Questo manuale è adatto anche per

ORIGINAL INSTRUCTIONS
TRADUCTION DES INSTRUCTIONS ORIGINALES
ÜBERSETZUNG DER ORIGINALANLEITUNG
TRADUCCIÓN DE LAS INSTRUCCIONES ORIGINALES
TRADUZIONE DELLE ISTRUZIONI ORIGINALI
VERTALING VAN DE ORIGINELE INSTRUCTIES
TRADUÇÃO DAS INSTRUÇÕES ORIGINAIS
OVERSÆTTELSE AF DE ORIGINALE INSTRUKTIONER
ÖVERSÄTTNING AV DE URSPRUNGLIGA INSTRUKTIONERNA
ALKUPERÄISTEN OHJEIDEN SUOMENNOS
OVERSETTELSE AV DE ORIGINALE INSTRUKSJONENE
ɉȿɊȿȼɈȾɈɊɂȽɂɇȺɅɖɇɕɏɂɇɋɌɊɍɄɐɂɃ
7à80$&=(1,(,16758.&-,25<*,1$/1(-
3ě(./$'25,*,1È/1Ë&+32.<1ģ
$=(5('(7,Ò7087$7Ï)25'Ë7È6$
75$'8&(5($,16758&ğ,81,/2525,*,1$/(
78/.2761225,Ʀ,1Ɩ/Ɩ6,16758.&,-$6
25,*,1$/,Ǐ,16758.&,-Ǐ9(57,0$6
ORIGINAALJUHENDI TÕLGE
PRIJEVOD ORIGINALNIH UPUTA
PREVOD ORIGINALNIH NAVODIL
35(./$'25,*,1È/1<&+32.<129
ɉɊȿȼɈȾɈɌɈɊɂȽɂɇȺɅɇɂɌȿɂɇɋɌɊɍɄɐɂɂ
EN
FR
DE
ES
IT
NL
PT
DA
SV
FI
NO
RU
PL
CS
HU
RO
LV
LT
ET
HR
SL
SK
BG
RCS36X3550HI

ȼɚɠɧɨ
Subject to technical modification / Sous réserve de modifications techniques / Technische Änderungen vorbehalten /
Bajo reserva de modificaciones técnicas / Con riserva di eventuali modifiche tecniche / Technische wijzigingen voorbehouden /
Com reserva de modificações técnicas / Med forbehold for tekniske ændringer / Med förbehåll för tekniska ändringar /
7HNQLVHWPXXWRNVHWYDUDWDDQ0HGIRUEHKROGRPWHNQLVNHHQGULQJHUɦɨɝɭɬɛɵɬɶɜɧɟɫɟɧɵɬɟɯɧɢɱɟɫɤɢɟɢɡɦɟɧɟɧɢɹ
=]DVWU]HĪHQLHPPRG\ILNDFMLWHFKQLF]Q\FK=PČQ\WHFKQLFNêFK~GDMĤY\KUD]HQ\$PĦV]DNLPyGRVtWiVMRJiWIHQQWDUWMXN
6XEUH]HUYDPRGLILFDĠLLORUWHKQLFH3DWXUDPWLHVƯEDVPDLQƯWWHKQLVNRVUDNVWXUOLHOXPXV
3DVLOLHNDQWWHLVĊGDU\WLWHFKQLQLXVSDNHLWLPXV7HKQLOLVHGPXXGDWXVHGY}LPDOLNXG3RGORQRWHKQLsNLPSURPMHQDPD
7HKQLþQHVSUHPHPEHGRSXãþHQH3UiYRQDWHFKQLFNp]PHQ\MHY\KUDGHQpɉɨɞɥɟɠɢɧɚɬɟɯɧɢɱɟɫɤɢɦɨɞɢɮɢɤɚɰɢɢ
,WLVHVVHQWLDOWKDW\RXUHDGWKHLQVWUXFWLRQVLQWKLVPDQXDOEHIRUHDVVHPEOLQJRSHUDWLQJDQG
maintaining this machine.
,OHVWHVVHQWLHOTXHYRXVOLVLH]OHVLQVWUXFWLRQVFRQWHQXHVGDQVFHPRGHGHPSORLDYDQWGDVVHPEOHU
d'entretenir et d'utiliser cette machine.
(VLVWZLFKWLJGDVV6LHYRU=XVDPPHQEDX%HQXW]XQJXQG:DUWXQJGLHVHU0DVFKLQHGLH
$QZHLVXQJHQLQGLHVHU$QOHLWXQJOHVHQ
$QWHVGHPRQWDUGHXWLOL]DURGHUHDOL]DUHOPDQWHQLPLHQWRGHHVWDPiTXLQDHVPX\LPSRUWDQWHTXH
lea las instrucciones de este manual.
ÊHVVHQ]LDOHOHJJHUHOHLVWUX]LRQLFRQWHQXWHQHOPDQXDOHSULPDGLPRQWDUHPHWWHUHLQIXQ]LRQHH
VYROJHUHOHRSHUD]LRQLGLPDQXWHQ]LRQHVXOOXWHQVLOH
Het is van essentieel belang dat u de instructies in deze gebruiksaanwijzing leest voor u deze
PDFKLQHPRQWHHUWEHGLHQWHQRQGHUKRXGW
eHVVHQFLDOTXHOHLDDVLQVWUXo}HVQHVWHPDQXDODQWHVGHPRQWDURSHUDUHHIHWXDUPDQXWHQomRD
HVWDPiTXLQD
'HWHUPHJHWYLJWLJWDWPDQOVHUDQYLVQLQJHUQHLGHQQHEUXJVDQYLVQLQJLQGHQPDVNLQHQVDPOHV
betjenes og vedligeholdes.
'HWlUYLNWLJWDWWGXOlVHULQVWUXNWLRQHUQDLPDQXDOHQI|UHPRQWHULQJDQYlQGQLQJRFKXQGHUKnOODY
maskinen.
2QWlUNHllHWWlOXHWWlPlQNlVLNLUMDQHQQHQWlPlQODLWWHHQNRNRDPLVWDKXROWRDMDNl\WW|l
'HWHUYLNWLJDWGXOHVHULQVWUXNVMRQHQHLGHQQHEUXNHUPDQXDOHQI¡UGXPRQWHUHUEUXNHURJ
vedlikeholder maskinen.
ɇɟɨɛɯɨɞɢɦɨɩɪɨɱɢɬɚɬɶɢɧɫɬɪɭɤɰɢɢɜɞɚɧɧɨɦɪɭɤɨɜɨɞɫɬɜɟɩɟɪɟɞɫɛɨɪɤɨɣɷɤɫɩɥɭɚɬɚɰɢɟɣɢ
ɨɛɫɥɭɠɢɜɚɧɢɟɦɷɬɨɝɨɭɫɬɪɨɣɫɬɜɚ
.RQLHF]QLHSU]HF]\WDMLQVWUXNFMH]DZDUWHZW\PSRGUĊF]QLNXSU]HGPRQWDĪHPREVáXJąRUD]
NRQVHUZDFMąWHMPDV]\Q\
1HLQVWDOXMWHQHSURYiGČMWH~GUåEXDQLQHSRXåtYHMWHWHQWRQiVWURMGĜtYHQHåVLSĜHþWHWHSRN\Q\
XYHGHQpYWRPWRQiYRGX
)RQWRVKRJ\DJpS|VV]HV]HUHOpVHKDV]QiODWDpVNDUEDQWDUWiVDHOĘWWHOROYDVVDDNp]LN|Q\YEHQ
WDOiOKDWyXWDVtWiVRNDW
(VWHHVHQĠLDOVăFLWLĠLLQVWUXFĠLXQLOHGLQDFHVWPDQXDOvQDLQWHGHDVDPEODUHDRSHUDUHDVDXvQWUHĠLQHUHD
DFHVWXLDSDUDW
3LUPVLHUƯFHVPRQWƗåDVGDUELQƗãDQDVXQDSNRSHVYHLNãDQDVREOLJƗWLL]ODVLHWQRUƗGƯMXPXVãDMƗ
URNDVJUƗPDWƗ
3ULHãVXULQNGDPLHNVSORDWXRGDPLLUSULåLnjUơGDPLãƳƳUHQJLQƳEnjWLQDNDGSHUVNDLW\WXPơWHQXURG\PXV
SDWHLNWXVãLDPHQDXGRWRMRYDGRYH
(QQHPDVLQDNRNNXSDQHNXWNDVXWDPDMDKRROGDPDKDNNDPLVWWXOHENlHVROHYDVMXKHQGLVHVLWDWXG
juhised kindlasti läbi lugeda.
9UORMHYDåQRGDVWHSULMHVNODSDQMDUDGDLRGUåDYDQMDRYRJVWURMDSURþLWDOLXSXWHXRYRPSULUXþQLNX
=HORSRPHPEQRMHGDSUHGVHVWDYOMDQMHPY]GUåHYDQMHPLQXSRUDERWHQDSUDYHSUHEHUHWHQDYRGLODY
WHPSULURþQLNX
3UHGPRQWiåRXSRXåtYDQtPD~GUåERXWRKWRQiVWURMDMHG{OHåLWpE\VWHVLSUHþtWDOLSRN\Q\YWRPWR
QiYRGH
ɂɡɤɥɸɱɢɬɟɥɧɨɜɚɠɧɨɟɞɚɩɪɨɱɟɬɟɬɟɢɧɫɬɪɭɤɰɢɢɬɟɜɧɚɫɬɨɹɳɟɬɨɪɴɤɨɜɨɞɫɬɜɨɩɪɟɞɢɞɚ
ɫɝɥɨɛɢɬɟɢɞɚɪɚɛɨɬɢɬɟɫɬɚɡɢɦɚɲɢɧɚɤɚɤɬɨɢɞɚɢɡɜɴɪɲɜɚɬɟɞɟɣɧɨɫɬɢɩɨɧɟɣɧɚɬɚɩɨɞɞɪɴɠɤɚ

1 English |
EN
FR
DE
ES
IT
NL
PT
DA
SV
FI
NO
RU
PL
CS
HU
RO
LV
LT
ET
HR
SL
SK
BG
WARNING
When using the product, the safety rules must be
followed. For your own safety and that of bystanders, you
must read and fully understand these instructions before
operating the product. You should attend a professionally
organized safety course in the use, preventative actions,
¿UVWDLG DQG PDLQWHQDQFH RI FKDLQVDZV 3OHDVH NHHS
these instructions safe for later use.
WARNING
Chainsaws are potentially dangerous tools. Accidents
involving the use of chainsaws often result in loss of limbs
or death. It is not just the chainsaw that is the hazard.
)DOOLQJEUDQFKHVWRSSOLQJWUHHVUROOLQJORJVFDQDOONLOO
Diseased or rotting timber poses additional hazards.
<RXVKRXOGDVVHVV\RXUFDSDELOLW\RIFRPSOHWLQJWKHWDVN
safely. If there is any doubt, leave it to a professional
tree surgeon.
GENERAL SAFETY WARNINGS
WARNING
Read all safety warnings and all instructions. Failure
to follow the warnings and instructions may result in
HOHFWULFVKRFN¿UHDQGRUVHULRXVLQMXU\
Save all warnings and instructions for future reference.
The term “power tool’’ in the warnings refers to your
PDLQVRSHUDWHG FRUGHG SRZHU WRRO RU EDWWHU\RSHUDWHG
FRUGOHVVSRZHUWRRO
WORK AREA SAFETY
Ŷ Keep work area clean and well lit.&OXWWHUHGRUGDUN
areas invite accidents.
Ŷ Do not operate power tools in explosive
atmospheres, such as in the presence of flammable
liquids, gases or dust. 3RZHU WRROV FUHDWH VSDUNV
which may ignite the dust or fumes.
Ŷ Keep children and bystanders away while operating
a power tool. Distractions can cause you to lose
control.
ELECTRICAL SAFETY
Ŷ Power tool plugs must match the outlet. Never
modify the plug in any way. Do not use any adapter
plugs with earthed (grounded) power tools.
8QPRGLILHGSOXJVDQGPDWFKLQJRXWOHWVZLOOUHGXFHULVN
RIHOHFWULFVKRFN
Ŷ Avoid body contact with earthed or grounded
surfaces, such as pipes, radiators, ranges and
refrigerators. 7KHUH LV DQ LQFUHDVHG ULVN RI HOHFWULF
VKRFNLI\RXUERG\LVHDUWKHGRUJURXQGHG
Ŷ Do not expose power tools to rain or wet conditions.
:DWHU HQWHULQJ D SRZHU WRRO ZLOO LQFUHDVH WKH ULVN RI
HOHFWULFVKRFN
Ŷ Do not abuse the cord. Never use the cord for
carrying, pulling or unplugging the power tool.
Keep cord away from heat, oil, sharp edges or
moving parts. Damaged or entangled cords increase
WKHULVNRIHOHFWULFVKRFN
Ŷ When operating a power tool outdoors, use an
extension cord suitable for outdoor use. Use of a
FRUGVXLWDEOHIRURXWGRRUXVHUHGXFHVWKHULVNRIHOHFWULF
VKRFN
Ŷ If operating a power tool in a damp location is
unavoidable, use a residual current device (RCD)
protected supply.8VHRIDQ5&'UHGXFHVWKHULVNRI
HOHFWULFVKRFN
PERSONAL SAFETY
Ŷ Stay alert, watch what you are doing and use
common sense when operating a power tool. Do
not use a power tool while you are tired or under the
influence of drugs, alcohol or medication. A moment
of inattention while operating power tools may result in
serious personal injury.
Ŷ Use personal protective equipment. Always wear
eye protection. 3URWHFWLYH HTXLSPHQW VXFK DV GXVW
PDVN QRQVNLG VDIHW\ VKRHV KDUG KDW RU KHDULQJ
protection used for appropriate conditions will reduce
personal injuries.
Ŷ Prevent unintentional starting. Ensure the switch
is in the off-position before connecting to power
source and/or battery pack, picking up or carrying
the tool. Carrying power tools with your finger on the
switch or energising power tools that have the switch
on invites accidents.
Ŷ Remove any adjusting key or wrench before turning
the power tool on.$ZUHQFKRUDNH\OHIWDWWDFKHGWR
a rotating part of the power tool may result in personal
injury.
Ŷ Do not overreach. Keep proper footing and balance
at all times. This enables better control of the power
tool in unexpected situations.
Ŷ Dress properly. Do not wear loose clothing or
jewellery. Keep your hair, clothing and gloves away
from moving parts. Loose clothes, jewellery or long
hair can be caught in moving parts.
Ŷ If devices are provided for the connection of dust
extraction and collection facilities, ensure these are
connected and properly used. Use of dust collection
FDQUHGXFHGXVWUHODWHGKD]DUGV
POWER TOOL USE AND CARE
Ŷ Do not force the power tool. Use the correct power
tool for your application. The correct power tool will
do the job better and safer at the rate for which it was
designed.
Ŷ Do not use the power tool if the switch does not turn
it on and off. Any power tool that cannot be controlled
with the switch is dangerous and must be repaired.
Ŷ Disconnect the plug from the power source and/or
the battery pack from the power tool before making
any adjustments, changing accessories or storing
power tools. Such preventive safety measures reduce
WKHULVNRIVWDUWLQJWKHSRZHUWRRODFFLGHQWDOO\
Ŷ Store idle power tools out of the reach of children

2 | English
and do not allow persons unfamiliar with the power
tool or these instructions to operate the power tool.
3RZHUWRROV DUHGDQJHURXVLQ WKHKDQGV RIXQWUDLQHG
users.
Ŷ Maintain power tools. Check for misalignment or
binding of moving parts, breakage of parts and any
other condition that may affect the power tool’s
operation. If damaged, have the power tool repaired
before use. Many accidents are caused by poorly
maintained power tools.
Ŷ Keep cutting tools sharp and clean. 3URSHUO\
maintained cutting tools with sharp cutting edges are
OHVVOLNHO\WRELQGDQGDUHHDVLHUWRFRQWURO
Ŷ Use the power tool, accessories and tool bits etc,
in accordance with these instructions, taking into
account the working conditions and the work to
be performed. Use of the power tool for operations
different from those intended could result in a
hazardous situation.
BATTERY TOOL USE AND CARE
Ŷ Recharge only with the charger specified by the
manufacturer. A charger that is suitable for one type
RIEDWWHU\SDFNPD\FUHDWHDULVNRIILUHZKHQXVHGZLWK
DQRWKHUEDWWHU\SDFN
Ŷ Use power tools only with specifically designated
battery packs. 8VH RI DQ\ RWKHU EDWWHU\ SDFNV PD\
FUHDWHDULVNRILQMXU\DQGILUH
Ŷ When battery pack is not in use, keep it away from
other metal objects, like paper clips, coins, keys,
nails, screws or other small metal objects, that can
make a connection from one terminal to another.
Shorting the battery terminals together may cause
burns or a fire.
Ŷ Under abusive conditions, liquid may be ejected
from the battery; avoid contact. If contact
accidentally occurs, flush with water. If liquid
contacts eyes, additionally seek medical help.
/LTXLGHMHFWHGIURPWKHEDWWHU\PD\FDXVHLUULWDWLRQRU
burns.
SERVICE
Ŷ Have your power tool serviced by a qualified repair
person using only identical replacement parts.
This will ensure that the safety of the power tool is
maintained.
ADDITIONAL GENERAL SAFETY WARNINGS
Ŷ Some regions have regulations that restrict the use of
WKHSURGXFW&KHFNZLWK\RXUORFDODXWKRULW\IRUDGYLFH
Ŷ Never allow children or people unfamiliar with the
instructions to use the product. Local regulations may
restrict the age of the operator.
Ŷ Ensure before each use that all controls and safety
devices function correctly. Do not use the power tool if
the “off” switch does not stop the motor.
Ŷ Wear full eye and hearing protection, strong sturdy
gloves as well as head protection while operating the
SURGXFWXVHDIDFHPDVNLIRSHUDWLRQLVGXVW\
Ŷ Do not wear loose fitting clothing, short trousers or
MHZHOOHU\RIDQ\NLQG
Ŷ Secure long hair so it is above shoulder level to prevent
entanglement in moving parts.
Ŷ %HZDUH RI WKURZQ IO\LQJ RU IDOOLQJ REMHFWV NHHS DOO
bystanders, children, and animals at least 15 m away
IURPZRUNDUHD
Ŷ 'RQRWRSHUDWHLQSRRUOLJKWLQJ7KHRSHUDWRUUHTXLUHVD
FOHDUYLHZRIWKHZRUNDUHDWRLGHQWLI\SRWHQWLDOKD]DUGV
Ŷ Use of hearing protection reduces the ability to hear
ZDUQLQJV VKRXWV RU DODUPV 7KH RSHUDWRU PXVW SD\
H[WUDDWWHQWLRQWRZKDWLVJRLQJRQLQWKHZRUNLQJDUHD
Ŷ 2SHUDWLQJVLPLODUWRROVQHDUE\LQFUHDVHVERWKWKHULVN
of hearing injury and the potential for other persons to
HQWHU\RXUZRUNLQJDUHD
Ŷ Keep firm footing and balance. Do not overreach.
Overreaching can result in loss of balance and can
LQFUHDVHWKHULVNRINLFNEDFN
Ŷ Keep all parts of your body away from any moving part.
Ŷ ,QVSHFWWKHPDFKLQHEHIRUHHDFKXVH&KHFNIRUFRUUHFW
RSHUDWLRQ RI DOO FRQWUROV LQFOXGLQJ WKH FKDLQ EUDNH
&KHFNIRUORRVHIDVWHQHUVPDNHVXUHDOOJXDUGVDQG
handles are properly and securely attached. Replace
any damaged parts before use.
Ŷ Do not modify the machine in any way or use parts
and accessories which are not recommended by the
manufacturer.
WARNING
If the machine is dropped, suffers heavy impact or begins
to vibrate abnormally, immediately stop the machine and
inspect for damage or identify the cause of the vibration.
Any damage should be properly repaired or replaced by
an authorized service centre.
CHAINSAW SAFETY WARNINGS
Ŷ Keep all parts of the body away from the saw chain
when the chainsaw is operating. Before you start
the chainsaw, make sure the saw chain is not
contacting anything. A moment of inattention while
operating chainsaws may cause entanglement of your
clothing or body with the saw chain.
Ŷ Always hold the chainsaw with your right hand
on the rear handle and your left hand on the front
handle. Holding the chainsaw with a reversed hand
FRQILJXUDWLRQLQFUHDVHVWKHULVNRISHUVRQDOLQMXU\DQG
should never be done.
Ŷ Hold the power tool by insulated gripping surface
only, because the saw chain may contact hidden
wiring.6DZFKDLQVFRQWDFWLQJD³OLYH´ZLUHPD\PDNH
exposed metal parts of the power tool “live” and could
JLYHWKHRSHUDWRUDQHOHFWULFVKRFN
Ŷ Wear safety glasses and hearing protection. Further
protective equipment for head, hands, legs and feet
is recommended. $GHTXDWH SURWHFWLYH FORWKLQJ ZLOO
reduce personal injury by flying debris or accidental
contact with the saw chain.
Ŷ Do not operate a chainsaw in a tree. Operation of

3 English |
EN
FR
DE
ES
IT
NL
PT
DA
SV
FI
NO
RU
PL
CS
HU
RO
LV
LT
ET
HR
SL
SK
BG
a chainsaw while up in a tree may result in personal
injury.
Ŷ Always keep proper footing and operate the
chainsaw only when standing on fixed, secure and
level surface. Slippery or unstable surfaces such as
ladders may cause a loss of balance or control of the
chainsaw.
Ŷ When cutting a limb that is under tension be alert
for spring back. When the tension in the wood fibres is
UHOHDVHGWKHVSULQJORDGHGOLPEPD\VWULNHWKHRSHUDWRU
DQGRUWKURZWKHFKDLQVDZRXWRIFRQWURO
Ŷ Use extreme caution when cutting brush and
saplings. The slender material may catch the saw
chain and be whipped toward you or pull you off
balance.
Ŷ Carry the chainsaw by the front handle with the
chainsaw switched off and away from your body.
When transporting or storing the chainsaw always
fit the guide bar cover. 3URSHU KDQGOLQJ RI WKH
FKDLQVDZZLOOUHGXFHWKHOLNHOLKRRGRIDFFLGHQWDOFRQWDFW
with the moving saw chain.
Ŷ Follow instructions for lubricating, chain tensioning
and changing accessories. Improperly tensioned
RU OXEULFDWHG FKDLQ PD\ HLWKHU EUHDN RU LQFUHDVH WKH
FKDQFHIRUNLFNEDFN
Ŷ Keep handles dry, clean, and free from oil and
grease. Greasy, oily handles are slippery causing loss
of control.
Ŷ Cut wood only. Do not use chainsaw for purposes
not intended. For example: do not use chainsaw
for cutting plastic, masonry or non-wood building
materials. Use of the chainsaw for operations different
than intended could result in a hazardous situation.
Causes and operator prevention of kickback:
.LFNEDFNPD\RFFXUZKHQWKHQRVHRUWLSRIWKHJXLGHEDU
touches an object, or when the wood closes in and pinches
the saw chain in the cut.
Tip contact in some cases may cause a sudden reverse
UHDFWLRQ NLFNLQJ WKH JXLGH EDU XS DQG EDFN WRZDUGV WKH
operator.
3LQFKLQJWKHVDZFKDLQDORQJWKHWRSRIWKHJXLGHEDUPD\
SXVKWKHJXLGHEDUUDSLGO\EDFNWRZDUGVWKHRSHUDWRU
Either of these reactions may cause you to lose control of
the saw which could result in serious personal injury. Do
not rely exclusively upon the safety devices built into your
VDZ$VDFKDLQVDZXVHU\RXVKRXOGWDNHVHYHUDOVWHSVWR
NHHS\RXUFXWWLQJMREVIUHHIURPDFFLGHQWRULQMXU\
.LFNEDFN LV WKH UHVXOW RI WRRO PLVXVH DQGRU LQFRUUHFW
operating procedures or conditions and can be avoided by
WDNLQJSURSHUSUHFDXWLRQVDVJLYHQEHORZ
Ŷ Maintain a firm grip, with thumbs and fingers
encircling the chainsaw handles, with both hands
on the saw and position your body and arm to allow
you to resist kickback forces. .LFNEDFN IRUFHV FDQ
be controlled by the operator, if proper precautions are
WDNHQ'RQRWOHWJRRIWKHFKDLQVDZ
Ŷ Do not overreach and do not cut above shoulder
height. This helps prevent unintended tip contact and
enables better control of the chainsaw in unexpected
situations.
Ŷ Only use replacement bars and chains specified
by the manufacturer. Incorrect replacement bars and
FKDLQVPD\FDXVHFKDLQEUHDNDJHDQGRUNLFNEDFN
Ŷ Follow the manufacturer’s sharpening and
maintenance instructions for the saw chain.
Decreasing the depth gauge height can lead to
LQFUHDVHGNLFNEDFN
ADDITIONAL CHAINSAW SAFETY WARNINGS
Ŷ ,WLVUHFRPPHQGHGWRFXWORJVRQDVDZKRUVHRUFUDGOH
when operating the product the first time.
Ŷ (QVXUH DOO JXDUGV KDQGOHV DQG VSLNHG EXPSHU DUH
properly fitted and are in good condition.
Ŷ 3HUVRQVXVLQJWKLVFKDLQVDZVKRXOGEHLQJRRGKHDOWK
7KHFKDLQVDZLVDKHDY\XQLWVRWKHRSHUDWRUUHTXLUHV
to be physically fit. The operator should be alert, have
good vision, mobility, balance and manual dexterity. If
there is any doubt, do not operate the chainsaw.
Ŷ Do not start using the product until you have a clear
ZRUNDUHDVHFXUHIRRWLQJDQGDSODQQHGUHWUHDWSDWK
away from the falling tree.
Ŷ Beware of the emission of lubricant mist and saw dust.
:HDUDPDVNRUUHVSLUDWRULIUHTXLUHG
Ŷ 'RQRWFXWYLQHV DQGRUVPDOOXQGHUJURZWKOHVV WKDQ
PPLQGLDPHWHU
Ŷ Always hold the chainsaw with both hands when
operating the saw. Use a firm grip with thumbs and
fingers encircling the chainsaw handles. Right hand
must be on the rear handle and left hand on the front
handle.
Ŷ %HIRUHVWDUWLQJWKHWRROPDNHVXUHWKHVDZFKDLQLVQRW
contacting any object.
Ŷ Do not modify your tool in any way or use it to power
any attachments or devices not recommended by the
manufacturer for your saw.
Ŷ 7KHUH VKRXOG EH D ILUVWDLG NLW FRQWDLQLQJ ODUJH
wound dressings and a means to summon attention
HJ ZKLVWOH FORVH WR WKH RSHUDWRU $ ODUJHU PRUH
FRPSUHKHQVLYHNLWVKRXOGEHUHDVRQDEO\QHDUE\
Ŷ The operator may be tempted to remove the helmet if
WKHUHLVQRGDQJHURIIDOOLQJREMHFWVLQWKHZRUNDUHDEXW
remember the helmet, particularly with the mesh visor,
can help reduce the potential for injury to the face and
KHDGLINLFNEDFNRFFXUV
Ŷ An incorrectly tensioned chain can jump off the guide
bar and could result in serious injury or fatality. The
OHQJWKRIFKDLQGHSHQGVRQWKHWHPSHUDWXUH&KHFNWKH
WHQVLRQIUHTXHQWO\
Ŷ <RXVKRXOGJHWXVHGWR\RXUQHZFKDLQVDZE\PDNLQJ
simple cuts on securely supported wood. Do this
whenever you have not operated the saw for some
time.
Ŷ 7RUHGXFHWKHULVNRILQMXU\DVVRFLDWHGZLWKFRQWDFWLQJ
PRYLQJSDUWVDOZD\VVWRSWKHPRWRUDSSO\FKDLQEUDNH
UHPRYH WKH EDWWHU\ SDFN DQG PDNH VXUH DOO PRYLQJ
SDUWVKDYHFRPHWRDVWRSEHIRUH
– FOHDQLQJRUFOHDULQJDEORFNDJH
– leaving the product unattended

4 | English
– installing or removing attachments
– FKHFNLQJPDLQWHQDQFHRUZRUNLQJRQWKHPDFKLQH
Ŷ 7KH VL]H RI WKH ZRUN DUHD GHSHQGV RQ WKH MRE EHLQJ
SHUIRUPHGDVZHOODVWKHVL]HRIWKHWUHHRUZRUNSLHFH
LQYROYHG)RUH[DPSOHIHOOLQJDWUHHUHTXLUHV DODUJHU
ZRUN DUHD WKDQ PDNLQJ RWKHU FXWVLHEXFNLQJ FXWV
etc. The operator needs to be aware and in control of
HYHU\WKLQJKDSSHQLQJLQWKLVZRUNDUHD
Ŷ Do not cut with your body in line with the guide bar
DQGFKDLQ,I\RXGRH[SHULHQFHNLFNEDFNWKLVZLOOKHOS
prevent the chain coming into contact with your head
or body.
Ŷ 'RQRWXVHDEDFNDQGIRUZDUGVDZLQJPRWLRQOHWWKH
FKDLQGRWKHZRUNNHHSWKHFKDLQVKDUSDQGGRQ¶WWU\WR
push the chain through the cut.
Ŷ Do not put pressure on the saw at the end of the cut.
%HUHDG\WRWDNHRQWKHZHLJKWRIWKHVDZDVLWFXWVIUHH
from the wood. Failure to do so could result in possible
serious personal injury.
Ŷ Do not stop the saw in the middle of a cutting operation.
Keep the saw running until it is already removed from
the cut.
Push and pull
The reaction force is always opposite to the direction the
chain is moving. Thus, the operator must be ready to
FRQWUROWKHWHQGHQF\IRUWKHPDFKLQHWRSXOODZD\IRUZDUG
PRWLRQZKHQFXWWLQJRQWKHERWWRPHGJHRIWKHEDUDQGWKH
SXVKEDFNZDUGVWRZDUGVWKHRSHUDWRUZKHQFXWWLQJDORQJ
the top edge.
Saw jammed in the cut
6WRSWKHFKDLQVDZDQGPDNHLWVDIH'RQRWWU\WRIRUFHWKH
FKDLQDQGEDURXWRIWKHFXWDVWKLV LVOLNHO\WREUHDNWKH
FKDLQZKLFKPD\VZLQJEDFNDQGVWULNHWKHRSHUDWRU7KLV
situation normally occurs because the wood is incorrectly
supported and forcing the cut to close under compression
thereby pinching the blade. If adjusting the support does
not release the bar and chain, use wooden wedges or a
lever to open the cut and release the saw. Never try to start
WKHFKDLQVDZZKHQWKHJXLGHEDULVDOUHDG\LQDFXWRUNHUI
Personal protective equipment
*RRG TXDOLW\ SHUVRQDO SURWHFWLYH HTXLSPHQW DV XVHG
E\ SURIHVVLRQDOV ZLOO KHOS WR UHGXFH WKH ULVN RI LQMXU\ WR
the operator. The following items should be used when
RSHUDWLQJ\RXUFKDLQVDZ
Safety helmet
– VKRXOGFRPSO\ZLWK(1DQGEH&(PDUNHG
Hearing protection
– VKRXOGFRPSO\ZLWK(1DQGEH&(PDUNHG
Eye and face protection
– VKRXOGEH&(PDUNHGDQGFRPSO\ZLWK(1IRU
VDIHW\JODVVHVRU(1IRUPHVKYLVRUV
Gloves
– VKRXOGFRPSO\ZLWK(1DQGEH&(PDUNHG
Leg protection (chaps)
– VKRXOG FRPSO\ ZLWK (1 EH &( PDUNHG DQG
SURYLGHDOOURXQGSURWHFWLRQ
Chainsaw safety boots
– VKRXOG FRPSO\ ZLWK (1 ,62 DQG EH
PDUNHGZLWKDVKLHOGGHSLFWLQJDFKDLQVDZWRVKRZ
FRPSOLDQFH ZLWK (1 2FFDVLRQDO XVHUV
PD\XVHVWHHOWRHFDSVDIHW\ERRWVZLWKSURWHFWLYH
JDLWHUVZKLFKFRQIRUPWR(1LIWKHJURXQGLV
HYHQDQGWKHUHLVOLWWOHULVNRIWULSSLQJRUFDWFKLQJRQ
XQGHUJURZWK
Chainsaw jackets for upper body protection
– VKRXOGFRPSO\ZLWK(1DQGEH&(PDUNHG
INSTRUCTIONS CONCERNING THE PROPER TECH-
NIQUES FOR BASIC FELLING, LIMBING, AND CROSS-
CUTTING
Understanding the forces within the wood
When you understand the directional pressures and
stresses inside the wood you can reduce the “pinches” or
at least expect them during your cutting. Tension in the
ZRRGPHDQVWKH ¿EHUVDUH EHLQJSXOOHGDSDUW DQGLI \RX
FXWLQWKLVDUHDWKH³NHUI´RUFXWZLOOWHQGWRRSHQDVWKHVDZ
goes through. If a log is being supported on a saw horse
and the end is hanging unsupported over the end then
tension is created on the upper surface due to the weight
RIWKHRYHUKDQJLQJORJVWUHWFKLQJWKH¿EHUV/LNHZLVHWKH
XQGHUVLGHRIWKHORJZLOOEHLQFRPSUHVVLRQDQGWKH¿EHUV
are being pushed together. If a cut is made in this area the
NHUIZLOOKDYHWKHWHQGHQF\WRFORVHXSGXULQJWKHFXW7KLV
would pinch the blade.
Felling a tree
See page 239 - 240.
:KHQEXFNLQJDQGIHOOLQJRSHUDWLRQVDUHEHLQJSHUIRUPHG
by two or more persons at the same time, the felling
RSHUDWLRQVVKRXOGEHVHSDUDWHGIURPWKHEXFNLQJRSHUDWLRQ
by a distance of at least twice the height of the tree being
felled. Trees should not be felled in a manner that would
HQGDQJHUDQ\ SHUVRQVWULNH DQ\ XWLOLW\OLQH RUFDXVH DQ\
SURSHUW\GDPDJH,IWKHWUHHGRHVPDNHFRQWDFWZLWKDQ\
XWLOLW\OLQHWKHFRPSDQ\VKRXOGEHQRWL¿HGLPPHGLDWHO\
7KHFKDLQVDZRSHUDWRUVKRXOGNHHS RQWKH XSKLOOVLGH RI
WKHWHUUDLQDVWKHWUHHLVOLNHO\WRUROORUVOLGHGRZQKLOODIWHU
it is felled.
An escape path should be planned and cleared as
necessary before cuts are started. The escape path should
H[WHQGEDFNDQGGLDJRQDOO\WRWKHUHDURIWKHH[SHFWHGOLQH
of fall.
Before felling is started, consider the natural lean of the
tree, the location of larger branches and the wind direction
to judge which way the tree will fall.
5HPRYH GLUW VWRQHV ORRVH EDUN QDLOV VWDSOHV DQG ZLUH
from the tree.
Do not attempt to fell trees which are rotten or have been
GDPDJHG E\ ZLQG ¿UH OLJKWQLQJ HWF 7KLV LV H[WUHPHO\
dangerous and should only be completed by professional
tree surgeons.
1. Notching undercut
See page 239 - 240.
0DNH WKH QRWFK WKH GLDPHWHU RI WKH WUHH
SHUSHQGLFXODUWRWKHGLUHFWLRQRIIDOOV0DNHWKHORZHU
horizontal notching cut first. This will help to avoid
pinching either the saw chain or the guide bar when the

5 English |
EN
FR
DE
ES
IT
NL
PT
DA
SV
FI
NO
RU
PL
CS
HU
RO
LV
LT
ET
HR
SL
SK
BG
second notch is being made.
2. Felling back cut
See page 239 - 240.
0DNH WKH IHOOLQJ EDFN FXW DW OHDVW PP LQ KLJKHU
WKDQWKHKRUL]RQWDOQRWFKLQJFXW.HHSWKHIHOOLQJEDFN
FXW SDUDOOHO WR WKH KRUL]RQWDO QRWFKLQJ FXW 0DNH WKH
IHOOLQJEDFNFXWVRHQRXJKZRRGLVOHIWWRDFWDVDKLQJH
7KHKLQJHZRRGNHHSVWKHWUHHIURPWZLVWLQJDQGIDOOLQJ
in the wrong direction. Do not cut through the hinge.
As the felling gets close to the hinge, the tree should
begin to fall. If there is any chance that the tree may
QRW IDOO LQ GHVLUHG GLUHFWLRQ RU LW PD\ URFN EDFN DQG
ELQGWKHVDZFKDLQVWRSFXWWLQJEHIRUHWKHIHOOLQJEDFN
cut is complete and use wedges of wood, plastic or
aluminium to open the cut and drop the tree along the
desired line of fall.
When the tree begins to fall remove the chainsaw from
the cut, stop the motor, put the chainsaw down, then
use the retreat path planned. Be alert for overhead
limbs falling and watch your footing.
Removing buttress roots
See page 240.
$EXWWUHVVURRWLVDODUJHURRWH[WHQGLQJIURPWKHWUXQNRI
the tree above the ground. Remove large buttress roots
SULRUWRIHOOLQJ0DNHWKHKRUL]RQWDOFXWLQWRWKHEXWWUHVV¿UVW
followed by the vertical cut. Remove the resulting loose
VHFWLRQIURPWKHZRUNDUHD)ROORZWKHFRUUHFWWUHHIHOOLQJ
procedure after you have removed the large buttress roots.
Bucking a log
See page 241.
%XFNLQJ LV FXWWLQJ D ORJ LQWR OHQJWKV ,W LV LPSRUWDQW WR
PDNHVXUH \RXUIRRWLQJ LV¿UP DQG\RXU ZHLJKWLV HYHQO\
distributed on both feet. When possible, the log should be
UDLVHGDQGVXSSRUWHGE\WKHXVHRIOLPEVORJVRUFKRFNV
Follow the simple directions for easy cutting. When the log
is supported along its entire length, it is cut from the top
RYHUEXFN
:KHQWKHORJLVVXSSRUWHGRQRQHHQGFXWWKHGLDPHWHU
IURPWKHXQGHUVLGH XQGHUEXFN 7KHQ PDNH WKH ¿QLVKHG
FXWE\RYHUEXFNLQJWRPHHWWKH¿UVWFXW
:KHQ WKH ORJ LV VXSSRUWHG RQ ERWK HQGV FXW WKH
GLDPHWHUIURPWKHWRSRYHUEXFN7KHQPDNHWKH¿QLVKHG
FXWE\XQGHUEXFNLQJWKHORZHUWRPHHWWKH¿UVWFXW
:KHQEXFNLQJRQDVORSHDOZD\VVWDQGRQWKHXSKLOOVLGH
of the log. When “cutting through”, to maintain complete
control release the cutting pressure near the end of the
cut without relaxing your grip on the chainsaw handles.
Don’t let the chain contact the ground. After completing the
cut, wait for the saw chain to stop before you move the
chainsaw. Always stop the motor before moving from tree
to tree.
Limbing a tree
See page 242.
Limbing is removing the branches from a fallen tree. When
limbing leave larger lower limbs to support the log off the
ground. Remove the small limbs in one cut. Branches
under tension should be cut from the bottom up to avoid
binding the chainsaw.
Cutting springpoles
See page 242.
A springpole is any log, branch, rooted stump, or sapling
which is bent under tension by other wood so that it springs
EDFNLIWKHZRRGKROGLQJLWLVFXWRUUHPRYHG
On a fallen tree, a rooted stump has a high potential of
VSULQJLQJ EDFNWRWKH XSULJKW SRVLWLRQ GXULQJ WKH EXFNLQJ
cut to separate the log from the stump. Watch out for
springpoles—they are dangerous.
WARNING
6SULQJSROHVDUHGDQJHURXVDQGFRXOGVWULNHWKHRSHUDWRU
causing the operator to lose control of the chainsaw.
This could result in severe or fatal injury to the operator.
This should be done by trained users.
INTENDED USE
The product is only intended for use outdoors. For safety
UHDVRQV WKH SURGXFW PXVW EH DGHTXDWHO\ FRQWUROOHG E\
using two handed operation at all times.
7KHSURGXFWLVGHVLJQHGIRUFXWWLQJEUDQFKHVWUXQNVORJV
and beams of a diameter determined by the cutting length
of the guide bar. It is only designed to cut wood. It is only
to be used in domestic application by adults who have
UHFHLYHGDGHTXDWHWUDLQLQJRQWKHKD]DUGVDQGSUHYHQWDWLYH
PHDVXUHVDFWLRQVWREHWDNHQZKLOVWXVLQJLW
Do not use the product for any purpose not listed above. It
is not to be used for professional tree services. The product
is not to be used by children or by persons not wearing
DGHTXDWHSHUVRQDOSURWHFWLYHHTXLSPHQWDQGFORWKLQJ
RESIDUAL RISKS
Even when the product is used as prescribed, it is still
LPSRVVLEOH WR FRPSOHWHO\ HOLPLQDWH FHUWDLQ UHVLGXDO ULVN
factors. The following hazards may arise in use and the
RSHUDWRUVKRXOGSD\VSHFLDODWWHQWLRQWRDYRLGWKHIROORZLQJ
Ŷ Injury caused by vibration. Always use the right tool for
WKH MRE XVH GHVLJQDWHG KDQGOHV DQG UHVWULFW ZRUNLQJ
time and exposure.
Ŷ Exposure to noise can cause hearing injury. Wear ear
protection and limit exposure
Ŷ &RQWDFW ZLWKH[SRVHG VDZ WHHWK RI WKH FKDLQ FXWWLQJ
KD]DUGV
Ŷ 8QIRUHVHHQDEUXSWPRYHPHQWRUNLFNEDFNRIWKHJXLGH
EDUFXWWLQJKD]DUGV
Ŷ 3DUWV HMHFWHG IURP WKH VDZ FKDLQ FXWWLQJLQMHFWLRQ
KD]DUGV
Ŷ 7KURZQ RXW SLHFHV RI WKH ZRUN SLHFH ZRRG FKLSV
VSOLQWHUV
Ŷ Inhalation of saw dust and particles.
Ŷ 6NLQFRQWDFWZLWKOXEULFDQWRLO
RISK REDUCTION
,WKDV EHHQUHSRUWHG WKDW YLEUDWLRQVIURP KDQGKHOGWRROV
may contribute to a condition called Raynaud’s Syndrome
in certain individuals. Symptoms may include tingling,

6 | English
QXPEQHVVDQGEODQFKLQJRIWKH¿QJHUVXVXDOO\DSSDUHQW
upon exposure to cold. Hereditary factors, exposure to
FROG DQG GDPSQHVV GLHW VPRNLQJ DQG ZRUN SUDFWLFHV
are all thought to contribute to the development of these
V\PSWRPV7KHUHDUHPHDVXUHVWKDWFDQEHWDNHQE\WKH
RSHUDWRUWRSRVVLEO\UHGXFHWKHHIIHFWVRIYLEUDWLRQ
Ŷ Keep your body warm in cold weather. When operating
WKH XQLW ZHDU JORYHV WR NHHS WKH KDQGV DQG ZULVWV
warm. It is reported that cold weather is a major factor
contributing to Raynaud’s Syndrome.
Ŷ After each period of operation, exercise to increase
blood circulation.
Ŷ 7DNH IUHTXHQW ZRUN EUHDNV /LPLW WKH DPRXQW RI
exposure per day.
Ŷ 3URWHFWLYHJORYHVDYDLODEOHIURPSURIHVVLRQDOFKDLQVDZ
retailers are designed specifically for chainsaw use
which give protection, good grip and also reduce the
effect of handle vibration. These gloves should comply
ZLWK(1DQGPXVWEH&(PDUNHG
If you experience any of the symptoms of this condition,
immediately discontinue use and see your doctor about
these symptoms.
WARNING
Injuries may be caused, or aggravated, by prolonged
use of a tool. When using any tool for prolonged periods,
HQVXUH\RXWDNHUHJXODUEUHDNV
KNOW YOUR PRODUCT
See page 233.
1. )URQWKDQGJXDUG&KDLQEUDNH
2. Front handle
3. Rear handle
4. Chain
5. Guide bar
6SLNHGEXPSHU
7. Chain lubricant cap
8. Trigger release
9. Throttle trigger
10. 6SURFNHWFRYHU
11. Chain tensioner adjustment ring
12. &KDLQWHQVLRQHUNQRE
13. Guide bar cover
SAFETY DEVICES
Low kick-back saw chain
$ORZNLFNEDFNVDZFKDLQKHOSVWRUHGXFHWKHSRVVLELOLW\
RIDNLFNEDFNHYHQW
7KH UDNHUV GHSWK JDXJHV DKHDG RI HDFK FXWWHU FDQ
PLQLPL]HWKHIRUFHRIDNLFNEDFNUHDFWLRQE\SUHYHQWLQJWKH
cutters from digging in too deeply. Only use replacement
guide bar and chain combinations recommended by the
manufacturer.
As saw chains are sharpened, they lose some of the low
NLFNEDFNTXDOLWLHVDQGH[WUDFDXWLRQLVUHTXLUHG )RU\RXU
safety, replace saw chains when cutting performance
decreases.
Spiked bumper
7KHLQWHJUDOEXPSHUVSLNHPD\EHXVHGDVDSLYRWZKHQ
PDNLQJD FXW ,WKHOSV WR NHHS WKHERG\ RI WKHFKDLQVDZ
steady while cutting. When cutting, push the machine
IRUZDUGXQWLOWKHVSLNHVGLJLQWRWKHHGJHRIWKHZRRGWKHQ
by moving the rear handle up or down in the direction of the
cutting line it can help ease the physical strain of cutting
Guide bars
Generally, guide bars with small radius tips have somewhat
ORZHUSRWHQWLDOIRUNLFNEDFN<RXVKRXOGXVHDJXLGHEDU
and matching chain which is just long enough for the job.
/RQJHU EDUV LQFUHDVH WKH ULVN RI ORVV RI FRQWURO GXULQJ
VDZLQJ5HJXODUO\FKHFN WKHFKDLQWHQVLRQ :KHQFXWWLQJ
VPDOOHUEUDQFKHVOHVVWKDQWKHIXOOOHQJWKRIWKHJXLGHEDU
WKHFKDLQ LV PRUHOLNHO\ WR EHWKURZQ RII LIWKH WHQVLRQ LV
not correct.
Chain brake
&KDLQ EUDNHV DUH GHVLJQHG WR TXLFNO\ VWRS WKH FKDLQ
URWDWLQJ:KHQWKHFKDLQEUDNHOHYHUKDQGJXDUGLVSXVKHG
towards the bar, the chain should stop immediately. A
FKDLQEUDNHGRHVQRWSUHYHQWNLFNEDFN,WRQO\ORZHUVWKH
ULVN RI LQMXU\ VKRXOG WKH FKDLQ EDU FRQWDFW WKH RSHUDWRU¶V
ERG\GXULQJDNLFNEDFNHYHQW7KHFKDLQEUDNHVKRXOGEH
tested before each use for correct operation in both the run
DQGEUDNHSRVLWLRQV
ASSEMBLY
WARNING
If any parts are damaged or missing do not operate this
product until the parts are replaced. Failure to heed this
warning could result in serious personal injury.
ASSEMBLING SAW CHAIN AND GUIDE BAR
See page 243 - 244.
1. 0DNH VXUH WR UHPRYH WKH EDWWHU\ SDFN IURP WKH XQLW
Wear protective gloves.
2. 8QVFUHZ WKH FKDLQ WHQVLRQHU NQRE DQG UHPRYH WKH
VSURFNHWFRYHU
3. The saw chain should face in the direction of chain
URWDWLRQ,IWKH\IDFHEDFNZDUGVWXUQWKHORRSRYHU
4. 3ODFHWKHFKDLQGULYHOLQNVLQWRWKHEDUJURRYH
5. 3RVLWLRQWKHFKDLQVRWKHUHLVDORRSDWWKHEDFNRIWKH
bar.
Hold the chain in position on the bar and place the loop
DURXQG WKH GULYH VSURFNHW /RZHU WKH EDU VR WKDW WKH
bolt goes through the hole in the attached chain tension
assembly. You may need to rotate this assembly so the
bolt and hole align. You may rotate this assembly again
WRDSSO\VRPHWHQVLRQWRWKHFKDLQZKLFKZLOOKHOSNHHS
it in place.
7. 5HSODFHWKHVSURFNHWFRYHUDQGWXUQWKHFKDLQWHQVLRQHU
NQREXQWLOQHDUO\WLJKWWXUQWKHFKDLQWHQVLRQDGMXVWPHQW
ring until the saw chain is properly tensioned. The guide
EDUPXVWWKHQEHSXVKHGXSZDUGVFKHFNFKDLQWHQVLRQ
again, do not tension the chain too tight.
8. $IWHUWKHFKDLQLVZHOOWHQVLRQHGWLJKWHQWKHNQREDJDLQ

7 English |
EN
FR
DE
ES
IT
NL
PT
DA
SV
FI
NO
RU
PL
CS
HU
RO
LV
LT
ET
HR
SL
SK
BG
ADJUSTING THE CHAIN TENSION
See page 235. See page 245.
1. /RRVHQWKH FKDLQWHQVLRQHUNQRE VOLJKWO\E\WXUQLQJ LW
FRXQWHUFORFNZLVH
2. To increase the chain tension, turn the chain tensioner
DGMXVWPHQWULQJFORFNZLVHDQGFKHFNWKHFKDLQWHQVLRQ
IUHTXHQWO\7RUHGXFHWKHFKDLQWHQVLRQWXUQWKHFKDLQ
WHQVLRQHUDGMXVWPHQWULQJFRXQWHUFORFNZLVHDQGFKHFN
WKHFKDLQWHQVLRQIUHTXHQWO\
3. The chain tension is correct when the gap between the
FXWWHULQ WKH FKDLQ DQG WKH EDULV EHWZHHQ PP
PP3XOOWKHFKDLQLQWKHPLGGOHRIWKHORZHUVLGHRIWKH
EDUGRZQZDUGVDZD\IURPWKHEDUDQGPHDVXUHWKH
distance between the bar and the chain cutters.
4. 7LJKWHQWKHFKDLQWHQVLRQHUNQREE\WXUQLQJLWFORFNZLVH
OPERATION
ADDING CHAIN LUBRICATING OIL
See page 234.
WARNING
1HYHUZRUNZLWKRXWFKDLQOXEULFDQW,I WKHVDZFKDLQLV
running without lubricant, guide bar and saw chain can
EH GDPDJHG ,W LV WKHUHIRUH HVVHQWLDO WR FKHFN WKH RLO
OHYHO LQ WKH RLO OHYHO JDXJH IUHTXHQWO\ DQG HYHU\ WLPH
before starting to use the chain saw.
1. Clear surface around the oil cap to prevent
contamination.
2. 8QVFUHZDQGUHPRYHWKHFDSIURPWKHRLOWDQN
3. 3RXUWKHRLOLQWRWKHRLO WDQNDQGPRQLWRUWKH RLOOHYHO
JDXJH (QVXUH WKDW QR GLUW HQWHUV WKH RLO WDQN ZKLOH
filling.
4. 3XWWKHRLOFDS EDFNRQDQGWLJKWHQLWXS:LSH DZD\
any spillage.
5. 2QHIXOORLOWDQNZLOOHQDEOH\RXWRXVHWKHVDZIRU
40 min.
Recommended chain lubricating oil
Ŷ The manufacturer recommends you use only Ryobi
FKDLQVDZOXEULFDWLQJRLO$YDLODEOHIURP\RXUDXWKRULVHG
5\RELVHUYLFHFHQWUH
INSTALLING BATTERY PACK
See page 235.
1. 3ODFH WKHEDWWHU\ SDFNLQ WKH FKDLQVDZ$OLJQUDLVHG
ULEV RQ EDWWHU\ SDFN ZLWK JURRYHV LQ WKH FKDLQ VDZ¶V
battery port.
2. 0DNH VXUH WKH ODWFK RQ ERWWRP RI WKH EDWWHU\ SDFN
VQDSVLQSODFHDQGWKDWEDWWHU\SDFNLVIXOO\VHDWHGDQG
secure in the chain saw before beginning operation.
HOLDING THE CHAIN SAW
See page 235.
Always hold the chain saw with your right hand at the rear
handle and your left hand at the front handle. Grip both
KDQGOHVZLWKWKHWKXPEVDQG¿QJHUVHQFLUFOLQJWKHKDQGOHV
Ensure that your left hand is holding the front handle so
that your thumb is underneath.
STARTING THE CHAIN SAW
See page 235.
1. Before starting for operation, you should install the
EDWWHU\ SDFN LQ WKH PDFKLQH DQG PDNH VXUH FKDLQ
EUDNHLVLQUXQSRVLWLRQ E\SXOOLQJ FKDLQEUDNH OHYHU
hand guard toward the front handle.
2. 7RVWDUWWKHPDFKLQHSXOOWKHWULJJHUUHOHDVHDQGWKHQ
press the throttle trigger.
CHECKING AND OPERATING CHAIN BRAKE
1. (QJDJH WKH FKDLQ EUDNH E\ URWDWLQJ \RXU OHIW KDQG
DURXQGWKHIURQWKDQGOH$OORZWKHEDFNRI\RXUKDQGWR
SXVKWKHFKDLQEUDNHOHYHUKDQGJXDUGWRZDUGWKHEDU
while the chain is rotating rapidly. Be sure to maintain
both hands on the saw handles at all times.
2. 5HVHW WKH FKDLQ EUDNH EDFN LQWR WKH 5XQ SRVLWLRQ E\
JUDVSLQJWKHWRSRIWKHFKDLQEUDNHOHYHUKDQGJXDUG
and pulling toward the front handle until you hear a
FOLFN
WARNING
,IWKHFKDLQEUDNHGRHVQRWVWRSWKHFKDLQLPPHGLDWHO\RU
LIWKHFKDLQEUDNHZLOOQRWVWD\LQWKHUXQSRVLWLRQZLWKRXW
DVVLVWDQFHWDNHWKHVDZWRDQDXWKRULVHGVHUYLFHFHQWUH
for repair prior to use.
TRANSPORTATION AND STORAGE
See page 247 - 248.
Ŷ 6WRSWKHPDFKLQHUHPRYHWKHEDWWHU\SDFNDQGDOORZ
the tool to cool before storing or transporting.
Ŷ Clean all foreign material from the product. Store it in
DFRROGU\DQGZHOOYHQWLODWHGSODFHWKDWLVLQDFFHVVLEOH
to children. Keep away from corrosive agents such
DVJDUGHQFKHPLFDOV DQGGHLFLQJVDOWV 'RQRW VWRUH
outdoors.
Ŷ Fit guide bar cover before storing the unit, or during
transportation.
Ŷ For transportation, secure the machine against
movement or falling to prevent injury to persons or
damage to the machine.
MAINTENANCE
WARNING
Use only original manufacturer’s replacement parts,
accessories and attachments. Failure to do so can
cause possible injury, poor performance and may void
your warranty.
WARNING
6HUYLFLQJ UHTXLUHV H[WUHPH FDUH DQG NQRZOHGJH
DQG VKRXOG EH SHUIRUPHG RQO\ EH D TXDOL¿HG VHUYLFH
technician. For service we suggest you return the
product to your nearest authorized service center for
repair. When servicing, use only identical replacement
parts.

8 | English
WARNING
Remove the battery before adjustment, maintenance or
cleaning. Failure to do so could result in serious personal
injury.
Ŷ You may only make adjustments or repairs described
in this manual. For other repairs, contact the authorized
service agent.
Ŷ Consequences of improper maintenance may cause
the chain brake and other safety features to not function
correctly, thus increasing the potential for serious
injury. Keep your chainsaw professionally maintained
and safe.
Ŷ Sharpening the chain safely is a skilled task. Therefore
the manufacturer strongly recommends that a worn or
dull chain is replaced with a new one, available from
your authorised Ryobi service centre. The part number
is available in the product specification table in this
manual.
Ŷ Follow instructions for lubricating and chain tension
checking and adjustment.
Ŷ After each use, clean the product with a soft dry cloth.
Ŷ Check all nuts, bolts and screws at frequent intervals
for security to ensure the product is in safe working
condition. Any part that is damaged should be properly
repaired or replaced by an authorized service centre.
REPLACING GUIDE BAR AND SAW CHAIN
See page 243 - 244.
1. Make sure to remove the battery. Wear protective
gloves.
2. Unscrew the chain tensioner knob by turning it
counterclockwise until the sprocket cover comes loose.
3. Remove the sprocket cover. Remove the bar and saw
chain from unit.
4. To replace the bar with a new one, unscrew the nut of
the chain tension assembly. Mount the chain tension
assembly on to the new bar and tighten the nut.
5. Put the new chain in the correct direction onto the bar
and make sure that the drive links are aligned in the
bar groove.
6. Attach the bar to the chain saw and loop the chain
around the drive sprocket.
7. Replace the sprocket cover.
8. Adjust the chain tension. Refer to the “Adjusting the
chain tension” section.
WARNING
A dull or improperly sharpened chain can cause
excessive motor speed during cutting which may result
in severe motor damage.
WARNING
Improper chain sharpening increases the potential of
kick-back.
WARNING
Failure to replace or repair a damaged chain can cause
serious injury.
WARNING
The saw chain is very sharp. Always wear protective
gloves when performing maintenance to the chain.
INSPECTING AND CLEANING THE CHAIN BRAKE
See page 246.
Ŷ Always keep the chain brake mechanism clean by
lightly brushing the linkage free from dirt.
Ŷ Always test the chain brake performance after cleaning.
Refer to “Operation - Checking and Operating Chain
Brake” earlier in this manual for additional information.
MAINTENANCE SCHEDULE
Daily check
Bar lubrication Before each use
Chain tension Before each use and
frequently
Chain sharpness Before each use, visual
check
For damaged parts Before each use
For loose fasteners Before each use
Chain brake function Before each use
Inspect and clean
Bar Before each use
Complete saw After each use
Chain brake Every 5 hours*
* Hours of operation
SYMBOLS ON THE PRODUCT
Safety alert
Read and understand all instructions
before operating the product, follow all
warnings and safety instructions.
Wear eye, ear and head protection.
Wear non-slip safety footwear when
using the product.
Wear non-slip, heavy duty gloves.
Beware of chain saw kickback and
avoid contact with bar tip.

9 English |
EN
FR
DE
ES
IT
NL
PT
DA
SV
FI
NO
RU
PL
CS
HU
RO
LV
LT
ET
HR
SL
SK
BG
Do not expose to rain or damp
condition.
Hold and operate the saw properly
with both hands.
Do not operate the saw using only
one hand.
Conforms to all regulatory standards
in the country in the EU where the
product is purchased.
*2675&RQIRUPLW\
Waste electrical products should not
be disposed of with household waste.
3OHDVHUHF\FOHZKHUHIDFLOLWLHVH[LVW
&KHFNZLWK\RXUORFDODXWKRULW\RU
retailer for recycling advice.
105
The guaranteed sound power level is
105 dB
Bar and chain lubricant
Minimum lubricant level
/RFN
8QORFN
Rotate to adjust chain tension
+ = Tighten the chain
/RRVHQWKHFKDLQ
Moving direction of the chain
0DUNHGXQGHUWKHVSURFNHWFRYHU
V
0
PV 1RORDGFKDLQVSHHGLVPV
/PD[PP 0D[LPXPJXLGHEDUOHQJWKLVPP
SYMBOLS IN THIS MANUAL
3DUWVRUDFFHVVRULHVVROGVHSDUDWHO\
Waste electrical products should not
be disposed of with household waste.
3OHDVHUHF\FOHZKHUHIDFLOLWLHVH[LVW
Note
Warning
Wear eye and face protection.
Wear upper body protection.
Wear leg protection.
Stop the product.
The following signal words and meanings are intended to
H[SODLQWKHOHYHOVRIULVNDVVRFLDWHGZLWKWKLVSURGXFW
DANGER
Indicates an imminently hazardous situation, which, if
not avoided, will result in death or serious injury.
WARNING
Indicates a potentially hazardous situation, which, if not
avoided, could result in death or serious injury.
CAUTION
Indicates a potentially hazardous situation, which, if not
avoided, may result in minor or moderate injury.
CAUTION
Without safety alert symbol
Indicates a situation that may result in property damage.

10 | Français
AVERTISSEMENT
6XLYH] OHV UqJOHV GH VpFXULWp ORUVTXH YRXV XWLOLVH] OH
SURGXLW3RXUYRWUHVpFXULWpHWFHOOHGHVSDVVDQWVYHXLOOH]
lire ces instructions avant d'utiliser le produit. Vous
devriez suivre un stage professionnel de sécurité ayant
trait à l’utilisation et à l’entretien des tronçonneuses,
DLQVLTX¶DX[PHVXUHVSUpYHQWLYHVHWDX[SUHPLHUVVRLQV
9HXLOOH]FRQVHUYHUFHPDQXHOSRXUYRXV\UHSRUWHUGDQV
le futur.
AVERTISSEMENT
Les tronçonneuses sont des outils potentiellement
GDQJHUHX[ /HV DFFLGHQWV LPSOLTXDQW O¶XWLOLVDWLRQ GH
tronçonneuses causent souvent la perte d’un membre
RX OD PRUW /D WURQoRQQHXVH HQ HOOHPrPH Q¶HVW SDV
OH VHXO ULVTXH /D FKXWH GH EUDQFKHV HW G¶DUEUHV HW OD
rotation des bûches peuvent tuer. Le bois malade ou
SRXUUL FUpH GHV ULVTXHV VXSSOpPHQWDLUHV 9RXV GHYH]
jauger votre capacité à effectuer une tâche de façon
VXUH(QFDVGHGRXWHTXHOTX¶LOVRLWFRQ¿H]OHWUDYDLOj
un chirurgien du bois.
AVERTISSEMENTS GÉNÉRAUX DE SÉCURITÉ
AVERTISSEMENT
Lisez tous les avertissements de sécurité et toutes
les instructions./HQRQUHVSHFWGHVDYHUWLVVHPHQWVHW
LQVWUXFWLRQVSHXWHQWUDvQHUXQHGpFKDUJHpOHFWULTXHXQ
LQFHQGLHHWRXGHJUDYHVEOHVVXUHV
Save all warnings and instructions for future reference.
/H WHUPH ³RXWLO pOHFWULTXH´ GDQV OHV DYHUWLVVHPHQWV VH
UDSSRUWHjYRWUHRXWLOpOHFWULTXHDOLPHQWpSDUOHVHFWHXUj
¿ORXSDUEDWWHULHVDQV¿O
ENVIRONNEMENT DE TRAVAIL
Ŷ Gardez l'espace de travail propre et bien éclairé.
Les espaces de travail sombres ou encombrés sont
propices aux accidents.
Ŷ N'utilisez pas d'outil électrique en atmosphère
explosive, comme en présence de liquides
inflammables, de gaz ou de poussières. Les
DSSDUHLOV pOHFWULTXHV SURGXLVHQW GHV pWLQFHOOHV
susceptibles d'enflammer poussières et vapeurs.
Ŷ Gardez les enfants et les visiteurs à distance
lorsque vous utilisez un outil électrique. Les
distractions peuvent entraîner une perte de contrôle.
SÉCURITÉ ÉLECTRIQUE
Ŷ Les fiches secteur des outils électriques doivent
correspondre à la prise de courant. Ne modifiez
jamais la fiche secteur d'aucune façon. N'utilisez
pas d'adaptateurs avec les outils électriques reliés
à la terre. L'utilisation de fiches secteur non modifiées
HW DGDSWpHV j OD SULVH GH FRXUDQW UpGXLW OH ULVTXH GH
GpFKDUJHpOHFWULTXH
Ŷ Evitez que votre corps entre en contact avec des
surfaces reliées à la terre, telles que des tuyaux,
radiateurs, cuisinières et réfrigérateurs. /H ULVTXH
GH GpFKDUJH pOHFWULTXH HVW DFFUX VL YRWUH FRUSV HVW
pOHFWULTXHPHQWUHOLpjODWHUUH
Ŷ N'exposez ce produit à la pluie ou à des conditions
humides./DSpQpWUDWLRQGHDXGDQVXQRXWLOpOHFWULTXH
DXJPHQWHOHULVTXHGHGpFKDUJHpOHFWULTXH
Ŷ Ne maltraitez pas le câble d'alimentation. Ne
vous servez jamais du câble d'alimentation
pour transporter l'outil, pour le tirer, ou pour en
débrancher la fiche secteur. Gardez le câble à l'écart
de la chaleur, de l'huile, des bords coupants et des
pièces en mouvement. Les câbles endommagés ou
HPPrOpVDXJPHQWHQWOHULVTXHGHGpFKDUJHpOHFWULTXH
Ŷ Lorsque vous utilisez un outil électrique en
extérieur, utilisez une rallonge adaptée à un usage
en extérieur. L'utilisation d'une rallonge adaptée à un
XVDJHHQH[WpULHXUUpGXLWOHVULVTXHVGHFKRFpOHFWULTXH
Ŷ S'il n'est pas possible d'éviter d'utiliser un outil
électrique en environnement humide, utilisez une
alimentation électrique équipée d'un disjoncteur
différentiel. L'utilisation d'un disjoncteur différentiel
UpGXLWOHULVTXHGHFKRFpOHFWULTXH
SÉCURITÉ PERSONNELLE
Ŷ Restez vigilant, regardez ce que vous faites et
faites preuve de bon sens lorsque vous utilisez un
outil électrique. N'utilisez pas d'outil électrique si
vous êtes fatigué ou sous l'influence de l'alcool,
de drogues ou de médicaments. Un moment
GLQDWWHQWLRQ ORUV GH OXWLOLVDWLRQ GXQ RXWLO pOHFWULTXH
VXIILWjSURYRTXHUGHJUDYHVEOHVVXUHV
Ŷ Utilisez des protections individuelles. Portez
toujours une protection oculaire.'HVpTXLSHPHQWV
GH SURWHFWLRQ WHOV TXXQ PDVTXH DQWLSRXVVLqUHV
des chaussures de sécurité antidérapantes, ou une
protection auditive dans les conditions appropriées
UpGXLWOHULVTXHGHEOHVVXUHV
Ŷ Prévenez les mises en marche accidentelles.
Assurez-vous que l'interrupteur est en position
"arrêt" avant la connexion au secteur et/ou
l'insertion de la batterie, ainsi qu'avant de saisir ou
de transporter l'outil./HWUDQVSRUWGXQRXWLOpOHFWULTXH
avec votre doigt sur l'interrupteur ou la mise sous
tension d'un outil dont l'interrupteur est en position
"marche" est propice aux accidents.
Ŷ Retirez toute clé ou tout outil de réglage avant de
mettre l'outil électrique en marche. Une clé ou un
RXWLOODLVVpVXUXQHSDUWLHWRXUQDQWHGXQRXWLOpOHFWULTXH
est susceptible d'entraîner des blessures.
Ŷ Ne travaillez pas en extension. Prenez bien appui
sur vos jambes et ne tendez pas le bras trop loin.
9RXV FRQWU{OHUH] DLQVL PLHX[ ORXWLO pOHFWULTXH HQ FDV
d'imprévu.
Ŷ Portez des vêtements adéquats. Ne portez pas de
vêtements ou de bijoux amples. Maintenez vos
cheveux, vos vêtements et vos gants éloignés
des parties en mouvement./HVYrWHPHQWVHWELMRX[
DPSOHVDLQVLTXHOHVFKHYHX[ORQJVVRQWVXVFHSWLEOHV
GrWUHKDSSpVSDUOHVSDUWLHVHQPRXYHPHQW
Ŷ Si un dispositif d'extraction et de collecte des

11 Français |
EN
FR
DE
ES
IT
NL
PT
DA
SV
FI
NO
RU
PL
CS
HU
RO
LV
LT
ET
HR
SL
SK
BG
poussières est fourni, assurez-vous que ce
dispositif est installé et utilisé de façon correcte.
L'utilisation d'un dispositif de collecte des poussières
UpGXLWOHVULVTXHVDVVRFLpVDX[SRXVVLqUHV
UTILISATION ET ENTRETIEN DES OUTILS
ÉLECTRIQUES
Ŷ Ne faites pas forcer le produit. Utilisez un outil
électrique adapté au travail à effectuer. Un outil
pOHFWULTXH DGDSWp XWLOLVp GDQV OHV OLPLWHV GH VHV
capacités effectuera un meilleur travail dans de
meilleures conditions de sécurité.
Ŷ N'utilisez pas un outil électrique dont l'interrupteur
marche/arrêt est inopérant. 7RXW RXWLO pOHFWULTXH
TXLQHSHXWSDVrWUHFRQWU{OpSDUVRQLQWHUUXSWHXUHVW
GDQJHUHX[HWGRLWrWUHUpSDUp
Ŷ Débranchez la fiche secteur de la source de
courant et/ou le pack batterie de l'outil électrique
avant d'effectuer tout réglage, tout changement
d'accessoire, et avant de le ranger. De telles mesures
SUpYHQWLYHVGHVpFXULWpUpGXLVHQWOHVULVTXHVGHPHWWUH
DFFLGHQWHOOHPHQWHQPDUFKHORXWLOpOHFWULTXH
Ŷ Rangez les outils électriques inutilisés hors de
portée des enfants et ne laissez pas les personnes
non familiarisées avec l'outil électrique ou avec ces
instructions s'en servir. /HV RXWLOV pOHFWULTXHV VRQW
dangereux entre des mains non entraînées.
Ŷ Entretenez les outils électriques. Vérifiez que
les pièces en mouvement sont bien alignées et
non déformées, qu'aucune pièce n'est cassée
ou mal montée, et qu'aucun autre problème n'est
susceptible d'affecter le bon fonctionnement
de l'outil électrique. En cas de dommage, faites
réparer l'outil électrique avant de l'utiliser.
%HDXFRXSGDFFLGHQWVVRQWGXVjGHVRXWLOVpOHFWULTXHV
mal entretenus.
Ŷ Gardez les outils coupants propres et affûtés. Les
outils coupants bien entretenus et bien affûtés sont
moins susceptibles de se déformer et sont plus faciles
à contrôler.
Ŷ Utilisez l'outil électrique, ses accessoires et
ses embouts, etc. en concordance avec ces
instructions, en prenant en compte les conditions
de travail et le travail à effectuer. L'utilisation
GpWRXUQpHGXQRXWLOpOHFWULTXHHQWUDvQHGHVVLWXDWLRQV
dangereuses.
UTILISATION ET ENTRETIEN DES OUTILS ALIMENTÉS
PAR BATTERIE
Ŷ N'utilisez que le chargeur préconisé par le
fabricant. L'utilisation d'un chargeur prévu pour un type
de batterie avec un autre type de batterie peut entraîner
XQULVTXHGLQFHQGLH
Ŷ N'utilisez les outils électriques qu'avec les packs
batterie leur étant spécifiquement destinés.
/XWLOLVDWLRQ GH WRXW DXWUH SDFN EDWWHULH HQWUDvQH GHV
ULVTXHVGHEOHVVXUHHWGLQFHQGLH
Ŷ Lorsque le pack batterie n'est pas utilisé, éloignez-
le des autres objets métalliques tels que trombones,
pièces de monnaie, clés, clous, vis, ou autres petits
objets susceptibles de court-circuiter les bornes
de la batterie./DPLVHHQFRXUWFLUFXLWGHVERUQHVGH
la batterie peut causer des brûlures et entraîner un
incendie.
Ŷ Sous des conditions abusives, du liquide peut
être éjecté de la batterie, évitez d'entrer en contact
avec ce liquide. En cas de contact accidentel, lavez
à grande eau. Si du liquide entre en contact avec
les yeux, consultez immédiatement un médecin. Le
OLTXLGHpMHFWpGHODEDWWHULHSHXWFDXVHUGHVLUULWDWLRQV
ou des brûlures.
ENTRETIEN
Ŷ Faites réparer votre outil électrique par un
réparateur qualifié n'utilisant que des pièces
détachées identiques. Vous maintiendrez ainsi la
VpFXULWpGXWLOLVDWLRQGHYRWUHRXWLOpOHFWULTXH
INSTRUCTIONS DE SÉCURITÉ GÉNÉRALE
ADDITIONNELLES
Ŷ La législation de certaines régions restreint l'utilisation
du produit. Contactez les autorités locales pour obtenir
des conseils.
Ŷ Ne laissez jamais les enfants ou les personnes non
familiarisées avec le mode d'emploi utiliser le produit.
Les lois locales peuvent imposer un âge minimum à
l’opérateur.
Ŷ $YDQW FKDTXH XWLOLVDWLRQ DVVXUH]YRXV TXH WRXWHV
les commandes et tous les organes de sécurité
fonctionnent correctement. N’utilisez pas l’outil à
PRWHXU VL OD PLVH GH VRQ LQWHUUXSWHXU VXU³RII´DUUrW
Q¶DUUrWHSDVOHPRWHXU
Ŷ 3RUWH] XQH SURWHFWLRQ RFXODLUH HW DXGLWLYH WRWDOH GHV
JDQWV VROLGHV DLQVL TX¶XQ FDVTXH GH SURWHFWLRQ GH OD
WrWHORUVGHO¶XWLOLVDWLRQGXSURGXLWSRUWH]XQPDVTXH
facial au cas où l’opération générerait des poussières.
Ŷ 1H SRUWH] SDV GH YrWHPHQWV DPSOHV GH SDQWDORQV
courts ou de bijoux d’aucune sorte.
Ŷ $WWDFKH]OHVFKHYHX[ORQJVDXGHVVXVGXQLYHDXGHV
pSDXOHV DILQ GpYLWHU TXLOV QH VH SUHQQHQW GDQV OHV
parties en mouvement.
Ŷ 3UHQH] JDUGH j OD SURMHFWLRQ HW j OD FKXWH G¶REMHWV
*DUGH]WRXVOHVSDVVDQWVHQSDUWLFXOLHUOHVHQIDQWVHW
OHVDQLPDX[pORLJQpVGDXPRLQVPGHGLVWDQFHGH
la zone de travail.
Ŷ N’utilisez pas cet outil dans une zone mal éclairée.
L'opérateur doit avoir une bonne vue d'ensemble de
la zone de travail pour identifier les dangers éventuels.
Ŷ L'utilisation d'une protection auditive réduit la capacité
j HQWHQGUH OHV DYHUWLVVHPHQWV FULV RX DODUPHV
L'utilisateur doit redoubler d'attention par rapport aux
événements survenant dans la zone de travail.
Ŷ L'utilisation d'outils similaires alentour augmente le
ULVTXH GDWWHLQWH j ODXGLWLRQ DLQVL TXH OH ULVTXH TXH
d'autres personnes entrent dans la zone de travail.
Ŷ *DUGH]XQERQDSSXLHWXQERQpTXLOLEUH1HWUDYDLOOH]
pas en extension. Un travail en extension excessive
SHXW HQWUDvQHU XQH SHUWH G¶pTXLOLEUH HW DXJPHQWHU OH
ULVTXHGHUHERQG
Ŷ Maintenez toutes les parties de votre corps éloignées
des parties en mouvement.

12 | Français
Ŷ Vérifiez le produit avant utilisation. Vérifiez le
fonctionnement correct de toutes les commandes,
frein de chaîne compris. Vérifiez le bon serrage des
DWWDFKHV $VVXUH]YRXV TXH WRXWHV OHV SURWHFWLRQV
et toutes les poignées sont bien en place et bien
verrouillés. Remplacez toute pièce endommagée avant
utilisation.
Ŷ Ne modifiez la machine d'aucune façon et n'utilisez
pas de pièces ou accessoires non recommandés par
le fabricant.
AVERTISSEMENT
Si la machine est tombée, a subi un choc important
RX VH PHW j YLEUHU GH IDoRQ DQRUPDOH DUUrWH]OD
immédiatement et recherchez les dommages éventuels
RX LGHQWL¿H] OD FDXVH GHV YLEUDWLRQV 7RXWH SLqFH
HQGRPPDJpH GRLW rWUH FRUUHFWHPHQW UHPSODFpH RX
UpSDUpHSDUXQVHUYLFHDSUqVYHQWHDJUpp
AVERTISSEMENTS DE SÉCURITÉ RELATIFS À LA
TRONÇONNEUSE
Ŷ Gardez toutes les parties du corps éloignées de
la chaîne de la tronçonneuse lorsque elle est en
fonctionnement. Avant de mettre la tronçonneuse
HQ PDUFKH DVVXUH]YRXV TXH ULHQ QH VRLW HQ HQ
contact avec la chaîne. Un moment d’inattention lors
de l’utilisation d’une tronçonneuse est susceptible
G¶HQWUDvQHUO¶HQFKHYrWUHPHQWGHYRVKDELWVRXGHYRWUH
corps dans sa chaîne.
Ŷ Tenez toujours la tondeuse avec votre main droite
sur la poignée arrière et votre main gauche sur la
poignée avant. Le maintien de la tronçonneuses avec
ODSRVLWLRQGHVPDLQVLQYHUVpHDXJPHQWHOHULVTXHGH
EOHVVXUHVHWQHGRLWMDPDLVrWUHHIIHFWXp
Ŷ Ne maintenez l’outil à moteur que par ses surfaces
de préhension isolées, car sa chaîne est susceptible
d’entrer en contact avec des câbles électriques
cachés.8QHFKDvQHGHWURQoRQQHXVHTXLHQWUHUDLWHQ
contact avec un câble «sous tension» pourrait véhiculer
FHWWHWHQVLRQpOHFWULTXHYHUVOHVSDUWLHVPpWDOOLTXHVGH
O¶RXWLOHWH[SRVHUO¶RSpUDWHXUjXQHGpFKDUJHpOHFWULTXH
Ŷ Portez des lunettes de sécurité et une protection
auditive. L’utilisation d’équipement de protection
supplémentaire pour la tête, les mains, les jambes
et les pieds est recommandée. Un habillement de
SURWHFWLRQ DGpTXDW UpGXLW OHV ULVTXHV GH EOHVVXUHV
SURYRTXpHVSDUODSURMHFWLRQ GHGpEULVRXODPLVH HQ
contact accidentelle avec la chaîne de la tronçonneuse.
Ŷ N’utilisez pas de tronçonneuse dans un arbre.
L’utilisation d’une tronçonneuse en hauteur dans un
DUEUHHVWVXVFHSWLEOHGHSURYRTXHUGHVEOHVVXUHV
Ŷ Gardez toujours un bon appui de vos pieds au sol
et n’utilisez la tronçonneuse que lorsque vous
vous tenez debout sur une surface fixe, sûre et
horizontale. Les surfaces glissantes ou instables telles
TXHOHVpFKHOOHVSHXYHQWHQWUDvQHUXQHSHUWHG¶pTXLOLEUH
ou de maîtrise de la tronçonneuse.
Ŷ Lorsque vous coupez une branche sous tension,
prenez garde à l’effet ressort. Une fois la tension
des fibres du bois relâchée, la branche sous tension
SRXUUDLWIUDSSHUO¶RSpUDWHXUHWRXFDXVHUXQHSHUWHGH
contrôle de la tronçonneuse.
Ŷ Soyez particulièrement prudent lors de la coupe de
broussailles et de jeunes arbres. Les fins branchages
VRQW VXVFHSWLEOHV G¶rWUH DJULSSpV SDU OD FKDvQH GH OD
tronçonneuse et de venir vous fouetter ou de vous faire
SHUGUHO¶pTXLOLEUH
Ŷ Transportez la tronçonneuse par sa poignée avant,
moteur coupé et éloignée de votre corps. Mettez
toujours le fourreau de protection du guide-chaîne
en place lorsque vous transportez ou rangez la
tronçonneuse. Une manipulation correcte de la
tronçonneuse réduit la probabilité de mise en contact
accidentelle avec la chaîne en mouvement.
Ŷ Respectez les instructions concernant la
lubrification, la tension de la chaîne et le
changement d’accessoires. Une chaîne mal tendue
RXPDOOXEULILpHSHXWVRLWFDVVHURXDXJPHQWHUOHULVTXH
de rebond.
Ŷ Gardez les poignées propres, sèches, et exemptes
d'huile et de graisse. Des poignées grasses ou
huileuses sont glissantes et peuvent entraîner une
perte de contrôle.
Ŷ Ne coupez que du bois. N’utilisez pas cette
tronçonneuse pour un usage autre que ceux
prévus. Par exemple, n’utilisez pas la tronçonneuse
pour couper du plastique, de la maçonnerie ou des
matériaux n’étant pas à base de bois. L’utilisation
détournée de l’appareil peut entraîner des situations
dangereuses.
Causes et prévention du rebond:
,OSHXWVHSURGXLUHXQUHERQGVLOH[WUpPLWpGXJXLGHFKDvQH
entre en contact avec un objet ou si la chaîne coupante se
SLQFHHWVHEORTXHGDQVOHERLVSHQGDQWODFRXSH
'DQVFHUWDLQVFDVOHFRQWDFWDYHFOHQH]GXJXLGHFKDvQH
SHXWSURYRTXHUXQUHERQGH[WUrPHPHQWUDSLGHHWVRXGDLQ
en direction de l'opérateur.
/H SLQFHPHQW GH OD FKDvQH DX QLYHDX GX KDXW GX JXLGH
chaîne est susceptible de le repousser rapidement le
JXLGHFKDvQHHQGLUHFWLRQGHORSpUDWHXU
Dans chacun de ces cas, vous pouvez perdre le contrôle
GH OD WURQoRQQHXVH HW rWUH JULqYHPHQW EOHVVp 1H YRXV
¿H] SDV H[FOXVLYHPHQW DX[ pOpPHQWV GH SURWHFWLRQ GH
votre tronçonneuse. Vous devez également prendre
GLIIpUHQWHVPHVXUHVSRXUpYLWHUOHVULVTXHVGDFFLGHQWVRX
de blessures.
Le rebond est le résultat d’une utilisation incorrecte de l’outil
HWRXGHPDXYDLVHVSURFpGXUHVRXFRQGLWLRQVG¶XWLOLVDWLRQ
HWLOSHXWrWUHpYLWpHQSUHQDQWOHVSUpFDXWLRQVDGpTXDWHV
LQGLTXpHVFLGHVVRXV
Ŷ Maintenez fermement la tronçonneuse des deux
mains, vos pouces et vos doigts enserrant ses
poignées, et positionnez votre corps et vos bras
de façon à pouvoir résister aux forces de rebond.
/HV IRUFHV GH UHERQG SHXYHQW rWUH PDvWULVpHV SDU
l’opérateur si des précautions adaptées sont prises. Ne
lâchez pas la tronçonneuse.
Ŷ Ne travaillez pas en extension et ne tronçonnez

13 Français |
EN
FR
DE
ES
IT
NL
PT
DA
SV
FI
NO
RU
PL
CS
HU
RO
LV
LT
ET
HR
SL
SK
BG
pas au dessus du niveau des épaules. Vous aiderez
DLQVLjpYLWHUOHFRQWDFWDFFLGHQWHODYHFOHQH]GXJXLGH
chaîne et à améliorer la contrôle de la tronçonneuse en
cas de situation inattendue.
Ŷ N’utilisez que les chaînes et guides-chaînes
indiqués par le fabricant. 'HV FKDvQHV HW JXLGHV
chaînes de rechange de type incorrect pourraient
HQWUDvQHUXQHUXSWXUHGHODFKDvQHHWRXXQUHERQG
Ŷ Respectez les instructions du fabricant pour
l'aiguisage et l'entretien de la chaîne. La diminution
de la hauteur du limiteur de profondeur est susceptible
G¶DXJPHQWHUOHULVTXHGHUHERQG
AVERTISSEMENTS DE SÉCURITÉ SUPPLÉMENTAIRES
CONCERNANT LES TRONÇONNEUSES
Ŷ Il est recommandé de couper les bûches sur un
chevalet ou sur un berceau lors de la première
utilisation du produit.
Ŷ $VVXUH]YRXV TXH WRXWHV OHV SURWHFWLRQV HW SRLJQpHV
DLQVL TXH O¶DUUrWRLU j JULIIHV VRQW ELHQ HQ SODFH HW HQ
bon état.
Ŷ /HVXWLOLVDWHXUVGHFHWWHWURQoRQQHXVHGRLYHQWrWUHHQ
bonne santé. Cette tronçonneuse pesant un certain
SRLGVO¶XWLOLVDWHXUGRLW rWUHHQERQQH IRUPHSK\VLTXH
/¶XWLOLVDWHXUGRLWrWUHYLJLODQWDYRLUXQHERQQHYXHXQH
ERQQHPRELOLWpXQERQVHQVGHO¶pTXLOLEUHHWrWUHDGURLW
GHVHVPDLQV(QFDVGHGRXWHTXHOTX¶LOVRLWQHSDV
utiliser la tronçonneuse.
Ŷ Ne commencez pas à utiliser le produit avant de
disposer d’une zone de travail dégagée, d’avoir un bon
DSSXLDXVRODLQVLTX¶XQFKHPLQGHUHSOLpORLJQpGHOD
zone de chute de l’arbre.
Ŷ 3UHQH]JDUGHDX[SURMHFWLRQVGHEURXLOODUGG¶KXLOHHWGH
VFLXUH3RUWH]XQPDVTXHRXXQUHVSLUDWHXUDXEHVRLQ
Ŷ 1HFRXSH]SDVGHYLJQHHWRXGHSHWLWHVEURXVVDLOOHV
GHPRLQVGHPPGHGLDPqWUH
Ŷ 7HQH]WRXMRXUVODWURQoRQQHXVHGHVGHX[PDLQVORUVTXH
vous l’utilisez. Tenez la tronçonneuse fermement, vos
doigts entourant les poignées. La main droite doit tenir
la poignée arrière et la main gauche la poignée avant.
Ŷ $YDQWGHPHWWUHO¶RXWLOHQPDUFKHDVVXUH]YRXVTXHULHQ
n’est en en contact avec la chaîne de la tronçonneuse.
Ŷ Ne modifiez votre outil d’aucune façon, et ne l’utilisez
pas pour faire fonctionner des accessoires ou appareils
non recommandés par le fabricant de la tronçonneuse.
Ŷ Il devrait toujours y avoir une trousse de premiers
soins contenant de grands pansements et un dispositif
SHUPHWWDQW G¶DWWLUHU O¶DWWHQWLRQ SDU H[ XQ VLIIOHW j
proximité de l’utilisateur. Une trousse de premiers
soins mieux fournie doit aussi se trouver à distance
raisonnablement proche.
Ŷ /¶RSpUDWHXU SRXUUDLW rWUH WHQWp GH UHWLUHU VRQ FDVTXH
VLDXFXQ ULVTXHGHFKXWHG¶REMHWVQ¶HVW SUpVHQWPDLV
UDSSHOH]YRXV TXH OH FDVTXH HQ SDUWLFXOLHU V¶LO HVW
pTXLSp G¶XQH YLVLqUH j JULOOH SHXW DLGHU j UpGXLUH OHV
ULVTXHVGHEOHVVXUHVLQIOLJpHVDXYLVDJHHWjODWrWHHQ
cas de rebond.
Ŷ 8QHFKDvQHPDOWHQGXHSHXWGpUDLOOHUGXJXLGHFKDvQH
HW SURYRTXHU GH JUDYHV EOHVVXUHV SRWHQWLHOOHPHQW
mortelles. La longueur de la chaîne varie en fonction de
ODWHPSpUDWXUH9pULILH]IUpTXHPPHQWVDWHQVLRQ
Ŷ Vous devriez vous familiariser avec votre nouvelle
tronçonneuse en effectuant des coupes simples dans
GXERLVELHQFDOp)DLWHVOHVLYRXVQ¶DYH]SDVXWLOLVpOD
tronçonneuse depuis longtemps.
Ŷ 3RXUUpGXLUHOHULVTXHGHEOHVVXUHVRFFDVLRQQpHVSDU
le contact avec les éléments en mouvement, il convient
GH WRXMRXUV DUUrWHU OH PRWHXU DFWLRQQHU OH IUHLQ GH
FKDvQHUHWLUHUOHSDFNEDWWHULHHWV¶DVVXUHUTXHWRXVOHV
pOpPHQWVHQPRXYHPHQWVHVRQWELHQDUUrWpVDYDQWGH
– nettoyer ou dégager la cause d'un blocage
– laisser le produit sans surveillance
– mettre en place ou retirer des accessoires
– vérifier, entretenir ou travailler sur la machine
Ŷ La superficie de la zone de travail dépend du travail
jHIIHFWXHUWRXWDXWDQWTXHGHODWDLOOHGHODUEUHRXGH
ODSLqFH j XVLQHU 3DU H[HPSOHO¶DEDWWDJH G¶XQ DUEUH
GHPDQGHXQH]RQHGHWUDYDLOSOXVLPSRUWDQWHTXHOHV
DXWUHVFRXSHVWHOOHVTXHOHWURQoRQQDJHHWF
/¶RSpUDWHXU GRLWrWUHFRQVFLHQWGHVRQHQYLURQQHPHQW
de travail et opérer un contrôle total sur tout événement
pouvant s’y produire.
Ŷ Ne coupez pas en ayant votre corps aligné avec le
JXLGHFKDvQHHWDYHFODFKDvQH(QFDVGHUHERQGYRXV
DLGHUH]DLQVLjpYLWHUTXHODFKDvQHQ¶HQWUHHQFRQWDFW
DYHFYRWUHWrWHRXYRWUHFRUSV
Ŷ N’effectuez pas de mouvements de sciage d’avant
en arrière, laissez la chaîne faire le travail, gardez la
chaîne affûtée et ne tentez pas de la pousser dans la
coupe.
Ŷ N'exercez pas de pression sur la tronçonneuse en
ILQ GH FRXSH 7HQH]YRXV SUrW j VXSSRUWHU OH SRLGV
GHOD WURQoRQQHXVHXQH IRLVFHOOHFL OLEpUpH HQILQ GH
la coupe. Le non respect de cet avertissement peut
entraîner de graves blessures.
Ŷ 1¶DUUrWH]SDVODWURQoRQQHXVHHQSOHLQHRSpUDWLRQGH
coupe. Gardez la tronçonneuse en fonctionnement
MXVTX¶jFHTX¶HOOHVRLWVRUWLHGHODFRXSH
Poussée et traction
La force de réaction s'exerce toujours dans la direction
opposée au sens de rotation de la chaîne. Ainsi, l’opérateur
GRLWrWUHSUrWjFRQWU{OHUODWHQGDQFHGHODPDFKLQHjWUDFWHU
PRXYHPHQWYHUVO¶DYDQWORUVGHODFRXSHDYHFOHF{WpEDV
GHODFKDvQHHWjSRXVVHUYHUVO¶RSpUDWHXUORUVGHODFRXSH
avec le côté supérieur.
Tronçonneuse coincée dans la coupe
$UUrWH] OD WURQoRQQHXVH HW VpFXULVH]OD 1H WHQWH] SDV
GHIDLUHVRUWLUGHIRUFHODFKDvQHHWOHJXLGHFKDvQHGHOD
FRXSHYRXVULVTXHULH]GHSURYRTXHUOH EULVGHODFKDvQH
TXLSRXUUDLWDORUVEDVFXOHUHQDUULqUHHWIUDSSHUO¶RSpUDWHXU
&HWWHVLWXDWLRQDUULYHJpQpUDOHPHQWORUVTXHOHERLVHVWPDO
soutenu et force la coupe à se resserrer sous la pression,
HQWUDvQDQWOHSLQFHPHQWGHODFKDvQHHWGXJXLGHFKDvQH6L
le réglage du support ne parvient pas à dégager la chaîne
HW OHJXLGHFKDvQHRXYUH] OD FRXSH j O¶DLGH GH FRLQV RX
d’un levier. Ne tentez jamais de mettre la tronçonneuse en
PDUFKHORUVTXHOHJXLGHFKDvQHVHWURXYH GpMjGDQVXQH
coupe ou dans un trait d’abattage.

14 | Français
Équipement de protection individuel
8QpTXLSHPHQW GH SURWHFWLRQLQGLYLGXHO GH ERQQHTXDOLWp
XWLOLVp SDU GHV SURIHVVLRQQHOV DLGH j UpGXLUH OH ULVTXH
GH EOHVVXUHV LQÀLJpHV j O¶RSpUDWHXU /HV pOpPHQWV
VXLYDQWV GRLYHQW rWUH XWLOLVpV ORUVTXH YRXV XWLOLVH] YRWUH
WURQoRQQHXVH
Casque de sécurité
– GRLWrWUHFRQIRUPHj(1HWSRUWHUO¶LQVFULSWLRQ
CE
Protection auditive
– GRLWrWUHFRQIRUPHj(1HWSRUWHUO¶LQVFULSWLRQ
CE
Protection oculaire et faciale
– GRLW SRUWHU O¶LQVFULSWLRQ &( HW rWUH FRQIRUPH j (1
SRXU OHV OXQHWWHV GH VpFXULWp RX (1
SRXUOHVYLVLqUHVjJULOOH
Gants
– GRLWrWUHFRQIRUPHj(1HWSRUWHUO¶LQVFULSWLRQ
CE
Protèges-jambes (jambières)
– GRLYHQW rWUH FRQIRUPHV j (1 SRUWHU
l’inscription CE et protéger tout le tour des jambes.
Bottes de protection pour tronçonneuse
– GRLYHQW rWUH FRQIRUPHV j (1 ,62 HW
SRUWHUXQSLFWRJUDPPHGHWURQoRQQHXVHLQGLTXDQW
OD FRQIRUPLWp j (1 /HV XWLOLVDWHXUV
occasionnels peuvent porter des chaussures de
VpFXULWpjHPERXWVDFLHUHWGHVJXrWUHVGHVpFXULWp
FRQIRUPHVj(1VLOHVROHVWUpJXOLHUHWTXH
OHULVTXHGH WUpEXFKHURX GHV¶HPPrOHUGDQV GHV
EURXVVDLOOHVHVWIDLEOH
Vestes de protection du haut du corps pour
tronçonneuse
– GRLWrWUHFRQIRUPHj(1HWSRUWHUO¶LQVFULSWLRQ
CE
INSTRUCTIONS CONCERNANT LES TECHNIQUES
DE BASE ADÉQUATE POUR L’ABATTAGE, LE
TRONÇONNAGE, ET L’ÉBRANCHAGE
Compréhension des forces présentes dans le bois
Une fois comprises les pressions directionnelles et les
tensions présentes dans le bois, vous pouvez réduire les
“pincement” ou au moins les prévoir en cours de coupe.
8QHWHQVLRQGDQVOHERLVVLJQL¿HTXHOHV¿EUHVVXELVVHQW
XQHIRUFHGHWUDFWLRQHWTXHVLYRXVFRXSH]GDQVFHWWH]RQH
le “trait de coupe” ou la coupe auront tendance à s’ouvrir
jPHVXUHTXHODWURQoRQQHXVHSURJUHVVHUD6LXQHEFKH
HVWVRXWHQXH SDU XQFKHYDOHW HW TXHVRQ H[WUpPLWp SHQG
VDQVrWUHVRXWHQXHjVRQH[WUpPLWpXQHWHQVLRQVHFUpH
DORUVVXUVRQGHVVXVGXHDXSRLGVGHODSDUWLHTXLGpSDVVH
HWTXLpWLUHOHV¿EUHV'HODPrPHIDoRQOHGHVVRXVGHOD
EFKHVHUDFRPSULPpHWOHV¿EUHVVHURQWFRPSUHVVpHV6L
une coupe est effectuée dans cette zone, le trait de coupe
aura tendance à se refermer en cours de coupe. La chaîne
HWOHJXLGHFKDvQHV¶HQWURXYHURQWSLQFpV
Abattage d’un arbre
Voir page 239 - 240.
/RUVTXHGHVRSpUDWLRQVGHWURQoRQQDJHHWG¶DEDWWDJHVRQW
effectuées simultanément par deux personnes ou plus,
OHVRSpUDWLRQV G¶DEDWWDJHHW GHWURQoRQQDJHGRLYHQW rWUH
séparées par une distance égale à au moins deux fois la
hauteur de l’arbre à abattre. Les arbres ne doivent pas
rWUHDEDWWXVG¶XQHIDoRQTXLSRXUUDLWPHWWUHTXLFRQTXHHQ
GDQJHUDWWHLQGUH WRXWHFRQGXLWH RXWRXWHOLJQHpOHFWULTXH
ou causer des dommages à la propriété d’autrui. En cas de
FRQWDFWDYHFWRXWHFRQGXLWHRXOLJQHpOHFWULTXHSUpYHQH]
immédiatement la compagnie d’exploitation.
Si le terrain est en pente, restez toujours en haut du terrain
FDUODUEUHULVTXHGHURXOHURXGHJOLVVHUDXEDVGHODSHQWH
une fois abattu.
8QFKHPLQ GH UHSOL GRLWrWUH SUpYX HW GpEOD\pDX EHVRLQ
avant de commencer les coupes. Le chemin de repli doit
s’étendre vers l’arrière et en diagonale par rapport à la ligne
de chute prévue.
Avant de commencer l’abattage, prenez en compte
l’inclinaison naturelle de l’arbre, la position des plus
JURVVHVEUDQFKHVDLQVLTXHODGLUHFWLRQGXYHQWSRXUMXJHU
du chemin de chute de l’arbre.
Débarrassez l’arbre de la terre, des pierres, des écorces
détachées, des clous, des agrafes et des câbles.
Ne tentez pas d’abattre d’arbres pourris ou endommagés
par le vent, le feu, la foudre, etc.
&HFLHVWH[WUrPHPHQWGDQJHUHX[ HWQHGRLW rWUHHIIHFWXp
TXHSDUGHVFKLUXUJLHQVDUERULFROHVSURIHVVLRQQHOV
1. Entaille d’abattage
Voir page 239 - 240.
(IIHFWXH] O¶HQWDLOOH VXU GX GLDPqWUH GH O¶DUEUH
perpendiculairement à la direction de chute.
Commencez par l’entaille horizontale inférieure. Vous
aiderez ainsi à éviter de pincer soit la chaîne ou le
JXLGHFKDvQHORUVGHODFRXSHGHODGHX[LqPHHQWDLOOH
2. Trait d’abattage
Voir page 239 - 240.
Effectuez le trait d’abattage au moins 50 mm au dessus
de l’entaille d’abattage horizontale. Gardez le trait
d’abattage parallèle à l’entaille d’abattage horizontale.
Effectuez le trait d’abattage de façon à laisser assez
GHERLVSRXUTXHVHIRUPHXQHFKDUQLqUH/DFKDUQLqUH
pYLWHTXHO¶DUEUHQHVHYULOOHHWFKXWHGDQVODPDXYDLVH
direction. Ne coupez pas dans la charnière.
¬PHVXUHTXHODFRXSHVHUDSSURFKHGHODFKDUQLqUH
l’arbre doit commencer à tomber. S’il existe une
SRVVLELOLWp TXH O¶DUEUH QH FKXWH SDV GDQV OD GLUHFWLRQ
SUpYXHRXTX¶LOEDVFXOHHWFRLQFHODFKDvQHDUUrWH]OD
FRXSHDYDQWTXHOHWUDLWG¶DEDWWDJHQHVRLWWHUPLQpHW
XWLOLVH]GHVFRLQVHQERLVHQSODVWLTXHRXHQDOXPLQLXP
pour ouvrir la coupe et faire tomber l’arbre le long de la
ligne de chute prévue.
/RUVTXH O¶DUEUH FRPPHQFH j WRPEHU UHWLUH] OD
WURQoRQQHXVHGHODFRXSHDUUrWH]OHPRWHXUSRVH]OD
tronçonneuse, puis empruntez le chemin de repli prévu.
3UHQH]JDUGHjODFKXWHGHEUDQFKHVKDXWHVHWDVVXUH]
vos pas.
Coupe des racines de contrefort
Voir page 240.
Une racine de contrefort est une grosse racine partant du
WURQFGHODUEUHMXVTXDXVRO&RXSH]OHVJURVVHV UDFLQHV

15 Français |
EN
FR
DE
ES
IT
NL
PT
DA
SV
FI
NO
RU
PL
CS
HU
RO
LV
LT
ET
HR
SL
SK
BG
avant de procéder à l'abattage. Effectuez tout d'abord une
entaille horizontale dans le contrefort, puis une entaille
verticale . Dégagez la partie ainsi coupée de la zone de
WUDYDLO3URFpGH]jODEDWWDJHDSUqVDYRLUUHWLUpOHVUDFLQHV
de contrefort.
Coupe d’un tronçon
Voir page 241.
Le tronçonnage consiste à débiter une bûche en plusieurs
WURQoRQV,OHVWLPSRUWDQWGHYRXVDVVXUHUTXHYRWUHDSSXL
DXVROHVWIHUPHHWTXHYRWUHSRLGVHVWELHQUpSDUWLVXUYRV
GHX[SLHGV/RUVTXHFHODHVWSRVVLEOHODEFKHGRLWrWUH
relevée et soutenue à l’aide de branches, de bûches ou
de cales. Suivez les instructions de base pour une coupe
IDFLOH/RUVTXHODEFKHHVWVRXWHQXHVXUWRXWHVDORQJXHXU
FRXSH]ODSDUOHGHVVXVWURQoRQQDJHSDUGHVVXV
/RUVTXHODEFKHHVWVRXWHQXHSDUXQHH[WUpPLWpFRXSH]
GH VRQ GLDPqWUH SDU OH GHVVRXV WURQoRQQDJH SDU
GHVVRXV(IIHFWXH]HQVXLWHODFRXSH¿QDOHSDUOHGHVVXV
en rejoignant la première coupe.
/RUVTXHOD EFKHHVWVRXWHQXH SDUVHV GHX[H[WUpPLWpV
FRXSH] GH VRQ GLDPqWUH SDUOH GHVVXV WURQoRQQDJH
SDU GHVVXV (IIHFWXH] HQVXLWH OD FRXSH ¿QDOH SDU OH
GHVVRXVDX[HQUHMRLJQDQWODSUHPLqUHFRXSH
/RUVTXH YRXV WURQoRQQH] GDQV XQH SHQWH WHQH]YRXV
WRXMRXUVHQDPRQWGHODEFKH/RUVTXHYRXVDWWHLJQH]OD
¿QGHODFRXSHSRXUJDUGHUXQFRQWU{OHWRWDOUHOkFKH]OD
SUHVVLRQGHFRXSHORUVTXHYRXVDSSURFKH]GHOD¿QGHOD
coupe sans desserrer votre maintien des poignées de la
tronçonneuse. Ne laissez pas la chaîne entrer en contact
DYHF OH VRO 8QH IRLV OD FRXSH WHUPLQpH DWWHQGH] O¶DUUrW
complet de la chaîne avant de déplacer la tronçonneuse.
$UUrWH] WRXMRXUV OH PRWHXU DYDQW GH SDVVHU G¶XQ DUEUH j
un autre.
Ébranchage d’un arbre
Voir page 242.
L’ébranchage consiste à retirer les branches d’un arbre
DEDWWX/RUVTXHYRXVSURFpGH]jXQpEUDQFKDJHODLVVH]
les plus grosses branches inférieures en place pour
soulever le tronc du sol. Retirez les petites branches en
XQHVHXOHFRXSH/HVEUDQFKHVVRXVWHQVLRQGRLYHQWrWUH
FRXSpHVGXGHVVRXVYHUVOHGHVVXVD¿QG¶pYLWHUGHFRLQFHU
la tronçonneuse.
Coupe des branches sous tension
Voir page 242.
Un fouet est une branche, souche déracinée ou un
DUEULVVHDXTXLHVWÀpFKLSDUXQDXWUHPRUFHDXGHERLVGH
WHOOHVRUWHTXLOVHGpWHQGEUXVTXHPHQWORUVTXHORQFRXSH
ou retire le morceau ce bois le retenant.
/DVRXFKHGpUDFLQpHGXQDUEUHDEDWWXULVTXHIRUWHPHQWGH
se détendre et de revenir en position verticale pendant la
coupe pour la séparer du tronc. Attention aux fouets, ils
sont dangereux.
AVERTISSEMENT
Les fouets sont dangereux car ils peuvent vous frapper
et vous faire perdre le contrôle de la tronçonneuse. ce
TXL SHXW HQWUDvQHU GHV EOHVVXUHV JUDYHV RX PRUWHOOHV
&HFLGRLWrWUHHIIHFWXpSDUGHVXWLOLVDWHXUVHQWUDvQpV
UTILISATION PRÉVUE
&H SURGXLW QH GRLW rWUH XWLOLVp TX¶j O¶H[WpULHXU 3RXU GHV
UDLVRQV GH VpFXULWp OH SURGXLW GRLW rWUH HQ SHUPDQHQFH
contrôlé des deux mains.
Le produit est destiné à la coupe des branches, troncs,
bûches, et poutres d’un diamètre déterminé par la longueur
GH FRXSH GX JXLGHFKDvQH ,O QHVW DXWRULVp GH OXWLOLVHU
TXH SRXU FRXSHU GX ERLV ,O QH GRLW rWUH XWLOLVp TXH GH
façon privée par des adultes ayant reçu un entraînement
DSSURSULpFRXYUDQWOHVULVTXHVHWPHVXUHVSUpYHQWLYHVOLpV
à son utilisation.
1¶XWLOLVH]SDVOHSURGXLWSRXUXQXVDJHDXWUHTXHFHX[OLVWpV
FLGHVVXV,OQHGRLWSDVrWUHXWLOLVpGHIDoRQSURIHVVLRQQHOOH
pour l’abattage et l’élagage des arbres. Le produit ne doit
SDVrWUHXWLOLVpSDUGHVHQIDQWVRXSDUGHVSHUVRQQHVQH
SRUWDQWSDVGHVpTXLSHPHQWVHWYrWHPHQWVGHVpFXULWp
RISQUES RÉSIDUELS
0rPH ORUVTXH OD PDFKLQH HVW XWLOLVpH VHORQ OHV
prescriptions, il reste impossible d'éliminer totalement
FHUWDLQVIDFWHXUVGHULVTXHUpVLGXHOV/HVGDQJHUVVXLYDQWV
ULVTXHQWGHVHSUpVHQWHUHQFRXUVGXWLOLVDWLRQHWOXWLOLVDWHXU
GRLWSUrWHUSDUWLFXOLqUHPHQWJDUGHjFHTXLVXLW
Ŷ Blessures dues aux vibrations. Utilisez toujours un
RXWLO DGDSWp DX WUDYDLO j HIIHFWXHU VHUYH]YRXV GHV
poignées appropriées et limitez le temps de travail et
d'exposition.
Ŷ /H[SRVLWLRQ DX EUXLW SHXW SURYRTXHU GHV SHUWHV
GDXGLWLRQ3RUWH] XQHSURWHFWLRQ DXGLWLYH HWOLPLWH] OH
temps d'exposition
Ŷ Entrée en contact avec les dents de la chaîne de
OpODJXHXUULVTXHVGHFRXSXUHV
Ŷ 0RXYHPHQWEUXVTXH HW LPSUpYXRX UHERQG GXJXLGH
FKDvQHULVTXHVGHFRXSXUHV
Ŷ 3URMHFWLRQ G¶pOpPHQWV HQ SURYHQDQFH GH OD FKDvQH
ULVTXHVGHFRXSXUHVLQMHFWLRQV
Ŷ Éléments projetés en provenance de l’élément coupé
FRSHDX[pFODWV
Ŷ Inhalation de sciure et particules.
Ŷ Mise en contact de la peau avec de l’essence et de
l’huile.
RÉDUCTION DES RISQUES
,ODpWpUHSRUWpTXHOHVYLEUDWLRQVHQJHQGUpHVSDUOHVRXWLOV
à main peuvent contribuer à l'apparition d'un état appelé
le Syndrome de Raynaud chez certaines personnes. Les
symptômes peuvent comprendre des fourmillements,
un engourdissement et un blanchiment des doigts,
généralement par temps froid. Des facteurs héréditaires,
l'exposition au froid et à l'humidité, le régime alimentaire,
le tabagisme et les habitudes de travail peuvent contribuer

16 | Français
au développement de ces symptômes. Certaines mesures
SHXYHQWrWUHSULVHVSDUOXWLOLVDWHXUSRXUDLGHUjUpGXLUHOHV
HIIHWVGHVYLEUDWLRQV
Ŷ *DUGH]YRWUHFRUSVDXFKDXGSDUWHPSVIURLG/RUVTXH
vous utilisez l'appareil, portez des gants afin de garder
vos mains et vos poignets au chaud. Le temps froid est
considéré comme un facteur contribuant très largement
à l'apparition du Syndrome de Raynaud.
Ŷ $SUqV FKDTXH VHVVLRQ GH WUDYDLO SUDWLTXH] GHV
H[HUFLFHVTXLIDYRULVHQWODFLUFXODWLRQVDQJXLQH
Ŷ )DLWHV GHV SDXVHV IUpTXHQWHV /LPLWH] OD TXDQWLWp
d'exposition journalière.
Ŷ Les gants de protection disponibles auprès des
revendeurs professionnels de tronçonneuses
sont spécialement destinés à l’utilisation avec une
tronçonneuse, ils procurent une bonne protection et
une bonne accroche, et ils réduisent également les
effets des vibrations des poignées. Ces gants doivent
rWUHFRQIRUPHVj(1HWSRUWHUO¶LQVFULSWLRQ&(
Si vous ressentez l'un des symptômes associés à ce
V\QGURPH DUUrWH] LPPpGLDWHPHQW OH WUDYDLO HW FRQVXOWH]
votre médecin pour lui en faire part.
AVERTISSEMENT
L'utilisation prolongée d'un outil est susceptible de
SURYRTXHU RX GDJJUDYHU GHV EOHVVXUHV $VVXUH]YRXV
GH IDLUH GHV SDXVHV GH IDoRQ UpJXOLqUH ORUVTXH YRXV
utilisez tout outil de façon prolongée.
APPRENEZ À CONNAÎTRE VOTRE PRODUIT
Voir page 233.
1. 3URWqJHPDLQDYDQWIUHLQGHFKDvQH
2. 3RLJQpHDYDQW
3. 3RLJQpHDUULqUH
4. Chaîne coupante
5. *XLGHFKDvQH
3DWLQG¶pEUDQFKDJH
7. Bouchon du réservoir d'huile
8. Bouton de déverrouillage de la gâchette
9. Gâchette d'accélérateur
10. Carter de pignon
11. Bague de réglage de la tension de la chaîne
12. Bouton de tension de chaîne
13. )RXUUHDXGHJXLGHFKDvQH
ÉLÉMENTS DE SÉCURITÉ
Chaîne à faible tendance au rebond
Une chaîne à faible rebond aide à réduire la possibilité
TX¶XQUHERQGVHSURGXLVH
/HVOLPLWHXUVGHSURIRQGHXUVLWXpVjODYDQWGHFKDTXHGHQW
SHXYHQWUpGXLUHODIRUFHGHOHIIHWGHUHERQGHQpYLWDQWTXH
les dents ne s'enfoncent trop profondément dans la zone
GHUHERQG1¶XWLOLVH]TXHOHVFRPELQDLVRQVGHFKDvQHVHW
JXLGHVFKDvQHVUHFRPPDQGpVSDUOHIDEULFDQW
Redoublez de vigilance après avoir aiguisé la chaîne de
votre tronçonneuse, car l'aiguisage rend la chaîne moins
UpVLVWDQWH DX UHERQG 3RXU YRWUH VpFXULWp UHPSODFH] OHV
FKDvQHVGHVWURQoRQQHXVHVORUVTXHOHXUVSHUIRUPDQFHVGH
coupe diminuent.
Patin d’ébranchage
7RXW OH SDWLQ G¶pEUDQFKDJH SHXW rWUH XWLOLVp FRPPH
pivot lors d’une coupe. Cela aide à garder le corps de la
tronçonneuse stable en cours de coupe. Lors de la coupe,
SRXVVH]ODPDFKLQHYHUVO¶DYDQWMXVTX¶jFHTXHOHVSRLQWHV
s’enfoncent dans le bord du bois, puis en déplaçant la
poignée arrière vers le bas et vers le haut dans le sens du
trait de coupe, facilitez la libération des efforts de coupe.
Guide-chaîne
/HV JXLGHVFKDvQH D\DQW XQ UD\RQ SOXV IDLEOH j OHXU
extrémité présentent généralement une plus faible
WHQGDQFH DX UHERQG 9RXV GHYULH] XWLOLVHU XQ JXLGH
chaîne et une chaîne juste assez longs pour le travail à
HIIHFWXHU 'HV JXLGHVFKDvQHV SOXV ORQJV DXJPHQWHQW OH
ULVTXH GH SHUWH GH FRQWU{OH HQ FRXUV GH FRXSH 9pUL¿H]
régulièrement la tension de la chaîne. Lors de la coupe
GHEUDQFKHVFRXUWHVSOXVFRXUWHVTXHOHJXLGHFKDvQHOD
chaîne a plus de chances de se faire éjecter si la tension
n’est pas correcte.
Frein de chaîne
/H IUHLQ GH FKDvQH D pWp FRQoX SRXU SHUPHWWUH GDUUrWHU
UDSLGHPHQWODFKDvQHGHWRXUQHU/DFKDvQHGRLWVDUUrWHU
LPPpGLDWHPHQW ORUVTXH OH OHYLHU GX IUHLQ SURWqJHPDLQ
HVW SRXVVp YHUV ODYDQW 8Q IUHLQ GH FKDvQH QHPSrFKH
SDVOHIIHWGHUHERQG,OQHIDLWTXHGLPLQXHUOHULVTXHGH
EOHVVXUHVHQFDVGHFRQWDFWGXJXLGHFKDvQHDYHFOHFRUSV
de l’opérateur en cas de rebond. Le frein de chaîne doit
rWUHWHVWpDYDQWFKDTXHXWLOLVDWLRQD¿QGHYpUL¿HUVRQERQ
fonctionnement à la fois en position de fonctionnement et
en position de frein.
MONTAGE
AVERTISSEMENT
6L XQH TXHOFRQTXH SLqFH RX SDUWLH GH FHWWH DSSDUHLO
HVW PDQTXDQWH RX HQGRPPDJpH QH O¶XWLOLVH] SDV
DYDQW G¶DYRLU FKDQJp OD SLqFH /H QRQUHVSHFW GH FHW
avertissement pourrait entraîner de graves blessures.
MONTAGE DE LA CHAÎNE ET DU GUIDE-CHAÎNE
Voir page 243 - 244.
1. $VVXUH]YRXVGH UHWLUHUOH SDFNEDWWHULHGH O¶DSSDUHLO
3RUWH]GHVJDQWVGHSURWHFWLRQ
2. Dévissez le bouton de tension de la chaîne puis retirez
le carter de pignon.
3. /DFKDvQHGRLWrWUHRULHQWpHYHUVVRQVHQVGHURWDWLRQ
Si elles sont orientées dans le sens inverse, retournez
ODERXFOHTXHYRXVDYH]IRUPpH
4. 3ODFH] OHV PDLOORQV GHQWUDvQHPHQW GDQV OH UDLO GX
guide.
5. 3RVLWLRQQH]ODFKDvQHGHIDoRQjIRUPHUXQHERXFOHj
l'arrière du guide.
0DLQWHQH] ODFKDvQH HQ SODFHVXU OH JXLGH&KDvQHHW
enroulez sa boucle autour du pignon. Abaissez le
JXLGHFKDvQHGH IDoRQ TXHOH ERXORQ WUDYHUVHOH WURX
de l’ensemble tensionneur de chaîne attenant. Vous

17 Français |
EN
FR
DE
ES
IT
NL
PT
DA
SV
FI
NO
RU
PL
CS
HU
RO
LV
LT
ET
HR
SL
SK
BG
DXUH] SHXWrWUH j IDLUH SLYRWHU FHW HQVHPEOH SRXU
aligner le trou avec le boulon. Vous pouvez faire pivoter
FHWHQVHPEOH jQRXYHDX SRXUDSSOLTXHU XQHFHUWDLQH
WHQVLRQ j OD FKDvQH FH TXL DLGHUD j OD PDLQWHQLU HQ
place.
7. Remettez le carter de pignon en place et tournez
OD EDJXH GH WHQVLRQ GH OD FKDvQH MXVTX¶j FH TXH OD
FKDvQHVRLWFRUUHFWHPHQWWHQGXH/HJXLGHFKDvQHGRLW
DORUVrWUH SRXVVp YHUVOH KDXW 9pULILH] jQRXYHDX OD
tension de la chaîne. Ne tendez pas la chaîne de façon
excessive.
8. Une fois la chaîne correctement tendue, serrez à
nouveau le bouton.
RÉGLAGE DE LA TENSION DE LA CHAÎNE
Voir page 235. Voir page 245.
1. Desserrez légèrement le bouton de tension de la
chaîne en le tournant dans le sens inverse des aiguilles
d’une montre.
2. 3RXU DXJPHQWHU OD WHQVLRQ GH OD FKDvQH WRXUQH] OD
bague de réglage de tension dans le sens des aiguilles
d’une montre et vérifiez régulièrement la tension de la
FKDvQH3RXUGLPLQXHUODWHQVLRQGHODFKDvQHWRXUQH]
la bague de réglage de tension dans le sens inverse
des aiguilles d’une montre et vérifiez régulièrement la
tension de la chaîne.
3. /DWHQVLRQHVWFRUUHFWHORUVTXHOHMHXHQWUHODGHQWGHOD
FKDvQHHWOHJXLGHFKDvQHHVWGHPPjPP
Tirez la chaîne vers le bas au niveau du milieu de la
SDUWLHLQIpULHXUHGXJXLGHFKDvQHGHIDoRQjO¶pORLJQHU
GXJXLGHFKDvQHHWPHVXUH]ODGLVWDQFHHQWUHOHJXLGH
chaîne et les dents de coupe.
4. Serrez le bouton de tension de la chaîne en le tournant
dans le sens des aiguilles d’une montre.
UTILISATION
AJOUT D’HUILE DE LUBRIFICATION DE CHAÎNE
Voir page 234.
AVERTISSEMENT
Ne travaillez jamais sans huile de chaîne. Si la chaîne
WRXUQHVDQVOXEUL¿DQWFHODSHXWHQGRPPDJHUODFKDvQH
HW OH JXLGHFKDvQH ,O HVW GRQF HVVHQWLHO GH YpUL¿HU
IUpTXHPPHQWOHQLYHDXG¶KXLOHjO¶DLGHGHODMDXJHDLQVL
TX¶jFKDTXHGpPDUUDJH
1. Nettoyez la surface autour du bouchon d’huile pour
éviter toute contamination.
2. Dévissez et retirez le bouchon du réservoir d’huile.
3. Versez l’huile dans le réservoir d’huile et vérifiez la
MDXJHGHQLYHDXG¶KXLOH3UHQH]JDUGHGHQHSDVIDLUH
pénétrer de saletés dans le réservoir d’huile lors de son
remplissage.
4. 5HPHWWH] OH ERXFKRQ G¶KXLOH HQ SODFH HW VHUUH]OH
Essuyez toute huile renversée.
5. Un réservoir d’huile plein vous permet d’utiliser la
WURQoRQQHXVHSHQGDQWPLQXWHV
+XLOHOXEUL¿DQWHSRXUFKDvQHUHFRPPDQGpH
Ŷ /H IDEULFDQW YRXV UHFRPPDQGH GH Q¶XWLOLVHU TXH GH
O¶KXLOH SRXU FKDvQH GH PDUTXH 5\REL 'LVSRQLEOH
DXSUqVGHYRWUHVHUYLFHDSUqVYHQWHDJUpp5\REL
MISE EN PLACE DU PACK BATTERIE
Voir page 235.
1. 0HWWH] OH SDFN EDWWHULH HQ SODFH GDQV ORXWLO $OLJQH]
OHV ODQJXHWWHV GX SDFN EDWWHULH DYHF OHV UDLQXUHV GX
logement batterie de l'appareil.
2. $VVXUH]YRXV TXH OHV ORTXHWV j OD EDVH GX SDFN
EDWWHULHVHYHUURXLOOHQWELHQHWTXHOHSDFNHVWELHQHQ
place dans le produit avant de commencer le travail.
COMMENT TENIR LA TRONÇONNEUSE
Voir page 235.
Tenez toujours la tondeuse avec votre main droite sur la
poignée arrière et votre main gauche sur la poignée avant.
$JULSSH]OHVGHX[SRLJQpHV GHIDoRQTXH YRVSRXFHVHW
YRV GRLJWV OHV HQFHUFOHQW $VVXUH]YRXV TXH YRWUH PDLQ
JDXFKH WLHQW OD SRLJQpH DYDQW GH WHOOH IDoRQ TXH YRWUH
pouce se trouve en dessous.
DÉMARRAGE DE LA TRONÇONNEUSE
Voir page 235.
1. Avant de commencer l’utilisation, vous devez mettre en
SODFHOHSDFNEDWWHULHGDQVODPDFKLQHHWYRXVDVVXUHU
TXHOHIUHLQGHFKDvQHHVWHQSRVLWLRQGHIRQFWLRQQHPHQW
HQWLUDQWVXUVRQOHYLHUVXUOHSURWqJHPDLQVHQGLUHFWLRQ
de la poignée avant.
2. 3RXUPHWWUHODPDFKLQHHQPDUFKHWLUH]VXUOHEORFDJH
GHJkFKHWWHSXLVHQIRQFH]ODJkFKHWWHLQWHUUXSWHXU
VÉRIFICATION ET UTILISATION DU FREIN DE CHAÎNE
1. Actionnez le frein de chaîne en faisant tourner votre
main gauche autour de la poignée avant. À l’aide du
GRVGHYRWUHPDLQSRXVVH]OHOHYLHUGXIUHLQGHFKDvQH
VXUOHSURWqJHPDLQVHQGLUHFWLRQGXJXLGHFKDvQHDORUV
TXHODFKDvQHHVWHQURWDWLRQUDSLGH$VVXUH]YRXVGH
maintenir les poignées de la tronçonneuse des deux
mains en permanence.
2. Remettez le frein de chaîne en position Run
IRQFWLRQQHPHQW HQ VDLVLVVDQW OD SDUWLH VXSpULHXUH
GXOHYLHUGHIUHLQSURWqJHPDLQVHWHQOHWLUDQWYHUVOD
SRLJQpHDYDQWMXVTX¶jHQWHQGUHXQFOLF
AVERTISSEMENT
Si le frein de chaîne ne stoppe pas immédiatement la
chaîne, ou s’il ne reste pas en position de fonctionnement
VDQV\rWUHDLGpDSSRUWH]ODWURQoRQQHXVHjXQVHUYLFH
aprèsvente agréé pour la faire réparer avant de continuer
à l’utiliser.
TRANSPORT ET STOCKAGE
Voir page 247 - 248.
Ŷ $UUrWH]ODPDFKLQHUHWLUH]OHSDFNEDWWHULHHWODLVVH]
l’outil refroidir avant de le ranger ou de le transporter.
Ŷ Débarrassez l'appareil de tous les corps étrangers.
Rangez la en un endroit frais, sec et correctement

18 | Français
ventilé, hors de portée des enfants. Ne la rangez
SDV j SUR[LPLWp GDJHQWV FRUURVLIV WHOV TXH SURGXLWV
FKLPLTXHV GH MDUGLQDJH RX VHOV GH GpJHO 1H UDQJH]
pas à l'extérieur.
Ŷ 0HWWH] OH IRXUUHDX GH SURWHFWLRQ GX JXLGHFKDvQH HQ
SODFHDYDQWGHUDQJHUO¶DSSDUHLODLQVLTX¶DXFRXUVGH
son transport.
Ŷ 3RXUOHWUDQVSRUWDWWDFKH]ODPDFKLQHSRXUOHPSrFKHU
de bouger ou de tomber, afin d'éviter toute blessure et
tout dommage matériel.
ENTRETIEN
AVERTISSEMENT
1XWLOLVH] TXH GHV SLqFHV GpWDFKpHV HW DFFHVVRLUHV
d'origine constructeur. Le non respect de cette
précaution peut entraîner de mauvaises performances,
des blessures, et annuler votre garantie.
AVERTISSEMENT
Les réparations demandent un soin et des
FRQQDLVVDQFHV H[WUrPHVHW QH GRLYHQW rWUH HIIHFWXpHV
TXH SDU XQ UpSDUDWHXU TXDOL¿p 3RXU WRXWH UpSDUDWLRQ
nous vous conseillons de retourner votre appareil à
votre service après vente agréé le plus proche. N’utilisez
TXHGHVSLqFHVGpWDFKpHVLGHQWLTXHVSRXUHIIHFWXHUOHV
réparations.
AVERTISSEMENT
Retirez la batterie avant tout réglage et toute opération
d’entretien ou de nettoyage. Le non respect de cet
avertissement peut entraîner de graves blessures.
Ŷ Vous pouvez effectuer les réglages et réparations
GpFULWV GDQV FH PDQXHO 3RXU OHV DXWUHV UpSDUDWLRQV
FRQWDFWH]XQVHUYLFHDSUqVYHQWHDJUpp
Ŷ /HVFRQVpTXHQFHVG¶XQPDXYDLVHQWUHWLHQSHXYHQWrWUH
la rupture de la chaîne et le mauvais fonctionnement
GHVGLVSRVLWLIVGHVpFXULWpFHTXLDXJPHQWHOHVULVTXHV
de graves blessures. Gardez votre tronçonneuse
entretenue professionnellement et sure.
Ŷ L’affûtage de la chaîne en toute sécurité est une
RSpUDWLRQ GHPDQGDQW XQ FHUWDLQ VDYRLUIDLUH /H
fabricant vous recommande donc de remplacer toute
chaîne usée ou émoussée par une neuve, disponible
DXSUqVGHYRWUHVHUYLFHDSUqVYHQWHDJUpp5\REL9RXV
pourrez trouver la référence de la pièce dans le tableau
GHVFDUDFWpULVWLTXHVSUpVHQWGDQVFHPDQXHO
Ŷ Respectez les instructions concernant la lubrification,
la vérification de la tension de la chaîne et son réglage.
Ŷ $SUqV FKDTXH XWLOLVDWLRQ XWLOLVH] XQ FKLIIRQ SURSUH HW
sec pour nettoyer le produit.
Ŷ Vérifiez régulièrement le bon serrage des écrous, vis
HWERXORQVSRXUTXHOHSURGXLWVRLWWRXMRXUVHQERQpWDW
GHIRQFWLRQQHPHQW7RXWHSLqFHHQGRPPDJpHGRLWrWUH
correctement remplacée ou réparée par un service
DSUqVYHQWHDJUpp
REMPLACEMENT DU GUIDE-CHAÎNE ET DE LA
CHAÎNE
Voir page 243 - 244.
1. $VVXUH]YRXVG¶DYRLUUHWLUpODEDWWHULH3RUWH]GHVJDQWV
de protection.
2. Dévissez le bouton de serrage de la chaîne en le
tournant dans le sens inverse des aiguilles d’une
PRQWUHMXVTX¶jFHTXHOHFDUWHUGHSLJQRQVRLWGHVVHUUp
3. 5HWLUH] OH FDUWHU GH SLJQRQ 5HWLUH] OH JXLGHFKDvQH
DLQVLTXHODFKDvQHGHO¶DSSDUHLO
4. 3RXU PHWWUH HQ SODFH XQ QRXYHDX JXLGHFKDvQH
desserrez l’écrou de l’ensemble tensionneur de
chaîne. Montez l’ensemble tensionneur de chaîne sur
OHQRXYHDXJXLGHFKDvQHHWVHUUH]O¶pFURX
5. 0HWWH]ODQRXYHOOHFKDvQHHQSODFHVXUOHJXLGHFKDvQH
GDQV OH ERQ VHQV HW DVVXUH]YRXV TXH OHV PDLOORQV
d’entraînement sont bien alignés dans le sillon du
JXLGHFKDvQH
$VVHPEOH] OH JXLGHFKDvQH VXU OD WURQoRQQHXVH SXLV
passez la chaîne autour du pignon d’entraînement.
7. Remettez le carter de pignon en place.
8. 5pJOH] OD WHQVLRQ GH OD FKDvQH 5HSRUWH]YRXV DX
chapitre “ Réglage de la tension de la chaîne”.
AVERTISSEMENT
Une chaîne émoussée ou mal affûtée peut entraîner un
VXUUpJLPHPRWHXUHQFRXUVGHFRXSHHWrWUHODFDXVHGH
graves dommages au moteur.
AVERTISSEMENT
8QPDXYDLVDLJXLVDJHGHODFKDvQHDXJPHQWHOHULVTXH
de rebond.
AVERTISSEMENT
Si vous ne remplacez pas ou ne réparez pas une chaîne
HQGRPPDJpH YRXV YRXV H[SRVH] j GHV ULVTXHV GH
blessures corporelles graves.
AVERTISSEMENT
/DFKDvQHHVWWUqVFRXSDQWH3RUWH]WRXMRXUVGHVJDQWV
GHSURWHFWLRQORUVTXHYRXVDVVXUH]VRQHQWUHWLHQ
VÉRIFICATION ET NETTOYAGE DU FREIN DE CHAÎNE
Voir page 246.
Ŷ Gardez toujours le mécanisme de frein de chaîne
propre en en brossant légèrement l’accouplement pour
en retirer la saleté.
Ŷ Testez toujours l’efficacité du frein de chaîne après
O¶DYRLUQHWWR\p5HSRUWH]YRXVj ODVHFWLRQ8WLOLVDWLRQ
±,QGLTXpVRXVOHFDUWHUGHFKDvQHGHFHPDQXHOSRXU
plus d'informations.
PÉRIODICITÉ D’ENTRETIEN
Vérification quotidienne
/XEUL¿FDWLRQGXJXLGH $YDQWFKDTXHXWLOLVDWLRQ
La pagina si sta caricando...
La pagina si sta caricando...
La pagina si sta caricando...
La pagina si sta caricando...
La pagina si sta caricando...
La pagina si sta caricando...
La pagina si sta caricando...
La pagina si sta caricando...
La pagina si sta caricando...
La pagina si sta caricando...
La pagina si sta caricando...
La pagina si sta caricando...
La pagina si sta caricando...
La pagina si sta caricando...
La pagina si sta caricando...
La pagina si sta caricando...
La pagina si sta caricando...
La pagina si sta caricando...
La pagina si sta caricando...
La pagina si sta caricando...
La pagina si sta caricando...
La pagina si sta caricando...
La pagina si sta caricando...
La pagina si sta caricando...
La pagina si sta caricando...
La pagina si sta caricando...
La pagina si sta caricando...
La pagina si sta caricando...
La pagina si sta caricando...
La pagina si sta caricando...
La pagina si sta caricando...
La pagina si sta caricando...
La pagina si sta caricando...
La pagina si sta caricando...
La pagina si sta caricando...
La pagina si sta caricando...
La pagina si sta caricando...
La pagina si sta caricando...
La pagina si sta caricando...
La pagina si sta caricando...
La pagina si sta caricando...
La pagina si sta caricando...
La pagina si sta caricando...
La pagina si sta caricando...
La pagina si sta caricando...
La pagina si sta caricando...
La pagina si sta caricando...
La pagina si sta caricando...
La pagina si sta caricando...
La pagina si sta caricando...
La pagina si sta caricando...
La pagina si sta caricando...
La pagina si sta caricando...
La pagina si sta caricando...
La pagina si sta caricando...
La pagina si sta caricando...
La pagina si sta caricando...
La pagina si sta caricando...
La pagina si sta caricando...
La pagina si sta caricando...
La pagina si sta caricando...
La pagina si sta caricando...
La pagina si sta caricando...
La pagina si sta caricando...
La pagina si sta caricando...
La pagina si sta caricando...
La pagina si sta caricando...
La pagina si sta caricando...
La pagina si sta caricando...
La pagina si sta caricando...
La pagina si sta caricando...
La pagina si sta caricando...
La pagina si sta caricando...
La pagina si sta caricando...
La pagina si sta caricando...
La pagina si sta caricando...
La pagina si sta caricando...
La pagina si sta caricando...
La pagina si sta caricando...
La pagina si sta caricando...
La pagina si sta caricando...
La pagina si sta caricando...
La pagina si sta caricando...
La pagina si sta caricando...
La pagina si sta caricando...
La pagina si sta caricando...
La pagina si sta caricando...
La pagina si sta caricando...
La pagina si sta caricando...
La pagina si sta caricando...
La pagina si sta caricando...
La pagina si sta caricando...
La pagina si sta caricando...
La pagina si sta caricando...
La pagina si sta caricando...
La pagina si sta caricando...
La pagina si sta caricando...
La pagina si sta caricando...
La pagina si sta caricando...
La pagina si sta caricando...
La pagina si sta caricando...
La pagina si sta caricando...
La pagina si sta caricando...
La pagina si sta caricando...
La pagina si sta caricando...
La pagina si sta caricando...
La pagina si sta caricando...
La pagina si sta caricando...
La pagina si sta caricando...
La pagina si sta caricando...
La pagina si sta caricando...
La pagina si sta caricando...
La pagina si sta caricando...
La pagina si sta caricando...
La pagina si sta caricando...
La pagina si sta caricando...
La pagina si sta caricando...
La pagina si sta caricando...
La pagina si sta caricando...
La pagina si sta caricando...
La pagina si sta caricando...
La pagina si sta caricando...
La pagina si sta caricando...
La pagina si sta caricando...
La pagina si sta caricando...
La pagina si sta caricando...
La pagina si sta caricando...
La pagina si sta caricando...
La pagina si sta caricando...
La pagina si sta caricando...
La pagina si sta caricando...
La pagina si sta caricando...
La pagina si sta caricando...
La pagina si sta caricando...
La pagina si sta caricando...
La pagina si sta caricando...
La pagina si sta caricando...
La pagina si sta caricando...
La pagina si sta caricando...
La pagina si sta caricando...
La pagina si sta caricando...
La pagina si sta caricando...
La pagina si sta caricando...
La pagina si sta caricando...
La pagina si sta caricando...
La pagina si sta caricando...
La pagina si sta caricando...
La pagina si sta caricando...
La pagina si sta caricando...
La pagina si sta caricando...
La pagina si sta caricando...
La pagina si sta caricando...
La pagina si sta caricando...
La pagina si sta caricando...
La pagina si sta caricando...
La pagina si sta caricando...
La pagina si sta caricando...
La pagina si sta caricando...
La pagina si sta caricando...
La pagina si sta caricando...
La pagina si sta caricando...
La pagina si sta caricando...
La pagina si sta caricando...
La pagina si sta caricando...
La pagina si sta caricando...
La pagina si sta caricando...
La pagina si sta caricando...
La pagina si sta caricando...
La pagina si sta caricando...
La pagina si sta caricando...
La pagina si sta caricando...
La pagina si sta caricando...
La pagina si sta caricando...
La pagina si sta caricando...
La pagina si sta caricando...
La pagina si sta caricando...
La pagina si sta caricando...
La pagina si sta caricando...
La pagina si sta caricando...
La pagina si sta caricando...
La pagina si sta caricando...
La pagina si sta caricando...
La pagina si sta caricando...
La pagina si sta caricando...
La pagina si sta caricando...
La pagina si sta caricando...
La pagina si sta caricando...
La pagina si sta caricando...
La pagina si sta caricando...
La pagina si sta caricando...
La pagina si sta caricando...
La pagina si sta caricando...
La pagina si sta caricando...
La pagina si sta caricando...
La pagina si sta caricando...
La pagina si sta caricando...
La pagina si sta caricando...
La pagina si sta caricando...
La pagina si sta caricando...
La pagina si sta caricando...
La pagina si sta caricando...
La pagina si sta caricando...
La pagina si sta caricando...
La pagina si sta caricando...
La pagina si sta caricando...
La pagina si sta caricando...
La pagina si sta caricando...
La pagina si sta caricando...
La pagina si sta caricando...
La pagina si sta caricando...
La pagina si sta caricando...
La pagina si sta caricando...
La pagina si sta caricando...
La pagina si sta caricando...
La pagina si sta caricando...
La pagina si sta caricando...
La pagina si sta caricando...
La pagina si sta caricando...
La pagina si sta caricando...
La pagina si sta caricando...
La pagina si sta caricando...
La pagina si sta caricando...
La pagina si sta caricando...
La pagina si sta caricando...
La pagina si sta caricando...
La pagina si sta caricando...
La pagina si sta caricando...
La pagina si sta caricando...
La pagina si sta caricando...
La pagina si sta caricando...
La pagina si sta caricando...
La pagina si sta caricando...
La pagina si sta caricando...
La pagina si sta caricando...
La pagina si sta caricando...
La pagina si sta caricando...
La pagina si sta caricando...
La pagina si sta caricando...
La pagina si sta caricando...
La pagina si sta caricando...
La pagina si sta caricando...
La pagina si sta caricando...
La pagina si sta caricando...
La pagina si sta caricando...
La pagina si sta caricando...
La pagina si sta caricando...
La pagina si sta caricando...
La pagina si sta caricando...
La pagina si sta caricando...
La pagina si sta caricando...
La pagina si sta caricando...
La pagina si sta caricando...
La pagina si sta caricando...
La pagina si sta caricando...
La pagina si sta caricando...
La pagina si sta caricando...
La pagina si sta caricando...
La pagina si sta caricando...
La pagina si sta caricando...
La pagina si sta caricando...
La pagina si sta caricando...
La pagina si sta caricando...
-
 1
1
-
 2
2
-
 3
3
-
 4
4
-
 5
5
-
 6
6
-
 7
7
-
 8
8
-
 9
9
-
 10
10
-
 11
11
-
 12
12
-
 13
13
-
 14
14
-
 15
15
-
 16
16
-
 17
17
-
 18
18
-
 19
19
-
 20
20
-
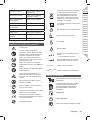 21
21
-
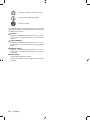 22
22
-
 23
23
-
 24
24
-
 25
25
-
 26
26
-
 27
27
-
 28
28
-
 29
29
-
 30
30
-
 31
31
-
 32
32
-
 33
33
-
 34
34
-
 35
35
-
 36
36
-
 37
37
-
 38
38
-
 39
39
-
 40
40
-
 41
41
-
 42
42
-
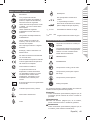 43
43
-
 44
44
-
 45
45
-
 46
46
-
 47
47
-
 48
48
-
 49
49
-
 50
50
-
 51
51
-
 52
52
-
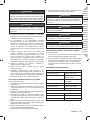 53
53
-
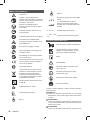 54
54
-
 55
55
-
 56
56
-
 57
57
-
 58
58
-
 59
59
-
 60
60
-
 61
61
-
 62
62
-
 63
63
-
 64
64
-
 65
65
-
 66
66
-
 67
67
-
 68
68
-
 69
69
-
 70
70
-
 71
71
-
 72
72
-
 73
73
-
 74
74
-
 75
75
-
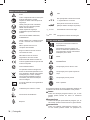 76
76
-
 77
77
-
 78
78
-
 79
79
-
 80
80
-
 81
81
-
 82
82
-
 83
83
-
 84
84
-
 85
85
-
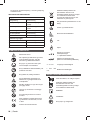 86
86
-
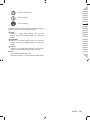 87
87
-
 88
88
-
 89
89
-
 90
90
-
 91
91
-
 92
92
-
 93
93
-
 94
94
-
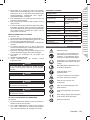 95
95
-
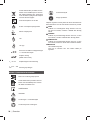 96
96
-
 97
97
-
 98
98
-
 99
99
-
 100
100
-
 101
101
-
 102
102
-
 103
103
-
 104
104
-
 105
105
-
 106
106
-
 107
107
-
 108
108
-
 109
109
-
 110
110
-
 111
111
-
 112
112
-
 113
113
-
 114
114
-
 115
115
-
 116
116
-
 117
117
-
 118
118
-
 119
119
-
 120
120
-
 121
121
-
 122
122
-
 123
123
-
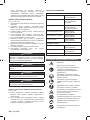 124
124
-
 125
125
-
 126
126
-
 127
127
-
 128
128
-
 129
129
-
 130
130
-
 131
131
-
 132
132
-
 133
133
-
 134
134
-
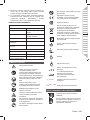 135
135
-
 136
136
-
 137
137
-
 138
138
-
 139
139
-
 140
140
-
 141
141
-
 142
142
-
 143
143
-
 144
144
-
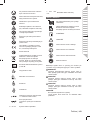 145
145
-
 146
146
-
 147
147
-
 148
148
-
 149
149
-
 150
150
-
 151
151
-
 152
152
-
 153
153
-
 154
154
-
 155
155
-
 156
156
-
 157
157
-
 158
158
-
 159
159
-
 160
160
-
 161
161
-
 162
162
-
 163
163
-
 164
164
-
 165
165
-
 166
166
-
 167
167
-
 168
168
-
 169
169
-
 170
170
-
 171
171
-
 172
172
-
 173
173
-
 174
174
-
 175
175
-
 176
176
-
 177
177
-
 178
178
-
 179
179
-
 180
180
-
 181
181
-
 182
182
-
 183
183
-
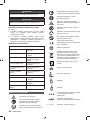 184
184
-
 185
185
-
 186
186
-
 187
187
-
 188
188
-
 189
189
-
 190
190
-
 191
191
-
 192
192
-
 193
193
-
 194
194
-
 195
195
-
 196
196
-
 197
197
-
 198
198
-
 199
199
-
 200
200
-
 201
201
-
 202
202
-
 203
203
-
 204
204
-
 205
205
-
 206
206
-
 207
207
-
 208
208
-
 209
209
-
 210
210
-
 211
211
-
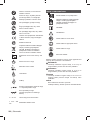 212
212
-
 213
213
-
 214
214
-
 215
215
-
 216
216
-
 217
217
-
 218
218
-
 219
219
-
 220
220
-
 221
221
-
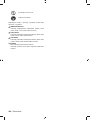 222
222
-
 223
223
-
 224
224
-
 225
225
-
 226
226
-
 227
227
-
 228
228
-
 229
229
-
 230
230
-
 231
231
-
 232
232
-
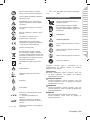 233
233
-
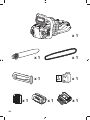 234
234
-
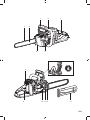 235
235
-
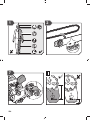 236
236
-
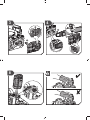 237
237
-
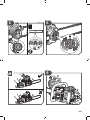 238
238
-
 239
239
-
 240
240
-
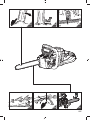 241
241
-
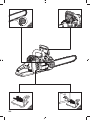 242
242
-
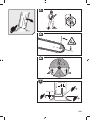 243
243
-
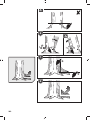 244
244
-
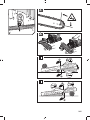 245
245
-
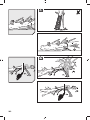 246
246
-
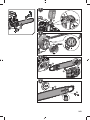 247
247
-
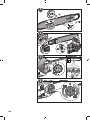 248
248
-
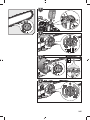 249
249
-
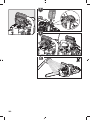 250
250
-
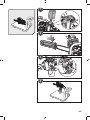 251
251
-
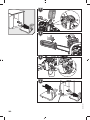 252
252
-
 253
253
-
 254
254
-
 255
255
-
 256
256
-
 257
257
-
 258
258
-
 259
259
-
 260
260
-
 261
261
-
 262
262
-
 263
263
-
 264
264
-
 265
265
-
 266
266
-
 267
267
-
 268
268
-
 269
269
-
 270
270
-
 271
271
-
 272
272
-
 273
273
-
 274
274
-
 275
275
-
 276
276
-
 277
277
-
 278
278
-
 279
279
-
 280
280
-
 281
281
-
 282
282


Ryobi RCS36X3550HI Manuale del proprietario
- Categoria
- Motoseghe
- Tipo
- Manuale del proprietario
- Questo manuale è adatto anche per
Documenti correlati
Altri documenti
-
Black & Decker CS1840 Manuale utente
-
Stell SHO 4520 Manuale utente
-
 Stell SHO 7500 Manuale utente
-
Stell SHO 4610 Manuale utente
-
Olimpia Splendid Unico Air Manuale utente
-
Stell SHO 4620 Manuale utente
-
-
Stell SHO 5610 Manuale utente
-
Stell SHO 4510 Manuale utente
-
CONTINENTAL EDISON CECP9060MID Manuale utente
