Tascam MD-350 Manuale utente
- Categoria
- Lettori minidisc
- Tipo
- Manuale utente

AC POWER CORD CONNECTION
CAUTION:
TO PREVENT ELECTRIC SHOCK, MATCH WIDE
BLADE OF PLUG TO WIDE SLOT, FULLY INSERT.
CORDE DE CONNEXION CA
ATTENTION:
POUR ÉVITER LES CHOCS ÉLECTRIQUES,
INTRODUIRE LA LAME LA PLUS LARGE DE LA
FICHE DANS LA BORNE CORRESPONDANTE DE
LA PRISE ET POUSSER JUSQU’AU FOND.
For CANADA
TEAC CORPORATION
3-7-3, Nakacho, Musashino-shi, Tokyo 180-8550, Japan Phone: (0422) 52-5082
TEAC AMERICA, INC. 7733 Telegraph Road, Montebello, California 90640 Phone: (213) 726-0303
TEAC CANADA LTD. 5939 Wallace Street, Mississauga, Ontario L4Z 1Z8, Canada Phone: 905-890-8008 Facsimile: 905-890-9888
TEAC MEXICO, S.A. De C.V Privada De Corina, No.18, Colonia Del Carmen Coyoacon, Mexico DF 04100 Phone: 5-658-1943
TEAC UK LIMITED 5 Marlin House, Marlins Meadow, The Croxley Centre, Watford, Herts. WD1 8YA, U.K. Phone: 01923-819699
TEAC DEUTSCHLAND GmbH Bahnstrasse 12, 65205 Wiesbaden-Erbenheim, Germany Phone: 0611-71580
TEAC FRANCE S. A. 17 Rue Alexis-de-Tocqueville, CE 005 92182 Antony Cedex, France Phone: 01.42.37.01.02
TEAC BELGIUM NV/SA P.A. TEAC Nederland BV, Perkinsbaan 11a, 3439 ND Nieuwegein, Netherlands Phone: 0031-30-6048115
TEAC NEDERLAND BV Perkinsbaan 11a, 3439 ND Nieuwegein, Netherlands Phone: 030-6030229
TEAC AUSTRALIA PTY., LTD.
106 Bay Street, Port Melbourne, Victoria 3207, Australia Phone: (03) 9644-2442
A.C.N. 005 408 462
TEAC ITALIANA S.p.A. Via C. Cantù 11, 20092 Cinisello Balsamo, Milano, Italy Phone: 02-66010500
Printed in China MA-0484
»
MD-350
Minidisc Deck
ESPAÑOL ITALIANO DEUTSCH
FRANÇAIS
ENGLISH
This appliance has a serial number located
on the rear panel. Please record the model
number and serial number and retain them
for your records.
Model number
Serial number
WARNING: TO PREVENT FIRE OR SHOCK
HAZARD, DO NOT EXPOSE THIS
APPLIANCE TO RAIN OR MOISTURE.
The exclamation point within an equilateral triangle is intended to alert the user to the
presence of important operating and maintenance (servicing) instructions in the literature
accompanying the appliance.
The lightning flash with arrowhead symbol, within an equilateral triangle, is intended to alert
the user to the presence of uninsulated “dangerous voltage” within the product’s enclosure
that may be of sufficient magnitude to constitute a risk of electric shock to persons.
CAUTION: TO REDUCE THE RISK OF ELECTRIC SHOCK, DO NOT
REMOVE COVER (OR BACK). NO USER-SERVICEABLE PARTS INSIDE.
REFER SERVICING TO QUALIFIED SERVICE PERSONNEL.
Ü
ÿ
Ÿ
OWNER'S MANUAL / MANUEL DU PROPRIETAIRE
BEDIENUNGSANLEITUNG / MANUALE DI ISTRUZIONI
MANUAL DEL USUARIO / GEBRUIKSAANWIJZING
D00602210A

IMPORTANT SAFETY INSTRUCTIONS
– 2 –
CAUTION:
●Read all of these Instructions.
●Save these Instructions for later use.
●Follow all Warnings and Instructions marked on the audio
equipment.
1) Read Instructions — All the safety and operating instructions should
be read before the product is operated.
2) Retain Instructions — The safety and operating instructions
should be retained for future reference.
3) Heed Warnings — All warnings on the product and in the operating
instructions should be adhered to.
4) Follow Instructions — All operating and use instructions should be
followed.
5) Cleaning — Unplug this product from the wall outlet before
cleaning. Do not use liquid cleaners or aerosol cleaners. Use a damp
cloth for cleaning.
6) Attachments — Do not use attachments not recommended by the
product manufacturer as they may cause hazards.
7) Water and Moisture — Do not use this product near water
_
for
example, near a bath tub, wash bowl, kitchen sink, or laundry tub; in a
wet basement; or near a swimming pool; and the like.
8) Accessories — Do not place this product on an unstable cart,
stand, tripod, bracket, or table. The product may fall, causing serious
injury to a child or adult, and serious damage to the product. Use only
with a cart, stand, tripod, bracket, or table recommended by the
manufacturer, or sold with the product. Any mounting of the product
should follow the manufacturer’s instructions, and should use a
mounting accessory recommended by the manufacturer.
9) A product and cart combination should be moved with care. Quick
stops, excessive force, and uneven surfaces may cause the product
and cart combination to overturn.
10) Ventilation — Slots and openings in the cabinet are provided for
ventilation and to ensure reliable operation of the product and to
protect it from overheating, and these openings must not be blocked or
covered. The openings should never be blocked by placing the product
on a bed, sofa, rug, or other similar surface. This product should not be
placed in a built-in installation such as a bookcase or rack unless
proper ventilation is provided or the manufacturer’s instructions have
been adhered to.
11) Power Sources — This product should be operated only from the
type of power source indicated on the marking label. If you are not sure
of the type of power supply to your home, consult your product dealer
or local power company. For products intended to operate from battery
power, or other sources, refer to the operating instructions.
12) Grounding or Polarization — This product may be equipped with
a polarized alternating-current line plug (a plug having one blade wider
than the other). This plug will fit into the power outlet only one way.
This is a safety feature. If you are unable to insert the plug fully
into the outlet, try reversing the plug. If the plug should still fail to fit,
contact your electrician to replace your obsolete outlet. Do not defeat
the safety purpose of the polarized plug.
13) Power-Cord Protection — Power-supply cords should be routed
so that they are not likely to be walked on or pinched by items placed
upon or against them, paying particular attention to cords at plugs,
conve-nience receptacles, and the point where they exit from the
product.
14) Outdoor Antenna Grounding — If an outside antenna or cable
system is connected to the product, be sure the antenna or cable
system is grounded so as to provide some protection against voltage
surges and built-up static charges. Article 810 of the National
Electrical Code, ANSI/NFPA 70, provides information with regard to
proper grounding of the mast and supporting structure, grounding of
the lead-in wire to an antenna discharge unit, size of grounding
conductors, location of antenna-discharge unit, connection to
grounding electrodes, and re-quirements for the grounding electrode.
"Note to CATV system installer:
This reminder is provided to call the CATV system installer’s attention
to Section 820-40 of the NEC which provides guidelines for proper
grounding and, in particular, specifies that the cable ground shall be
connected to the grounding system of the building, as close to the point
of cable entry as practical.
grounding and, in particular, specifies that the cable ground shall be
connected to the grounding system of the building, as close to the point
of cable entry as practical.
ANTENNA
LEAD IN
WIRE
ANTENNA
DISCHARGE UNIT
(NEC SECTION 810-20)
GROUNDING CONDUCTORS
(NEC SECTION 810-21)
GROUND CLAMPS
POWER SERVICE GROUNDING
ELECTRODE SYSTEM
(NEC ART 250. PART H)
NEC - NATIONAL ELECTRICAL CODE
ELECTRIC
SERVICE
EQUIPMENT
Example of Antenna Grounding as per
National Electrical Code, ANSI/NFPA 70
GROUND
CLAMP
15) Lightning — For added protection for this product during a
lightning storm, or when it is left unattended and unused for long
periods of time, unplug it from the wall outlet and disconnect the
antenna or cable system. This will prevent damage to the product due
to lightning and power-line surges.
16) Power Lines — An outside antenna system should not be located
in the vicinity of overhead power lines or other electric light or power
circuits, or where it can fall into such power lines or circuits. When
installing an outside antenna system, extreme care should be taken to
keep from touching such power lines or circuits as contact with them
might be fatal.
17) Overloading — Do not overload wall outlets, extension cords, or
integral convenience receptacles as this can result in risk of fire or
electric shock.
18) Object and Liquid Entry — Never push objects of any kind into
this product through openings as they may touch dangerous voltage
points or short-out parts that could result in a fire or electric shock.
Never spill liquid of any kind on the product.
19) Servicing — Do not attempt to service this product yourself as
opening or removing covers may expose you to dangerous voltage or
other hazards. Refer all servicing to qualified service personnel.
20) Damage Requiring Service — Unplug this product from the wall
outlet and refer servicing to qualified service personnel under the
following conditions:
a) when the power-supply cord or plug is damaged.
b) if liquid has been spilled, or objects have fallen into the product.
c) if the product has been exposed to rain or water.
d) if the product does not operate normally by following the operating
instructions. Adjust only those controls that are covered by the
operating instructions as an improper adjustment of other controls may
result in damage and will often require extensive work by a qualified
technician to restore the product to its normal operation.
e) if the product has been dropped or damaged in any way.
f ) when the product exhibits a distinct change in performance
_
this
indicates a need for service.
21) Replacement Parts — When replacement parts are required, be
sure the service technician has used replacement parts specified by
the manufacturer or have the same characteristics as the original part.
Unauthorized substitutions may result in fire, electric shock, or other
hazards.
22) Safety Check — Upon completion of any service or repairs to this
product, ask the service technician to perform safety checks to
determine that the product is in proper operating condition.
23) Wall or Ceiling Mounting — The product should be mounted to a
wall or ceiling only as recommended by the manufacturer.
24) Heat — The product should be situated away from heat sources
such as radiators, heat registers, stoves, or other products (including
amplifiers) that produce heat.
– 111 –
MEMO

– 110 –
Localización de averías Especificaciones
Formato: Sistema de audio digital MiniDisc
Sistema de grabación:
Sistema de sobreescritura con modu-
lación archivada magnéticamente
Tiempo de grabación/reproducción:
SP, 80 minutos máximo.
LP2, 160 minutos máximo.
LP4, 320 minutos máximo.
Mono: 160 minutos máximo.
Frecuencia de muestreo: 44,1 kHz
Sistema de compresión: ATRAC (Adaptive
TRansform Acoustic Coding)
(codificación acústica de
transformación adaptiva)
Gama dinámica: Superior a 94 dB
(reproducción, 1 kHz, filtro A)
Distorsión armónica total: Inferior a 0,013%
Números de canales:
2 (estereofónicos), 1 (monofónico)
Respuesta de frecuencia:
20 Hz – 20 kHz ±0,5 dB
(reproducción)
Relación señal a ruido:
Superior a 94 dB (reproducción,
filtro A )
Conectores analógicos de entrada/salida:
Entrada:
Equilibrada: XLR, +4 dBu (ref.),
10 kohms
Desequilibrada: RCA, –10 dBV (ref.),
` 50 kohms
Salida:
Equilibrada: XLR, +4 dBu (ref.),
150 ohms
Desequilibrada: RCA, –10 dBV (ref.),
600 ohms
Alimentación:
120 V CA, 60 Hz
(modelo EE.UU./Canadá),
230 V CA, 50 Hz (modelo Europa/
Exportación general),
240 V CA, 50 Hz
(modelo para Australia)
Salida de auriculares: Máx. 25 mW +
25 mW, 32 ohms
Conectores digitales de entrada y salida:
Entrada 1, 2:
TOS (EIAJ RC-5720), IEC60958
Tipo II (S/PDIF)
Salida:
TOS (EIAJ RC-5720), IEC60958
Tipo II (S/PDIF)
Conector remoto:
Conector KEYBOARD: Mini DIN 6
clavijas
Consumo de energía: 13 W
Dimensiones (A x Alt. x P):
482,6 x 94 x 313 (mm)
Peso: 5,5 kg
Accesorios:
Unidad de control remoto (RC-32) x 1
Pila (tipo SUM-3, "AA", "R6") x 2
Guía de letras x 1
Juego de tornillos para instalación
en estante x 1
… Las mejoras pueden resultar en
modificaciones de especificaciones o de
funciones sin aviso.
… Las fotografías e ilustraciones pueden
ser levemente diferentes a los modelos
de producción.
* Las patentes EE.UU. y extranjeras han
sido otorgadas por Dolby Laboratories
Licensing Corporation.
ª U-TOC
La edición de las pistas grabadas es fácil
con los MiniDisc grabables. La información
acerca de las pistas grabadas (dirección
de inicio, dirección de fin, título,etc.), son
grabados en el área U-TOC (índice de la
tabla del usuario). Usted puede editar las
pistas simplemente reescribiendo estos
datos.
Si usted encuentra cualquier problema en la platina, verifique lo siguiente antes de llamar al
servicio de reparación. Si el problema persiste, consulte con su agente o con el agente de
servicio TEAC más cercano.
… Si no es posible volver al funcionamiento normal, desenchufe el cordón de alimentación del
tomacorriente y enchúfelo otra vez.
Problema Remedio
No es posible realizar El MD está sucio o dañado. Si "Disc Error !" aparece indicado,
ninguna operación. reemplace el MD por otro disco.
No se reinicia la Verifique que la alimentación esté conectada.
reproducción.
"Blank Disc" aparece indicado si el MD no contiene datos
grabados. "No Track !!" aparece indicado si no se ha grabado ninguna
pista en el disco. Reemplace el MD por un MD grabado.
Cuando aparece indicado "UTOC Error !" reemplace el MD por
otro disco.
Puede haber condensación dentro de la platina. En este caso
eyecte el MD y deje la alimentación de la platina conectada durante
unas pocas horas.
No se inicia la grabación. Cuando aparece indicado "Protected !!" el MD está protegido
contra borrado accidental. Deslice la lengüeta de protección contra
borrado para cerrar el orificio. Un MD que sólo reproduce está
insertado. Reemplace el MD con uno grabable.
Cuando aparece indicado "D-IN UNLOCK !" y no entra audio de
la fuente, conecte la fuente a través de una conexión digital o grabe
el audio empleando una entrada digital.
La grabación por temporizador no está disponible.
Después de la grabación por temporizador, active nuevamente la
alimentación dentro de 3 ó 4 días y extraiga el MD. Si la platina es
mantenida desactivada por un período prolongado, el contenido de
la grabación puede desaparecer.
Cuando aparece indicado "Disc Full !!" el disco no tiene espacio
para la grabación. Borre las pistas innecesarias o emplee otro MD.
Cuando aparece indicado "Rec Error !!", hay un error en la
grabación. Reinicie la grabación desde el principio.
Demasiada interferencia. No opere esta platina cerca de un TV.
SAFETY INFORMATION
– 3 –
This product has been designed and manufactured according to FDA regulations "title 21, CFR, chapter 1, subchapter J, based on the Radiation
Control for Health and Safety Act of 1968", and is classified as class 1 laser product. There is no hazardous invisible laser radiation during
operation because invisible laser radiation emitted inside of this product is completely confined in the protective housings.
The label required in this reguration is shown 1.
… CAUTION
- DO NOT REMOVE THE PROTECTIVE HOUSING USING SCREWDRIVER.
- USE OF CONTROLS OR ADJUSTMENTS OR PERFORMANCE OF PROCEDURES OTHER THAN THOSE SPECIFIED HEREIN MAY RESULT IN
HAZARDOUS RADIATION EXPOSURE.
- IF THIS PRODUCT DEVELOPS TROUBLE, MAKE A CONTACT WITH OUR SERVICEMAN, AND DO NOT USE THE PRODUCT IN A
TROUBLED STATE.
CERTIFICATION
THIS PRODUCT COMPLES WITH DHHS
RULES 21 CFR SUBCHAPTER J APPLI-
CABLE AT DATE OF MANUFACTURE
TEAC CORPORATION
3-7-3 NAKA-CHO, MUSASHINO-SHI, TOKYO, JAPAN
MANUFACTURED TIF
1
Optical pickup: Type : KMS-260A
Manufacturer : SONY Corporation
Laser output : 4.55 mW
Wavelength : 785±20 nm
For U.S.A.
TO THE USER
This equipment has been tested and found to
comply with the limits for a Class B digital
device, pursuant to Part 15 of the FCC Rules.
These limits are designed to provide
reasonable protection against harmful
interference in a residential installation. This
equipment generates, uses, and can radiate
radio frequency energy and, if not installed
and used in accordance with the instruction
manual, may cause harmful interference to
radio communications. However, there is no
guarantee that interference will not occur in a
particular installation. If this equipment does
cause harmful interference to radio or
television reception, which can be determined
by turning the equipment off and on, the user
is encouraged to try to correct the interference
by one or more of the following measures.
a) Reorient or relocate the receiving antenna.
b) Increase the separation between the
equipment and receiver.
c) Connect the equipment into an outlet on a
circuit different from that to which the
receiver is connected.
d) Consult the dealer or an experienced
radio/TV technician for help.
CAUTION
Changes or modifications to this equipment
not expressly approved by TEAC
CORPORATION for compliance could void the
user’s authority to operate this equipment.
For U.S.A

Before UseContents
… Place the unit on a hard flat surface.
… Avoid placing it in direct sunlight or
close to a source of heat. Also avoid
locations subject to vibrations and
excessive dust, heat, cold or moisture.
… Do not open the cabinet, as this might
result in circuitry damage or electrical
shock.
… Do not attempt to clean the unit with
chemical solvents, as this might
damage the finish. Use a clean, dry
cloth.
… When removing the power plug from the
wall outlet, always pull directly on the
plug, never yank the cord.
… Keep this manual in a safe place for
future reference.
IMPORTANT SAFETY INSTRUCTIONS ................................................................ 2-3
Before Use ................................................................................................................ 4
Read This Before Operating .............................................................................. 4
Handling MDs .............................................................................................. 5
Memory back-up function........................................................................... 5
When "Protected !!" is displayed................................................................ 5
While "UTOC Writing" is blinking............................................................... 5
When "D-IN UNLOCK !" blinks.................................................................... 5
Remote Control Unit........................................................................................... 5
Rack Mounting.................................................................................................... 6
Voltage Conversion (For general export models)............................................ 6
Connections .............................................................................................................. 6
Connection .................................................................................................. 6
Name of Each Control .............................................................................................. 7
Recording .................................................................................................................. 8
Recording an MD ............................................................................................... 8
Notes on Recording ........................................................................................... 9
Playback .................................................................................................................. 10
Normal Playback .............................................................................................. 10
Useful Tips for Recording ...................................................................................... 11
Monitoring the Input Signal ............................................................................ 11
Adjusting the Recording Level ....................................................................... 11
Assigning Track Numbers During Recording ................................................ 11
Recording Over Existing Tracks (Over Write) ................................................ 11
Sync Recording ................................................................................................ 12
Checking the Remaining MD Recording Time .............................................. 12
Checking the Recorded Tracks ....................................................................... 12
Timer Recording .............................................................................................. 12
Useful Tips for Playback ........................................................................................ 13
Using the Display Window ............................................................................. 13
Selecting the Desired Track ............................................................................. 13
Playing Tracks in Random Order (Shuffle Playback) .................................... 13
When Recording to Analog Tape .............................................................. 13-14
Playing Tracks in the Desired Order (Program Playback) ....................... 14-15
Repeating Track(s) (Repeat Playback) ............................................................ 15
Timer Playback ................................................................................................ 15
Pitch control ..................................................................................................... 15
Play modes ....................................................................................................... 15
Editing Recorded MDs ........................................................................................... 16
Notes on Editing .............................................................................................. 16
Erasing Track(s) (ERASE Function) ............................................................... 16
Dividing a Track (DIVIDE Function) ................................................................ 17
Combining Tracks (COMBINE Function) ........................................................ 17
Moving a Track (MOVE Function) .................................................................. 17
Assigning Titles (TITLE Function) ................................................................... 18
Assigning Titles to the Disc and All Tracks Successively
(TITLE AUTO INC Function)........................................................................ 18-19
Changing entered characters.................................................................... 19
Copying a Title (TITLE COPY Function) .......................................................... 19
Canceling the Last Operation (UNDO Function) ............................................ 19
Optional Functions.................................................................................................. 20
Correspondence between deck buttons and keyboard keys.................. 20
Editing keys ................................................................................................ 20
Title entry keys........................................................................................... 20
System Restrictions .......................................................................................... 20-21
Display Messages ................................................................................................... 21
Guide to the Serial Copy Management System .................................................. 22
Serial Copy Management System .................................................................. 22
Troubleshooting ..................................................................................................... 23
Specifications ......................................................................................................... 23
– 4 –
IMPORTANT (for U.K. Customers)
DO NOT cut off the mains plug from this
equipment. If the plug fitted is not
suitable for the power points in your
home or the cable is too short to reach
a power point, then obtain an
appropriate safety approved extension
lead or consult your dealer.
If nonetheless the mains plug is cut off,
remove the fuse and
dispose of the plug
immediately, to avoid a possible shock
hazard by inadvertent connection to the
mains supply.
If this product is not provided with a
mains plug, or one has to be fitted,
then
follow the instructions given below:
IMPORTANT. DO NOT make any
connection to the larger terminal which
is marked with the letter E or by the
safety earth symbol ç or coloured
GREEN or GREEN-and-YELLOW.
The wires in the mains lead on this
product are coloured in accordance
with the following code:
BLUE: NEUTRAL
BROWN: LIVE
As these colours may not correspond
with the coloured markings identifying
the terminals in your plug proceed as
follows:
The wire which is coloured BLUE must
be connected to the terminal which is
marked with the letter N or coloured
BLACK.
The wire which is coloured BROWN
must be connected to the terminal
which is marked with the letter L or
coloured RED.
When replacing the fuse only a
correctly rated approved type should
be used and be sure to re-fit the fuse
cover.
IF IN DOUBT — CONSULT A
COMPETENT ELECTRICIAN.
Read This Before Operating
– 109 –
Guía para el sistema de manejo de copia en serie
Esta platina de MD cumple con el estándar
Serial Copy Management System. Este
estándar ha sido elaborado para limitar la
copia digital a digital a la primera
generación exclusivamente. Las
regulaciones básicas que gobiernan este
sistema están descritas a continuación.
… Regla 1
La copia digital desde una fuente digital tal
como CD, DAT o MD grabado en un DAT o
MD grabado es posible a través de una
conexión de entrada digital. Sin embargo,
se prohiben las copias de segunda y
subsecuentes generaciones de digital a
digital.
Sistema de manejo de copia en
serie
Reproduciendo
Reproductor
de CD
Platina
DAT
Platina
MD
Platina
DAT
Platina
MD
Platina DAT
Platina MD
o
o
Cable óptico o
digital coaxial de
conexión
Cable óptico o
digital coaxial de
conexión
Jack de salida digital
Jacks de salida
(analógica) de
línea
Cordón de
conexión de audio
Jacks de entrada
(analógica) de
línea
√
√
Cinta DAT de
primera generación
o MD grabado vía
conexión digital a
digital
DAT
o
MD
Jack de entrada digital
Jack de salida digital
Grabando
Platina DAT
Platina MD
o
Grabando
Reproduciendo
Jack de entrada
digital
… Regla 2
Cuando una fuente analógica tal como
disco analógico o radiodifusión de FM son
grabadas digitalmente empleando un DAT
o MD, esta fuente grabada puede ser
digitalmente grabada en otro DAT o MD.
Sin embargo la copia digital posterior está
prohibida.
Cinta DAT de
primera generación
o MD grabado vía
conexión digital a
digital
Jack de
salida digital
Jacks de salida
(analógica) de
línea
Cordón de
conexión de
audio
Jacks de entrada
(analógica) de
línea
Jack de entrada
digital
Jack de
entrada digital
√
√
Reproduciendo
Sintonizador
Tocadiscos
Platina de
cassette
Micrófono
amplificador
Reproductor de
CD
Platina DAT
Platina MD
Jacks de salida
(analógica) de línea
Jacks de entrada
(analógica) de línea
√
√
Cinta DAT o MD
grabado vía
conexión
analógica - digital
DAT
o
MD
DAT
o
MD
Platina DAT
Platina MD
o
Grabando
Platina DAT
Platina MD
o
Grabando
Platina DAT
Platina MD
o
Grabando
Platina
DAT
Platina
MD
o
Reproduciendo
Platina
DAT
Platina
MD
o
Reproduciendo
Cordón de
conexión de audio
Cable óptico o
digital coaxial de
conexión
Jack de salida
digital
Cable óptico o
digital coaxial
de conexión
… Regla 3
Una platina DAT o una platina de MD que
es compatible con las frecuencias de
muestreo de 32 kHz y 48 kHz, puede grabar
el audio digital de un programa de
transmisión satelital digitalmente (digital a
digital). Un DAT o MD de primera
generación grabado en esta forma, puede
ser grabado nuevamente en otro DAT o
MD digitalmente (digital a digital). Sin
embargo, el DAT o MD de segunda
generación no es posible grabar con
ciertos modelos de sintonizadores BS.
Cinta DAT o MD
de segunda
generación
grabado vía
conexión digital
- digital
Jack de
salida digital
Jacks de salida
de línea
(analógica)
Cordón de
conexión de
audio
Jacks de entrada
de línea
(análogica)
Jack de entrada
digital
Jack de
entrada digital
√
√
Reproduciendo
Sintonizador BS
√
√
DAT o MD de
primera
generación
grabado vía
conexión digital -
digital
DAT
o
MD
DAT
o
MD
Platina DAT
Platina MD
o
Grabando
Platina DAT
Platina MD
o
Grabando
Platina DAT
Platina MD
o
Grabando
Platina
DAT
Platina
MD
o
Reproduciendo
Platina
DAT
Platina
MD
o
Reproduciendo
Cable óptico o
cable de conexión
coaxial digital
Jack de salida
digital
Jack de entrada
digital
Cable óptico o
cable de conexión
digital coaxial
Jack de salida
digital
Cable óptico o
cable de
conexión
coaxial digital
ESPAÑOL

– 108 –
… El audio se interrumpe durante la
búsqueda.
Cuando busca una pista creada por
medio de una operación de edición, el
audio se interrumpe algunas veces.
… Los números de pista no son
correctamente asignados.
Cuando graba un CD por medio de una
conexión digital, pistas cortas pueden
ser grabadas dependiendo del
contenido del CD. También, cuando el
marcado de pista automática es
efectuado, los números de pista pueden
no ser correctamente asignados en
algunos casos.
… La indicación "TOC Reading" no se
borra.
"TOC Reading" aparece indicado
durante un tiempo mayor que el usual
cuando se coloca un disco MD grabable
nuevo.
… Note lo siguiente cuando intenta
efectuar la grabación mientras borra
(sobreescritura) una grabación
anterior:
≠ El tiempo de grabación restante del
MD puede no ser indicado correcta-
mente.
≠ Después de repetidas operaciones
de sobreescritura, puede no ser
posible la grabación por
sobreescritura. En este caso, primero
edite la grabación anterior (borrando
pistas, etc.), luego proceda con la
operación de sobreescritura.
≠ El tiempo de grabación restante es
más corto después de grabar que lo
era antes de grabar.
≠ No se recomienda la operación de
sobreescritura si la pista que va a ser
sobreescrita contiene interferencia.
Como la grabación se efectúa en
base a 6 bloques (12 segundos
aprox.), la pista con interferencia
puede borrar parte de la pista.
… No es posible asignar un título de
pista durante la grabación por
sobreescritura.
… Algunas veces el tiempo máximo de
grabación no estará disponible aun
después de la ejecución de “ERASE
DISC”.
En este caso, intente ejecutar
nuevamente "ERASE DISC". Aunque, no
será posible anularlo posteriormente.
… Aunque el modo LP4 (cuádruple larga
duración) le ofrece una excepcional
cantidad de tiempo para la grabación
gracias a una avanzada tecnología de
compresión, algunas veces puede que
escuche algunos pequeños ruidos,
dependiendo del material que esté
grabando. Por ese motivo le
recomendamos que si la calidad de
sonido es más importante para su
proyecto de grabación que el tiempo de
grabación total, utilice mejor los modos
SP (stereo) o LP2 (doble larga
duración).
Mensajes de indicación
Los siguientes mensajes aparecen indicados dependiendo de las condiciones de operación.
Mensaje Descripción
Blank Disc El MD grabable no contiene datos grabados.
Cannot Copy ! Es imposible copiar.
Cannot EDIT ! Es imposible editar.
Disc Error ! Los datos en el MD son anormales.
Disc Full !! No hay lugar para continuar grabando.
D-IN UNLOCK ! No se ha realizado la conexión de entrada digital.
ERASE DISC ? ¿Se pueden borrar los datos grabados del MD?
ERASE TRK ? ¿Se puede borrar esta pista?
Name Full !! La memoria de títulos está llena.
NO DISC !! No se ha colocado un MD.
No Track !! No hay pista grabada.
PGM Empty !! No se han programado las pistas.
PGM Full !! No hay lugar para programar pistas.
Play Mode !! El modo de reproducción seleccionado es incorrecto.
Protected !! El MD está protegido contra borrado accidental.
Un MD que sólo reproduce está insertado.
Rec Error !! Ha ocurrido un error de grabación.
Track Full !! El MD ha completado todos sus números de pista.
UNDO ? ¿Se puede cancelar la última operación?
UTOC Writing Los datos grabados están siendo escritos en el MD.
Restricciones del sistema
ª Handling MDs
The MiniDisc (MD) measures 64 mm in
diameter. Although the MD is housed in a
protective cartridge (68 mm x 72 mm x 5
mm) and can be handled easily, deck
malfunc-tions may result if the cartridge
gets dust on it or is damaged. To protect
the disc, always take the following
precautions:
… Be sure that the MD is taken out of the
deck and put back in its MD case after
using it.
… Do not touch the disc inside the
cartridge. Do not open the shutter to
expose the MD.
… Do not place MDs in direct sunlight, high
temperatures, or high levels of humidity.
… Use a dry, soft cloth to clean the
cartridge.
… When attaching a label to the MD
cartridge, be sure to apply it correctly to
the specified position. If the label is
rolled up or partially detached, the MD
cartridge may get stuck inside the deck.
… Do not place one label on top of another.
ª Memory back-up function
This unit is provided with a memory back-
up function. When you use the deck for the
first time, leave it on for about 5 minutes to
allow the back-up circuit to be charged
and become operational. When not using
the deck for a while, try to turn the power
on every 3 or 4 days.
ª Serial Copy Management System
This deck complies with the SCMS (Serial
Copy Management System). As a result, it
is not possible to digitally record from a
source MD which has been recorded
digitally.
Cartridge
Shutter
ª When "Protected !!" is
displayed
… A playback-only MD is loaded.
… The MD is record-protected against
accidental erasure. To make recording
(or editing) possible, slide the record-
protect tab to close the hole.
ª While "UTOC Writing" is
blinking:
"UTOC Writing" blinks while the MD is
being ejected after recording (or
editing). While it is blinking, the recorded
data is being written on the MD. Do not
pull out the power cord or vibrate the
deck. Otherwise the recorded data may
not be written correctly on the MD.
If the power is turned off with the MD
left in the deck (" " lights up)
after recording, the UTOC cannot be
recorded. Turn the power back on
within 3 or 4 days and eject the MD. The
recorded data might be lost if the MD is
left in the deck for a long time.
ª When "D-IN UNLOCK !" blinks
… The program source is not connected to
the [DIGITAL INPUT 1] or [DIGITAL IN 2]
terminal even though you have selected
[DIGITAL 1] or [DIGITAL 2] with the
[INPUT SELECTOR]. Either make the
digital connection or select [ANALOG]
with the [INPUT SELECTOR] and perform
analog recording.
… This message also appears when the
digital signal input is interrupted during
digital recording. To continue recording,
restart the digital program source.
– 5 –
When operating the remote control unit,
point it towards the remote sensor on the
front panel of the unit.
ª Battery installation
1. Remove the battery compartment
cover.
2. Insert two "AA" (R6, SUM-3) dry
batteries.
Make sure that the batteries are
inserted with their positive ± and
negative — poles positioned correctly.
3. Close the cover until it clicks.
Battery replacement
If you notice that the distance between
the remote control unit and the player for
correct operation becomes shorter, it
indicates that the batteries are exhaust-
ed. In this case replace the batteries with
new ones.
Precautions concerning batteries
… Be sure to insert the batteries with
correct positive ± and negative —
polarities.
… Use batteries of the same type. Never
use different types of batteries
together.
… Rechargeable and non-rechargeable
batteries can be used. Refer to the
precautions on their labels.
… When the remote control unit is not to
be used for a long time (more than a
month), remove the batteries from the
remote control unit to prevent them from
leaking. If they leak, wipe away the
liquid inside the battery compartment
and replace the batteries with new
ones.
… Do not heat or disassemble batteries
and never dispose of old batteries by
throwing them in fire.
Remote Control Unit
ENGLISH

– 6 –
Connections
… Turn off power for all equipment before
making connections.
… Read instructions of each component
you intend to use with the MD deck.
ª Connection
ANALOG INPUT/OUTPUT
(BALANCED/UNBALANCED) terminals
Use these terminals to connect the deck to
a mixer, cassette tape recorder or other
components.
… Be sure to insert each plug securely. To
prevent hum and noise, do not bundle
the connection cords with the power
cord or speaker cord.
ª Power cord
Be sure to connect the power cord to an
AC outlet which supplies the correct
voltage.
… Hold the power plug when plugging or
unplugging the power cord.
Rack Mounting
Install this deck with the provided
mounting screw kit as illustrated.
DIGITAL INPUT 1/OUTPUT terminals
Use these terminals to connect the deck to
a digital component (such as a CD player,
DAT deck, digital amplifier, or another MD
deck).
… Use a digital optical (TOS) cable
(optional) for digital recording. Connect
the [DIGITAL IN 2] terminal located on
the front panel to a digital component
such as a DAT/MD deck.
… When making a digital connection,
remove the caps from the terminals.
When the terminals are not in use, leave
the caps in place.
Be sure to remove the power cord from the
AC outlet before repositioning the voltage
converter switch.
1. Locate the voltage selector on the rear
panel.
2. Using a flat-bladed screwdriver, set to
the appropriate 230 V or 120 V position
according to your area.
Voltage Conversion
(For general export models)
IN NORTH AMERICA DANSL'AMERIQUE
USE ONLY ON 120 V DU NORD:
SUPPLY. UTILISABLE SUR 120 V
D'ALIMENTATION
UNIQUEMENT.
– 107 –
Funciones opcionales Restricciones del sistema
Si conecta un teclado de una computadora
personal compatible IBM (101 o 106 teclas)
al terminal KEYBOARD de esta platina,
puede operar el control de la platina,
selección de pista, edición e ingreso de
títulos directamente desde el teclado.
… Coloque la guía de letras suministrada
alrededor de las teclas de función del
teclado.
ª Correspondencia entre los
botones de la platina y las
teclas del teclado
Botones de la Teclas del teclado
platina
[µ] Tecla F1
[≤] Tecla F2
Botón STOP Tecla F4
Botón PLAY Tecla F5
Botón READY Tecla F6
Botón RECORD Tecla F8
Botón AUTO SPACE Tecla F9
Botón REPEAT Tecla F10
Botón PLAY MODE Tecla F11
Botón DISPLAY Tecla F12
Botón YES Tecla Enter
Botón +10 Tecla +
Botones Numéricos Teclas Numéricas
Botón CLEAR Teclas Shift + F10
Botón EJECT Teclas Shift + F12
∆ Tecla ß
˚ Tecla ∑
ª Teclas de edición
Función Operación de
teclas
ERASE TRACK Teclas Shift + F1
ERASE DISC Teclas Shift + F2
MOVE Teclas Shift + F4
DIVIDE Teclas Shift + F5
COMBINE Teclas Shift + F6
TITLE COPY Teclas Shift + F7
TITLE Teclas Shift + F8
UNDO Teclas Shift + F9
Cancelación de modo Tecla Esc
ª Teclas de entrada de título
Operación Operación de
teclas
Movimiento del cursor Tecla ß, ∑ Tecla
Modificación de número Tecla ™, ≈ Tecla
de pista a ser editado
Conmutador de Tecla Caps
mayúscula/minúscula
Borrado de caracteres Tecla BS
antes del cursor (retroceso)
Borrado de caracteres Tecla DEL
en el cursor (eliminación)
Inserción de caracteres Tecla INS
(inserción)
Finalización de ingreso Tecla Esc
de título
… Se pueden ingresar los caracteres
directamente desde el teclado.
… Cuando el número de pista a ser editado
es modificado utilizando [™] o [≈], el
título de pista permanecerá igual.
… " " y " " pueden ser
utilizados al mismo tiempo.
… Cuando utilice un teclado, no active ni
desactive la alimentación rápidamente,
ya que algunas veces puede afectar el
teclado dejándolo inoperable.
Como hay diferentes sistemas de
grabación empleados por los cassettes
compactos, DAT, etc., el MD (minidisco)
está sujeto a algunas restricciones de
sistema. Estas restricciones pueden
ocasionar los siguientes problemas. Pero
los mismos son normales, no son fallas.
… "Track Full" aparece antes de terminar
el tiempo de grabación disponible.
"Track Full" aparece siempre que la
unidad llega al número de pistas
permitidas, independientemente del
tiempo de grabación todavía disponible.
Con el sistema MD, no es posible grabar
más de 254 pistas. Si usted desea
grabar más pistas, borre las que no
necesita, grabándolas en otro MD, o
emplee el procedimiento de edición
para combinar las pistas existentes.
… "Track Full" aparece aunque el número
de pistas y el tiempo de grabación no
hayan llegado al límite.
Siempre que se conmuten (on/off) los
datos de énfasis u otros refuerzos de
señal en la mitad de una pista, la misma
es separada en ese punto y aparece
"Track Full" independientemente del
tiempo de grabación y del número de
pistas.
… El tiempo de grabación restante de un
MD no aumenta aunque se hayan
borrado varias pistas.
La indicación del tiempo de grabación
restante ignora las pistas de menos de
12 segundos. Por lo tanto el tiempo
puede no aumentar si usted ha borrado
varias pistas cortas.
… El tiempo total de grabación
transcurrido y el tiempo de grabación
restante no coinciden con el tiempo de
grabación disponible calculado a partir
del tiempo establecido en el disco, y
con el del modo de grabación.
La unidad mínima para grabación de
datos son usualmente 6 bloques (12
segundos aprox.) Los datos de menos
de 12 segundos emplean el espacio de
12 segundos, por eso, el tiempo real de
grabación disponible se acorta más de
lo especificado. También, si el MD está
arañado, las secciones arañadas son
automáticamente borradas y el tiempo
disponible se reduce en la misma
proporción.
… No es posible efectuar la combinación
de pistas.
Las pistas creadas por otras
operaciones de edición no pueden ser
combinadas algunas veces.
ESPAÑOL

– 106 –
Edición de MD grabados
… "DISC" se enciende cuando un título de
disco es ingresado, y "TRACK" se
enciende cuando un título de pista es
ingresado.
… La asignación de títulos no es disponible
en "SHUFFLE MODE" o "PGM MODE".
ª Tipos de caracteres
… Cuando " " está encendido: Es
posible ingresar el alfabeto japonés
Katakana.
… Cuando " " está encendido: Es
posible ingresar mayúsculas, números y
símbolos del alfabeto. A B C D E F G H I J
K L M N O P Q R S T U V W X Y Z 0 1 2 3 4 5
6 7 8 9 : ; < = > ? @ ! “ # $ % & ‘ ( )
*
+ , – . /
_ (espacio)
… Cuando no hay ningún indicador
encendido: Es posible ingresar
minúsculas, números y símbolos del
alfabeto. a b c d e f g h i j k l m n o p q r s
t u v w x y z 0 1 2 3 4 5 6 7 8 9 : ; < = > ? @
! “ # $ % & ‘ ( )
*
+ , – . / _ (espacio)
ª Modificación de los caracteres
ingresados
Mueva el cursor hacia el caracter a ser
corregido en el modo de entrada de
caracter.
… Seleccione el nuevo caracter para
modificar el caracter en la posición del
cursor.
ª Para mover el cursor
Platina ® Presione los botones
[∆ SEARCH ˚].
Control remoto ® Presione los botones
[∆ SEARCH ˚].
ª Para seleccionar un caracter en la
posición del cursor
Platina ® Gire el disco [µ TRACK ≤].
Control remoto ® Presione los botones
[µ TRACK ≤].
ª Para modificar el tipo de caracter en la
posición del cursor
Platina ® Presione el botón [DISPLAY].
Control remoto ® Presione cualquiera de
los botones [DISPLAY] o [CHAR SELECT].
ª Para modificar el caracter en la
posición del cursor para una letra
mayúscula/minúscula
Platina ® Presione el botón [DISPLAY].
Control remoto ® Presione el botón
[Aß∑a].
ª Para insertar un espacio en la posición
del cursor
Platina ® Presione [PUSH ENTER] en el
disco durante 3 segundos o más.
Control remoto ® Presione el botón
[INSERT] o [ENTER] durante más de 3
minutos.
ª Para ingresar un número
Platina ® Gire el disco [µTRACK≤].
Control remoto ® Presione los botones
numéricos.
ª Para borrar un caracter en la posición
del cursor
Platina ® Presione el botón [EDIT/NO].
Control remoto ® Presione cualquier de
los botones [DELETE] o [EDIT/NO].
ª Para mover el cursor hacia la derecha
después de seleccionar un caracter
Platina ® Presione [PUSH ENTER] en el
disco.
Control remoto ® Presione el botón
[ENTER].
ª Para borrar todos los caracteres de una
vez
Platina ® No disponible.
Control remoto ® Presione el botón
[CLEAR].
1. En el modo de parada, indique el título
de disco o de la pista (número) que
desee copiar con el disco
[µTRACK≤].
ejem. Para copiar el título de la pista 4
2. Presione el botón [EDIT/NO]
repetidamente hasta que aparezca "TITLE
COPY ?".
3. Presione el botón [YES].
"Copiar hasta 001? aparece indicado
("001" parpadea).
ejem. Para copiar el título de la pista 4 a
la pista 6
Número de la Número de la
pista fuente pista destino
Copia de un título
(función TITLE COPY)
4. Seleccione la pista en la cual desea
copiar el título con el disco
[µTRACK≤].
"Copy to 006 ? (Copiar hasta 006 ?)"
aparece indicado ("006" parpadea).
… Presione el botón [ª STOP] o [EDIT/NO]
para cancelar el modo TITLE COPY.
5. Presione el botón [YES].
… El título es copiado a la pista de número
006.
… Al presionar el botón [¥PLAY] o
[π READY], se cancela la operación de
copia de título.
1. En el modo función de parada, presione
el botón [EDIT/NO] repetidamente hasta
que "UNDO ?" aparezca.
2. Presione el botón [YES].
En pantalla aparece “Undo OK ?”.
… Para cancelar esta función, presione el
botón [ª STOP] o el botón [EDIT/NO].
3. Presione el botón [YES].
… La última operación es anulada y
"COMPLETE" aparece indicado.
… Al presionar el botón [¥PLAY] o
[π READY] activa el modo UNDO.
Notas:
"UNDO ?" no será indicado en los
siguientes casos abajo, aunque presione el
botón [EDIT/NO] (no es posible anular).
… Cuando la operación ya ha sido anulada
(no es posible anular una anulación), o
no ha sido efectuada la operación para
anular.
… Cuando el modo de edición es activado
presionando el botón [YES].
… Durante la grabación o cuando el modo
de listo de grabación está activado.
… Cuando "DISC ERASE" es ejecutado en
un disco en blanco.
… Cuando ocurre un corte de
alimentación.
Cancelación de la última
operación (función UNDO)
Butones empleados en esta página
Botones
numéricos
– 7 –
ENGLISH
Name of Each Control
1 [POWER] button
2 [TIMER PLAY/OFF/REC] switch
3 PITCH CONTROL ON/OFF switch
4 [INPUT] control
5 Remote sensor
6 Disc insertion slot
7 [
ø EJECT] button
8 [
º RECORD] button
9 [DISPLAY] button
0 [
∆ SEARCH˚] buttons
q [PLAY MODE] button
w [
µ TRACK≤] dial / [PUSH ENTER]
e [EDIT/NO] button
r [YES] button
t [INPUT SELECTOR] switch
y [PHONES] jack
u PHONES level control
i Display window
o [
ª STOP] button
p [
¥ PLAY] button
a [
π READY] button
s [DIGITAL IN 2] terminal
d [KEYBOARD] terminal
f Numeric buttons (1 to 9, 0, +10)
g [REPEAT/A-B] buttons
h [TITLE EDIT] button
j [CLEAR] button
k [INSERT] button
l [DELETE] button
; [SYNC RECORD] button
z Upper/Lower case button [A
ß∑a]
x [AUTO SPACE] button
c [SCROLL] button
v Character select button [CHAR SELECT]
b [ENTER] button
n [
µ TRACK≤] buttons

– 8 –
Recording
1. Press the [POWER] button.
… "NO DISC" appears on the display.
… Turn on the source component and the
amplifier. Set the input selector to the
source component.
2. Insert a recordable MD.
… When a blank MD is inserted, the
display shows "Disc Loading", "TOC
Reading", "No Track !!" and "Blank Disc"
in sequence.
… When a partially recorded MD is
inserted, the deck will automatically
start recording from the end of the last
recorded track.
3. Select the input with the [INPUT
SELECTOR].
Display Selected Input
ANALOG ANALOG INPUT
DIGITAL 1 DIGITAL INPUT 1
(OPTICAL)
DIGITAL 2 DIGITAL IN 2 (OPTICAL)
(front panel)
4. Select the recording mode following the
steps below:
The MD-350 is capable of recording and
playing back in standard stereo mode
(SP), monaural standard speed (MON),
double long-play (LP2) and quadruple
long-play (LP4) modes.
Recording an MD
Insert in the direction of
the arrow.
Hold the MD with the
label side up.
As the name suggests, LP2 provides
long-play facilities giving twice the
usual recording/playback time, and LP4
provides four times the usual
recording/playback time.
All modes are stereo, except for MONO,
when recording will be performed using
only the left (L) channel. "L" appears on
the level meter, but the output is sent to
both channels.
To select a mode (SP, MON, LP2 or LP4)
for recording:
a) With the unit in stop mode, press the
[EDIT/NO] button repeatedly until “REC
MODE?” is displayed.
b) Press the [YES] button. ("RecMode>
XXX" is displayed.)
c) Use the [µTRACK≤] dial to select
the recording mode shown on the
display.
d) Press the [YES] button to confirm the
setting.
… Note:that when the time remaining on a
disc for further recording is shown, this
refers to the remaining time using the
current mode.
… It is possible to include tracks recorded
in different modes (SP,MONO, LP2 and
LP4) on one disc.
… Also note that while the LP4 (quadruple
long-play) mode provides exceptional
recording time thanks to advanced
compression technology, very
occasionally you may hear some slight
noise, depending on the material being
recorded. We therefore recommend that
if sound quality is more important for
your recording project than recording
time, you use either the SP (stereo) or
LP2 (double long-play) mode.
… The maximum amount of time available
with monaural recording is twice that of
stereo recording.
Buttons used on this page
ª Indication of recording mode
When the recording mode is shown, the
last three characters of the display are
used, and it is displayed as SP, MON, LP2
or LP4.
… In stop mode, the recording mode is
shown when the remaining time display
is selected.
… In record or record-ready mode, the
recording mode is always shown
… In play or in play-pause mode, the
recording mode is shown when the
remaining time is selected. In this case,
the display shows the recording mode
of the current material, not the
currently-selected recording mode.
5. Press the [
º RECORD] button.
… The deck enters the Record-Ready
mode ("
"
lights up).
… "Disc Full !!" or "Track Full !!" is
displayed when no room is available on
the MD for recording.
6. Adjust the recording level.
… If [ANALOG] was selected above,
adjust the recording level with the
[INPUT] control.
… When adjusting the recording level,
adjust so that the "OVER" segments of
the peak level meter do not light up.
.
7. Start recording.
Press the [
¥PLAY] button or the
[
π READY] button ( "¥
"
lights up).
Start playing the source program.
8. To stop recording, press the [
ª STOP]
button.
ª To stop recording temporarily (ready)
Press the [
π READY] button.
… Press the [
¥PLAY] or [π READY]
button to resume recording.
… Whenever you pause recording, the
track number increases by one.
ª To eject the MD
Press the [ø EJECT] button in stop mode.
If the power is turned off with the MD left
in the deck (" " lights up) after
recording, the UTOC cannot be recorded.
Turn the power back on within 3 or 4 days
and eject the MD. The recorded data
might be lost if the MD is left in the deck
for a long time.
– 105 –
6. Seleccione cada caracter girando el
disco [
µTRACK≤] y presionando
[PUSH ENTER] en el disco.
… Si utiliza el control remoto, seleccione
cada caracter con los botones
[
µTRACK≤] y presione el botón
[ENTER] para ingresarlo.
7. Repita los pasos 5-6.
8. Presione el botón [YES] después de
asignar el título del disco.
… El modo de entrada de título para la
pista 1 es activado automáticamente
("001 > _" aparece indicado) y el cursor
parpadea en la indicación.
9. Repita los pasos 5-6.
10. Presione el botón [YES] nuevamente.
… Cuando el modo de entrada de título
para la pista 2 está activado ("002 > _"
aparece indicado), repita los pasos 5-8.
… Repita el procedimiento de entrada de
caracteres hasta que todos los títulos
hayan sido ingresados. El título del
disco aparece luego indicado, si la
platina está en el modo de parada, o si
la platina está en el modo de
reproducción, el título de la pista en uso
aparece indicado.
… Confirme los títulos girando el disco
[
µTRACK≤].
… Presione el botón [
ª STOP] para
abortar la operación.
Presione el botón [EDIT/NO] por más de
3 segundos (o presione el botón
[TITLE EDIT] en el control remoto) para
cancelar la función de título y retornar a
la reproducción.
Notas:
… Hasta 100 caracteres pueden ser
ingresados por cada título de pista.
Cuando el número total de caracteres
de los títulos de todas las pistas excede
los 1700, no se podrán escribir más
títulos de pistas en el MD.
… Si la función TITLE AUTO INC es
cancelada antes que todos los títulos
hayan sido asignados, el título de la
pista ingresado actualmente será
borrado. Sólo los títulos de las pistas
que ya hayan sido asignados serán
mantenidos.
… Si UNDO es ejecutado después que
TITLE AUTO INC fuera completado, el
último título de la pista editada será
cancelado.
… Los títulos de disco y pista pueden ser
asignados durante la grabación.
… Si un título de pista es asignado
mientras está en el modo de listo de
grabación durante la sobreescritura de
una pista, el título de pista será borrado
cuando retorne a la grabación.
Los títulos pueden ser asignados a cada
disco o cada pista empleando letras
mayúsculas o minúsculas, números "
" (katakana) y símbolos.
1. Presione el botón [EDIT/NO] de manera
que "TITLE ?" aparezca indicado.
2. Presione el botón [YES].
… Presione el botón [TITLE EDIT] si está
utilizando el control remoto.
3. Seleccione "DSC" o un número de pista
utilizando el disco [
µTRACK≤].
… Para asignar el título a un disco,
seleccione "TITLE > DSC"
("DSC" parpadea).
… Para asignar el título a una pista,
seleccione "TITLE > XXX (número de
pista)" (el número de pista parpadea).
4. Presione el botón [YES].
"DSC > _" o "XXX > _" aparece indicado.
… Se activará el modo de ingreso de
caracteres y el cursor parpadea en la
indicación.
5. Presione el botón [DISPLAY] para
seleccionar el tipo de caracteres.
… Cuando " " está encendido: Es
posible ingresar el alfabeto japonés
Katakana.
… Cuando " " está encendido: Es
posible ingresar mayúsculas, números y
símbolos del alfabeto.
… Cuando no hay ningún indicador
encendido: Es posible ingresar
minúsculas, números y símbolos del
alfabeto.
6. Seleccione cada caracter girando el
disco [
µTRACK≤] y presionando
[PUSH ENTER] en el disco.
Asignación de títulos
(función TITLE)
7. Repita los pasos 5-6.
… Presione el botón [
ª STOP] para abortar
la operación.
… Presione el botón [EDIT/NO] por más de
3 segundos (o presione el botón [TITLE
EDIT] en el control remoto) para
cancelar la función de título y retornar a
la reproducción.
8. Presione el botón [YES] nuevamente.
… El título del disco o de la pista es
indicado nuevamente.
… Repita los pasos de 1 a 8 para asignar
los títulos para los otros números de
pistas.
Seleccione el modo "CONTINUE" con el
botón [PLAY MODE]. Los títulos pueden ser
asignados para el disco y para todas las
pistas sucesivamente.
1. Presione el botón [EDIT/NO] de manera
que "TITLE ?" aparezca indicado.
2. Presione el botón [YES].
… Presione el botón [TITLE EDIT] si está
utilizando el control remoto.
3. Seleccione "TITLE > AINC" con el disco
[
µTRACK≤] ("AINC" parpadea).
4. Presione el botón [YES].
… El modo de entrada del título de disco se
activa ("DSC > _" aparece indicado) y el
cursor parpadea en la indicación.
… El cursor parpadea en la posición del
primer caracter aun si un título ya
hubiera sido asignado.
5. Presione el botón [DISPLAY] para
seleccionar el tipo de caracter.
Asignación de títulos para el
disco y para todas las pistas
sucesivamente
(función TITLE AUTO INC)
Butones empleados en esta página
ESPAÑOL

– 104 –
Edición de MD grabados
Una pista grabada puede ser dividida en
dos pistas y es posible asignar un número
de pista a la segunda pista. Esta función
está diseñada para ser empleada cuando
una sóla pista contiene varias piezas
musicales (por ejemplo con un MD
grabado analógicamente), o cuando usted
desea marcar un punto para usa en la
ubicación de la pista. Los nuevos números
de pistas son asignados después de la
división de tal manera que los números de
pista de la segunda mitad de la pista
dividida y los de las pistas siguientes se
incrementarán en una unidad.
(Ejemplo): Para dividir C y D contenidos en
la pista número 3, en dos pistas:
1. Con la reproducción activada presione
el botón [
π READY] en el punto dónde
desee dividir la pista en dos.
2. Presione el botón [EDIT/NO] hasta que
aparezca indicado "DIVIDE ?".
3. Presione el botón [YES].
… "Rehearsal" y "Point OK ?" aparecerán
alternadamente indicados mientras los
primeros 4 segundos de la porción que
se transforma en la segunda pista
después de la división, son
reproducidos repetidamente.
4. Si la pista original no quedó dividida con
la precisión que usted desea, es posible
ajustar finamente el punto de división
girando el disco [
µ TRACK≤]
mientras monitorea el sonido.
… El punto de división puede ser ajustado
dentro de los límites –128 ~ +127
(±1 corresponde a 0,06 seg. aprox.).
… Presione el botón de parada [
ª STOP] o
[EDIT/NO] para cancelar la operación.
5. Cuando la pista queda dividida en el
punto deseado, presione otra vez el
botón [YES].
… Los números de la nueva pista (segunda
pista después de la división) y las pistas
siguientes se incrementan en una
unidad, aunque estos nuevos números
continúan siendo correlativos.
… En la pantalla aparece “COMPLETE” y la
pista es dividida. La pletina entrará en el
modo de pausa al principio de la nueva
pista obtenida tras la división.
División de una pista
(función DIVIDE)
… Tenga en cuenta que es imposible
combinar pistas que hayan sido
grabadas en distintos modos (SP,
MONO, LP2 y LP4).
El orden de las pistas puede ser
modificado trasladando una pista a otra
posición. Después de trasladar la pista, las
pistas son automáticamente renumeradas.
(Ejemplo): Traslado de D de la pista
número 4 a la pista número 2
1. Durante los modos de reproducción o
pausa, elija la pista a ser desplazada
girando el dial [
µ TRACK≤].
2. Presione el botón [EDIT/NO] hasta que
"MOVE ?" aparezca indicado.
3. Presione el botón [YES].
… "Trasladar a 001?" ("Move to 001?")
aparece indicado ("001" parpadea).
Número de pista Número de pista
a ser trasladado destino
4. Seleccione el número de pista destino
con el disco [
µ TRACK≤].
… "Trasladar a 002?" ("Move to 002?")
aparece indicado ("002" parpadea).
… Cuando especifique el número de pista
destino con los botones numéricos,
"COMPLETE" es indicado, luego la pista
es trasladada y los números de pistas
son automáticamente cambiados. La
reproducción retorna desde la nueva
ubicación de la pista.
… Presione el botón de parada [
ª STOP] o
[EDIT/NO] para cancelar la operación.
5. Presione otra vez el botón [YES].
… "COMPLETE" aparece indicado y luego
la pista es trasladada, mientras que los
números de pista son automáticamente
modificados. La reproducción continúa
desde la nueva ubicación de la pista
trasladada.
Traslado de una pista
(función MOVE)
… Las pistas obtenidas después de la
división no tienen títulos de pista,
independientemente que la pista
original lo tenga o no.
… El inicio de las pistas no puede ser
dividido.
Es posible combinar dos pistas
consecutivas en una sóla pista. Esta
función está diseñada para uso cuando
usted desea reproducir varias músicas
continuadamente o cuando desea
confeccionar una sóla pista a partir de
varias composiciones musicales grabadas
independientemente.
(Ejemplo): Combinación de B y C
1. Seleccione un número de pista girando
el disco [
µ TRACK≤].
… El número de la pista seleccionada será
combinado con la pista anterior.
Por ejemplo, para combinar los números
de pista 2 y 3 seleccione el número de
pista 3 en este paso.
… Si usted selecciona la pista 1, ésta no
será combinada en una sóla pista.
2. Presione el botón [EDIT/NO] hasta que
aparezca indicado "COMBINE ?".
3. Presione el botón [YES].
… "Rehearsal" (ensayo) aparece indicado.
El inicio de la pista seleccionada es
reproducida repetidamente.
… Si el punto de combinación entre las dos
pistas no ha sido correctamente
reproducido, presione el botón
[EDIT/NO] para parar la reproducción y
reiniciar la operación desde el principio.
… Pulse el botón [
ª STOP] o [EDIT/NO]
para anular la operación.
4. Si el punto de combinación es correcto,
presione otra vez el botón [YES].
… "COMPLETE" (concluido) aparece
indicado por unos segundos y las pistas
son combinadas.
… Cuando ambas pistas tienen títulos
asignados, el título de la pista anterior a
la pista seleccionada es asignada para
la pista combinada. Los números de las
pistas siguientes son reducidos en una
unidad.
Combinación de pistas
(función COMBINE)
Notes on Recording
ª To protect an MD against
accidental erasure
… After recording an MD, slide the record-
protect tab to open the hole.
… To record on the MD again, slide the tab
to close the hole.
ª When "Disc Full !!" or "Track
Full !!" is displayed
The MD has no more available space for
recording or the MD has used up all its
track numbers. Erase unnecessary tracks
or record music on another MD.
– 9 –
ENGLISH
ª The way track numbers are
assigned varies depending on
the source
When a CD or MD is played and recorded
digitally by selecting [DIGITAL 1/2] with
the [INPUT SELECTOR]:
… Track numbers on the recorded MD are
assigned to match those on the source
CD or MD. However, in the circum-
stances listed below only one track
number may be assigned to a recorded
section.
· A section composed of the repeated
playback of a single track on a disc
(e.g. using single track repeat
playback).
· A section composed of the succes-
sive recording of tracks with the
same track number from more than
one disc. Also, if the source is an
MD, track numbers may not be
marked for tracks shorter than 3
seconds.
When the source is recorded with
[ANALOG] or when a digital source other
than a CD or MD is recorded with
[DIGITAL 1] or [DIGITAL 2] while the Auto
Track function is OFF:
… The entire recording may be counted as
a single track with only one track
number assigned to it.
· Track numbers can be assigned
manually at the desired points by
pressing the [
º RECORD] button
during recording.
· Track numbers can be assigned
automatically by switching the Auto
Track function to "A_TRACK > ON"
before starting recording.

1. Press the [POWER] button.
… "NO DISC" appears on the display.
… Turn on the amplifier and set the input
selector to MD.
2. Insert an MD.
… After the TOC (Table Of Contents) data
has been read, the disc title (when the
disc has a title assigned to it), the total
number of tracks and the total playing
time of the disc are displayed.
Total number of tracks Disc title
Music calendar
Playback
Insert in the direction
of the arrow.
Hold the MD with the
label side up.
Normal Playback
… The disc or track title can be scrolled on
the display with the [SCROLL] button on
the remote control unit. After scrolling,
the title returns to its original display.
3. Start playback.
Press the [
¥PLAY] button ("¥" lights
up). Playback starts from the first track
and "001" appears on the "TRACK NO."
display.
… When the disc finishes playback, the
track numbers disappear from the music
calendar.
… If the total number of tracks exceeds 20
(" " lights up), the track number
should be confirmed on the TRACK NO.
display.
… Press the [
¥PLAY] button immediately
after recording is stopped (within 10
seconds) to play back a track which has
just been recorded from the beginning.
… If ten seconds or more have passed
after recording is stopped, or if the
[
¥PLAY] button is pressed after
pressing the [
ª STOP] button, playback
starts from the first track of the disc.
4. To stop playback, press the [
ª STOP]
button.
ª To stop playback temporarily (ready)
Press the [
π READY] button ("π" lights up).
… Press the [
¥PLAY] or [π READY] button
to resume playback.
ª To play a track located before or after
the current track
Turn the [
µ TRACK≤] dial.
… If you are operating the remote control
unit, select the desired track by pressing
the [
µ TRACK≤] buttons or entering
the track number with the numeric
buttons.
… The selected track number starts
playing.
ª To eject the MD
Press the [ø EJECT] button.
ª Headphones
When using headphones, connect the
headphone plug into the PHONES jack.
… Adjust the level of the signals output
from the phones jack.
Condensation
When the deck is moved directly from
a cold to a warm location or when the
temperature is raised suddenly in the
room where the deck is installed,
moisture may condense inside the
mechanism. This will prevent the deck
from operating normally and may result
in damage to the MD or to precision
parts. If condensation occurs, turn on
the deck and leave it for an hour or two
until the moisture evaporates.
Buttons used on this page
– 10 –
– 103 –
Edición de MD grabados
1. Especifique la pista que desea borrar
con el disco [
µ TRACK≤].
2. Presione el botón [EDIT/NO] hasta que
aparezca "ERASE TRK ?".
3. Presione el botón [YES]
(Aparecerá "Track OK ?").
… El presionar el botón [EDIT/NO] o el
botón de parada [
ª STOP] mientras
"Track OK ?" está indicado, cancelará la
operación.
4. Presione el botón [YES] otra vez.
… "COMPLETE" aparecerá indicado. Una
vez que haya borrado la pista
especificada, el número de pista
siguiente se reduce en una unidad y
todas las pistas siguientes son
renumeradas.
… Repita este procedimiento para borrar
pistas adicionales.
ª Borrado de parte de una pista
Esta operación consiste en la división de
una pista, borrado de una de ellas obtenida
por división y combinación de las pistas
restantes. Empleando las siguientes
funciones es posible borrar parte de una
pista.
(Ejemplo): Para borrar la parte A de la
pista número 1
Las operaciones de edición incluyen
borrado, traslado, división y combinación
de pistas. También es posible asignar
títulos de disco y de pista.
ª Cuando aparece el mensaje
"Protected !!"
El MD está protegido contra la grabación.
Para posibilitar la grabación o edición,
deslice la lengüeta de protección de
grabación para que cierre el orificio.
ª Cuando el mensaje "UTOC Writing" está
parpadeando
Este mensaje indica que los datos
grabados están siendo escritos en el MD.
No desconecte el cordón de alimentación
ni sujete la platina a vibraciones. De lo
contrario los datos grabados pueden no
ser correctamente escritos en el MD.
Notas sobre edición
Los datos escritos en un MD pueden ser
borrados de las siguientes maneras:
… Borrando todas las pistas
simultáneamente
… Borrando una sóla pista
… Borrando porciones de una pista
ª Borrado de todas las pistas
simultáneamente (DISC ERASE)
1. Con el modo de parada activado,
presione el botón [EDIT/NO] hasta que
aparezca indicado "ERASE DISC ?".
2. Presione el botón [YES].
(Aparecerá la pregunta "Sure ?"
(seguro?))
… El presionar el botón [EDIT/NO] o el
botón de parada [
ª STOP] mientras
"Sure ?" está indicada, cancelará la
operación.
3. Presione el botón [YES] otra vez.
Aparecerá "COMPLETE" y luego
aparecerá "Blank Disc" indicando que
todos los datos grabados en el MD han
sido borrados.
… Si "ERASE DISC ?" es seleccionado con
el botón [EDIT/NO] mientras "Blank Disc"
(disco en blanco) está indicado, y luego
el botón [YES] es presionado, UNDO
(que cancela la operación más reciente)
no puede ser ejecutado.
ª Borrado de una sóla pista
(TRACK ERASE)
(Ejemplo) Para borrar B en la pista
número 2:
Borrado de pista/s
(función ERASE)
Butones empleados en esta página
ESPAÑOL

– 102 –
Consejos útiles para la reproducción
ª Para repetir una sóla pista
(repetición de una sóla pista)
1. Con la reproducción en "CONTINUE
MODE", presione dos veces el botón
[REPEAT] en el control remoto.
… "REPEAT 1" es indicado (" " y
" " encendidos).
2. Presione el botón de reproducción
[
¥PLAY]. Se repetirá la pista actual.
3. La pista a ser repetida puede ser
cambiada girando el disco
[
µ TRACK≤] o presionando los
botones [
µ TRACK≤] o los botones
numéricos (1 a 9, 0, +10) del control
remoto.
… La repetición de una sóla pista no está
disposible en "SHUFFLE MODE" (modo
aleatorio) o "PGM MODE" (modo
programado).
ª Repetición de una sección dentro de
una pista (repetición A-B)
La porción especificada (entre A y B) de
una pista puede ser reproducida
repetidamente.
1. Con la reproducción activada, presione
el botón [A-B] del control remoto
("REPEAT A_" es indicado y " "
se enciende, " " parpadean), en el
punto de principio (A) de la porción que
usted desea repetir.
2. Presione otra vez el botón [A-B]
("REPEAT A-B" es indicado y " "
" " se enciende continuadamente)
en el punto final (B). La porción (A-B)
será reproducida repetidamente.
… La reproducción repetida de las
porciones A-B extendidas más allá de
una pista no es posible durante la
reproducción programada o
reproducción aleatoria.
… Para cancelar la reproducción repetida
y retornar a la reproducción normal,
presione el botón [A-B] o el botón
[REPEAT] nuevamente ("REPEAT OFF"
aparece indicado).
… Presione el botón [
ª STOP] para borrar
la porción especificada (entre A-B).
Conectando esta platina con un
temporizador (comercialmente disponible),
es posible iniciar la reproducción a la hora
especificada.
1. Inserte un MD grabado y coloque el
conmutador [TIMER] en [PLAY].
2. Seleccione la entrada del amplificador
que permite la reproducción en la
platina.
… La reproducción por temporizador está
disponible cuando la reproducción
"SHUFFLE MODE", "PGM MODE", "ALL
REPEAT" o "REPEAT SINGLE" es
seleccionada.
3. Ajuste el temporizador a la hora de
inicio deseada y desconecte la
alimentación.
Cuando llegue la hora preajustada, se
conectará la alimentación de cada
componente y se iniciará la reproduc-
ción.
… Ajuste el conmutador [TIMER] en [OFF]
después de la reproducción por
temporizador.
Reproducción por temporizador
Puede usar la función de control de tono
para reproducir material grabado con un
–12.0% de diferencia en relación al tono
normal de reproducción. Esta función no
está disponible en el modo LP2.
Para ajustar el cambio de tono que será
operativo cuando el interruptor PITCH
ON/OFF esté activado:
1. En el modo de parada, reproducción o
pausa, pulse el botón [EDIT/NO] hasta
que en la pantalla aparezca Pitch?.
2. Pulse el botón [YES].
3. Gire el dial [TRACK ] para ajustar el tono
en pasos de 0.1%.
4. Pulse el botón [YES] una vez que haya
realizado el ajuste.
… El valor ajustado de esta forma no
tendrá efecto hasta que el interruptor
PITCH ON/OFF no sea colocado en ON.
… Tenga en cuenta que cuando cambie la
posición del interruptor PITCH ON/OFF,
el sonido será anulado temporalmente.
Control de tono
Puede combinar en un mismo disco pistas
grabadas en distintos modos (SP, MONO,
LP2 y LP4). Cuando reproduzca un disco, el
modo adecuado será seleccionado
conforme vaya siendo reproducida cada
una de las pistas, siendo visualizado en la
pantalla.
Modos de reproducción
Butones empleados en esta página
Botones
numéricos
Useful Tips for Recording
– 11 –
You can monitor the input signal of the
component connected to each input
terminal before recording.
1. Press the [
ø EJECT] button to eject the
disc.
2. Select the input source with the [INPUT
SELECTOR].
3. Press the [
º RECORD] button.
("Monitor Mode" appears.)
… Even when the [REC MODE] is set to
[MONO], the output is sent to both
channels.
… Insert an MD or press the [
ª STOP]
button to cancel the Monitor mode.
ª Recording an analog signal
1. Insert a recordable MD and press the
[
º RECORD] button to enter the Record-
Ready mode (" " lights up).
2. Play the highest-level section of the
program source and turn the [INPUT]
control so that the "OVER" segments of
the peak level meters do not light.
3. Play the program source again.
… Press the [
¥PLAY] or [π READY] button
to start recording.
ª Recording a digital signal
1. In Record-Ready mode, press the
[EDIT/NO] button until “D-LEV 0.0dB”
appears.
2. Turn the [
µTRACK≤] dial to adjust
the recording level. The recording level
can be set in 0.5 dB steps within a range
between -6.0 dB and +6.0 dB.
3. Press the [YES] button after making the
adjustment.
Adjusting the Recording Level
Monitoring the Input Signal
Assigning track numbers at specific points
will make it easy to quickly locate those
points later using the playback or editing
functions.
ª To assign track numbers automatically
(Auto Track function)
Track numbers can be assigned automati-
cally during recording by setting the Auto
Track function to ON.
1. In the Record or Record-Ready mode,
press the [EDIT/NO] button until
"A_TRACK > XXX" appears.
2. Turn the [
µTRACK≤] dial to select
"A_TRACK > ON".
3. Press the [YES] button to end the setting
function.
… While the Auto Track function is "ON",
the signal level must remain low for 4 or
more seconds before a new track
number is advanced.
… During digital recording from a CD or
MD, the track numbers are advanced
automatically according to the CD or
MD data.
… Once the Auto Track function is "ON",
this mode will not be released even after
the power is turned off.
Press the [YES] button after selecting
"A_TRACK > OFF" to release it.
ª To assign track numbers manually
Press the [º RECORD] button at every point
where you want to assign a track number
during recording. Each press of the button
advances the track number.
ª To assign track numbers after recording
A track number is added when a track is
divided in editing. (See "Dividing a track" on
page 16.)
Note:
Changing the input with the [INPUT
SELECTOR] switch during recording
activates the Record-Ready mode.
Assigning Track Numbers During
Recording
The Over Write function allows you to
record music by erasing a previously
recorded track.
1. Perform steps 1 to 4 of "Recording an
MD" on page 8.
2. Turn the [
µTRACK≤] dial (or press
the [
µTRACK≤] buttons on the
remote control unit) until the track
number to be recorded over appears.
3. Press the [
º RECORD] button (" "
lights up).
… After "Over Write" appears, the remain-
ing recording time is displayed.
… The track numbers which come after the
track being recorded over blink on the
music calendar.
4. Adjust the recording level.
… If [ANALOG] was selected above, adjust
the recording level with the [INPUT]
control.
5. Press the [
¥PLAY] button or [πREADY]
button to start recording.
… The deck records over the existing
track. The track number is updated.
ª Recording over an existing track from
the middle
1. Select the track number to be erased
then press the [
¥PLAY] button to start
playback.
2. Press the [
π READY] button where you
want to start recording.
3. Press the [
º RECORD] button.
… The track number is updated and blinks
on the music calender.
4. Press the [
¥PLAY] or [πREADY] button
to start recording.
… The deck records over the existing
track.
[CAUTION]
… It is not possible to record from the
middle of an existing track when
" " or " " is lit.
Recording Over Existing Tracks
(Over Write)
Buttons used on this page
ENGLISH

– 12 –
The deck starts recording when the input
audio exceeds a certain level and pauses
when the input audio has dropped below a
certain level continuously for 4 seconds or
more.
1. Perform steps 1-4 of "Recording an MD"
on page 8.
2. Press the [SYNC RECORD] button on the
remote control unit. The deck enters the
Sync Record-Ready mode.
(" " and " " light up.)
… The remaining recording time appears
after "S_SYNC ON" is displayed.
3. Start playing the source component.
… The deck starts sync recording upon
detection of the input audio signal.
It pauses when the input audio level
drops below a certain level.
… You cannot start recording manually
by pressing the [
¥ PLAY] button or
[
π READY] button in the Sync Record-
Ready mode.
… Press the [SYNC RECORD] button again
to cancel sync recording.
Notes:
… Pressing the [
π READY] button during
sync recording aborts the Sync Record
operation.
… Changing the input with the [INPUT
SELECTOR] switch during sync
recording aborts the Sync Record
operation.
Sync Recording
With each press of the [DISPLAY] button,
the display changes as follows:
In the Stop /Record mode:
… The remaining recording time (REMAIN)
is only displayed in the Record-Ready
mode.
… The disc title can be displayed only
when it has been recorded onto the MD.
ª Press the [¥PLAY] button immediately
after stopping recording.
The track which has just been recorded
will be played from the beginning.
∑∑
ª To play from the first track of the MD
after recording:
Press the [
ª STOP] button again
immediately after stopping recording then
press the [
¥PLAY] button.
∑∑∑
¥
PLAY
ª
STOP
ª
STOP
Recording
¥
PLAY
ª
STOP
Recording
Checking the Recorded Tracks
Checking the Remaining MD
Recording Time
By connecting this deck with a timer
(commercially available), you can start and
stop recording operations at a preset time.
1. Perform steps 1 to 6 of "Recording an
MD" on page 8.
2. Set the [TIMER] switch to [REC].
3. Set the [TIMER] so that it starts and
stops power supply at the desired start
time and end time.
… As the actual recording starts after the
"TOC Reading" operation, set the timer
recording start time to slightly before
the time when you want to start
recording.
… Each component power is turned off.
… When the start time comes, power is
supplied to the components and
recording starts.
[CAUTION]
… When timer recording is performed in
the "SHUFFLE" mode or "PROGRAM"
mode, the deck automatically enters the
"CONTINUE" mode.
… Be sure to turn the deck on again and
eject the MD within 3 or 4 days of timer
recording. When the MD is ejected, the
recorded contents will be written on the
MD. If the deck is left off for a long time
after the timer recording has finished,
the contents may disappear.
… During timer recording, recording starts
from the end of the previously-recorded
portion on the MD.
… Set the [TIMER] switch to [OFF] after
timer recording. If the timer is left in
[REC], the deck will automatically start
recording the next time the power is
turned on.
Timer Recording
Buttons used on this page
Useful Tips for Recording
– 101 –
… El modo programado no será cancelado
aun cuando la alimentación sea
desactivada, y los datos programados
permanecerán en la platina.
… Si usted intenta la reproducción
programada cuando no hubiera ningún
dato programado ingresado, la
reproducción normal se iniciará después
que "PGM Empty !!" aparezca indicado.
ª Verificación del contenido del programa
Con el modo de reproducción o listo de
reproducción activado, gire el disco
[
µ TRACK≤] o presione el botón [µ ]
o [
≤] del control remoto para llamar la
indicación del contenido del programa.
ª Borrado de una pista programada
Con el modo de parada activado, presione
el botón [CLEAR]. Cada presión del botón
borra la última pista en el programa.
ª Agregado de una pista al programa
Con el modo de parada activado, gire el
disco [
µ TRACK≤] para seleccionar el
número de pista deseado y presione
[PUSH ENTER] en el disco.
Es posible agregar una sóla pista desde el
control remoto, ingresando el número de
pista con los botones numéricos (1 a 9, 0,
+10).
… La nueva pista es agregada al fin del
programa existente.
ESPAÑOL
… Las pistas pueden ser automáticamente
programadas simplemente presionando
los botones numéricos (1 a 9, 0, +10) del
control remoto para llamar la indicación
secuencial de los números.
… Cuando selecciona el número de pista
21 o un número mayor, se parpadeará el
indicador " ". Sin embargo el
número de pista podrá ser verificado en
la indicación TRACK NO..
… La misma pista puede ser programada
repetidamente.
… Si usted comete un error en el ingreso
del número de pista, presione el botón
[CLEAR]. Cada vez que presiona el
botón se borra la última pista del
programa.
3. Presione el botón de reproducción
[
¥PLAY] para iniciar la reproducción
programada.
… El programa es mantenido en memoria
después de parar la reproducción
programada presionando el botón de
parada [
ª STOP] o cuando haya parado
automáticamente al llegar al fin de la
misma.
… El presionar el botón de parada [
ª
STOP] con el modo de parada activado,
borra la programación.
… Cuando el tiempo total de reproducción
programada es mayor a 159 minutos y
59 segundos aparecerá "---m--s" en el
contador de tiempo.
… Después de programar la pista no. 25
aparecerá "PGM Full !!" y no será
posible programar otras pistas.
… Al presionar el botón [PLAY MODE] con
el modo de parada activado, desactiva
el modo de reproducción programada y
borra el programa de la memoria.
Butones empleados en esta página
Botones
numéricos
Es posible reproducir repetidamente todas
o una de las pistas o una porción
especificada (entre A - B) de una pista.
La reproducción programada y la
reproducción aleatoria también pueden
ser repetidas.
ª Para repetir todas la pistas del MD
(repetición de todas las pistas)
1. En el modo de parada, presione el botón
[PLAY MODE] para seleccionar uno de
los siguientes modos de reproducción
repetida.
Modo de
reproducción
Repetición
CONTINUE Repetición normal
SHUFFLE MODE Repetición aleatoria
PGM MODE Repetición programada
2. Presione el botón [REPEAT] del control
remote una vez para indicar "REPEAT
ALL".
… " " se ilumina.
3. Presione el botón de reproducción
[
¥PLAY].
Las pistas serán reproducidas
repetidamente en el modo especificado.
… Para liberar la reproducción REPEAT y
retornar a la reproducción normal,
presione el botón [REPEAT] repetida-
mente hasta que "REPEAT OFF"
aparezca.
… El modo de reproducción repetida no
será cancelado aun cuando la
alimentación sea desactivada.
Repetición de pista/s
(reproducción repetida)

– 100 –
Es posible programar un máximo de 25
pistas en el orden deseado de reproduc-
ción.
ª Programación de pistas
1. Con el modo de parada activado
presione repetidamente el botón [PLAY
MODE] hasta que aparezca en la
indicación "PGM MODE". Después de
indicar "PGM MODE" la indicación
muestra "0m 00s 00p" (" "
encendido).
2. Gire el disco [
µ TRACK≤] de tal
manera que se enciendan los
indicadores del número de pista
deseado en el calendario musical y
presione el disco [PUSH ENTER].
… El número de pista parpadea.
… Repita esta operación para programar
otras pistas.
Reproducción de pistas en el
orden deseado (reproducción
programada)
ª Reproducción de pistas con espacios sin
grabar entre cada pista (reproducción
con espaciamiento automático)
La función de reproducción con
espaciamiento automático deja un espacio
sin grabar de 3 segundos entre pistas.
Esto posibilita las operaciones de
búsqueda de música cuando graba desde
un MD a una cinta analógica.
1. Presione una vez el botón [AUTO
SPACE] del control remoto de manera
que "A_SPACE ON" aparezca indicado
(" " se enciende).
2. Presione el botón [
¥PLAY].
… Para liberar la reproducción de espacio
automático, presione el botón [AUTO
SPACE] repetidamente hasta que
desaparezca " ".
ª Pausa después de cada pista
(reproducción con pausa automática)
La platina puede activar el modo de listo
después de reproducir cada pista. Esta
función es conveniente cuando copia una
sóla pista de un MD en una cinta o cuando
las pistas a ser copiadas no son contiguas.
1. Presione el botón [AUTO SPACE] del
control remoto dos veces para que se
encienda "A_READY ON"
(" " se enciende).
2. Presione el botón [
¥PLAY].
… Cuando la reproducción haya finalizado,
la platina ingresa a pausa en el principio
de la próxima pista.
3. Presione el botón de reproducción
[
¥PLAY] o el botón de pausa [π READY]
para iniciar la reproducción de la
próxima pista.
… Para liberar la reproducción de
disponibilidad automática (Auto Ready),
presione el botón [AUTO SPACE]
repetidamente hasta que " "
desaparezca.
… La reproducción A
.
SPACE y A
.
READY no
pueden ser usadas al mismo tiempo.
Cuando graba en una cinta
analógica
Butones empleados en esta página
Botones
numéricos
Consejos útiles para la reproducción
ª Modo de auto escucha (solo en pistas
grabadas con el modo SP)
La función de auto escucha permite que la
unidad comience automáticamente la
reproducción al principio de la señal audio
de cada pista. El nivel de disparo que
determina el punto en el que comenzará la
reproducción se ajusta de la siguiente
forma:
1. En el modo de parada, reproducción o
pausa, pulse el botón [EDIT/NO] hasta
que en pantalla aparezca AUTO CUE?.
2. Pulse [YES].
3. Gire el dial [TRACK ] para ir pasando el
nivel de umbral entre los siguientes
valores: -54dB , -60dB , -66dB , -72dB y
OFF .
4. Pulse el botón [YES] una vez que haya
realizado el ajuste que quiera.
… Cuando el modo de auto escucha está
activo (el valor es cualquiera distinto a
“OFF y la unidad está en el modo de
parada (STOP), el desplazamiento a la
pista anterior o siguiente hará que el
punto de reproducción busque
automáticamente el primer punto de la
pista en el que el nivel del sonido pase
por encima del nivel de disparo fijado
anteriormente, tras lo cual la unidad
quedará en el modo de pausa.
… Cuando el modo de auto escucha esté
activado y el modo de auto preparación
también esté activado, el
desplazamiento a la pista anterior o
siguiente hará que el punto de
reproducción busque automáticamente
el primer punto de la pista en el que el
nivel del sonido pase por encima del
nivel de disparo fijado anteriormente,
tras lo cual la unidad quedará en pausa
en dicho punto. Si el punto de inicio
deseado para la pista se corta al usar
esta función, debería ajustar un nivel de
disparo un poco más bajo.
… Tenga en cuenta que si están
desactivados tanto el modo de auto
escucha como el de auto preparación,
el desplazamiento a la pista siguiente o
anterior activará el modo de parada
como es habitual.
… Si el modo de auto escucha está activo,
la función de espaciado automático no
está disponible.
… Si la función de auto espaciado está
activa cuando active la auto escucha,
esa función de espaciado automático y
la de auto preparación (si es que está
activa) se desconectarán.
… Si la función de auto escucha está
activa y pulsa el botón [AUTO SPACE],
el único efecto que producirá será el de
activar o desactivar la función de auto
preparación.
… La función no actúa con pistas
grabadas con cualquier otro modo
distinto al SP. Con las pistas grabadas
con modos no-SP, el punto de escucha
siempre será el principio de la pista, no
el punto de escucha elegido.
… Esta escucha o prueba se realiza con
una precisión de –1 secuencia (en el
modo SP, eso es –64 ms).
ENGLISH
Useful Tips for Playback
1. In the Stop mode, press the [PLAY
MODE] button repeatedly until "SHUFFLE
MODE" is displayed (" " lights
up).
2. Press the [
¥PLAY] button.
… To play the next track, turn the
[
µ TRACK≤] dial clockwise (or press
the [
≤] button on the remote control
unit) during shuffle playback.
… To play from the beginning of the
current track, turn the [
µ TRACK≤]
dial counterclockwise (or press the
[
µ ] button on the remote control unit)
during shuffle playback.
… The Shuffle mode will not be canceled
even when the power is turned off.
… To cancel the Shuffle mode, press the
[PLAY MODE] button repeatedly until
"CONTINUE MODE" is displayed.
ª Playing a track by direct search
Specify the desired track by pressing the
numeric buttons (1 to 9, 0, +10) on the
remote control unit. The specified track
starts to play.
… Examples of operation for direct search
of track number 10 or more:
To search track number 10:
Press +10 once then 0.
To search track number 25:
Press +10 twice then 5.
… Press the [CLEAR] button while "TRACK
NO." is blinking to cancel it.
ª To skip to the previous or next track
Turn the [
µ TRACK≤] dial clockwise
or counterclockwise (or press the
[
µ TRACK≤ ] buttons on the remote
control unit) during playback to skip to a
track located after or before the current
track.
ª To search a desired section
During playback, press and hold the
[
∆/˚] (or [∆ SEARCH˚]) buttons to
search the desired section.
… In the Play-Ready mode, the desired
section can be searched by observing
the elapsed playing time or remaining
playing time on the display.
… Normal search may not be possible if
there are several successive short
tracks of only a few seconds in length.
Selecting the Desired Track
– 13 –
The information shown on the display
allows you to check the disc title, track
title, the total track number in an MD, total
playing time, remaining recordable time of
the MD.
… Each press of the [DISPLAY] button
changes the display as shown below.
In the Stop mode:
In the Play mode:
… The total number of tracks appears on
the TRACK NO. display.
… The disc title and track titles are
displayed only when they have been
recorded onto the MD.
… When a track has been selected in the
Stop mode ("TRACK" is lit), pressing the
[DISPLAY] button displays the track title.
… When a track title is composed of more
than 100 characters, the 100th character
and beyond cannot be displayed.
… The disc or track title can be scrolled on
the display with the [SCROLL] button on
the remote control unit. After scrolling,
the title returns to its original display.
Using the Display Window
Buttons used on this page
Each track on the disc is played once in
random order.
Playing Tracks in Random Order
(Shuffle Playback)
ª To play tracks with spaces inserted
after every track (Auto Space playback)
The Auto Space playback function inserts
a 3-second blank space between each
track. This makes possible music scan
operations when recording from MDs to
analog tape.
1. Press the [AUTO SPACE] button on the
remote control unit once so that
"A_SPACE ON" is displayed. ("
" lights up.)
2. Press the [
¥PLAY] button.
… To release Auto Space Playback, press
the [AUTO SPACE] button repeatedly
until " " disappears.
ª To pause after each track
(Auto Ready playback)
The deck can enter the Ready mode after
playing each track. This feature is
convenient when copying a single MD
track onto tape or when the tracks to be
copied are not continuous.
1. Press the [AUTO SPACE] button on the
remote control unit twice so that
"A_READY ON" is displayed.
(" " lights up.)
When Recording to Analog Tape

Each press clears the current last track
in the program.
3. Press the [
¥PLAY] button to start
Program playback.
… The program is held in memory after
Program playback has been stopped by
pressing the [
ª STOP] button or it has
stopped automatically at the end.
… Pressing the [
ª STOP] button in the Stop
mode clears the program memory.
… When the total program playback time is
longer than 159 minutes and 59 seconds,
"---m--s" appears on the time counter.
… When the 25th track has been
programmed, "PGM Full !!" is displayed
and no more tracks can be programmed.
… Pressing the [PLAY MODE] button in the
Stop mode cancels the Program Play
mode and clears the program memory.
… The Program mode will not be canceled
even when the power is turned off, and
the programmed data will remain in the
deck.
… If you attempt program playback when
no programmed data is entered, normal
playback will start after "PGM Empty !!"
is displayed.
ª To check the program contents
In the Play or Play-Ready mode, turn the
[
µTRACK≤] dial or press the [µ ] or
[
≤] button on the remote control unit to
display the program contents.
ª To delete a programmed track
In the Stop mode, press the [CLEAR] button.
Each press clears the current last track in
the program.
– 14 –
2. Press the [¥PLAY] button.
… When playback is finished, the deck
pauses at the beginning of the next
track.
3. Press the [
¥PLAY] or [π READY] button
to start playing the next track.
… To release Auto Ready playback, press
the [AUTO SPACE] button repeatedly
until " " disappears.
… A
.
SPACE and A
.
READY playback cannot
be used together.
ª Auto cue mode
(tracks recorded in SP mode only)
The auto cue function lets the unit
automatically start playback at the audio
start of each track. The trigger level which
determines the point at which playback
starts is set as follows:
1 In stop, play or pause mode, press the
[EDIT/NO] button until “AUTO CUE?”
appears.
2 Press [YES].
3 Turn the [
µ TRACK≤ ] dial to
cycle the threshold level between the
following values: “-54dB”, “-60dB”,
“-66dB”, “-72dB” and “OFF”.
4 Press the [YES] button after making the
adjustment.
… When the Auto Cue mode is on (the
value is anything except “OFF”), and the
unit is in STOP, moving to the next or
previous track will automatically cue the
playback point to the first point in the
track where the sound level rises above
the trigger level as set above and the
unit will pause.
… When Auto Cue is on, and Auto Ready is
also on, moving to the next or previous
track will automatically cue the
playback point to the first point in the
track where the sound level rises above
the trigger level as set above and the
unit will pause at this point. If the
desired start of the track is cut off using
this function, the trigger level should be
adjusted to a lower level.
… Note that if Auto Cue and Auto Ready
are both off, moving to the next track
will enter stop mode as usual.
… If the Auto Cue mode is on, the Auto
Space function is unavailable.
Buttons used on this page
… If the Auto Space function is on when
Auto Cue is turned on, the Auto Space
function and the Auto Ready function (if
this is on) will be turned off.
… If the Auto Cue function is on, and the
[AUTO SPACE] button is pressed, the
only effect is to turn the Auto Ready
function on or off.
… The function does not work with tracks
recorded in any mode other than SP
mode. With any non-SP tracks, the cue
point is the top of the track, not the cue
point.
… This cue is made to ±1 frame accuracy
(in SP mode, this is ±64 ms).
Up to 25 tracks can be programmed in the
desired order and played.
ª To program tracks
1. In the Stop mode, press the [PLAY
MODE] button repeatedly until "PGM
MODE" appears in the display. After
"PGM MODE", the display shows "0m 00s
00p" (" " lights up).
2. Turn the [
µTRACK≤] dial so that the
desired track number indicator lights on
the music calendar, and press [PUSH
ENTER] on the dial.
… The track number blinks.
… Repeat this operation to program other
tracks.
… Tracks can be programmed
automatical-ly by simply pressing the
numeric buttons (1 to 9, 0, +10) on the
remote control unit to display their
numbers sequentially.
… When a track number of 21 or more is
selected, the " " indicator blinks.
However, the track number can still be
checked on the TRACK NO. display.
… The same track can be programmed
repeatedly.
… If you make a mistake in the track
number entry, press the [CLEAR] button.
Playing Tracks in the Desired
Order (Program Playback)
Useful Tips for Playback
– 99 –
ESPAÑOL
Consejos útiles para la reproducción
Cada pista del disco será aleatoriamente
reproducida.
Encendido
1. Con el modo de parada activado,
presione repetidamente el botón [PLAY
MODE] hasta que aparezca "SHUFFLE
MODE" (" " encendido).
2. Presione el botón de reproducción
[
¥PLAY].
… Para reproducir la próxima pista, gire
hacia la derecha el disco
[
µ TRACK≤] (o presione el botón
[
≤] del control remoto), durante la
reproducción aleatoria.
… Para reproducir la pista actual desde el
principio gire hacia la izquierda el disco
[
µ TRACK≤] (o presione el botón
[
µ ] del control remoto), durante la
reproducción aleatoria.
… El modo aleatorio no será cancelado
aun cuando la alimentación sea
desactivada.
… Para desactivar el modo de
reproducción aleatoria, presione
repetidamente el botón [PLAY MODE]
hasta que aparezca indicado
"CONTINUE MODE".
Reproducción aleatoria de
pistas ("SHUFFLE")
… El título del disco o de la pista puede ser
desplazado (hacia arriba o hacia abajo)
en la indicación con el botón [SCROLL]
del control remoto. Después del
desplazamiento, el título vuelve a su
indicación original.
ª Reproducción de una pista por búsqueda
directa
Especifique la pista deseada presionando
los botones numéricos (1 a 9, 0, +10) del
control remoto. Se iniciará la reproducción
de la pista especificada.
… Ejemplos de operación para búsqueda
directa de la pista número 10 o mayor:
Para buscar la pista número 10:
Presione +10 una vez y luego 0.
Para buscar la pista número 25:
Presione +10 y luego presione 5 dos
veces.
… Presione el botón [CLEAR] cuando
"TRACK NO." esté parpadeando para
cancelarlo.
ª Salto a la pista anterior o posterior
Gire hacia la derecha el disco
[
µ TRACK≤] o gírelo hacia la izquierda
(o presione los botones [
µ TRACK≤]
del control remoto), durante la
reproducción para saltar a la pista
posterior o a la anterior a la pista actual.
ª Búsqueda de una secciónn
Durante la reproducción, mantenga
presionado los botones [
∆ /˚] (o
[
∆ SEARCH ˚]) para buscar la sección
deseada.
… En el modo de listo de reproducción es
posible buscar la sección deseada
observando el tiempo de reproducción
transcurrido o el tiempo de
reproducción restante en la indicación.
… La búsqueda normal no es posible si hay
varias pistas cortas (de pocos segundos
de duración), sucesivas.
Selección de la pista deseada
La información mostrada en la indicación
le permite verificar el título del disco, el
título de pista, el número total de pistas de
un MD, el tiempo total de reproducción.
… Cada vez que presiona el botón
[DISPLAY] la indicación cambia de la
siguiente manera.
Con el modo de parada activado:
Con el modo de reproducción activado:
… El número total de pistas aparecen en la
indicación TRACK NO.
… El título del disco y los títulos de la pista
son indicados sólo cuando han sido
grabados en el MD.
… Después de seleccionar una pista en el
modo de parada (cuando "TRACK" está
encendido), el presionar el botón
[DISPLAY] indica el título de la pista.
… Cuando un título de la pista está
compuesto por más de 100 caracteres,
el centésimo caracter y los siguientes
no podrán ser indicados.
Empleo de la ventanilla de
indicación
Butones empleados en esta página
Botones
numéricos

– 98 –
La platina inicia la grabación cuando la
entrada de audio excede un cierto nivel y
pausa cuando la entrada de audio cae por
debajo de un cierto nivel continuamente
durante 4 segundos o más.
1. Realice los pasos 1 a 4 de “Grabación
de un MD” en la página 94.
2. Presione el botón [SYNC RECORD] en el
control remoto. La platina ingresa en el
modo de listo de grabación sincronizada
(se encienden " " y " ").
… El tiempo de grabación restante
aparece después que "S_SYNC ON" es
indicado.
3. El componente fuente inicia la
reproducción.
… La platina inicia la grabación
sincronizada por detección de la señal
de audio de entrada. Hace una pausa
cuando el nivel de audio de entrada cae
por debajo de un cierto nivel.
… No puede iniciar la grabación
manualmente presionando el botón
[
¥PLAY] o el botón [π READY] durante
el modo de listo de la grabación
sincronizada.
… Pulse de nuevo el botón [SYNC
RECORD] para cancelar la grabación
sincronizada.
Notas:
… Al presionar el botón [
π READY]
durante la grabación sincronizada
aborta la operación de grabación
sincronizada.
… El cambio de la entrada con el
interruptor [INPUT SELECTOR] durante
la grabación sincronizada anula este
proceso de grabación sincronizada.
Grabación sincronizada
Cada vez que presione el botón [DISPLAY]
la indicación cambia de la siguiente
manera:
En el modo de parada/grabación:
… El tiempo de grabación restante
(REMAIN) es sólo indicado en el modo
de listo de grabación.
… El título del disco puede ser indicado
solamente cuando haya sido grabado en
el MD.
ª Presione el botón de reproducción
[
¥PLAY] inmediatamente después de
parar la grabación.
La pista que ha sido grabada aparecerá
indicada desde el principio.
∑∑
ª Para reproducir la primera pista del MD
después de la grabación:
Presione el botón de parada [
ª STOP] otra
vez inmediatamente después de parar la
grabación y presione el botón de
reproducción [
¥ PLAY].
∑∑∑
¥
PLAY
ª
STOP
ª
STOP
Grabación
¥
PLAY
ª
STOP
Grabación
Verificación de las pistas
grabadas
Comprobación del tiempo
restante de grabación en el MD
Conectando esta platina a un temporizador
(comercialmente disponible), usted puede
iniciar y detener las operaciones de
grabación a la hora preajustada.
1. Realice los pasos 1-6 de "Grabación de
un MD" en la página 94.
2. Ajuste el conmutador [TIMER] en [REC].
3. Ajuste [TIMER] de manera que inicie o
detenga la fuente de alimentación en la
hora de inicio y finalización deseada.
… Como la grabación real se inicia
después de la operación "TOC Reading",
ajuste la hora de activación de la
grabación por temporizador levemente
antes de la hora en la que desee iniciar
la grabación.
… La alimentación de cada componente se
desactiva.
… Cuando la hora de inicio se cumple, la
alimentación es suministrada a los
componentes y la grabación se inicia.
[PRECAUCION]
… Cuando la grabación por temporizador
es realizada en el modo "SHUFFLE" o
"PROGRAM", la platina automáticamente
ingresa en el modo "CONTINUE".
… Asegúrese de activar la platina
nuevamente y de eyectar el MD dentro
de los 3 ó 4 días de grabación por
temporizador. Cuando el MD es
eyectado, el contenido grabado será
escrito en el MD. Si deja la platina
desactivada por un período prolongado
después de haber finalizado la
grabación por temporizador, el
contenido puede desaparecer.
… Durante la grabación por temporizador,
la misma se inicia desde el fin de la
porción previamente grabada en el MD.
… Ajuste el conmutador [TIMER] en [OFF]
después de la grabación por
temporizador. Si se deja el temporizador
en [REC] la platina iniciará
automáticamente la grabación la
próxima vez que se conecte la
alimentación.
Grabación por temporizador
Butones empleados en esta página
ENGLISH
All or one of the tracks, or a specified
portion (A-B) of an MD can be played
repeatedly. Program playback and Shuffle
playback can also be repeated.
ª To repeat all MD tracks
(All-track repeat)
1. In the Stop mode, press the [PLAY
MODE] button to select one of the
following repeat play modes.
Play Mode Repeat
CONTINUE Normal repeat
SHUFFLE MODE Shuffle repeat
PGM MODE Program repeat
2. Press the [REPEAT] button on the
remote control unit once to display
"REPEAT ALL".
… " " lights up.
3. Press the [
¥PLAY] button.
The tracks will be played repeatedly in
the specified mode.
… To release REPEAT playback and
resume normal playback, press the
[REPEAT] button repeatedly until
"REPEAT OFF" appears.
… The Repeat Playback mode will not be
canceled even when the power is
turned off.
ª To repeat a single track
(Single-track repeat)
1. During playback in the "CONTINUE
MODE", press the [REPEAT] button on
the remote control unit twice.
Repeating Track(s)
(Repeat Playback)
… "REPEAT 1" appears (" " and
" " light up).
2. Press the [
¥PLAY] button. The current
track will be repeated.
3. The track to be repeated can be
changed by turning the [
µ TRACK≤]
dial or by pressing the [
µ TRACK≤]
buttons or numeric buttons (1 to 9, 0,
+10) on the remote control unit.
… Single-track repeat is unavailable in the
"SHUFFLE MODE" or "PGM MODE".
ª To repeat a section within a track
(A-B repeat)
A specified portion (between A and B) of a
track can be played repeatedly.
1. During playback, press the [A-B] button
on the remote control ("REPEAT A–" is
displayed, and " " lights up,
" " blinks) at the starting point (A) of
the portion you want to repeat.
2. Press the [A-B] button again ("REPEAT
A-B" is displayed, and " " and
" " light steadily) at the ending point
(B). The portion (A-B) will be played
repeatedly.
… A-B repeat playback of portions
extending over more than one track is
not possible during programmed
playback or shuffle playback.
… To cancel Repeat playback and resume
normal playback, press the [A-B] button
or [REPEAT] button again.
("REPEAT OFF" is displayed.)
… Press the [
ª STOP] button to erase the
specified portion (between A-B).
3. Set the timer to the desired start time
and turn off the power.
When the set time comes, each
component will be turned on and
playback will start.
… Set the [TIMER] switch back to [OFF]
after timer playback.
– 15 –
Buttons used on this page
ª To add a track to the program
In the Stop mode, turn the [
µTRACK≤]
dial to select the desired track number and
press [PUSH ENTER] on the dial.
A track can also be added from the remote
control unit by simply entering the track
number with the numeric buttons
(1 to 9, 0, +10).
… The new track is appended to the end of
the existing program.
By connecting this deck with a timer
(commercially available), playback can be
started at a specified time.
1. Insert a pre-recorded MD and set the
[TIMER] switch to [PLAY].
2. Select the amplifier's input which
allows this deck to play back.
… Timer playback is available when
"SHUFFLE MODE", "PGM MODE", "ALL
REPEAT" or "REPEAT SINGLE" playback
is selected.
Timer Playback
You can use the pitch control feature to
play back material at ±12.0% relative to the
normal playback pitch. This feature is not
available in LP2 mode.
To set the pitch change which will be
operative when the PITCH ON/OFF switch
is on:
1 In stop, play or pause mode, press the
[EDIT/NO] button until "Pitch?" appears.
2 Press the [YES] button.
3 Turn the [
µ TRACK≤] dial to adjust
the pitch in 0.1% steps.
4 Press the [YES] button after making the
adjustment.
… The value set in this way does not take
effect until the PITCH ON/OFF switch is
set to ON.
… Note that when the position of the
PITCH ON/OFF switch is changed, the
sound is momentarily muted.
Pitch control
Tracks recorded in different modes (SP,
MONO, LP2 and LP4) can be combined on
one disc. When playing back a disc, the
appropriate mode is automatically
selected as each track is played back, and
this is shown on the display.
Play modes

Editing Recorded MDs
1. Specify the track to be erased with the
[
µTRACK≤] dial.
2. Press the [EDIT/NO] button repeatedly
until "ERASE TRK ?" is displayed.
3. Press the [YES] button.
("Track OK ?" is displayed.)
… Pressing the [EDIT/NO] button or the
[
ªSTOP] button while "Track OK ?" is
displayed aborts the operation.
4. Press the [YES] button again.
… "COMPLETE" is displayed. Once the
specified track has been erased, the
subsequent track is decreased by one
and all tracks following are renumbered.
… Repeat this procedure to erase
additional tracks.
ª To erase a part of a track
This operation consists of dividing the
track, erasing one of the tracks obtained
by division and combining the remaining
tracks. A part of a track can be erased
using these three functions.
(Example): To erase a part of A with track
number 1
– 16 –
Available editing operations include
erasing, moving, dividing and combining
tracks. It is also possible to assign disc and
track titles.
ª When "Protected !!" is displayed
The MD is record-protected against
accidental erasure. To make recording or
editing possible, slide the record-protect
tab to close the hole.
ª While "UTOC Writing" is blinking
This message indicates that the recorded
data is being written on the MD. Do not
pull out the power cord or vibrate the deck.
Otherwise the recorded data may not be
written correctly on the MD.
Notes on Editing
The data written on an MD can be erased
in the following ways.
… Erasing all tracks simultaneously
… Erasing a single track
… Erasing parts of a track
ª To erase all tracks at once (DISC
ERASE)
1. In the Stop mode, press the [EDIT/NO]
button repeatedly until "ERASE DISC ?" is
displayed.
2. Press the [YES] button.
("Sure ?" is displayed.)
… Pressing the [EDIT/NO] button or the
[
ªSTOP] button while "Sure ?" is
displayed aborts the operation.
3. Press the [YES] button again.
"COMPLETE" is displayed and then
"Blank Disc" is displayed to indicate that
all recorded data on the MD has been
erased.
… If "ERASE DISC ?" is selected with the
[EDIT/NO] button while "Blank Disc" is
displayed, and then the [YES] button is
pressed, UNDO (which cancels the
most recent operation) cannot be
performed.
ª To erase a single track (TRACK ERASE)
(Example): To erase B in track number 2
Erasing Track(s)
(ERASE Function)
Buttons used on this page
– 97 –
Consejos útiles para grabación
Nota:
El cambio de la entrada con el interruptor
[INPUT SELECTOR] durante la grabación
activa el modo de espera de grabación.
La función de sobreescritura le permite
grabar músicas borrando una pista
grabada previamente.
1. Realice los pasos 1-4 de "Grabación de
un MD" en la página 94.
2. Gire el disco [
µ TRACK≤] (o
presióne los botones [
µ TRACK≤]
en el control remoto) hasta que el
número de la pista a ser sobregrabada
aparezca.
3. Presione el botón [
… RECORD] (se
ilumina " ").
… Después que aparece "Sobreescritura", el
tiempo de grabación restante es
indicado.
… Los números de pistas que continúan
después de la pista a ser sobregrabada
parpadearán en el calendario musical.
4. Ajuste el nivel de grabación.
… Si [ANALOG] fuera seleccionado
anteriormente, ajuste el nivel de
grabación con el control [INPUT].
5. Presione el botón [¥PLAY] o [πREADY]
para iniciar la grabación.
… La platina graba sobre pistas grabadas.
El número de pista es actualizado.
ª Grabación sobre la mitad de una pista
grabada
1. Seleccione el número de pista a ser
borrado y presione el botón [
¥PLAY]
para iniciar la reproducción.
2. Presione el botón [
π READY] dónde
desea iniciar la grabación.
3. Presione el botón [
º RECORD].
… El número de pista es actualizado y
parpaderá en el calendario musical.
4. Presione el botón [
¥PLAY] o [π READY]
para iniciar la grabación.
… La platina graba sobre la pista existente.
[PRECAUCION]
… No es posible grabar desde la mitad de
una pista existente cuando " "
o " "estánencendidos.
Grabación sobre pistas grabadas
(sobreescritura)
La asignación de números de pista en
puntos específicos facilitará la localización
rápida de esos puntos cuando se emplee la
función de reproducción o las funciones de
edición.
ª Para asignar automáticamente un
número de pista
Los números de pista pueden ser
automáticamente asignados durante la
grabación colocando la función de pista
automática en ON.
1. En el modo de grabación o espera de
grabación, pulse el botón [EDIT/NO]
hasta que aparezca “A_TRACK >XXX”.
2. Gire el disco [
µ TRACK≤] para
seleccionar "A_TRACK > ON".
3. Presione el botón [YES] para desactivar
la función de ajuste.
… Con la función de pista automática
activada, el nivel de señal debe
permanecer bajo durante al menos 4
segundos para que la unidad avance a
un nuevo número de pista.
… Durante la grabación digital de un CD o
de un MD, los números de pista avanzan
automáticamente de acuerdo a los
datos del CD o MD.
… Una vez que la función de pista
automática esté en "ON", este modo no
será liberado aun después de
desactivar la alimentación.
Presione el botón [YES] después de
seleccionar "A_TRACK > OFF" para
liberarlo.
ª Asignación manual de números de pista
Presione el botón [
º RECORD] en cada
punto dónde desee asignar un número de
pista durante la grabación. Cada vez que
presiona el botón el número de pista se
incrementa.
ª Asignación de números de pista
después de la grabación
Cuando una pista queda dividida durante la
edición, la unidad agrega un número de
pista (Ver "División de una pista" en la
página 92).
Asignación de números de pista
durante la grabación
Usted puede monitorear la señal de
entrada del componente conectado a cada
terminal de entrada antes de la grabación.
1. Presione el botón [
ø EJECT] para
eyectar el disco.
2. Seleccione la fuente de entrada con el
[INPUT SELECTOR].
3. Presione el botón [
º RECORD] (aparece
el "Monitor Mode (modo de monitor)").
… Aun cuando se ajuste [REC MODE] en
[MONO], la salida será enviada a ambos
canales.
… Inserte un MD o presione el botón
[
ª STOP] para cancelar el modo de
monitor.
ª Grabación de una señal analógica
No se
Medidor de nivel enciende
1. Inserte un MD grabable y presione el
botón [
ºRECORD] para activar el modo
de listo de grabación (se enciende
" ").
2. Reproduzca la sección con el nivel más
alto de la fuente del programa y gire el
control [INPUT] de tal manera que los
segmentos "OVER" del medidor de nivel
pico no se enciendan.
3. Reproduzca otra vez la fuente del
programa.
… Presione el botón [
¥ PLAY] o
[
π READY] para iniciar la grabación.
ª Grabación de una señal digital
1. En el modo de espera de grabación,
pulse el botón [EDIT/NO] hasta que en
pantalla aparezca D-LEV 0.0dB.
2. Gire el dial [TRACK ] para ajustar el nivel
de grabación. Puede ajustar el nivel de
grabación en pasos de 0.5 dB en un
rango de -6.0 dB a +6.0 dB.
3. Pulse el botón [YES] después de que
haya hecho el ajuste.
Ajuste del nivel de grabación
Señal de entrada de monitoreo
Butones empleados en esta página
ESPAÑOL

Reproducción
3. Inicie la reproducción.
Presione el botón de reproducción
[
¥PLAY], (Se encenderá "¥").
La reproducción se inicia desde la
primera pista. "001" aparece en la
indicación "TRACK NO.".
… Cuando termine la reproducción del
disco, los números de pista
desaparecen del calendario musical.
… Si el número total de pistas excede 20
(se encenderá " "). El número de
pista debe ser confirmado en la
indicación TRACK NO..
… Para reproducir la pista recién grabada
desde el principio, presione el botón
[
¥PLAY] inmediatamente después que
la grabación se haya detenido (dentro
de 10 segundos).
… Si pasan diez segundos o más después
que la grabación se haya detenido, o si
se presiona el botón [
¥ PLAY] después
que el botón [
ª STOP] haya sido
presionado, la reproducción se iniciará
desde la primera pista del disco.
4. Para parar la reproducción, presione el
botón de parada [
ª STOP].
ª Parada temporaria de la reproducción
(listo)
Presione el botón de pausa [
π READY],
(se encenderá "
π").
… Presione el botón [
¥PLAY] o [π READY]
para continuar la reproducción.
Reproducción normal
1. Presione el botón [POWER].
… En la indicación aparecerá "NO DISC".
… Conecte el amplificador y ajuste el
selector de entrada en MD.
2. Inserte un MD.
… Después que los datos TOC (Contenido
de la tabla) hayan sido leídos, el título
del disco (cuando el disco tiene un título
asignado en él), el número total de
pistas y el tiempo total de reproducción
del disco aparecerán indicados.
Número total de pistas Título de disco
Calendario musical
… El título del disco o de la pista puede ser
desplazado (hacia arriba o hacia abajo)
en la indicación con el botón [SCROLL]
del control remoto. Después del
desplazamiento, el título vuelve a su
indicación original.
Condensación
Cuando se traslada la platina
directamente de un lugar frío a uno
tibio, o cuando la temperatura se eleva
súbitamente en la sala donde la platina
está instalada, la humedad puede
condensarse dentro del mecanismo.
Esto evitará que la platina funcione
normalmente y puede resultar en daños
al MD o a los componentes de pre-
cisión. Si hay condensación, conecte la
alimentación de la platina y déjela
conectada durante una o dos horas
hasta que se evapore la humedad.
Butones empleados en esta página
ª Reproducción de una pista previa o
posterior a la pista actual
Gire el disco [
µ TRACK≤].
… Si está operando la unidad de control
remoto, seleccione la pista deseada
presionando los botones [
µTRACK≤]
o ingresando el número de pista con los
botones numéricos.
… El número de pista seleccionada inicia
la reproducción.
ª Eyección del MD
Presione el botón de eyección [øEJECT].
ª Auriculares
Cuando emplee los auriculares, conecte el
enchufe de los mismos al jack PHONES.
… Ajuste el nivel de la salida de señales
del jack phones.
Insértelo en el
sentido de la flecha.
Coloque el MD con el lado
de la etiqueta hacia arriba.
– 96 –
ENGLISH
A recorded track can be divided into two
tracks and a track number can be assigned
to the second track. This function is
designed for use when a single track
contains several musical pieces (for
example with an analog-recorded MD), or
when you want to mark a point for use in
track location.
(Example): To divide C and D contained in
track number 3 into two tracks
1. During playback, press the [
π READY]
button at the point where you want to
divide the current track into two.
2. Press the [EDIT/NO] button repeatedly
until "DIVIDE ?" is displayed.
3. Press the [YES] button.
… "Rehearsal" and "Point OK ?" are
displayed alternately while the first 4
seconds of the portion which becomes
the second track after division are
played repeatedly.
4. If the original track is not divided as
precisely as desired, you can fine-adjust
the division point by turning the
[
µTRACK≤] dial while monitoring
the sound.
… The division point can be adjusted
within an offset range of –128 ~ +127
(±1 corresponds to approx. 0.06 sec.).
… Press the [
ª STOP] button or [EDIT/NO]
button to abort the operation.
5. When the track is divided at the desired
point, press the [YES] button again.
… The track numbers of the new track
(second track after division) and
subsequent tracks are increased by one
but these new numbers are still
continuous.
… "COMPLETE" is displayed and the track
is divided. The deck will pause at the
beginning of new track obtained after
division.
tracks which have been recorded in
… Tracks obtained after division do not
have track titles, regardless of whether
the original track had one or not.
… The beginnings of tracks cannot be
divided.
Dividing a Track
(DIVIDE Function)
The order of tracks can be changed by
moving a track to another position. After
the track has been moved, track numbers
are automatically renumbered.
(Example): To move D from track number 4
to track number 2
1. During playback or pause, select the
track to be moved by turning the
[
µTRACK≤] dial.
2. Press the [EDIT/NO] button until
"MOVE ?" is displayed.
3. Press the [YES] button.
… "Move to 001?" is displayed. ("001"
blinks.)
Track number Destination track
to be moved number
4. Select the destination track number with
the [
µTRACK≤] dial.
… "Move to 002 ?" is displayed.
("002" blinks.)
… When you specify the destination track
number with the numeric buttons,
"COMPLETE" is displayed, then the track
is moved and the track numbers
are automatically changed. Playback
resumes from the track’s new location.
… Press the [
ª STOP] button or [EDIT/NO]
button to abort the operation.
5. Press the [YES] button again.
… "COMPLETE" is displayed, then the track
is moved and the track numbers
are automatically changed. Playback
resumes from the track’s new location.
Moving a Track (MOVE Function)
– 17 –
Two consecutive tracks can be combined
into a single track. This function is
designed for use when you want to play
several songs continuously or you want to
make a single track from many separately
recorded parts of music.
(Example): Combining B and C
1. Select a track number by turning the
[
µTRACK≤] dial.
… The selected track number will be
combined with the track before it.
For example, to combine track numbers
2 and 3, select track number 3 in this
step.
… If you select track 1, it will not be
combined into a single track.
2. Press the [EDIT/NO] button until
"COMBINE ?" is displayed.
3. Press the [YES] button.
… "Rehearsal" is displayed. The beginning
of the selected track is played back
repeatedly.
… If the combination point between the
two tracks is not played properly, press
the [EDIT/NO] button to stop playback
and restart the operation from the
beginning.
… Press the [
ª STOP] or [EDIT/NO] button
to abort the operation.
4. If the combination point is correct, press
the [YES] button again.
… "COMPLETE" is displayed for a few
seconds and the tracks are combined.
… When both tracks have titles assigned,
the title of the track before the selected
track is assigned to the combined
track. Subsequent track numbers are
decreased by one.
… Note that it is impossible to combine
tracks which have been recorded in
different modes (SP, MONO, LP2 and
LP4).
Combining Tracks
(COMBINE Function)

6. Select each character by turning the
[
µTRACK≤] dial and pressing
[PUSH ENTER] on the dial.
… If you are using the remote control unit,
select each character with the
[
µ TRACK≤] buttons and press the
[ENTER] button to enter it.
7. Repeat steps 5-6.
8. Press the [YES] button after assigning
the disc title.
… The title entry mode for track 1 is
automatically engaged ("001 > _" is
displayed) and the cursor blinks on the
display.
9. Repeat steps 5-6.
10. Press the [YES] button again.
… When the title entry mode for track 2 is
engaged ("002 > _" is displayed), repeat
steps 5-8.
… Repeat the character entry procedure
until all titles have been entered. The
disc title is then displayed if the deck is
in the Stop mode, or if the deck is in the
Play mode, the current track title is
displayed.
… Confirm titles by turning the
[
µTRACK≤] dial.
… Press the [
ª STOP] button to abort the
operation.
Press the [EDIT/NO] button for more
than 3 seconds (or press the [TITLE
EDIT] button on the remote control unit)
to cancel the title function and resume
playback.
Notes:
… Up to 100 characters can be entered per
track title. However, when the total
number of characters of all track titles
exceeds 1700, no more track titles can
be written onto the MD.
… If the TITLE AUTO INC function is
canceled before all titles have been
assigned, the track title currently being
entered will be erased. Only track titles
which have already been assigned will
be kept.
… If UNDO is performed after TITLE AUTO
INC is completed, the last edited track
title will be canceled.
… Disc and track titles can be assigned
during recording.
… If a track title is assigned while in the
Record-Ready mode during the
overwrit-ing of a track, the track title
will be erased when you resume
recording.
… "DISC" lights while a disc title is being
entered, and "TRACK" lights while a
track title is being entered.
… Assigning titles is unavailable in the
"SHUFFLE MODE" or "PGM MODE".
– 18 –
Titles can be assigned to each disc or
each track using uppercase and
lowercase letters, numbers, " "
(Katakana) and symbols.
1. Press the [EDIT/NO] button so that
"TITLE ?" is displayed.
2. Press the [YES] button.
… Press the [TITLE EDIT] button if you are
using the remote control unit.
3. Select "DSC" or a track number using the
[
µTRACK≤] dial.
… To assign a disc title, select "TITLE >
DSC" ("DSC" blinks).
… To assign a track title, select "TITLE >
XXX (track number)" (Track number
blinks).
4. Press the [YES] button.
"DSC > _ " or "XXX > _ " is displayed.
… The character entry mode is engaged
and the cursor blinks on the display.
5. Press the [DISPLAY] button to select the
character type.
… When " " is lit: Katakana (square
Japanese syllabary) can be entered.
… When " " is lit: Capital alphabet
letters, numerals and symbols can be
entered.
… When no indicator is lit: Small alphabet
letters, numerals and symbols can be
entered.
6. Select each character by turning the
[
µTRACK≤] dial and pressing [PUSH
ENTER] on the dial.
Assigning Titles (TITLE Function)
7. Repeat steps 5-6.
… Press the[
ª STOP] button to abort the
operation.
… Press the [EDIT/NO] button for more
than 3 seconds (or press the [TITLE
EDIT] button on the remote control unit)
to cancel the title function and resume
playback
8. Press the [YES] button again.
… The disc or track title is displayed again.
… Repeat steps 1-8 to assign titles to other
track numbers.
Select the "CONTINUE" mode with the
[PLAY MODE] button. Titles can be
assigned to the disc and all tracks
successively.
1. Press the [EDIT/NO] button so that
"TITLE ?" is displayed.
2. Press the [YES] button.
… Press the [TITLE EDIT] button if you are
using the remote control unit.
3. Select "TITLE > AINC" with the
[
µTRACK≤] dial ("AINC" blinks).
4. Press the [YES] button.
… The disc title entry mode is engaged
("DSC > _" is displayed) and the cursor
blinks on the display.
… The cursor blinks at the first character
position even if a title has already been
assigned.
5. Press the [DISPLAY] button to select the
character type.
Assigning Titles to the Disc and
All Tracks Successively
(TITLE AUTO INC Function)
Buttons used on this page
Editing Recorded MDs
Notas sobre grabación
ª Para proteger un MD contra
borrado accidental
… Después de grabar el MD, deslice la
lengüeta de protección contra
grabación para que el orificio quede
abierto.
… Para grabar el MD otra vez, deslice la
lengüeta para cerrar el orificio.
ª Cuando aparece el mensaje
"Disc Full !!" o "Track Full !!"
El MD no tiene más espacio disponible para
grabar o todas las pistas del MD han sido
utilizadas. Borre las pistas que no necesite
o grabe la música en otro MD.
– 95 –
ESPAÑOL
ª La forma de asignación de los
números de pista varía
dependiendo de la fuente.
Cuando se reproduce un CD o un MD, y se
lo graba digitalmente seleccionado
[DIGITAL 1] o [DIGITAL 2] con el selector
[INPUT SELECTOR]:
… Los números de pista en el MD grabado
son asignados para adecuarse a los del
CD o MD fuente. Sin embargo, en los
casos abajo listados sólo un número de
pista puede ser asignado a una sección
grabada.
· Una sección compuesta de varias
repeticiones de una sóla pista en un
disco (ej.: empleando la
reproducción repetida de una sóla
pista).
· Una sección compuesta de
grabaciones sucesivas de pistas con el
mismo número de pista provenientes
de más de un disco. También, si la
fuente es un MD, los números de pista
pueden no ser marcadas para pistas
que tengan una duración menor a 3
segundos.
Cuando la fuente es grabada con
[ANALOG] o cuando se graba una fuente
digital que no sea un CD o MD con
[DIGITAL 1] o [DIGITAL 2] estando la
función de pista automática en OFF:
… Toda la grabación puede ser contada
como una sóla pista con un sólo
número de pista asignado a la misma.
· Los números de pista pueden ser
manualmente asignados en los
puntos deseados presionando el
botón [
º RECORD] durante la
grabación.
· Los números de pista pueden ser
automáticamente asignados conmut-
ando al función de pista automática
a "A_TRACK > ON" antes de iniciar la
grabación.

– 94 –
Grabación
1. Presione el botón [POWER].
… En la indicación aparecerá' "NO DISC".
… Conecte el componente fuente y el
amplificador. Ajuste el selector de
entrada para el componente fuente.
2. Inserte un MD grabable.
… Cuando coloca un MD sin grabar, la
indicación muestra "Disc Loading", "TOC
Reading", "No Track !!" y "Blank Disc" en
este orden.
… Cuando coloca un MD parcialmente
grabado, la platina iniciará auto-
máticamente la grabación desde el fin
de la última pista grabada.
3. Seleccione la entrada con [INPUT
SELECTOR].
Indicación Entrada seleccionada
ANALOG ANALOG INPUT
DIGITAL 1 DIGITAL INPUT 1
(OPTICAL)
DIGITAL 2 DIGITAL IN 2 (OPTICAL)
(panel frontal)
4. Elija el modo de grabación siguiendo los
pasos que indicamos a continuación:
El MD-350 es capaz de realizar la
grabación y reproducción en el modo
stereo standard (SP), monoaural con
velocidad standard (MON), doble larga
duración (LP2) y cuádruple larga
duración (LP4).
Como su propio nombre sugiere, el
modo LP2 le ofrece funciones de larga
duración, dándole el doble del tiempo
habitual de grabación / reproducción,
mientras que el modo LP4 le ofrece
cuatro veces el tiempo habitual de
grabación / reproducción.
Todos los modos son stereo, excepto el
MONO, en el que la grabación se realiza
usando solo el canal izquierdo (L). En el
medidor de nivel aparece “L”, si bien la
salida es enviada a ambos canales.
Para elegir un modo (SP, MON, LP2 o
LP4) para la grabación:
a) Con la unidad en el modo de parada,
pulse repetidamente el botón [EDIT/NO]
hasta que en pantalla aparezca “REC
MODE?”.
b) Pulse el botón [YES]. (En la pantalla
aparecerá “RecMode> XXX”).
c) Use el dial [
µ TRACK≤] para elegir
el modo de grabación que aparece en
pantalla.
d) Pulse el botón [YES] para confirmar su
elección.
… Tenga en cuenta que cuando vea la
indicación del tiempo restante para
grabación en un disco, ese tiempo hará
referencia al tiempo que queda usando
el modo activo.
… En un disco puede incluir pistas
grabadas en distintos modos (SP,
MONO, LP2 y LP4).
… Tenga en cuenta también que aunque el
modo LP4 (cuádruple larga duración) le
ofrece una excepcional cantidad de
tiempo para la grabación gracias a una
avanzada tecnología de compresión,
algunas veces puede que escuche
algunos pequeños ruidos, dependiendo
del material que esté grabando. Por ese
motivo le recomendamos que si la
calidad de sonido es más importante
para su proyecto de grabación que el
tiempo de grabación total, utilice mejor
los modos SP (stereo) o LP2 (doble larga
duración).
… El período máximo de tiempo disponible
con la grabación en monaural es el
doble que la grabación en estéreo.
Grabación de un MD
Butones empleados en esta página
Insértelo en el
sentido de la flecha.
Coloque el MD con el
lado de la etiqueta
hacia arriba.
ª Indicación del modo de grabación
Cuando tenga activo el modo de
grabación, los tres últimos caracteres de
la pantalla se usan para indicar el modo
activo, siendo indicado como SP, MON,
LP2 o LP4.
… En el modo de parada, el modo de
grabación es mostrado cuando se elige
la opción de visualización del tiempo
restante.
… En el modo de grabación o de espera
de grabación, el modo de grabación es
visualizado en todo momento.
… En el modo de reproducción o de pausa
de reproducción, el modo de grabación
es visualizado cuando se elige la
opción de tiempo restante. En este
caso, la pantalla muestra el modo de
grabación del material activo, no el
modo de grabación elegido en ese
momento.
5. Presione el botón [
º RECORD].
… La platina ingresa en el modo de listo
de grabación (Se enciende "
π ").
… "Disc Full !!" o "Track Full !!" aparece
cuando no hay espacio en el MD para
continuar grabando.
6. Ajuste el nivel de grabación.
… Si seleccionó [ANALOG], arriba, ajuste
el nivel de grabación con el control
[INPUT].
… Ajuste el nivel de grabación de tal
manera que los segmentos "OVER" del
medidor de nivel pico no se enciendan.
7. Inicie la grabación.
Presione el botón [
¥ PLAY] o el botón
[
π READY] (se encenderá "¥ ").
Inicie la reproducción del programa
fuente.
8. Para parar la grabación presione el
botón de parada [
ª STOP].
ª Parada temporaria de la grabación
(listo)
Presione el botón de pausa [
π READY].
… Presione el botón [
¥ PLAY] o [π
READY] para continuar la grabación.
… Siempre que haga una pausa de
grabación, el número de pista se
incrementará en una unidad.
ª Eyección del MD
Pulse el botón de expulsión [ø EJECT] en
el modo de parada.
Si la alimentación es desactivada con el
MD puesto en la platina (se iluminará
" ") después de la grabación, el
UTOC no podrá ser grabado.
Active la alimentación nuevamente dentro
de 3 ó 4 días y eyecte el MD. Los datos
grabados se pueden perder si el MD es
dejado puesto en la platina por un largo
período.
ENGLISH
ª Character types selectable
… When " " is lit: Katakana (square
Japanese syllabary) can be entered.
… When " " is lit: Capital alphabet
letters, numerals and symbols can be
entered: A B C D E F G H I J K L M N O P
Q R S T U V W X Y Z 0 1 2 3 4 5 6 7 8 9 : ; <
= > ? @ ! " # $ % & ‘ ( )
*
+ , – . / _ (space)
… When no indicator is lit: Small alphabet
letters, numerals and symbols can be
entered: a b c d e f g h i j k l m n o p q r s
t u v w x y z 0 1 2 3 4 5 6 7 8 9 : ; < = > ? @
! " # $ % & ‘ ( )
*
+ , – . / _ (space)
ª Changing entered characters
Move the cursor to the character to be
corrected in the character entry mode.
… Select a new character to change the
character at the cursor position.
ª To move the cursor
Deck ® Press the [∆SEARCH˚]
buttons.
Remote Control Unit ® Press the
[∆ SEARCH˚] buttons.
ª To select a character at the cursor
position
Deck ® Turn the [µTRACK≤] dial.
Remote Control Unit ® Press the
[µ TRACK ≤] buttons.
ª To change the character type at the
cursor position
Deck ® Press the [DISPLAY] button.
Remote Control Unit ® Press either the
[DISPLAY] button or [CHAR SELECT]
button.
ª To change the character at the cursor
position to an upper/lower case letter
Deck ® Press the [DISPLAY] button.
Remote Control Unit ® Press the [Aß∑a]
button.
ª To insert a space at the cursor position
Deck ® Press [PUSH ENTER] on the dial
for 3 seconds or more.
Remote Control Unit ® Press the [INSERT]
or [ENTER] button for more than 3 seconds.
ª To enter a number
Deck ® Turn the [µTRACK≤] dial.
Remote Control Unit ® Press the numeric
buttons.
ª To erase a character at the cursor
position
Deck ® Press the [EDIT/NO] button.
Remote Control Unit ® Press either the
[DELETE] button or [EDIT/NO] button.
ª To move the cursor to the right after
selecting a character
Deck ® Press [PUSH ENTER] on the dial.
Remote Control Unit ® Press the [ENTER]
button.
ª To erase all the characters at once
Deck ® Unavailable.
Remote Control Unit ® Press the [CLEAR]
button.
1. In the Stop mode, display the disc title
or track title (number) that you want to
copy with the [µTRACK≤] dial.
(Example): To copy the track 4 title
2. Press the [EDIT/NO] button repeatedly
until "TITLE COPY ?" appears.
3. Press the [YES] button.
"Copy to 001 ?" is displayed.
("001" blinks)
(Example): To copy the track 4 title to track 6
Source track Destination
number track number
4. Select the track to copy the title to with
the [µTRACK≤] dial.
"Copy to 006 ?" is displayed ("006" blinks).
… Press the [ª STOP] button or [EDIT/NO]
button to cancel the TITLE COPY mode.
5. Press the [YES] button.
… The title is copied to track number 006.
… Pressing the [¥ PLAY] button or
[π READY] button releases the title copy
operation.
Copying a Title
(TITLE COPY Function)
1. In the Stop mode, press the [EDIT/NO]
button repeatedly until "UNDO ?"
appears.
2. Press the [YES] button.
"Undo OK ?" is displayed.
… To cancel this function, press the
[ª STOP] button or [EDIT/NO] button.
3. Press the [YES] button.
… The last operation is undone and
"COMPLETE" is displayed.
… Pressing the [¥ PLAY] button or
[π READY] button releases the UNDO
mode.
Notes:
"UNDO ?" will not be displayed in the cases
below, even if you press the [EDIT/NO]
button (cannot undo).
… When the operation has already been
undone (cannot undo an undo), or no
operation has been performed to undo.
… When the editing mode is released by
pressing the [YES] button.
… During recording or when the
Recording-Ready mode is engaged.
… When "DISC ERASE" is performed on a
blank disc.
… When the power is cut off.
Canceling the Last Operation
(UNDO Function)
– 19 –
Buttons used on this page

Optional Functions
If you connect an IBM-compatible
personal computer keyboard (101 or 106
keys) to the KEYBOARD terminal of this
deck, you can operate the deck control,
track selection, editing and title entry
directly from the keyboard.
… Place the provided lettering guide
around the keyboard function keys for
your reference.
ª Correspondence between deck
buttons and keyboard keys
Deck Buttons Keyboard Keys
[µ] F1 key
[≤] F2 key
STOP button F4 key
PLAY button F5 key
READY button F6 key
RECORD button F8 key
AUTO SPACE button F9 key
REPEAT button F10 key
PLAY MODE button F11 key
DISPLAY button F12 key
YES button Enter key
+10 button + key
Numeric buttons Numeric keys
CLEAR button Shift + F10 keys
EJECT button Shift + F12 keys
Ƨkey
˚∑key
ª Editing keys
Function Key Operation
ERASE TRACK Shift + F1 keys
ERASE DISC Shift + F2 keys
MOVE Shift + F4 keys
DIVIDE Shift + F5 keys
COMBINE Shift + F6 keys
TITLE COPY Shift + F7 keys
TITLE Shift + F8 keys
UNDO Shift + F9 keys
Mode cancellation Esc key
ª Title entry keys
Operation Key Operation
Move cursor ß key, ∑ key
Change track number ™ key, ≈ key
to be edited
Switch uppercase/ Caps key
lowercase
Erase character BS (Back Space)
before cursor key
Erase character on DEL (Delete) key
cursor
Insert character INS (Insert) key
End title entry Esc key
… Characters can be entered directly from
the keyboard.
… When the track number to be edited is
changed using [™] or [≈], the track title
will remain the same.
… " " and " " cannot be used at
the same time.
… When using a keyboard, do not turn the
power on and off rapidly, as this may
sometimes cause the keyboard to
become unoperational.
– 20 –
System Restrictions
Because of the different recording systems
used by Compact Cassette, DAT, etc., the
MD (Mini Disc) is subjected to some
system restrictions. These restrictions may
result in the following problems. These are
normal and are not malfunctions.
… "Track Full" is displayed before the
available recording time expires.
"Track Full" is displayed whenever the
number of allowable tracks is reached,
regardless of the recording time still
available. With the MD system, it is not
possible to record more than 254 tracks.
If you want to record more tracks, erase
unnecessary tracks, record them on
another MD, or use the editing proce-
dure to combine existing tracks.
… "Track Full" is displayed even though
both the number of tracks and the
recording time have not been filled.
Whenever emphasis data or other
signal enhancements are switched on-
off in the middle of tracks, the track is
separated at that point and "Track Full"
may be displayed regardless of the
recording time and number of tracks.
… The remaining recording time of an MD
does not increase although you have
erased several tracks.
The remaining recording time display
ignores tracks shorter than 12 seconds.
Therefore, the time may not increase if
you have erased several short tracks.
… The total elapsed recording time and
remaining recording time does not
coincide with the available recording
time as calculated from the stated time
on the disc, and the recording mode.
The minimum unit for recording data is
usually 6 clusters (approx. 12 seconds).
Data of less than 12 seconds still uses
the 12-second space, so actual
available recording time becomes
shorter than rated. Also, if the MD is
scratched, the scratched sections are
automatically deleted and the time
available is decreased accordingly.
– 93 –
Nombre de los controles
1 Botón [POWER]
2 Conmutador [TIMER PLAY/OFF/REC]
3 Conmutador [PITCH CONTROL ON/OFF]
4 Control [INPUT]
5 Sensor remoto
6 Ranura para insertar el disco
7 Botón [
ø EJECT]
8 Botón [
º RECORD]
9 Botón [DISPLAY]
0 Botones de búsqueda [
∆ SEARCH˚]
q Botón [PLAY MODE]
w [
µ TRACK≤] disco de búsqueda cuadro por
cuadro [PUSH/ENTER]
e Botón [EDIT/NO]
r Botón [YES]
t Conmutador [INPUT SELECTOR]
y Jack [PHONES]
u Mando de los auriculares
i Ventanilla de indicación
o Botón [
ª STOP]
p Botón [
¥ PLAY]
a Botón [
π READY]
s Terminal [DIGITAL IN 2]
d Terminal [KEYBOARD]
f Botones numéricos [1 a 9, 0, +10]
g Botones de repetición [REPEAT/A-B]
h Botón [TITLE EDIT]
j Botón [CLEAR]
k Botón [INSERT]
l Botón [DELETE]
; Botón [SYNC RECORD]
z Botón de letras mayúsculas/minúsculas [Aß∑a]
x Botón [AUTO SPACE]
c Botón [SCROLL]
v Botón de selección de caracteres [CHAR SELECT]
b Botón [ENTER]
n Botones de salto [
µ TRACK≤]
ESPAÑOL
La pagina si sta caricando...
La pagina si sta caricando...
La pagina si sta caricando...
La pagina si sta caricando...
La pagina si sta caricando...
La pagina si sta caricando...
La pagina si sta caricando...
La pagina si sta caricando...
La pagina si sta caricando...
La pagina si sta caricando...
La pagina si sta caricando...
La pagina si sta caricando...
La pagina si sta caricando...
La pagina si sta caricando...
La pagina si sta caricando...
La pagina si sta caricando...
La pagina si sta caricando...
La pagina si sta caricando...
La pagina si sta caricando...
La pagina si sta caricando...
La pagina si sta caricando...
La pagina si sta caricando...
La pagina si sta caricando...
La pagina si sta caricando...
La pagina si sta caricando...
La pagina si sta caricando...
La pagina si sta caricando...
La pagina si sta caricando...
La pagina si sta caricando...
La pagina si sta caricando...
La pagina si sta caricando...
La pagina si sta caricando...
La pagina si sta caricando...
La pagina si sta caricando...
La pagina si sta caricando...
La pagina si sta caricando...
-
 1
1
-
 2
2
-
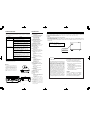 3
3
-
 4
4
-
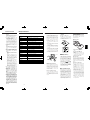 5
5
-
 6
6
-
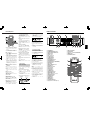 7
7
-
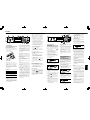 8
8
-
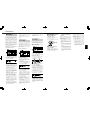 9
9
-
 10
10
-
 11
11
-
 12
12
-
 13
13
-
 14
14
-
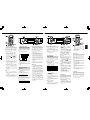 15
15
-
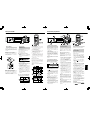 16
16
-
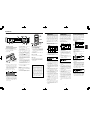 17
17
-
 18
18
-
 19
19
-
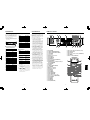 20
20
-
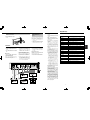 21
21
-
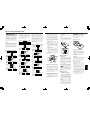 22
22
-
 23
23
-
 24
24
-
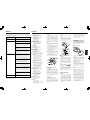 25
25
-
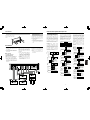 26
26
-
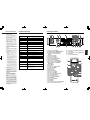 27
27
-
 28
28
-
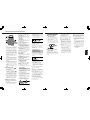 29
29
-
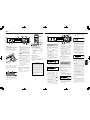 30
30
-
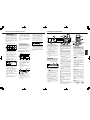 31
31
-
 32
32
-
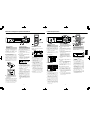 33
33
-
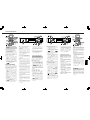 34
34
-
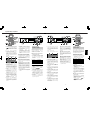 35
35
-
 36
36
-
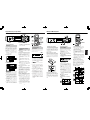 37
37
-
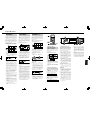 38
38
-
 39
39
-
 40
40
-
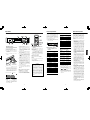 41
41
-
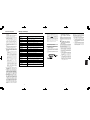 42
42
-
 43
43
-
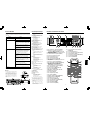 44
44
-
 45
45
-
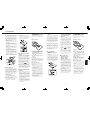 46
46
-
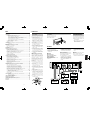 47
47
-
 48
48
-
 49
49
-
 50
50
-
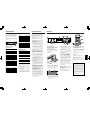 51
51
-
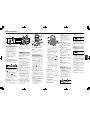 52
52
-
 53
53
-
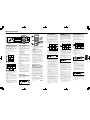 54
54
-
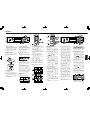 55
55
-
 56
56


Tascam MD-350 Manuale utente
- Categoria
- Lettori minidisc
- Tipo
- Manuale utente
in altre lingue
- English: Tascam MD-350 User manual
- français: Tascam MD-350 Manuel utilisateur
- español: Tascam MD-350 Manual de usuario
- Deutsch: Tascam MD-350 Benutzerhandbuch
Documenti correlati
Altri documenti
-
Denon DMD-1000 Operating Instructions Manual
-
Sony MZ-G755 Istruzioni per l'uso
-
-
TEAC AD-500 Manuale utente
-
Sony MXD-D3 Manuale utente
-
-
Audio Analogue SRL Maestro Manuale utente
-
TEAC A-H500 Manuale del proprietario
-
-