Oregon RM818P Manuale utente
- Categoria
- Sveglie
- Tipo
- Manuale utente
Questo manuale è adatto anche per

1
2
3
4
5
6
7
8
9
1
2
3
4
5
6
7
8
9
1
2
3
4
5
6
7
1
2
3
14
5
6
1
2
3
4
5
6
7
EN
Cool RF Projection Clock with
Animated Projection (RM818P)
PISA Animated Projection Clock
(RM818PA)
USER MANUAL
INTRODUCTION
Thank you for selecting the projection clock
(RM818P / RM818PA). The Vibration Wake-Up
Alarm (VR101) is compatible with this product and
can be purchased separately.
NOTE Please keep this manual handy as you use
your new product. It contains practical step-by-step
instructions, as well as technical specifications and
warnings you should know.
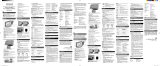
OVERVIEW
FRONT VIEW
1. Projector : Projects time on the wall or ceiling
2. LCD display
3. SNOOZE / LIGHT : Turns on projector and backlight
for 5 seconds
4. ALARM : Toggles between Alarm 1, Alarm 2 and
Calendar
5.
ON / OFF : Activates / deactivates the alarm
6. CLOCK : Toggles between different clock displays
BACK VIEW
1. Battery compartment
2. ADAPTER : Adaptor slot
3. Reset : Press to reset
4. EU / UK (RM818P only) : Slide to select your
nearest radio signal base
5. UP / DOWN : Increases / decreases setting;
Enables / disables clock reception signal
6. PROJECTION ON : Enables continuous projection
with AC adapter connected
LCD DISPLAY
1. Clock radio reception signal
2. Time
3. Alarm display
4. Alarm time / calendar
5. Animation speed : Select fast or slow
6. Low battery
7. Time zone
8. Alarm ON : Appears when alarm 1/2 is activated.
GETTING STARTED
BATTERIES
The unit uses 2 x AAA (UM-4) 1.5V batteries.
Insert batteries before first use, matching the
polarity (+ and -):
NOTE appears when batteries are low.
ADAPTER
For continuous projection you must use the AC
adapter.
CLOCK DISPLAY MODES
Press CLOCK to toggle between the clock displays:
• Clock with seconds and calendar
• Clock with weekday and calendar
• Clock with time zone offset and calendar
CLOCK RECEPTION
This product is designed to synchronize its calendar
clock automatically once it is brought within range of a
radio signal:
• DCF-77 generated from Frankfurt, Germany for
Central Europe
• MSF-60 generated from Rugby, England
• WWVB-60 generated from the atomic clock in
Fort Collins, Colorado
The clock collects the radio signals whenever it is within
1500 km (932 miles) of a signal.
RM818P only — slide the EU / UK switch to the
appropriate setting based on your location. Press
RESET whenever you change the selected setting.
RECEPTION SIGNAL
The reception icon will blink when it is searching for a
signal. If the radio signal is weak, it can take up to 24
hours to get a valid signal reception.
For best reception, place the clock away from metal
objects and electrical appliances and place near a
window.
To enable / disable the clock radio reception, press
and hold UP / DOWN.
SETTING THE CLOCK
You only need to do this if you have disabled the clock
radio reception, or if you are too far from the radio
signal.
To set the clock:
1. Press and hold CLOCK for 2 seconds. The setting
will blink.
2. Use UP / DOWN to change the setting.
3. Press CLOCK to confirm.
4. Repeat steps 2 and 3 to set the time zone, 12 / 24
hour format, hour, minute, year, day-month format,
month, day and display language.
NOTE If you enter +1 in the time zone setting, this
will give you your local time plus 1 hour. If you are
in the US (RM818PA) set the clock to:
-8 for Pacific time -7 for Mountain time
-6 for Central time -5 for Eastern time
NOTE The language options are (E) English, (F)
French, (D) German, (I) Italian, and (S) Spanish.
ALARM
The clock has 2 alarms with a beep sound. If you have
purchased the vibration device, you can also set the
alarm to vibrate for 1.5 minutes.
To set an alarm:
1. Press ALARM to toggle between the alarm displays
and select either alarm 1 or 2 for setting.
2. Press and hold ALARM to enter alarm setting
mode. The alarm setting will blink.
3. Select the hour, minute, alarm beep sound or
vibration alarm or both. Press UP / DOWN to
change the settings.
4. Press ALARM to confirm.
NOTE “-:--“ appears when the alarm is not activated.
ALARM STATUS
The alarm icon will appear on the display to show which
alarm has been set (see below):
ICON MEANING
/ Beep alarm is set
Vibration alarm is set
/ Beep and vibration alarms are
set
No icons No alarm is set
ACTIVATING / DEACTIVATING THE ALARM
Press
ON / OFF to toggle between alarm 1 and 2,
ON or OFF. See the table above for further clarification.
NOTE You can also activate / deactivate the alarm
when you are in the alarm setting mode by
toggling the
ON / OFF button.
SNOOZE / STOP ALARM
To silence the alarm for 8 minutes, press SNOOZE /
LIGHT.
NOTE When the snooze function is activated, the
alarm icon will flash.
To stop the alarm and reset it to activate at the same
time the next day, press any key except SNOOZE /
LIGHT.
THE VIBRATING DEVICE — VR101
(OPTIONAL)
The vibrating wake-up device can be placed under your
pillow and will wake you up by gently vibrating. All you
need to do is activate the vibrating alarm option on the
clock and switch the vibrating device to alarm 1, alarm
2 or both.
You can purchase this device separately.
NOTE Please refer to the vibrating wake-up alarm
(VR101) user manual for further information.
PROJECTOR
Press SNOOZE / LIGHT to project the time (and turn
on the backlight) for 5 seconds.
To use the projector continuously, plug in the adapter
and press PROJECTOR ON. Press PROJECTION
ON again to turn continuous projection OFF.
NOTE You can only use the continuous projection
function when the adapter is plugged in.
Press SNOOZE / LIGHT repeatedly to flip the projected
time upside down and back again.
SETTING THE ANIMATION SPEED
1. Press and hold PROJECTOR ON until the setting
blinks.
2. Press UP / DOWN to change setting.
3. Press PROJECTOR ON to confirm.
4. The setting sequence is speed high / slow, alarm
animation on / off.
BACKLIGHT
Press SNOOZE / LIGHT to activate the backlight (and
projector) for 5 seconds.
RESET
To return the unit to the default settings, insert a blunt
stylus into the RESET hole in the battery compartment.
PRECAUTIONS
This unit is engineered to give you years of satisfactory
service if you handle it carefully. Here are a few
precautions:
• Placement of this product on wood surfaces with
certain types of finishes, such as clear varnish, may
result in damage to the finish. Consult the furniture
manufacturer’s care instructions for direction as to
the types of objects that may safely be placed on
the wood surface. Oregon Scientific shall not be
responsible for any damage to wood surfaces from
contact with this product.
• Do not immerse the unit in water. If you spill liquid
over it, dry it immediately with a soft, lint-free cloth.
• Do not clean the unit with abrasive or corrosive
materials. This may scratch the plastic parts and
corrode the electronic circuit.
• Do not subject the unit to excessive force, shock,
dust, temperature or humidity, which may result in
malfunction, shorter electronic life span, damaged
battery and distorted parts.
• Do not tamper with the units internal components.
Doing so will invalidate the warranty on the unit
and may cause unnecessary damage. The unit
contains no user-serviceable parts.
• Only use fresh batteries as specified in the users
instructions. Do not mix new and old batteries as
the old ones may leak.
• Due to printing limitations, the displays shown in
this manual may differ from the actual display.
• The contents of this manual may not be reproduced
without the permission of the manufacturer.
NOTE The technical specifications for this product
and the contents of the user manual are subject to
change without notice.
SPECIFICATIONS
TYPE DESCRIPTION
Calendar Day of week
Current date / month
format
Clock time 12 or 24-hour format
RF frequency DCF-77 (EU)
MSF-60 (UK)
WWVB-60 (US)
Alarm duration 2 minutes
Snooze 8 minutes
Battery type 2 x AAA (UM-4) 1.5V
Unit dimension 141 x 44 x 88 mm
(H x W x D) (5.6 x 1.73 x 3.47 inches)
Unit weight 146 g (5.2 ounces)
without battery
AC power adapter DC 3.0V
ABOUT OREGON SCIENTIFIC
Visit our website (www.oregonscientific.com) to learn
more about Oregon Scientific products such as digital
cameras; MP3 players; children’s electronic learning
products and games; projection clocks; health and
fitness gear; weather stations; and digital and
conference phones. The website also includes contact
information for our Customer Care department in case
you need to reach us, as well as frequently asked
questions and customer downloads.
We hope you will find all the information you need on
our website, however if you’re in the US and would
like to contact the Oregon Scientific Customer Care
department directly, please visit:
OR
Call 1-800-853-8883.
For international inquiries, please visit:
www2.oregonscientific.com/about/international
EC-DECLARATION OF CONFORMITY
Hereby, Oregon Scientific, declares that the Projection
Clock (Model RM818P) is in compliance with the
essential requirements and other relevant provisions of
Directive 1999/5/EC.
A copy of the signed and dated Declaration of Conformity
is available on request via our Oregon Scientific
Customer Service.
RTTE APPROVAL COMPLIED
All EC countries, Switzerland CH
and Norway N
FCC STATEMENT
This device complies with Part 15 of the FCC Rules.
Operation is subject to the following two conditions: (1)
This device may not cause harmful interference, and
(2) This device must accept any interference received,
including interference that may cause undesired
operation.
WARNING Changes or modifications not expressly
approved by the party responsible for compliance could
void the user’s authority to operate the equipment.
NOTE This equipment has been tested and found to
comply with the limits for a Class B digital device,
pursuant to Part 15 of the FCC Rules. These limits are
designed to provide reasonable protection against
harmful interference in a residential installation.
This equipment generates, uses and can radiate radio
frequency energy and, if not installed and used in
accordance with the instructions, may cause harmful
interference to radio communications. However, there
is no guarantee that interference will not occur in a
particular installation. If this equipment does cause
harmful interference to radio or television reception,
which can be determined by turning the equipment off
and on, the user is encouraged to try to correct the
interference by one or more of the following measures:
• Reorient or relocate the receiving antenna.
• Increase the separation between the equipment
and receiver.
• Connect the equipment into an outlet on a circuit
different from that to which the receiver is
connected.
• Consult the dealer or an experienced radio / TV
technician for help.
DECLARATION OF CONFORMITY
The following information is not to be used as
contact for support or sales. Please call our
customer service number (listed on our website at
www.oregonscientific.com), or on the warranty card
for this product) for all inquiries instead.
We
Name: Oregon Scientific, Inc.
Address: 19861 SW 95th Ave.,
Tualatin, Oregon 97062
USA
Telephone No.: 1-800-853-8883
Fax No.: 1-503-684-3332
declare that the product
Product No.: RM818PA
Product Name: Projection Clock
NO SIGNAL
5. SU/Gi : aumenta o riduce il valore
dell impostazione; attiva o disattiva il segnale di
ricezione dell orologio
6. Proiezione accesa : attiva la proiezione continua
con l adattatore CA collegato
DISPLAY LCD
1. Segnale di ricezione radio dell orologio
2. Ora
3. Display sveglia
4. Calendario/Ora sveglia
5. Velocit animazione: scegliere veloce o lenta
6. Batteria scarica
7. Fuso orario
8. Sveglia attivata: viene visualizzato quando stata
attivata la sveglia 1 / 2
OPERAZIONI PRELIMINARI
BATTERIE
L unit accoglie 2 batterie AAA (UM-4) da 1,5 V.
Inserire le batterie prima di utilizzare l unit per la
prima volta, rispettando le polarit (+ e -):
NOTA viene visualizzato quando le batterie
sono scariche.
ADATTATORE
Per una proiezione costante, necessario utilizzare
l adattatore CA.
MODALIT¸ DI VISUALIZZAZIONE DELL ORA
Premere CLOCK per attivare una delle modalit di
visualizzazione dell ora:
• Ora con secondi e calendario
• Ora con giorno della settimana e calendario
• Ora con fuso orario e calendario
RICEZIONE DELL ORA
Questo prodotto progettato per la sincronizzazione
automatica dell ora del calendario se posizionato entro
un campo di segnale radio:
• DCF-77 generato da Francoforte, Germania per
l Europa centrale
• MSF-60 generato da Rugby, Inghilterra
• WWVB-60 generato dall orologio atomico di Fort
Collins, Colorado
L orologio rileva i segnali radio quando posizionato
entro 1.500 km (932 miglia) da un segnale.
Solo RM818P: fare scorrere l interruttore EU / UK
sull impostazione appropriata in base alla propria
ubicazione. Premere RESET ogni volta che si cambia
l impostazione selezionata.
RICEZIONE DEL SEGNALE
L icona di ricezione lampeggia durante la ricerca di un
segnale. Se il segnale radio debole, potrebbero
essere necessarie fino a 24 ore per ricevere un segnale
valido.
Per una ricezione ottimale, collocare l orologio lontano
da oggetti di metallo e apparecchiature elettriche e
vicino a una finestra.
Per attivare/disattivare la ricezione radio dell orologio,
tenere premuto UP / DOWN.
IMPOSTAZIONE DELL ORA
Ø necessario impostare l ora, solo se stata disattivata
la ricezione radio dell orologio oppure se si troppo
lontani dal segnale radio.
Per impostare l ora:
1. Tenere premuto CLOCK per 2 secondi.
L impostazione lampegger .
2. Premere UP / DOWN per modificare
l impostazione.
3. Premere CLOCK per confermare.
4. Ripetere i passaggi 2 e 3 per impostare il fuso
orario, il formato dell ora (12 / 24 ore), le ore, i
minuti, l anno, il formato giorno-mese, il mese, il
giorno e la lingua.
NOTA Se si specifica +1 nell impostazione del fuso
orario, verr visualizzata l ora locale pi 1 ora. Se
ci si trova negli USA (RM818PA),impostare l ora su:
-8 per l ora PST -7 per l ora MST
-6 per l ora CST -5 per l ora EST
NOTA Le lingue disponibili sono (E) Inglese, (F)
Francese, (D) Tedesco, (I) Italiano e (S) Spagnolo.
SVEGLIA
L orologio dispone di 2 sveglie con un segnale acustico.
Se stata acquistata l unit con vibrazione, anche
impossibile impostare la sveglia a vibrazione per 1,5
minuti.
Per impostare una sveglia:
1. Premere ALARM per attivare la visualizzazione
della sveglia, quindi selezionare la sveglia 1 o 2.
2. Tenere premuto ALARM per attivare la modalit di
impostazione sveglia. L impostazione della
lampegger .
3. Selezionare l ora, i minuti, il segnale acustico, la
vibrazione o entrambi. Premere UP / DOWN per
modificare le impostazioni.
4. Premere ALARM per confermare.
NOTA -:-- viene visualizzato quando la sveglia
non attivata.
STATO DELLA SVEGLIA
L icona della sveglia viene visualizzata sul display per
mostrare il tipo di sveglia impostata (vedere tabella
seguente):
ICONA SIGNIFICATO
/ Sveglia con segnale acustico
Sveglia con vibrazione
Entrambe le sveglie: con vibrazione
e con segnale acustico
Nessuna icona Nessuna sveglia impostata
ATTIVAZIONE/DISATTIVAZIONE DELLE
SVEGLIE
Premere ON / OFF per attivare la sveglia 1 e 2, ON
o OFF. Per ulteriori informazioni, vedere la tabella in
alto.
NOTA Per attivare/disattivare la sveglia in modalit
di impostazione sveglia, utilizzare il pulsante
ON
/ OFF.
SILENZIAMENTO / ARRESTO DELLA SVEGLIA
Per silenziare la sveglia per 8 minuti, premere SNOOZE
/ LIGHT.
NOTA Quando la funzione snooze attivata. L icona
della sveglia lampeggia.
Per arrestare la sveglia e impostarla affinch si attivi
la stessa ora del giorno successivo, premere un
pulsante qualsiasi ad eccezione di SNOOZE / LIGHT.
PERIFERICA CON VIBRAZIONE — VR101
(FACOLTATIVA)
Il dispositivo sveglia con vibrazione pu essere
posizionato sotto il cuscino per essere svegliata da una
delicata vibrazione. Ø sufficiente attivare l opzione di
sveglia con vibrazione nell orologio e impostare il
dispositivo a vibrazione sulla sveglia 1, sveglia 2 o
entrambi.
Ø possibile acquistare questa periferica
separatamente.
NOTA Per ulteriori informazioni, consultare il manuale
dell utente della sveglia con vibrazione (VR101).
PROJECTOR
Premere per proiettare l ora (e accendere la
retroilluminazione) per 5 secondi.
Per utilizzare il proiettore costantemente, collegare
l adattatore ala corrente e premere PROJECTOR ON.
Premere di nuovo PROJECTION ON per disattivare
la proiezione costante.
NOTA La funzione di proiezione continua pu essere
utilizzata solo quando l adattatore collegato alla
corrente.
Premere ripetutamente SNOOZE / LIGHT per
capovolgere l ora proiettata e riportarla alla posizione
originale.
IMPOSTAZIONE DELLA VELOCIT¸ DI
ANIMAZIONE
1. Tenere premuto PROJECTOR ON finch
l impostazione lampeggia.
2. Premere UP / DOWN per modificare l impostazione.
3. Premere PROJECTOR ON per confermare.
4. La sequenza dell impostazione veloce/lenta,
attivazione/disattivazione animazione sveglia.
RETROILLUMINAZIONE
Premere SNOOZE / LIGHT per attivare la
retroilluminazione (e il proiettore) per 5 secondi.
AZZERAMENTO
Per ripristinare i valori predefiniti dell unit , inserire una
stilo a punta nel foro RESET del vano batterie.
PRECAUZIONI
L unit stata progettata per fornire un servizio
soddisfacente per diversi anni, purch manipolata con
attenzione. Di seguito sono riportate alcune importanti
precauzioni:
• La collocazione di questo prodotto su superfici di
legno con particolari tipi di rifiniture, ad esempio
vernice trasparente, pu danneggiare le rifiniture.
Per informazioni sui tipi di oggetti che possibile
collocare sulla superficie di legno, consultare le
istruzioni del produttore sulla manutenzione.
Oregon Scientific non responsabile dei danni alle
superfici di legno provocati dal contatto con questo
prodotto.
• Non immergere l unit nell acqua. Se si sparge del
liquido sull unit , asciugarla immediatamente con
un panno asciutto privo di lanugine.
• Non pulire l unit con sostanze abrasive o corrosive
che potrebbero graffiare le parti di plastica e
corrodere il circuito elettrico.
• Non sottoporre l unit a sforzi, scosse, polvere,
temperature o umidit eccessivi, che potrebbero
provocare malfuzionamenti, ridurre la durata dei
componenti elettronici, danneggiare le batterie e
deformare le parti.
• Non manomettere i componenti interni dell unit .
Ci potrebbe invalidare la garanzia e causare danni
superflui. L unit non contiene parti riparabili
dall utente.
• Utilizzare solo batterie nuove, come specificato nel
manuale di istruzioni. Non mescolare batterie
vecchie e nuove, poich dalle batterie vecchie
possono fuoriuscire liquidi.
• A causa delle limitazione della stampa, le
illustrazioni riportate in questo manuale possono
differire dalle visualizzazione reali.
Manufacturer: IDT Technology
Limited
Address: Block C, 9/F, Kaiser
Estate, Phase 1,41
Man Yue St., Hung
Hom, Kowloon, Hong
Kong
is in conformity with Part 15 of the FCC Rules.
Operation is subject to the following two conditions: 1)
This device may not cause harmful interference. 2) This
device must accept any interference received,
including interference that may cause undesired
operation.
INTRODUZIONE
Grazie per avere scelto l orologio a proiezione
(RM818P / RM818PA). La sveglia con vibrazione
(VR101) compatibile con questo prodotto e pu
essere acquistata separatamente.
NOTA Tenere questo manuale a portata di mano
durante l utilizzo del nuovo prodotto, poich contiene
pratiche istruzioni dettagliate, specifiche tecniche e
avvertimenti che necessario conoscere.
PRESENTAZIONE
VISTA ANTERIORE
1. Proiettore: proietta l ora sulla parete o sul soffitto
2. Display LCD
3. SNOOZE / LUCE: accende il proiettore e la
retroilluminazione per 5 secondi
4. SVEGLIA: attiva la modalit Sveglia 1, Sveglia 2 o
Calendario
5.
ON / OFF: attiva/disattiva la sveglia
6. OROLOGIO: attiva le diverse visualizzazioni dell ora
VISTA POSTERIORE
1. Vano batterie
2. Slot adattatore
3. Reset : premere per azzerare
4. Interruttore EU / UK (solo RM818P): (fare scorrere
per selezionare la base del segnale radio pi vicina
IT
DEBOLE
FORTE
NESSUN SEGNALE
• Non consentito riprodurre il contenuto di questo
manuale senza il permesso del produttore.
NOTA Le specifiche tecniche d questo prodotto e il
contenuto del manuale sono soggetti a modifiche senza
preavviso.
SPECIFICHE
TIPO DESCRIZIONE
CALENDARIO GIORNO DELLA
SETTIMANA FORMATO DEL MESE/DATA
CORRENTE
ORA DELLOROLOGIO FORMATO DELLORA 12
O 24
FREQUENZA RF DCF-77 (EU)
MSF-60 (UK)
WWVB-60 (US)
DURATA SVEGLIA 2 MINUTI
SNOOZE 8 MINUTI
TIPO DI BATTERIA 2 X AAA (UM-4) 1,5 V
DIMENSIONE UNIT¸ 41 X 44 X 88 MM
(A X L X P) (5,6 X 1,73 X 3,47
POLLICI)
PESO UNIT¸ 146 G (5,2 ONCE)
SENZA BATTERIA
ADATTATORE
ALIMENTAZIONE CA CC 3,0 V
INFORMAZIONI SU OREGON SCIENTIFIC
Per avere maggiori informazioni sui nuovi prodotti
Oregon Scientific, come le fotocamere digitali, i lettori
MP3, i computer didattici per ragazzi, gli orologi con
proiezione dell ora, le stazioni barometriche, gli orologi
da polso multifunzione, gli strumenti per la cura della
persona ed il fitness, ed altro ancora, visita il nostro
sito internet www.oregonscientific.it
Puoi trovare anche le informazioni necessarie per
contattare il nostro servizio clienti, le risposte ad alcune
domande pi frequenti (F AQ) o i software da scaricare
gratuitamente.
Sul nostro sito internet potrai trovare tutte le
informazioni di cui hai bisogno, ma se desideri
contattare direttamente il nostro Servizio Consumatori
puoi visitare il sito
www.oregonscientific.it oppure
chiamare al numero 199112277. Per ricerche di tipo
internazionale puoi visitare invece il sito
www.oregonscientific.com
DICHIARAZIONE DI CONFORMIT
Con la presente Oregon Scientific dichiara che questo
Orologio con proiezione RF e animata RM818P
conforme ai requisiti essenziali ed alle altre disposizioni
pertinenti stabilite dalla direttiva 1999/5/CE.
Una copia firmata e datata della Dichiarazione di
Conformit disponibile, su richiesta, tramite il servizio
clienti della Oregon Scientific.
PAESI CONFORMI ALLA DIRETTIVA R&TTE
Tutti i Paesi Europei,Svizzera CH
e Norvegia N
1
2
3
14
5
6
WEAK SIGNAL
STRONG SIGNAL
-
 1
1

Oregon RM818P Manuale utente
- Categoria
- Sveglie
- Tipo
- Manuale utente
- Questo manuale è adatto anche per
in altre lingue
- English: Oregon RM818P User manual
Documenti correlati
Altri documenti
-
 Oregon Scientific BARM969P / BARM969PA Manuale utente
-
 Oregon Scientific RM998PS / RM998PG Manuale utente
-
Oregon Scientific RA308PH Manuale utente
-
-
Oregon Scientific RRM313P Manuale utente
-
 Oregon Scientific RM308PX Manuale utente
-
 Oregon Scientific RMR221P Manuale utente
-
 Oregon Scientific RM382P / RM382PA Manuale utente
-
 Oregon Scientific VR101 Manuale utente
-
Oregon Scientific WS902H Manuale utente


