
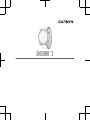
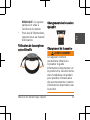
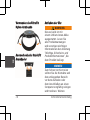
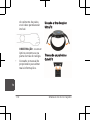
ENDURO™ 2

Quick Start Manual ............................ 4
Manuel de démarrage rapide ......................19
Manuale di avvio rapido .........................40
Schnellstartanleitung ...........................58
Guía de inicio rápido ...........................78
Manual de início rápido .........................96

© 2022 Garmin Ltd. or its subsidiaries
Garmin® and the Garmin logo are trademarks of Garmin Ltd.
or its subsidiaries, registered in the USA and other countries.
Enduro™, Connect IQ™, Firstbeat Analytics™, Garmin Connect™,
Garmin Express™, and Garmin Pay™ are trademarks of Garmin Ltd.
or its subsidiaries. These trademarks may not be used without the
express permission of Garmin.
The BLUETOOTH® word mark and logos are owned by the
Bluetooth SIG, Inc. and any use of such marks by Garmin is under
license. Wi‑Fi® is a registered mark of Wi-Fi Alliance Corporation.
Other trademarks and trade names are those of their respective
owners.
El número de registro COFETEL/IFETEL puede ser revisado en el
manual a través de la siguiente página de internet.

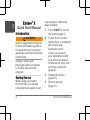
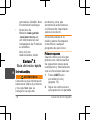
Enduro™ 2
Quick Start Manual
Introduction
WARNING
See the Important Safety and
Product Information guide in
the product box for product
warnings and other important
information.
Always consult your
physician before you begin
or modify any exercise
program.
Getting Started
When using your watch
the first time, you should
complete these tasks to set
it up and get to know the
basic features.
1Press LIGHT to turn on
the watch (page5).
2Follow the on-screen
instructions to complete
the initial setup.
During the initial
setup, you can pair
your smartphone with
your watch to receive
notifications, sync your
activities, and more
(page8).
3Charge the device
(page16).
4Start an activity
(page11).
4 Quick Start Manual
EN

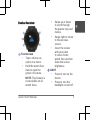
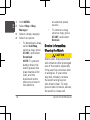
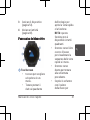
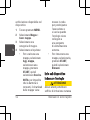
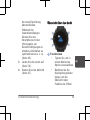
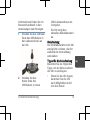
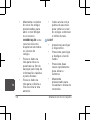
Device Overview
Touchscreen
• Tap to choose an
option in a menu.
• Hold the watch face
data to open the
glance or feature.
NOTE: This feature is
not available on all
watch faces.
• Swipe up or down
to scroll through
the glance loop and
menus.
• Swipe right to return
to the previous
screen.
• Cover the screen
with your palm
to return to the
watch face and turn
down the screen
brightness.
LIGHT
• Press to turn on the
device.
• Press to turn the
backlight on and off.
Quick Start Manual 5
EN

• Quickly press twice
to turn on the
flashlight.
• Hold to view the
controls menu.
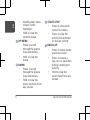
UP·MENU
• Press to scroll
through the glance
loop and menus.
• Hold to view the
menu.
DOWN
• Press to scroll
through the glance
loop and menus.
• Hold to view the
music controls from
any screen.
START·STOP
• Press to choose an
option in a menu.
• Press to view the
activity list and start
or stop an activity.
BACK·LAP
• Press to return to the
previous screen.
• Press to record a
lap, rest, or transition
during a multisport
activity.
• Hold to view the
watch face from any
screen.
6 Quick Start Manual
EN

Enabling and Disabling the
Touchscreen
• To temporarily enable or
disable the touchscreen,
hold DOWN and START.
• To enable or disable
the touchscreen during
general use, activities, or
sleep, hold MENU, select
System > Touch, and
select an option.
Using the Watch
• Hold LIGHT to view the
controls menu.
The controls menu
provides quick access
to frequently used
functions, such as
turning on do not disturb
mode, saving a location,
and turning the watch
off.
• From the watch face,
press UP or DOWN to
scroll through the glance
loop (page7).
• From the watch face,
press START to start an
activity or open an app
(page10).
• Hold MENU to customize
the watch face, adjust
settings, and pair
wireless sensors.
Viewing the Glance Loop
Glances provide quick
access to health data,
Quick Start Manual 7
EN

activity information, built-in
sensors, and more. When you
pair your watch, you can view
data from your phone, such
as notifications, weather, and
calendar events.
1Press UP or DOWN.
The watch scrolls
through the glance loop
and displays summary
data for each glance.
TIP: You can also swipe
to scroll or tap to select
options.
2Press START to view
more information.
3Select an option:
• Press DOWN to
view details about a
glance.
• Press START to view
additional options
and functions for a
glance.
Smart Features
Pairing Your Phone
To use the connected
features on your watch,
you must pair it directly
through the Garmin Connect™
8 Quick Start Manual
EN

app, instead of from the
Bluetooth® settings on your
phone.
1From the app store on
your phone, install and
open the Garmin Connect
app.
2During the initial setup,
select Yes when you are
prompted to pair with
your phone.
3Follow the instructions
in the app to complete
the pairing and setup
process.
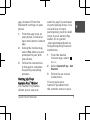
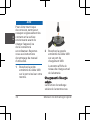
Setting Up Your
GarminPay™ Wallet
The GarminPay feature
allows you to use your
watch to pay for purchases
in participating stores. You
can add one or more
participating credit or debit
cards to your GarminPay
wallet. Go to garmin
.com/garminpay/banks to
find participating financial
institutions.
1From the Garmin
Connect app, select
or .
2Select Garmin Pay > Get
Started.
3Follow the on-screen
instructions.
You can open your
GarminPay wallet from
the controls menu on your
Quick Start Manual 9
EN

watch. See the owner's
manual for more information
on using the GarminPay
feature.
Music
You can download audio
content to your device, so
you can listen when your
smartphone is not nearby.
The Garmin Connect app and
Garmin Express™ application
allow you to download audio
content from a third-party
provider or your computer.
You can use the music
controls to control music
playback on your smartphone
or to play music stored on
your device. To listen to
audio content stored on your
device, you must connect
headphones with Bluetooth
technology.
Connect IQ™ Features
You can add Connect IQ
features to your watch from
Garmin® and other providers
using the Connect IQ app.
You can customize your
watch with watch faces,
device apps, data fields, and
music providers.
Activities and Apps
Your watch can be used
for indoor, outdoor, athletic,
and fitness activities. When
you start an activity, the
watch displays and records
10 Quick Start Manual
EN

sensor data. You can create
custom activities or new
activities based on default
activities. When you finish
your activities, you can save
and share them with the
Garmin Connect community.
Starting an Activity
1From the watch face,
press START.
2The first time you start
an activity, select the
checkbox next to each of
your favorites, and select
Done.
Your favorite activities
appear at the top of
the list, providing quick
access to the ones you
use most. Additional
activities appear in the
extended list.
3Select an activity.
4If the activity requires
GPS, go outside, and wait
while the watch locates
satellites.
5Press START to start the
activity timer.
NOTE: The watch does
not record your activity
data until you start the
activity timer.
6After you complete your
activity, press STOP to
stop the activity timer.
Quick Start Manual 11
EN

7Select Save to save the
activity and review the
activity summary.
Power Modes
Power modes allow you
to quickly adjust system
settings, activity settings,
and GPS settings to extend
battery life during an
activity. For example, power
modes can disconnect paired
sensors and turn on the
UltraTrac GPS option. The
watch displays the hours of
battery life gained with each
power mode. You can also
create custom power modes.
During an activity, hold
MENU, select Power Mode,
and select an option.
Map
Your watch can display
several types of Garmin map
data, including topographical
contours, nearby points of
interest, ski resort maps,
and golf courses. You can
use the Map Manager to
download additional maps or
manage map storage.
Viewing the Map
1Select an option to open
the map:
• Press START, and
select Map to view
the map without
starting an activity.
• Go outside, start
a GPS activity
12 Quick Start Manual
EN

(page11), and press
UP or DOWN to scroll
to the map screen.
2If necessary, wait while
the watch locates
satellites.
3Select an option to pan
and zoom the map:
• To use the
touchscreen, tap the
map, tap and drag
to position the
crosshairs, and press
UP or DOWN to zoom
in or out.
• To use the buttons,
hold MENU, select
Pan/Zoom, and press
UP or DOWN to zoom
in or out.
NOTE: You can press
START to toggle
between panning up
and down, panning
left and right, or
zooming.
4Hold START to select
the point indicated by the
crosshairs.
Managing Maps
When you connect your
watch to a Wi‑Fi® network,
you can download maps
for additional regions. You
can also remove maps to
increase the available device
storage.
Quick Start Manual 13
EN

1Hold MENU.
2Select Map > Map
Manager.
3Select a map category.
4Select an option:
• To download a map,
select Add Map,
select a map, press
START, and select
Download.
NOTE: To prevent
battery drain, the
watch queues the
map download for
later, and the
download starts
when you connect
the watch to
an external power
source.
• To remove a map,
select a map, press
START, and select
Remove.
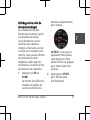
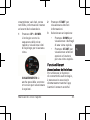
Device Information
Wearing the Watch
CAUTION
Some users may experience
skin irritation after prolonged
use of the watch, especially
if the user has sensitive skin
or allergies. If you notice
any skin irritation, remove
the watch and give your
skin time to heal. To help
prevent skin irritation, ensure
the watch is clean and
14 Quick Start Manual
EN

dry, and do not overtighten
the watch on your wrist.
For more information, go to
garmin.com/fitandcare.
• Wear the watch above
your wrist bone.
NOTE: The watch should
be snug but comfortable.
For more accurate heart
rate readings, the watch
should not shift while
running or exercising.
For pulse oximeter
readings, you should
remain motionless.
NOTE: The optical
sensor is located on the
back of the watch.
• See the owner's manual
for more information.
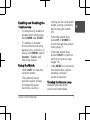
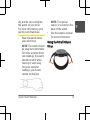
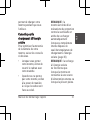
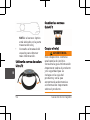
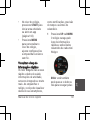
Using the UltraFit Nylon
Strap
Quick Start Manual 15
EN

Changing the QuickFit®
Bands
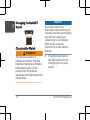
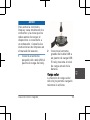
Charging the Watch
WARNING
This device contains a
lithium-ion battery. See the
Important Safety and Product
Information guide in the
product box for product
warnings and other important
information.
NOTICE
To prevent corrosion,
thoroughly clean and dry the
contacts and the surrounding
area before charging or
connecting to a computer.
Refer to the cleaning
instructions in the owner's
manual.
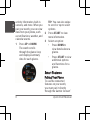
1Plug the small end of
the USB cable into the
charging port on your
watch.
16 Quick Start Manual
EN

2Plug the large end of the
USB cable into a USB
charging port.
The watch displays the
current battery charge
level.
Solar Charging
The solar charging capability
of the watch allows you to
charge your watch while you
use it.
Tips for Solar Charging
To maximize the battery life
of your watch, follow these
tips.
• When you are wearing
the watch, avoid covering
the face with your
sleeve.
• When you are not
wearing the watch, point
the face toward sunlight.
NOTE: The watch
protects itself from
overheating and stops
charging automatically if
the internal temperature
exceeds the solar
charging temperature
threshold (page18).
Quick Start Manual 17
EN

NOTE: The watch does
not solar charge when
connected to an external
power source or when
the battery is full.
Specifications
Operating temperature
range: From -20 to 45°C
(from -4 to 113°F)
Charging temperature range:
USB charging: from 0 to
45°C (from 32 to 113°F)
Solar charging: from 0 to
60°C (from 32 to 140°F)
EU Wireless frequency
(power): 2.4 GHz @ 19.3
dBm maximum
EU SAR values: 1.9 W/kg
torso, 3.9 W/kg limb
Troubleshooting
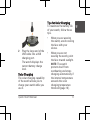
Restarting Your Watch
1Hold LIGHT until the
watch turns off.
2Hold LIGHT to turn on
the watch.
My watch is in the wrong
language
Go
to garmin.com/manuals
/enduro2/language for
more information on
changing your watch
language.
Getting the Owner's
Manual
The owner's manual includes
instructions for using device
18 Quick Start Manual
EN

features and accessing
regulatory information.
Go to garmin.com
/manuals/enduro2.
Getting More Information
You can find more
information about this
product on the Garmin
website.
• Go to support.garmin
.com for additional
manuals, articles, and
software updates.
• Go to buy.garmin.com,
or contact your
Garmin dealer for
information about
optional accessories and
replacement parts.
• Go to www.garmin
.com/ataccuracy for
information about
feature accuracy.
This is not a medical
device.
Enduro™ 2
Manuel de démarrage
rapide
Introduction
AVERTISSEMENT
Consultez le guide
Informations importantes sur
le produit et la sécurité inclus
dans l'emballage du produit
pour prendre connaissance
des avertissements et autres
Manuel de démarrage rapide 19
FR

informations importantes sur
le produit.
Consultez toujours votre
médecin avant de
commencer ou de modifier
tout programme d'exercice
physique.
Mise en route
Lors de la première
utilisation de la montre,
vous devrez effectuer
les opérations suivantes
pour la configurer et
vous familiariser avec les
fonctions de base.
1Appuyez sur le bouton
LIGHT pour allumer la
montre (page21).
2Suivez les instructions à
l'écran pour procéder au
réglage initial.
Pendant la phase de
configuration initiale,
vous pouvez coupler
votre smartphone
avec votre montre
pour recevoir
des notifications,
synchroniser vos
activités et bien plus
encore (page26).
3Chargez l'appareil
(page35).
4Démarrez une activité
(page29).
20 Manuel de démarrage rapide
FR
La pagina si sta caricando...
La pagina si sta caricando...
La pagina si sta caricando...
La pagina si sta caricando...
La pagina si sta caricando...
La pagina si sta caricando...
La pagina si sta caricando...
La pagina si sta caricando...
La pagina si sta caricando...
La pagina si sta caricando...
La pagina si sta caricando...
La pagina si sta caricando...
La pagina si sta caricando...
La pagina si sta caricando...
La pagina si sta caricando...
La pagina si sta caricando...
La pagina si sta caricando...
La pagina si sta caricando...
La pagina si sta caricando...
La pagina si sta caricando...
La pagina si sta caricando...
La pagina si sta caricando...
La pagina si sta caricando...
La pagina si sta caricando...
La pagina si sta caricando...
La pagina si sta caricando...
La pagina si sta caricando...
La pagina si sta caricando...
La pagina si sta caricando...
La pagina si sta caricando...
La pagina si sta caricando...
La pagina si sta caricando...
La pagina si sta caricando...
La pagina si sta caricando...
La pagina si sta caricando...
La pagina si sta caricando...
La pagina si sta caricando...
La pagina si sta caricando...
La pagina si sta caricando...
La pagina si sta caricando...
La pagina si sta caricando...
La pagina si sta caricando...
La pagina si sta caricando...
La pagina si sta caricando...
La pagina si sta caricando...
La pagina si sta caricando...
La pagina si sta caricando...
La pagina si sta caricando...
La pagina si sta caricando...
La pagina si sta caricando...
La pagina si sta caricando...
La pagina si sta caricando...
La pagina si sta caricando...
La pagina si sta caricando...
La pagina si sta caricando...
La pagina si sta caricando...
La pagina si sta caricando...
La pagina si sta caricando...
La pagina si sta caricando...
La pagina si sta caricando...
La pagina si sta caricando...
La pagina si sta caricando...
La pagina si sta caricando...
La pagina si sta caricando...
La pagina si sta caricando...
La pagina si sta caricando...
La pagina si sta caricando...
La pagina si sta caricando...
La pagina si sta caricando...
La pagina si sta caricando...
La pagina si sta caricando...
La pagina si sta caricando...
La pagina si sta caricando...
La pagina si sta caricando...
La pagina si sta caricando...
La pagina si sta caricando...
La pagina si sta caricando...
La pagina si sta caricando...
La pagina si sta caricando...
La pagina si sta caricando...
La pagina si sta caricando...
La pagina si sta caricando...
La pagina si sta caricando...
La pagina si sta caricando...
La pagina si sta caricando...
La pagina si sta caricando...
La pagina si sta caricando...
La pagina si sta caricando...
La pagina si sta caricando...
La pagina si sta caricando...
La pagina si sta caricando...
La pagina si sta caricando...
La pagina si sta caricando...
La pagina si sta caricando...
La pagina si sta caricando...
La pagina si sta caricando...
-
 1
1
-
 2
2
-
 3
3
-
 4
4
-
 5
5
-
 6
6
-
 7
7
-
 8
8
-
 9
9
-
 10
10
-
 11
11
-
 12
12
-
 13
13
-
 14
14
-
 15
15
-
 16
16
-
 17
17
-
 18
18
-
 19
19
-
 20
20
-
 21
21
-
 22
22
-
 23
23
-
 24
24
-
 25
25
-
 26
26
-
 27
27
-
 28
28
-
 29
29
-
 30
30
-
 31
31
-
 32
32
-
 33
33
-
 34
34
-
 35
35
-
 36
36
-
 37
37
-
 38
38
-
 39
39
-
 40
40
-
 41
41
-
 42
42
-
 43
43
-
 44
44
-
 45
45
-
 46
46
-
 47
47
-
 48
48
-
 49
49
-
 50
50
-
 51
51
-
 52
52
-
 53
53
-
 54
54
-
 55
55
-
 56
56
-
 57
57
-
 58
58
-
 59
59
-
 60
60
-
 61
61
-
 62
62
-
 63
63
-
 64
64
-
 65
65
-
 66
66
-
 67
67
-
 68
68
-
 69
69
-
 70
70
-
 71
71
-
 72
72
-
 73
73
-
 74
74
-
 75
75
-
 76
76
-
 77
77
-
 78
78
-
 79
79
-
 80
80
-
 81
81
-
 82
82
-
 83
83
-
 84
84
-
 85
85
-
 86
86
-
 87
87
-
 88
88
-
 89
89
-
 90
90
-
 91
91
-
 92
92
-
 93
93
-
 94
94
-
 95
95
-
 96
96
-
 97
97
-
 98
98
-
 99
99
-
 100
100
-
 101
101
-
 102
102
-
 103
103
-
 104
104
-
 105
105
-
 106
106
-
 107
107
-
 108
108
-
 109
109
-
 110
110
-
 111
111
-
 112
112
-
 113
113
-
 114
114
-
 115
115
-
 116
116


in altre lingue
- français: Garmin Enduro 2 Manuel utilisateur
- español: Garmin Enduro 2 Manual de usuario
- Deutsch: Garmin Enduro 2 Benutzerhandbuch
- português: Garmin Enduro 2 Manual do usuário
Documenti correlati
-
Garmin Instinct Crossover Series Rugged Hybrid Smartwatch Manuale utente
-
Garmin 010-02403-04 Descent MK2S Smartwatch Manuale utente
-
Garmin Vivomove Luxe Guida Rapida
-
Garmin Edge Explore 2 Guida utente
-
Garmin inReach Mini 2 Manuale del proprietario
-
Garmin Marq Aviator Product notices
-
Garmin ISPI Fitness Pulse OX Istruzioni per l'uso