Roland EP-880 Manuale del proprietario
- Categoria
- Pianoforti digitali
- Tipo
- Manuale del proprietario

Owner’s Manual (p. 3)
Bedienungsanleitung (p. 37)
Mode d’emploi (p. 71)
Manuale Utente (p. 105)
Manual del Usuario (p. 139)
Handleiding (p. 173)
Copyright © 2006 ROLAND CORPORATION
All rights reserved. No part of this publication may be reproduced in any form without the
written permission of ROLAND CORPORATION.
ep880.book Page 1 Wednesday, November 15, 2006 7:30 PM
La pagina si sta caricando...
La pagina si sta caricando...

4
Using the unit safely
001
• Before using this unit, make sure to read the instruc-
tions below, and the Owner’s Manual.
.......................................................................................................
002a
• Do not open or perform any internal modifications on
the unit.
.......................................................................................................
003
• Do not attempt to repair the unit, or replace parts
within it (except when this manual provides specific
instructions directing you to do so). Refer all
servicing to your retailer, the nearest Roland Service
Center, or an authorized Roland distributor, as listed
on the “Information” page.
.......................................................................................................
004
• Never use or store the unit in places that are:
• Subject to temperature extremes (e.g., direct
sunlight in an enclosed vehicle, near a heating
duct, on top of heat-generating equipment); or are
• Damp (e.g., baths, washrooms, on wet floors); or
are
• Humid; or are
• Exposed to rain; or are
• Dusty; or are
• Subject to high levels of vibration.
.......................................................................................................
007
• Make sure you always have the unit placed so it is
level and sure to remain stable. Never place it on
stands that could wobble, or on inclined surfaces.
.......................................................................................................
008a
• The unit should be connected to a power supply only
of the type described in the operating instructions, or
as marked on the bottom of unit.
.......................................................................................................
008e
• Use only the supplied adapter. Also, the adapter
must not be used with any other device.
.......................................................................................................
009
• Do not excessively twist or bend the power cord, nor
place heavy objects on it. Doing so can damage the
cord, producing severed elements and short circuits.
Damaged cords are fire and shock hazards!
010
• This unit, either alone or in combination with an
amplifier and headphones or speakers, may be
capable of producing sound levels that could cause
permanent hearing loss. Do not operate for a long
period of time at a high volume level, or at a level
that is uncomfortable. If you experience any hearing
loss or ringing in the ears, you should immediately
stop using the unit, and consult an audiologist.
.......................................................................................................
011
• Do not allow any objects (e.g., flammable material,
coins, pins); or liquids of any kind (water, soft drinks,
etc.) to penetrate the unit.
.......................................................................................................
012a
• Immediately turn the power off, remove the power
cord from the outlet, and request servicing by your
retailer, the nearest Roland Service Center, or an
authorized Roland distributor, as listed on the “Infor-
mation” page when:
• The adapter cord, or the plug has been damaged;
or
• If smoke or unusual odor occurs
• Objects have fallen into, or liquid has been spilled
onto the unit; or
• The unit has been exposed to rain (or otherwise
has become wet); or
• The unit does not appear to operate normally or
exhibits a marked change in performance.
.......................................................................................................
013
Used for instructions intended to alert
the user to the risk of injury or material
damage should the unit be used
improperly.
* Material damage refers to damage or
other adverse effects caused with
respect to the home and all its
furnishings, as well to domestic
animals or pets.
Used for instructions intended to alert
the user to the risk of death or severe
injury should the unit be used
improperly.
The ● symbol alerts the user to things that must be
carried out. The specific thing that must be done is
indicated by the design contained within the circle. In
the case of the symbol at left, it means that the power-
cord plug must be unplugged from the outlet.
The symbol alerts the user to important instructions
or warnings.The specific meaning of the symbol is
determined by the design contained within the
triangle. In the case of the symbol at left, it is used for
general cautions, warnings, or alerts to danger.
The symbol alerts the user to items that must never
be carried out (are forbidden). The specific thing that
must not be done is indicated by the design contained
within the circle. In the case of the symbol at left, it
means that the unit must never be disassembled.
ep880.book Page 4 Wednesday, November 15, 2006 7:30 PM

5
ENGLISH
ENGLISH
ENGLISH ENGLISH ENGLISH ENGLISH
• In households with small children, an adult should
provide supervision until the child is capable of
following all the rules essential for the safe operation
of the unit.
.......................................................................................................
014
• Protect the unit from strong impact.
(Do not drop it!)
015
• Do not force the unit’s adapter to share an outlet with
an unreasonable number of other devices. Be
especially careful when using extension cords—the
total power used by all devices you have connected
to the extension cord’s outlet must never exceed the
power rating (watts/amperes) for the extension cord.
Excessive loads can cause the insulation on the cord
to heat up and eventually melt through.
.......................................................................................................
016
• Before using the unit in a foreign country, consult
with your retailer, the nearest Roland Service Center,
or an authorized Roland distributor, as listed on the
“Information” page.
.......................................................................................................
026
• Do not put anything that contains water (e.g., flower
vases) on this unit. Also, avoid the use of insecticides,
perfumes, alcohol, nail polish, spray cans, etc., near
the unit. Swiftly wipe away any liquid that spills on
the unit using a dry, soft cloth.
101a
• The unit should be located so that its location or
position does not interfere with its proper venti-
lation.
.......................................................................................................
102b
• Always grasp only the plug on the adapter cord
when plugging into, or unplugging from, an outlet or
this unit.
.......................................................................................................
103a
• At regular intervals, you should unplug the power
plug and clean it by using a dry cloth to wipe all dust
and other accumulations away from its prongs. Also,
disconnect the power plug from the power outlet
whenever the unit is to remain unused for an
extended period of time. Any accumulation of dust
between the power plug and the power outlet can
result in poor insulation and lead to fire.
.......................................................................................................
104
• Try to prevent cords and cables from becoming
entangled. Also, all cords and cables should be
placed so they are out of the reach of children.
.......................................................................................................
106
• Never climb on top of, nor place heavy objects on the
unit.
.......................................................................................................
107b
• Never handle the adapter cord or its plugs with wet
hands when plugging into, or unplugging from, an
outlet or this unit.
.......................................................................................................
108d: Selection
• If you need to move the instrument, take note of the
precautions listed below. At least two persons are
required to safely lift and move the unit. It should be
handled carefully, all the while keeping it level. Make
sure to have a firm grip, to protect yourself from
injury and the instrument from damage.
• 1Disconnect the adapter cord.
• Disconnect all cords coming from external devices.
• Remove the music stand.
.......................................................................................................
109a
• Before cleaning the unit, turn off the power and
unplug the power cord from the outlet (p. 10).
.......................................................................................................
110a
• Whenever you suspect the possibility of lightning in
your area, pull the plug on the adapter cord out of the
outlet.
.......................................................................................................
118c
• Keep any wing nut you may remove and the
included screws of stand in a safe place out of
children’s reach, so there is no chance of them being
swallowed accidentally.
ep880.book Page 5 Wednesday, November 15, 2006 7:30 PM
La pagina si sta caricando...
La pagina si sta caricando...
La pagina si sta caricando...
La pagina si sta caricando...
La pagina si sta caricando...
La pagina si sta caricando...
La pagina si sta caricando...

13
ENGLISH
ENGLISH
ENGLISH ENGLISH ENGLISH ENGLISH
Listening to the Demo
Songs
You can listen to various demo songs, including those
demonstrating the piano and other tones, as well as the
function applied to the piano tones.
Playing Back the Tone Demo Songs
1.
Press the [DEMO] button.
The button’s indicator flashes, and playback of the
tone demo songs starts.
When playback of the last song is finished, playback
then returns to the first song.
When you press any of the tone buttons, or the [TWIN
PIANO] button, or the [SPLIT] button while the
[DEMO] button is flashing, the demo song
corresponding to that button is played.
Stopping the Tone Demo Songs
2.
Press the [DEMO] button.
The [DEMO] button’s indicator goes off, and the demo
quits.
Button Demo content
[PIANO] Piano tone demo songs
[E. PIANO] E. Piano tone and Vibraphone
tone demo songs
[HARPSICHORD] Harpsichord tone demo songs
[ORGAN] Organ tone demo songs
[STRINGS] Strings tone and Choir tone demo
songs
[SPLIT] Demo songs using the Split
function (p. 18)
[TWIN PIANO] Demo songs using the Twin Piano
function (p. 16)
No data for the music that is played will be output
from MIDI OUT.
All demosongs composed by Adrian Scott.
Copyright ©2006 Roland Corporation
NOTE
ep880.book Page 13 Wednesday, November 15, 2006 7:30 PM
La pagina si sta caricando...
La pagina si sta caricando...
La pagina si sta caricando...
La pagina si sta caricando...
La pagina si sta caricando...
La pagina si sta caricando...
La pagina si sta caricando...
La pagina si sta caricando...
La pagina si sta caricando...
La pagina si sta caricando...
La pagina si sta caricando...
La pagina si sta caricando...
La pagina si sta caricando...
La pagina si sta caricando...
La pagina si sta caricando...
La pagina si sta caricando...
La pagina si sta caricando...
La pagina si sta caricando...
La pagina si sta caricando...
La pagina si sta caricando...
La pagina si sta caricando...

35
ENGLISH
ENGLISH
ENGLISH ENGLISH ENGLISH ENGLISH
Easy Operation List
No. You want to Buttons Page
Press the [SPLIT] and [TWIN PIANO] buttons simultaneously, and press the [❍] button.
A
Master Tuning [SPLIT]+ [TWIN PIANO] → [PIANO] p. 27
B
Selecting a temperament
Specifying the keynote
[SPLIT]+ [TWIN PIANO] → [E. PIANO] → [E. PIANO] + key p. 27
C
Stretch tuning [SPLIT]+ [TWIN PIANO] → [HARPSICHORD] p. 28
D
Applying the damper pedal to
the left-hand keyboard area
[
SPLIT
]+ [
TWIN PIANO
] → [ORGAN] p. 28
E
MIDI send channel settings [
SPLIT
]+ [
TWIN PIANO
] → [STRINGS] p. 31
F
Local Control [
SPLIT
]+ [TWIN PIANO] → [VARIATION] p. 31
G
Song Backup [
SPLIT
]+ [TWIN PIANO] → [SONG/TEMPO] p. 25
H
Saving the Master Tune setting [
SPLIT
]+ [TWIN PIANO] → [METRONOME/COUNT IN] p. 29
I
Transmitting a recorded
performance
[
SPLIT
]+ [TWIN PIANO] → [PLAY] p. 32
J
V-LINK [
SPLIT
]+ [TWIN PIANO] → [RIGHT] p. 29
K
Depth of the Reverb effect [REVERB] + [-] [+] p. 15
L
Depth of the Chorus effect [CHORUS] + [-] [+] p. 15
M
Dual Balance [TRANSPOSE] + [
SPLIT
] → [-] [+] p. 17
K
L
Damper pedal’s resonance level [REVERB] + [CHORUS] + [-] [+] p. 26
N
Beat of metronome [SONG/TEMPO] + [-] [+] p. 19
O
Metronome volume [METRONOME/COUNT IN] + [-] [+] p. 19
Hold down the [SPLIT] or [TRANSPOSE] button and press the key.
Split Point [
SPLIT
] + key p. 18
Key Transpose [TRANSPOSE] + key p. 16
ABC DE F I JGH
KL M NO
ep880.book Page 35 Wednesday, November 15, 2006 7:30 PM

36
Main Specifications
* In the interest of product improvement, the specifications and/or appearance of this unit are subject to change without prior notice.
Keyboard
Keyboard 88 keys, weighted hammer action
Touch Sensitivity Preset 4 levels
Keyboard Modes Whole, Dual (volume balance adjustable), Split (split point adjustable), Twin Piano
Sound Generator
Max. Polyphony 64 voices
Tones 15 tones in 5 groups
Temperament 7 types, tonic selectable
Stretched Tuning 2 types
Master Tuning 415.3 Hz~466.2 Hz (adjustable in increments of 0.1 Hz)
Transpose Key Transpose (–6~+5 in semitones)
Effects Reverb (8 levels), Chorus (8 levels), Damper Resonance (for Piano only, 8 levels)
Metronome
Beat 2/2, 0/4, 2/4, 3/4, 4/4, 5/4, 6/4, 7/4, 3/8, 6/8, 9/8, 12/8
Volume 8 levels
Recorder
Tracks 2 tracks
Song 1 song
Note Storage Approx. 5000 notes
Tempo Quarter note = 20~250
Resolution 96 ticks per quarter note
Control Play/Stop, Rec, Tempo, All Song Play, Track Select, Song Backup
Preset Songs 66 songs + 13 Tone demo songs
Others
Rated Power Output 10W x 2, Digital Bass Enhancer
Speakers 10 cm x2, bass-reflex system
Display 7 segments, 3 characters (LED)
Headphone indicator
Control Volume, Brilliance (3 levels)
Other Functions Panel Lock, Tone Lock, Song Backup
Connectors OUTPUT jacks (L/Mono, R), Headphones jack x 2 (Stereo), MIDI IN connector, MIDI OUT connector,
HOLD jack, SOFT/HOLD 2 jack
Power Supply PSB-4U adapter
Power Consumption 30W
Dimensions 1,312 (W) x 389 (D) x 140 (H) mm
Weight 19.5kg
Accessories Owner’s Manual, AC/DC adapter, DP-8 pedal, Music Rest
ep880.book Page 36 Wednesday, November 15, 2006 7:30 PM
La pagina si sta caricando...

38
Hinweise für eine sichere Handhabung
001
• Lesen Sie sich vor dem Einsatz dieses Produkts alle
Hinweise dieser Seite sowie den Rest dieser Bedie-
nungsanleitung durch.
.......................................................................................................
002a
•Öffnen Sie das Instrument niemals und nehmen Sie
keine Modifikationen vor.
.......................................................................................................
003
• Versuchen Sie niemals, das Gerät zu öffnen oder
selbst defekte Teile zu erneuern (es sei denn, die
Bedienungsanleitung enthält ausdrückliche Anwei-
sungen). Überlassen Sie alle Wartungs- und Repara-
turarbeiten Ihrem Roland-Händler, einer
qualifizierten Kundendienststelle oder dem offiziellen
Roland-Vertrieb (siehe die Adressen auf der “Information”-
Seite).
.......................................................................................................
004
• Verwenden bzw. lagern Sie dieses Gerät niemals an
folgenden Orten:
• Orte, die extremen Temperaturen ausgesetzt sind
(z.B. in der prallen Sonne, in einem geschlossenen
Fahrzeug, in der Nähe eines Heizkörpers, Herdes
usw.);
• Feuchte Orte (Bad, Waschküche, nasser Fußboden
usw.);
• Nasse Orte;
• Draußen im Regen;
• Staubige Orte;
• Orte, die starken Vibrationen ausgesetzt sind.
.......................................................................................................
007
• Stellen Sie das Produkt immer auf eine ebene und
stabile Oberfläche. Verwenden Sie niemals ein
wackliges Stativ bzw. einen Ständer, auf dem es
geneigt aufgestellt würde.
.......................................................................................................
008a
• Schließen Sie dieses Produkt nur an eine Steckdose
an, die den Angaben in dieser Bedienungsanleitung
bzw. auf dem Typenschild entspricht.
.......................................................................................................
008e
• Verwenden Sie ausschließlich das beiliegende
Netzteil. Umgekehrt eignet sich das Netzkabel nicht
für andere Geräte.
.......................................................................................................
009
• Beschädigen Sie niemals das Netzkabel und stellen
Sie keine schweren Gegenstände darauf. Verlegen Sie
es so, dass es weder gequetscht, noch anderweitig
abgeklemmt wird. Bei Verwendung eines beschädigten
Kabels besteht Stromschlag- bzw. Brandgefahr.
010
• Dieses Produkt kann entweder von sich aus oder im
Zusammenspiel mit einem Verstärker oder
Kopfhörer einen Schallpegel erzeugen, der zu einem
permanenten Hörschaden führen kann. Verwenden
Sie es niemals über einen längeren Zeitraum bei
hohem Schallpegel. Wenden Sie sich bei Verdacht auf
Gehörverlust oder andere Beschwerden sofort an
einen Ohrenarzt.
.......................................................................................................
011
• Achten Sie darauf, dass niemals Fremdkörper
(brennbare Stoffe, Münzen, Büroklammern usw.)
oder Flüssigkeiten (Wasser, Getränke usw.) in das
Geräteinnere gelangen.
.......................................................................................................
012a
• Schalten Sie das Produkt sofort aus, lösen Sie den
Netzanschluss und wenden Sie sich an Ihren Roland-
Händler oder den Vertrieb (siehe die “Information”-
Seite), wenn:
• Das Netzteil oder sein Kabel beschädigt wurde;
• Rauch aus dem Gerät kommt bzw. wenn es
verbrannt riecht;.
• Fremdkörper oder Flüssigkeiten ins Geräteinnere
gelangt sind;
• Das Gerät im Regen gestanden hat (oder nass
geworden ist);
• Sich das Gerät nicht erwartungsgemäß verhält oder in
seiner Leistung merklich nachgelassen hat.
.......................................................................................................
Weist auf Verletzungsgefahr oder mögliche
Sachschäden hin, die sich aus einer unsach-
gemäßen Bedienung ergeben können.
* Mit "Sachschäden" sind hier Schäden an
den Möbeln oder Verletzungen von
Haustieren gemeint.
Dieses Symbol signalisiert Dinge, welche
den Anwender bei unsachgemäßer Behand-
lung auf die Gefahr schwerer Verletzungen
(eventuell mit Todesfolge) hinweisen.
Das ● Symbol bezeichnet Dinge, die Sie unbedingt
ausführen müssen. Auch hier richtet sich die genaue Bedeu-
tung nach dem Symbol in dem schwarzen Kreis. Das hier ge-
zeigte Symbol bedeutet beispielsweise, daß der Netzanschluß
gelöst werden muß.
Das Symbol weist auf wichtige Instruktionen oder War-
nungen hin. Die genaue Bedeutung des Symbols richtet sich
nach dem Zeichen in dem Dreieck. Das hier gezeigte Symbol
bedeutet beispielsweise, daß es sich um einen allgemeinen
Hinweis auf mögliche Gefahren handelt.
Das Symbol verweist auf Handlungen hin, die Sie niemals
ausführen dürfen (welche verboten sind). Was genau ver-
boten ist, können Sie an dem Symbol in dem Kreis ablesen.
Das hier gezeigte Symbol bedeutet beispielsweise, daß das
Gehäuse nicht geöffnet werden darf.
MASSNAHMEN FÜR DIE VERMEIDUNG VON BRÄNDEN, STROMSCHLÄGEN UND VERLETZUNGEN
BITTE FOLGENDE PUNKTE BEACHTEN
Über die WARNUNG und VORSICHT Hinweise Über die Symbole
WARNUNG
VORSICHT
WARNUNG
WARNUNG
ep880.book Page 38 Wednesday, November 15, 2006 7:30 PM

39
DEUTSCH
DEUTSCH
DEUTSCH DEUTSCH DEUTSCH DEUTSCH
013
• In Familien mit kleinen Kindern müssen die Eltern
darauf achten, dass die Kinder das Gerät erst dann
alleine bedienen, wenn sie mit allen wichtigen Bedie-
nungsverfahren vertraut sind.
.......................................................................................................
014
• Setzen Sie das Gerät niemals schweren
Erschütterungen aus.
(Lassen Sie es niemals fallen!)
015
• Schließen Sie das Netzteil niemals an einen Strom-
kreis an, der bereits mehrere andere Geräte speist.
Seien Sie besonders vorsichtig mit Verlängerungs-
kabeln: die Gesamtleistungsaufnahme aller daran
angeschlossenen Geräte darf niemals größer sein als
die Angaben auf dem Kabel, weil sonst die Adern
schmelzen, was zu Kurzschlüssen führt.
.......................................................................................................
016
• Vor dem Einsatz dieses Produkts im Ausland
wenden Sie sich mit eventuellen Fragen bezüglich
der Stromversorgung bitte an Ihren Händler oder
den Vertrieb (siehe die “Information”-Seite).
.......................................................................................................
026
• Stellen Sie niemals Flüssigkeitsbehälter (Vasen usw.)
auf das Gerät. Vermeiden Sie außerdem die
Verwendung von Insektensprays, Parfüm, Alkohol,
Nagellack, Spraydosen usw. in unmittelbarer Nähe
des Geräts. Falls das Gehäuse trotzdem Spritzer abbekommt,
müssen Sie diese sofort wegwischen.
101a
• Das Gerät und Netzkabel müssen immer so aufge-
stellt bzw. verlegt werden, dass eine ausreichende
Lüftung gewährleistet ist.
.......................................................................................................
102b
• Ziehen Sie beim Lösen des Netzanschlusses immer
am Stecker des Netzteils und niemals am Kabel, um
das Reißen der Adern zu vermeiden.
.......................................................................................................
103a
• Lösen Sie den Netzstecker in regelmäßigen
Abständen und reinigen Sie ihn mit einem trockenen
Tuch, um die Stifte von Staub und anderem Schmutz
zu befreien. Außerdem sollten Sie den Netzanschluss
lösen, wenn Sie das Gerät längere Zeit nicht
verwenden möchten. Bedenken Sie, dass Staub
zwischen dem Netzstecker und der Anschlussbuchse
zu einer ungenügenden Isolierung führen und einen Brand
verursachen kann.
.......................................................................................................
104
• Netz- und Signalkabel sollten niemals miteinander
verdreht werden. Verlegen Sie alle Kabel außerdem
immer außerhalb der Reichweite von Kindern.
.......................................................................................................
106
• Setzen Sie sich niemals auf das Gerät und stellen Sie
keine schweren Gegenstände darauf.
.......................................................................................................
107b
• Fassen Sie das Netzteil und die übrigen Kabel
niemals mit feuchten oder nassen Händen an.
.......................................................................................................
108d: Selection
• Beachten Sie beim Transport des Gerätes folgende
Hinweise. Am besten bitten Sie jemanden, Ihnen
beim Tragen des Produkts zu helfen. Halten Sie das
Instrument waagerecht und transportieren Sie es mit
äußerster Vorsicht. Halten Sie das Instrument beim
Transport gut fest, um Verletzungen und Schäden zu
vermeiden.
• Lösen Sie den Netzanschluss des Netzteils.
• Lösen Sie die Kabel aller externen Geräte.
• Entnehmen Sie den Notenständer.
.......................................................................................................
109a
• Schalten Sie das Instrument vor dem Reinigen aus
und lösen Sie den Netzanschluss (S. 44).
.......................................................................................................
110a
• Im Falle eines Gewitters lösen Sie am besten den
Netzanschluss des Netzteils.
.......................................................................................................
118c
• Wenn Sie Schrauben oder Muttern des Ständers
lösen, müssen Sie sie an einem sicheren Ort –stets
außerhalb der Reichweite von Kindern– verwahren,
damit niemand sie verlegt bzw. verschluckt.
WARNUNG
VORSICHT
ep880.book Page 39 Wednesday, November 15, 2006 7:30 PM
La pagina si sta caricando...
La pagina si sta caricando...
La pagina si sta caricando...
La pagina si sta caricando...
La pagina si sta caricando...
La pagina si sta caricando...
La pagina si sta caricando...
La pagina si sta caricando...
La pagina si sta caricando...
La pagina si sta caricando...
La pagina si sta caricando...
La pagina si sta caricando...
La pagina si sta caricando...
La pagina si sta caricando...
La pagina si sta caricando...
La pagina si sta caricando...
La pagina si sta caricando...
La pagina si sta caricando...
La pagina si sta caricando...
La pagina si sta caricando...
La pagina si sta caricando...
La pagina si sta caricando...
La pagina si sta caricando...
La pagina si sta caricando...
La pagina si sta caricando...
La pagina si sta caricando...
La pagina si sta caricando...
La pagina si sta caricando...
La pagina si sta caricando...

69
DEUTSCH
DEUTSCH
DEUTSCH DEUTSCH DEUTSCH DEUTSCH
Übersicht der internen Funktionen
Nr. Sie möchten… Taster Seite
Den [SPLIT]- und [TWIN PIANO]-Taster gedrückt halten, während Sie den [❍]-Taster betätigen.
A
Gesamtstimmung [SPLIT]+ [TWIN PIANO] → [PIANO] S. 61
B
Anwahl eines Stimmungssys-
tems
Angabe des Grundtons
[SPLIT]+ [TWIN PIANO] → [E. PIANO] → [E. PIANO] + Taste S. 61
C
Gedehnte Stimmung [SPLIT]+ [TWIN PIANO] → [HARPSICHORD] S. 62
D
Zuordnen des Dämpferpedals [
SPLIT
]+ [
TWIN PIANO
] → [ORGAN] S. 62
E
Einstellen des MIDI-Kanals [
SPLIT
]+ [
TWIN PIANO
] → [STRINGS] S. 65
F
Local Control [
SPLIT
]+ [TWIN PIANO] → [VARIATION] S. 65
G
Song-Speicherung [
SPLIT
]+ [TWIN PIANO] → [SONG/TEMPO] S. 59
H
Speichern der Gesamtstimmung [
SPLIT
]+ [TWIN PIANO] → [METRONOME/COUNT IN] S. 63
I
Ausgabe der Recorder-Daten [
SPLIT
]+ [TWIN PIANO] → [PLAY] S. 66
J
V-LINK [
SPLIT
]+ [TWIN PIANO] → [RIGHT] S. 63
K
Hallanteil [REVERB] + [-] [+] S. 49
L
Chorus-Anteil [CHORUS] + [-] [+] S. 49
M
Dual-Balance [TRANSPOSE] + [
SPLIT
] → [-] [+] S. 51
K
L
Lautstärke der
Dämpferresonanz
[REVERB] + [CHORUS] + [-] [+] S. 60
N
Taktart des Metronoms [SONG/TEMPO] + [-] [+] S. 53
O
Metronomlautstärke [METRONOME/COUNT IN] + [-] [+] S. 53
Den [SPLIT]- oder [TRANSPOSE]-Taster gedrückt halten, während Sie die gewünschte Note auf
der Tastatur spielen.
Splitpunkt [
SPLIT
] + Klaviaturtaste S. 52
Transposition [TRANSPOSE] + Klaviaturtaste S. 50
ABC DE F I JGH
KL M NO
ep880.book Page 69 Wednesday, November 15, 2006 7:30 PM

70
Technische Daten
* Änderungen der technischen Daten und des Designs ohne vorherige Ankündigung vorbehalten. Für Druckfehler wird keine Haftung
übernommen.
Tastatur
Tastatur 88er-Hammertastatur, gewichtet
Anschlagdynamik Einstellbar in 4 Stufen
Tastaturmodi Whole, Dual (einstellbare Lautstärkebalance), Split (Splitpunkt einstellbar), Twin Piano
Klangerzeugung
Polyphonie 64 Stimmen
Klangfarben 15 Klänge, 5 Gruppen
Stimmungssystem 7 Typen, Grundton einstellbar
Gedehnte Stimmung 2 Typen
Gesamtstimmung 415.3Hz~466.2Hz (regelbar in 0.1Hz-Schritten)
Transposition –6~+5 Halbtöne
Effekte Reverb/Hall (8 Stufen), Chorus (8 Stufen), Saitenresonanz-Simulation (nur für Piano, 8 Stufen)
Metronom
Taktart 2/2, 0/4, 2/4, 3/4, 4/4, 5/4, 6/4, 7/4, 3/8, 6/8, 9/8, 12/8
Lautstärke 8 Stufen
Recorder
Spuren 2 Spuren
Song 1 Song
Notenkapazität ±5000 Noten
Tempo Viertelnote= 20~250
Auflösung 96 Schritte je Viertelnote
Steuerung Play/Stop, Rec, Tempo, Wiedergabe aller Stücke, Spuranwahl, Song-Speicherung
Interne Stücke 66 Stücke + 13 Klangdemos
Andere
Ausgangsleistung 10W x 2, Digital Bass Enhancer
Lautsprecher 10cm x2, Bassreflex-System
Display 7 Segmente, 3 Zeichen (LED)
Kopfhörerdiode
Steuerung Volume, Brilliance (3 Stufen)
Andere Funktionen Verriegeln der Bedienelemente (auch für Klänge), Song-Speicherung
Anschlüsse OUTPUT-Buchsen (L/Mono, R), Kopfhörerbuchse x2 (Stereo), MIDI IN-Buchse, MIDI OUT-Buchse,
HOLD-Buchse, SOFT/HOLD 2-Buchse
Stromversorgung PSB-4U Netzteil
Leistungsaufnahme 30W
Abmessungen 1312 (B) x 389 (T) x 140 (H) mm
Gewicht 19,5kg
Lieferumfang Bedienungsanleitung, AC/DC-Netzteil, DP-8 Pedal, Notenständer
ep880.book Page 70 Wednesday, November 15, 2006 7:30 PM
La pagina si sta caricando...

72
Consignes de sécurité
001
• Avant d’utiliser ce produit, lisez les instructions don-
nées ci-dessous et dans le mode d’emploi.
.......................................................................................................
002a
• N’ouvrez (et ne modifiez) pas le produit.
003
• N’essayez pas de réparer ce produit ou d’en rempla-
cer des éléments (sauf si le mode d’emploi vous
donne des instructions spécifiques pour le faire).
Confiez tout entretien ou réparation à votre reven-
deur, au service de maintenance Roland le plus pro-
che ou à un distributeur Roland agréé (vous en trouverez la
liste à la page “Information”).
.......................................................................................................
004
• Ne placez jamais ce produit dans des endroits:
• soumis à des températures extrêmes (en plein
soleil dans un véhicule fermé, à proximité d’une
conduite de chauffage, au-dessus de matériel
générateur de chaleur),
• humides (salles de bain, toilettes, sur des sols ou
supports mouillés),
•à l’humidité ambiante élevée,
• exposés aux précipitations,
• poussiéreux,
• soumis à de fortes vibrations.
.......................................................................................................
007
• Veillez à placer ce produit sur une surface plane afin
de lui assurer une stabilité optimale. Évitez les sup-
ports qui vacillent ou les surfaces inclinées.
.......................................................................................................
008a
• Branchez l’appareil à une prise de courant répondant
aux spécifications énoncées dans le mode d’emploi
ou imprimées sur l’appareil.
.......................................................................................................
008e
• Utilisez uniquement l’adaptateur fourni. N’utilisez
jamais l’adaptateur fourni avec un autre appareil.
.......................................................................................................
009
• Evitez de tordre ou de plier excessivement le cordon
d’alimentation ainsi que de placer des objets lourds
dessus. Vous risquez de l’endommager, ce qui provo-
querait des courts-circuits et couperait l’alimentation
de certains éléments. Un cordon endommagé peut
provoquer une électrocution ou un incendie!
010
• Cet appareil, utilisé seul ou avec un amplificateur et
des enceintes ou un casque d’écoute, est en mesure
de produire des signaux à des niveaux qui pourraient
endommager l’ouïe de façon irréversible. Ne l’utilisez
donc pas trop longtemps à volume élevé ou inconfor-
table. Si vous pensez avoir endommagé votre ouïe ou
si vos oreilles bourdonnent, arrêtez immédiatement
l’écoute et consultez un spécialiste.
.......................................................................................................
011
•Évitez que des objets (du matériel inflammable, de la
monnaie, des trombones) ou des liquides (eau, limo-
nades, etc.) ne pénètrent à l’intérieur de ce produit.
.......................................................................................................
012a
• Coupez immédiatement l’alimentation de l’appareil,
débranchez le cordon d’alimentation de la prise et
ramenez l’appareil chez votre revendeur, au service
après-vente Roland le plus proche ou chez un distri-
buteur Roland agréé (vous en trouverez la liste à la
page “Information”) quand:
• le cordon ou la fiche est endommagée,
• il y a de la fumée ou une odeur inhabituelle,
• des objets ou du liquide ont pénétré dans le pro-
duit,
• le produit a été exposé à la pluie (ou a été mouillé
d’une autre façon) ou
• le produit semble ne pas fonctionner normalement
ou affiche un changement de performance marqué.
.......................................................................................................
013
OBSERVEZ TOUJOURS CE QUI SUIT
Sert aux instructions destinées à alerter
l'utilisateur d'un risque de blessure ou
de dommage matériel en cas d'emploi
incorrect de l'unité.
* Les dommages matériels se réfèrent
aux dommages ou autres effets
négatifs causés au lieu d'utilisation et
à tous ses éléments, ainsi qu'aux
animaux domestiques.
Sert aux instructions destinées à alerter
l'utilisateur d'un risque mortel ou de
blessure grave en cas d'utilisation
incorrecte de l'unité.
Le symbole ● alerte l'utilisateur de ce qui doit être
fait. Ce qui doit être fait est indiqué par l'icône
contenue dans le cercle. Dans le cas du symbole de
gauche, cela signifie que le cordon d'alimentation doit
être débranché de la prise murale.
AVERTISSEMENT
PRUDENCE
Le symbole alerte l'utilisateur d'instructions importantes
ou de mise en garde. La signification du symbole est
déterminée par ce que contient le triangle. Dans le cas du
symbole de gauche, il sert pour des précautions générales,
des mises en garde ou alertes vis-à-vis d'un danger.
Le symbole prévient l'utilisateur des interdits. Ce
qui ne doit spécifiquement pas être fait est indiqué
dans le cercle. Dans le cas du symbole de gauche, cela
signifie que l'unité ne doit jamais être démontée.
INSTRUCTIONS POUR LA PREVENTION D'INCENDIE, CHOC ÉLECTRIQUE OU BLESSURE
A propos des symboles Avertissement et Précaution
A propos des symboles
AVERTISSEMENT
AVERTISSEMENT
ep880.book Page 72 Wednesday, November 15, 2006 7:30 PM

73
FRANÇAIS
FRANÇAIS
FRANÇAIS FRANÇAIS FRANÇAIS
FRANÇAIS
• Avec de jeunes enfants, la présence d’un adulte est
indispensable jusqu’à ce que l’enfant puisse respecter
les précautions nécessaires au maniement de ce pro-
duit.
.......................................................................................................
014
• Protégez ce produit contre tout coup ou impact
important. (Ne le laissez pas tomber!)
015
• Ne faites pas partager à l’adaptateur une prise
murale avec un nombre excessif d’autres appareils.
Soyez particulièrement vigilant avec des multiprises.
La puissance totale utilisée par tous les appareils con-
nectés ne doit jamais excéder la puissance (watts/
ampères) de la rallonge. Une charge excessive peut
augmenter la température du câble et, éventuelle-
ment, entraîner une fusion.
.......................................................................................................
016
• Avant d’utiliser ce produit dans un pays étranger,
contactez votre revendeur, le service de maintenance
Roland le plus proche ou un distributeur Roland
agréé (vous en trouverez la liste à la page “Information”).
.......................................................................................................
026
• Ne placez aucun récipient contenant de l’eau (un
vase, par exemple) sur ce produit. Évitez en outre
l’usage d’insecticides, de parfum, d’alcool, de vernis
à ongles, d’atomiseurs ou de sprays à proximité de ce
produit. Essuyez rapidement tout liquide renversé
sur ce produit avec un chiffon sec et doux.
101a
• Placez ce produit de sorte à lui assurer une ventila-
tion appropriée.
.......................................................................................................
102b
• Saisissez toujours la fiche de l’adaptateur lors du
branchement (débranchement) au secteur ou à
l’unité.
.......................................................................................................
103a
• A intervalles réguliers, débranchez la prise secteur et
frottez-la avec un chiffon sec pour enlever toute la
poussière et autres saletés accumulées sur ses bro-
ches. Si ce produit ne va pas être utilisé durant une
période prolongée, débranchez le cordon d’alimenta-
tion. Toute accumulation de poussière entre la prise
murale et la fiche d’alimentation peut nuire à l’isola-
tion et causer un incendie.
.......................................................................................................
104
•Évitez que les cordons d’alimentation et les câbles ne
s’emmêlent. De plus, tous les cordons et câbles doi-
vent être placés hors de portée des enfants.
.......................................................................................................
106
• Ne montez jamais sur ce produit et évitez d’y
déposer des objets lourds.
.......................................................................................................
107b
• Ne saisissez jamais l’adaptateur ou les fiches avec des
mains humides lorsque vous le branchez ou
débranchez d’une prise murale ou de l’unité.
.......................................................................................................
108d: Selection
• Lorsque vous déplacez l’instrument, veuillez obser-
ver les précautions suivantes. Il faut au moins deux
personnes pour soulever et déplacer l’instrument. Il
doit être manié avec soin et maintenu horizontal.
Veillez à saisir fermement l’instrument afin d’éviter
tout risque de blessures et d’endommagement de
l’instrument en cas de chute.
• Débranchez le cordon de l’adaptateur.
• Débranchez tous les câbles reliant l’instrument à
des appareils périphériques.
• Retirez le pupitre.
.......................................................................................................
109a
• Avant de nettoyer cet appareil, éteignez-le et
débranchez le cordon d’alimentation de la prise sec-
teur (p. 78).
.......................................................................................................
110a
• S’il y a risque d’orage, débranchez le cordon d’ali-
mentation de la prise secteur.
118c
• Conservez les vis éventuellement retirées et les vis
fournies en lieu sûr et hors de portée des enfants,
pour éviter que ces derniers ne les avalent accidentel-
lement.
AVERTISSEMENT
PRUDENCE
ep880.book Page 73 Wednesday, November 15, 2006 7:30 PM
La pagina si sta caricando...
La pagina si sta caricando...
La pagina si sta caricando...
La pagina si sta caricando...
La pagina si sta caricando...
La pagina si sta caricando...
La pagina si sta caricando...
La pagina si sta caricando...
La pagina si sta caricando...
La pagina si sta caricando...
La pagina si sta caricando...
La pagina si sta caricando...
La pagina si sta caricando...
La pagina si sta caricando...
La pagina si sta caricando...
La pagina si sta caricando...
La pagina si sta caricando...
La pagina si sta caricando...
La pagina si sta caricando...
La pagina si sta caricando...
La pagina si sta caricando...
La pagina si sta caricando...
La pagina si sta caricando...
La pagina si sta caricando...
La pagina si sta caricando...
La pagina si sta caricando...
La pagina si sta caricando...
La pagina si sta caricando...
La pagina si sta caricando...

103
FRANÇAIS
FRANÇAIS
FRANÇAIS FRANÇAIS FRANÇAIS
FRANÇAIS
Liste des opérations
No. Opération/paramètre Boutons Page
Appuyez simultanément sur les boutons [SPLIT] et [TWIN PIANO] et appuyez sur le bouton [❍].
A
Diapason [SPLIT]+ [TWIN PIANO] → [PIANO] p. 95
B
Sélection d’une gamme
Sélection de la tonique
[SPLIT]+ [TWIN PIANO] → [E. PIANO] → [E. PIANO] + touche p. 95
C
Accord étiré [SPLIT]+ [TWIN PIANO] → [HARPSICHORD] p. 96
D
Appliquer la pédale forte à la
section gauche du clavier.
[
SPLIT
]+ [
TWIN PIANO
] → [ORGAN] p. 96
E
Canal de transmission MIDI [
SPLIT
]+ [
TWIN PIANO
] → [STRINGS] p. 99
F
Local Control [
SPLIT
]+ [TWIN PIANO] → [VARIATION] p. 99
G
Sauvegarde d’un morceau [
SPLIT
]+ [TWIN PIANO] → [SONG/TEMPO] p. 93
H
Sauvegarde du diapason [
SPLIT
]+ [TWIN PIANO] → [METRONOME/COUNT IN] p. 97
I
Transmission d’un enregistre-
ment
[
SPLIT
]+ [TWIN PIANO] → [PLAY] p. 100
J
V-LINK [
SPLIT
]+ [TWIN PIANO] → [RIGHT] p. 97
K
Intensité de la réverbération [REVERB] + [-] [+] p. 83
L
Intensité du chorus [CHORUS] + [-] [+] p. 83
M
Balance (superposition) [TRANSPOSE] + [
SPLIT
] → [-] [+] p. 85
K
L
Niveau de résonance de la
pédale forte
[REVERB] + [CHORUS] + [-] [+] p. 94
N
Rythme du métronome [SONG/TEMPO] + [-] [+] p. 87
O
Volume du métronome [METRONOME/COUNT IN] + [-] [+] p. 87
Maintenez le bouton [SPLIT] ou [TRANSPOSE] enfoncé et appuyez sur la touche.
Point de partage [
SPLIT
] + touche p. 86
Transposition du clavier [TRANSPOSE] + touche p. 84
ABC DE F I JGH
KL M NO
ep880.book Page 103 Wednesday, November 15, 2006 7:30 PM

104
Caractéristiques principales
* En vue d’améliorer le produit, ses caractéristiques techniques et/ou son aspect peuvent être modifiés sans avis préalable.
Clavier
Clavier 88 touches pondérées à mécanisme à marteaux
Sensibilité au toucher 4 niveaux préprogrammés
Modes clavier Clavier entier, Dual (balance réglable), Split (point de partage réglable), Twin Piano
Générateur de sons
Polyphonie 64 voix
Sons 15 sons dans 5 groupes
Gamme 7 types, tonique sélectionnable
Accord étiré 2 types
Diapason 415.3Hz~466.2Hz (réglable par pas de 0.1Hz)
Transposition Transposition du clavier (–6~+5 demi-tons)
Effets Reverb (8 niveaux), Chorus (8 niveaux), résonance sympathique (pour le son Piano uniquement, 8 niveaux)
Métronome
Métrique 2/2, 0/4, 2/4, 3/4, 4/4, 5/4, 6/4, 7/4, 3/8, 6/8, 9/8, 12/8
Volume 8 niveaux
Enregistreur
Pistes 2 pistes
Morceau 1 morceau
Capacité de mémoire Environ 5000 notes
Tempo Noire= 20~250
Résolution 96 pas par noire
Commandes Play/Stop, REC, tempo, reproduction de tous les morceaux, sélection de piste, sauvegarde de morceaux
Morceaux préprogrammés 66 morceaux + 13 morceaux de démonstration des sons
Divers
Puissance de sortie nomi-
nale
10W x 2, Digital Bass Enhancer
Haut-parleurs 10cm x2, système bass reflex
Ecran 7 segments, 3 caractères (diode)
Témoin de casque
Commandes Volume, Brilliance (3 niveaux)
Autres fonctions Piano uniquement, verrouillage des boutons, sauvegarde de morceaux
Prises Prises OUTPUT (L/Mono, R), Prises casque (jack stéréo) x2, Prise MIDI IN, Prise MIDI OUT, Prise HOLD,
Prise SOFT/HOLD 2
Alimentation Adaptateur PSB-4U
Consommation 30W
Dimensions 1312 (H) x 389 (L) x 140 (P) mm
Poids 19,5kg
Accessoires Mode d’emploi, Adaptateur AC/DC, Pédale DP-8, Pupitre
ep880.book Page 104 Wednesday, November 15, 2006 7:30 PM

Manuale Utente
Grazie, e congratulazioni per la vostra scelta del Pianoforte Digitale Roland ep 880.
Caratteristiche Principali
Suoni di Pianoforte Molto Espressivi e con Ricche Risonanze
Il generatore sonoro, con campionamenti stereofonici di pianoforte, riproduce
realisticamente anche il suono dei martelletti che colpiscono le corde, producendo il
suono di un pianoforte da concerto di alta qualità. La polifonia massima di 64 note
assicura che possiate usare liberamente il pedale senza paura di terminare le note a
disposizione.
Emulazione della Sensazione di un Pianoforte
Questo strumento dispone di una tastiera di altissima qualità.
Varie Funzioni per lo Studio che Vi Aiutano a Sviluppare la vostra
Musicalità
Oltre al metronomo, l’ep 880 dispone di un registratore a due tracce, che vi permette
di svolgere le lezioni di pianoforte in un modo possibile solo sui pianoforti elettronici
.
66 Brani per Pianoforte Incorporati
I brani interni (Song) sono per lo più pezzi classici, e comprendono sia composizioni
adatte per l’ascolto che studiate per le lezioni.
Prima di usare questo strumento, leggete attentamente i capitoli intitolati: “Important safety
instructions” (p. 2), “Usare lo Strumento Senza Rischi” (p. 106), e “Note Importanti” (p. 108).
Questi capitoli contengono informazioni importanti riguardanti l’utilizzo corretto dello
strumento. Inoltre, Per assicurarvi di avere compreso e di usare correttamente tutte le funzioni
dello strumento, dovreste leggere per intero il Manuale Utente. Il manuale, poi, dovrebbe essere
conservato in un luogo sicuro e a portata di mano per una facile consultazione.
Copyright © 2006 ROLAND CORPORATION
Tutti i diritti sono riservati. Nessuna parte di questa pubblicazione può essere
riprodotta in qualsiasi forma senza il permesso scritto di ROLAND CORPORATION
.
ep880.book Page 105 Wednesday, November 15, 2006 7:30 PM

106
Usare lo Strumento Senza Rischi
001
• Prima di usare l’ep 880 assicuratevi di leggere le
seguenti istruzioni ed il Manuale Utente.
....................................................................................................................
002a
• Non aprite né modificate in nessun modo lo
strumento.
....................................................................................................................
003
• Non cercate di riparare l’ep 880 o parti contenute in
esso (fatta eccezione per i casi in cui questo manuale
fornisca istruzioni specifiche in proposito).
Consultate il vostro rivenditore, il Centro Servizi
Roland più vicino o un distributore autorizzato, come
elencato nella pagina “informazioni.”
....................................................................................................................
004
• Non usate né conservate l’ep 880 in luoghi che siano:
• soggetti a temperature estreme (p. es. in una vet-
tura esposta al sole, vicino ad un tubo di riscalda-
mento o sopra un generatore di calore
• bagnati (p. es. bagni, lavanderie o pavimenti
bagnati);
• umidi
• esposti alla pioggia
• polverosi
• soggetti a forti vibrazioni
.......................................................................................................
007
• Assicuratevi
di posizionare sempre lo strumento su
superfici piane e stabili. Non mettetelo su supporti che
potrebbero oscillare o su superfici inclinate
.
....................................................................................................................
008a
• Questo
strumento dovrebbe essere collegato solo ad
una alimentazione del tipo descritto nelle istruzioni
operative o indicate sul fondo dello strumento
.
.......................................................................................................
008e
• Usate solo l’alimentatore fornito. Inoltre non dovreste
usare il cavo di alimentazioni per nessun’altro
strumento.
.......................................................................................................
009
• Non piegate o torcete troppo il cavo dell’alimen-
tatore, e neppure appoggiategli sopra oggetti pesanti.
Così facendo potreste danneggiare il cavo e rischiare
di creare dei corto circuiti. I cavi danneggiati sono pericolosi e
possono generare incendi e scosse elettriche!
010
• Questo strumento, da solo o con un impianto di
amplificazione o cuffie, può produrre un livello
sonoro tale da provocare diminuzioni di udito
permanenti. Non ascoltate per lungo tempo ad un
volume alto o, comunque, un volume non confor-
tevole. Se notate una diminuzione dell’udito o
qualche sibilo nelle orecchie, interrompete subito
l’uso del ep 880 e consultate un otorino.
....................................................................................................................
011
• Do fate entrare nello strumento nessun tipo di
oggetto (p. es. materiali infiammabili, monete, spilli)
né liquidi (acqua, bibite, ecc.).
....................................................................................................................
012a
• Spegnete immediatamente lo strumento, scollegate
l’alimentatore dalla presa di corrente e richiedete
l’intervento di un tecnico dal vostro rivenditore o dal
più vicino Centro Servizi Roland o da un distributore
autorizzato Roland, come indicato nella pagina
“Informazioni,” quando:
• Il cavo di alimentazione o la spina sono danneg-
giati; oppure
• Notate fumo o odori inconsueti; oppure
• Degli oggetti o liquidi sono caduti all’interno dello
strumento; oppure
• Lo strumento è stato esposto alla pioggia (o
comunque si è bagnato); oppure
• Lo strumento sembra non funzionare più normal-
mente o notate un evidente cambiamento nelle
prestazioni
.......................................................................................................
013
ep880.book Page 106 Wednesday, November 15, 2006 7:30 PM

107
ITALIANO
ITALIANO
ITALIANO
ITALIANO
ITALIANOITALIANO
• In famiglie con bambini, un adulto dovrebbe sorve-
gliarli fino a quando non siano capaci di seguire le
procedure essenziale per utilizzare lo strumento in
tutta sicurezza.
....................................................................................................................
014
• Proteggete lo strumento da urti violenti.
(Non fatelo cadere!)
015
• Evitate di condividere la stessa presa di corrente cui è
collegato l’alimentatore dell’ep 880 con troppe
apparecchiature. Ponete particolare attenzione in caso
di utilizzo di una prolunga — la potenza totale usata
da tutti gli apparecchi collegati non dovrà mai
superare il limite massimo (watt/ampere) indicato
per la prolunga. Eccessivi carichi possono provocare
un surriscaldamento eccessivo del cavo con conseguente
pericolo di fusione dell’isolante.
....................................................................................................................
016
• Prima di usare questo strumento all’estero consultate
il vostro rivenditore, il più vicino Centro Servizi
Roland, o un distributore autorizzato Roland, come
elencato nella pagina “Informazioni.”
....................................................................................................................
026
• Non appoggiate niente che contenga acqua (p. es.
vasi di fiori) sullo strumento. Evitate, inoltre di usare
insetticidi, profumi, alcool, smalto per unghie,
bombolette spray, ecc. vicino allo strumento.
Asciugate immediatamente ogni liquido che coli sullo
strumento con un panno morbido e asciutto.
101a
• Questo strumento deve essere posizionato in modo
tale che la sua posizione non interferisca con la
corretta ventilazione.
....................................................................................................................
102b
• Afferrate sempre la spina del cavo dell’alimentatore
quando lo collegate o scollegate dalla presa o dallo
strumento.
....................................................................................................................
103a
• Ad intervalli regolari, dovreste scollegare la spina
dalla presa di corrente e pulirla con un panno
asciutto dalla polvere e da altri accumuli di sporco.
Inoltre, scollegate il cavo dalla presa di corrente
quando lo strumento debba rimanere inutilizzato per
lunghi periodi di tempo. Qualsiasi accumulo di
sporco tra la spina e la presa di corrente potrebbe
portare a scarso isolamento e potrebbe provocare rischio di
incendio.
.......................................................................................................
104
• Evitate di aggrovigliare i cavi. Tutti i cavi inoltre
dovrebbero essere tenuti fuori dalla portata dei
bambini.
....................................................................................................................
106
• Non appoggiate oggetti pesanti e non salite mai sullo
strumento.
....................................................................................................................
107b
• Non maneggiate mai il cavo dell’alimentatore o la
spina con le mani bagnate quando lo collegate o
scollegate dalla presa di corrente o dallo strumento.
....................................................................................................................
108d: Selection
• Nel caso dobbiate spostare il ep 880, accertatevi di
seguire le precauzioni indicate qui di seguito. Per
sollevare e spostare lo strumento in maniera sicura
servono almeno due persone. Mettete molta cura e
tenetelo sempre orizzontale. Assicuratevi inoltre di
afferrarlo in maniera sicura per proteggervi da ferite
e per salvaguardare lo strumento.
• Scollegate il cavo dell’alimentatore.
• Scollegate tutti i cavi di collegamento con altri
dispositivi esterni.
• Togliete il leggio.
....................................................................................................................
109a
• Prima di pulire l’ep 880, spegnetelo e staccate il cavo
dell’alimentatore dalla presa di corrente (p. 112).
....................................................................................................................
110a
• In caso o in previsione di un temporale, staccate il
cavo di alimentazione dell’ep 880 dalla presa di
corrente.
.......................................................................................................
118c
• Conservate in un posto sicuro al di fuori dalla portata
dei bambini i dadi a farfalla e le viti del supporto che
togliete, in modo che non possano ingoiarle acciden-
talmente.
ep880.book Page 107 Wednesday, November 15, 2006 7:30 PM

108
Note Importanti
In aggiunta ai punti esposti nei capitoli “Important
safety instructions” (p. 2) e “Usare lo Strumento Senza
Rischi” (p. 106), leggete ed osservate le seguenti
precauzioni:
Alimentazione
• Non collegate lo strumento alla stessa presa di corrente con
altri apparecchi che siano controllati da un inverter
(frigoriferi, lavatrici, forni a microonde o condizionatori
d’aria), o che contengano un motore. A seconda del modo in
cui viene usato l’apparecchio elettrico, può generarsi del
rumore o provocare malfunzionamenti. Se non è possibile
usare una presa di corrente separata, usate un filtro tra questo
strumento e l’apparecchio che genera il disturbo.
307
• Prima di collegare l’ep 880 ad altri dispositivi, spegnete tutti
gli apparecchi. Preverrete così malfunzionamenti e/o danni
agli altoparlanti o ad altri dispositivi.
308
• Anche se lo schermo e gli indicatori luminosi (LED) sono
spenti quando l’interruttore POWER è spento, questo non
significa che lo strumento sia completamente scollegato dalla
corrente elettrica. Per togliere completamente l’alimentazione,
prima spegnete l’interruttore POWER, poi togliete la spina
dalla presa di corrente. Per questo motivo la presa di corrente
a cui collegate il cavo di alimentazione deve essere di facile e
veloce accessibilità.
Posizionamento
• L’utilizzo dell’ep 880 in prossimità di amplificatori (o di altri
apparecchi che contengano grossi trasformatori) può generare
ronzio. Per risolvere il problema, ruotate lo strumento oppure
allontanatelo il più possibile dalla sorgente dell’interferenza.
352a
• Questo strumento può interferire con apparecchi radio o
televisivi. Non utilizzatelo nelle vicinanze di tali ricevitori.
352b
• Potrebbe crearsi del rumore se usate nelle vicinanze di questo
strumento dei sistemi di comunicazione radio, per esempio
telefoni. Questo rumore potrebbe apparire quando iniziate o
ricevete una telefonata, o durante la conversazione. Se
dovesse capitarvi un problema simile, allontanate l’appar-
ecchio che genera l’interferenza o spegnetelo.
354b
• Non esponete lo strumento alla luce diretta del sole, non
mettetelo vicino a radiatori di calore, non lasciatelo chiuso in
macchina o in altri ambienti soggetti ad alte temperature.
Evitate, inoltre, che sorgenti luminose normalmente utilizzate
vicino allo strumento (lampada per la lettura per esempio) o
faretti, illuminino per lungo tempo la stessa area dello
strumento. Un calore eccessivo può deformare e scolorire lo
strumento.
355b
• Quando spostate lo strumento da un’ambiente ad un altro
dove la temperatura e/o il livello di umidità è molto diverso,
dentro lo strumento possono formarsi delle gocce d’acqua
(condensa). Se provate ad usare lo strumento in queste
condizioni potreste provocare danni e malfunzionamenti,
dovete lasciarlo adattare per alcune ore, fino a che la
condensa non sia completamente evaporata.
356
• Evitare di tenere oggetti in gomma, vinile o materiali simili
sul pianoforte per lungo tempo. Potrebbero scolorire o
danneggiare le finiture.
358
• Non lasciate oggetti appoggiati sulla tastiera. Possono causare
malfunzionamenti, come l’incapacità dei tasti di suonare.
359
• Non attaccate adesivi, decalcomanie o altre cose simili sullo
strumento. Una successiva rimozione potrebbe danneggiare
le finiture esterne.
Manutenzione
• Per la pulizia quotidiana usare un panno soffice e asciutto, o
leggermente umido. Per rimuovere lo sporco più persistente,
usare un panno con un detergente neutro e non abrasivo.
Asciugate poi perfettamente con un panno soffice e asciutto.
402
• Per evitare scolorimenti o deformazioni, non utilizzate mai
benzina alcool o solventi di qualsiasi tipo.
Ulteriori Precauzioni
• Maneggiate con cura i pulsanti, i controlli, i cursori e i
connettori dell’ep 880. Usandoli maldestramente potreste
causare malfunzionamenti.
556
• Quando collegate o scollegate i cavi, afferrate solo i
connettori; non tirate mai il cavo stesso. Eviterete così corto
circuiti o rotture interne ai cavi stessi.
557
• Durante il normale funzionamento, l’ep 880 genera una
piccola quantità di calore. Questo è perfettamente normale.
558a
• Per evitare di disturbare i vicini, tenete il volume dell’ep 880
ad un livello ragionevole. A volte può essere preferibile usare
le cuffie per non coinvolgere chi vi circonda (specialmente di
notte).
559b
• Per trasportare lo strumento, impacchettatelo in un materiale
che assorba gli urti. Se lo trasportate senza proteggerlo
potreste graffiarlo o danneggiarlo o provocare malfunziona-
menti.
560
• Non forzate troppo il leggio mentre lo usate.
562
• Per fare i collegamenti usate un cavo Roland. Se usate altri
cavi, seguite le seguenti precauzioni.
• Alcuni cavi di collegamento contengono resistenze. Per i
collegamenti con questo strumento non usate cavi che
contengano resistenze. Se usate questi cavi potreste avere
un livello estremamente basso o inudibile. Per informa-
zioni sulle caratteristiche dei cavi, contattate il costruttore
del cavo.
ep880.book Page 108 Wednesday, November 15, 2006 7:30 PM

109
ITALIANO
ITALIANO
ITALIANO
ITALIANO
ITALIANOITALIANO
Contenuto
Usare lo Strumento Senza Rischi .............. 106
Note Importanti............................................ 108
Descrizione dei Pannelli ............................. 110
Pannello Frontale............................................................110
Pannello Posteriore.........................................................111
Prima di Iniziare a Suonare......................... 112
Installare il Leggio ..........................................................112
Collegare l’Alimentatore in Dotazione........................112
Collegare le Cuffie..........................................................112
Accendere e Spegnere lo Strumento............................113
Regolare il Volume e la Brillantezza del Suono .........113
Collegare i pedali............................................................113
1. Ascoltare le Song e i Brani Demo.......... 114
Ascoltare le Song Interne ............................................114
Riprodurre Tutte le Song in Modo Continuo (All Song Play)..114
Scegliere una Song e Suonarla..............................................114
Ascoltare le Song Dimostrative (Demo)....................115
2.Esecuzione................................................ 116
Suonare con Vari Suoni ...............................................116
Regolare il Tocco della Tastiera (Key Touch)...........116
Applicare gli Effetti ai Suoni.......................................117
Aggiungere Riverbero al Suono (Reverb)...........................117
Arricchire il suono (Chorus) .................................................117
Trasporre la Tastiera (Transpose) ..............................118
Dividere la Tastiere in Due Sezioni
(Modo Twin Piano) ......................................................118
Suonare Due Suoni Contemporaneamente
(Dual Play).....................................................................119
Eseguire Suoni Diversi con le Mani Destra e Sinistra
(Split Play) .....................................................................120
Usare il Metronomo .....................................................121
3. Suonare Insieme alle Song Interne........ 122
Cambiare il Tempo.......................................................122
Aggiungere un Conteggio a Tempo con la Song (Count-In) ...... 122
Suonare Ogni Mano Separatamente..........................123
4. Registrare le Vostre Esecuzioni............. 124
Registrare Brani che Iniziano in Levare (Pickup) ..............124
Registrare una Nuova Song........................................124
Registrare Insieme ad una Song.................................125
Registrare le Parti di Mano Destra e Mano Sinistra
Separatamente ..............................................................126
Cancellare le Registrazioni Eseguite..........................126
Cancellare una Registrazione da una Traccia Specificata 126
Cancella una Song ..................................................................126
Conservare le Song Registrate Anche Dopo Aver
Spento lo Strumento (Song Backup)..........................127
Cancellare le Song Archiviate...............................................127
5. Cambiare Varie Impostazioni ................. 128
Cambiare la Risonanza del Pedale del Sustain ..........128
Impostazioni più Dettagliate (Funzione) ....................128
Accordare con gli Altri Strumenti (Master Tuning)..........129
Cambiare il Temperamento ..................................................129
Impostare la Curva dell’Accordatura (Intonazione Stretch) ...... 130
Applicare il Pedale del Sustain all’Area Sinistra della
Tastiera.....................................................................................130
Impedire il Cambio delle Impostazioni Durante
l’Esecuzione .................................................................... 130
Memorizzare l’Impostazione Master Tune Quando
Spegnete lo Strumento .................................................. 131
Usare le funzioni V-LINK............................................. 131
6. Collegare Apparecchi Esterni................. 132
Collegare Apparecchi Audio........................................ 132
Collegare Apparecchi MIDI ......................................... 132
Impostazioni Relative al MIDI ..................................... 133
Impostazione Canale Trasmissione MIDI...........................133
Attivare e Disattivare il Controllo Local .............................133
Transmettere un’Esecuzione che Avete Registrato ...........134
Appendici......................................................135
Problemi & Soluzioni..................................................... 135
Messaggi d’Errore/Altri Messaggi ............................. 136
Lista Operazioni Semplici............................................. 137
Caratteristiche Principali .............................................. 138
Tone List.......................................................................... 207
Internal Song List ........................................................... 208
MIDI Implementation Chart ........................................ 211
ep880_I Page 109 Thursday, November 16, 2006 11:59 AM

110
Descrizione dei Pannelli
Pannello Frontale
1
Controllo [VOLUME]
Regola il volume generale (p. 113).
2
Pulsante [DEMO]
Potete ascoltare un demo dei tone degli strumenti (p.
115).
3
Indicatore [ (Cuffie)]
Questo indicatore si illumina quando collegate delle
cuffie ai connettori delle cuffie (p. 112).
4
Pulsante [REVERB]
Aggiunge il riverbero al suono (p. 117).
5
Pulsante [CHORUS]
Arricchisce il suono (p. 117).
6
Pulsante [BRILLIANCE]
Regola la brillantezza del suono (p. 113).
7
Pulsante [TRANSPOSE]
Traspone l’intonazione della tastiera (p. 118).
8
Pulsante [SPLIT]
Divide la tastiere nelle aree per la mano destra e la
mano sinistra, permettendovi di suonare con suoni
diversi per ogni area (p. 120). Tenendo premuto
questo pulsante e il pulsante [TWIN PIANO], e
premendo determinati pulsanti, potete impostare
varie funzioni (p. 128~131, p. 133~134).
9
Pulsante [TWIN PIANO]
Potete dividere la tastiera in due sezioni separate,
permettendo a due persone di suonare nello stesso
registro (p. 118).
10
Pulsanti TONE SELECT
Servono per scegliere il tipo di suono (gruppi di Tone)
che verrà suonato dalla tastiera (p. 116).
11
Schermo
Visualizza informazioni, come per esempio numero
del brano, tempo, ritmo e valore dei parametri.
12
Pulsanti [-] [+]
Permette di scegliere il valore di varie impostazioni.
Premendoli contemporaneamente richiamerete il
valore originale di quel parametro o di quella
funzione.
13
Pulsante [SONG/TEMPO]
Serve per scegliere il brano (Song) tra quelle interne
(p. 114, 122). Ogni volta che premete questo pulsante,
verranno visualizzati alternativamente il numero della
Song e il tempo. Mentre è visualizzato il numero della
Song, l’indicatore del pulsante si illumina in rosso.
Quando viene visualizzato il tempo, si illumina in
verde.
14
Pulsante [METRONOME/COUNT IN]
Attiva e disattiva il metronomo (p. 121). Lo strumento
dispone anche di un suono per il conteggio (count-in),
che può essere eseguito prima dell’inizio della Song,
permettendovi così di iniziare il brano perfettamente a
tempo (p. 122).
RECORDER
Riproduce e registra le vostre esecuzioni.
15
Pulsante [PLAY]
Avvia e ferma la riproduzione delle Song interne e
delle registrazioni che avete eseguito (p. 114, 124).
Inoltre avvia e ferma la registrazione (p. 124~126).
16
Pulsante [REC]
Mette l’ep 880 in modalità di attesa della registrazione
(standby) (p. 124~126).
17
Pulsante [LEFT]
Riproduce o registra una esecuzione separatamente
per ogni mano (p. 123, 125~126). L’esecuzione della
mano sinistra nelle Song interne viene assegnata a
questo pulsante.
18
Pulsante [RIGHT]
Riproduce o registra una esecuzione separatamente
per ogni mano (p. 123, 125~126). L’esecuzione della
mano destra nelle Song interne viene assegnata a
questo pulsante.
19
Pulsante [KEY TOUCH]
Modifica la sensazione del tocco della tastiera (p. 116).
1 2 3 4 5 6 7 8 109
1211 13 14 15 16 17 18 19
ep880.book Page 110 Wednesday, November 15, 2006 7:30 PM
La pagina si sta caricando...
La pagina si sta caricando...
La pagina si sta caricando...
La pagina si sta caricando...
La pagina si sta caricando...
La pagina si sta caricando...
La pagina si sta caricando...
La pagina si sta caricando...
La pagina si sta caricando...
La pagina si sta caricando...
La pagina si sta caricando...
La pagina si sta caricando...
La pagina si sta caricando...
La pagina si sta caricando...
La pagina si sta caricando...
La pagina si sta caricando...
La pagina si sta caricando...
La pagina si sta caricando...
La pagina si sta caricando...
La pagina si sta caricando...
La pagina si sta caricando...
La pagina si sta caricando...
La pagina si sta caricando...
La pagina si sta caricando...
La pagina si sta caricando...
La pagina si sta caricando...
La pagina si sta caricando...
La pagina si sta caricando...
La pagina si sta caricando...
La pagina si sta caricando...
La pagina si sta caricando...
La pagina si sta caricando...
La pagina si sta caricando...
La pagina si sta caricando...
La pagina si sta caricando...
La pagina si sta caricando...
La pagina si sta caricando...
La pagina si sta caricando...
La pagina si sta caricando...
La pagina si sta caricando...
La pagina si sta caricando...
La pagina si sta caricando...
La pagina si sta caricando...
La pagina si sta caricando...
La pagina si sta caricando...
La pagina si sta caricando...
La pagina si sta caricando...
La pagina si sta caricando...
La pagina si sta caricando...
La pagina si sta caricando...
La pagina si sta caricando...
La pagina si sta caricando...
La pagina si sta caricando...
La pagina si sta caricando...
La pagina si sta caricando...
La pagina si sta caricando...
La pagina si sta caricando...
La pagina si sta caricando...
La pagina si sta caricando...
La pagina si sta caricando...
La pagina si sta caricando...
La pagina si sta caricando...
La pagina si sta caricando...
La pagina si sta caricando...
La pagina si sta caricando...
La pagina si sta caricando...
La pagina si sta caricando...
La pagina si sta caricando...
La pagina si sta caricando...
La pagina si sta caricando...
La pagina si sta caricando...
La pagina si sta caricando...
La pagina si sta caricando...
La pagina si sta caricando...
La pagina si sta caricando...
La pagina si sta caricando...
La pagina si sta caricando...
La pagina si sta caricando...
La pagina si sta caricando...
La pagina si sta caricando...
La pagina si sta caricando...
La pagina si sta caricando...
La pagina si sta caricando...
La pagina si sta caricando...
La pagina si sta caricando...
La pagina si sta caricando...
La pagina si sta caricando...
La pagina si sta caricando...
La pagina si sta caricando...
La pagina si sta caricando...
La pagina si sta caricando...
La pagina si sta caricando...
La pagina si sta caricando...
La pagina si sta caricando...
La pagina si sta caricando...
La pagina si sta caricando...
La pagina si sta caricando...
La pagina si sta caricando...
La pagina si sta caricando...
La pagina si sta caricando...
La pagina si sta caricando...
La pagina si sta caricando...
La pagina si sta caricando...
La pagina si sta caricando...
La pagina si sta caricando...
La pagina si sta caricando...
-
 1
1
-
 2
2
-
 3
3
-
 4
4
-
 5
5
-
 6
6
-
 7
7
-
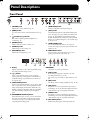 8
8
-
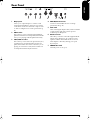 9
9
-
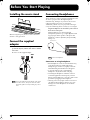 10
10
-
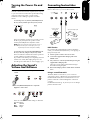 11
11
-
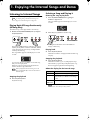 12
12
-
 13
13
-
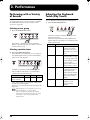 14
14
-
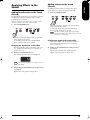 15
15
-
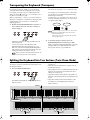 16
16
-
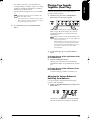 17
17
-
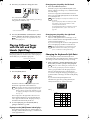 18
18
-
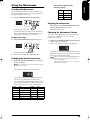 19
19
-
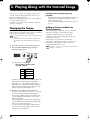 20
20
-
 21
21
-
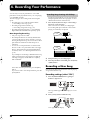 22
22
-
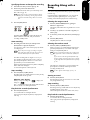 23
23
-
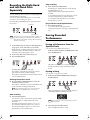 24
24
-
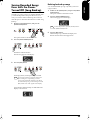 25
25
-
 26
26
-
 27
27
-
 28
28
-
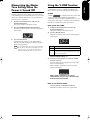 29
29
-
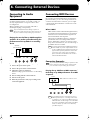 30
30
-
 31
31
-
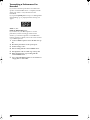 32
32
-
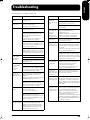 33
33
-
 34
34
-
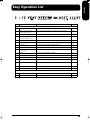 35
35
-
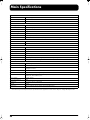 36
36
-
 37
37
-
 38
38
-
 39
39
-
 40
40
-
 41
41
-
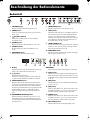 42
42
-
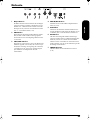 43
43
-
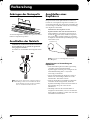 44
44
-
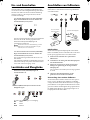 45
45
-
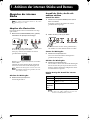 46
46
-
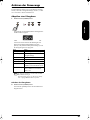 47
47
-
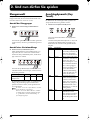 48
48
-
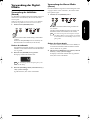 49
49
-
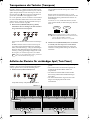 50
50
-
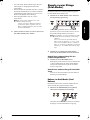 51
51
-
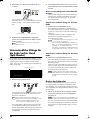 52
52
-
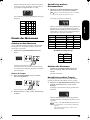 53
53
-
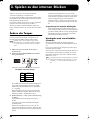 54
54
-
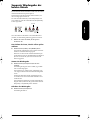 55
55
-
 56
56
-
 57
57
-
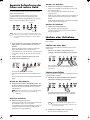 58
58
-
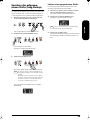 59
59
-
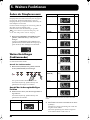 60
60
-
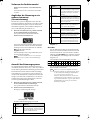 61
61
-
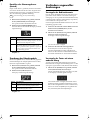 62
62
-
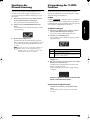 63
63
-
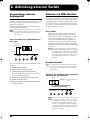 64
64
-
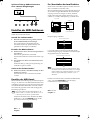 65
65
-
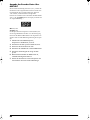 66
66
-
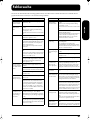 67
67
-
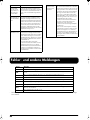 68
68
-
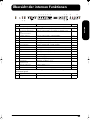 69
69
-
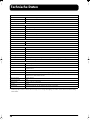 70
70
-
 71
71
-
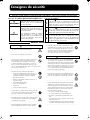 72
72
-
 73
73
-
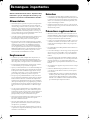 74
74
-
 75
75
-
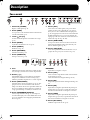 76
76
-
 77
77
-
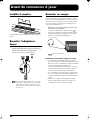 78
78
-
 79
79
-
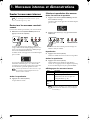 80
80
-
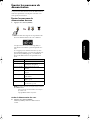 81
81
-
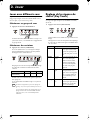 82
82
-
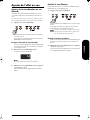 83
83
-
 84
84
-
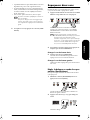 85
85
-
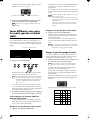 86
86
-
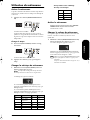 87
87
-
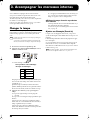 88
88
-
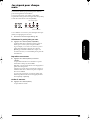 89
89
-
 90
90
-
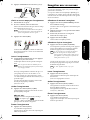 91
91
-
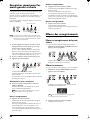 92
92
-
 93
93
-
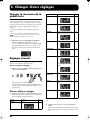 94
94
-
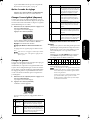 95
95
-
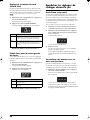 96
96
-
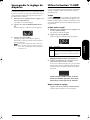 97
97
-
 98
98
-
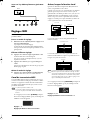 99
99
-
 100
100
-
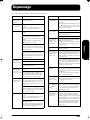 101
101
-
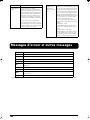 102
102
-
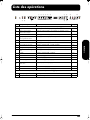 103
103
-
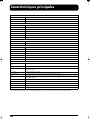 104
104
-
 105
105
-
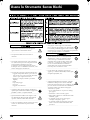 106
106
-
 107
107
-
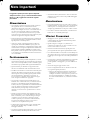 108
108
-
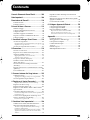 109
109
-
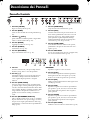 110
110
-
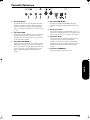 111
111
-
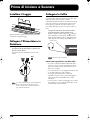 112
112
-
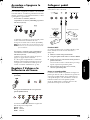 113
113
-
 114
114
-
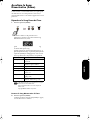 115
115
-
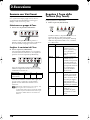 116
116
-
 117
117
-
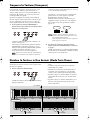 118
118
-
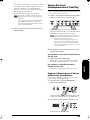 119
119
-
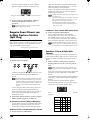 120
120
-
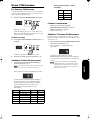 121
121
-
 122
122
-
 123
123
-
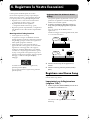 124
124
-
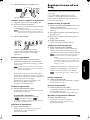 125
125
-
 126
126
-
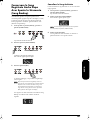 127
127
-
 128
128
-
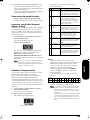 129
129
-
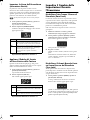 130
130
-
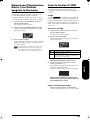 131
131
-
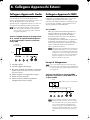 132
132
-
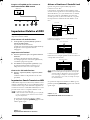 133
133
-
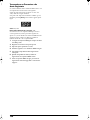 134
134
-
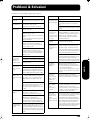 135
135
-
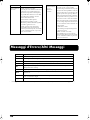 136
136
-
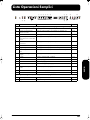 137
137
-
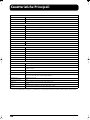 138
138
-
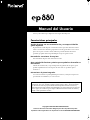 139
139
-
 140
140
-
 141
141
-
 142
142
-
 143
143
-
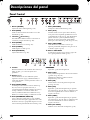 144
144
-
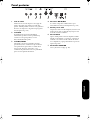 145
145
-
 146
146
-
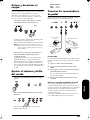 147
147
-
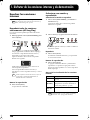 148
148
-
 149
149
-
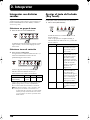 150
150
-
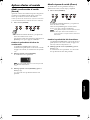 151
151
-
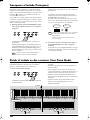 152
152
-
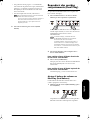 153
153
-
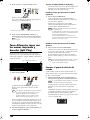 154
154
-
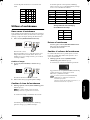 155
155
-
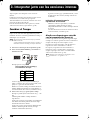 156
156
-
 157
157
-
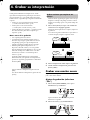 158
158
-
 159
159
-
 160
160
-
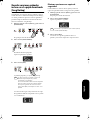 161
161
-
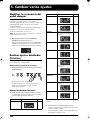 162
162
-
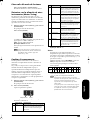 163
163
-
 164
164
-
 165
165
-
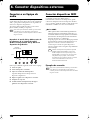 166
166
-
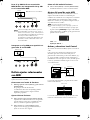 167
167
-
 168
168
-
 169
169
-
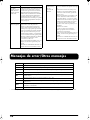 170
170
-
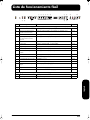 171
171
-
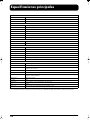 172
172
-
 173
173
-
 174
174
-
 175
175
-
 176
176
-
 177
177
-
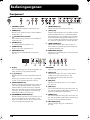 178
178
-
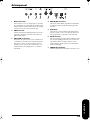 179
179
-
 180
180
-
 181
181
-
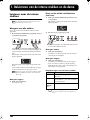 182
182
-
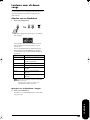 183
183
-
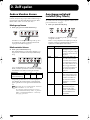 184
184
-
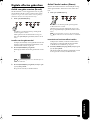 185
185
-
 186
186
-
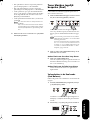 187
187
-
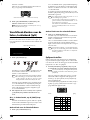 188
188
-
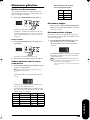 189
189
-
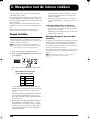 190
190
-
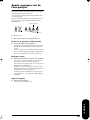 191
191
-
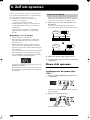 192
192
-
 193
193
-
 194
194
-
 195
195
-
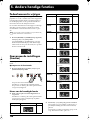 196
196
-
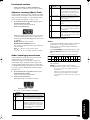 197
197
-
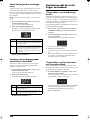 198
198
-
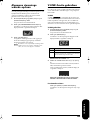 199
199
-
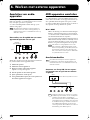 200
200
-
 201
201
-
 202
202
-
 203
203
-
 204
204
-
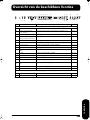 205
205
-
 206
206
-
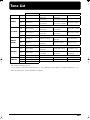 207
207
-
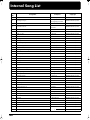 208
208
-
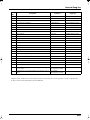 209
209
-
 210
210
-
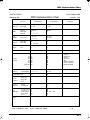 211
211
-
 212
212
-
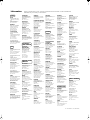 213
213
-
 214
214
-
 215
215
-
 216
216


Roland EP-880 Manuale del proprietario
- Categoria
- Pianoforti digitali
- Tipo
- Manuale del proprietario
in altre lingue
- English: Roland EP-880 Owner's manual
- français: Roland EP-880 Le manuel du propriétaire
- español: Roland EP-880 El manual del propietario
- Deutsch: Roland EP-880 Bedienungsanleitung
- Nederlands: Roland EP-880 de handleiding
Documenti correlati
-
Roland EP-880 Manuale utente
-
Roland HP603/HP603A Manuale del proprietario
-
-
Roland RP501R Manuale del proprietario
-
-
-
Roland RP401R Manuale del proprietario
-
Roland F-20 Manuale del proprietario
-
Roland FP-10 Manuale del proprietario
-