La pagina si sta caricando...

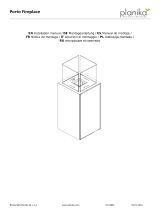
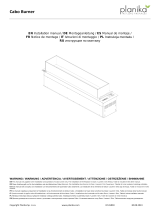
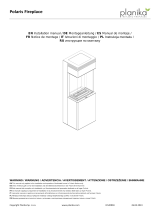
Cabo Table
Copyright Planika Sp. z o.o. www.planika.com I1532#00 01.09.2023
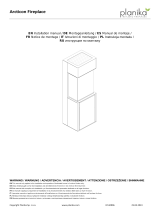
EN Installation manual / DE Montageanleitung / ES Manual de montaje /
FR Notice de montage / IT Istruzioni di montaggio / PL Instrukcja montażu /
RU инструкция по монтажу
WARNING / WARNUNG / ADVERTENCIA / AVERTISSEMENT / ATTENZIONE / OSTRZEŻENIE / ВНИМАНИЕ
EN This manual only applies to the installation and operation of Cabo Table only. The installation of the Cabo Burner is included in the other manual.
DE Diese Anleitung gilt nur für die Installation und den Betrieb von Cabo Table. Die Installation des Cabo Burner ist in der anderen Anleitung enthalten.
ES Este manual sólo se aplica a la instalación y funcionamiento de Cabo Table únicamente. La instalación del Cabo Burner se incluye en el otro manual.
FR Ce manuel ne s'applique qu'à l'installation et à l'utilisation de Cabo Table uniquement. L'installation du Cabo Burner fait l'objet d'un autre manuel.
IT Il presente manuale si applica esclusivamente all'installazione e al funzionamento di Cabo Table. L'installazione del Cabo Burner è inclusa nell'altro manuale.
PL Niniejsza instrukcja dotyczy wyłącznie instalacji i obsługi palnika Cabo Table Instalacja Cabo Burner zawarta jest w innej instrukcji.
RU Данное руководство относится только к установке и эксплуатации Только для камина Cabo Table. Установка Cabo Burner включена в другое руководство..

2
EN INSTALLATION MANUAL ....................................................................................................................................... 6
DE MONTAGEANLEITUNG ......................................................................................................................................... 6
ES MANUAL DE MONTAJE ......................................................................................................................................... 6
FR NOTICE DE MONTAGE .......................................................................................................................................... 6
IT ISTRUZIONI DI MONTAGGIO ................................................................................................................................ 6
PL INSTRUKCJA MONTAŻU ........................................................................................................................................ 6
RU ИНСТРУКЦИЯ ПО МОНТАЖУ .............................................................................................................................. 6
EN INSTRUCTION MANUAL .....................................................................................................................................10
DE BEDIENUNGSANLEITUNG ..................................................................................................................................15
ES MANUAL DE USUARIO ........................................................................................................................................ 19
FR NOTICE D’UTILISATION ......................................................................................................................................25
IT MANUALE D’USO .................................................................................................................................................30
PL INSTRUKCJA OBSŁUGI ......................................................................................................................................35
RU ИНСТРУКЦИЯ ПО ЭКСПЛУАТАЦИИ .................................................................................................................40
The product is a decorative device with real fire.
Read the included documentation prior to installing and operating the device.
Check the local regulations for fireplaces.
1. For outdoor and indoor use. Min. temperature of use is 0°C.
2. Room cubature for one device – min. 94 m3 (in case of indoor installations)
3. Natural air exchange rate in room – min. 1/h. (in case of indoor installations)
4. Do not cover top ventilation openings of the device.
5. Do not place any objects on the top of the device.
6. We recommend placing a CO2 or dry powder fire extinguisher nearby the device
7. For service purposes, the surrounding must allow for easy removal of the device.
8. Keep children, animals and unauthorized persons away from the device.
9. Keep the packaging and manuals for future use.
10. Do not turn on the device in case of fuel spill.
11. Do not interfere in the fuel filler when the device is operating.
12. Do not interfere in the device construction.
13. Do not touch the filament and other hot elements.
14. Do not transport the device if fueled.
15. Do not leave an operating device unattended
16. The Cosentino Silestone Gris is a natural material which, when exposed to UV rays for very long periods of time,
may slightly change shade. When not in use, we recommend covering the product with a cover designed for this
product.
!
ENGLISH

3
Es ist ein Dekorationsprodukt und es brennt mit echtem Feuer. Vor der Montage und vor der
Inbetriebnahme des Kamins lesen Sie bitte die beigelegte Dokumentation. Machen Sie sich mit den
lokalen Vorschriften bezüglich der Kamine vertraut.
1. Nur für den Außen- und Innenbereich. Die Mindesttemperatur für die Verwendung beträgt 0°C.
2. Rauminhalt für ein Gerät - min. 94 m3 (bei Inneninstallationen)
3. Natürliche Luftwechselrate im Raum - min. 1/h. (im Falle von Inneninstallationen)
4. Die Lüftungsschlitze nicht zudecken.
5. Keine Gegenstände auf dem Kamin platzieren.
6. Wir empfehlen, einen CO2- oder Trockenpulver-Feuerlöscher in der Nähe des Geräts aufzustellen
7. Die Montage des Kamins muss eine problemlose Herausnahme zu Wartungszwecken ermöglichen.
8. Den Kamin an einem für Kinder, Unbefugte und Tiere unzugänglichen Ort installieren.
9. Verpackung und Gebrauchsanweisung aufbewahren.
10. Im Falle des Brennstoffauslaufs, das Gerät nicht einschalten
11. Falls der Kamin im Betrieb ist, die Einfüllöffnung nicht berühren
12. In die Konstruktion des Gerätes nicht eingreifen
13. Das Glühelement und andere warmen Elemente nicht berühren
14. Den, mit Brennstoff nachgefüllten Kamin nicht transportieren
15. Das Gerät im Betrieb nicht ohne Aufsicht lasse
16. Der Cosentino Silestone Gris ist ein natürliches Material, das bei längerer Einwirkung von UV-Strahlen seinen
Farbton leicht verändern kann. Wir empfehlen, das Produkt bei Nichtgebrauch mit einer für dieses Produkt
geeigneten Abdeckung zu versehen.
El producto es un dispositivo decorativo que produce fuego real. Familiarícese con la
documentación adjunta antes de instalar e iniciar el dispositivo. Familiarícese con las
regulaciones locales sobre chimeneas.
1. Sólo para uso exterior e interior. La temperatura mínima de uso es de 0°C.
2. Cubicación del local para un aparato - mín. 94 m3 (en caso de instalaciones interiores)
3. Tasa de intercambio de aire natural en la habitación - mín. 1/h. (en caso de instalaciones interiores)
4. No cubra las ranuras de ventilación.
5. Está prohibido colocar objetos en el dispositivo.
6. Se recomienda colocar un extintor de polvo o CO2 cerca del dispositivo.
7. La instalación del dispositivo debe permitir una extracción fácil para el mantenimiento.
8. El dispositivo debe estar protegido contra el acceso de niños, animales y personas no autorizadas.
9. Guarde el embalaje y las instrucciones.
10. No encienda el dispositivo si el combustible se derrama fuera del tanque.
11. No toque el llenador de combustible cuando el dispositivo esté funcionando.
12. No modifique la construcción del dispositivo.
13. No toque el filamento o las partes calientes.
14. No transporte el dispositivo con combustible.
15. No deje el dispositivo funcionando sin supervisión
16. El Cosentino Silestone Gris es un material natural que, expuesto a los rayos UV durante periodos de tiempo muy
largos, puede cambiar ligeramente de tonalidad. Cuando no esté en uso, se recomienda cubrir el producto con
una cubierta diseñada para este producto.
ESPAÑOL
DEUTSCH
!
!

4
Le produit est un dispositif décoratif qui produit un feu réel. Familiarisez-vous avec la
documentation ci-jointe avant d'installer et de démarrer l'appareil. Familiarisez-vous avec
les réglementations locales concernant les cheminées.
1. Pour une utilisation à l'extérieur et à l'intérieur. La température minimale d'utilisation est de 0°C.
2. Cubature de la pièce pour un appareil - min. 94 m3 (dans le cas d'installations intérieures).
3. Taux de renouvellement de l'air naturel dans la pièce - min. 1/h. (dans le cas d'installations intérieures)
4. Ne couvrez pas les fentes de ventilation.
5. Il est interdit de placer des objets sur l'appareil.
6. Il est recommandé de placer un extincteur à poudre ou à CO2 à proximité de l'appareil.
7. L'installation de l'appareil doit permettre un retrait facile pour l'entretien.
8. L'appareil doit être protégé contre l'accès des enfants, des animaux et des personnes non autorisées.
9. Conservez l'emballage et les instructions.
10. Ne démarrez pas l'appareil en cas de débordement
11. Ne touchez pas le lieu de remplissage de carburant lorsque l'appareil est en marche.
12. Ne modifiez pas la construction de l'appareil.
13. Ne touchez pas le filament ou les parties chaudes.
14. Ne transportez pas l'appareil avec du carburant.
15. Ne laissez pas l'appareil fonctionner sans surveillance
16. Le Cosentino Silestone Gris est un matériau naturel qui, lorsqu'il est exposé aux rayons UV pendant de très longues
périodes, peut changer légèrement de teinte. Lorsque le produit n'est pas utilisé, il est recommandé de le recouvrir
d'une housse conçue pour ce produit.
Prodotto è un dispositivo decorativo che produce un vero fuoco. Familiarizzare con il
manuale allegato prima di installare e avviare il dispositivo. Familiarizzare con le
normative locali relative ai camini.
1. Solo per uso esterno e interno. La temperatura minima di utilizzo è 0°C.
2. Cubatura del locale per un dispositivo - min. 94 m3 (in caso di installazioni interne).
3. Tasso di ricambio d'aria naturale nella stanza - min. 1/h. (in caso di installazioni interne)
4. Non coprire le fessure di ventilazione.
5. È vietato posizionare oggetti sul dispositivo.
6. Si consiglia di posizionare un estintore a polvere o ad anidride carbonica vicino all'unità.
7. L'installazione del dispositivo deve consentire una facile rimozione per un eventuale manutenzione.
8. Il dispositivo deve essere protetto dall'accesso di bambini, animali e persone non autorizzate.
9. Conservare la confezione originale e le istruzioni d’uso.
10. Non avviare il dispositivo nel caso di fuoriuscita di carburante dal serbatoio.
11. Non operare nei pressi di bocchettone di riempimento quando il dispositivo è in funzione.
12. Non interferire nella costruzione del dispositivo.
13. Non toccare la resistenza o le parti calde del dispositivo.
14. Non trasportare il dispositivo con carburante.
15. Non lasciare incustodito il dispositivo.
16. Il Cosentino Silestone Gris è un materiale naturale che, se esposto ai raggi UV per periodi di tempo molto lunghi, può
cambiare leggermente tonalità. Quando non viene utilizzato, si consiglia di coprirlo con un telo apposito per questo
prodotto.
FRANÇAIS
!
ITALIANO
!

5
Produkt jest urządzeniem dekoracyjnym wytwarzającym prawdziwy ogień. Zapoznaj się z
załączoną dokumentacją przed montażem i uruchomieniem urządzenia. Zapoznaj się z
lokalnymi przepisami dotyczącymi kominków
1. Urządzenie wyłącznie do użytku zewnętrznego wewnętrznego. Używać w temperaturze min. 0C.
2. Kubatura pomieszczenia dla jednego urządzania - min. 94 m3(dla instalacji wewnątrz)
3. Naturalna wymiana powietrza w pomieszczeniu - min. 1/h. (dla instalacji wewnątrz)
4. Nie zakrywać otworów wentylacyjnych urządzenia.
5. Zabrania się umieszczania jakichkolwiek przedmiotów na urządzeniu.
6. Zaleca się umieszczenie w pobliżu urządzenia gaśnicy proszkowej lub CO2.
7. Montaż urządzenia musi umożliwiać bezproblemowe wyjęcie go w celu serwisowania.
8. Urządzenie należy zabezpieczyć przed dostępem dzieci, zwierząt oraz osób niepowołanych.
9. Należy zachować opakowanie oraz instrukcje.
10. Nie uruchamiaj urządzenia w przypadku rozlania paliwa poza zbiornik.
11. Nie operuj przy wlewie paliwa, gdy urządzenie jest uruchomione.
12. Nie ingeruj w konstrukcję urządzenia.
13. Nie dotykaj żarnika oraz rozgrzanych elementów.
14. Nie transportuj urządzenia z paliwem.
15. Nie pozostawiaj uruchomionego urządzenia bez nadzoru.
16. Cosentino Silestone Gris to naturalny materiał, który pod wpływem działania promieni UV przez bardzo długi czas
może nieznacznie zmienić odcień. Gdy nie jest używany, zalecamy przykrycie go pokrowcem przeznaczonym do
tego produktu.
Продукт является декоративным изделием, производящим настоящий огонь. Ознакомьтесь с
приложенной документацией перед монтажом и запуском устройства. Ознакомьтесь с местными
правилами, касающимися каминов
1. Только для использования на улице и в помещении. Минимальная температура использования - 0°C.
2. Кубатура помещения для одного устройства - мин. 94 м3 (при установке в помещении).
3. Естественный воздухообмен в помещении - мин. 1/ч. (при установке в помещении)
4. Не закрывать вентиляционных щелей на устройстве.
5. Запрещается размещать на устройстве любые предметы.
6. Рядом с устройством рекомендуется размещать порошковый или углекислотный огнетушитель.
7. Устройство должно быть установлено таким образом, чтобы его легко можно было извлечь для сервиса.
8. Устройство должно быть защищено от детей, животных и посторонних лиц.
9. Необходимо сохранить оригинальную упаковку устройства, а также настоящую инструкцию.
10. Не включать устройства в случае утечки топлива из бака.
11. Не заправлять камин топливом, когда устройство работает.
12. Не вмешиваться в конструкцию устройства.
13. Не трогать нити накаливания и горячих элементов.
14. Нельзя перемещать устройство, наполненное топливом.
15. Не оставлять запущенного устройства без присмотр
16. Cosentino Silestone Gris - это натуральный материал, который при длительном воздействии
ультрафиолетовых лучей может слегка изменить оттенок. Когда изделие не используется, мы рекомендуем
накрывать его чехлом, предназначенным для этого изделия.
POLSKI
РУССКИЙ
!
!

6
EN
DE
ES
FR
IT
PL
RU
Quantity
A.
Firebox with
burner
Feuerraum mit
Brenner
Hogar con
quemador
Foyer avec
brûleur
Focolare con
bruciatore
Obudowa z
paleniskiem
Топка с горелкой
1
B.
Glass
Glas
Vidrio
Verre
Vetro
Szyba
Cтекло
2+2
C.
Service cable
Service -Kabel
Cable USB de
servicio
Câble de
service
Cavetto per
l'assistenza technica
Kabel
serwisowy
кабель сервиса
1
D.
Bag with
granules
Tasche mit dem
Granulat
Bolsa de
gránulos
sachet de
granulés
Sacchetto per granuli
Torba z
granulatem
Мешок с гранулами
5
E.
Remote control
Fernbedienung
Control
remoto
Télécommand
e
Telecomando
Pilot
пульт дистанционногоу
правления
1
EN
Install the glass panes of the appliance by placing them in the prepared holes. Level the fireplace and connect it to the mains using a waterproof socket.
DE
Montieren Sie die Glasscheiben des Geräts, indem Sie sie in die vorbereiteten Löcher einsetzen. Richten Sie den Kamin aus und schließen Sie ihn mit
einer wasserdichten Steckdose an das Stromnetz an.
ES
Instale los cristales del aparato colocándolos en los orificios preparados. Nivele el hogar y conéctelo a la red eléctrica mediante una toma estanca.
FR
Installez les vitres de l'appareil en les plaçant dans les trous préparés. Mettez le foyer à niveau et raccordez-le au secteur à l'aide d'une prise étanche.
IT
Installare le lastre di vetro dell'apparecchio inserendole nei fori predisposti. Livellare il caminetto e collegarlo alla rete elettrica utilizzando una presa
impermeabile.
PL
Zainstaluj szyby urządzenia umieszczając je w przygotowanych otworach. Wypoziomuj kominek i podłącz do sieci elektrycznej używając wodoszczelnego
gniazda.
RU
Установите стеклянные стекла прибора, поместив их в подготовленные отверстия. Выровняйте камин и подключите его к электросети с
помощью водонепроницаемой розетки.
220270 270
192 192
154
315
760
1400
1190
284
1016
ACD E
B1
B2
2
Element B1 / B2
13
5m long cable
Hermetic power socket
(not supplied by producer)

7
EN
Spread the granules (D ) evenly on the marked area without leaving any free spaces. Ensure that the granules do not touch the filament.
DE
Verteilen Sie das Granulat (D ) gleichmäßig auf der markierten Fläche, ohne Freiräume zu lassen. Achten Sie darauf, dass das Granulat den Faden nicht
berührt.
ES
Esparza los gránulos (D ) uniformemente sobre la zona marcada sin dejar espacios libres. Asegúrese de que los gránulos no toquen el filamento.
FR
Répartissez les granulés (D ) de manière homogène sur la zone marquée sans laisser d'espaces libres. Veillez à ce que les granulés ne touchent pas le
filament.
IT
Distribuire i granuli (D ) in modo uniforme sull'area contrassegnata, senza lasciare spazi liberi. Assicurarsi che i granuli non tocchino il filamento.
PL
Rozłóż równomiernie granulat (D ) w oznaczonym miejscu nie zostawiając wolnych przestrzeni. Zwróć uwagę aby granulat nie dotykał żarnika.
RU
Равномерно распределите гранулы (D ) на размеченном участке, не оставляя свободных мест. Убедитесь, что гранулы не касаются нити.
D

8
EN
DE
ES
FR
1. Filament
1. Glühelement
1. Filamento
1. Filament
2. Burner
2. Feuerungsleiste
2. Quemador
2. Foyer
3. Device surface
3. Feuerungsrost
3. Tapa de la chimenea
3. Brûleur
4. Control panel
4. Bedienpanel
4. Panel de control
4. Panneau de commande
5. Fuel hose
5. Kraftstoffschlauch
5. Manguera de combustible
5. Tuyau de carburant
6. Fuel pump button
6. Knopf der
Kraftstoffpumpe
6. Botón de la bomba de
combustible
6. Bouton de la pompe à
carburant
IT
PL
RU
1. Resistenza
1. Żarnik
1. нить накаливания
2. Focolare
2. Palenisko
2. горелка
3. Bruciatore
3. Ruszt
3. верхняя плита
4. Pannello di controllo
4. Panel sterowania
4. панель управления
5. Tubo flessibile del carburante
5. Przewód paliwowy
5. Топливный шланг
6. Pulsante della pompa del
carburante
6. Przycisk pompy paliwa
6. Кнопка топливного насоса
1
2
3
4
6
5

9
EN
DE
ES
FR
1. Service port
2. Power ON/OFF
3. Flame START/STOP
4. Wi-Fi configuration/status
1. Service-USB-Eingang
2. Ein – und Ausschalten des
Kamins
3. Anzünden und Erlöschen
der Flamme
4. Konfiguration / WIFI Status
1. Puerto de servicio
2. Iniciar / apagar el dispositivo
3. Encender / apagar el
dispositivo
4. Configuración / estado de WIFI
1. Prise de service
2. Allumer/éteindre
l'appareil
3. Allumer / éteindre la
flamme
4. Configuration/état WIFI
IT
PL
RU
1. Presa USB
2. Accensione/spegnimento
del dispositivo
3. Accensione/spegnimento
della fiamma
4. Configurazione/stato WIFI
1. Gniazdo serwisowe
2. Włączenie / wyłączenie
urządzenia
3. Odpalanie /
wygaszanie płomienia
4. Konfiguracja / status
WIFI
1. Сервисный порт для подключения
кабеля
2. Включение / выключение
устройства
3. Розжиг / тушение пламени
4. Конфигурация / статус WIFI
START
STOP
SERVICE
ONLY
1
2
3
4

10
REPLACING FUEL CONTAINER
1. Turn the device on by pressing .
2.If the fuel tank is empty (START/STOP BUTTON BLUE LIGHT ON), open the flap and pull out the fuel hose (I). Place
the loose end in the fuel container and press and hold the fuel pump button (II).
3.If the tank fills up (START/STOP BUTTON GREEN LIGHT ON) put the fuel hose back in place. (III)
FLAME IGNITION
When the START/STOP button is lit up in green, the device is ready to be launched.
Press START. Firing up of the device takes from 2 to 10 minutes (FLASHING GREEN LIGHT). During the process of
firing up, scent of fumes can be present. When the lights stop flashing, the device is lit up and has reached the working
temperature.
FLAME HEIGHT REGULATION
When the flame is on, press the or button on the remote or scroll the flame level bar in the mobile app to choose
one of the six flame heights. The flame starts on height 4 by default.
NOTE. In case of too high a temperature of the device, the flame height will be automatically decreased and locked
from changing. If the temperature continues to increase, the flame will be extinguished (RED LIGHT)
FLAME EXTINGUISHING
To extinguish the flame:
-press STOP.
Flashing red light indicated the device being cooled. Restarting the flame is possible only after complete cooldown of
the device (GREEN LIGHT).
TURNING THE DEVICE OFF
To turn the device OFF, press .
The device will automatically turn off in case of any work related errors. (check the error in the mobile app).
III III
ENGLISH

11
WIRELESS CONTROL CONFIGURATION
To pair the device with the mobile app (simultaneous pairing of more than one device is not possible):
Join the newsletter
Find your fireplace
1. Launch the FLA3
NET-ZERO mobile
app. Join the newsletter
by submitting your e-
mail address and
pressing SIGN UP or
simply press SKIP.
2. On the FIND YOUR
FIREPLACE screen
press CONNECT to
start the network
search.
3. Press and hold the WiFi button on the fireplace. When the button starts flashing, the fireplace is ready to be paired
for 5 minutes.
Setup Network Active
Connect to Home Network
4. Go to mobile device setup,
turn on the WiFi network
and connect with
Fireplace_WiFi_setup (if
the network is not visible,
unplug the device for 10
seconds and retry the
configuration). The
fireplace will be
automatically found by the
mobile app, which will be
confirmed by the app
(SETUP NETWORK
ACTIVE). Press
CONNECT.
5. On the CONNECT
TO HOME
NETWORK screen,
choose the name of
the network which
you plan to use by
default (NETWORK
NAME) and submit its
password. Make sure
the password is
correct and hit
(SUBMIT).

12
Your fireplaces
Access Point
6. On the following
screen (YOUR
FIREPLACES),
choose your device
and press
CONNECT. The
screen also allows
you to change the
name of the
fireplace (EDIT).
7. You can also create a
dedicated network
ACCESS POINT and
connect directly with the
device. To do that, press
(HELP), choose
(CONNECTION TYPE),
and (ACCES POINT), then
confirm by pressing
(CREATE ACCESS
POINT). Submit new name
for the network and the
password. Confirm by
pressing NEXT.
After successful configuration, the WiFi button will light up in green.
FLA3 NET-ZERO MOBILE APP
1. Newsletter
2. Fireplace status
3. Flame height
4. Start and stop
5. Info
6. Menu
1
2
3
4
6
5

13
MENU
To access menu, press the button. To go back to the main panel, press BACK
To access general information about the fireplace, press the button. The newsletter is available after pressing the button.
Menu
Info
Newsletter
Main app setup. Press the tab to
change the settings.
Press to check the general
information of the fireplace
Press to check the notifications
Panel Lock
Default Level
Your fireplaces
Contact us
Press LOCK to lock the
control panel on the
fireplace. Press UNLOCK
to unlock the control panel
on the fireplace. Confirm by
clicking SAVE. The change
is possible with the fireplace
off only.
Change the default launch
flame height. Press SAVE
to confirm the change.
Press RESET to reset your
choice. The default setting
of the flame is height 4.
Check available
fireplaces. Press EDIT
to change the device
name. Press
CONNECT to connect
to the device.
Contact Planika by e-mail.
Press SEND to send us an
e-mail.

14
ERRORS
Help
Error
File a Report
Press HELP in the main MENU to
access the Troubleshooting tab.
Fix the error with the provided
information. If the error proceeds to
appear, contact us by pressing
REPORT.
If still in need of service, send us a
message with a short description
of the problem and general
information. Press SEND.
INFORMATION SIGNALS
POWER DIODE
START/STOP DIODE
SOUND
ACTION
COMMUNICATION
-
Green light
Device turned off
-
Green light
Device is ready to work
-
Green blinking
Starting procedure
-
Working
-
Blue light
No fuel
-
Blue blinking
Refueling
Blue blinking with sound
Full tank
Red light
Extingushing, cooling
Purple light with sound
Error – check the app (troubleshooting)
and contact with service
-
Blue, red blinking
Fuel tank is empty during the burning
process
WI-FI DIODE
ACTION
COMMUNICATION
Blue light
Not connected to wi-fi
Blue blinking
Pairing / configuration
Green light
Wi-fi connected
FUEL - Use only ethanol fuel produced from plants in the process of two-time alcohol distillation consisting of 95-
96.6% ethanol by volume. Fanola is the recommended fuel with pharmacological purity.
DO NOT USE SYNTHETIC PETROLEUM BASED FUELS AS THEY ARE CONTAMINATED, EMIT UNPLEASANT
ODORS AND CAN DAMAGE THE FIREPLACE! DO NOT USE FUELS CONTAINING 100% ETHANOL BY VOLUME,
GEL, OR AROMATIC FUELS!
CLEANING – Clean with a damp cloth and delicate detergents, only when the device is turned off and cooled.
SERVICE – Keep the provided USB cable for service. Reach out to us at service@planikafires.com.

15
BRENNSTOFFNACHFÜLLEN
1. Schalten Sie das Gerät ein, indem Sie drücken. .
2. Wenn der Kraftstofftank leer ist (START/STOPP-TASTE BLAUES LICHT AN), öffnen Sie die Klappe und ziehen
Sie den Kraftstoffschlauch (I) heraus. Das lose Ende in den Kraftstoffbehälter stecken und den Knopf der
Kraftstoffpumpe (II) drücken und halten.
3. Wenn sich der Tank füllt (START/STOPP-KNOPF GRÜNES LICHT AN), setzen Sie den Kraftstoffschlauch
wieder ein. (III)
FLAMMENZÜNDUNG
Die grün beleuchtete Taste START / STOP heisst, dass das Gerät bereit ist um die Flammenzündung zu starten.
Drücken Sie START. Die Flammenzündung dauert 2-10 Minuten (BLINKENDE GRÜNE LEUCHTDIODE). In dieser Zeit kann
der Geruch von Kraftstoffdämpfen zu spüren sein. Das Erlöschen der Leuchtdioden ist eine Information, dass die Flamme
gezündet wurde und der Kamin die Betriebstemperatur erreicht hat.
REGULIERUNG DER FLAMMENHÖHE
Wenn die Flamme brennt, drücken Sie oder auf der Fernbedienung oder den Flammenpegelbalken verschieben in der
Applikation, um die Flammenhöhe auf 6 Niveaus zu vergrössern oder zu verkleinern. Das Gerät schaltet sich standardmäßig
mit einer Flammenhöhe auf dem 4 Niveau.
ACHTUNG! Falls der Kamin zu hohe Temperatur erreicht, wird die Flamme automatisch verringert und die Möglichkeit die
Flammenhöhe zu ändern wird blockiert. Falls die Temperatur weiter ansteigen wird, wird die Flamme ausgelöscht (ROTE
LICHTDIODE). FLAMMENAUSLÖSCHUNG
Um die Flamme auszulöschen:
- drücken Sie STOP.
Blinkende rote Leuchtdiode bedeutet, dass das Gerät gekühlt wird. Die erneute Flammenzündung ist erst nach Abkühlung
des Gerätes möglich (GRÜNE LEUCHTDIODE).
AUSSCHALTUNG DES GERÄTES
Um das Gerät vollständig auszuschalten, drücken Sie .
Das Gerät wird sich automatisch ausschalten, wenn irgendwelche Fehler im Arbeitsmodus auftreten (überprüfen Sie den
Fehler in der Applikation).
III III
DEUTSCH

16
KONFIGURATION DER DRAHTLOSEN VERBINDUNG
Paarung des Gerätes mit der Applikation wird folgend durchgeführt (gleichzeitig kann nur ein Gerät gepaart werden):
Join the newsletter
Find your
fireplace
1. Schalten Sie bitte die FLA3 NET-
ZERO Applikation auf dem Handy ein.
Bestätigen Sie den Wunsch des
Beitritts zum Newsletter, indem Sie
die E-Mailadresse eintragen und auf
SIGN UP drücken oder übergehen Sie
zum SKIP
2. Auf dem
Bildschrim
zeigt sich
FIND YOUR
FIREPLACE.
Drücken Sie
CONNECT
um die
Netzsuche
zu starten.
3. Drücken Sie und halten die WIFI - Taste auf dem Kamin. Das Blinken der Taste bedeutet, dass das Gerät zur Paarung
bereit ist. Im Fall, das keine Aktivität stattfindet, wird die Bereitschaft nach 5 Minuten annulliert.
Setup Network Active
Connect to Home Network
4. Gehen Sie zu den Einstellungen
des Mobilgerätes, schalten Sie
das WiFi ein und verbinden mit
dem Netz
Fireplace_WiFi_setup (wenn
das Netz nicht zu sehen ist,
schalten Sie die
Stromversorgung des FLA
Gerätes für 10 Sekunden ab
und wiederholen Sie die
Konfiguration. Der Kamin wird
automatisch durch die
Applikation aufgefunden. Dies
wird durch die Information
SETUP NETWORK ACTIVE
bestätigt. Drücken Sie
CONNECT.
5. Auf dem Bildschirm
CONNECT TO HOME
NETWORK wählen Sie
den Netznamen,
welchen Sie im
Endeffekt benutzen
möchten (NETWORK
NAME) und geben
deren Passwort ein.
Überprüfen Sie, dass
das Passwort richtig ist
und drücken Sie
(SUBMIT).

17
Your fireplaces
Access Point
6. Auf dem nächsten
Bildschrim YOUR
FIREPLACES,
wählen Sie das
Gerät aus und
drücken
CONNECT. Auf
dem Bildschirm
können Sie den
Namen des
Kamins anpassen,
indem Sie auf
EDIT drücken.
7. Wenn Sie keinen von den
verfügbaren Netzen
verwenden möchten, können
Sie ein gewidmetes Netz
erschaffen durch ACCESS
POINT und sich direkt mit dem
Gerät zu verbinden. Um dies
zu tun, drücken Sie (HELP),
wählen (CONNECTION TYPE)
und nachhinein (ACCESS
POINT) mit drücken des
(CREATE ACCESS POINT)
zu bestätigen. Fügen Sie den
Netznamen und das Passwort
ein, bestätigen Sie durch das
drücken von NEXT.
Nach einer gelungenen Konfiguration wird die WIFI Leuchtdiode grün angezeigt.
APPLIKATION FLA3 NET-ZERO
1. Newsletter
2. Kaminmodus
3. Flammenhöhe
4. Flammenzündung und – auslöschung
5. Info
6. Menü
1
2
3
4
6
5

18
MENU
Das Menü ist erreichbar durch das drücken der Ikone . Die Rückkehr zum Hauptpaneel ist möglich durch das Drücken der
ZURÜCK Taste.
Um die allgemeinen Informationen über den Kamin zu bekommen, drücken Sie . Das Newsletter ist erreichbar durch das
Drücken auf die Ikone .
Menu
Info
Newsletter
Haupteinstellungen der Applikation.
Drücken Sie den Bookmark, um die
Einstellungen zu ändern.
Drücken Sie, um die
Hauptinformationen über den Kamin zu
prüfen.
Drücken Sie, um
Benachrichtigungen zu prüfen.
Panel Lock
Default Level
Your fireplaces
Contact Us
Drücken Sie LOCK, um den
Steuerpaneel des Kamins zu
blockieren. Drücken Sie
UNLOCK, um den
Steuerpaneel des Kamins
freizuschalten. Bestätigen
Sie die Auswahl durch das
Drücken der SAVE Taste.
Die Änderung ist nur bei dem
erloschenen Gerät möglich.
Stellen Sie das Niveau der
Flamme ein, auf dem der
Kamin seine Arbeit anfangen
wird nach dem Start. Drücken
Sie SAVE, um die Änderungen
zu speichern. RESET, um die
Einstellungen neuzustarten.
Das Gerät schaltet sich
standardmäßig mit einer
Flammenhöhe auf dem 4
Niveau.
Überprüfen Sie die
verfügbaren Kamine.
Drücken Sie EDIT, um den
Namen des Gerätes zu
ändern. Drücken Sie
CONNECT, um sich mit
dem Gerät zu verbinden.
Kontaktieren Sie Planika
durch durch E-Mail.
Drücken Sie SEND, um
die Nachricht zu
verschicken.

19
ALARMMITTEILUNGEN
Help
Error
File a Report
Drücken Sie HELP im MENU, um zum
Bookmark Troubleshooting zu
gelangen.
Führen Sie die Tätigkeit aus, die den
Fehler betrifft. Wenn der ERROR
weiterhin aufgezeigt wird, melden Sie
die Angelegenheit durch das Drücken
der REPORT Taste.
Wenn Sie weiterhin die Hilfe des
Service benötigen, so senden Sie
die Nachricht mit der Beschreibung
des Fehlers und den
Basisinformationen durch SEND.
INFORMATIONSSIGNALE
STROM-DIODEN
START/STOPP-DIODE
TON
AKTION
KOMMUNIKATION
-
Grüner Blitz
Gerät ist ausgeschaltet
-
Grünes Blinken
Gerät ist einsatzbereit
-
Grün blinkend
Startvorgang
-
In Betrieb
-
Blau blinken
Kein Kraftstoff
-
Blau blinkend
Tanken
Blau blinkend mit Ton
Voller Tank
Rotes Blinken
Entlüften, Kühlen
Lila blinken mit Ton
Fehler - App überprüfen (Fehlersuche) und
Kontakt mit dem Service aufnehmen
-
Blau, rot blinkend
Kraftstofftank ist während des
Brennvorgangs leer
WI-FI DIODEN
AKTION
KOMMUNIKATION
Blaues Blinken
Nicht mit Wi-Fi verbunden
Blau blinkend
Kopplung/Konfiguration
Grünes Blinken
Wi-fi verbunden
BRENNSTOFF - Verwenden Sie nur Ethanolkraftstoff, der aus Pflanzen im Prozess der zweimaligen Alkoholdestillation
hergestellt wird und aus 95-96,6 Vol.-% Ethanol besteht. Fanola ist der empfohlene Brennstoff mit pharmakologischer
Reinheit.
VERWENDEN SIE KEINE SYNTHETISCHEN BRENNSTOFFE AUF ERDÖLBASIS, DA DIESE VERUNREINIGT SIND,
UNANGENEHME GERÜCHE ABGEBEN UND DEN KAMIN BESCHÄDIGEN KÖNNEN! VERWENDEN SIE KEINE
KRAFTSTOFFE MIT 100 VOL.-% ETHANOL, GEL ODER AROMATISCHE KRAFTSTOFFE!
REINIGUNG – Mit einem feuchten Lappen und milden Reinigungsmittel reinigen, nur wenn der Kamin ausgeschaltet und
abgekühlt ist.
SERVICE – Für Servicezwecke bewahren Sie das mitgelieferte USB-Kabel auf. Kontakt:service@planikafires.com

20
RELLENO DEL COMBUSTIBLE
1.Encienda el dispositivo pulsando .
2.Si el depósito de combustible está vacío (LUZ AZUL DEL BOTÓN START/STOP ENCENDIDA), abra la tapa y
extraiga la manguera de combustible (I). Coloque el extremo suelto en el recipiente de combustible y mantenga
pulsado el botón de la bomba de combustible (II).
3.Si el depósito se llena (BOTÓN DE ARRANQUE/PARADA LUZ VERDE ENCENDIDA), vuelva a colocar la
manguera de combustible en su sitio. (III)
ENCENDIDO DE LA LLAMA
El botón START / STOP iluminado en verde significa que el dispositivo está listo para encender la llama. Presiona
START. Se tarda entre 2 y 10 minutos en encender la llama (LED VERDE PARPADEANDO). Durante este tiempo,
puede oler los vapores del combustible. Los diodos de extinción informan que la llama se ha encendido y el dispositivo
ha alcanzado su temperatura de funcionamiento.
REGULACIÓN DE LA ALTURA DE LLAMA
Mientras la llama está encendida, presione o en el control remoto o desplazar la barra de nivel de llama en la
aplicación para aumentar o disminuir su altura en 6 niveles. La llama se dispara a la 4ª altitud de forma predeterminada.
¡ATENCIÓN! En caso de una temperatura demasiado alta del dispositivo, la altura de la llama se reducirá
automáticamente y se bloqueará su ajuste. Si la temperatura sigue subiendo, la llama se apagará (LED ROJO)
APAGAR LA LLAMA
Para apagar la llama:
- presione STOP.
LED ROJO parpadeante significa que el dispositivo se está enfriando. El reencendido de la llama solo es posible
después de que el dispositivo se haya enfriado (LED VERDE).
APAGAR EL DISPOSITIVO
Para apagar el dispositivo por completo, presione .
El dispositivo se apagará automáticamente en caso de detectar algún mal funcionamiento (verifique el error en la
aplicación).
III III
ESPAÑOL
1/44